 It’s February. Every
onething needs special attention. It’s the time of year for slathering yourself in good smelling things and hoping for the best. Turns out the same goes for cutting boards. And spoons.
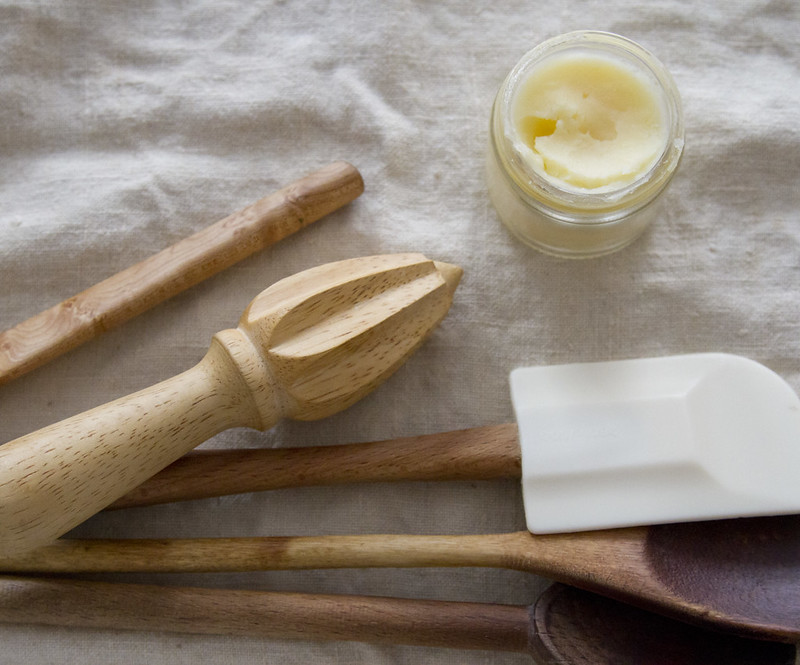
Enter board butter. Also known as spoon butter. Also known as the answer to your wooden utensil and cutting board woes.
Here’s the thing about being a little bit particular about the things you buy: sometimes it’s just easier not to buy anything. This is usually a good thing. It keeps me from making all kinds of potentially regretful purchases. But sometimes it means I put off more practical purchases, too. I knew I was supposed to be treating my wooden cutting board (and spatula and bowl, etc., etc.). I knew I didn’t want to use mineral oil—a petroleum product, I generally try to avoid—but I wasn’t sure what to use in its place. For some reason, doing the modicum of research required to figure out that I had the perfect non-toxic, food-grade alternative to mineral oil right in my own kitchen cabinet stopped me from doing anything at all. While I procrastinated, my wooden boards got dried out and sad looking.
 But sometimes procrastinating has its rewards. During a particularly seredipitous moment on instagram the other day, Abby showed her own recent concoction for getting her boards in shipshape and Camille chimed in, and suddenly I had a little plan worked out. So I gathered all of my wooden things and got them ready for a little wintry special attention. I decided on a wood treatment using coconut oil and beeswax. Coconut oil because it returns moisture to the wood but won’t go rapidly rancid like other fruit oils might. (Other good alternatives include walnut oil and jojoba oil.) Beeswax for sealing in the moisture.
 Like everything else I do, I eyeballed a rough ratio. I mixed one part beeswax with three parts coconut oil. I put both ingredients into a mason jar set inside an old enamel pan filled with an inch or two of water. As the water simmered on the stove, the coconut oil and beeswax melted together.
 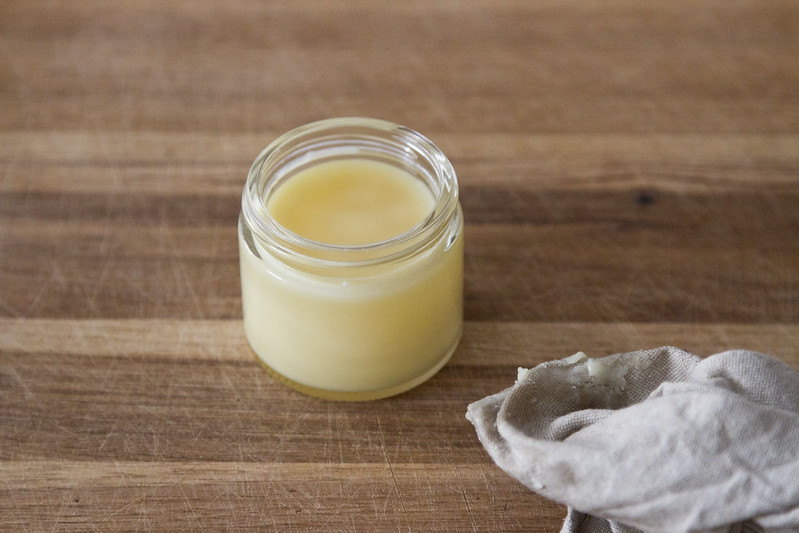 Once all melty, I poured the wood butter into little glass jars that I had saved, and let it cool. Side note: If you’re hoping this little project will have the added effect of turning your home into a richly scented haven, you are in luck.
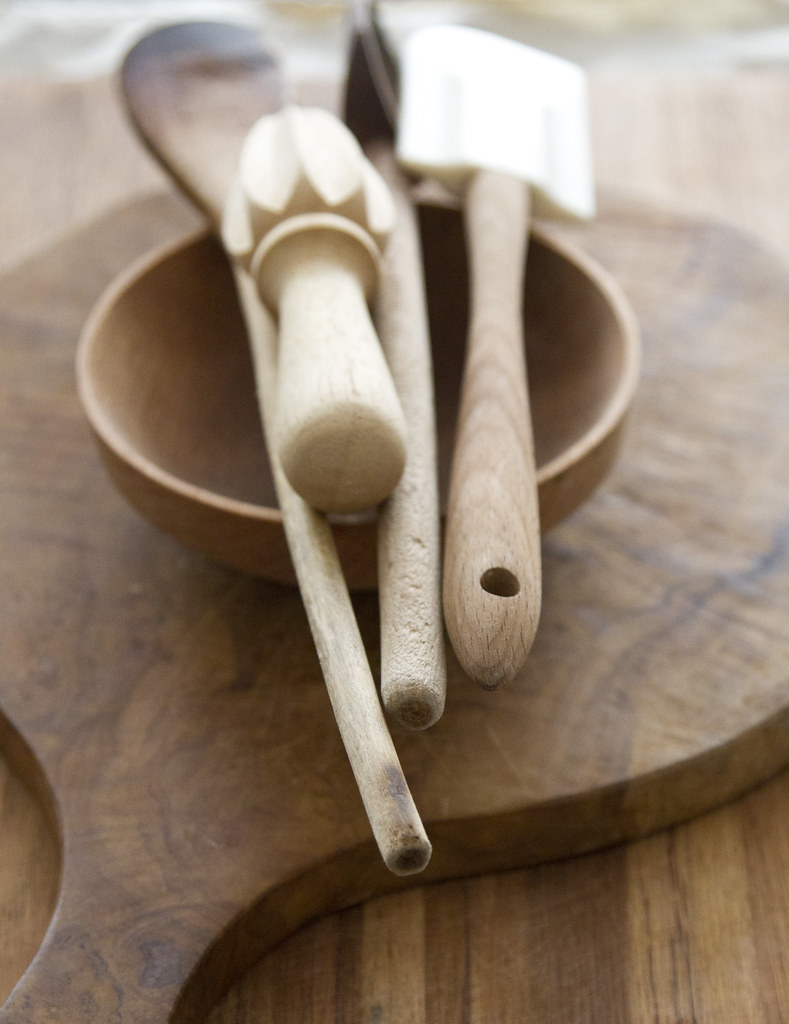
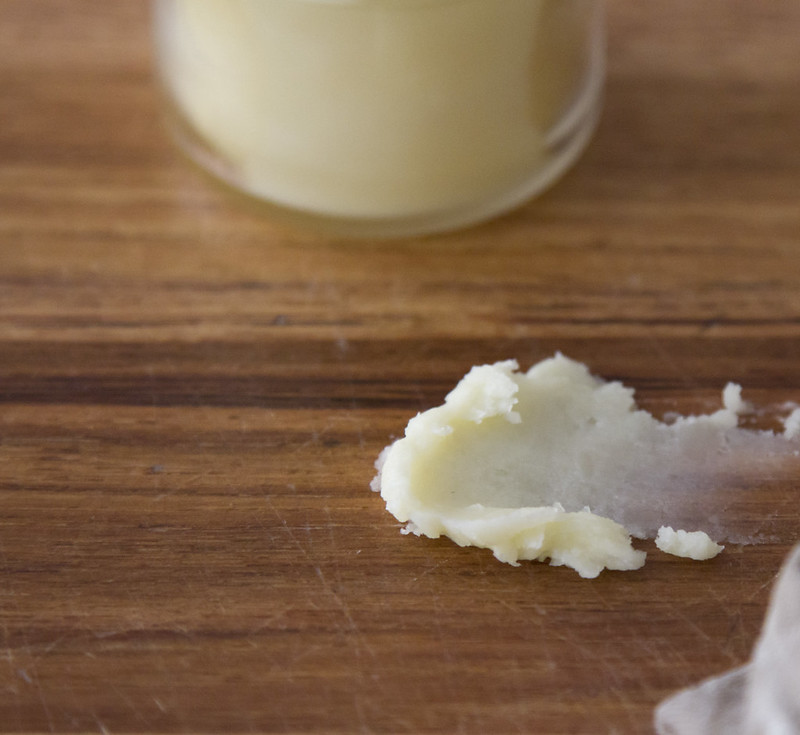 A hearty smear or four is all I needed to return a bit of luster to my board. My butter was the consistency of thick frosting and I used my own two hands and an old rag to help slather it onto my cutting board (and every other wooden thing I could get my hands on). Bonus: my dry hands got some much needed attention, too!
 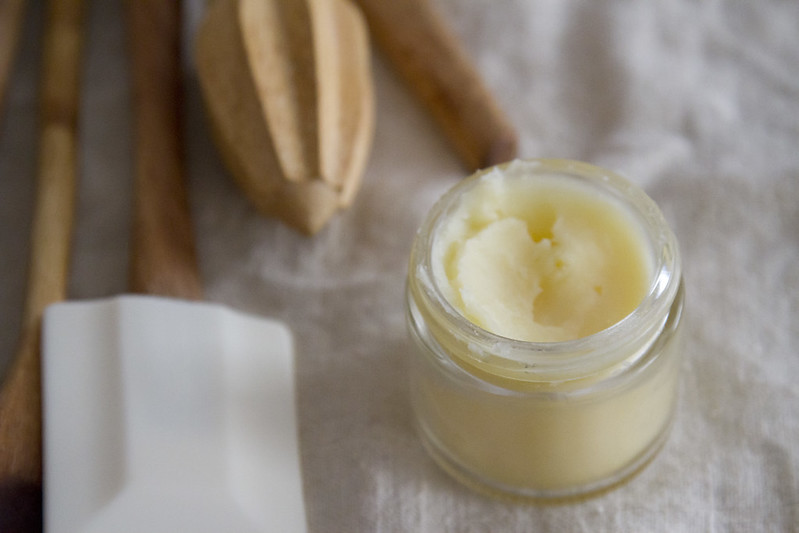 I gave everything a good rub down with the butter and let all of my utensils and board sit out on an old dish towel for the night before giving them another quick buff in the morning.
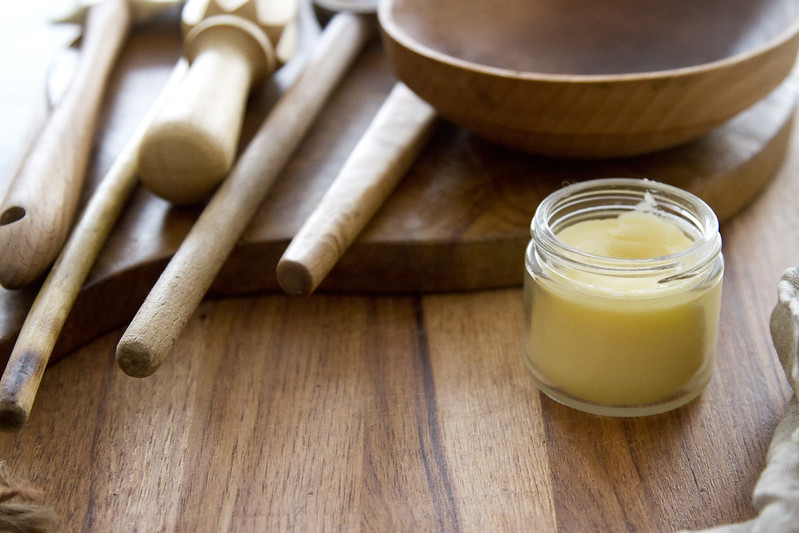
Board Butter
1 part beeswax
3 parts coconut oil
Melt together beeswax and coconut oil. If you hope to mix a large batch, you’ll want to break the wax into small pieces. If you have one, a small dedicated cheese grater could make lighter work of this step. Otherwise, use a knife and brute force.
Once melted, allow the butter to cool (it will change from bright yellow to a paler shade as it cools.)
Apply the cooled butter to your wooden boards, spoons, baby toys and teethers, countertops, etc. Allow the butter to sit overnight and buff in the morning.
PS. If have an old jar with label residue that you need some help removing, some coconut oil mixed with a little baking soda does the trick. (Goo gone, be gone….)
More coconut oil magic, HERE.

46 Comments
I love this! Where did you get that beautiful wooden bowl?
Thanks! The little bowl was a gift to Faye from my mom! It's made by New Hampshire Bowl and Board!
I saw that! So glad you found the post!
This is great! I have some adorable cutting boards that are a few years old (more than five, less than ten, although I can't remember exactly when I got them) that are looking a bit worse for the wear. I will definitely have to whip some of this up and see what I can do!
Oh sure! The drying out isn't really good for them and can lead to cracks and extra wear down the line!
I totally commented on one of your posts asking about your trick for your wooden spoons etc, this morning! perfect timing!
I saw that! So glad you found the post!
Agreed! (And thank you!)
I have never thought about treating my wood. Other then aesthetic purpose, are there other reasons for treating wooden boards, bowls, utensils. Thanks.
Oh sure! The drying out isn't really good for them and can lead to cracks and extra wear down the line!
It does! I don't think there'd be any harm in giving it a try!
Thanks!
Takes a little elbow grease, but it really, really works!
Ah! I think my cutting board could definitely use some of that. Thanks!
By any chance, does it double as lip balm as well? It looks a lot like some lip balm recipes.
It does! I don't think there'd be any harm in giving it a try!
I got this at my local grocery store, which also has a great herb section where they sell little one ounce beeswax cakes! But in the past, I've gotten blocks of wax from Brushy Mountain Bee Farm!
I forget where we got ours, but it's this one made by Norpro!
LABEL RESIDUE! What a thorn in my side at the moment! I'm going to try your baking soda/coconut oil trick asap!
Takes a little elbow grease, but it really, really works!
A drop of lemon essential oil is also great at getting label residue off, with little effort!
I'll chime in here too.. we keep a bottle of grain alcohol around to fill little spritzer bottles, which we use as hand sanitizer while out and about. But it's also an incredible solvent! It removes sticker goo like a champ, and will dissolve ink and other unexpected stains. I saved my sister's leather couch once, after her little toddler colored all over it with a black marker. It took the ink right off.
The secret to getting rid of label residue is not having it in the first place. as long as it’s not going to the damage the product always heat it up with a blow dryer before removing and 99% of the time it will peel off without residue. I’m an IT guy and I do this for every single computer/laptop/monitor I order (a handful a week) because the shiny plastic bezels get scratched so easily…. but I also do it with everything else at home of course. Never try to peel one to see if it will start because you’ll mess up that corner, just use the heat from the get go!
That wooden spatula is a dream. Where did you get it?
I forget where we got ours, but it's this one made by Norpro!
Thank you!!!!
I love your blog so much! Keep these wonderful posts coming…
Thank you!!!!
I love your attention to detail. When you buy only quality items it's important to care for them, too.
Agreed! (And thank you!)
Where do you get your beeswax? Your post prompted me to look at what I use (Boos Block Board Cream) and it has mineral oil… I'd love to switch when we run out (soon) and would love your beeswax recommendation!
I got this at my local grocery store, which also has a great herb section where they sell little one ounce beeswax cakes! But in the past, I've gotten blocks of wax from Brushy Mountain Bee Farm!
To the sound of enthusiastic clapping, let me say thank you! I had started on the research process of avoiding mineral oil to nourish my boards but, alas, never completed the mission…until today. I love how form meets function in your blog.
Glad to be able to share a serendipitous moment 🙂 I think I might try coconut oil one of these times. I don't usually have it around as I think I'm sensitive to it if I eat it on the regular, but as a salve for wood (and my skin maybe too) it seems like it would be amazing.
I'm not sure if I'm correct on this, but I was told (I make beeswax candles for my own personal use) that using kitchen tools for beeswax is potentially dangerous. Just to clarify, I don't mean dangerous for your health, I mean dangerous for your utensils. I love the idea of using it to seal the wooden utensils (mixed with coco oil), but maybe not the one of the cheese grater to make it smaller. It could be very difficult to remove, and could leave a permanent residue, which is great for your wood, but it may not be good for your future cheese consumption. Just something to think about! 🙂 love this article.
Totally! That's why I suggested a dedicated grater! If it's the one you want to keep nice to…grate cheese…best not to use that one!
Ah! I wish I had known about this post before I ordered a bottle of wood oil! But thanks for sharing. Where do you buy your beeswax? Is there a particular brand you’re more loyal to?
Just when I think I couldn’t love your blog more… I stumble upon this! I have mineral oil in my cupboard (& I dont want to use it) and I’m totally making this recipe for my boards and spoons tomorrow. I don’t have an enamel pot however, so hopefully it will be ok.
Do I need to keep the board butter refrigerated?
Nope!
Just throwing it out there I had a board I oiled with coconut oil for about 5 years and then one day it went rancid all over (very quickly I might add, not sure why it all happened at once but it did). Sanding / lemon + salt / sunlight. Nothing could get the smell out. I Just stick to mineral oil and bees/carnuba wax now.
Actually I also wanted to note that it was 2 boards that went rancid. They were bamboo, I had one for veggies and one for meat. The meat one took a little longer to go rancid (about 6 months longer), I assume because I used/oiled it much less than the veggie one. Also I did some digging into the manufacturing process of mineral oil. While I still wish I could use a natural oil for food products, I did turn up some info that made me feel like a lot of the worry of petroleum product is removed in the process. Still it is what it is, but the refinement process is pretty thorough.
Hello thanks for the info, just looking at my coconut oil, it is liquid not solid white like yours, it is oil and clear would I still mix this with the bees wax? Thnx again
Yes, that’s it! Coconut oil is liquid at room temp, so if you’re in a warmer home, yours will start as a liquid!
Could I use another oil instead of coconut oil? I have almond, olive, avocado.
Comments are moderated.