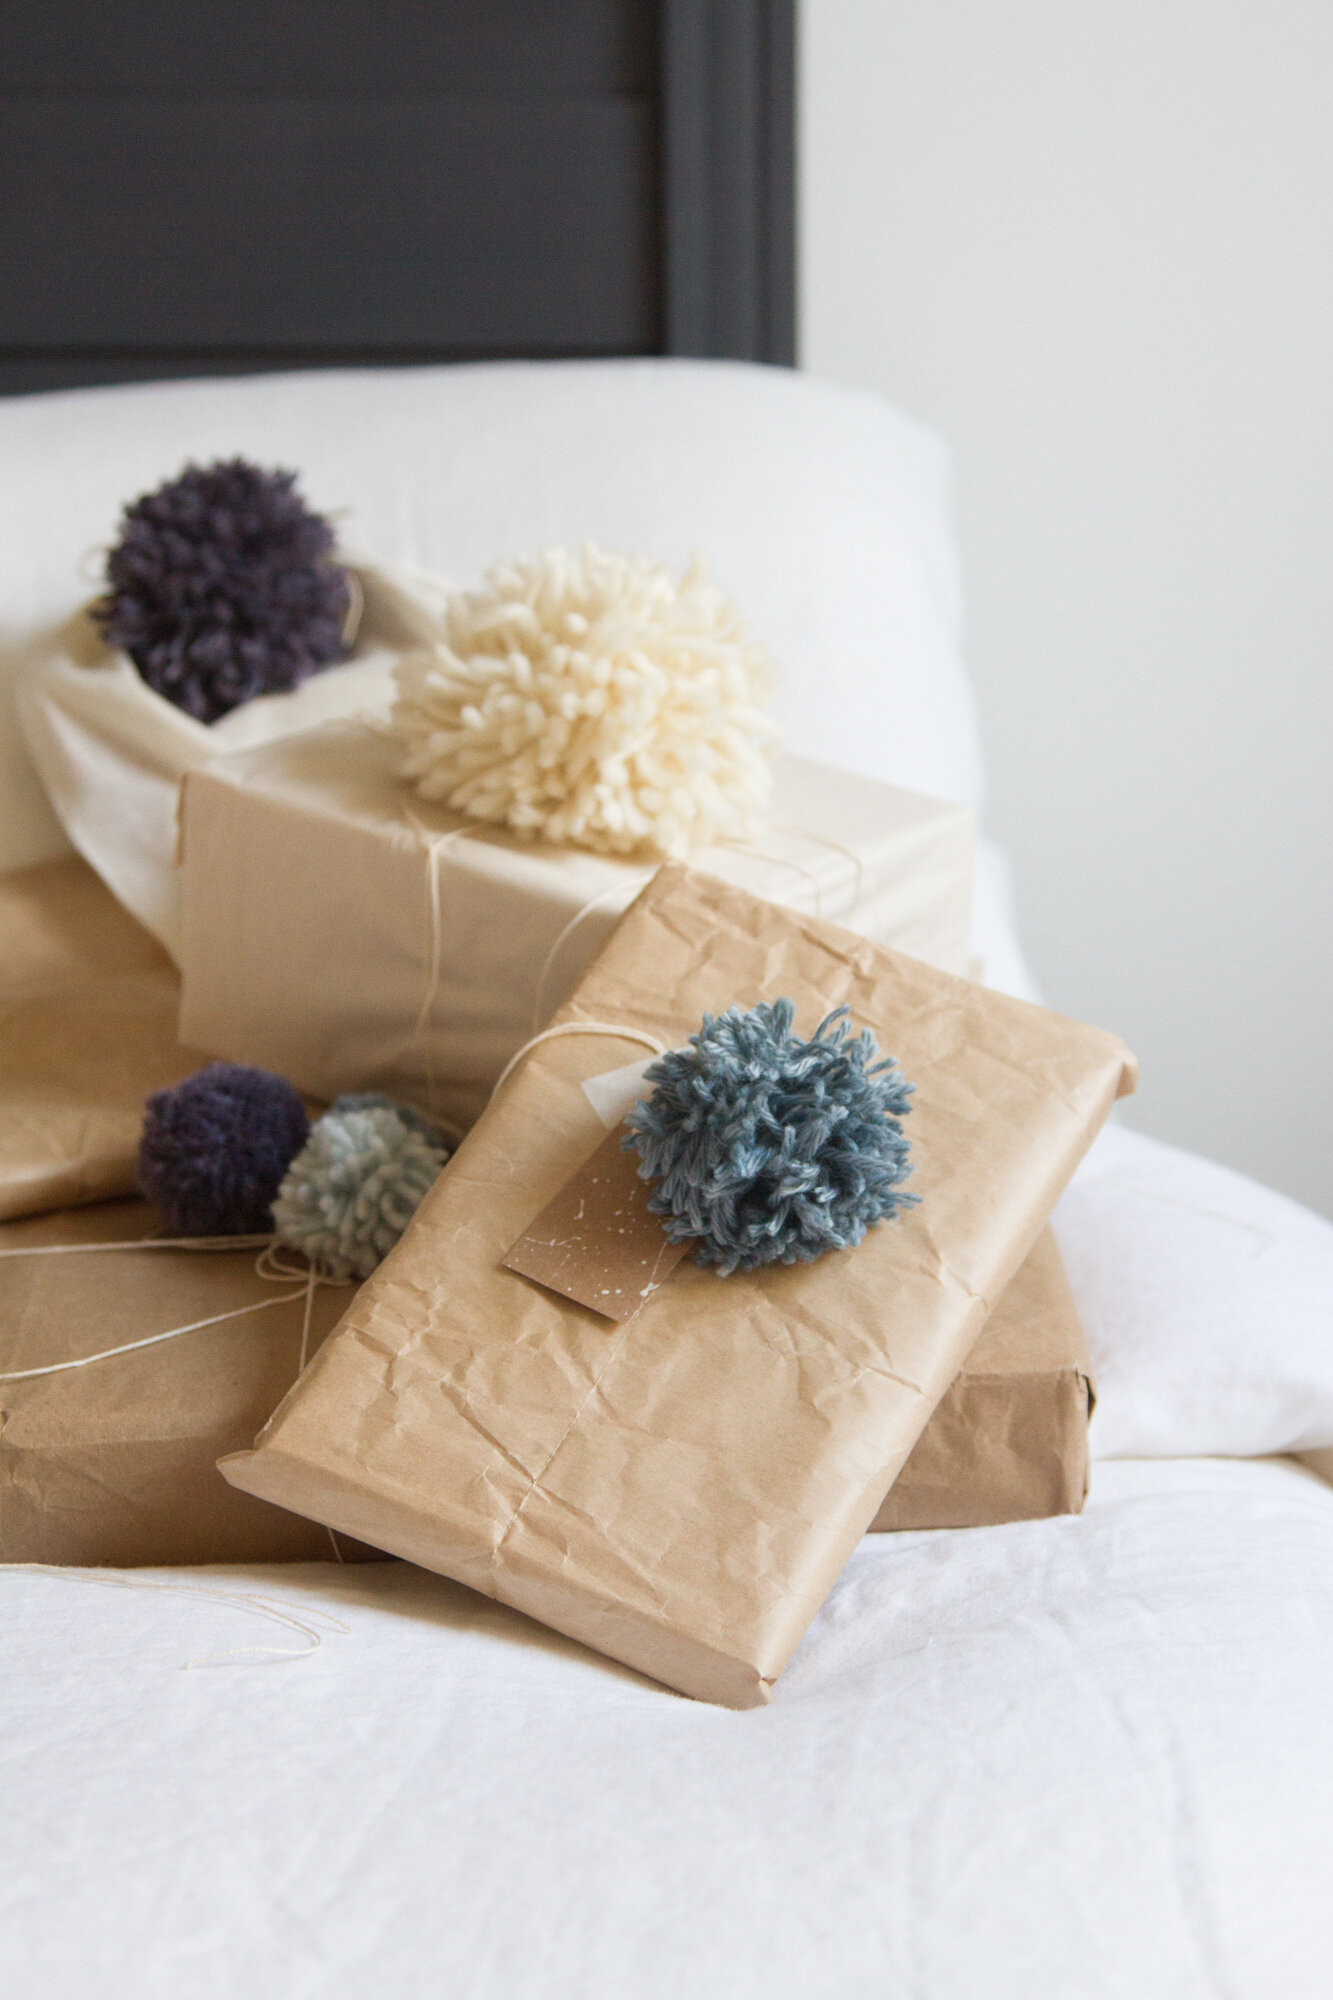
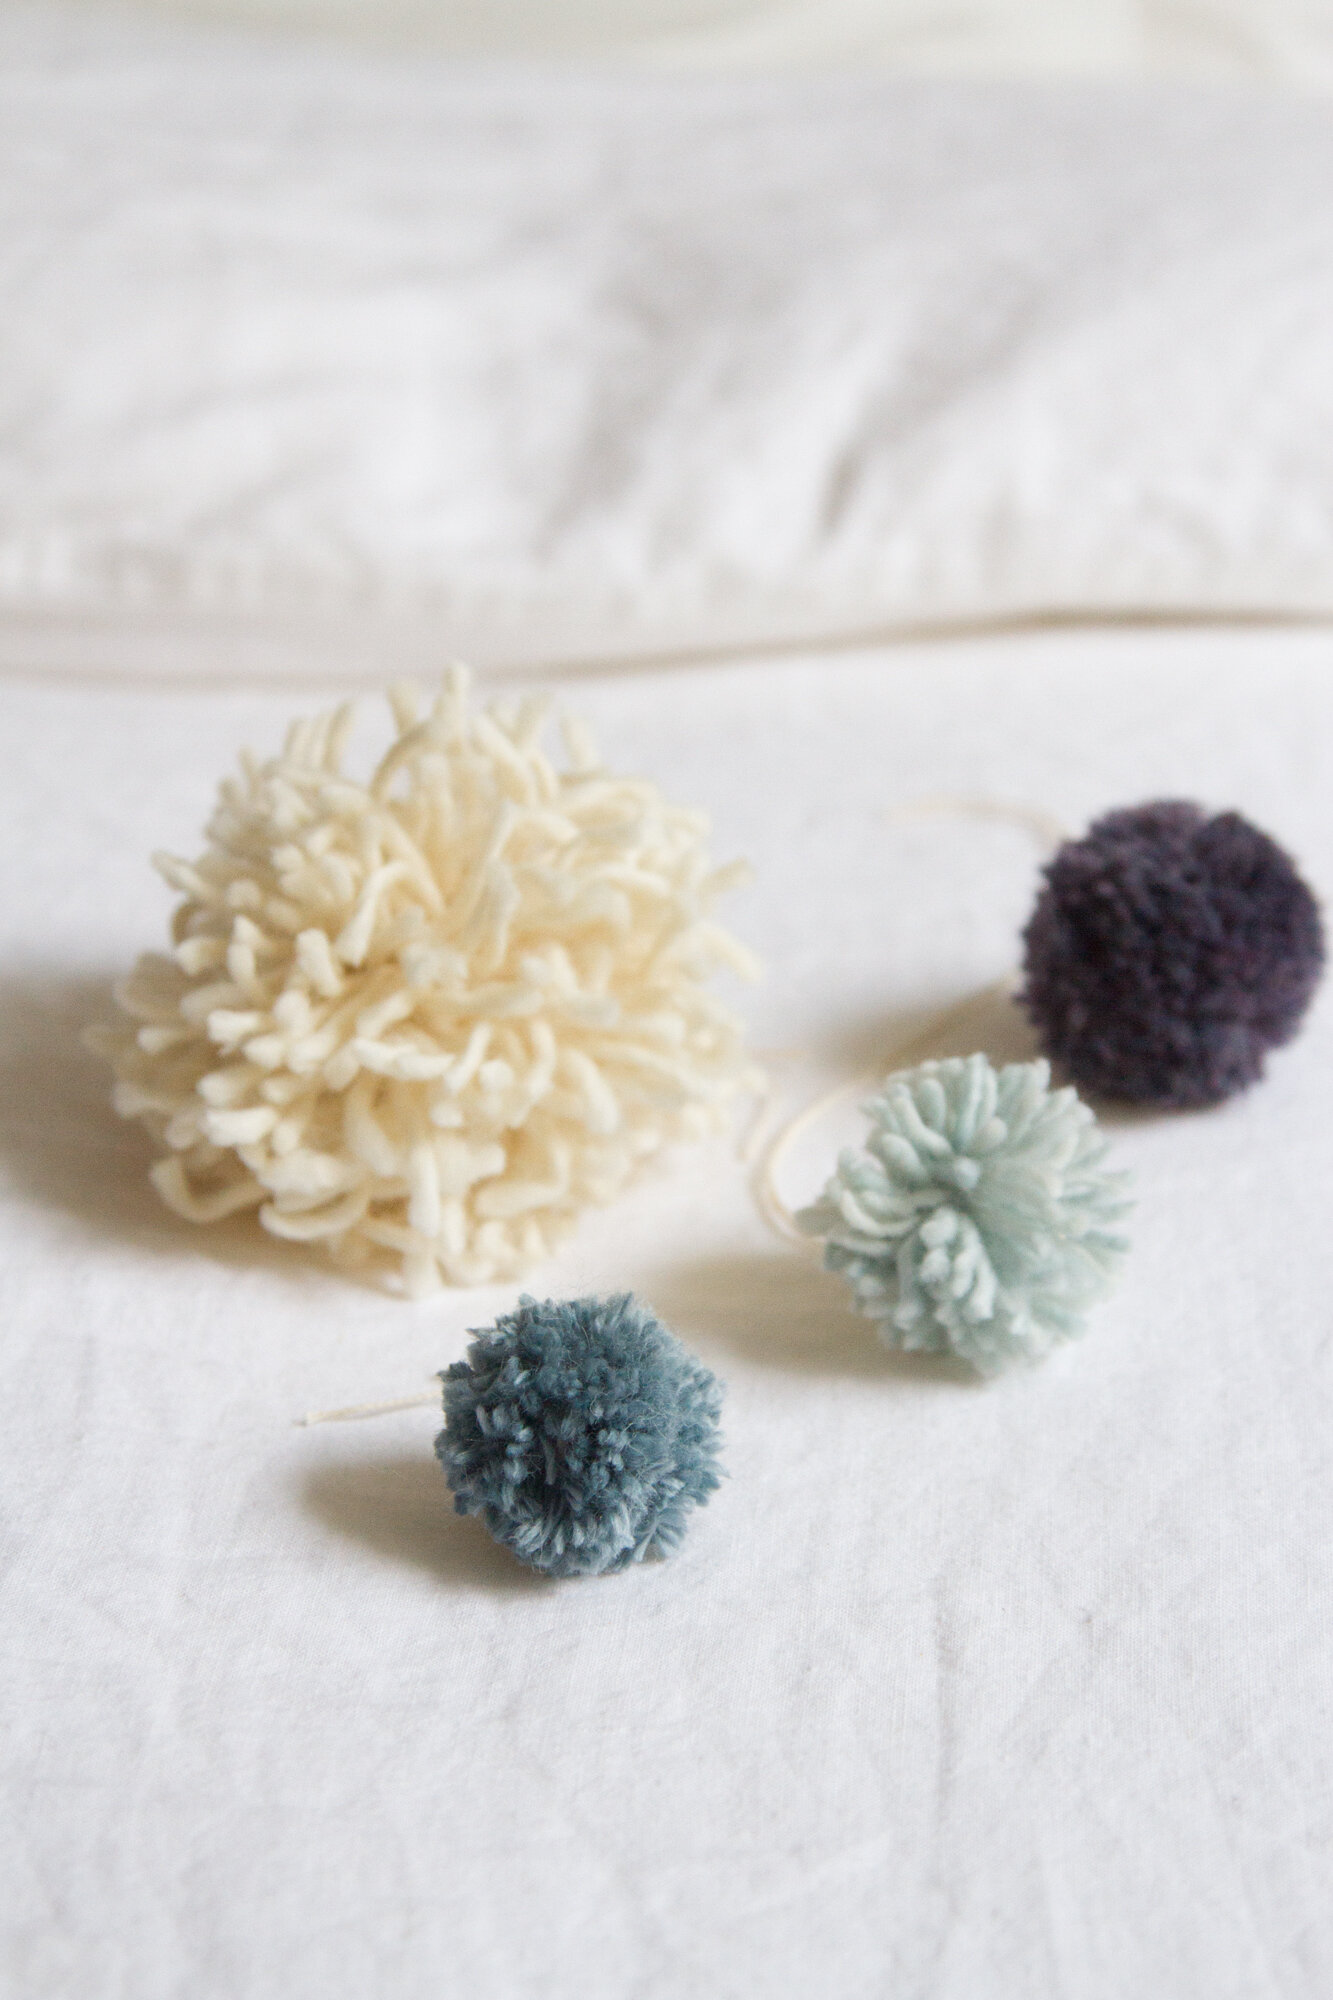
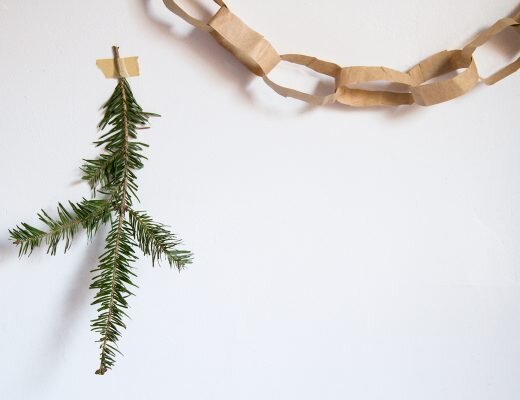
My nephew is enthralled by the idea of fake presents used in store displays during the holidays. He stops in front of shop windows to take in the shiny displays of teetering boxes, wondering aloud if there are presents inside or if, as he suspects, the boxes are empty—simulacrums of abundance. At home, he’s crafted his very own fake present gifts to display beneath his apartment-sized tree. I understand the captivation. There’s something lovely and magical about a pile of presents wrapped up under a tree. What luck! What mystery! This year, as always, I’ve pledged to mitigate the impact of our own Christmas wrappings. Instead of buying anything new, I’ve been smoothing out brown paper wrappings and embracing the wrinkles of pre-loved papers and I’ve dressed up my decidedly humble wrappings with bits of leftover yarn and string, turned into pom-poms and tassels.
The last time I made a pom-pom, I snipped it promptly into a million tiny pieces at precisely the moment that I thought it’d be finished. This time, I brought in the help of the inimitable Rose Pearlman. She’s a genius for all things quick and crafty and her method (below) for making pom-poms and tassels is clever and quick and virtually foolproof. Pom-poms can be made from any bits of leftover yarn you might have hanging around. If you lack yarn but have string, an easy tassel is in your future.
I made these poms and tassels following Rose’s lead. I’ll leave the instructions to her:
Pom-poms
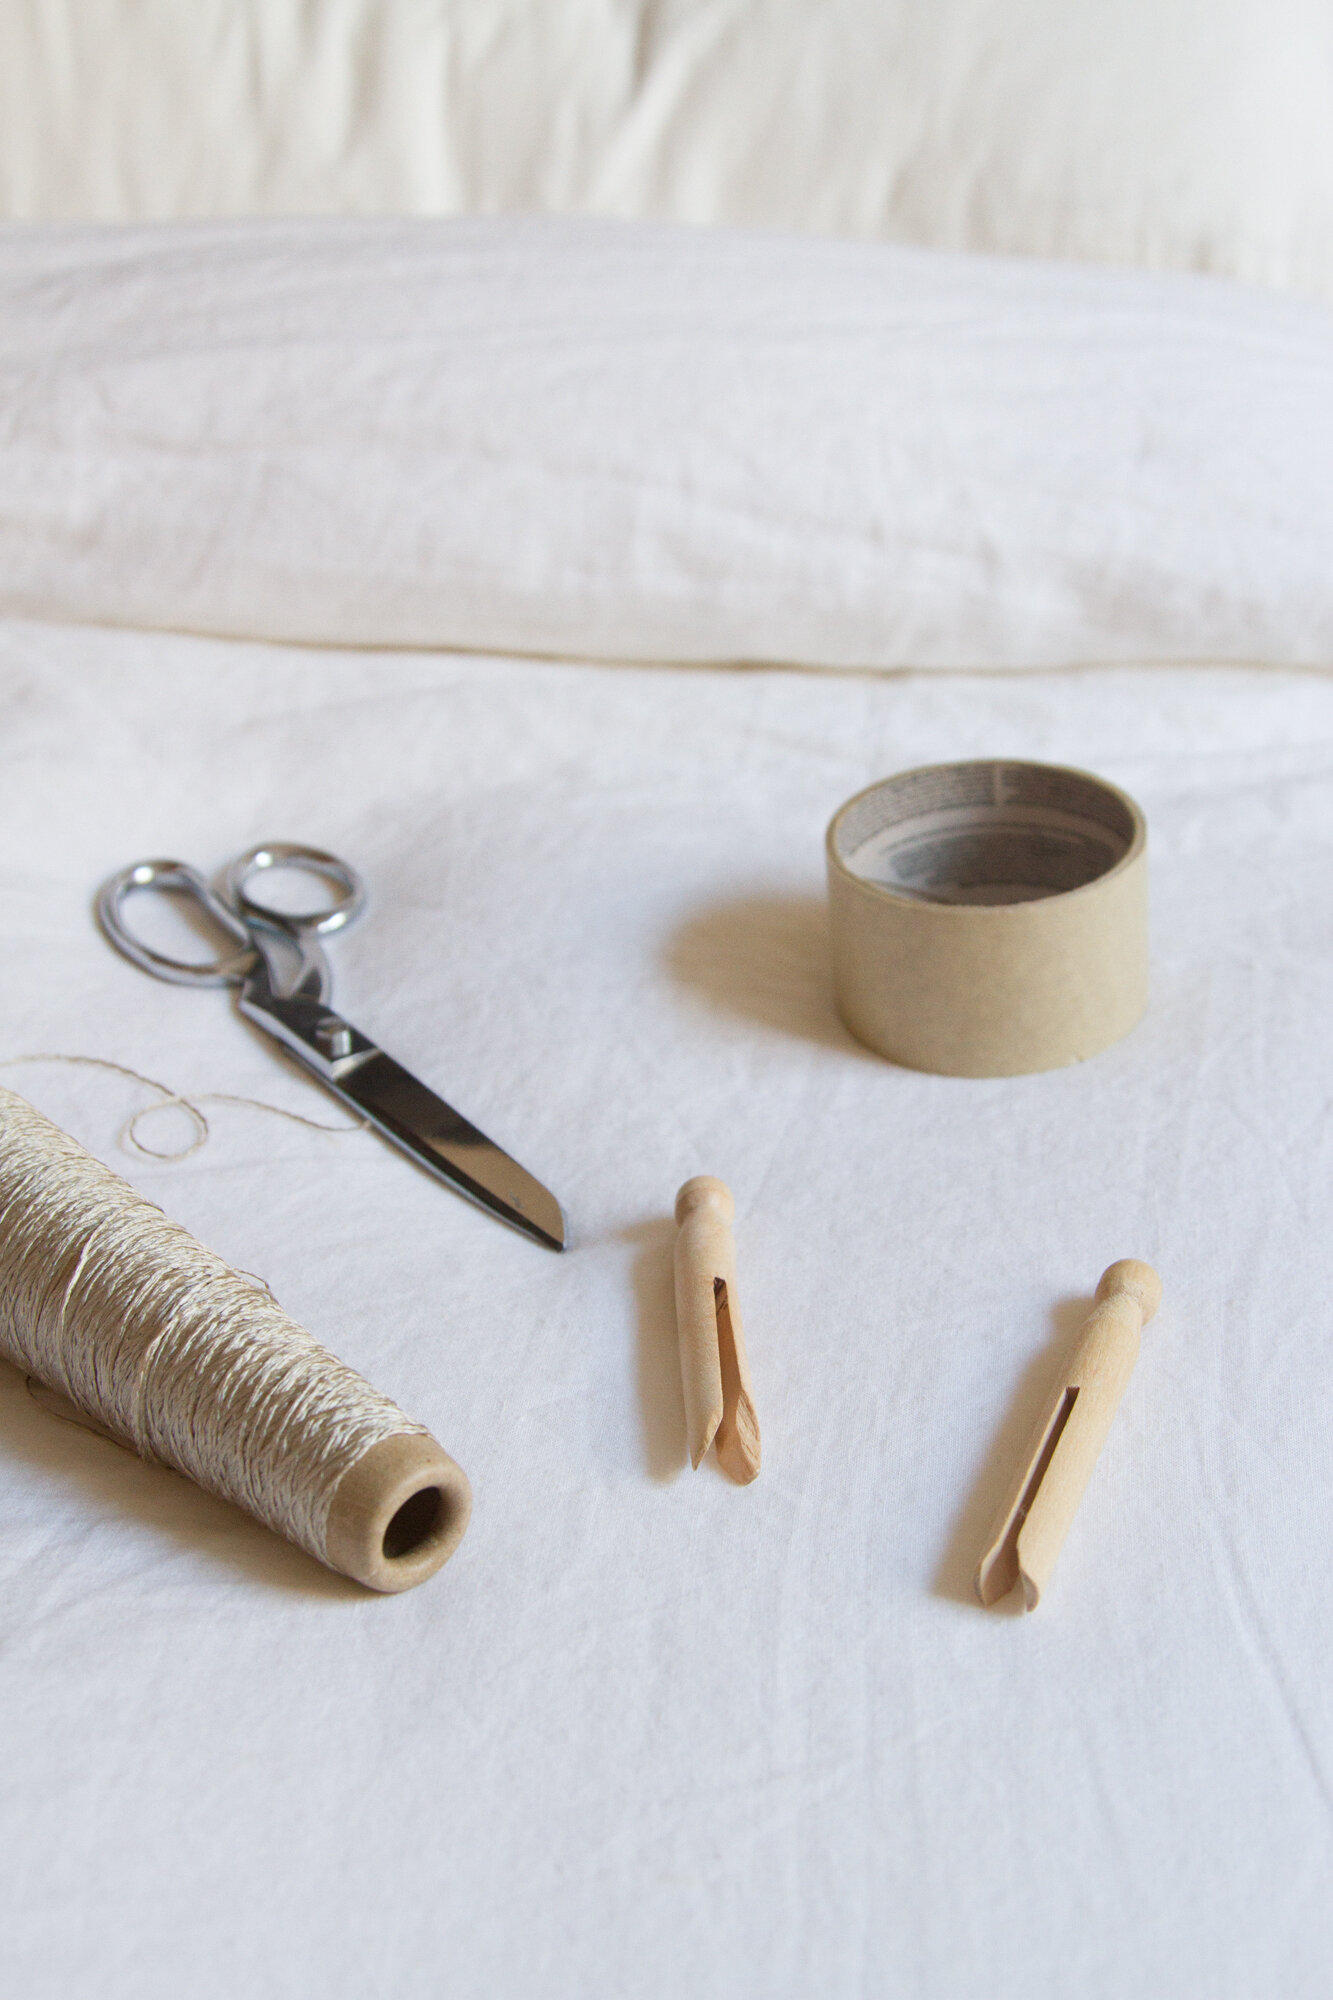
Materials needed:
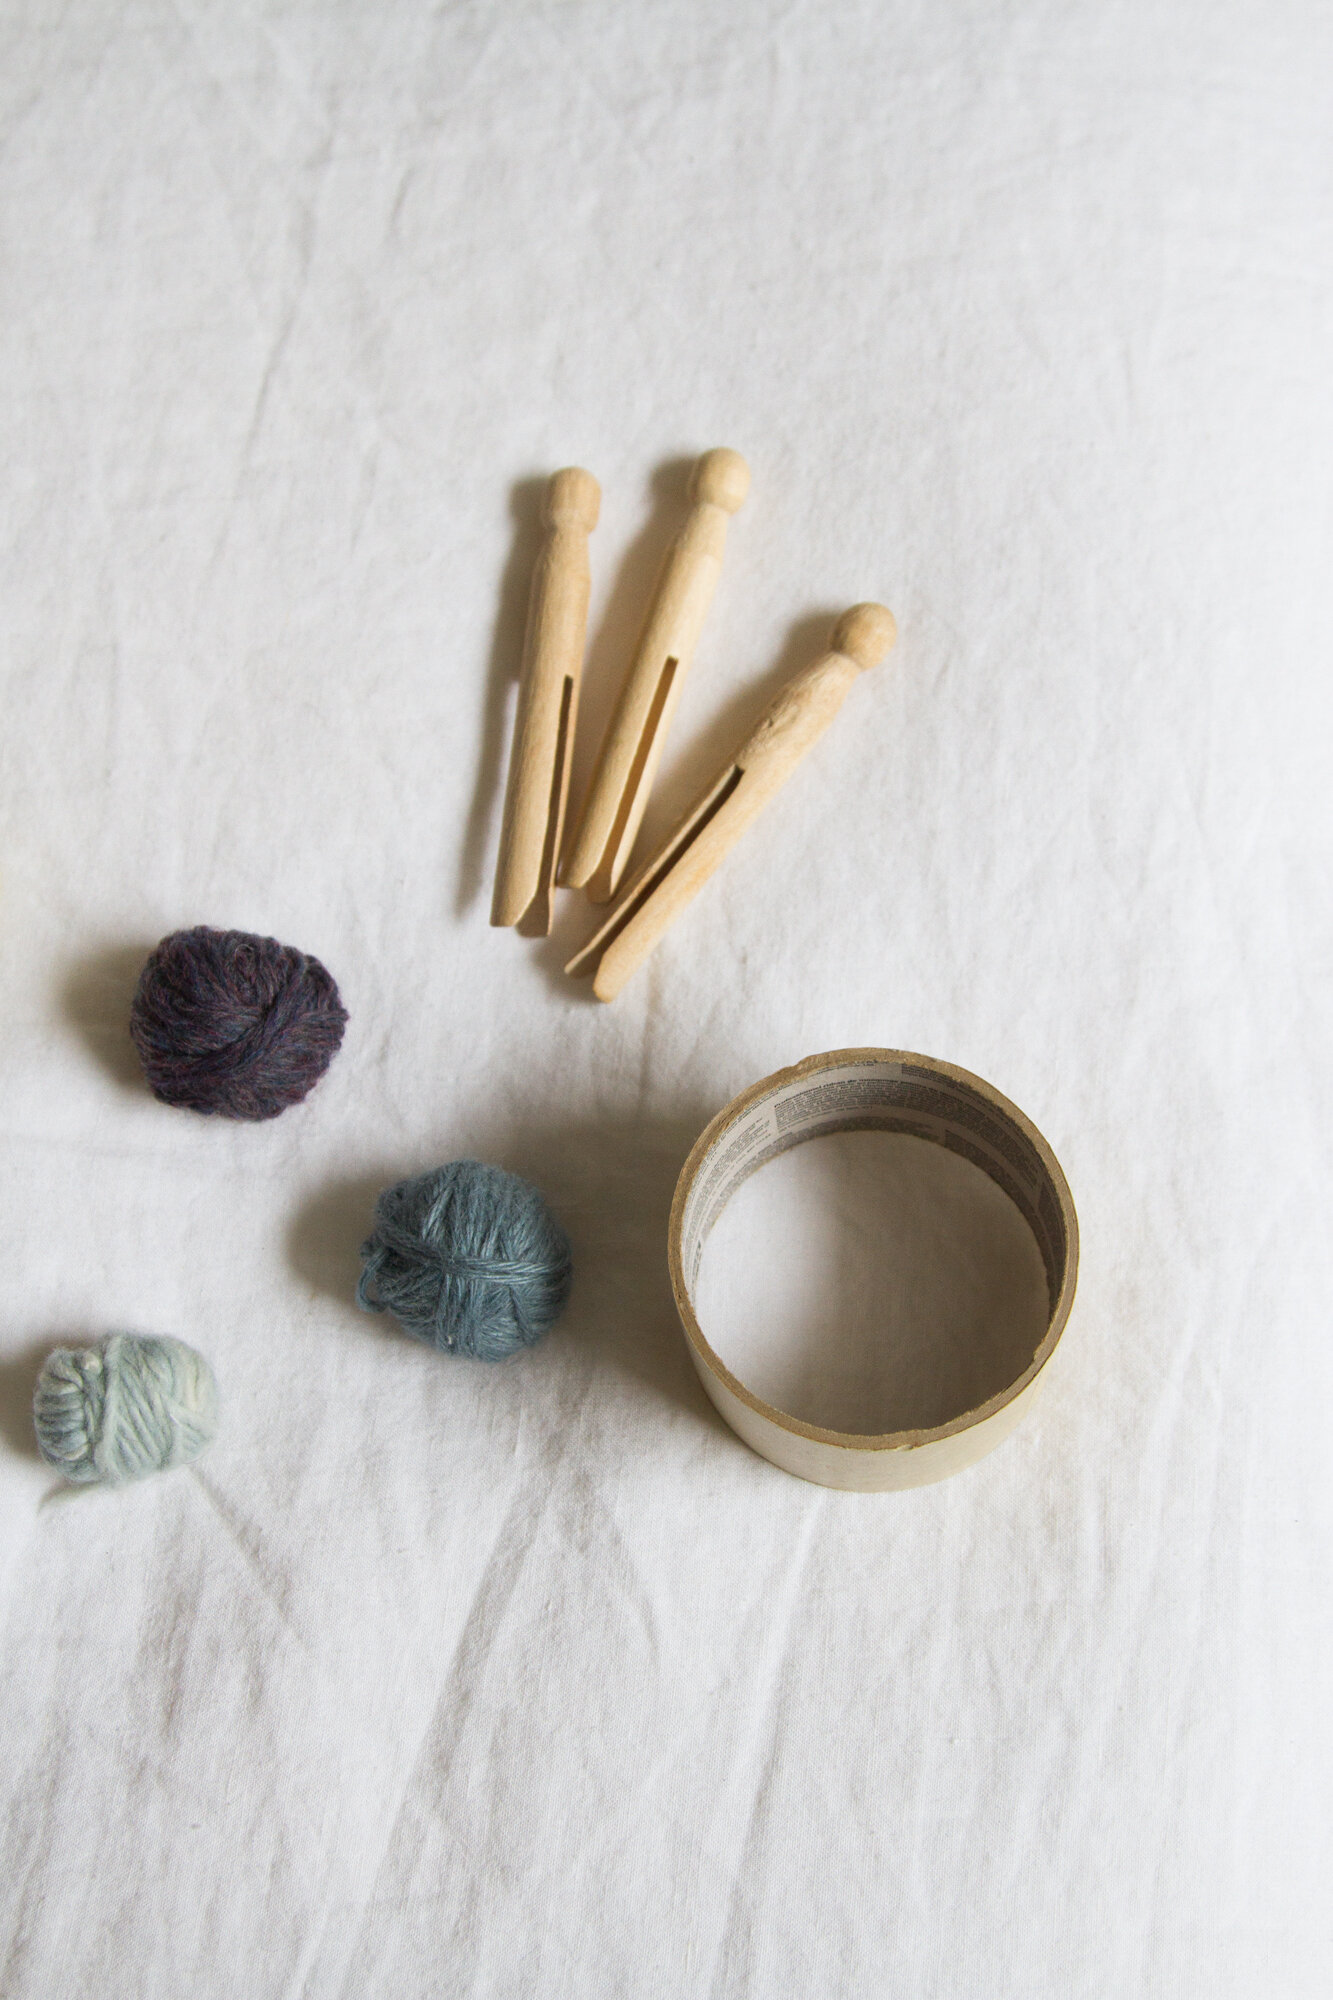
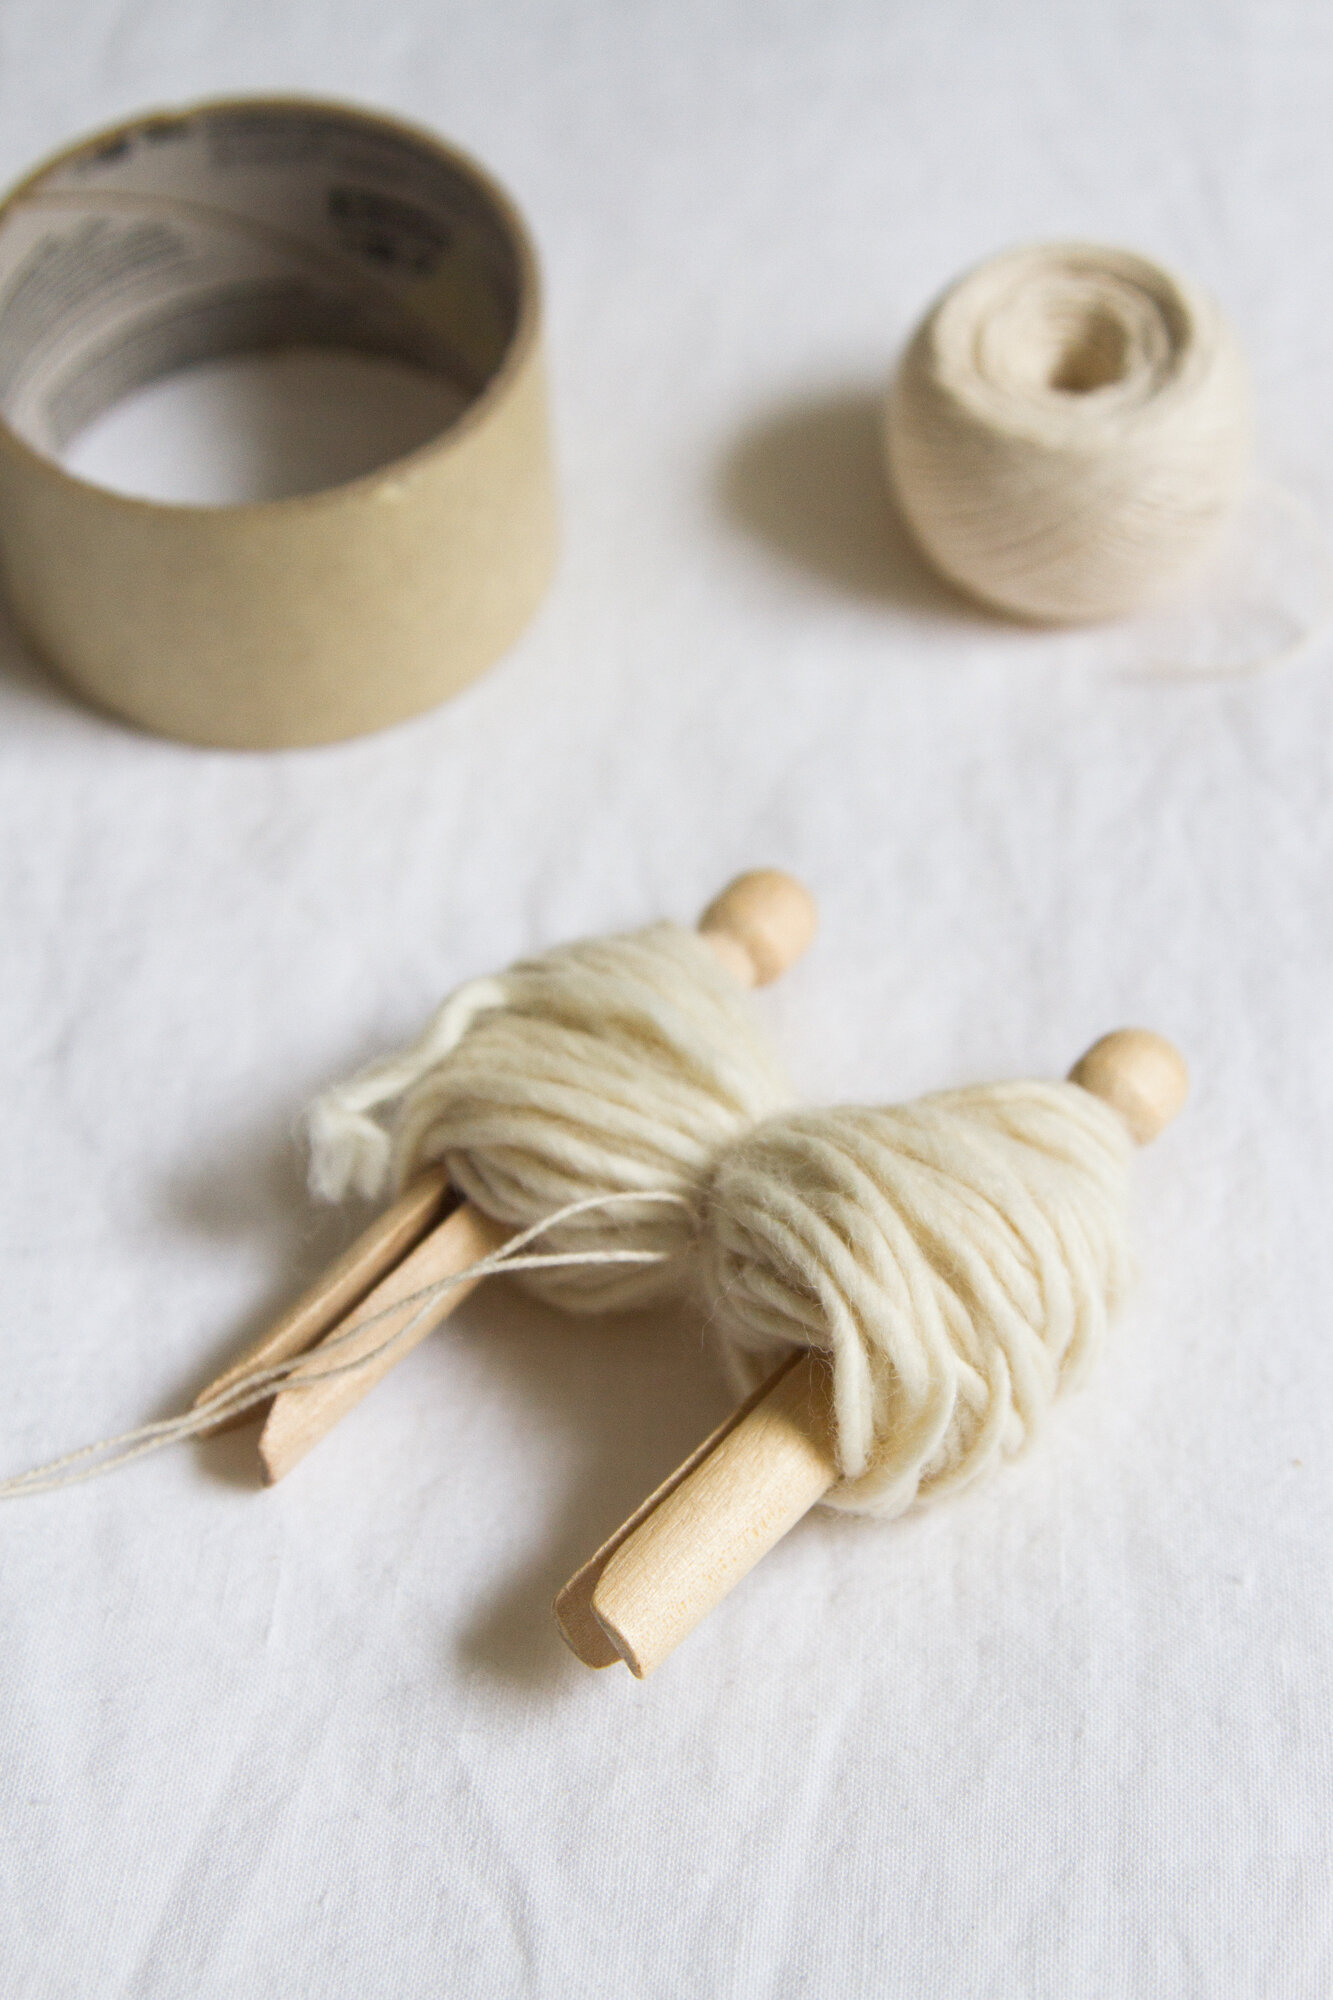
Empty cardboard tape core
2 laundry pegs
.25 oz. scrap yarn
24-inches cotton string for the tie
scissors
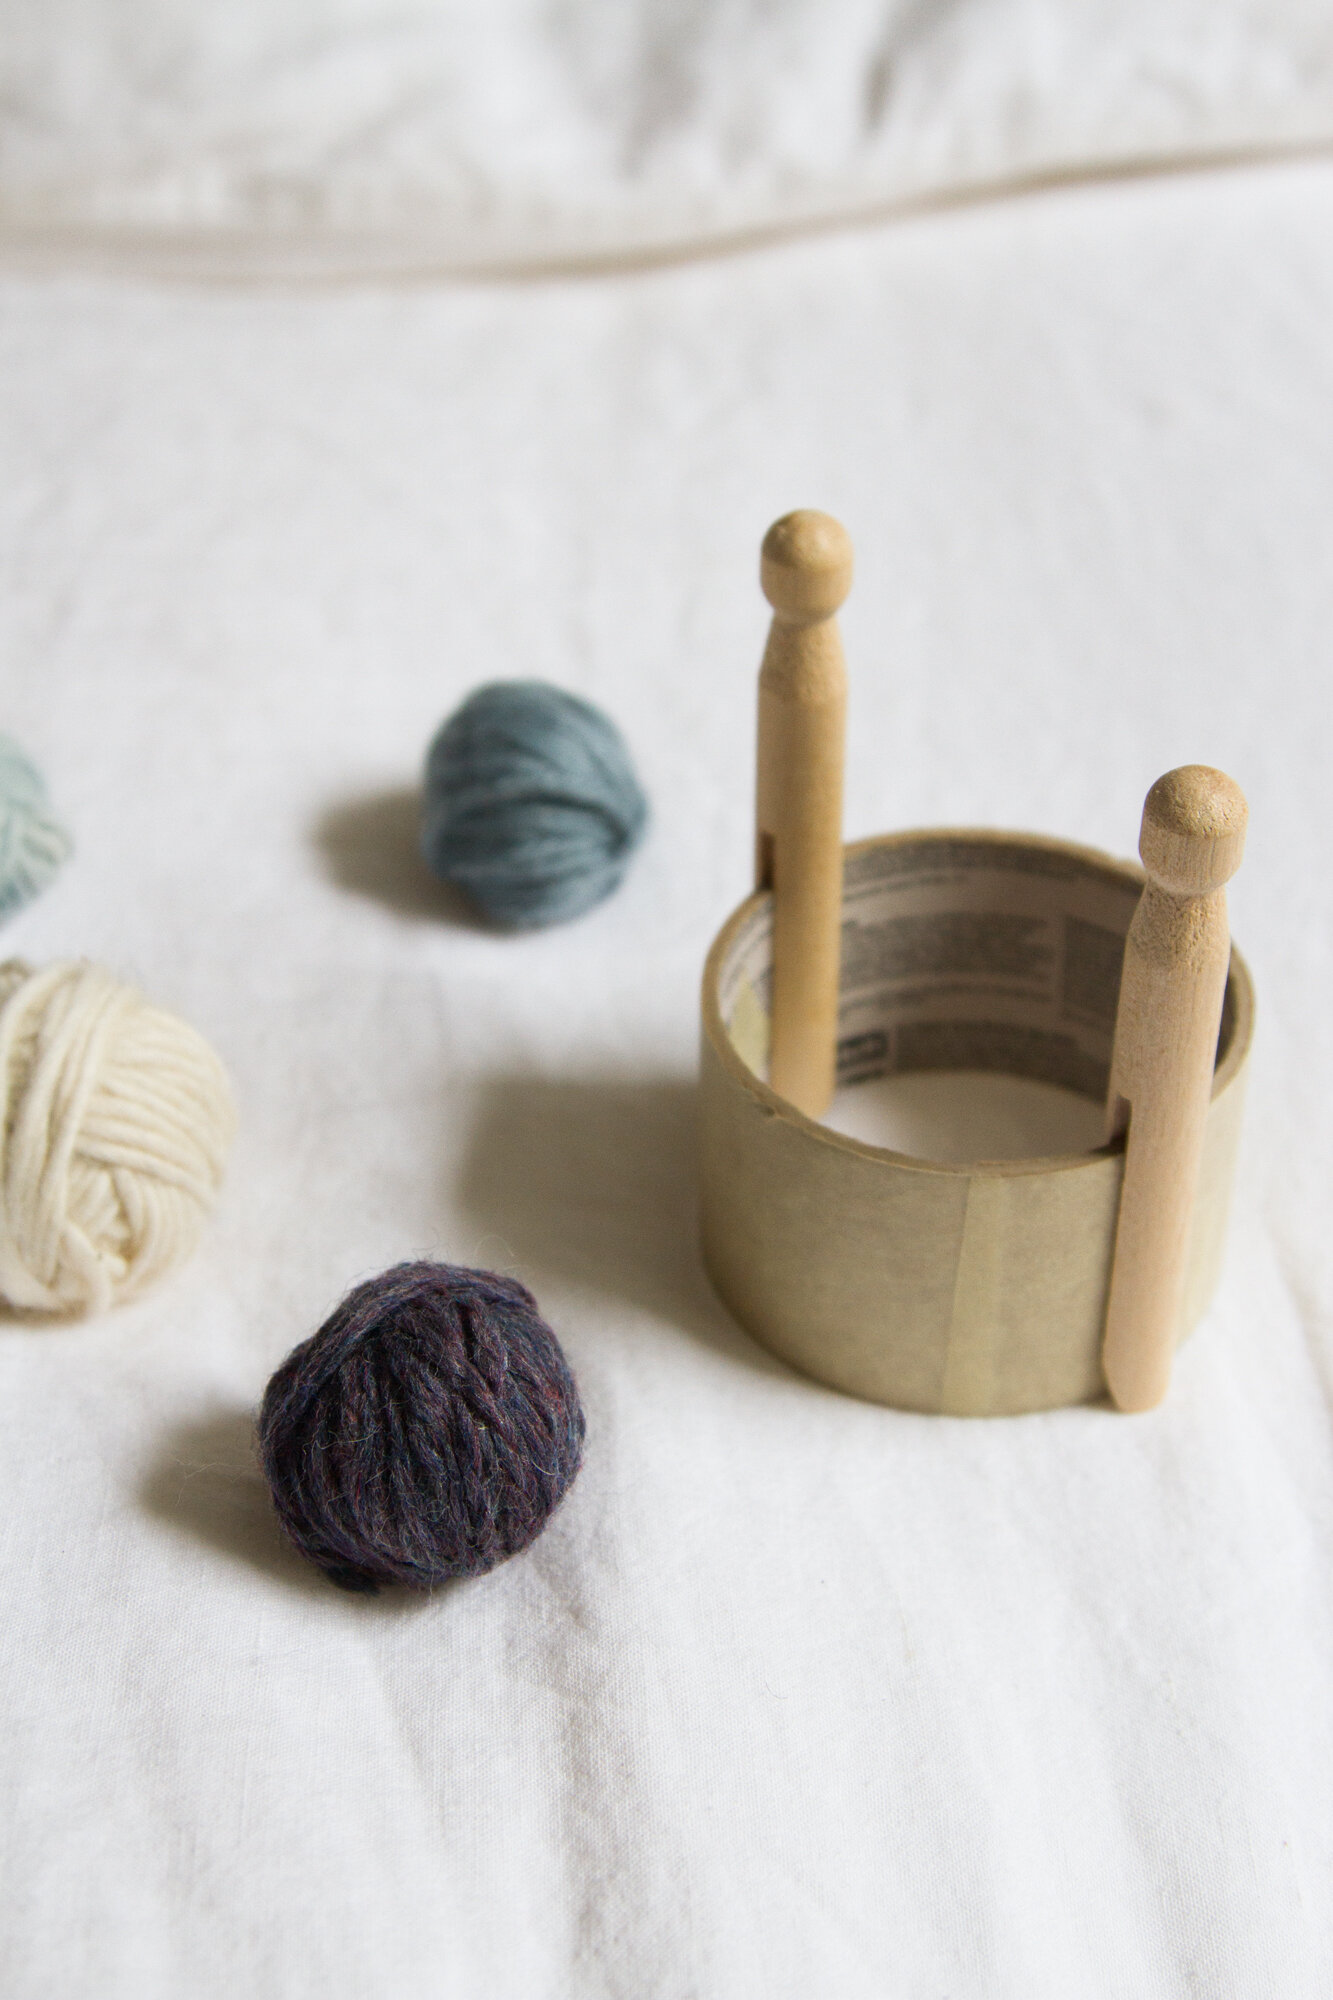
+ Secure two laundry pegs onto the edge of a tape core. The distance between the two pegs determines the size of the pom-pom. Make sure to insert the cardboard edge through the wooden slot until the pegs fit tightly.

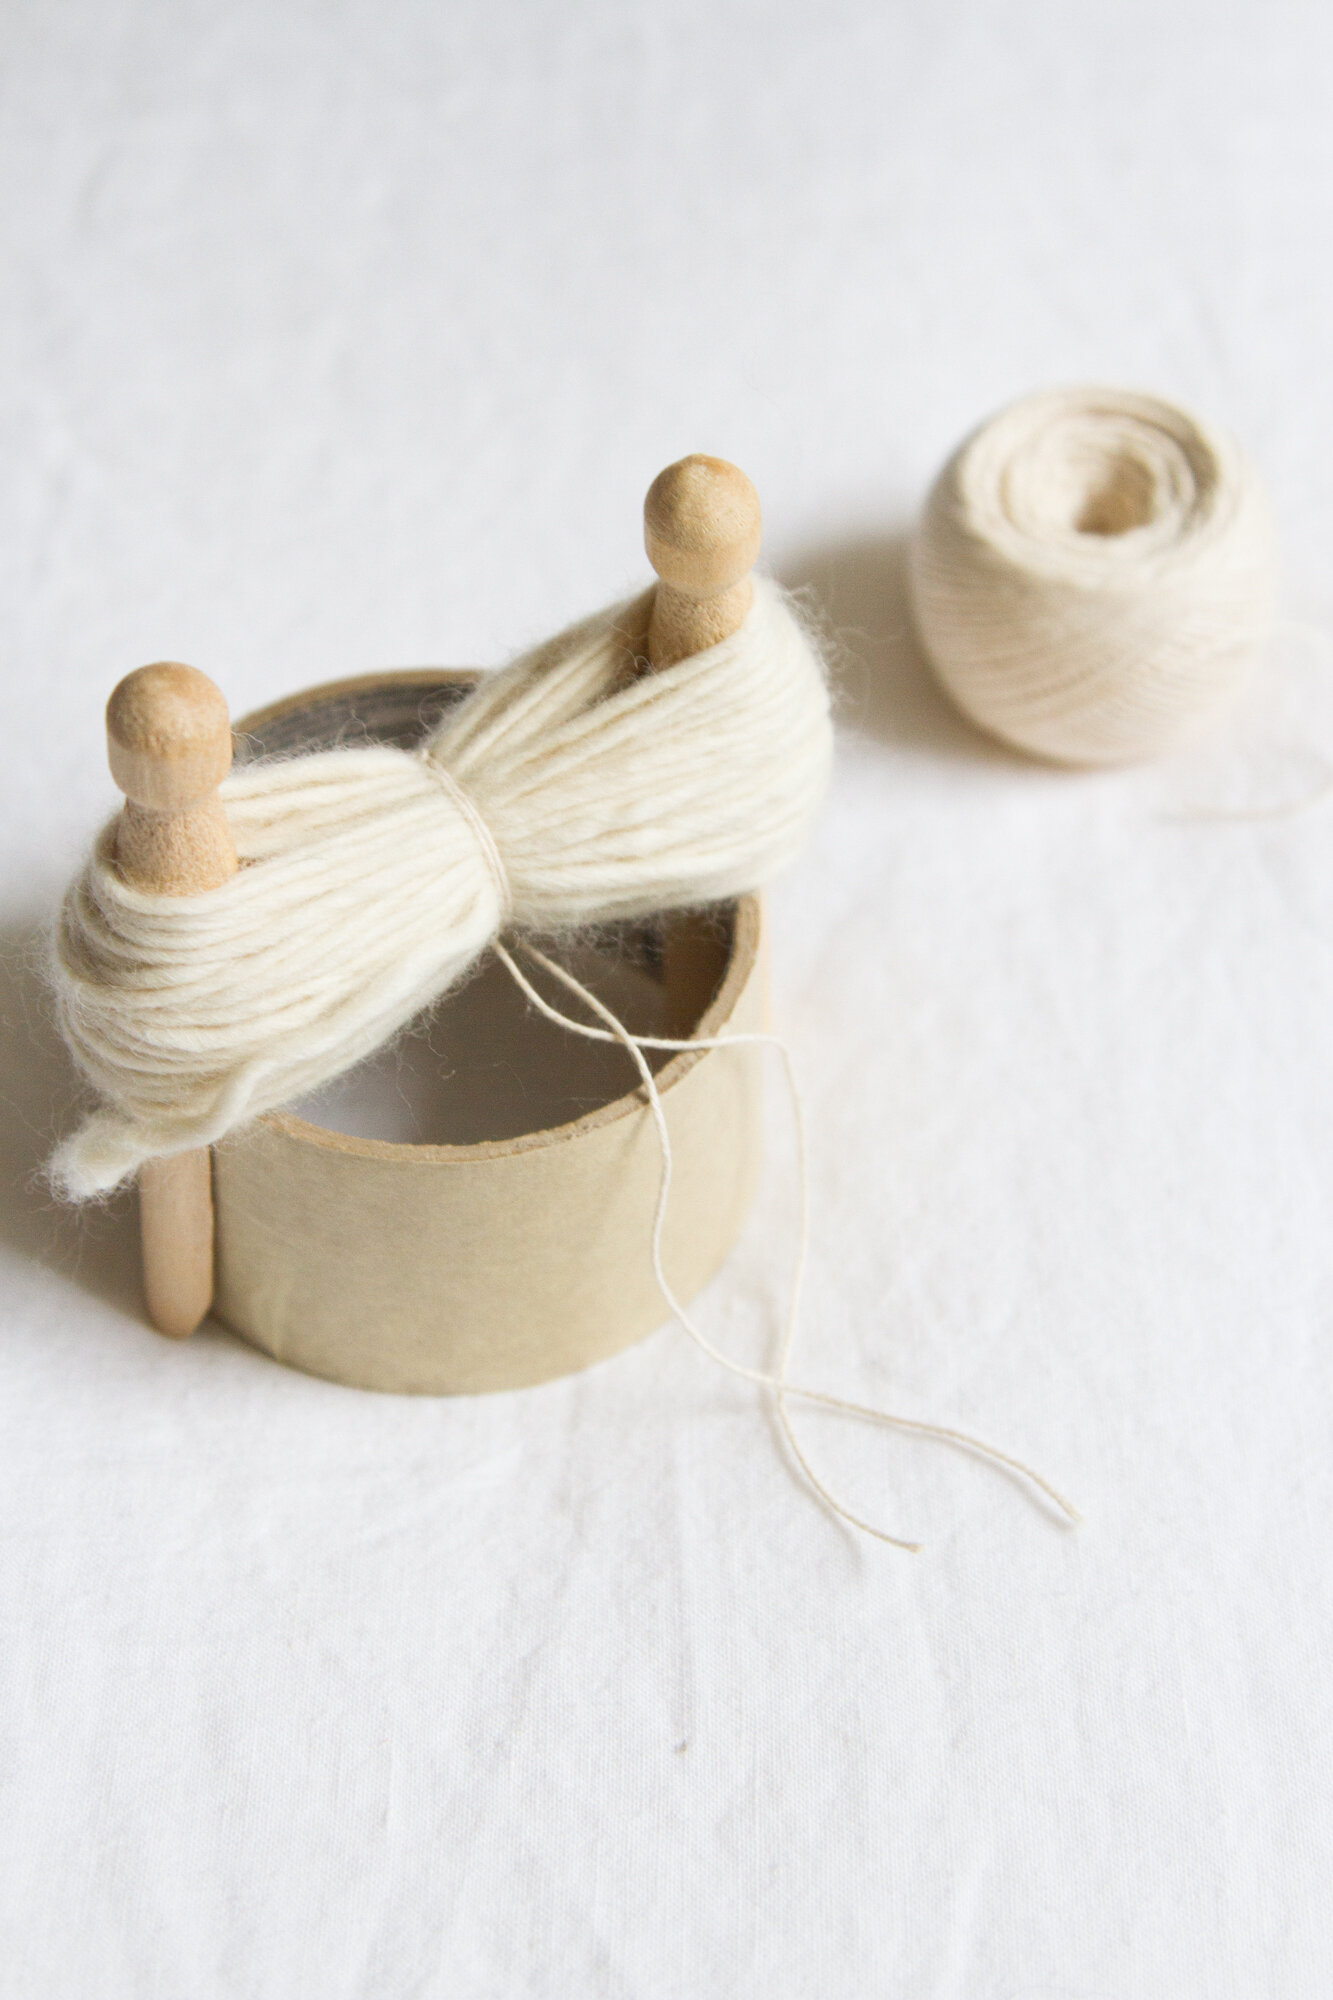
+ Wrap the yarn around the pegs until desired thickness. (Given the weight of the yarn this can be between 30-60 revolutions.) The thicker the wrap, the fluffier the pom-pom. Cut the tail end of yarn.
+ Using the additional string, tie a knot in the center of the bundle, cinching tightly to secure. Wrap the string again to the other side, repeating the cinch and knot.
+ Remove the pegs off the tape core and slide the bundle off the pegs.
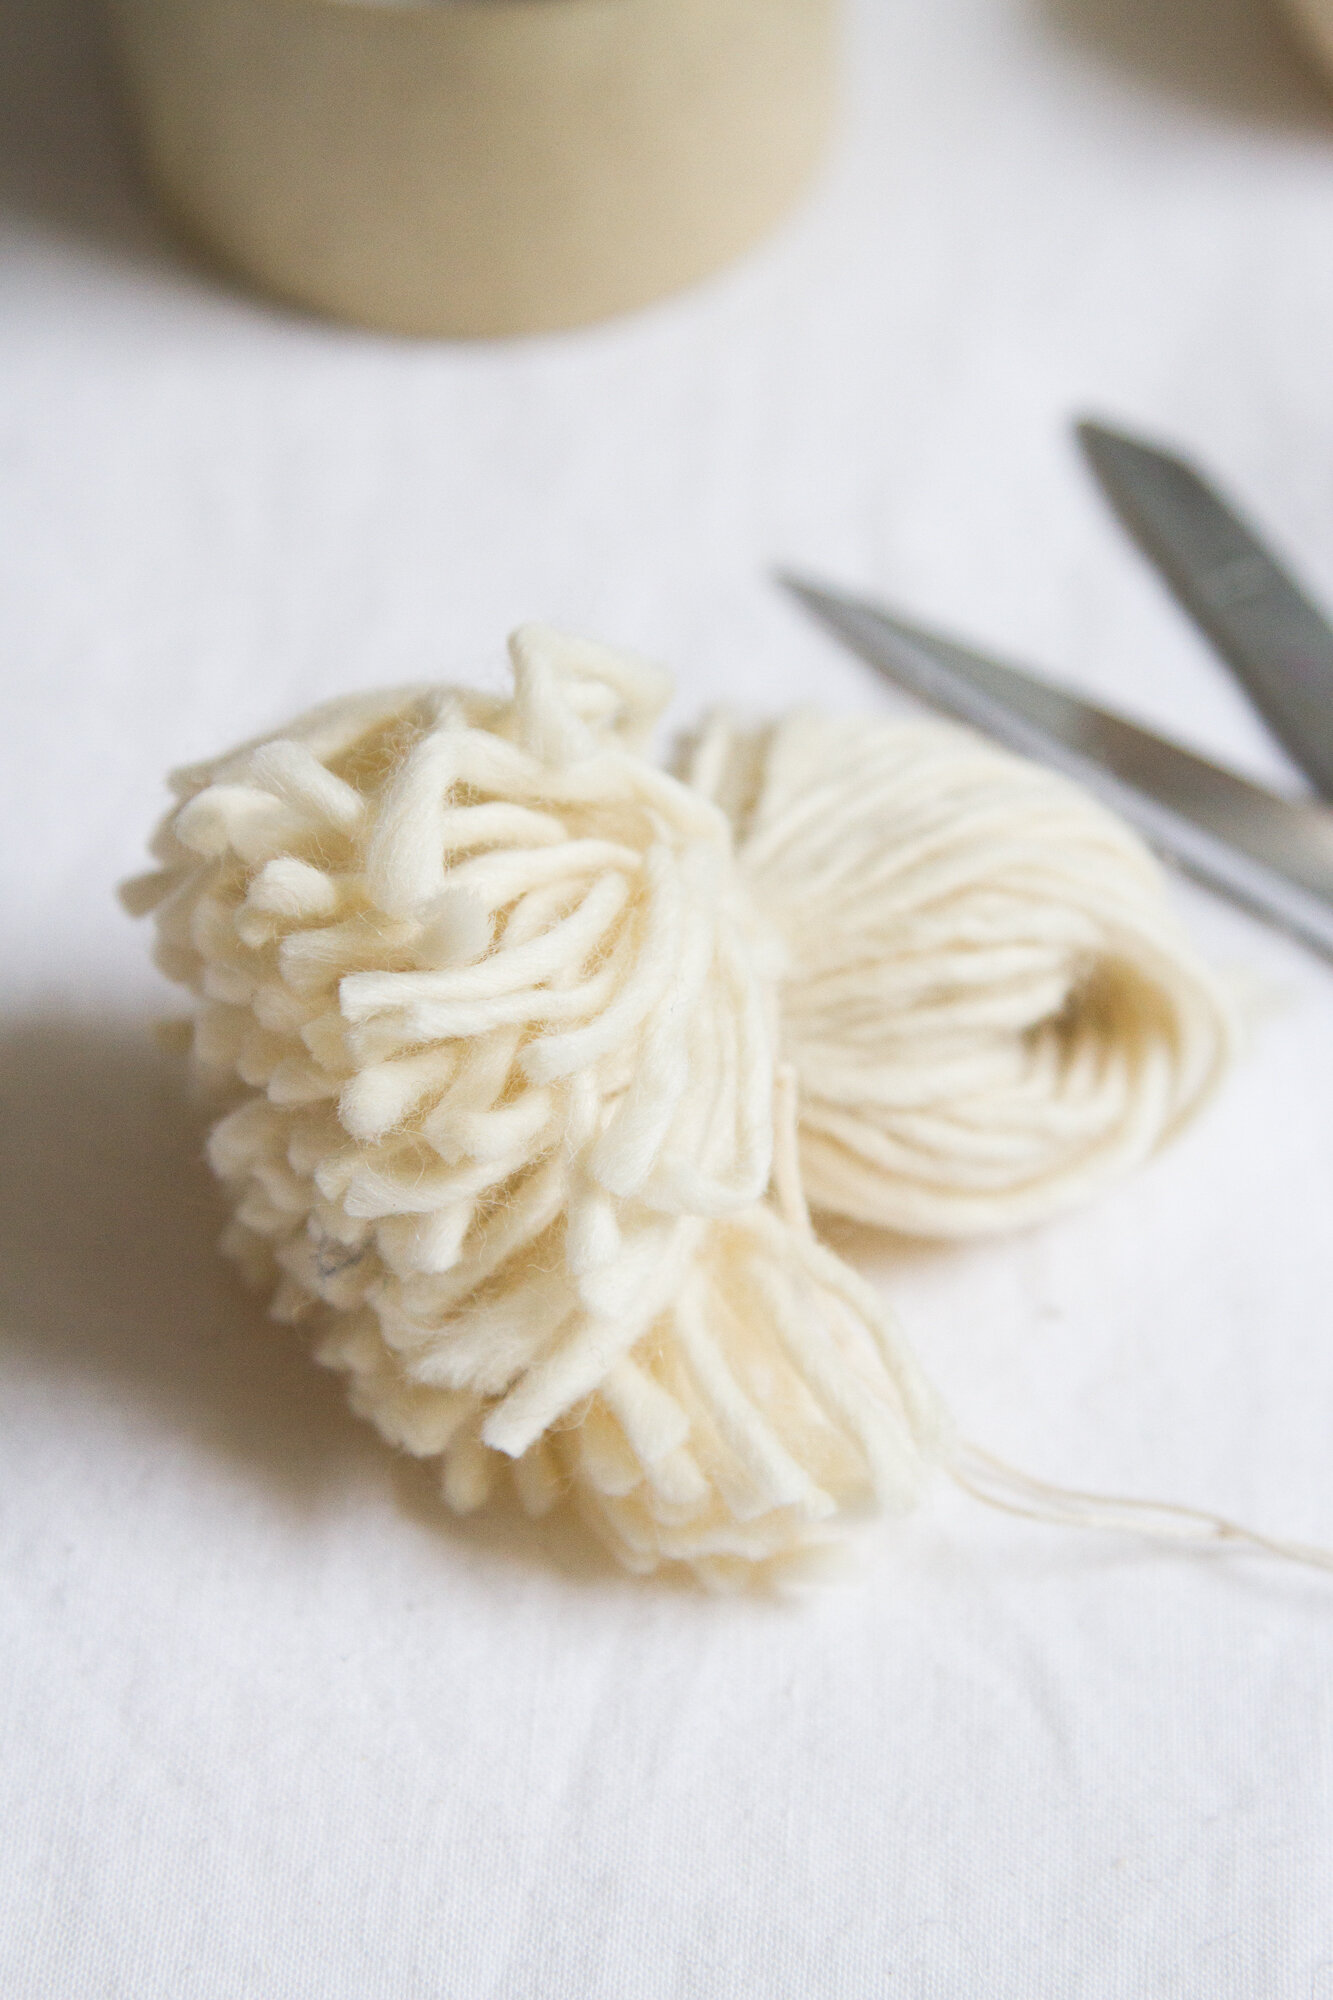
+ Cut both sides of the bundle right down the center of the loops using sharp scissors. Make sure all loops are cut through.
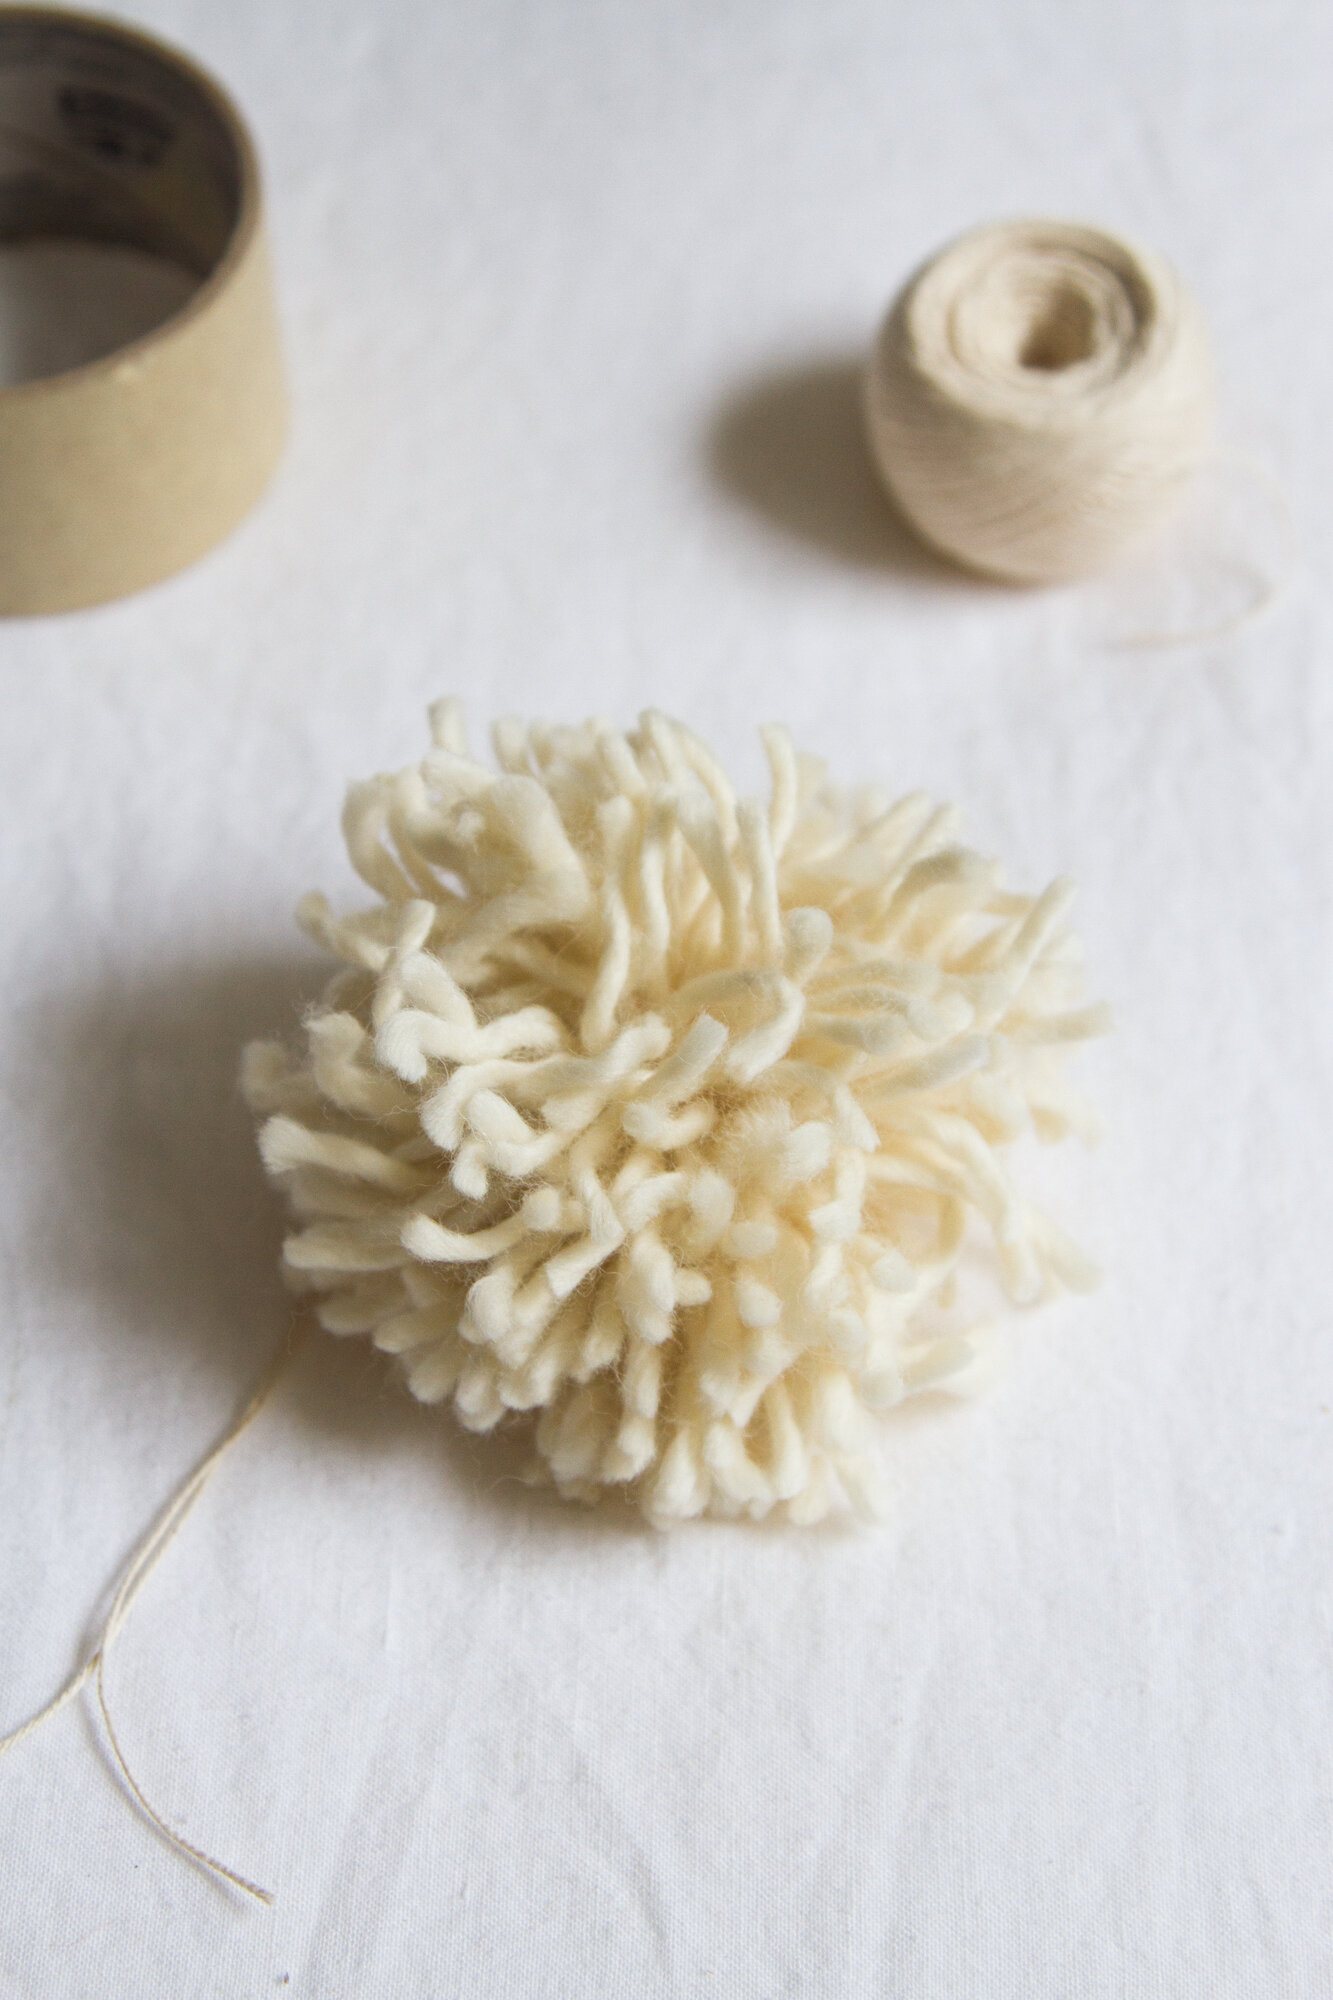
+ Trim around the pom-pom giving it a “hair cut”. Cut the strands so they are all the same length, being careful not to cut the string attached. The more you cut,the fluffier I find the pom-pom becomes.
+ Fluff out the pom-pom and tie the string around your gift.
Tassels
Materials needed:
Empty cardboard tape core
2 laundry pegs
.25 oz. string (cotton, hemp, linen)
24-inches of additional string, for tying the tassel onto a package
scissors
darning needle (optional)
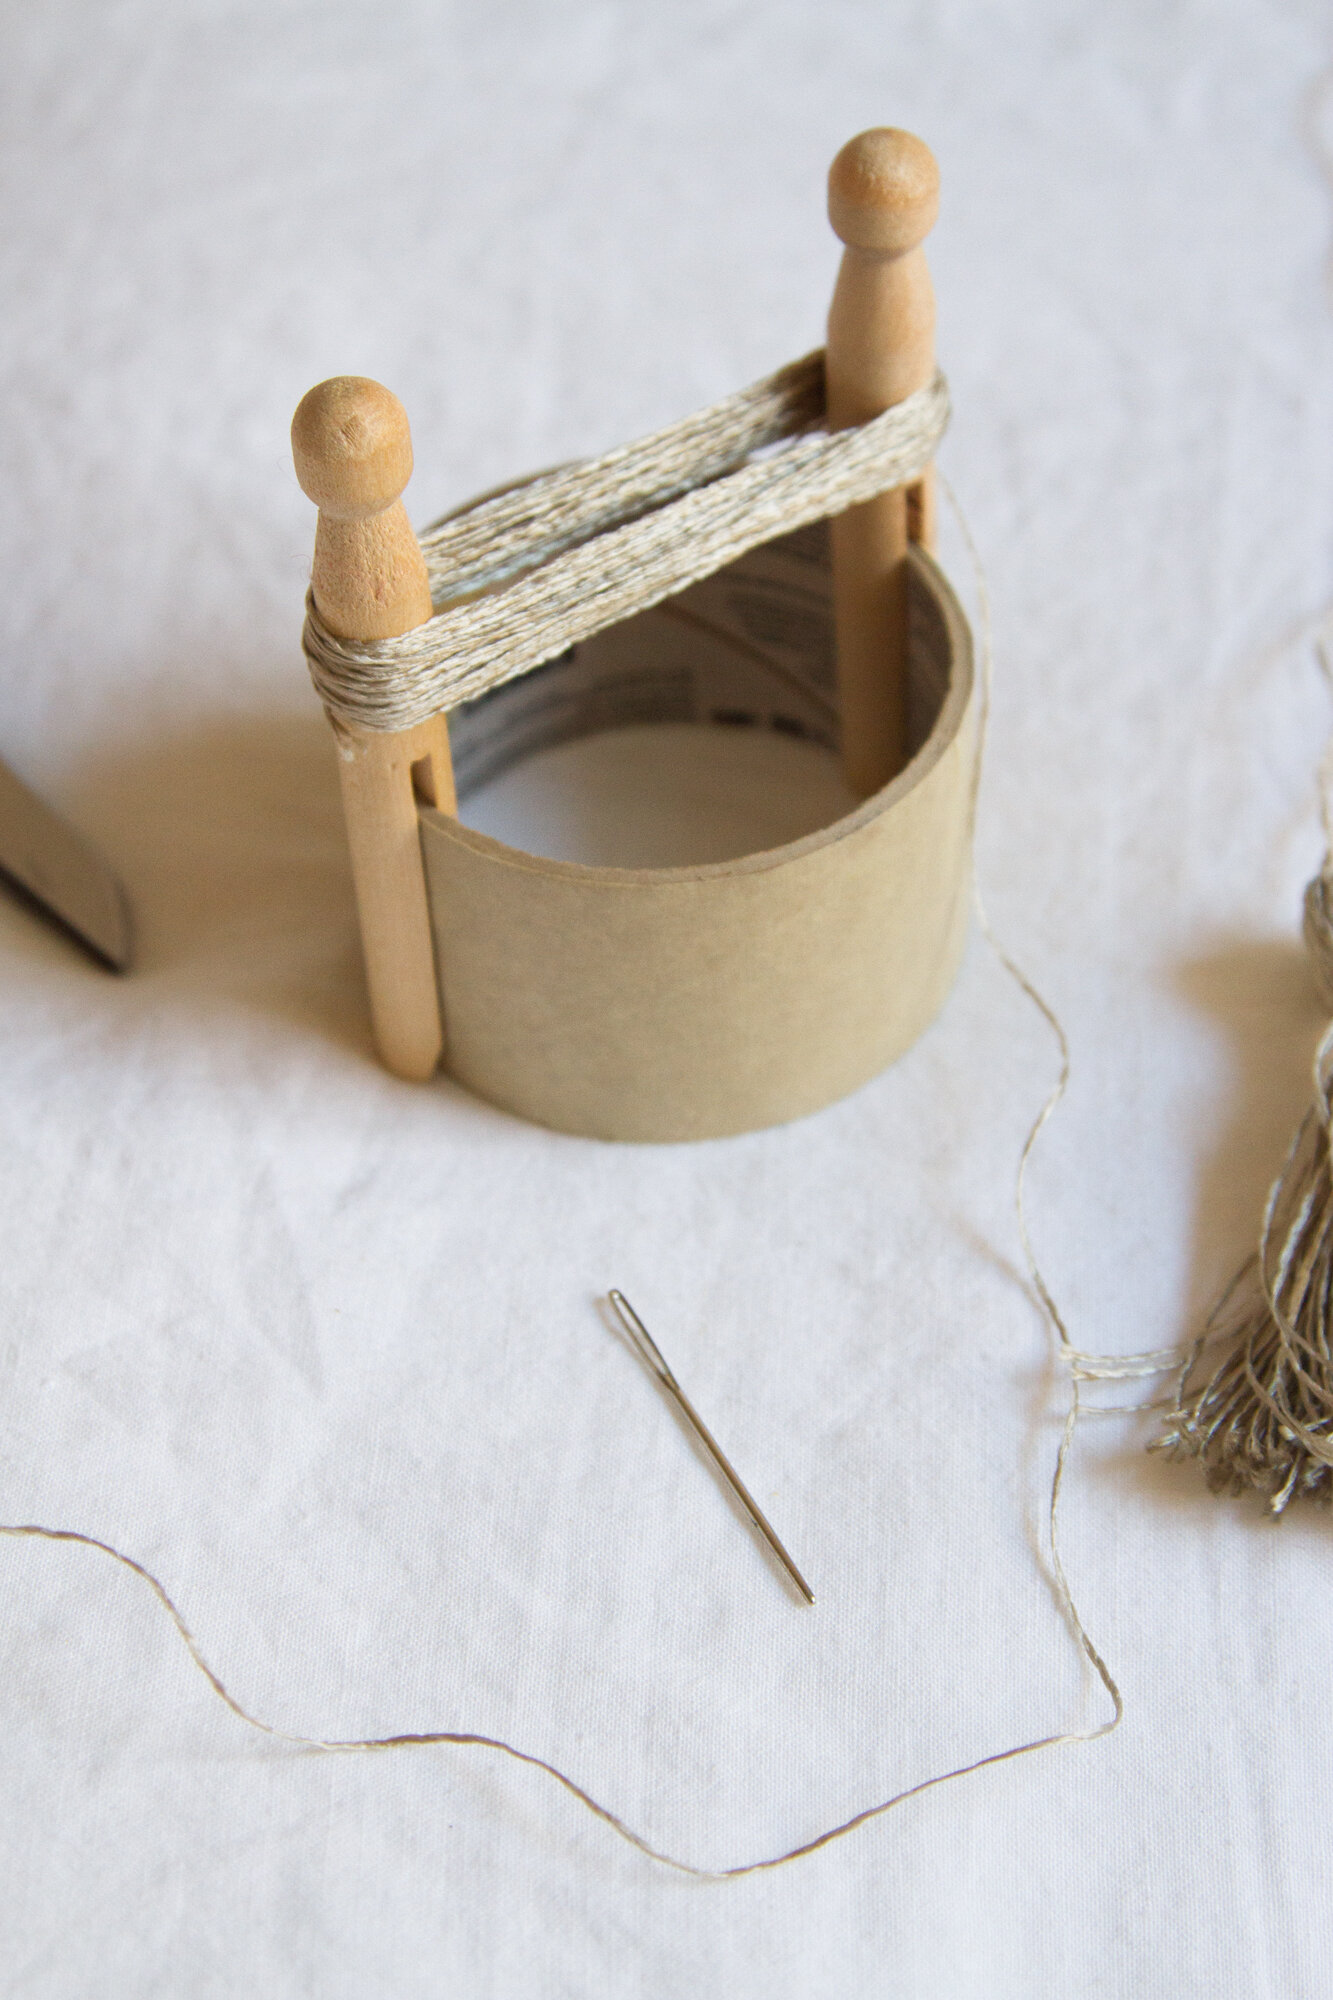
+ Secure two laundry pegs on opposite sides of the cardboard tape core, inserting the cardboard edge through the wooden slot. Make sure the pegs are secure and fit tightly.
+ Wrap your string around the two pegs to make a thick bundle. Depending on the thickness of your fiber, this can take between 30 and 60 rotations. The tassel’s thickness is up to you.
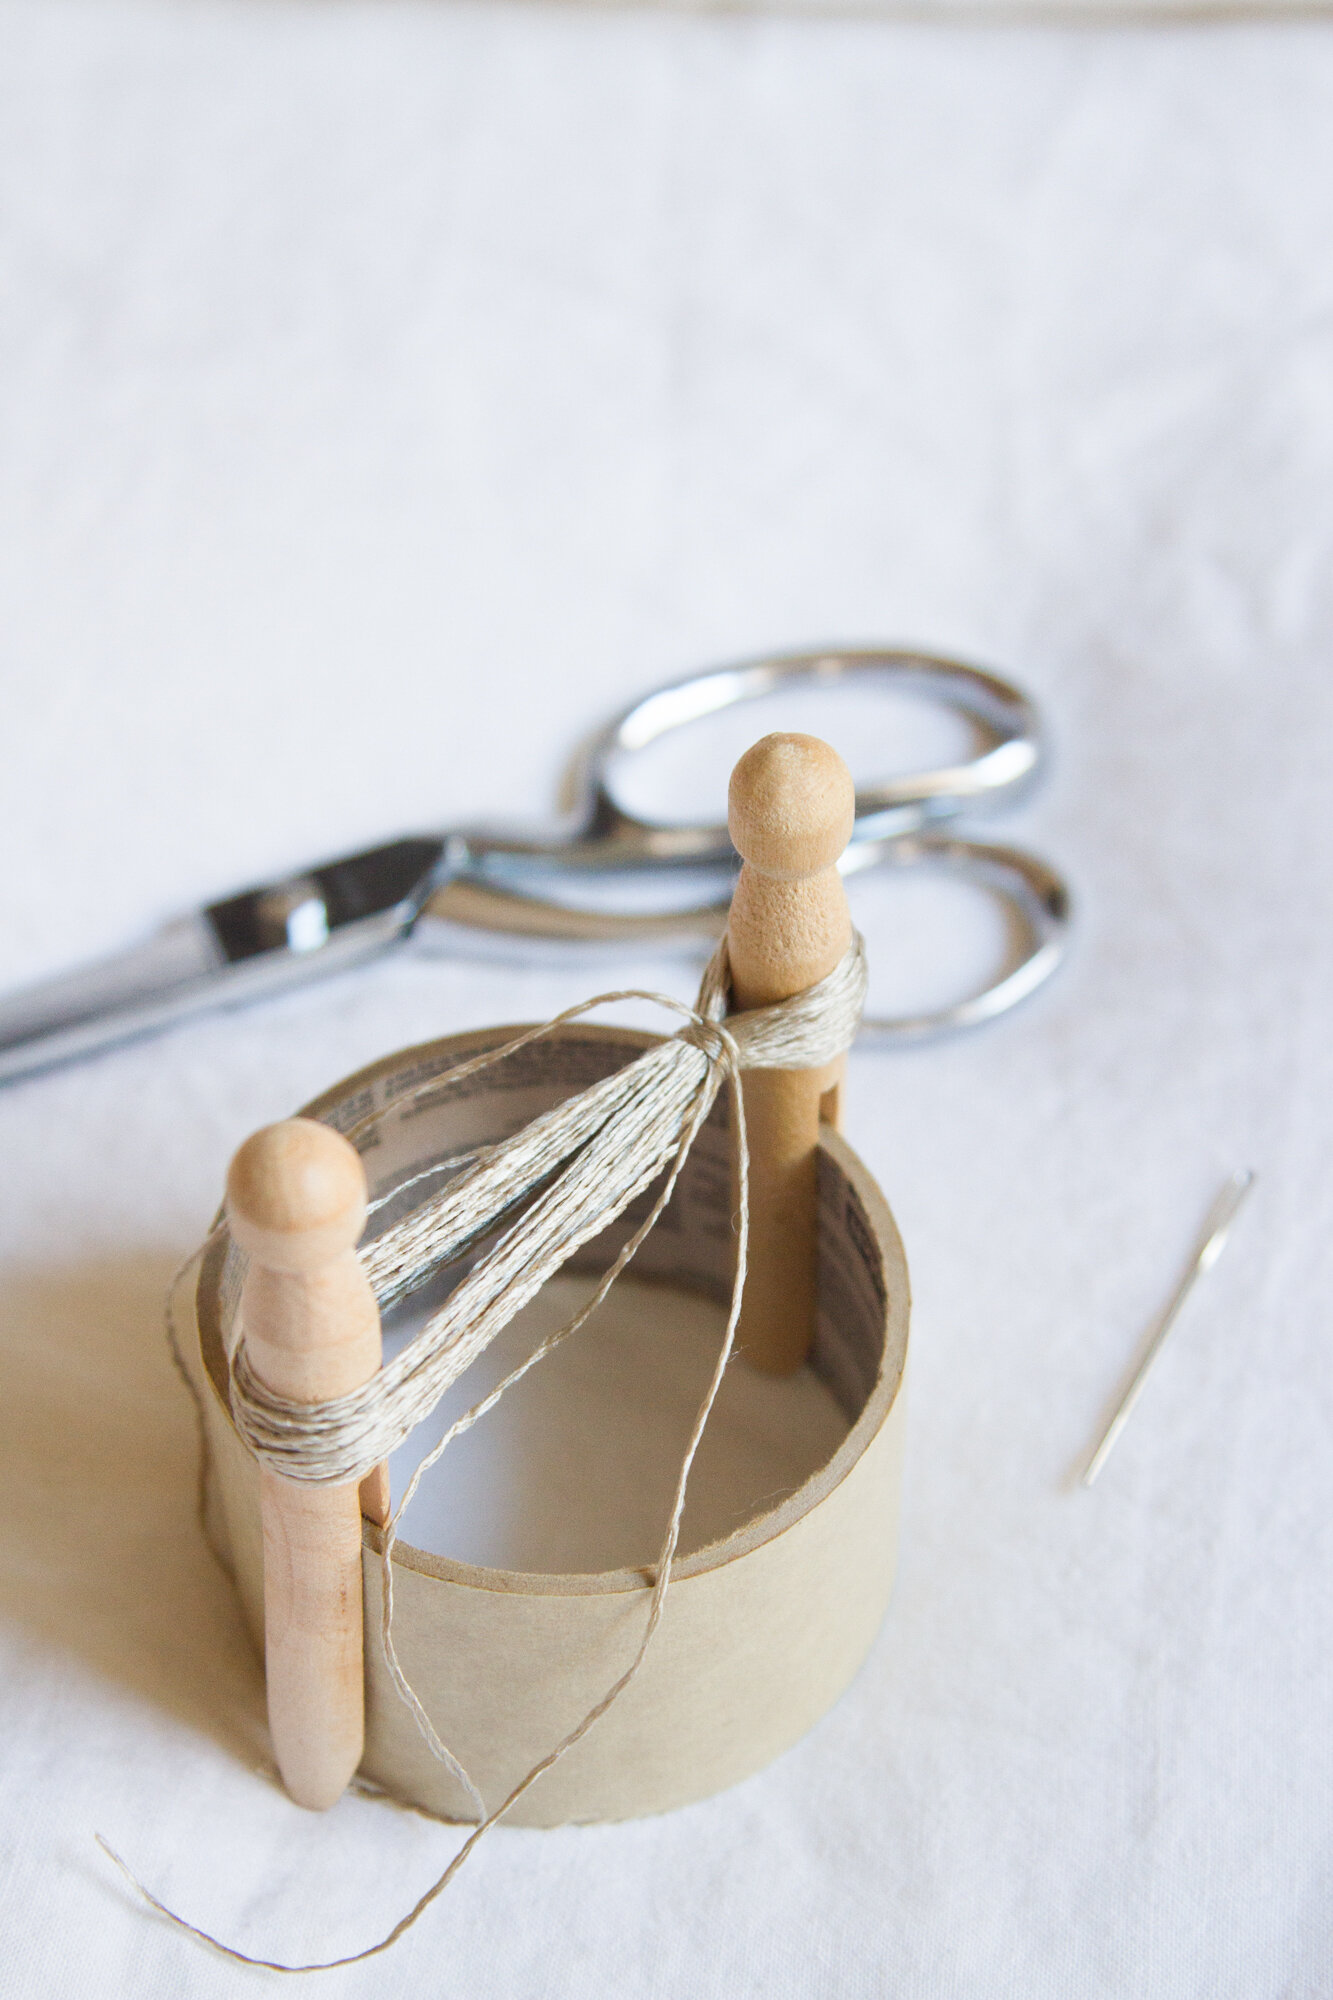
+ Use a second piece of string to tie a secure knot around the bundle right underneath one of the pegs. Make additional knots around the bundle and cinch tightly each time before tying.
+ Remove the pegs from the cardboard core and gently slide the knotted bundle off.
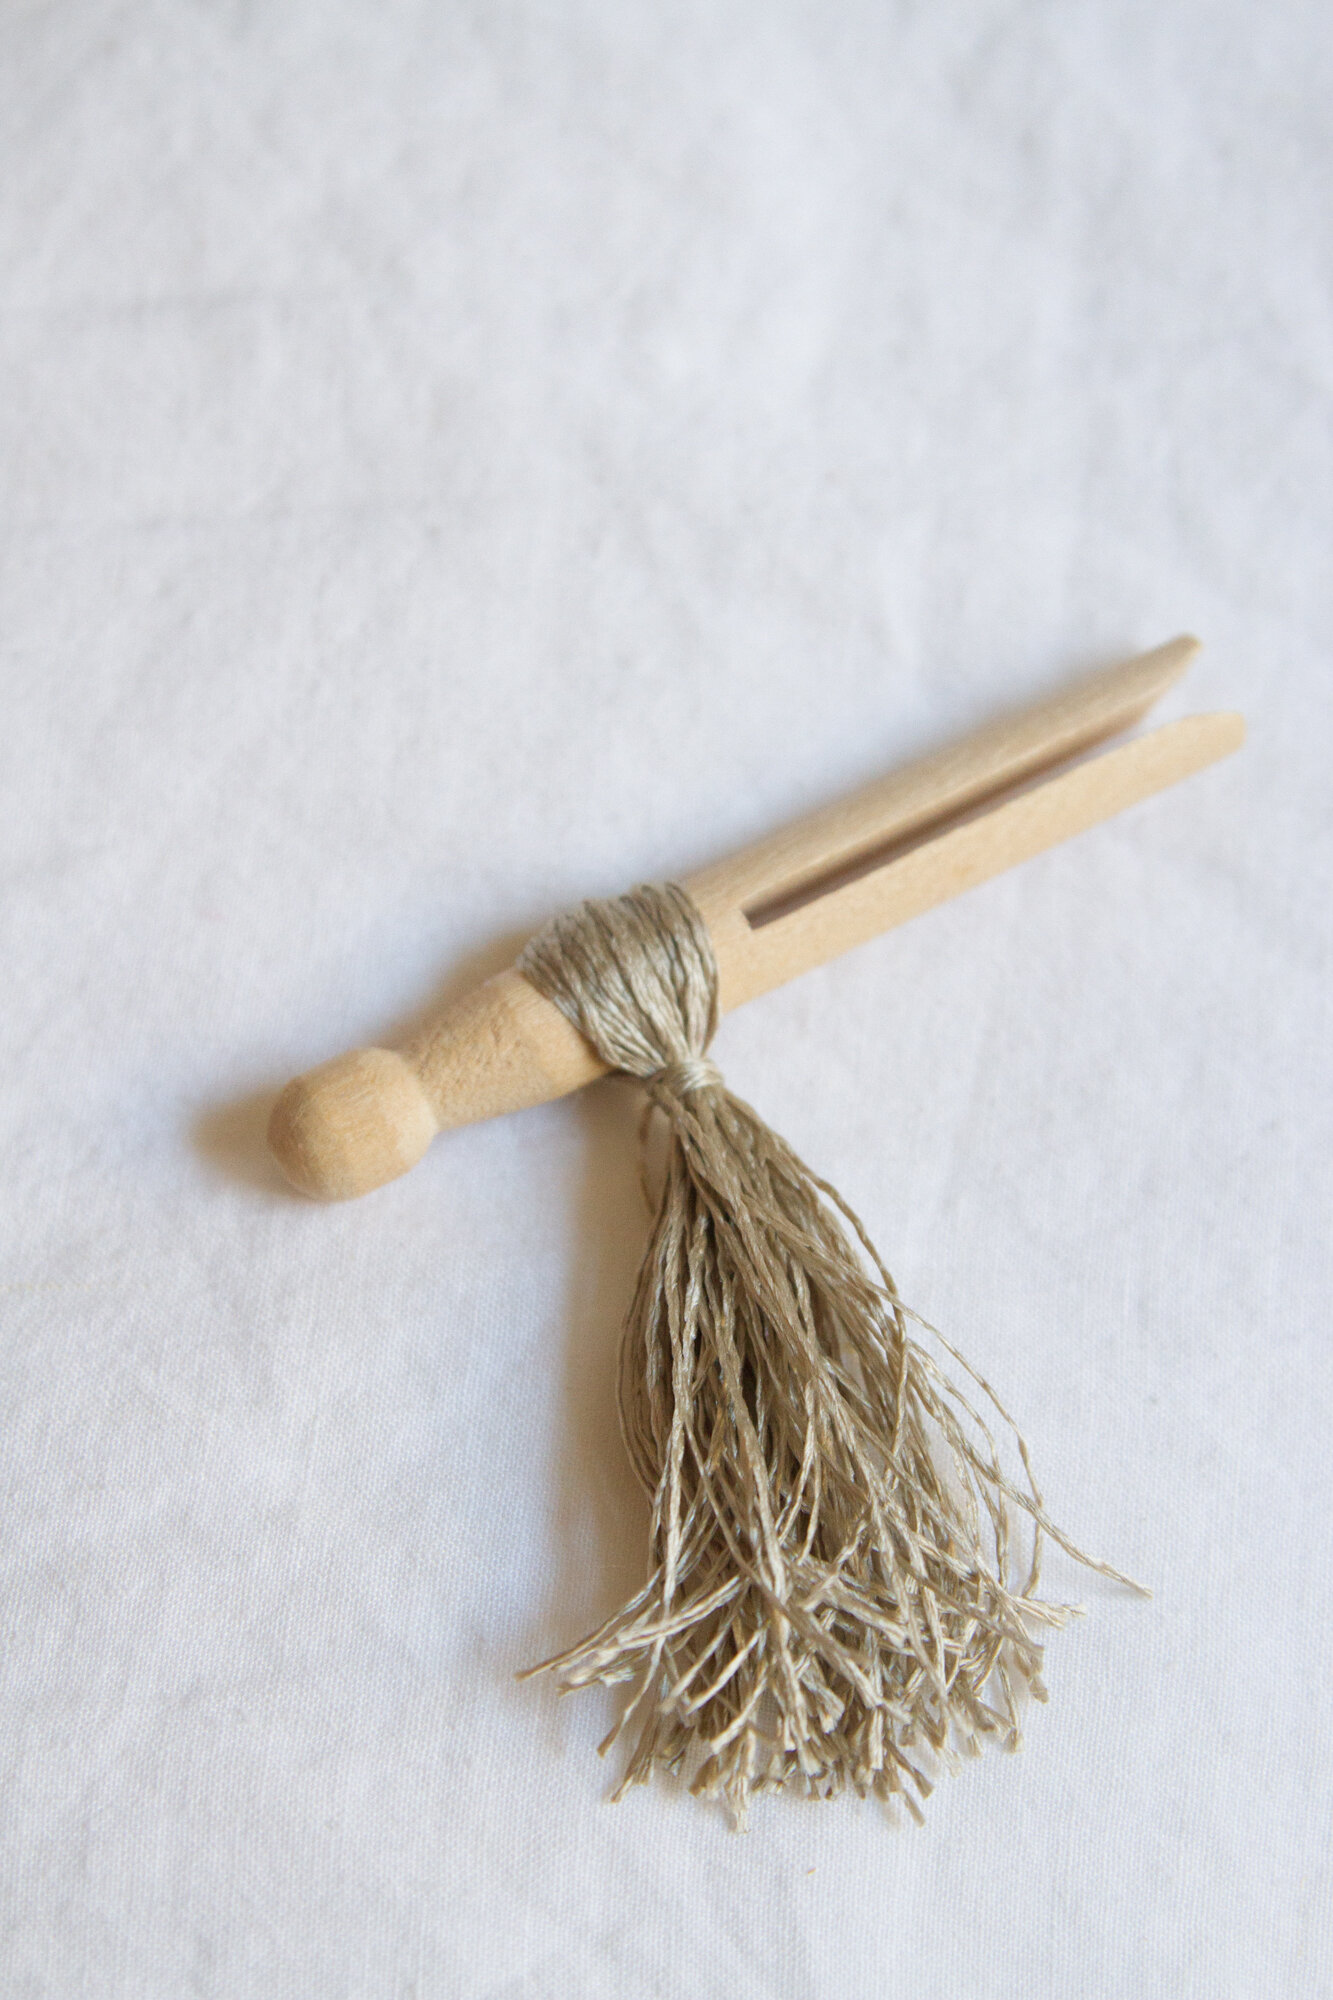
+ Cut through the bottom center of the loops on the long end of the tassel. Make sure to cut through the center of all the loops, and trim any longer pieces of string so the tassel has a blunt edge. Trim the string used to secure the knot to the same length as the rest.
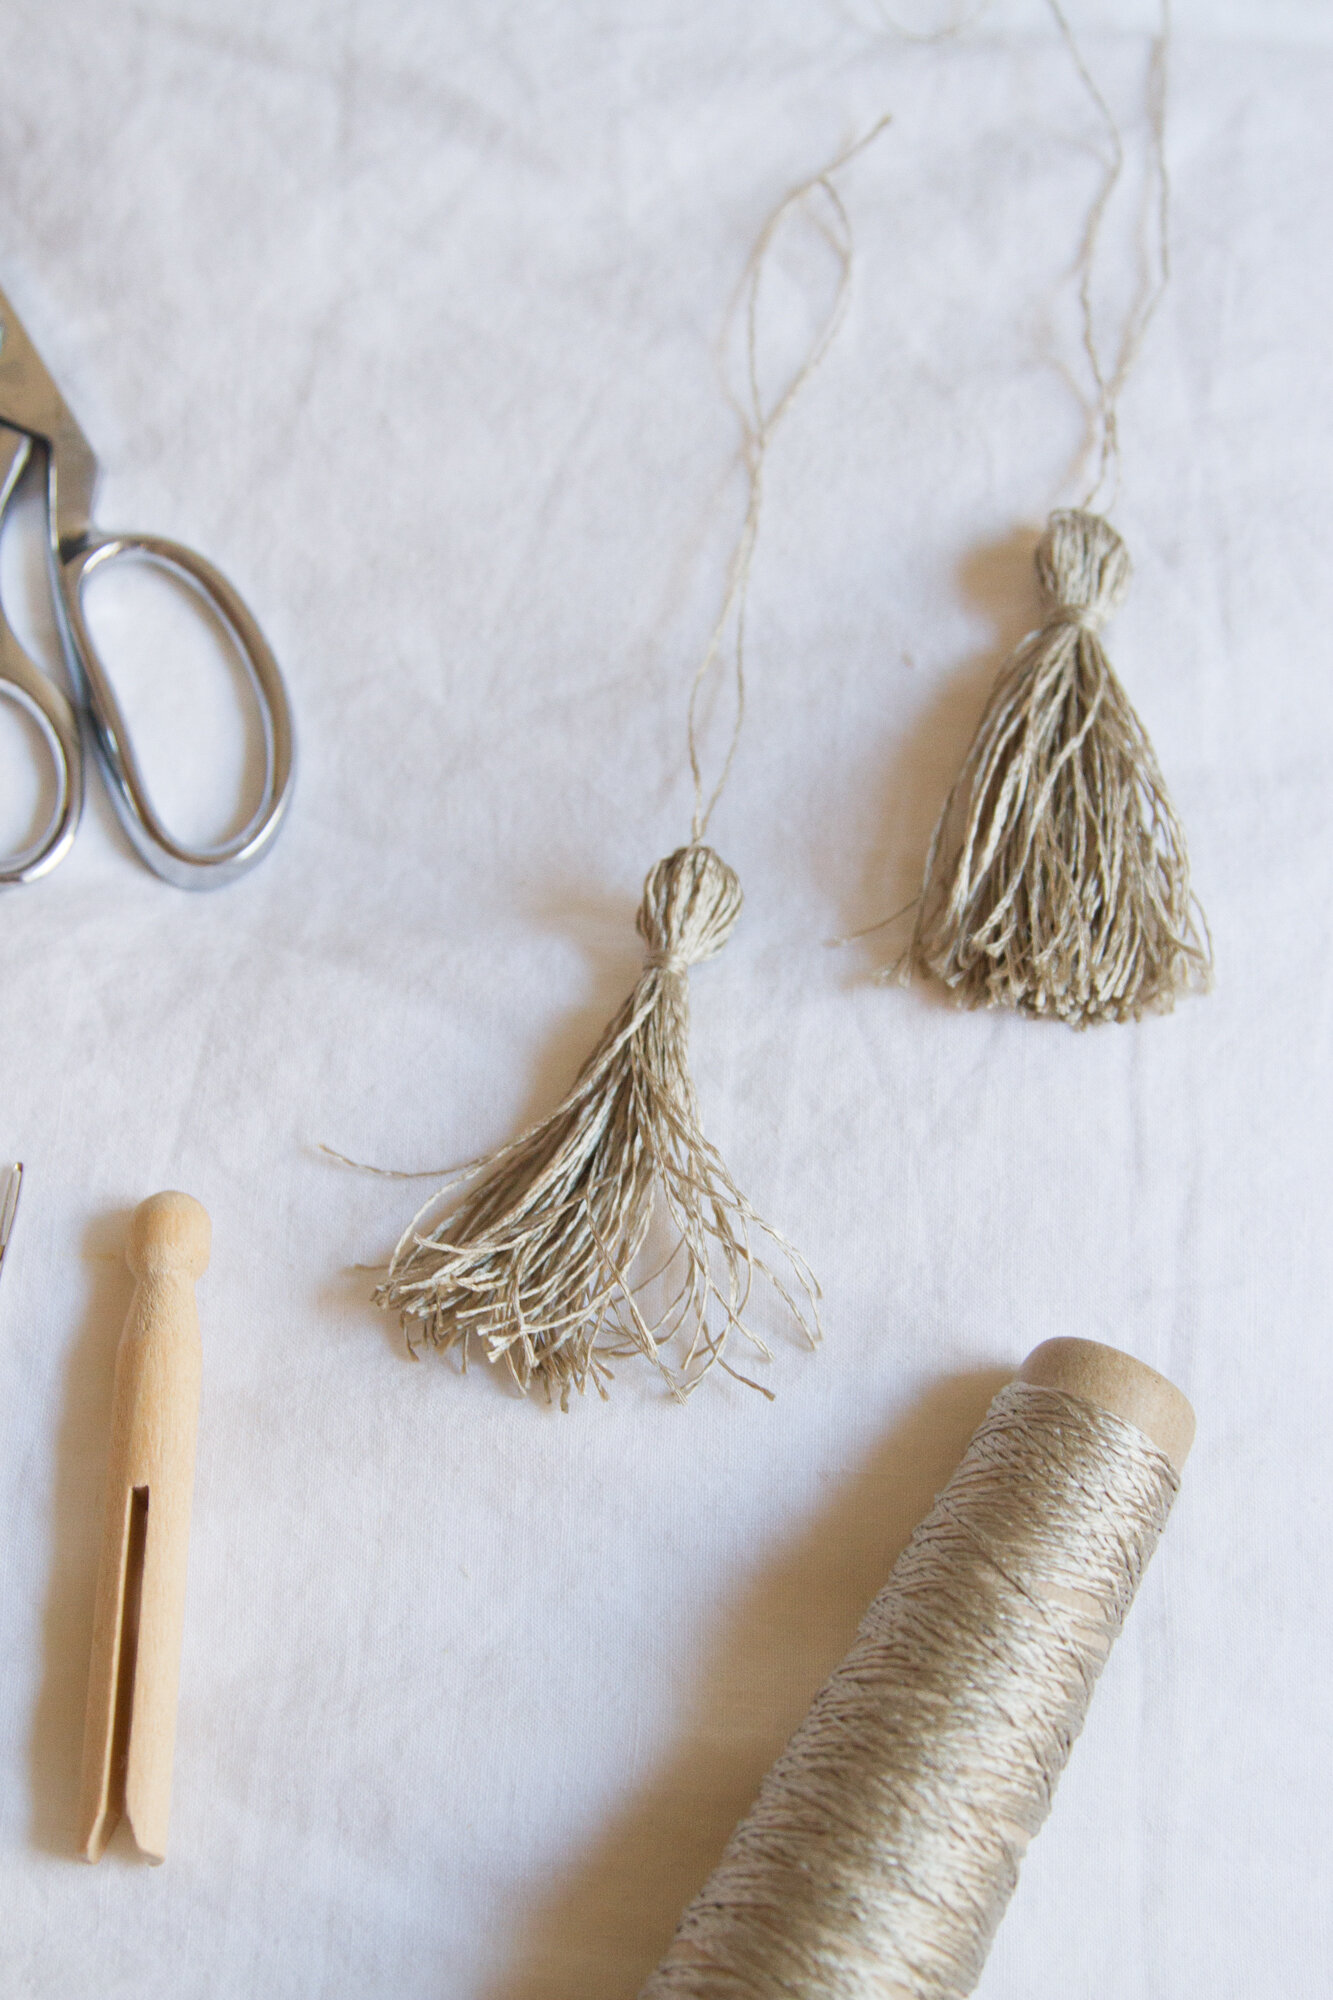
+ Thread the extra string through the center of the loops and secure a knot in the center of the string and at the top of the tassel. A darning needle can make this step easier.
+ Tie your tassel onto gift wrap or use as a decorative tree ornament.

Rose Pearlman is an artist, teacher, and textile designer. With a background in fine arts and a love of well designed functional objects, her creations blur the lines between art and craft and pushes the boundaries with non-traditional techniques and materials. Rose teaches monthly rug hooking workshops in and around her home in NYC, and also welcomes commissions for one of a kind constructions in decor and home furnishings. Her work has been featured in fiber magazines, galleries, and numerous online design sites. Her new book Modern Rug Hooking comes out December 3, 2019 and is currently available for preorder wherever books are sold. She lives in Brooklyn, NY with her family.


16 Comments
so cute! you can also just do it with two fingers (thumb and first finger) if you don’t have the pegs. 🙂 Great idea for wrapping a gift!
Ha! Resourceful! Does someone else tie off the middle for you?
always good to have a friend handy 🙂
I use my fingers! It’s really quick too! Oh you can use a fork to make tiny ones too 🙂
Yes! I love that you can move the clothespins closer together or farther apart to get differently sized poms!
love how the wrinkled paper is so pretty…
For some reason, I find this fascinating! Please don’t tell anyone, I have a rough and tough image to uphold. LOL
I absolutely love this. I will be making these with my daughter. Thanks for sharing!
Oh this is too fun! I love poms but have never tried to make them. This seems like a really easy to follow directions post!
You are soooo very clever! I love the simplicity, and no cost due to household items. Thank You!
Brilliant! Why buy a special tool when you can make it! Will share on my blog and link back so others can come visit!
So ha0ppy to be able to still learn in my old age
I love it! So ingenious, thanks for sharing!
The pompoms will be fluffier if you steam them over boiling water. The yarn must be wool, man made fibers won’t work.
This is a brilliant idea! Thank you so much
I happen to have some antique clothespins just like these ! This idea is so much easier
Thanks for sharing it
Comments are moderated.