I have a beloved pair of knit cotton potholders that I’ve used in my kitchen for the past six years. They’ve helped me pull every sheet of cookies out the oven, allowed me to peek under the lid of pot after pot of simmering beans, and transitioned endless cast iron skillets directly from oven to dinner table.
The design is sturdy, simple, and straightforward. And even though they now show ample evidence of their daily use, their stains are part of what I love about them. Still, I’ve been wanting a few more and to improve upon them (a loop for hanging would make them perfect).
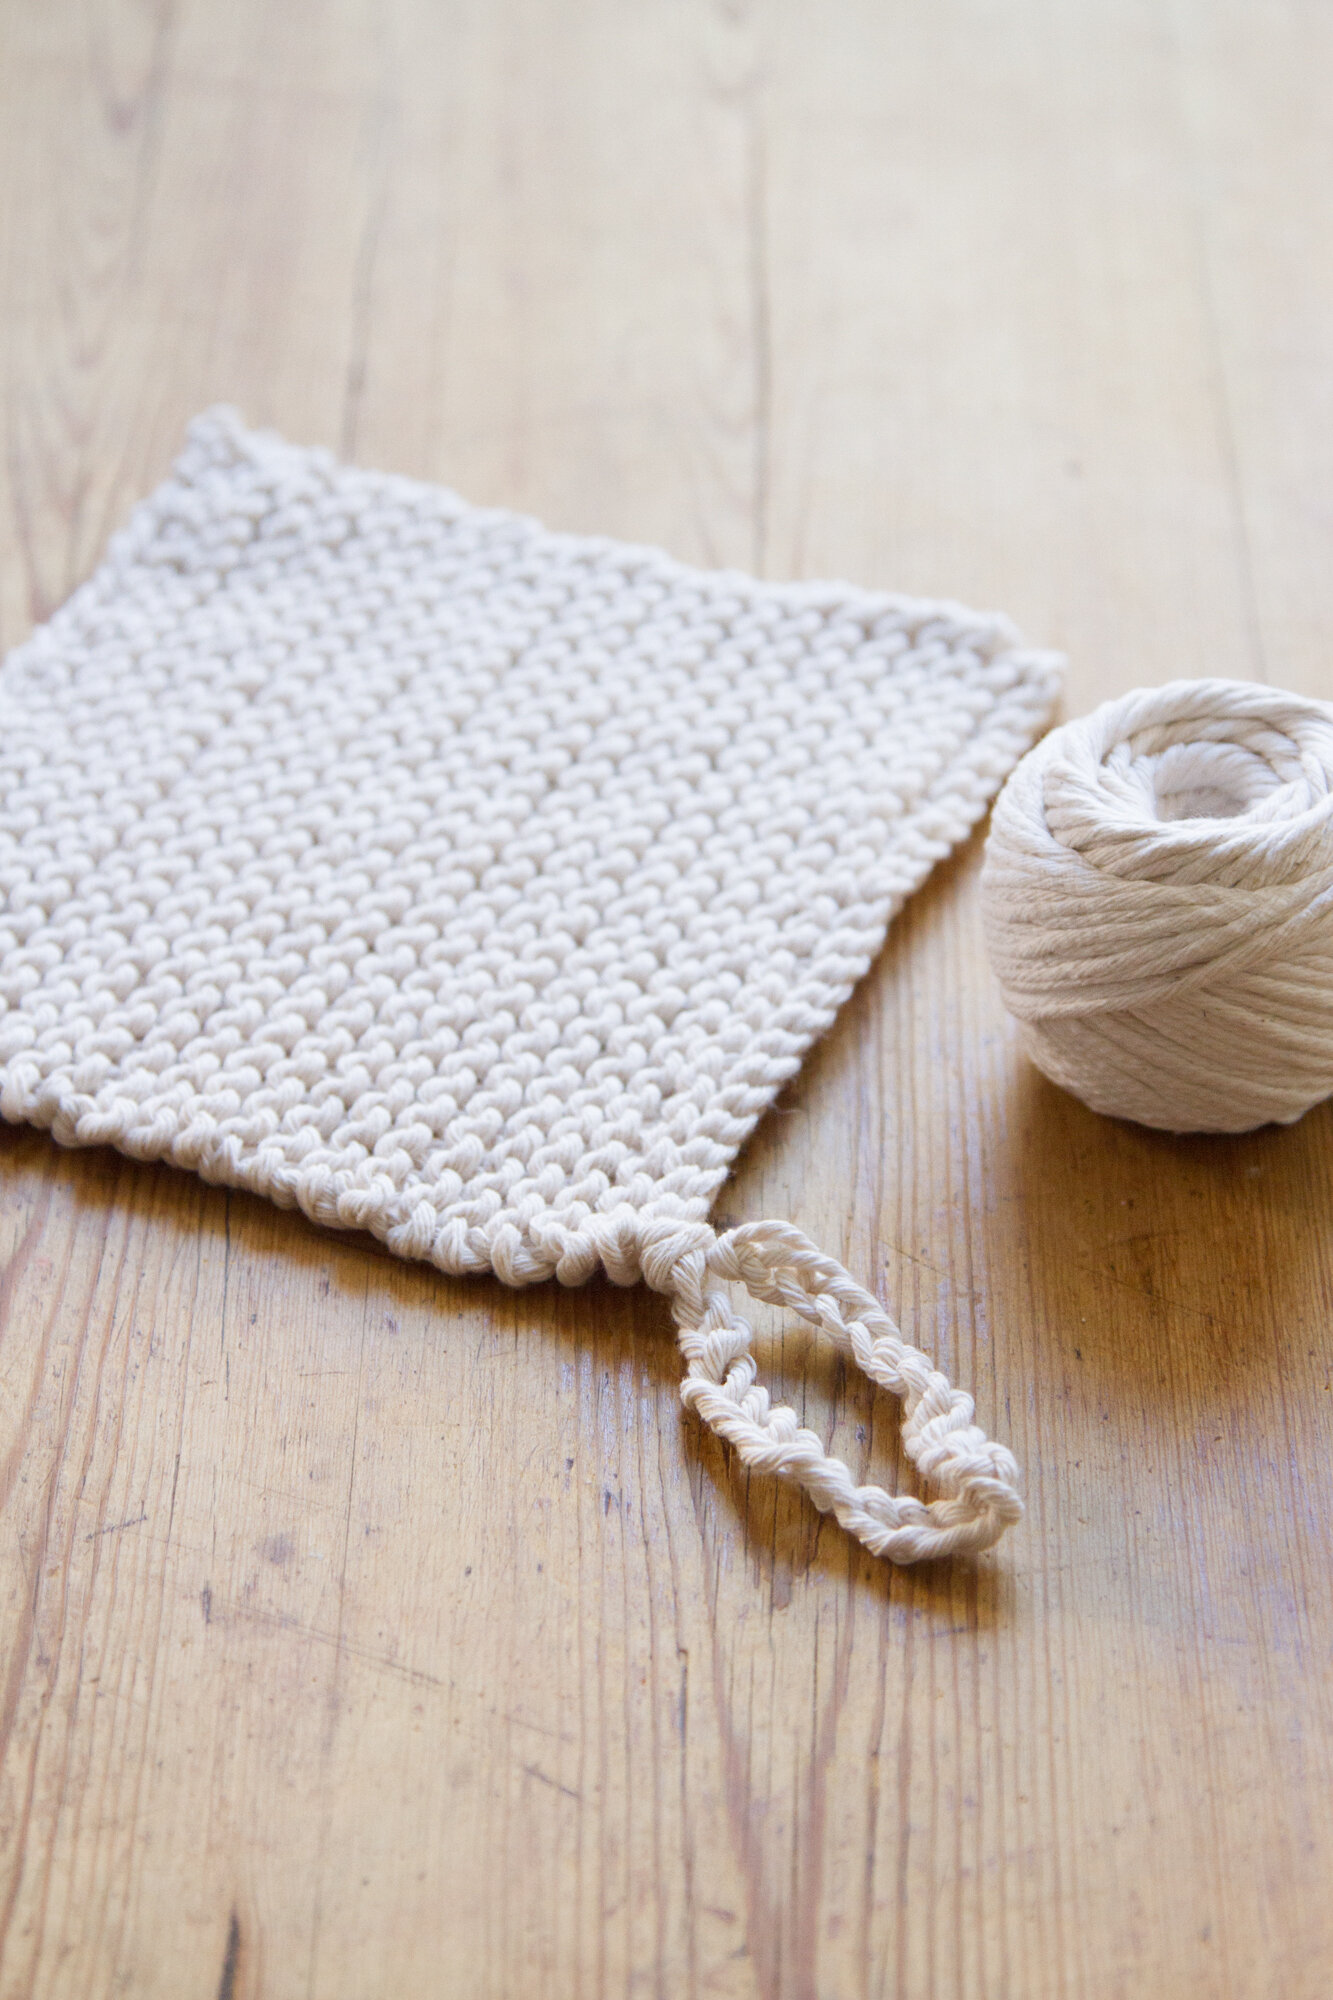
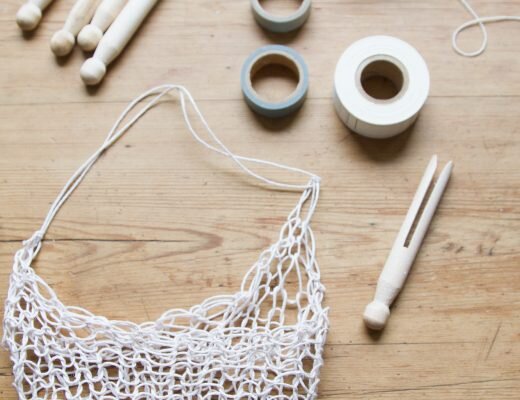
I asked my friend Rose to help me troubleshoot the project. She’s a genius at making something lovely from the humblest of materials. Here she’s done it again: potholders made from everyday butcher’s twine and knit with…chopsticks.
Instructions from Rose, photos from me:
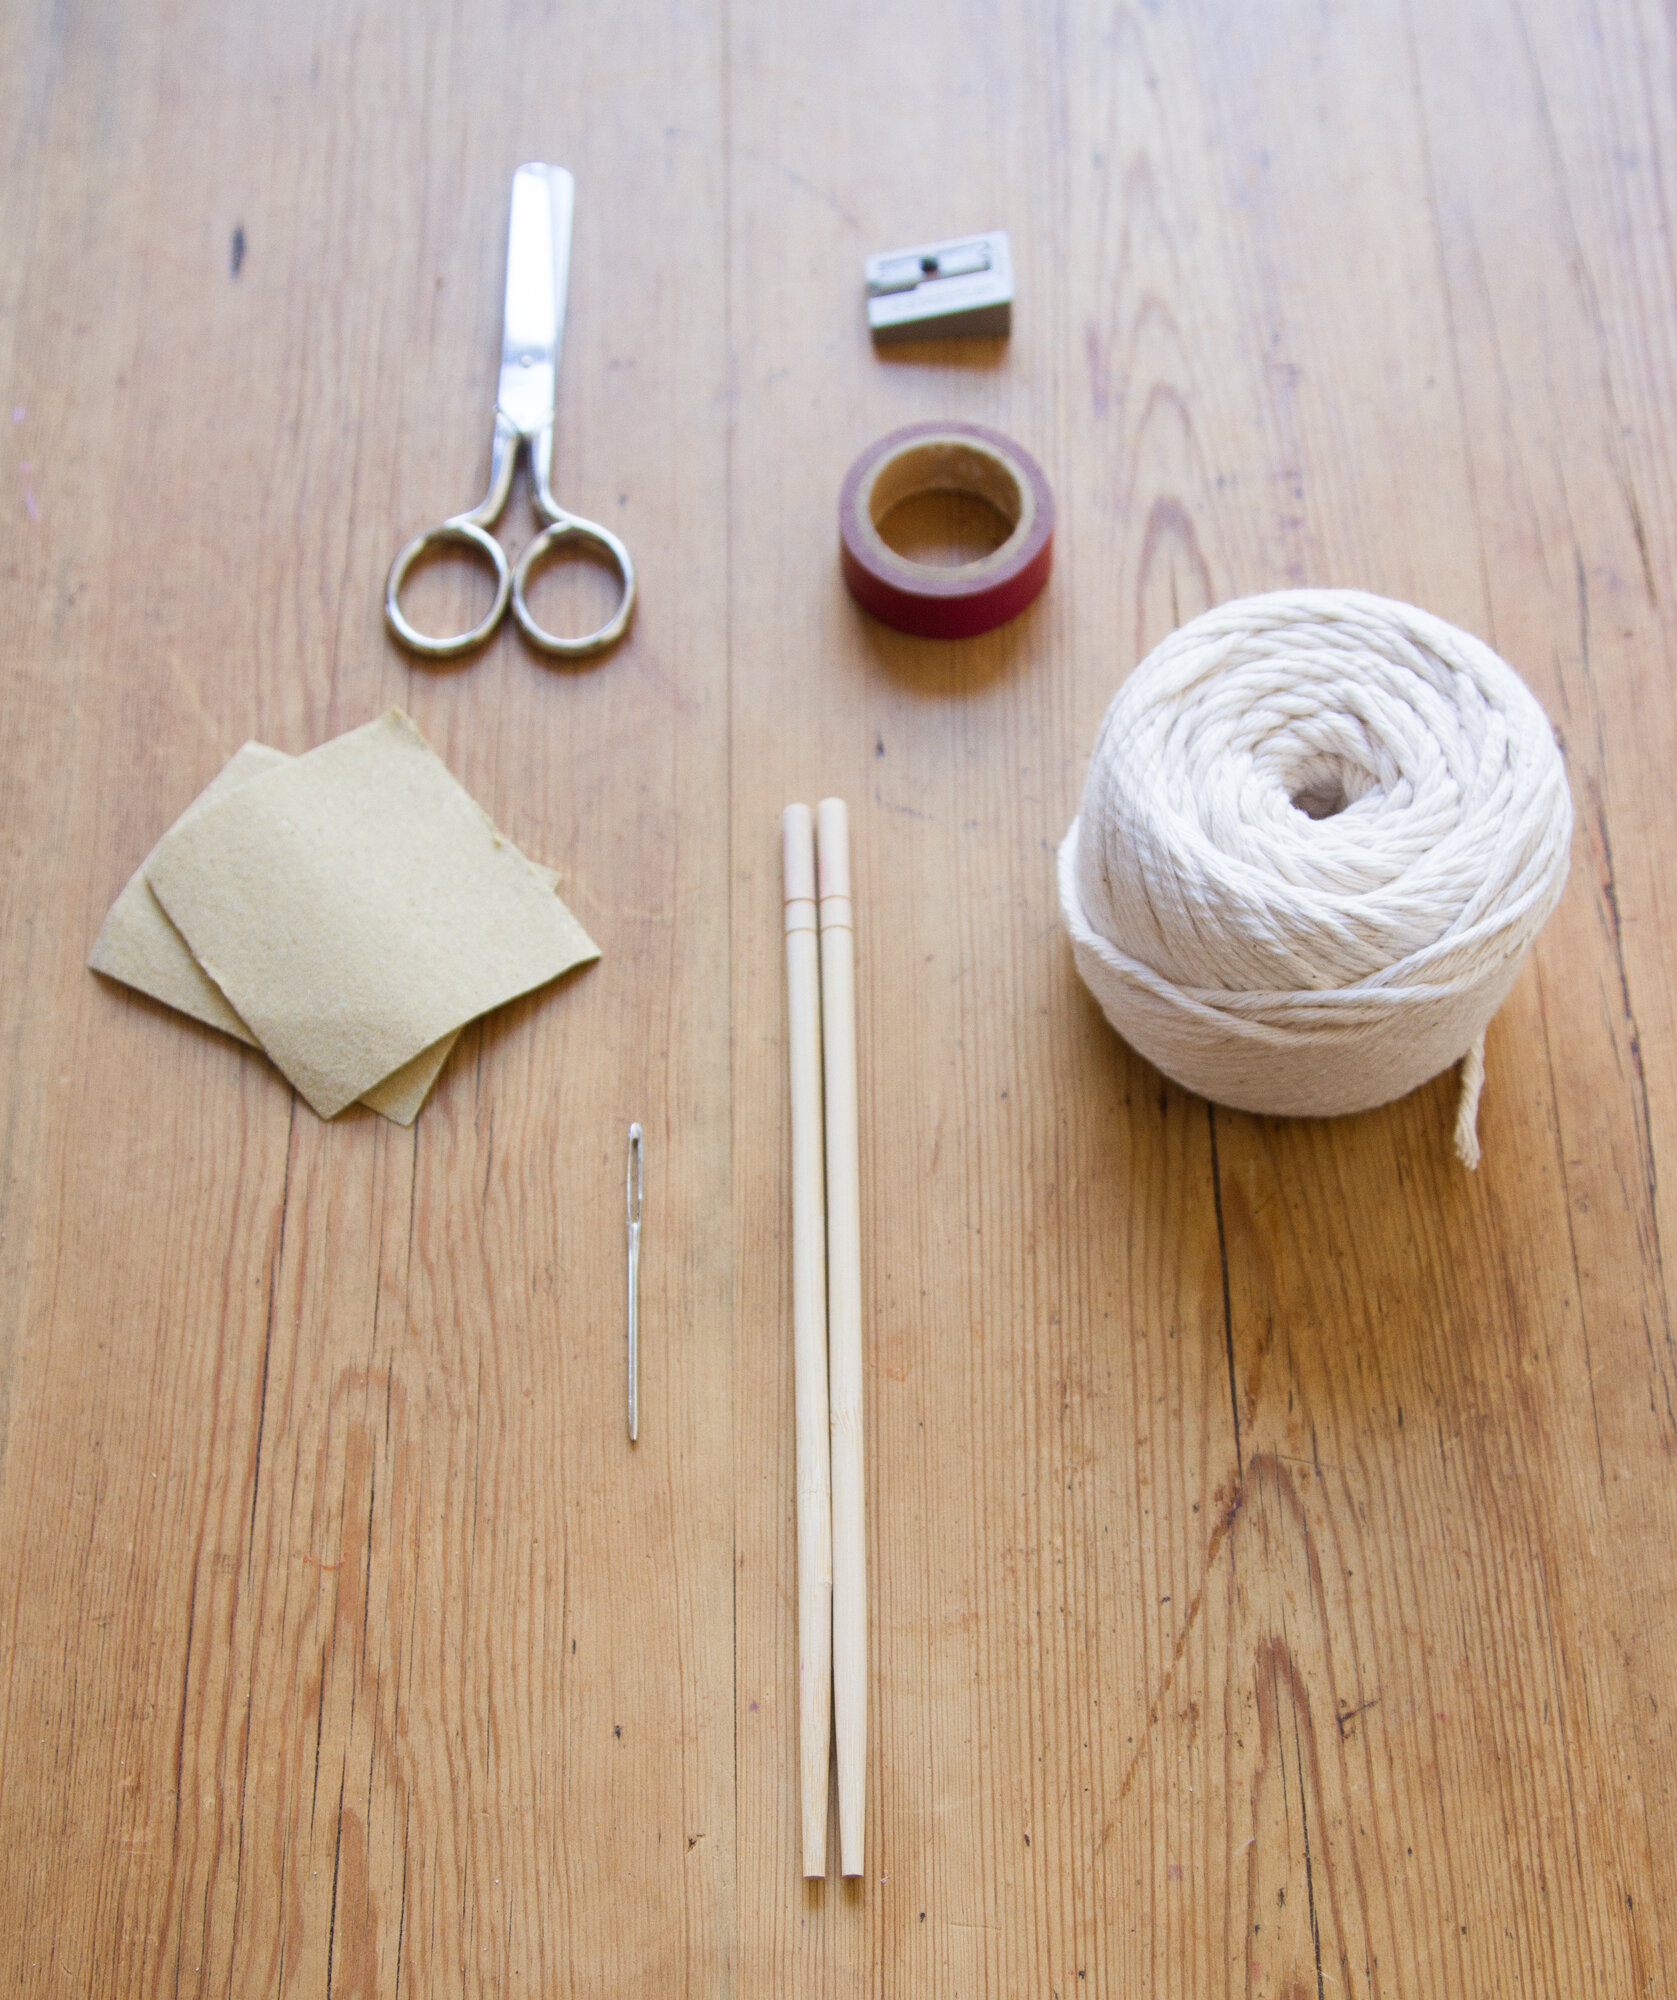
Supplies to make the knitting needles:
+ Wooden chopsticks (of the sort you might get with takeout orders)
+ Pencil sharpener
+ Sandpaper
+ Washi or other tape less then 1” in thickness
Supplies to make the potholder:
+ 24-ply Cotton Butcher’s Twine (~375ft) (Cotton Butcher’s Twine can easily be found in many local kitchen and hardware stores)
+ Chopstick knitting needles or equivalent knitting needles size 8 or 9
+ Darning needle
+ Ruler (optional)
+ Scissors
//
To make your own knitting needles:
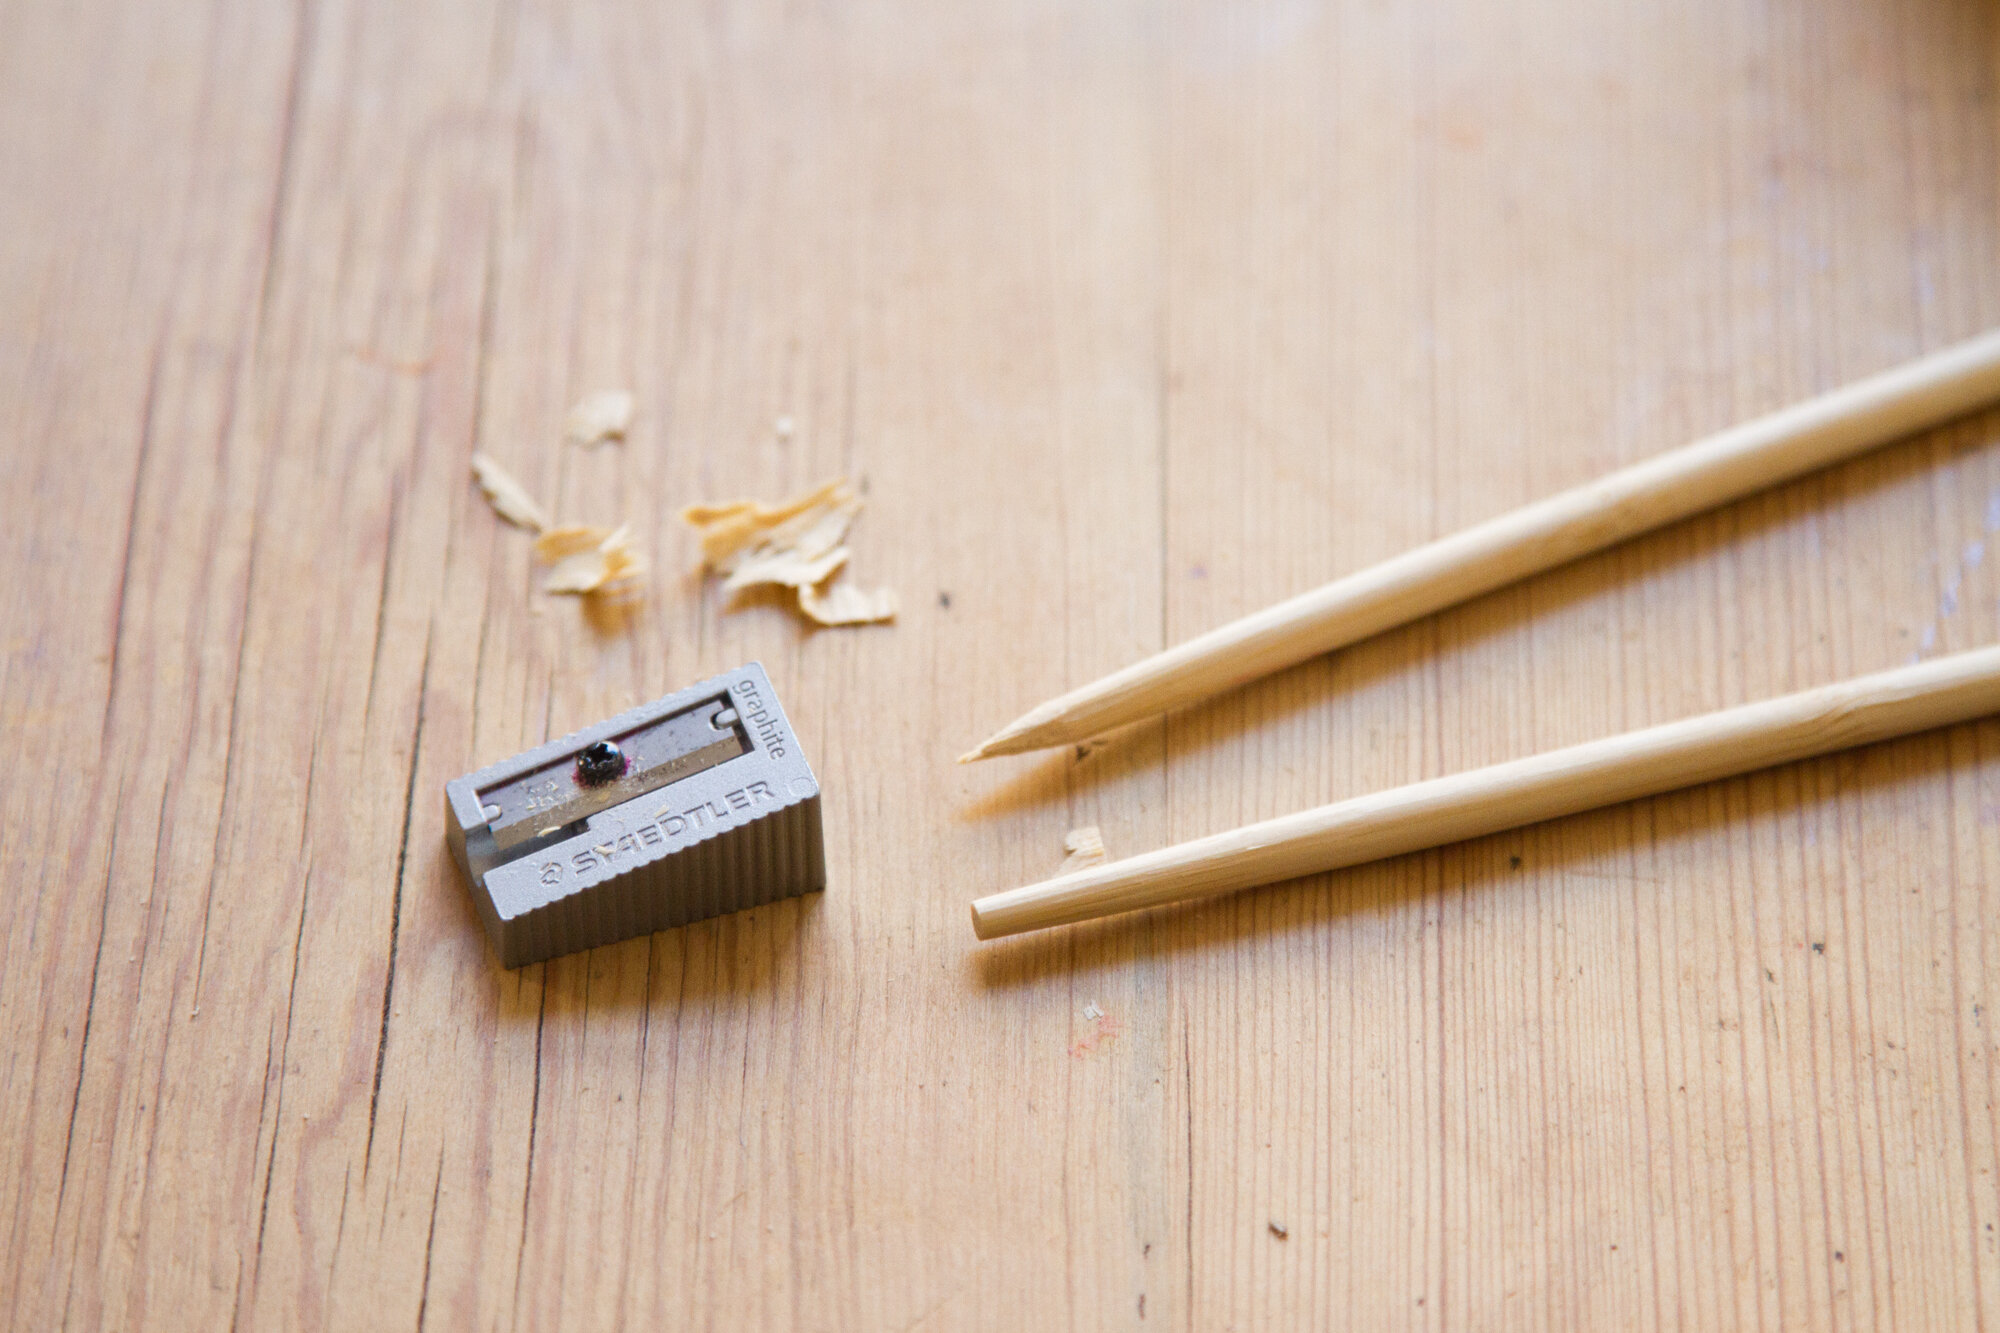
+ Sharpen the ends of both chopsticks with a pencil sharpener until a point forms.
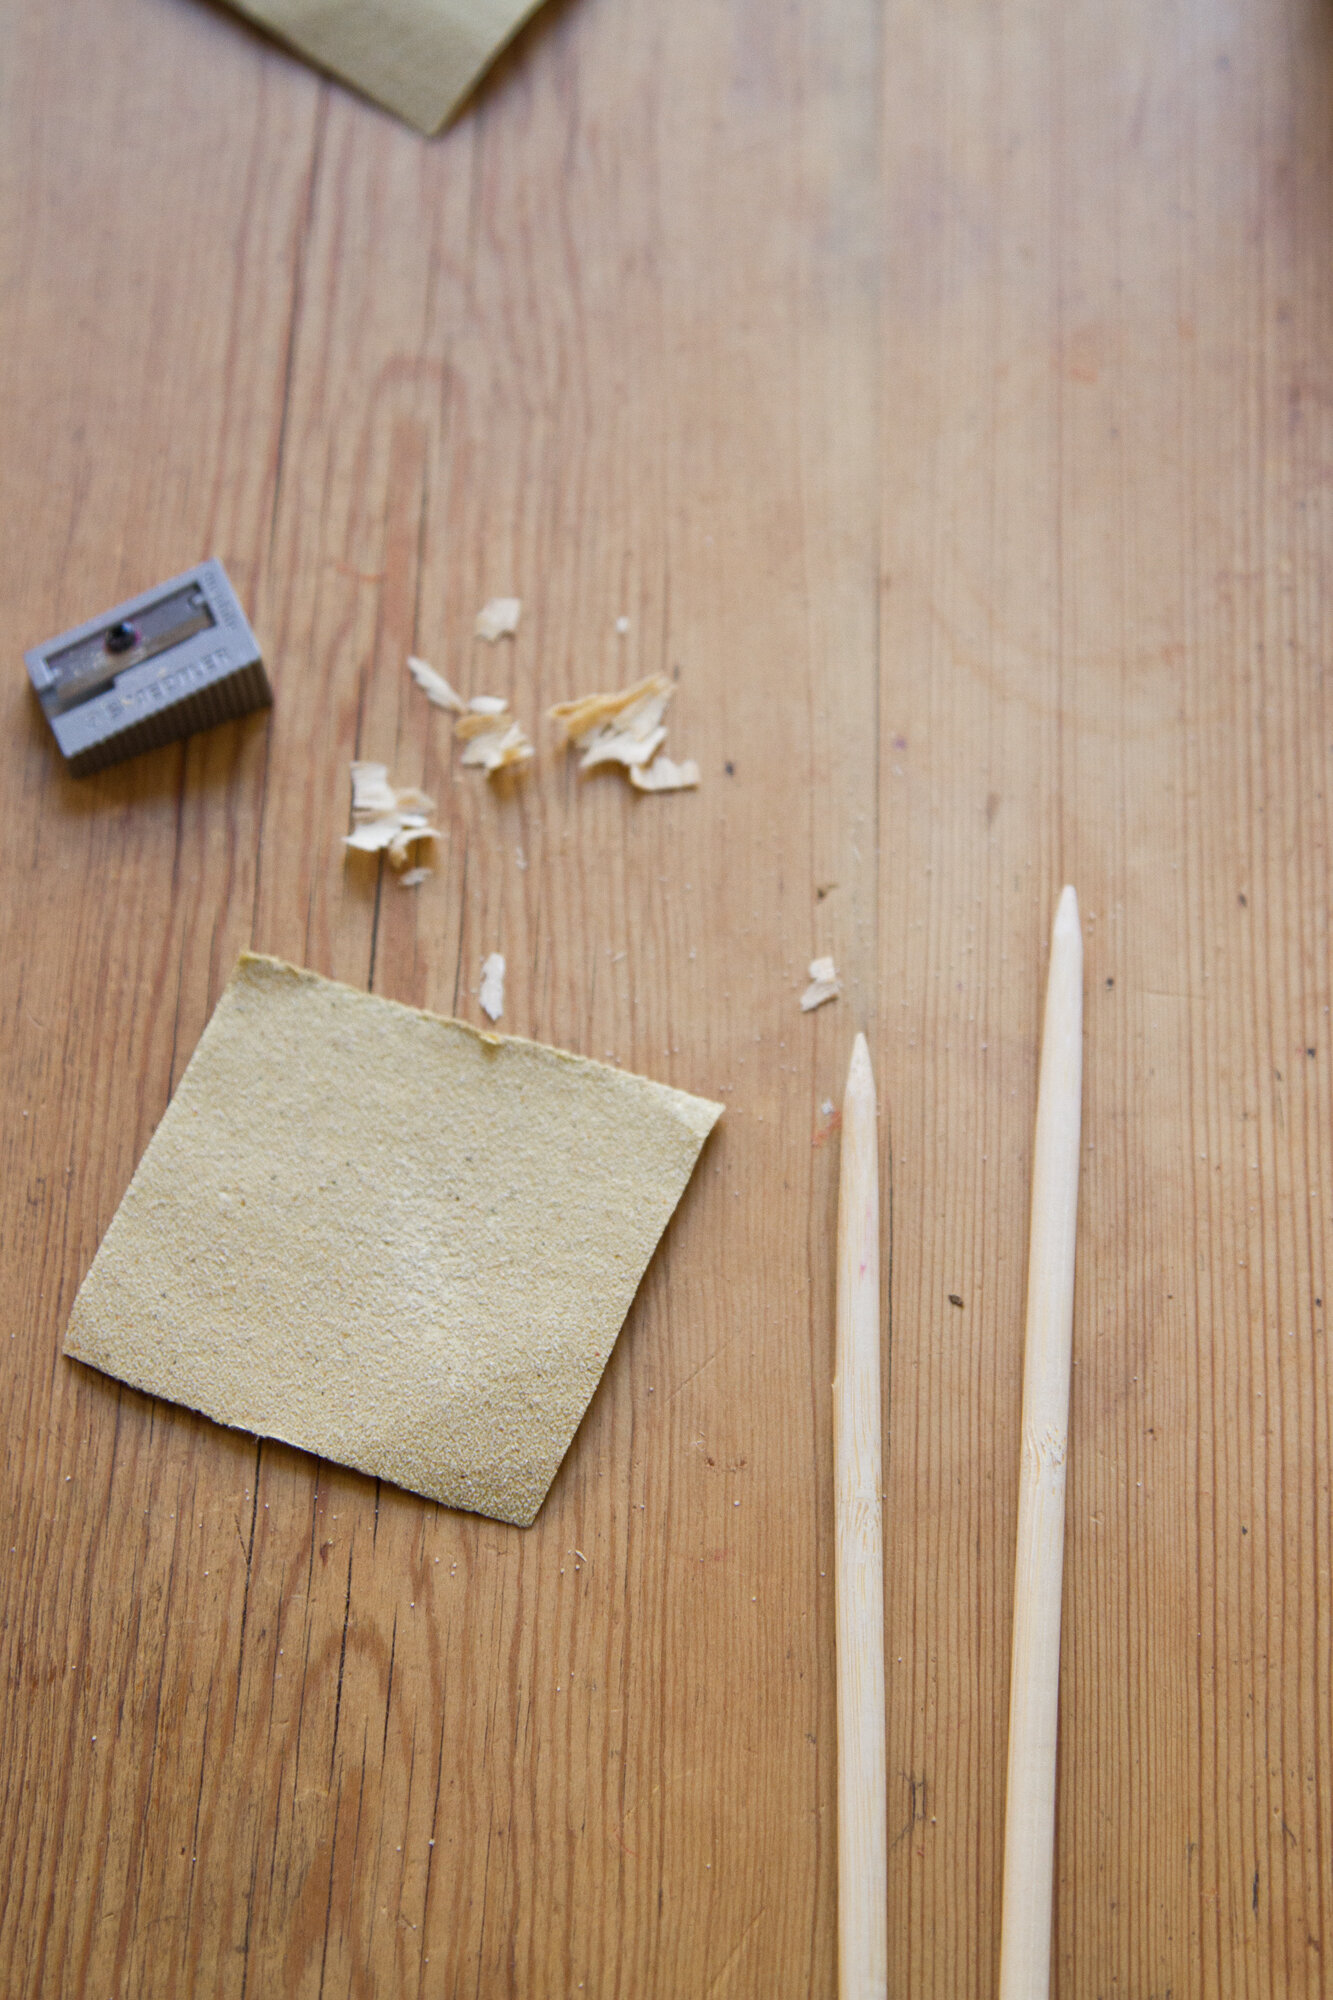
+ Gently use the sandpaper to smooth over the tip of the needle and along the length of the chopstick. This will remove any wooden splinters and create a rounded smooth tip at the end of the chopstick.
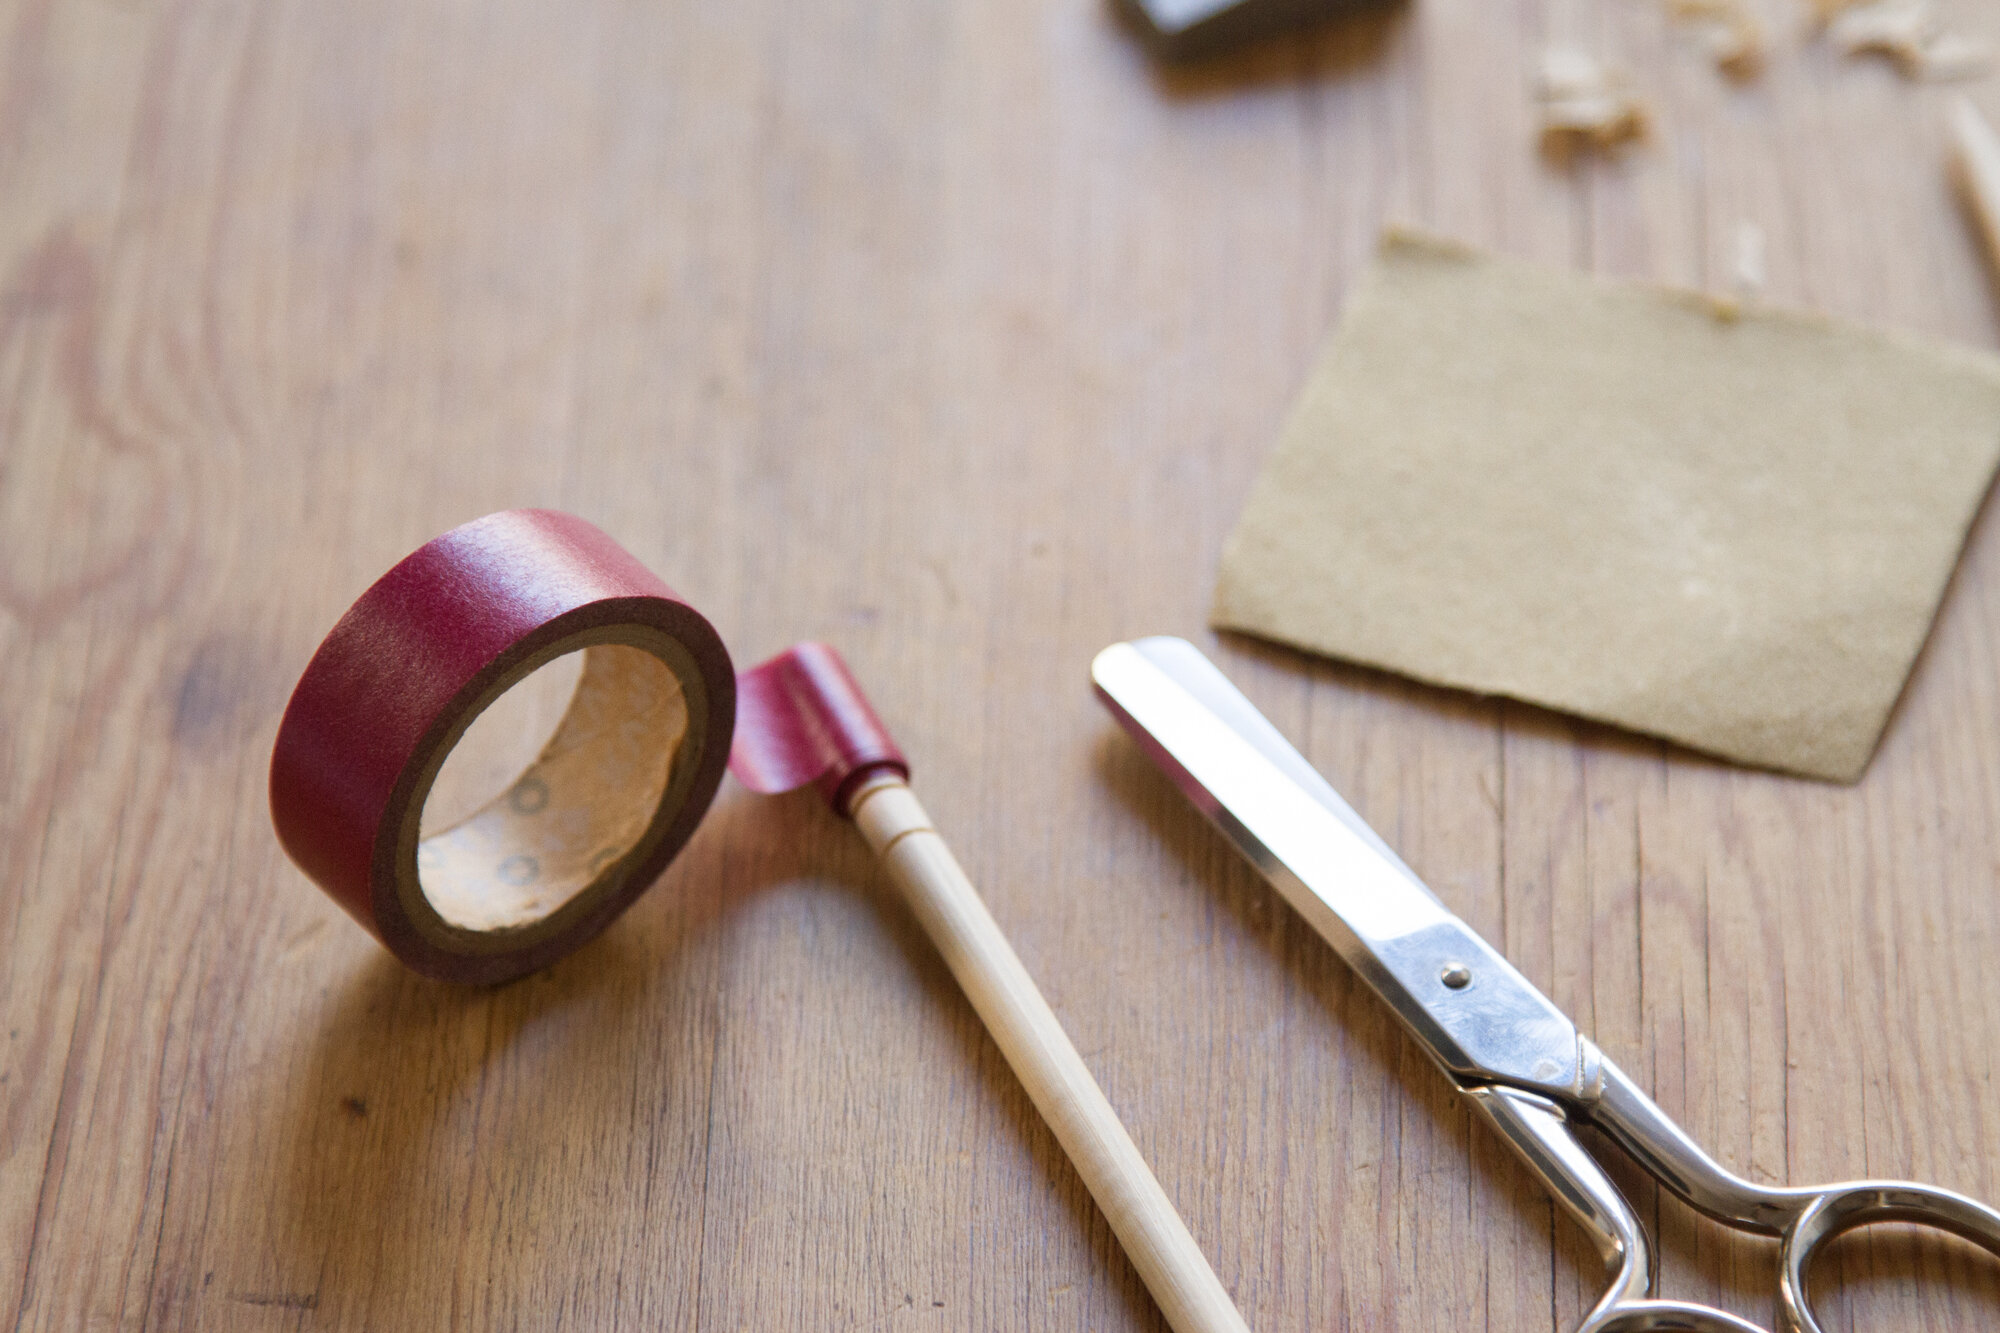
+ Wind your tape around the very base of the needle roughly 8-10 times. This will prevent stitches from falling off the end of the needle while you knit.
+ You’re ready to begin!
To knit the potholder:
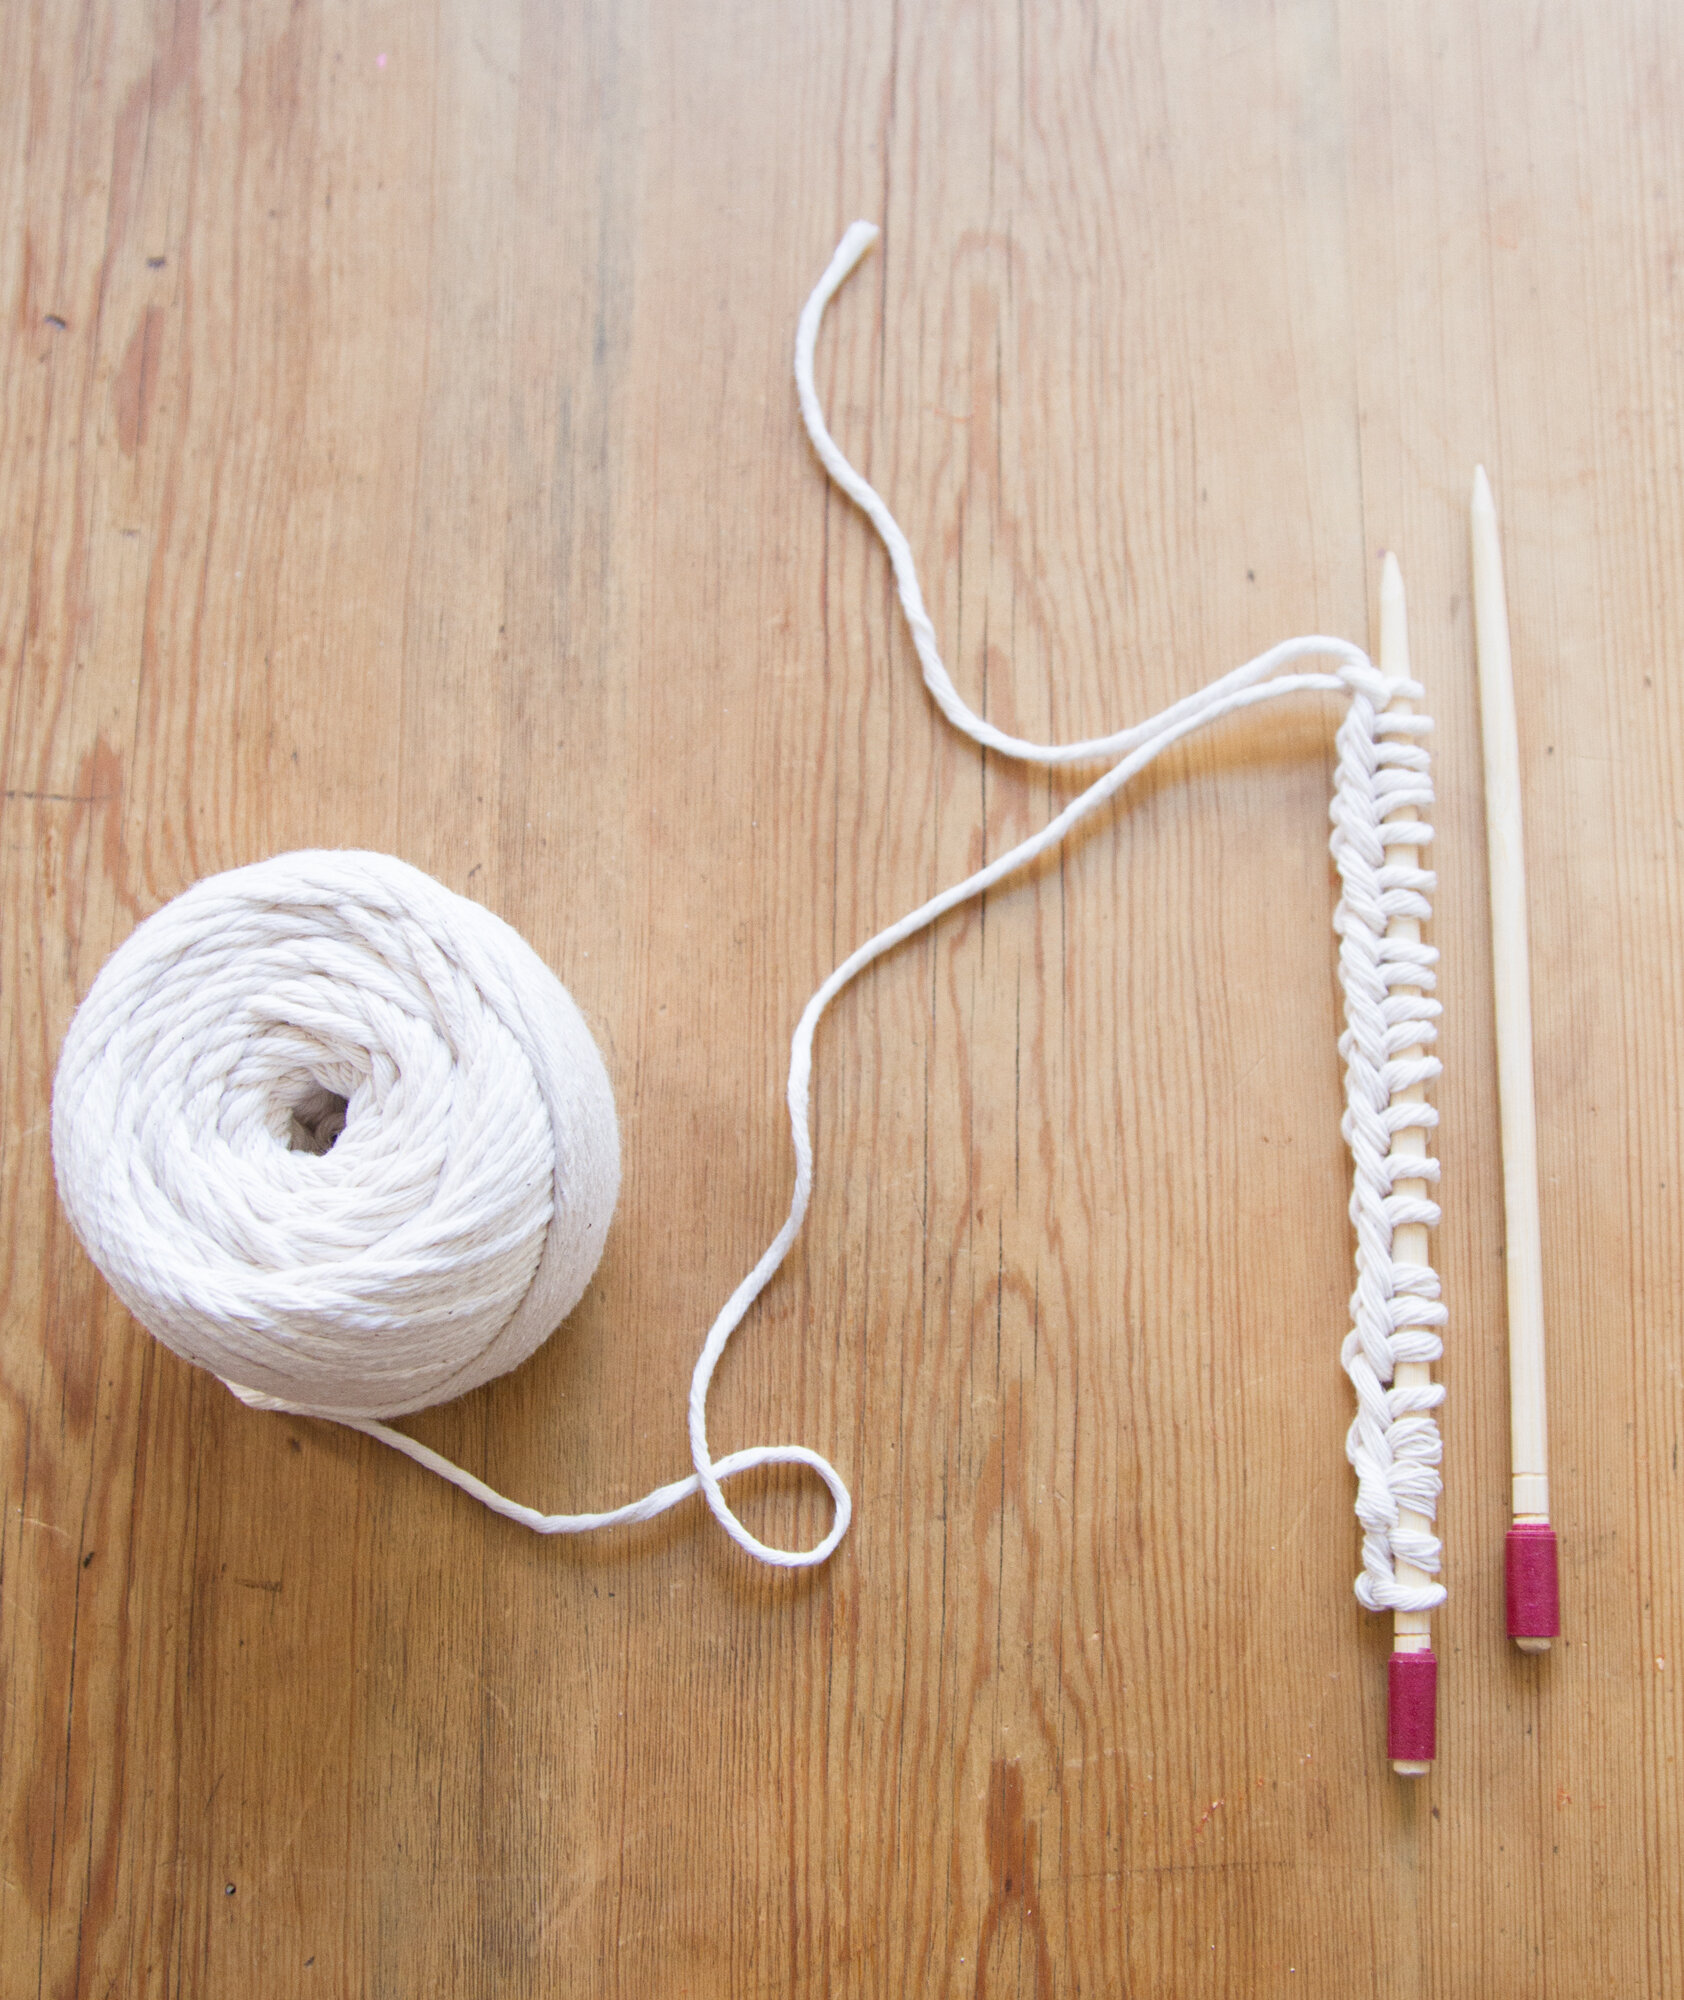
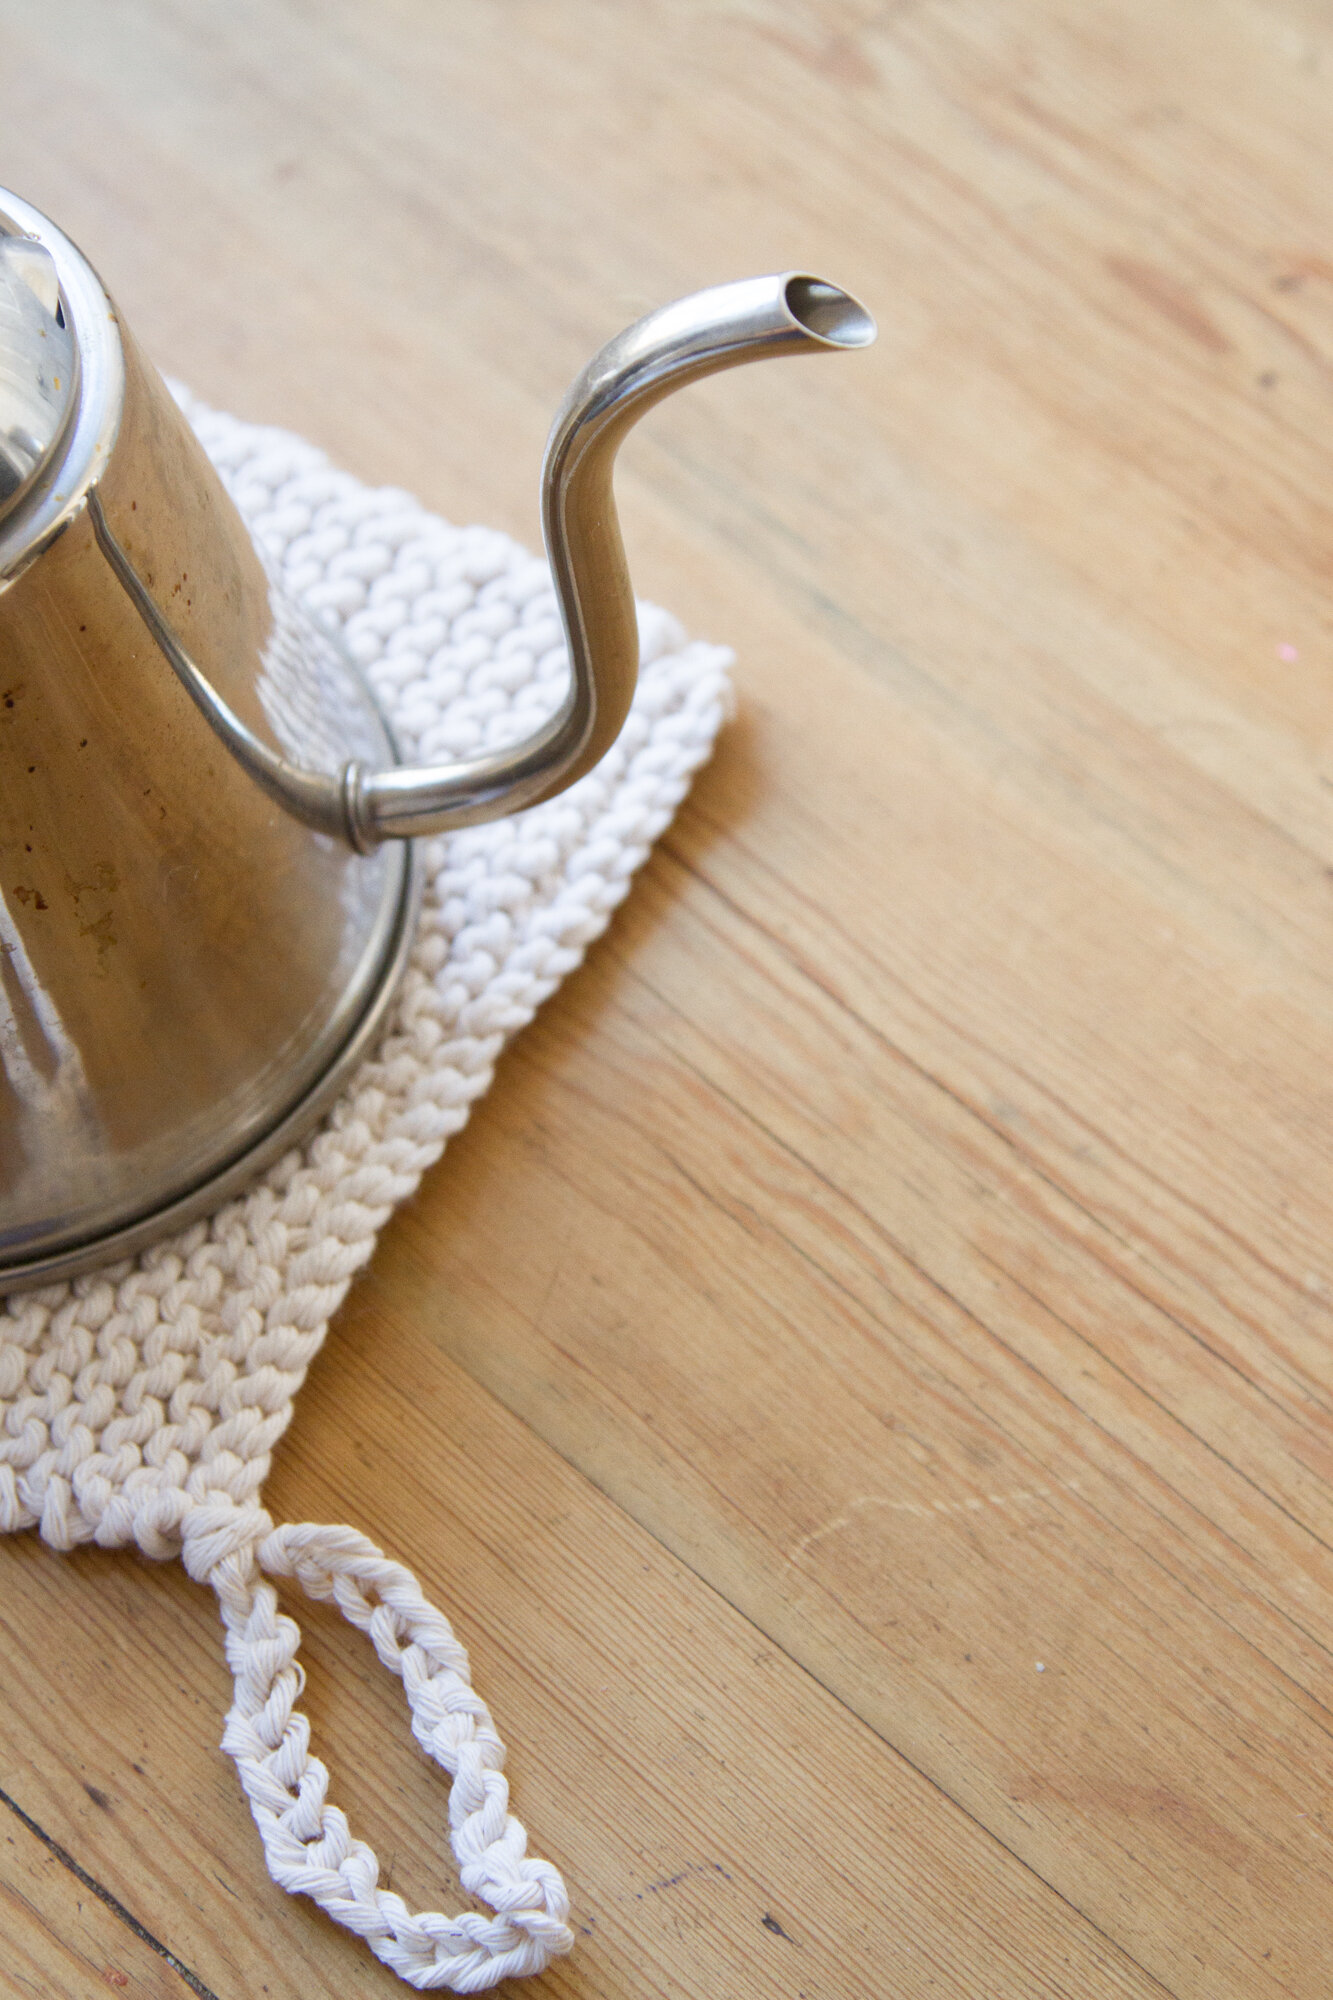
+ Leaving a 6-inch tail, cast on 24 stitches.
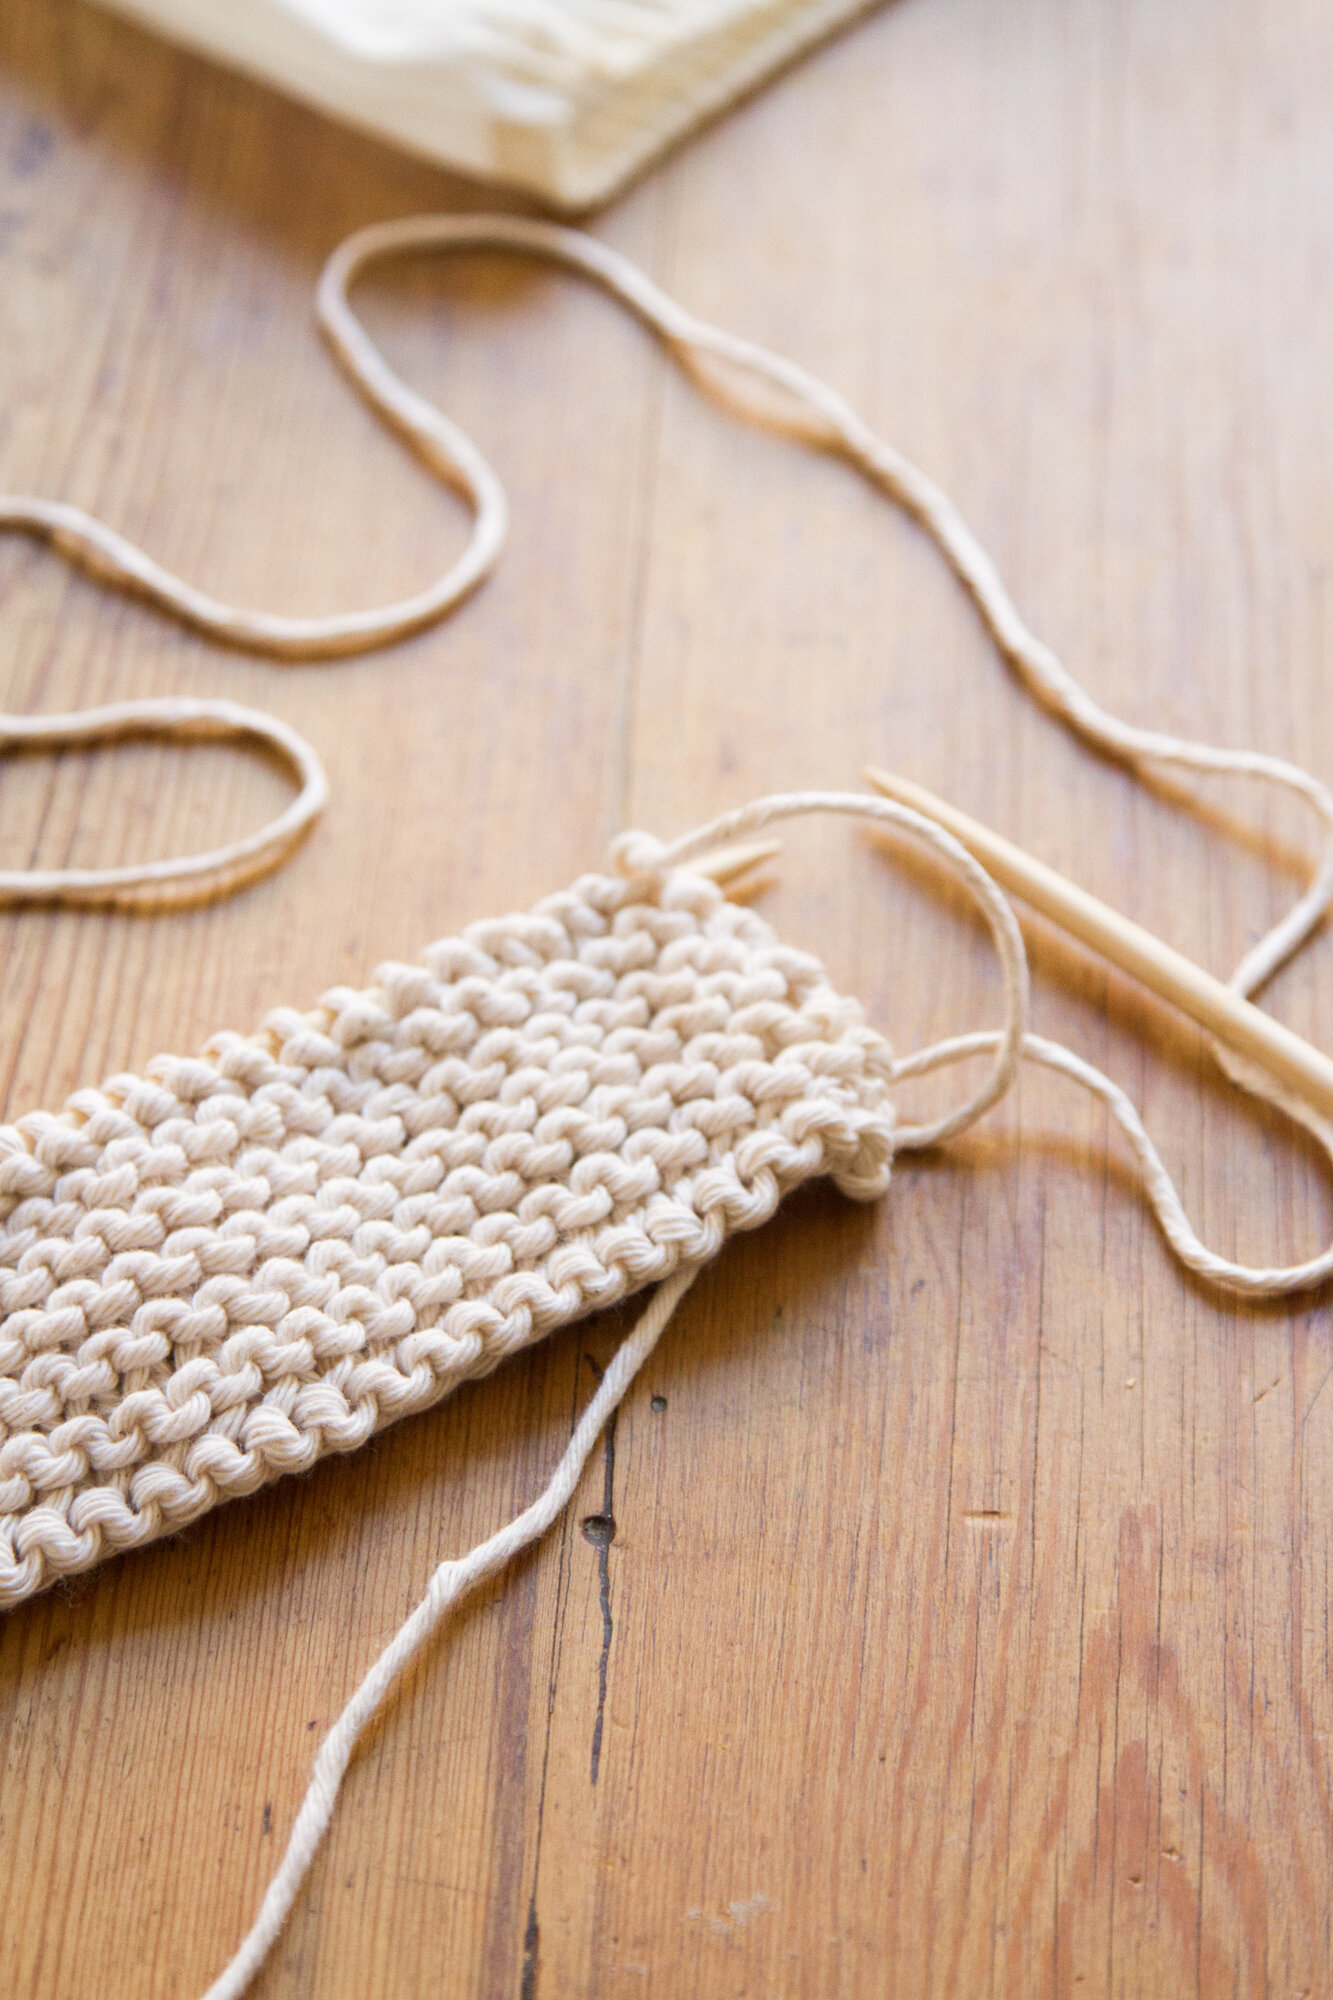
+ Knit the first row and continue knitting in garter stitch (knitting every row) for 23 additional rows, or until the piece measures almost 8 inches from your cast-on edge.
+ Bind off all stitches, except for the last stitch.
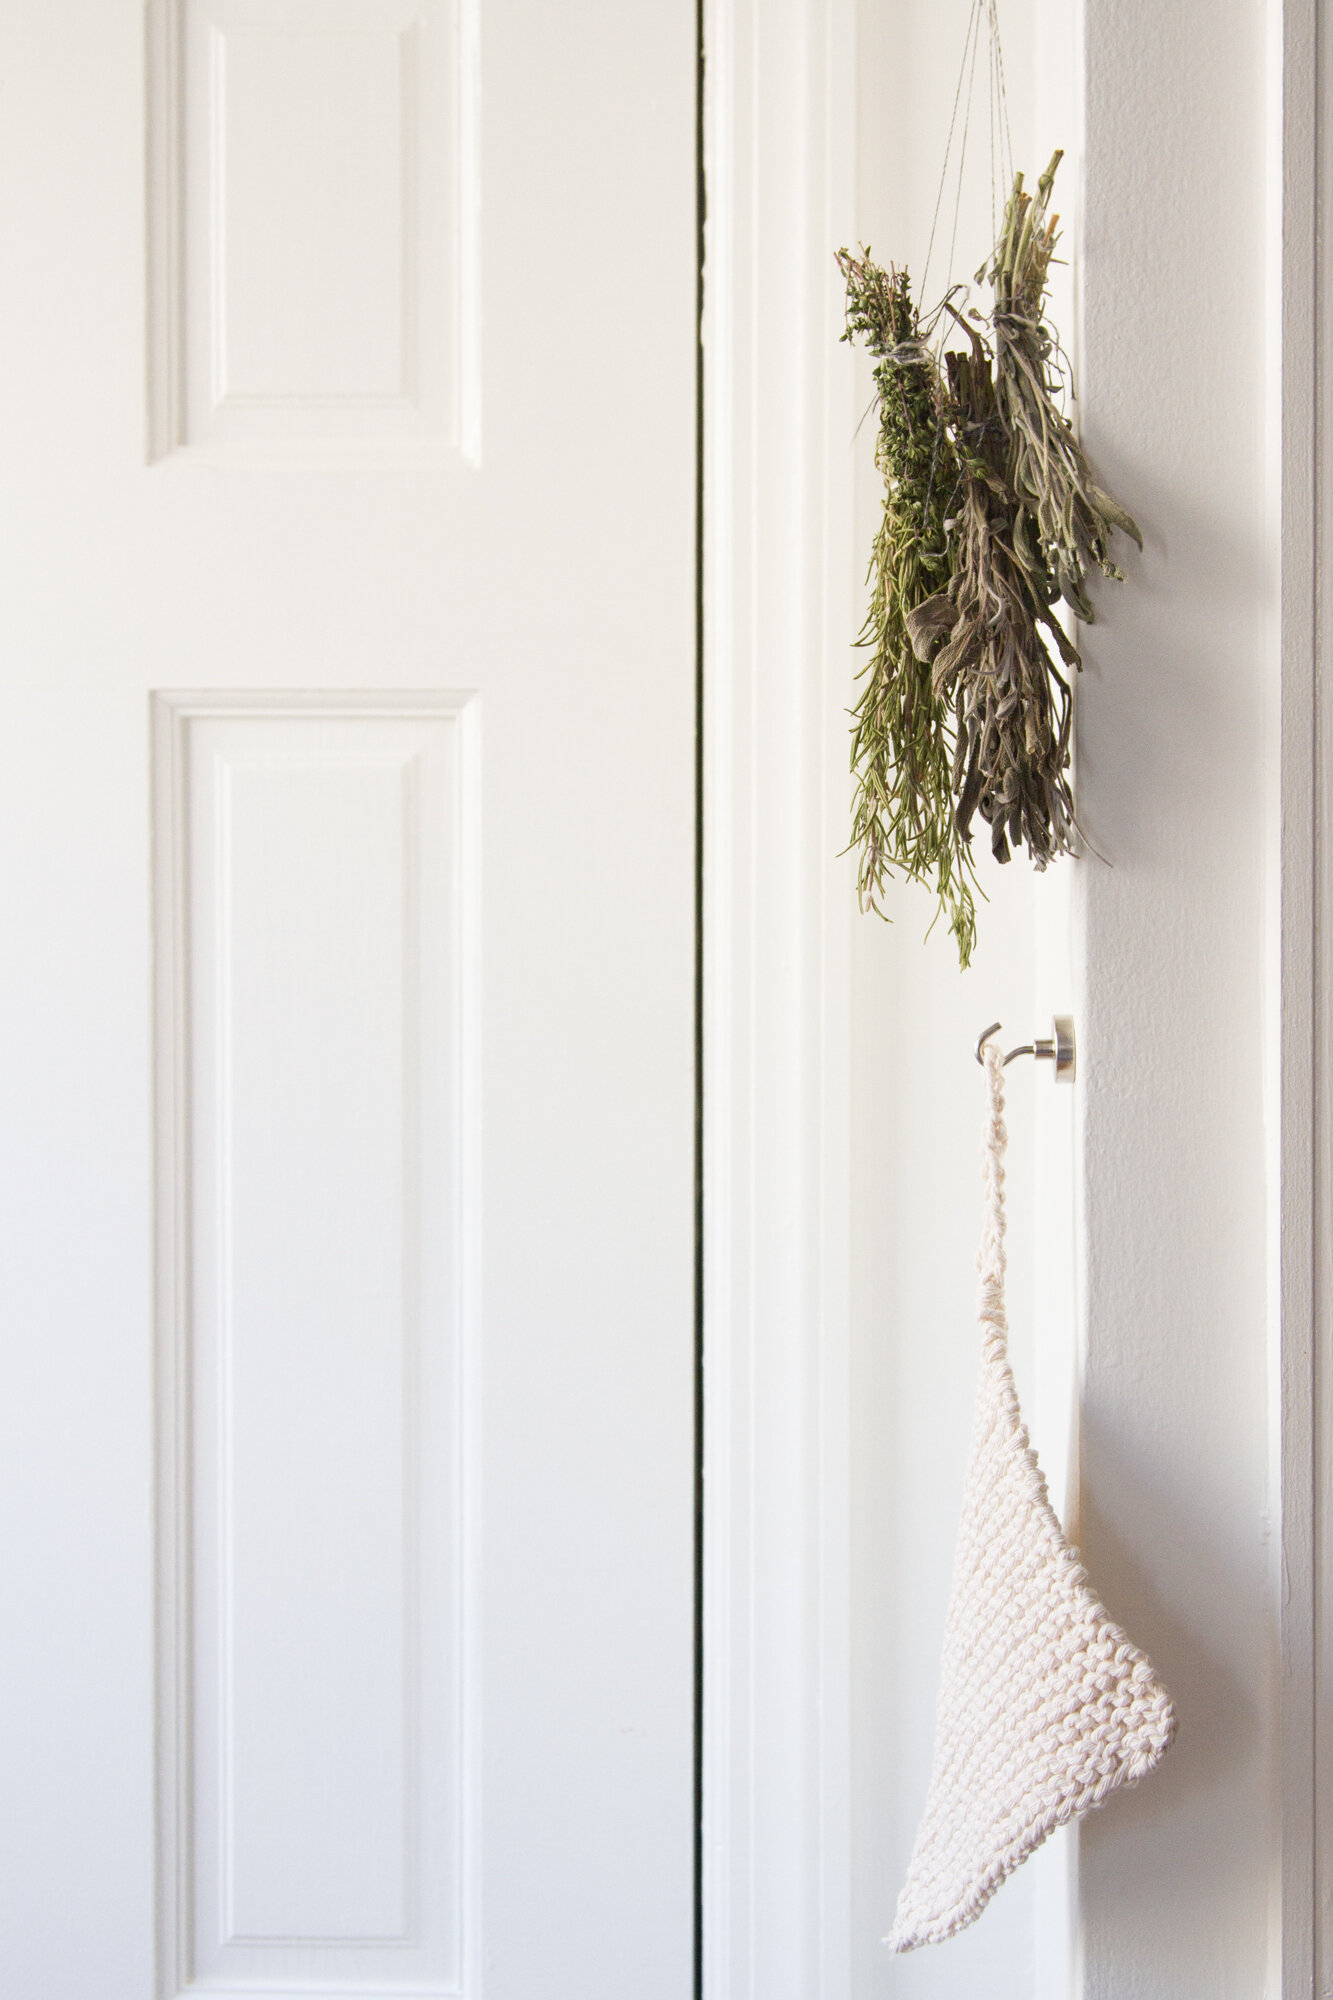
+ To create a loop for hanging your potholder you will continue to knit the last stitch using both needles to create a chain roughly 6-inches long.
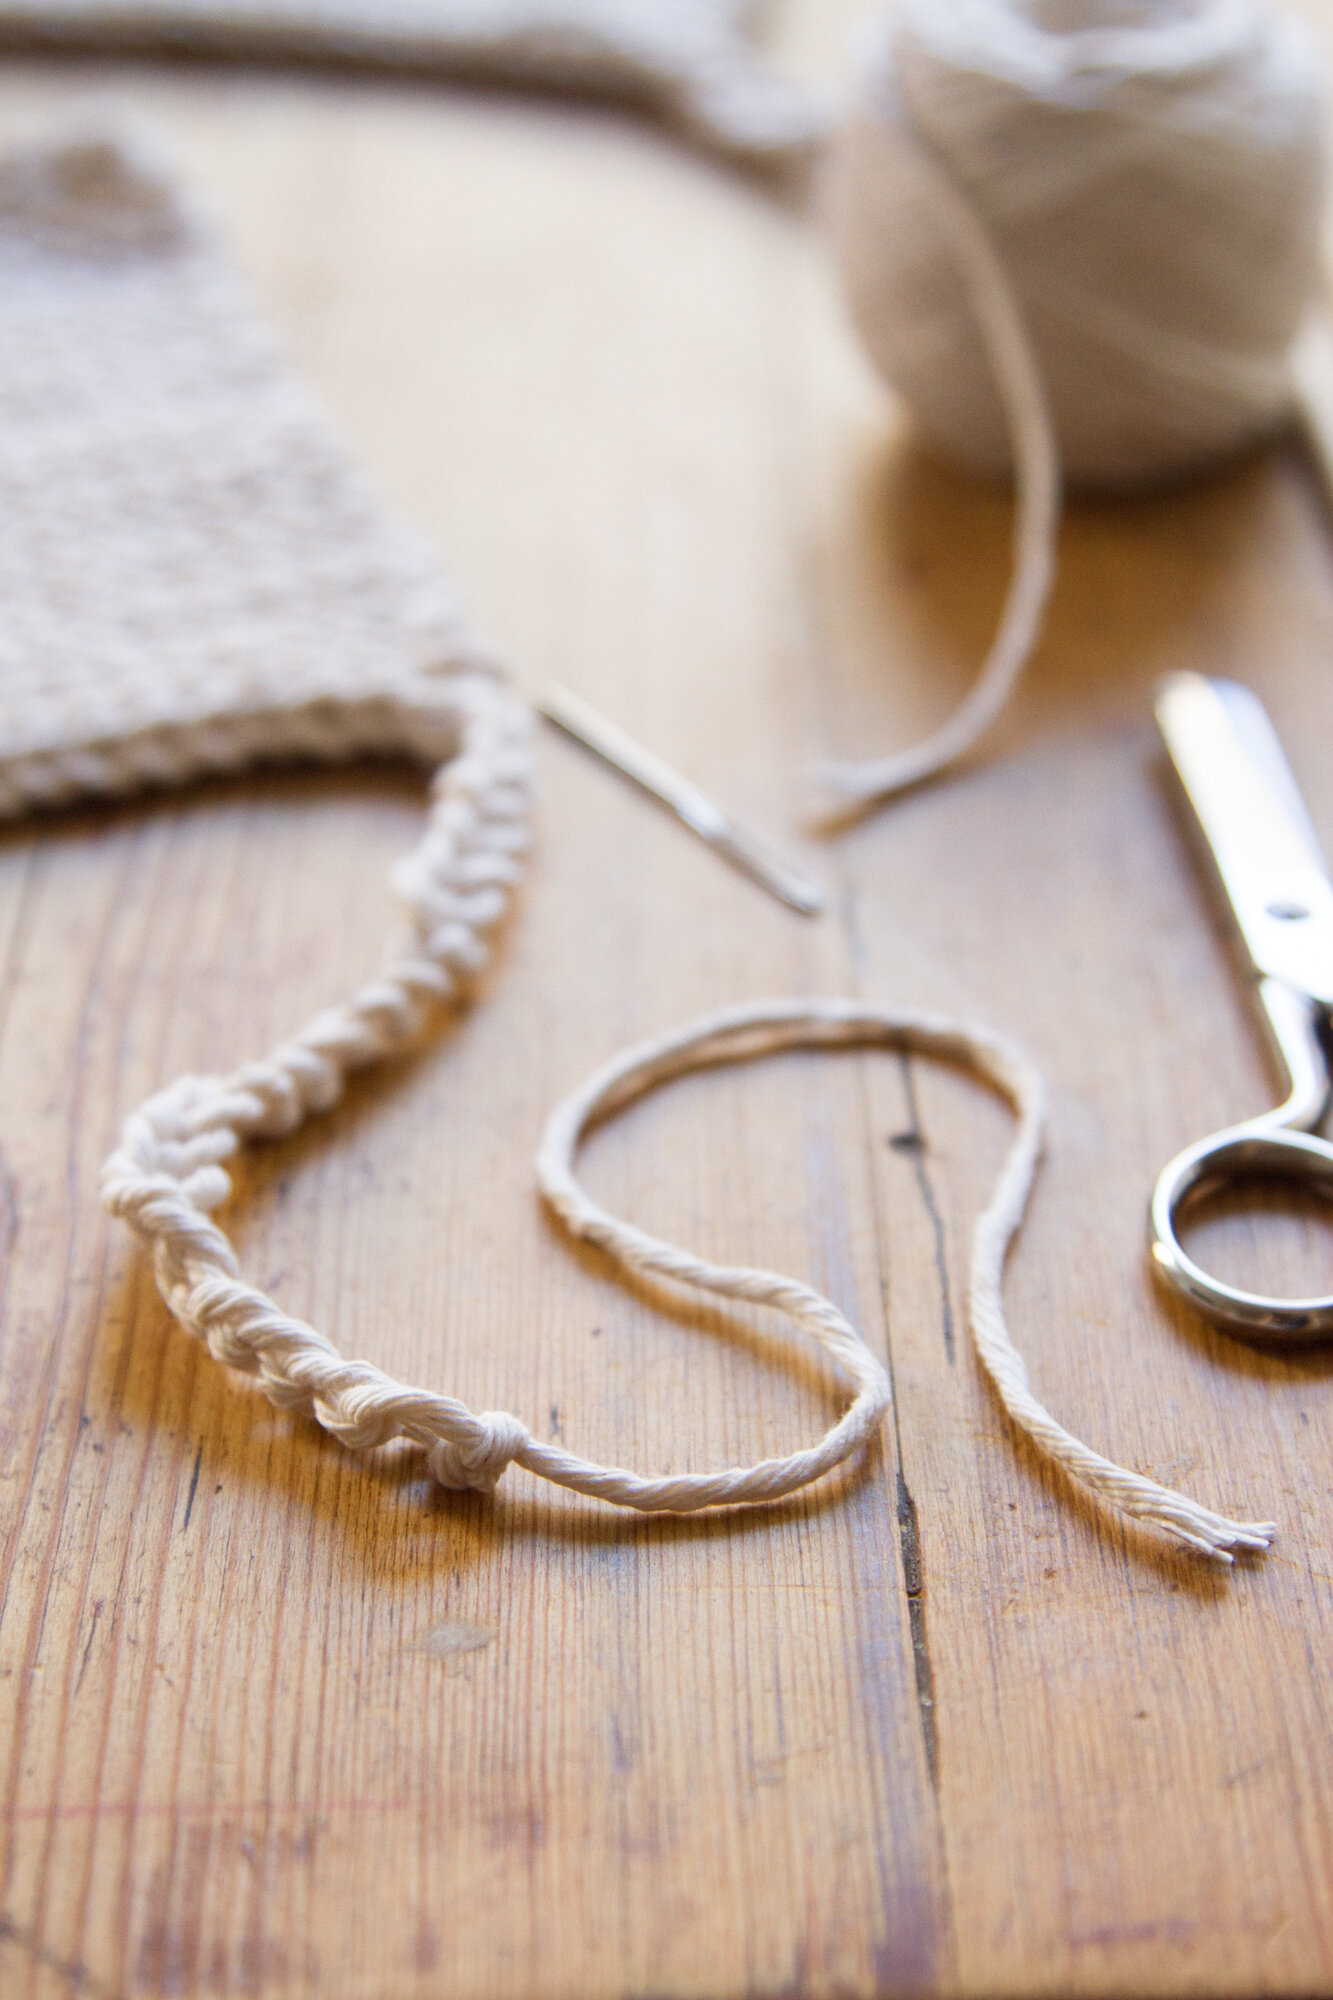
+ Bind off the last stitch by cutting a 8-inch tail, and threading the tail end through the last loop on your knitting needle.
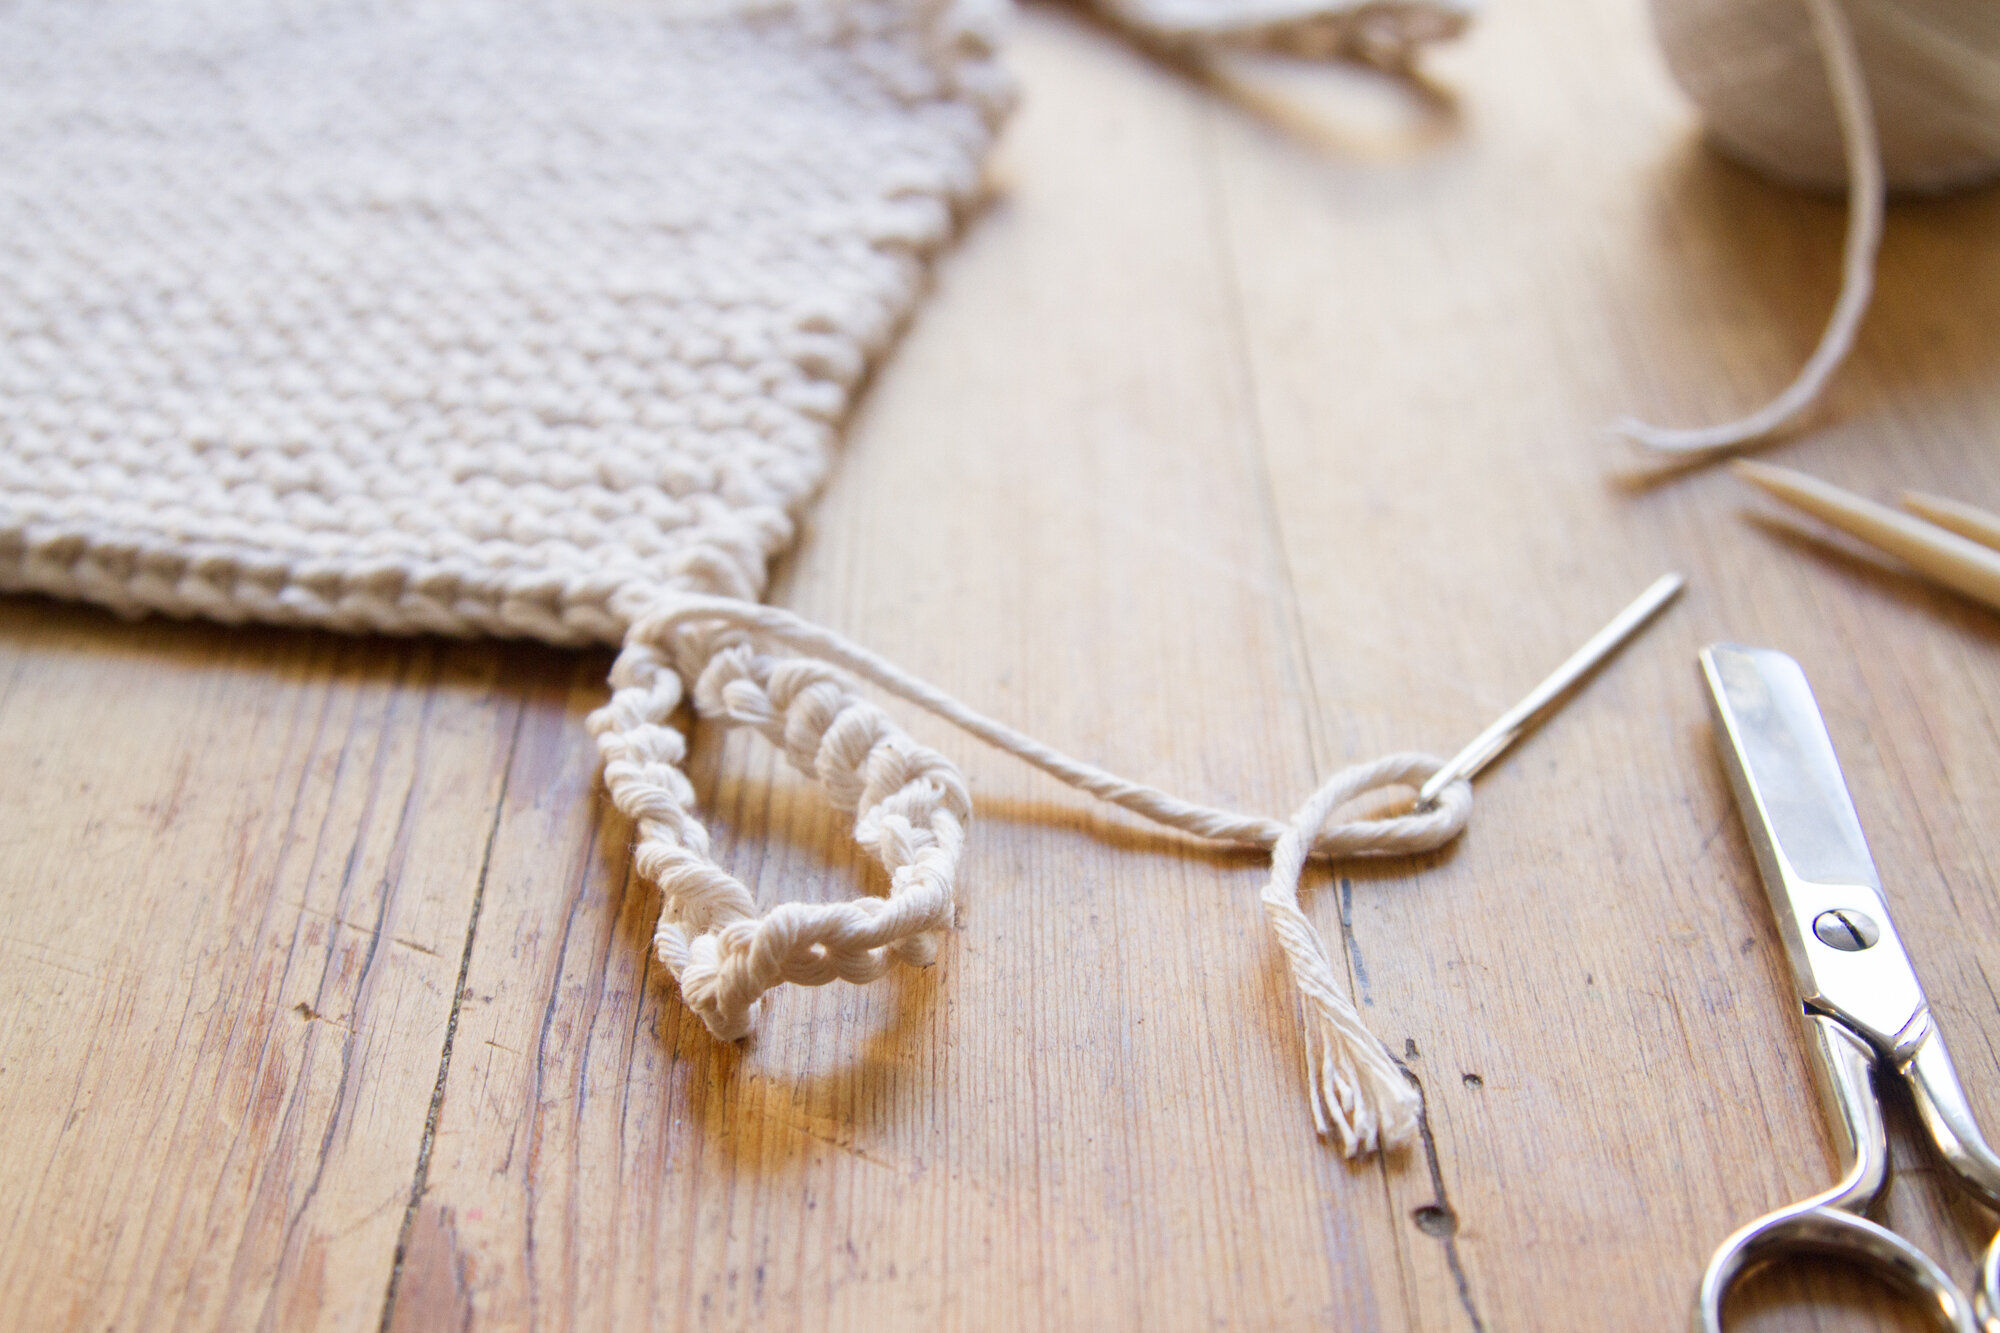
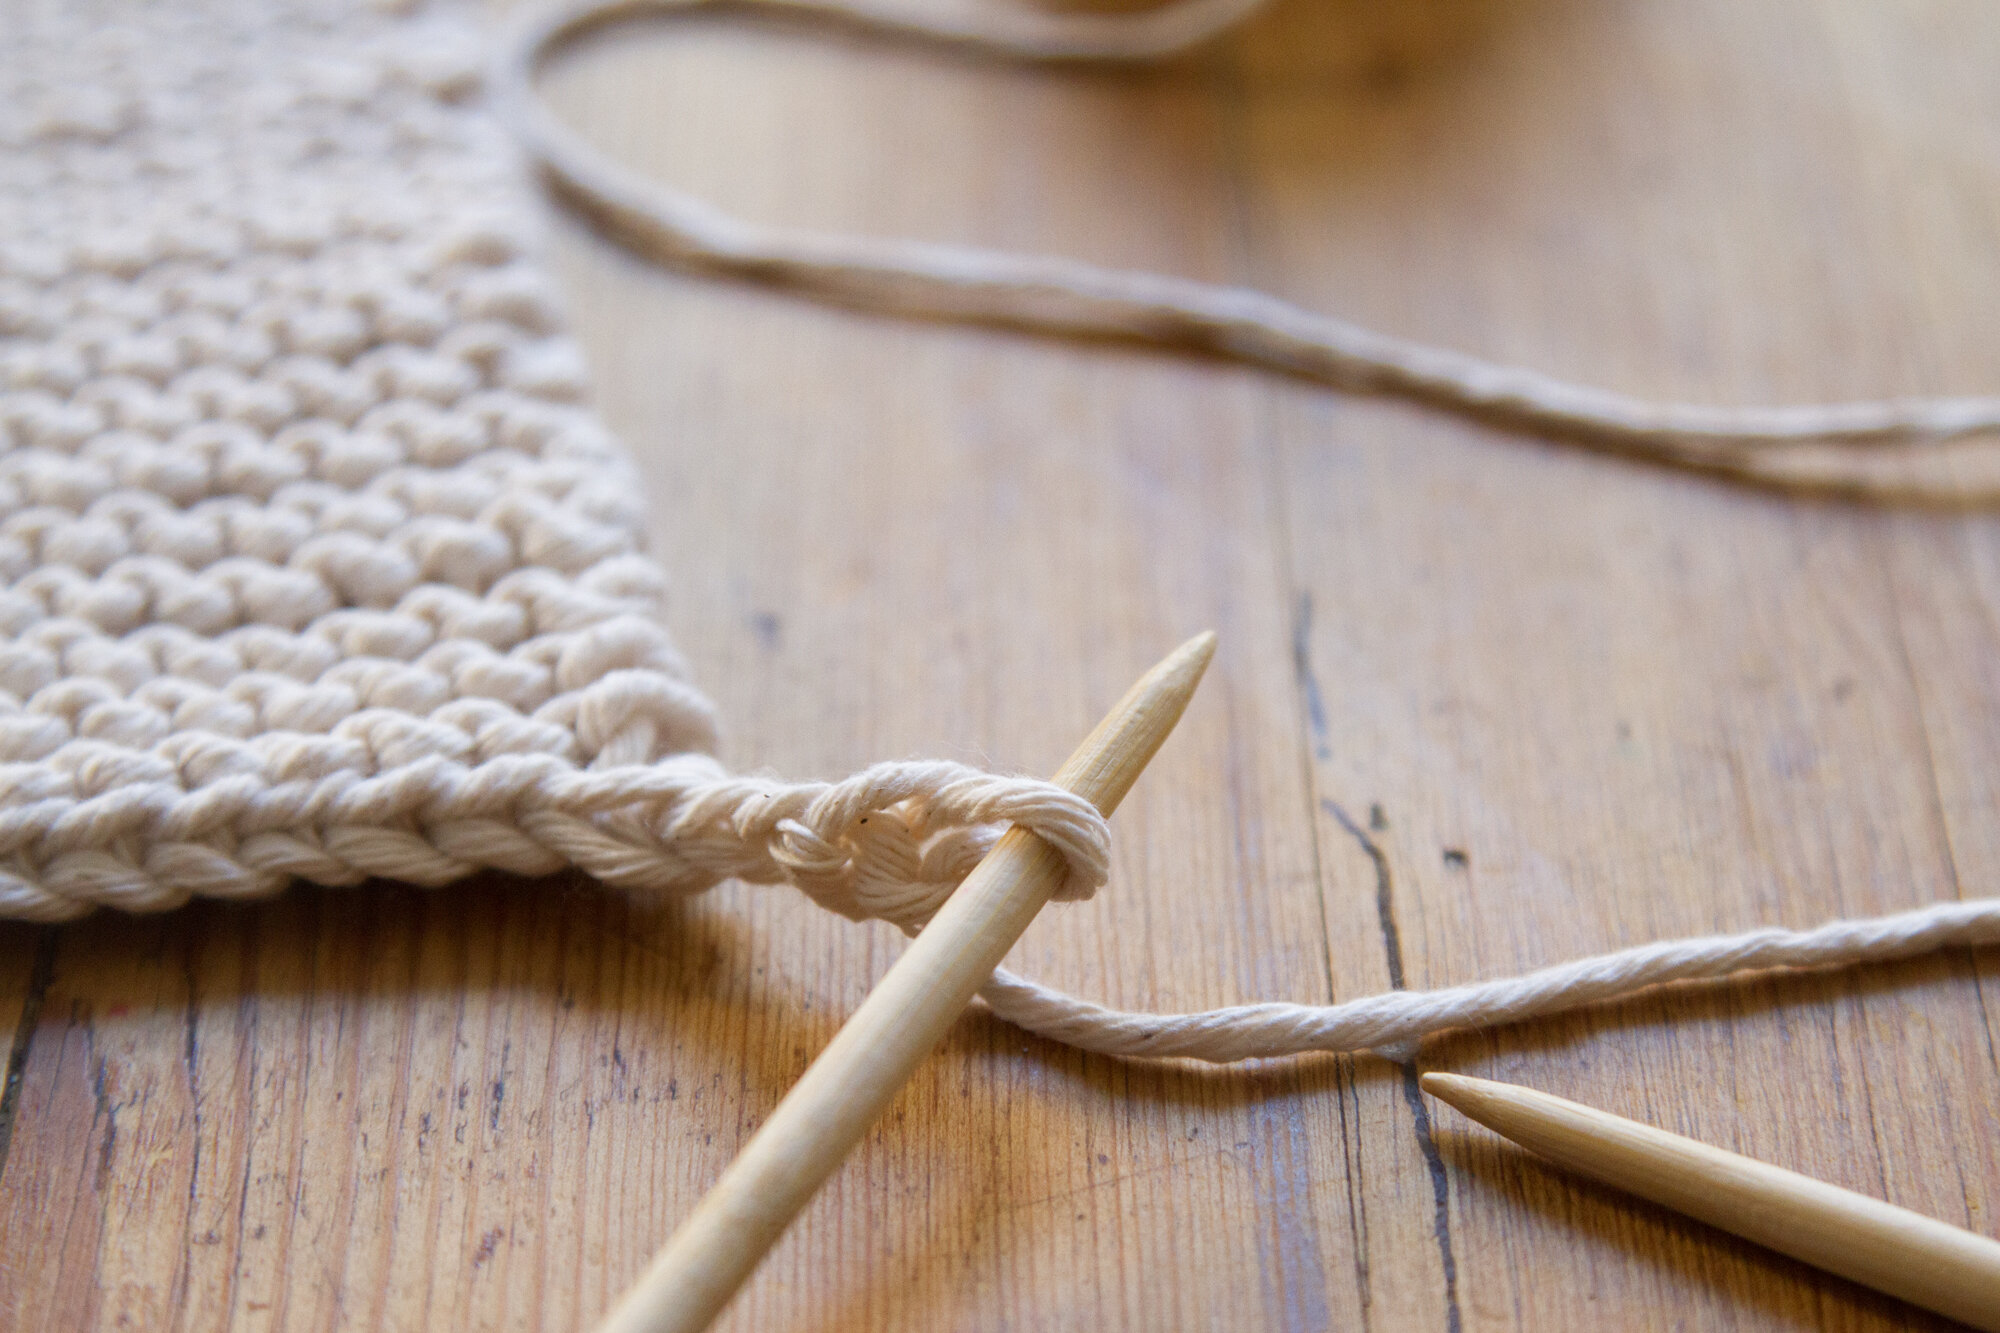
+ Using your darning needle, connect the tail end of your chain stitch to the corner of your potholder by threading it through a corner stitch. Wrap the tail around the base and tie a single or double knot to secure.
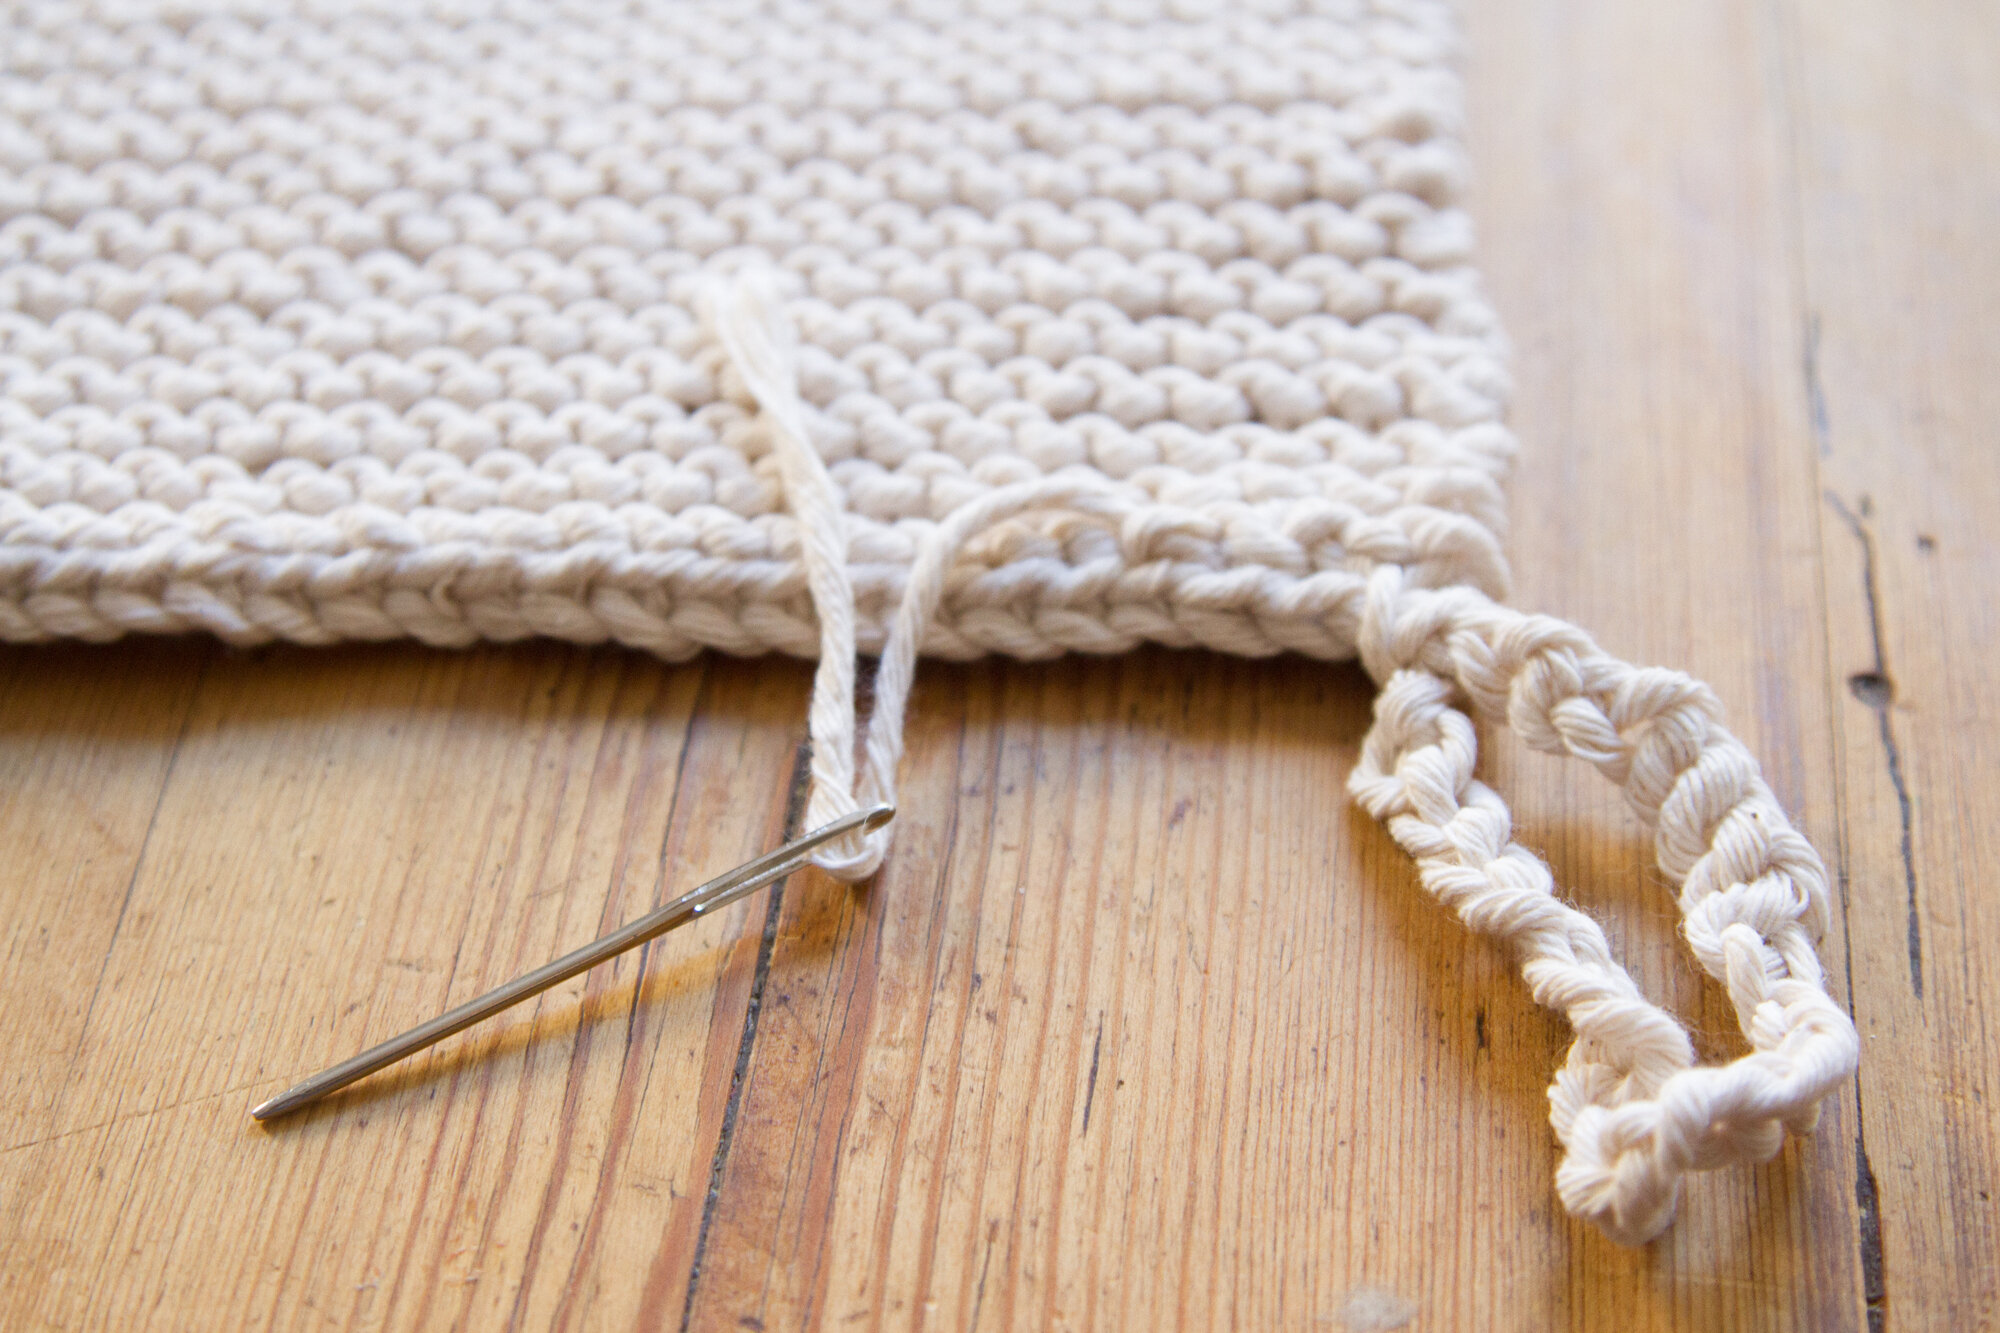
+ Weave in the extra tail end with your darning needle and cut off any extra length. Repeat with the tail end at the beginning.
+ You’re finished!
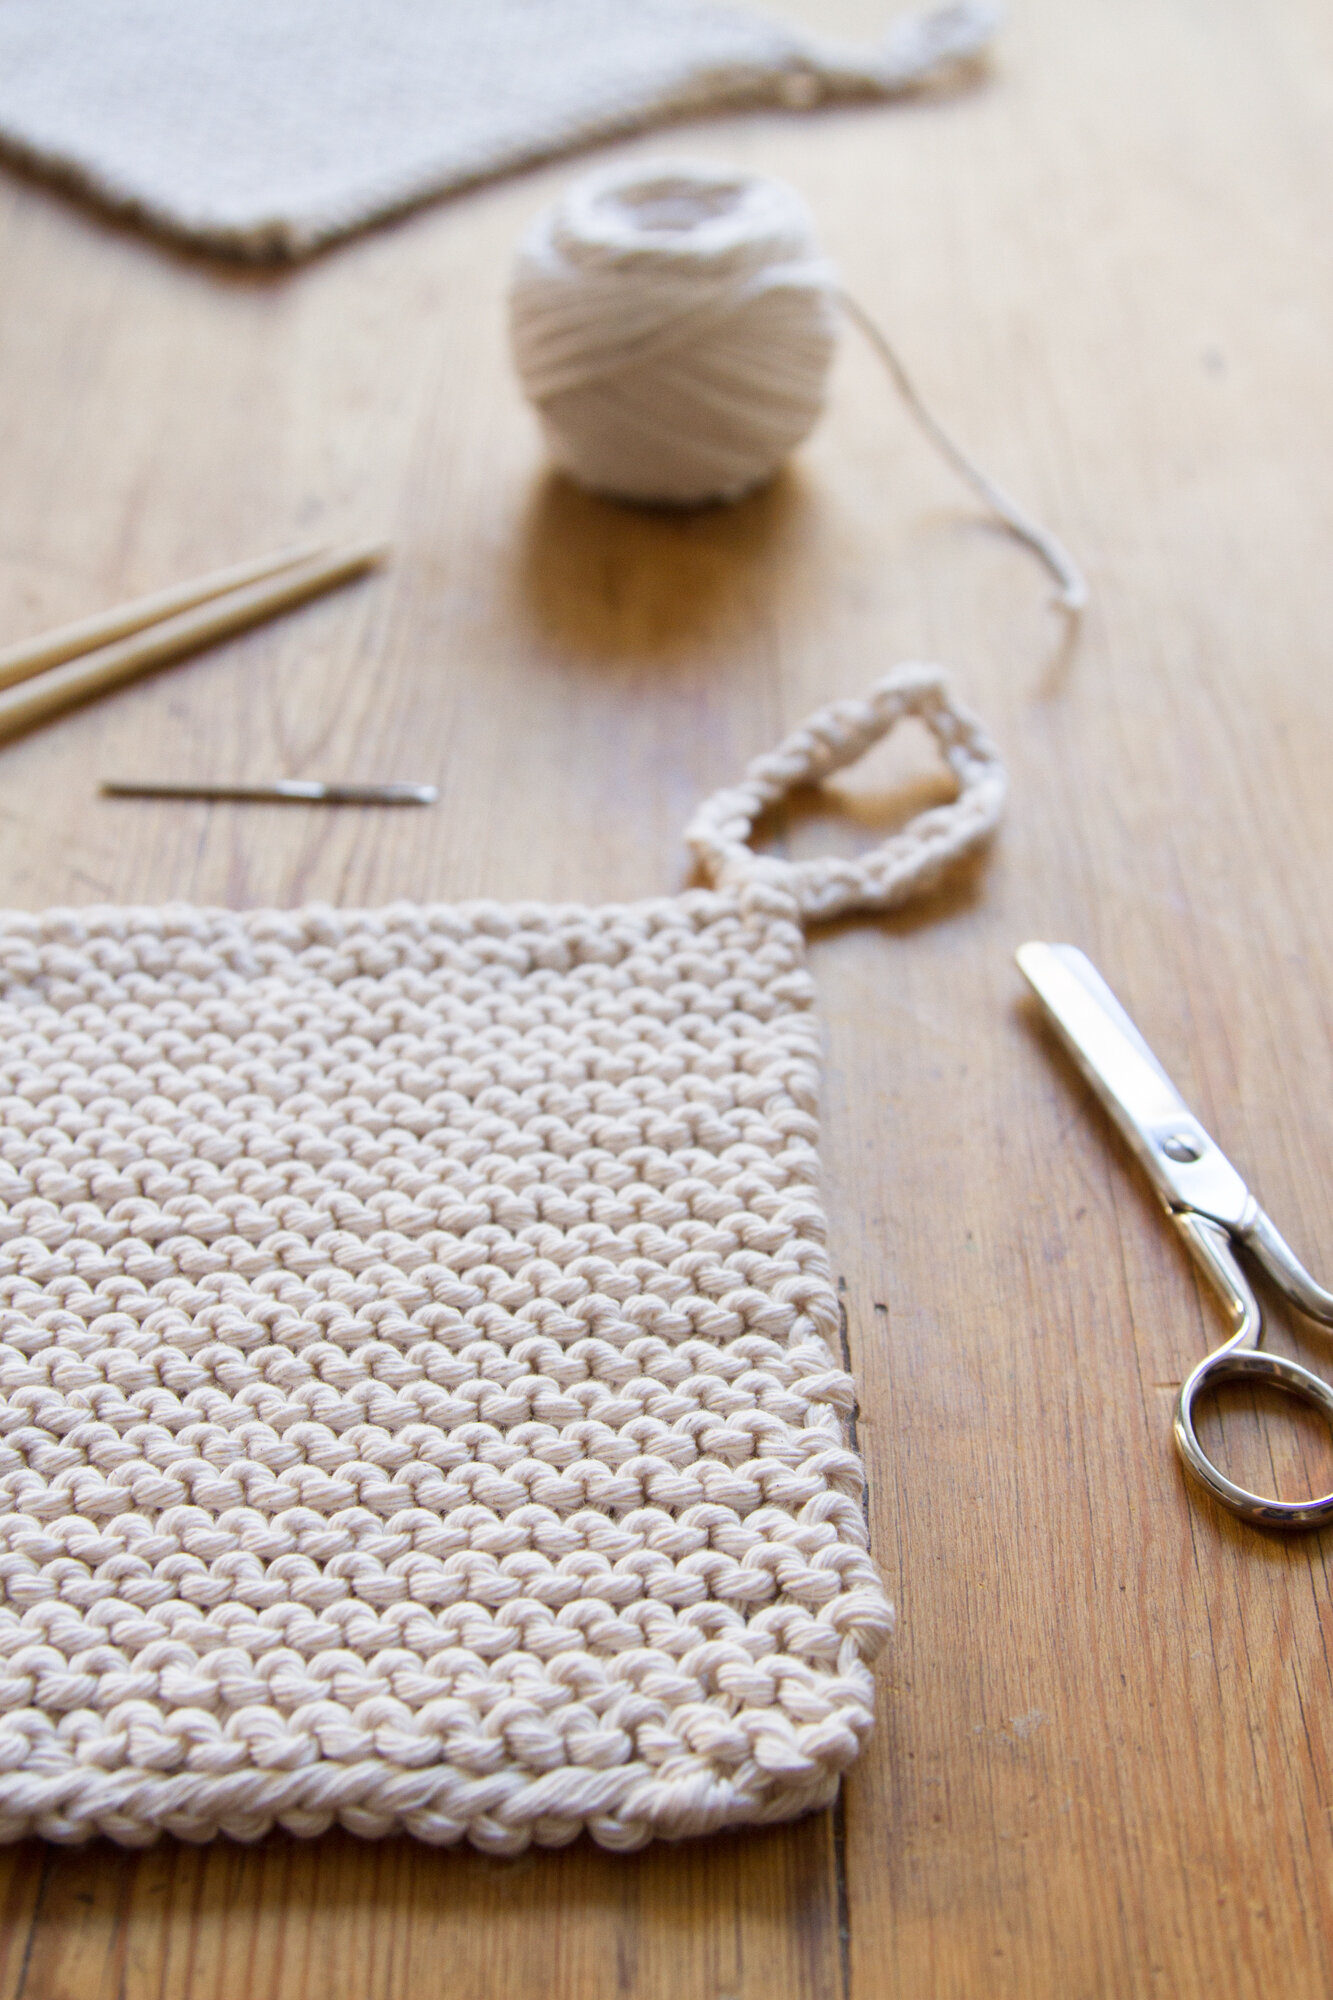
The finished potholder can be used in the kitchen or transitioned to the dinner table as a trivet. Depending on your needs, adjust the numbers of rows that you cast on and knit and you can have a potholder in any size that makes sense for you.
If you’ve never knit anything at all, this is still the project for you. I taught myself to knit in college using Debbie Stoller’s book, Stich ‘n Bitch and today there are terrific online tutorials to make learning even easier. I really like the simple how-to videos from Sheep & Stitch. They include everything you need for this project including casting on, the knit stitch (also known as garter stitch), and casting off (also called binding off!).
Thanks to Rose Pearlman for developing this project and writing the instructions. Rose is an artist, teacher, and textile designer. With a background in fine arts and a love of well designed functional objects, her creations blur the lines between art and craft and pushes the boundaries with non-traditional techniques and materials. Rose teaches monthly rug hooking workshops in and around her home in NYC, and also welcomes commissions for one of a kind constructions in decor and home furnishings. Her work has been featured in fiber magazines, galleries, and numerous online design sites. Her new book Modern Rug Hooking comes out December 3, 2019 and is currently available for preorder wherever books are sold. She lives in Brooklyn, NY with her family.
This post includes affiliate links. Reading My Tea Leaves might earn a small commission on the goods purchased through those links.
27 Comments
Chopsticks warp so easily… I think I’d rather ask around and see if anyone I know has knitting needles I can borrow. It’s cute to see what can be improvised; just doesn’t feel practical.
For sure borrowing is a great solution for getting your hands on anything you don’t own! Re: warping though, I haven’t experienced any kind of warping at all. Has that been something you’ve run into? As for practicality, at the grand total of free plus a minute of sharpening and smoothing, I’d say it’s a solid investment for anyone just getting started.
I’ve been served oddly warped wooden chopsticks at a restaurant more than once; they’re unfinished, low-quality wood, so it’s not shocking. (: Warped knitting needles make sliding the stitches for each row difficult.
It’s not a “bad” craft project, just not something I’d recommend for a brand new beginner if they could get actual knitting needles. (Which often aren’t hard to find or expensive… unless you want them to be, haha!)
It’s a great project! Rose has taught hundreds of school kids to knit this way which is so encouraging and hopeful!
A quick rub with a nail file and some waxed paper will take care of rough edges and allow the yarn to slide along the needle better. My husband laughs at me because I carry scraps of yarn in a pouch in my purse. Every time we go to Publix I grab a free set of chopsticks in the sushi section to use like this. When they die as knitting needles they make good garden markers, too.
Omg I love this! I have many knitting needles already but I really wish I had an excuse to make own, even if more “rustic”. As an aside I was fascinated to read some time ago that long ago knitters probably used wire rather than sanded pointed sticks for knitting.
This looks just like what I needed! However, knowing how dirty we get in the kitchen I’m wondering if there’s a different kind of twine one can use that would be in a dark color – and resist the heat! Any suggestion? Thanks!
Soak the finished pothoder in tea or coffee for a darker color, won’t show stains so easily.
How clever! Thank you, great idea!
Love the idea of dying these! With 100 percent cotton butcher’s twine natural dye should take easily, too!
Thanks for this practical, low-waste idea. Similar things I have knit: cotton washclothes (with cotton yarn) and even a bag for leftover pieces of soap (loosely knitted using linen string to form a mesh).
I always feel such joy when I look around my home and see the things I’ve made with my own two hands. Such creative resourcefulness at play here in this project. What fun! Bravo!
What a pleasing project, thanks!
I love this idea. I am a long time knitter, and while I love knitting on certain types of needles, the idea of chopstick knitting needles is genius. Almost always accessible, and what a fun project for kids to make their own needles! I follow Rose on Instagram and love when she posts a new creation. Thanks for sharing!
I have a first grader in a Waldorf school and the whole class is in a knitting frenzy. I can’t wait to show her this. She is teaching me and her dad how to knit:). She has a penchant for nabbing free chopsticks so this is going to be an awesome project for her.
When I was 11 or 12, I received a pair of wooden hair sticks for my birthday. I never could figure out how to make the darn things stay in my hair, so they became the most lovely knitting needles. I still have them, and occasionally use them for projects of a more diminutive size, like this potholder. Thanks for the encouragement to use what’s on hand to create beauty!
In Waldorf schools, when the children start knitting they make their own knitting needles from dowels. Basically the same as you showed, with the end sharpened. Plus they put a bead on the top. the children sand the dowels till smooth. Then their first project is to know a case for their needles. This follows them thru 8 grade.
A simple project that is so immensely satisfying.
Just working on one now! Using wool though, and 8” seems rather long? It will turn out more of a rectangle vs square if i go that far. Do you know, is the 8” based off the length of the 24 cast on stitches? Is yours more of a square or rectangle in the end? Thank you <3
Ours were all square! Everything depends on the size of your stitches, your yarn or string, and how tight or loose you knit, etc, so that’s why we included the note about continuing either for an additional 23 rows or about 8-inches. If you want yours to be square and 8 inches seems too long, just stop once you’ve reached a square shape, and of course if you’d like it be precise, just measure the width of your cast-on stitches after knitting a few rows and you’ll know exactly how far to knit to get a square!
Will do thank you for helping me out with my over-thinking tendencies haha! Thinking these would be great Christmas/holiday gifts paired with a soup mix or something in recycled jars 🙂
No problem! And yes, indeed. Lots of ideas along these lines coming at you in the next few weeks!
QUESTION!!!???? Does the Sugar and Creme work instead of the butcher twine? or is butcher twine a thicker/heavier yarn?
Hmm..not sure what Sugar and Creme might be! Butcher twine is soft and thick cotton string, so it works best for this project!
Yes, sugar and creme yarn works as it’s cotton. I use it all the time for ones I make. ♥️
If you cast on 24 stitches, you’ll need to knit 48 rows to make a square in garter stitch (knit every row).garter stitch is very compact and squishy.
Nope, not the case here! 24 stitches x 24 rows will get you the square as pictured!
Comments are moderated.