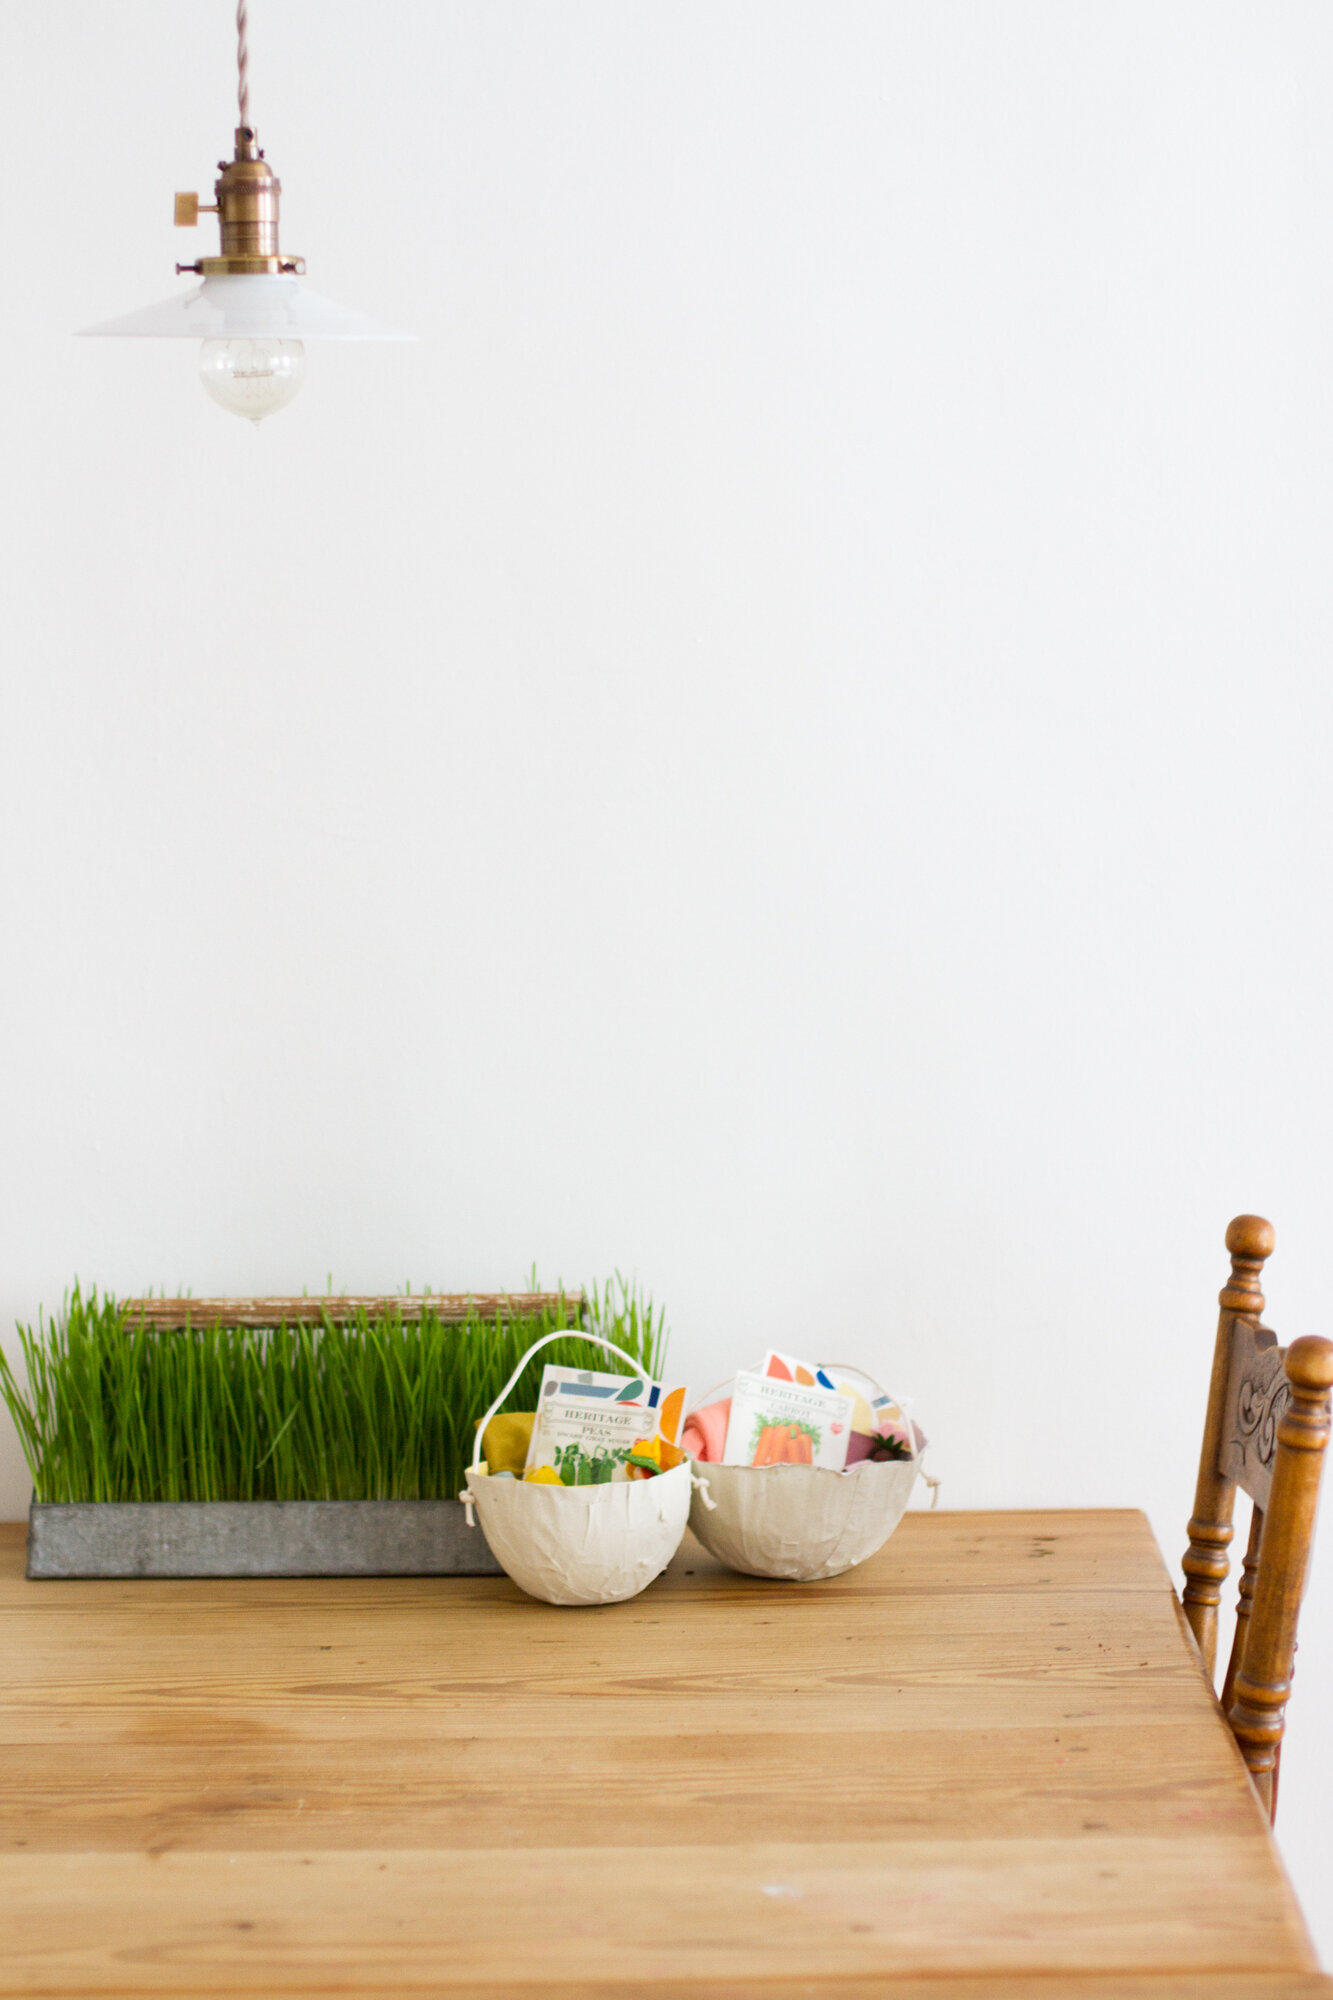
For use on Easter, or anytime, here’s a simple project to make your own papier-mâché basket or bowl from a little water, a little flour, and a few recycled materials you probably have around the house already.
I mentioned last week that I’ve been mixing up small batches of homemade paste in an effort to keep up with family demand. Using the same ingredients and the same basic principles, I made a batch of papier-mâché paste and a day later we had two festive Easter baskets ready for painting.
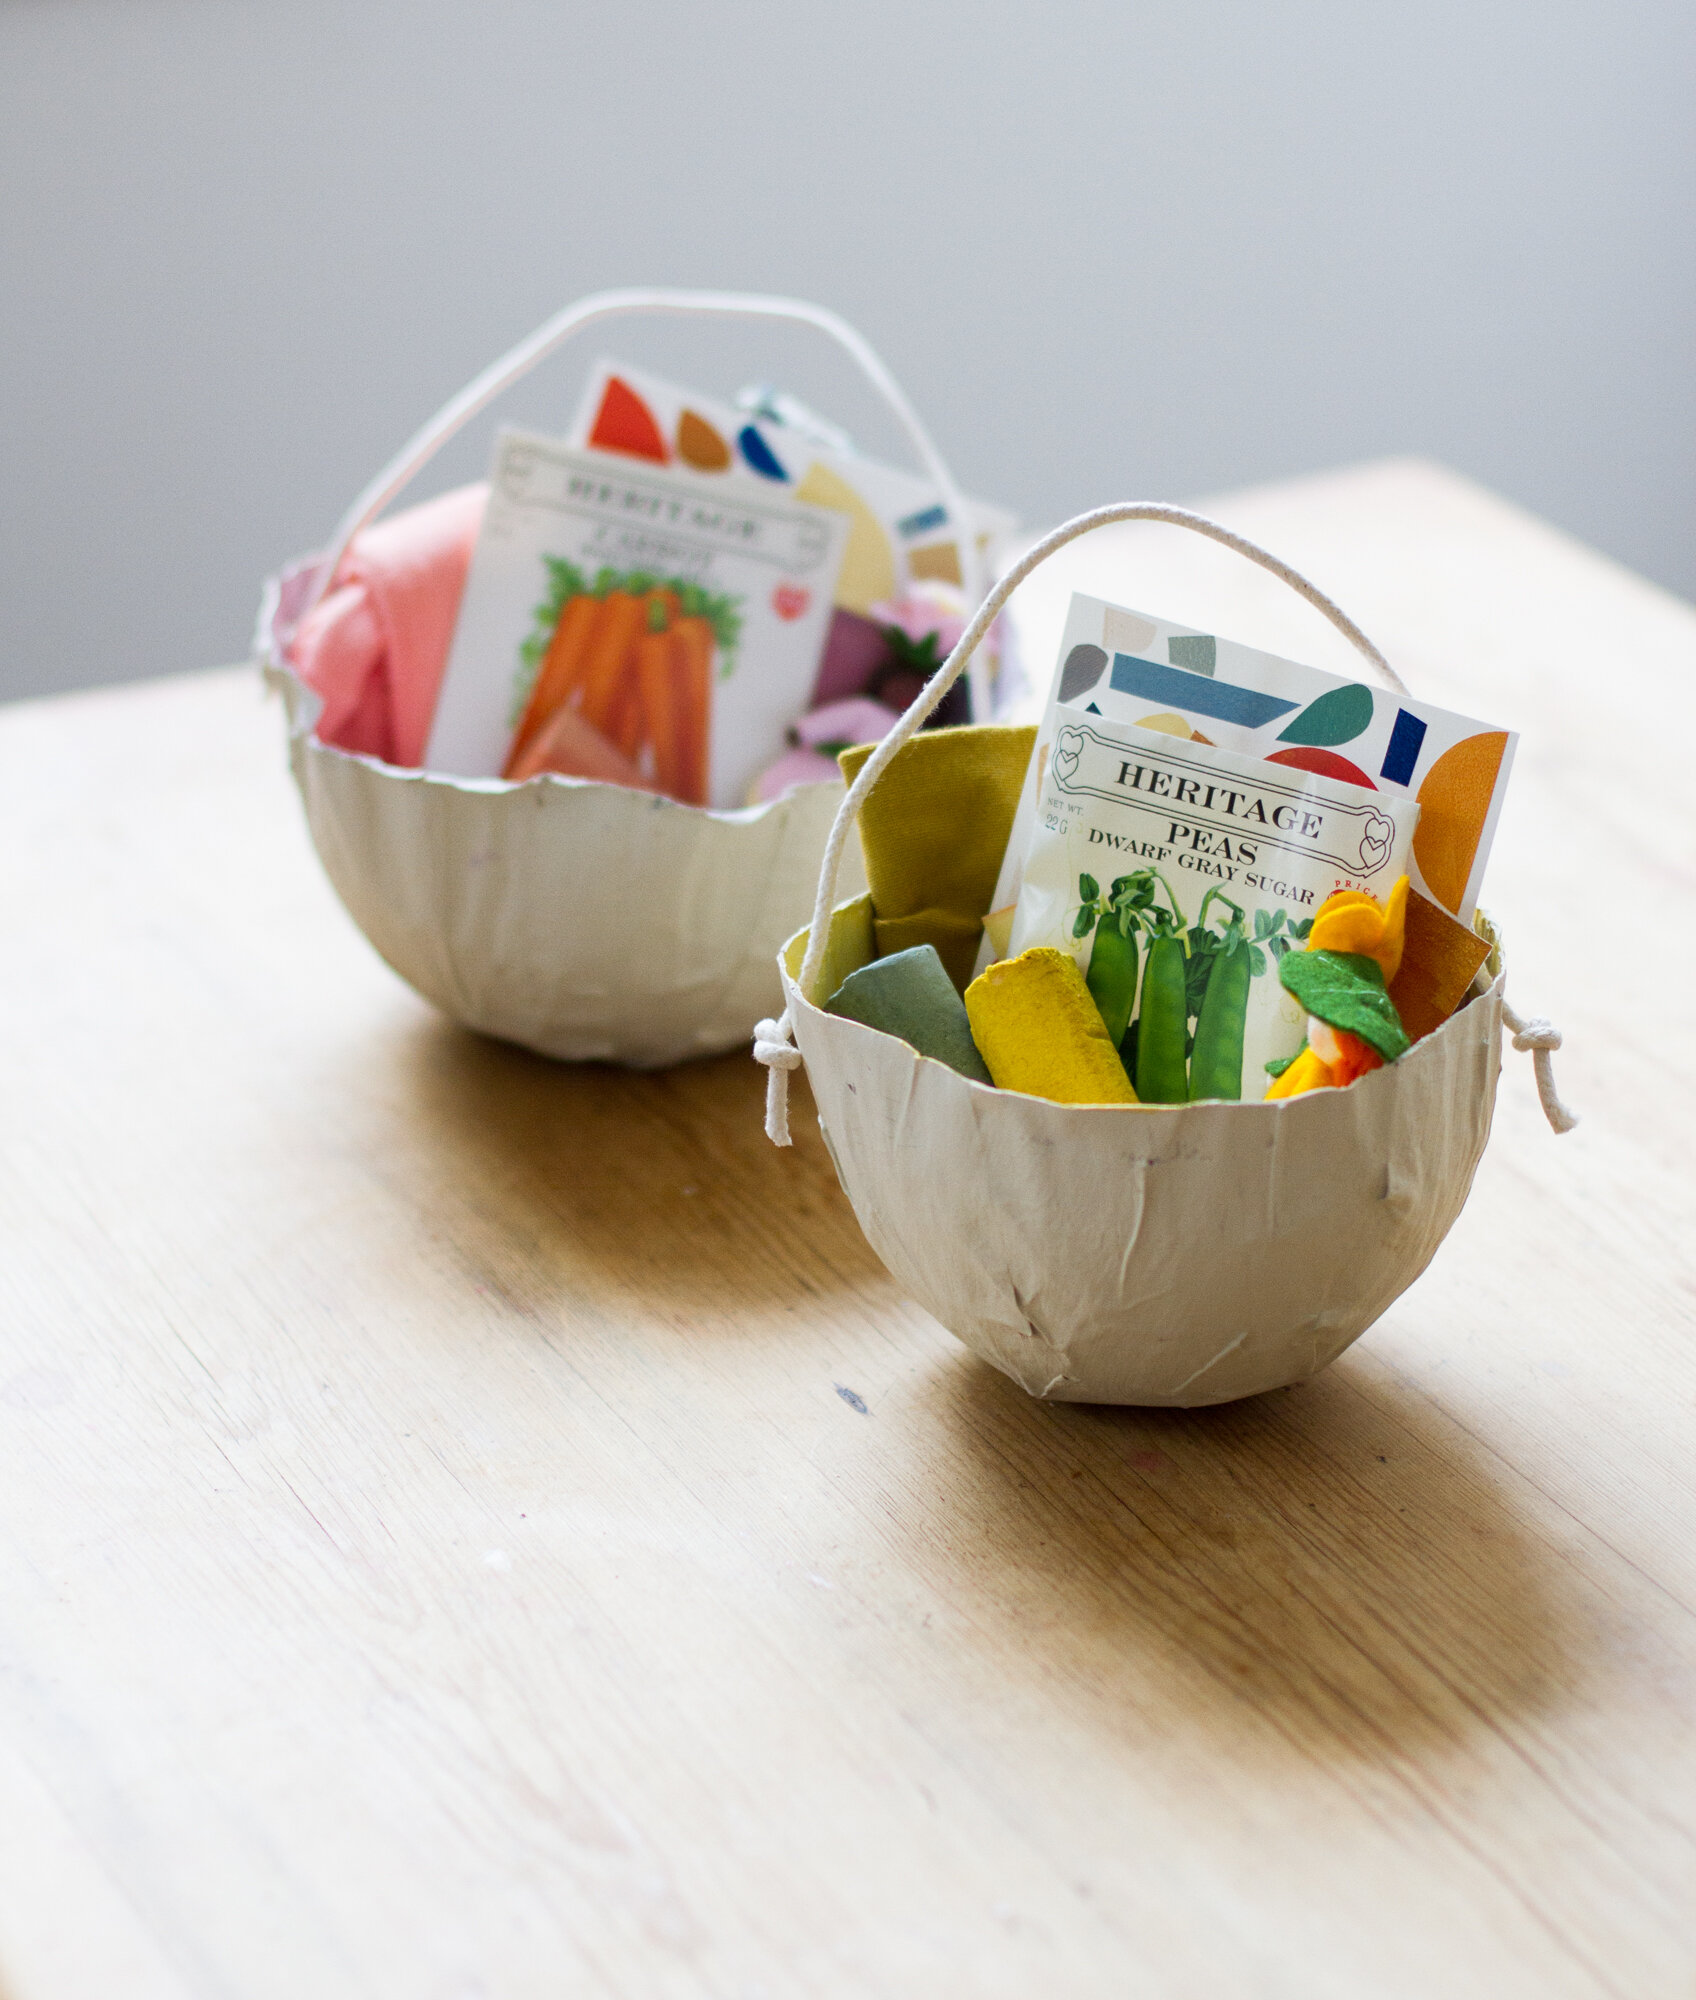
The possibilities here are abundant. You can follow the same basic instructions for making all manner of papier-mâché treasures! And for any skeptics: the final result is surprisingly sturdy! Fill up with eggs or apples, or anything else your heart desires.
Materials and directions below.
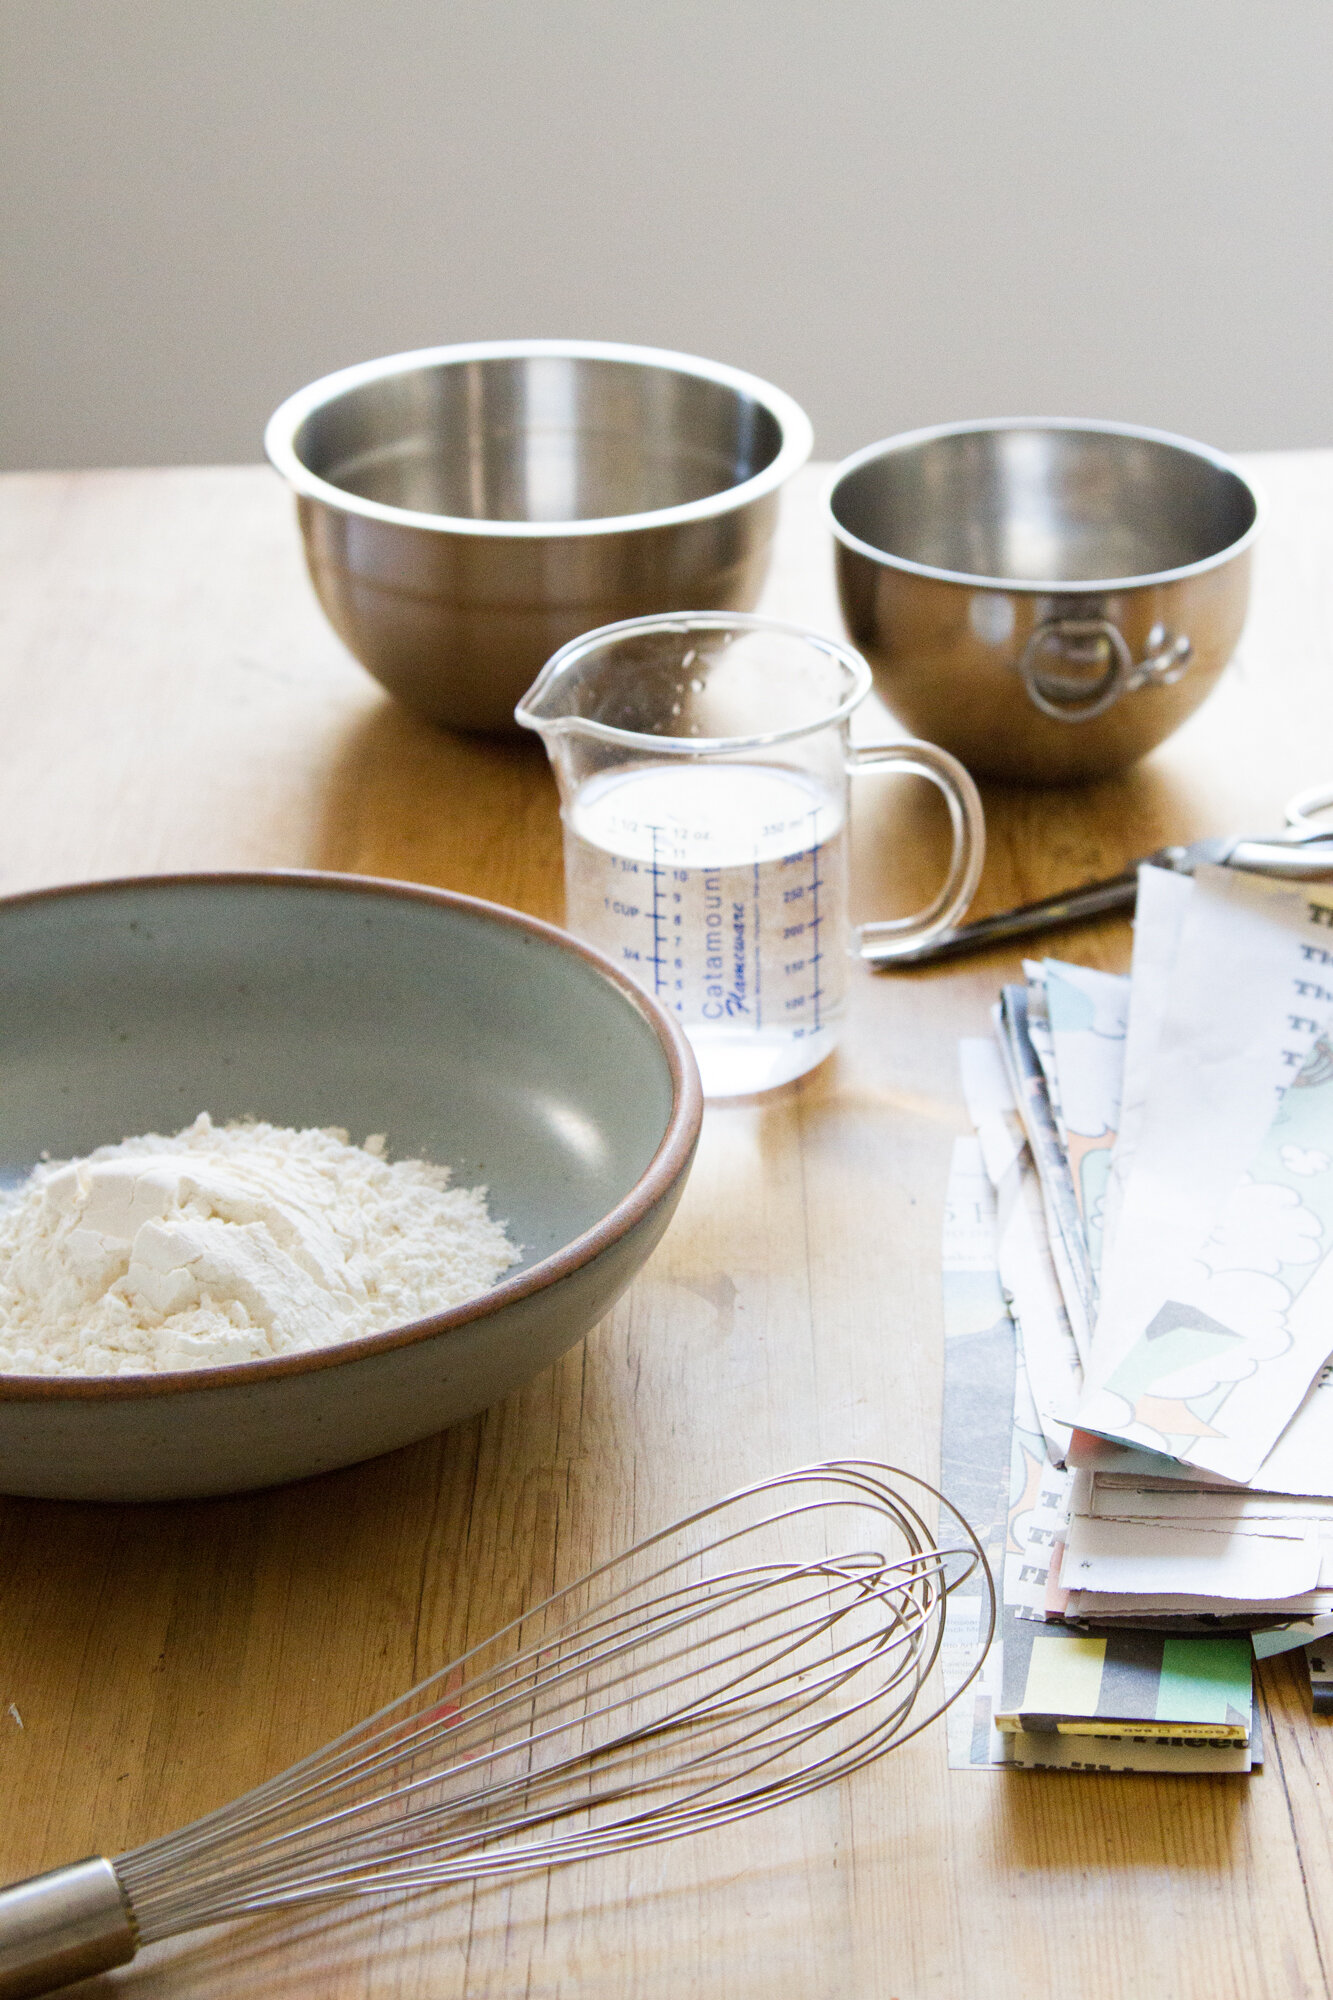
Materials:
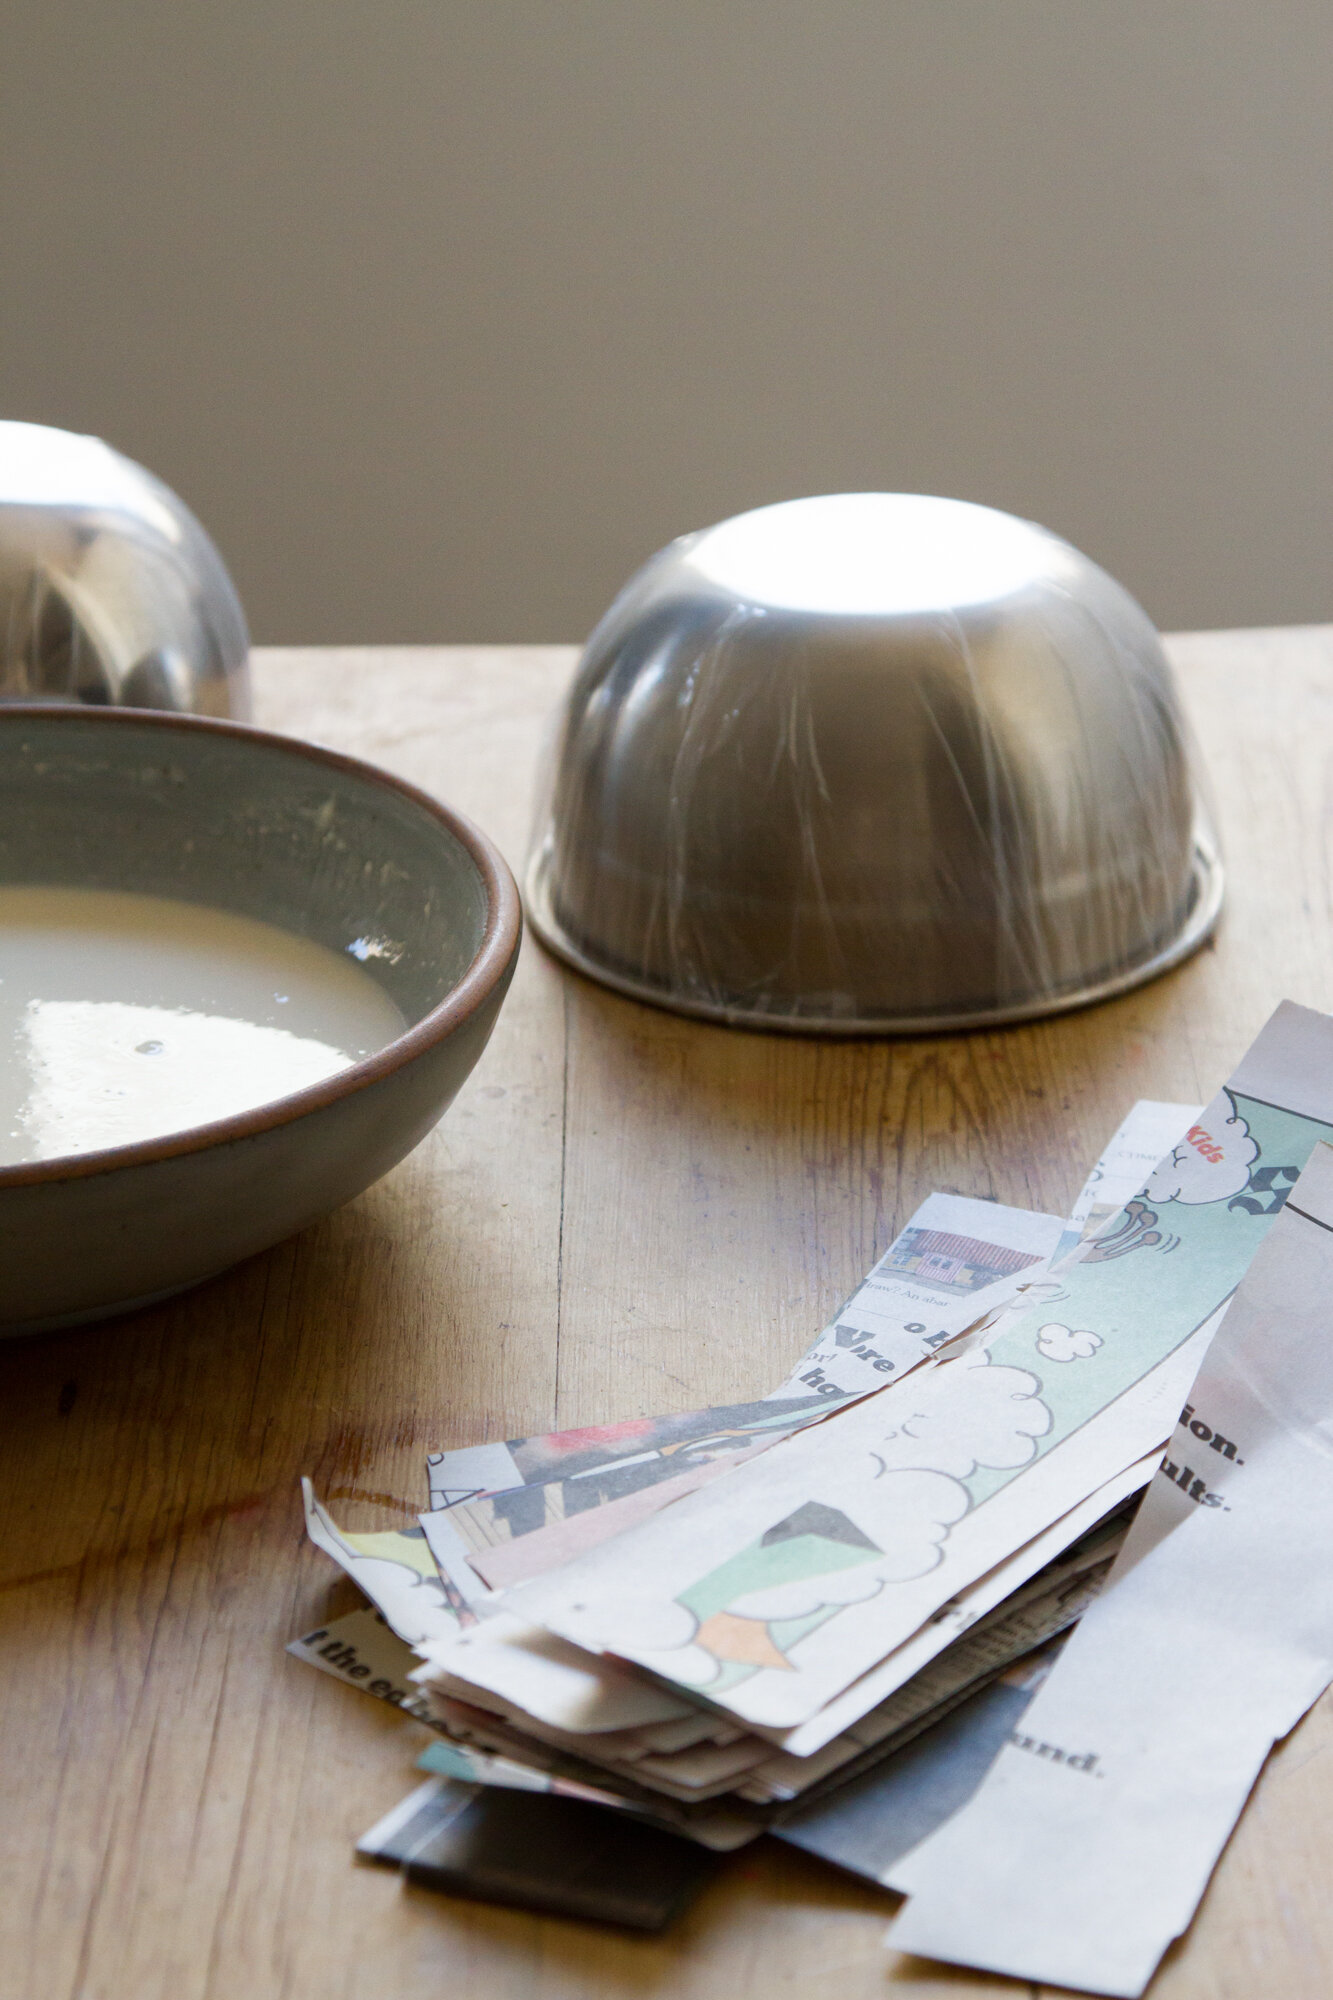
+ Small bowls to use as a mold
+ Scissors
+ Rubber bands
+ Plastic film (Does not need to be new or clingy! You can use string or a rubber band to secure old bread bags, produce bags, trash bags, shopping bags, or any other plastic film that you might be saving for recycling drop-off.
+ Water
+ Flour
+ Thin paper (Magazines, newsprint, seed catalogs, used gift wrap, tissue paper, etc. are all possibilities. Depending on the style you’d like, you might want to skip the paint and choose papers in whatever colors or style that you’d like to show off.)
+ Hole punch
+ String (I used cotton sash cord from the local hardware store.)
+ Paint (optional) (I used acrylic paint to finish my baskets—white on the outside and pastels on the inside—so that the baskets would resemble Easter eggs and please color-loving kids. The sky is the limit here.)
Directions:
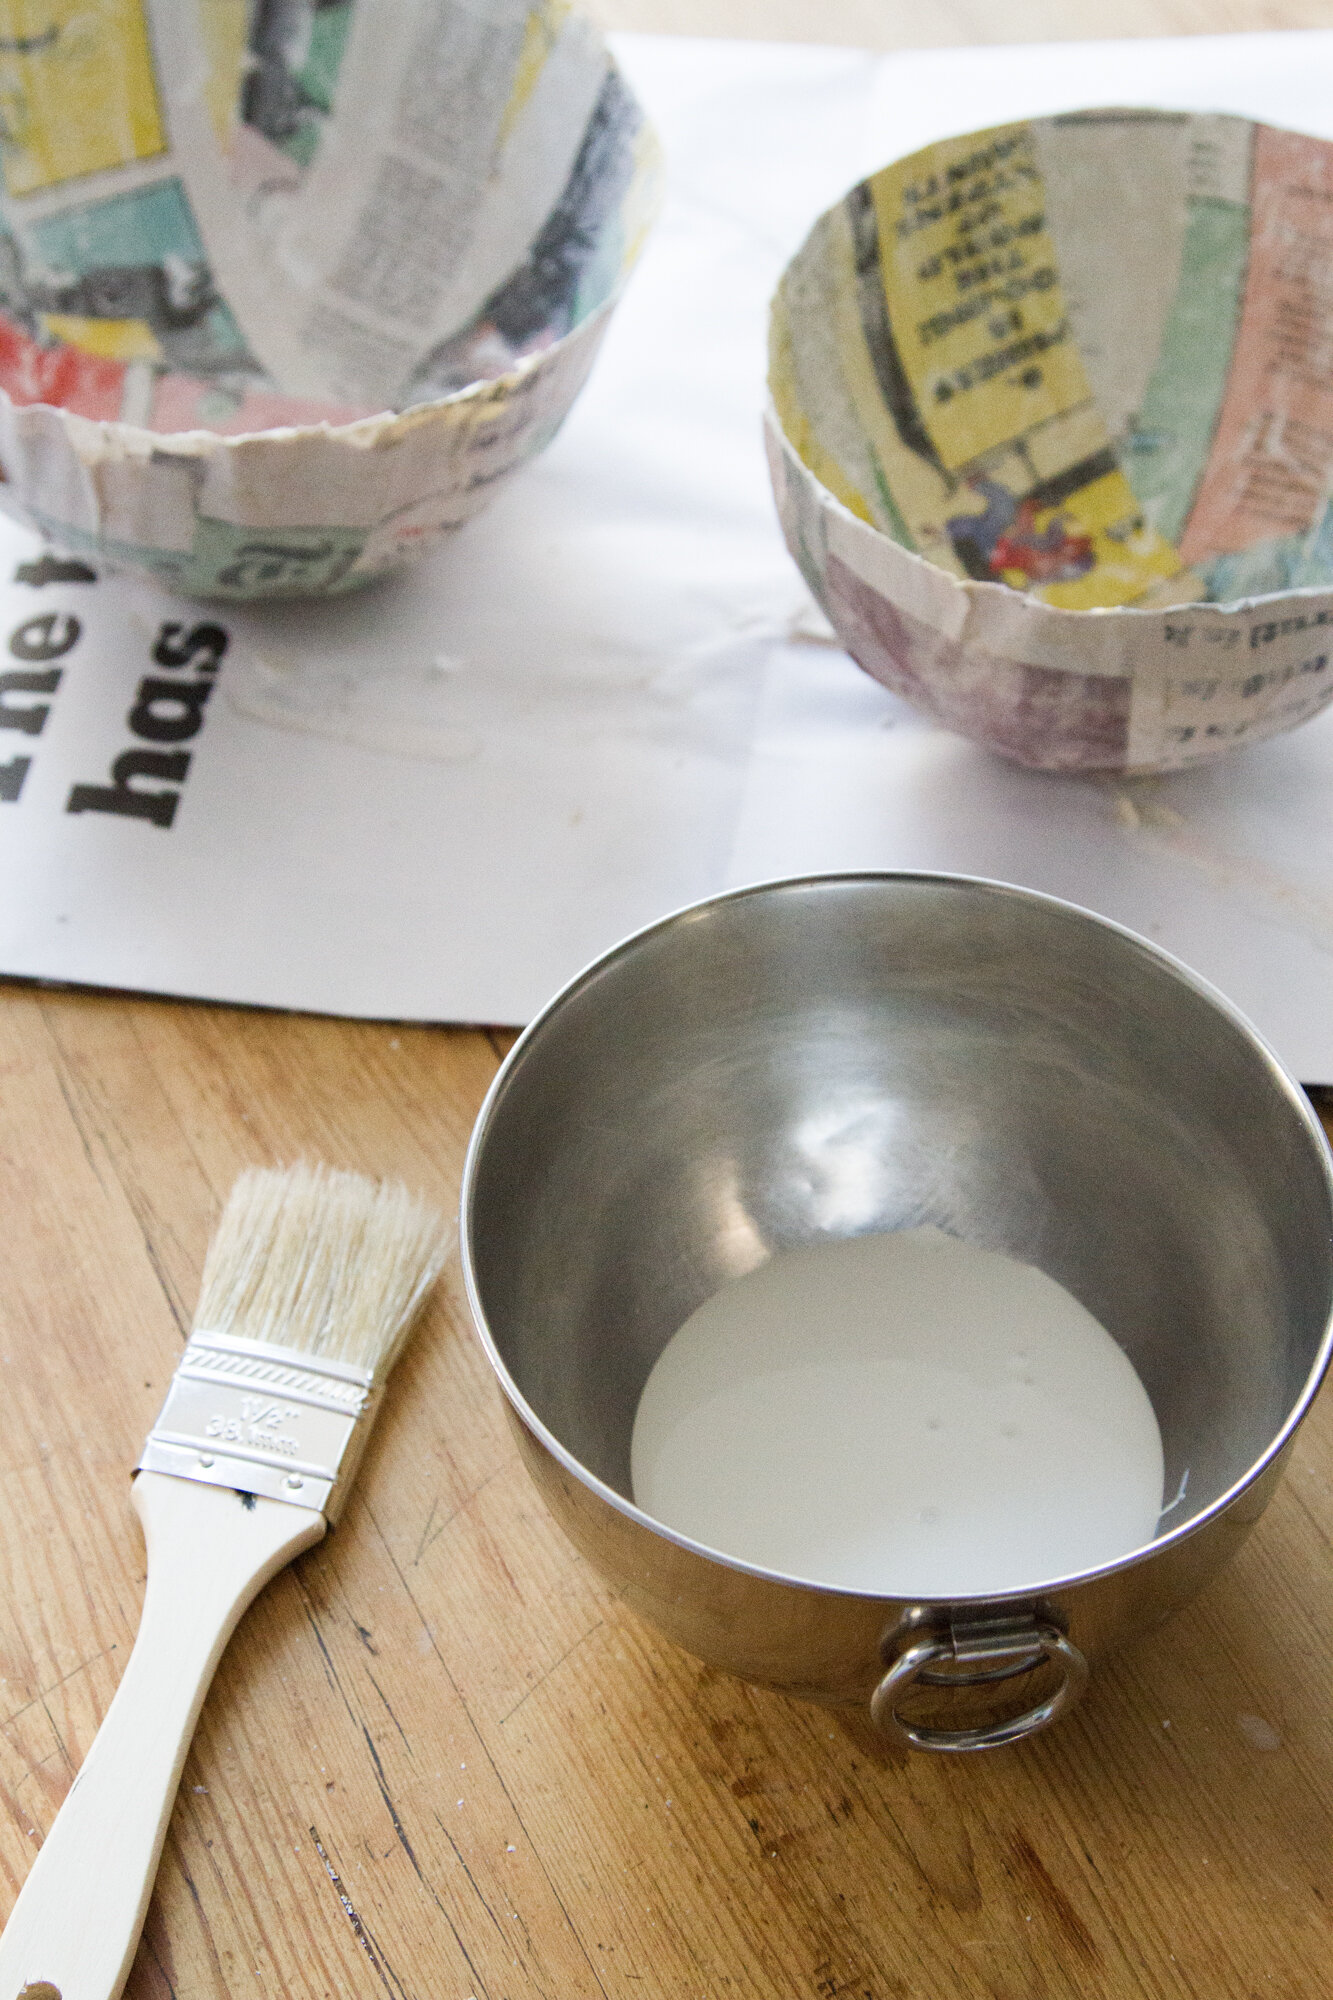
+ Cut paper into long strips ~1-inch wide.
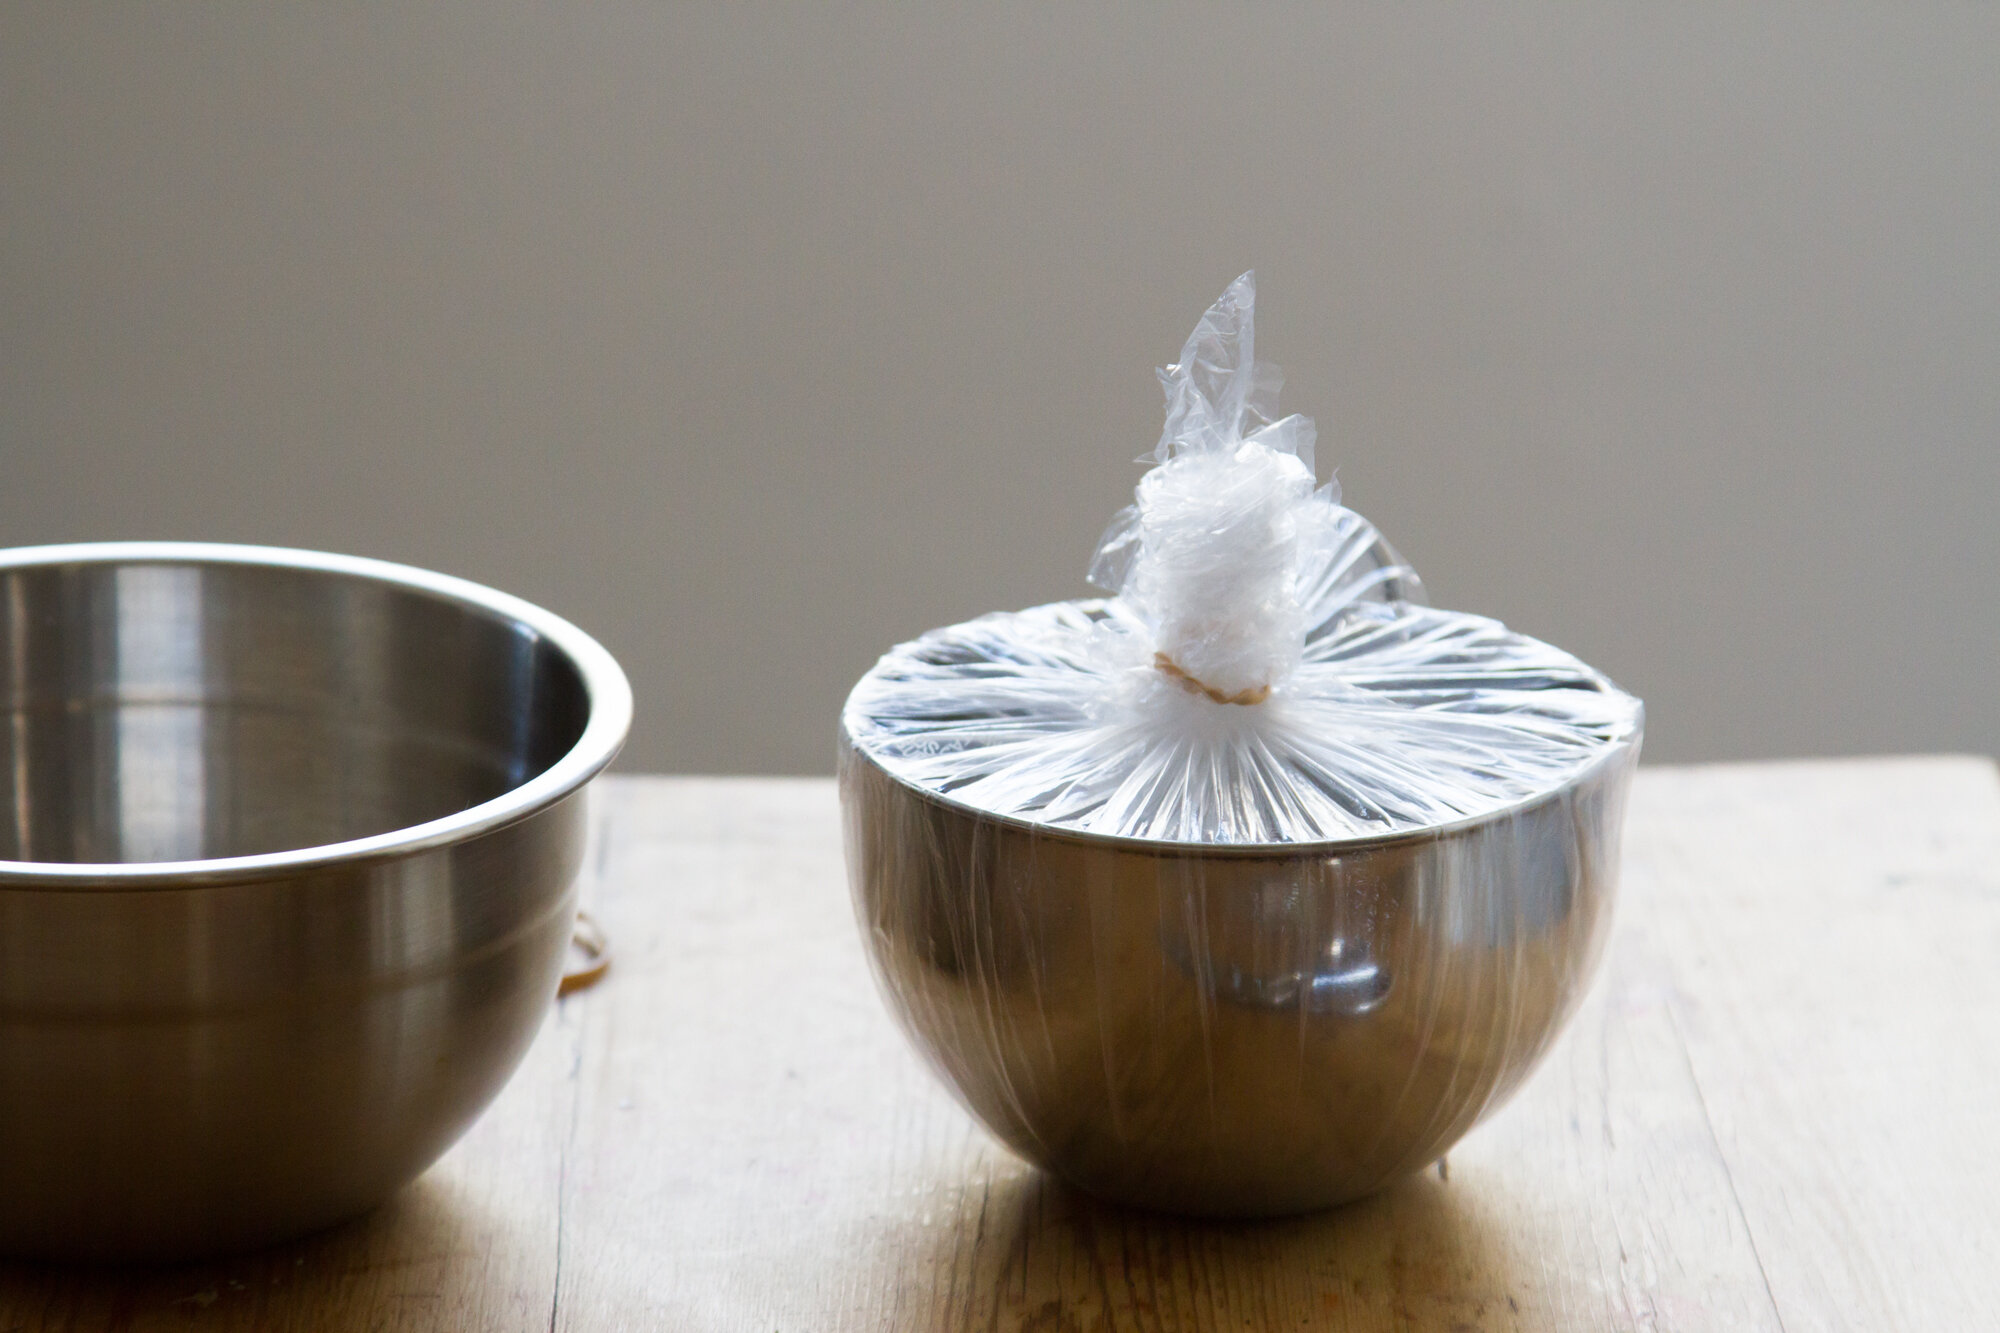
+ Cover a small bowl with plastic film (see above!) and secure with a rubber band or string.
+ Whisk together 1 part flour to 1 part water to start. (I used ~1 cup of each to make two small baskets. I did not heat my mixture, but for an even stronger glue, you certainly can. The final paste should be slightly thinner than the consistency of pancake batter, so add more water slowly to reach the desired consistency. See last week’s post for more detail.)
+ When you have your paste mixed and your bowl covered in plastic, place the bowl upside down on a covered work service.
+ Dip a strip of paper into the paste and slide the strip between two fingers to remove excess paste.
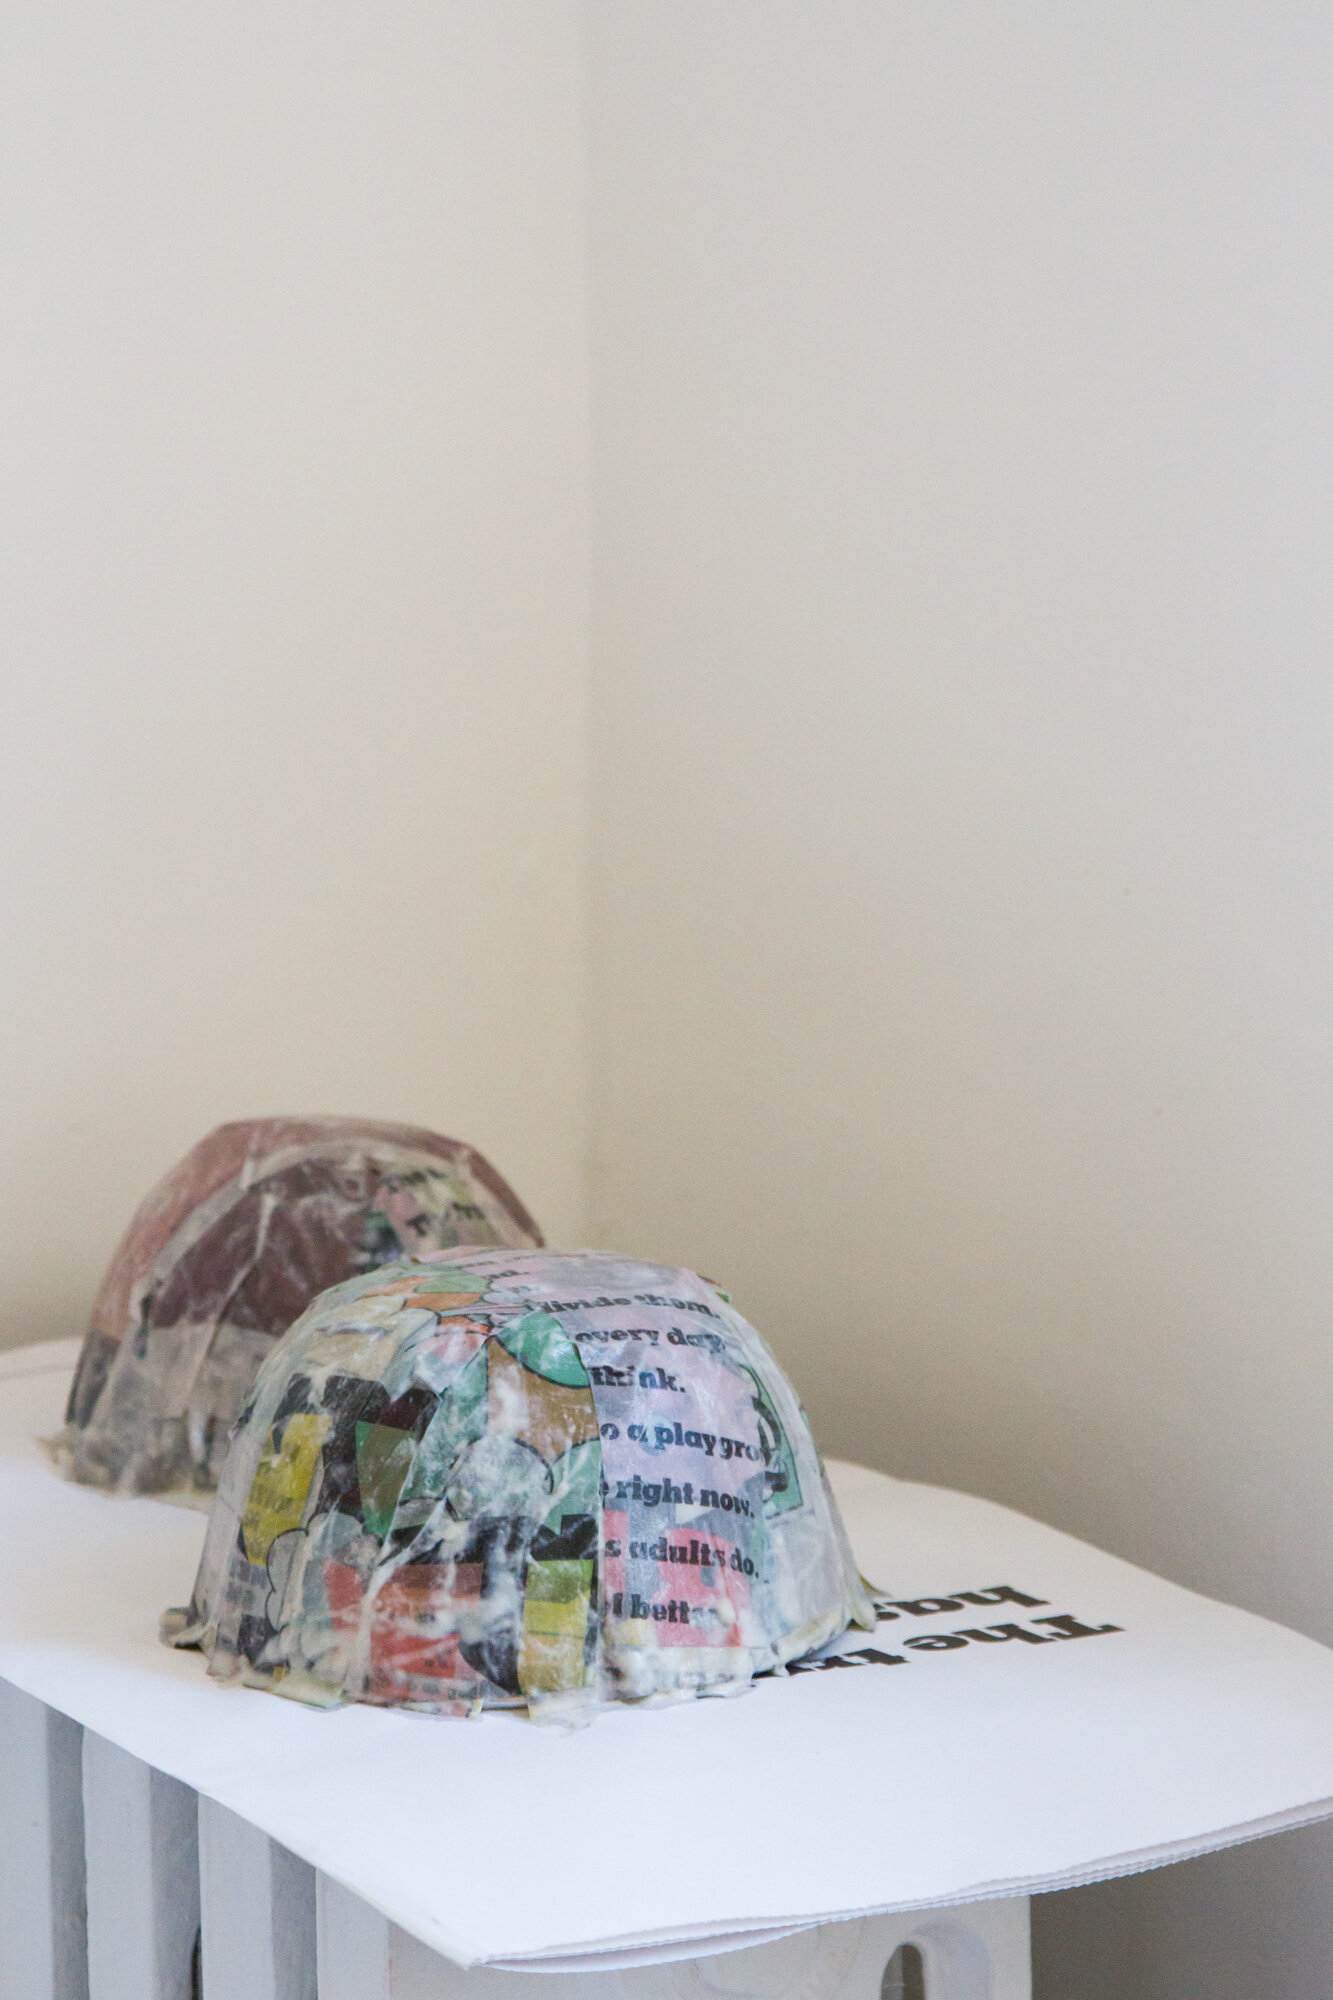
+ Place your strips over the bowl, working one at a time and forming crosses across the surface of the bowl. (I began with a simple cross and continued to drape strips in crosses, each time adjusting my angle slightly until the entire surface of the bowl was criss-crossed with paper and none of the original bowl was visible between the strips.)
+ Once completely covered once, repeat the steps above until the bowl has at least three complete layers of crosses.
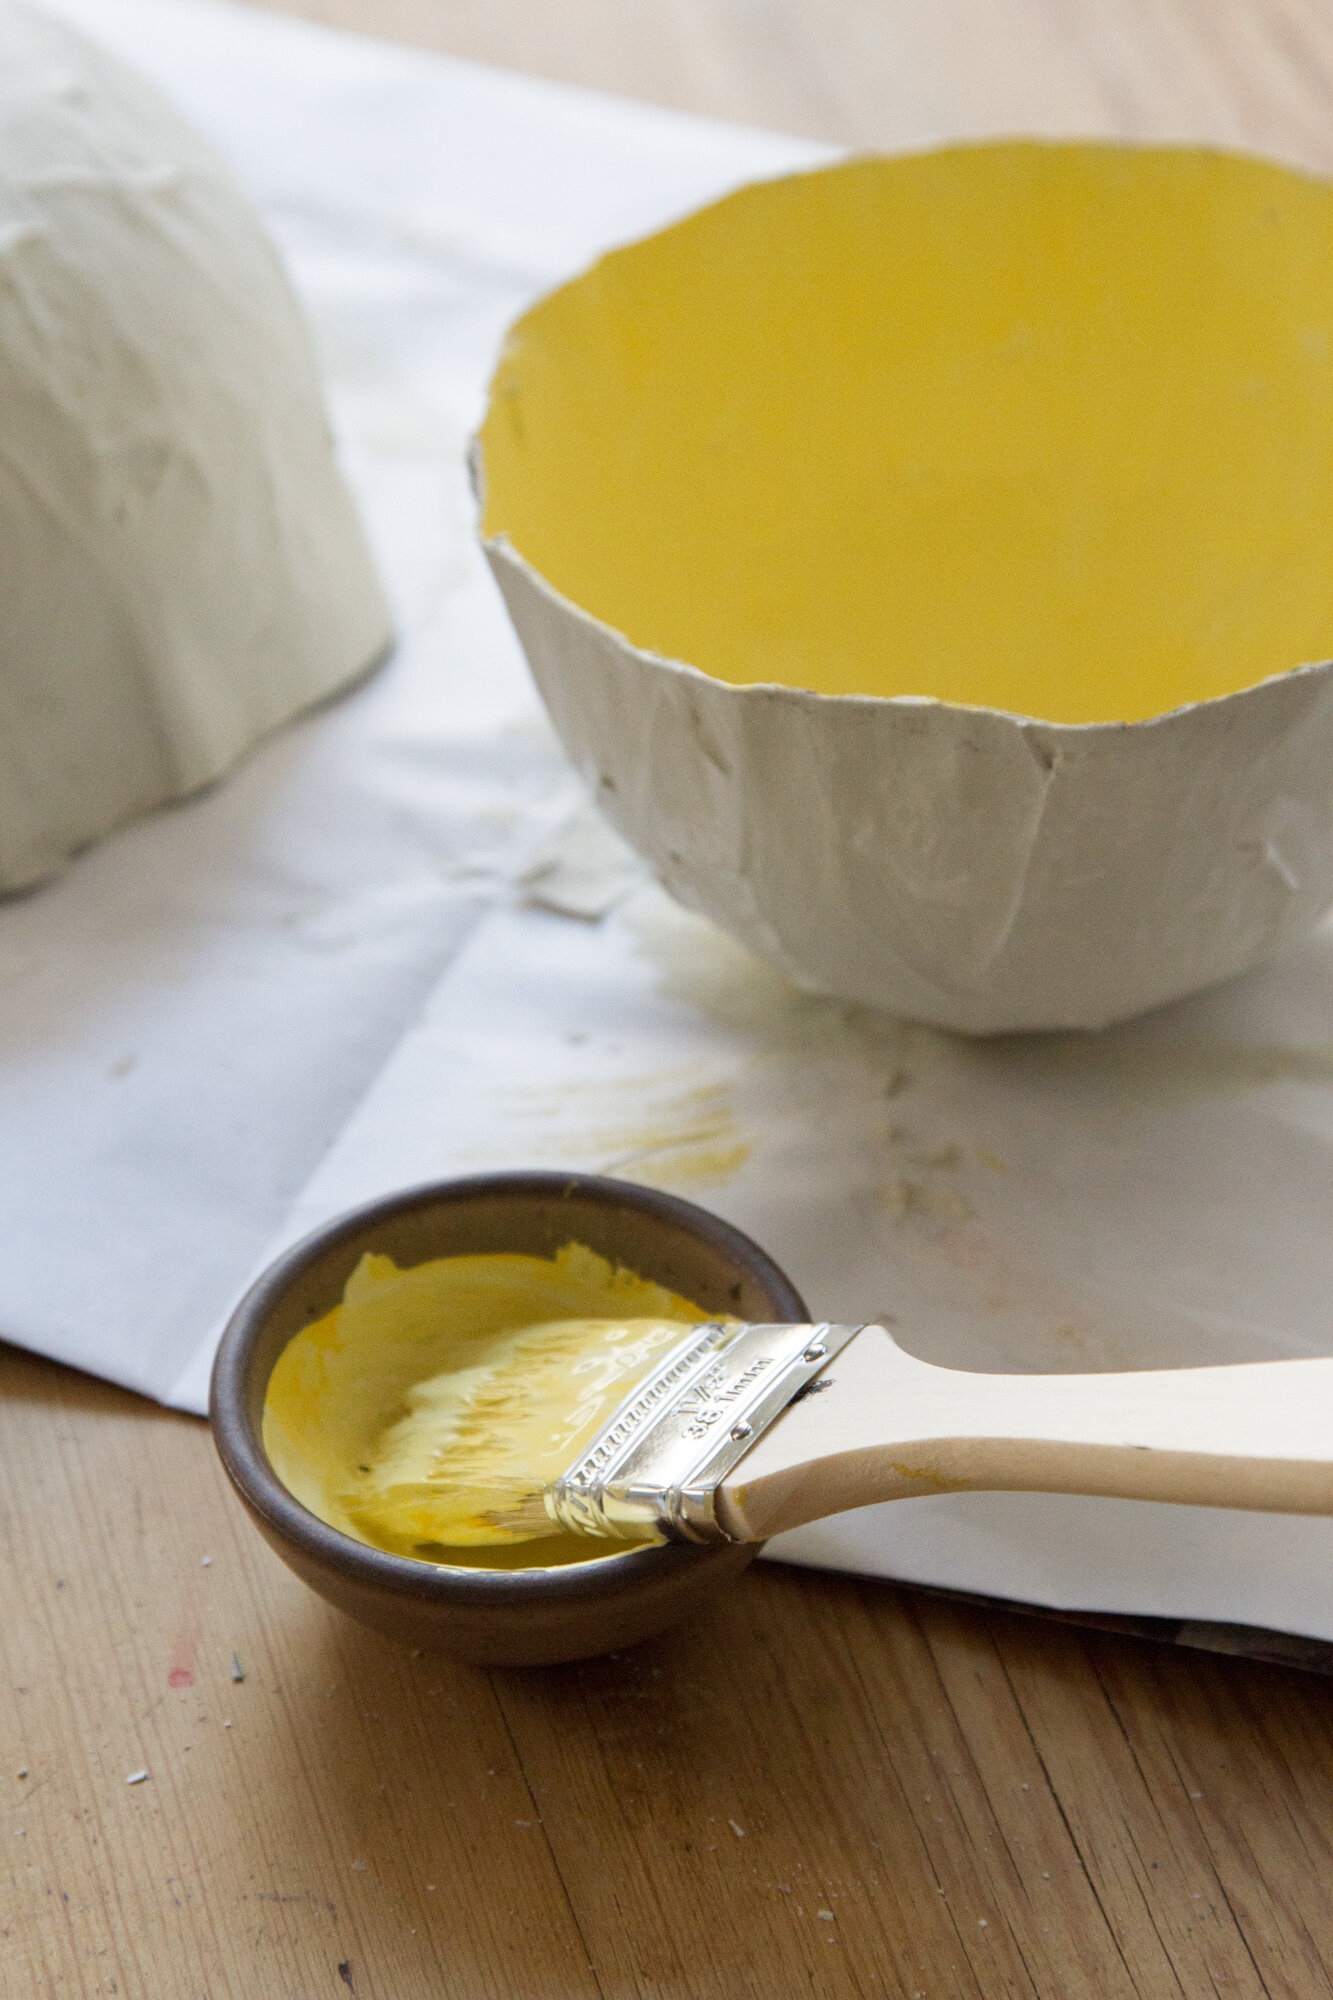
+ Allow bowls to dry overnight
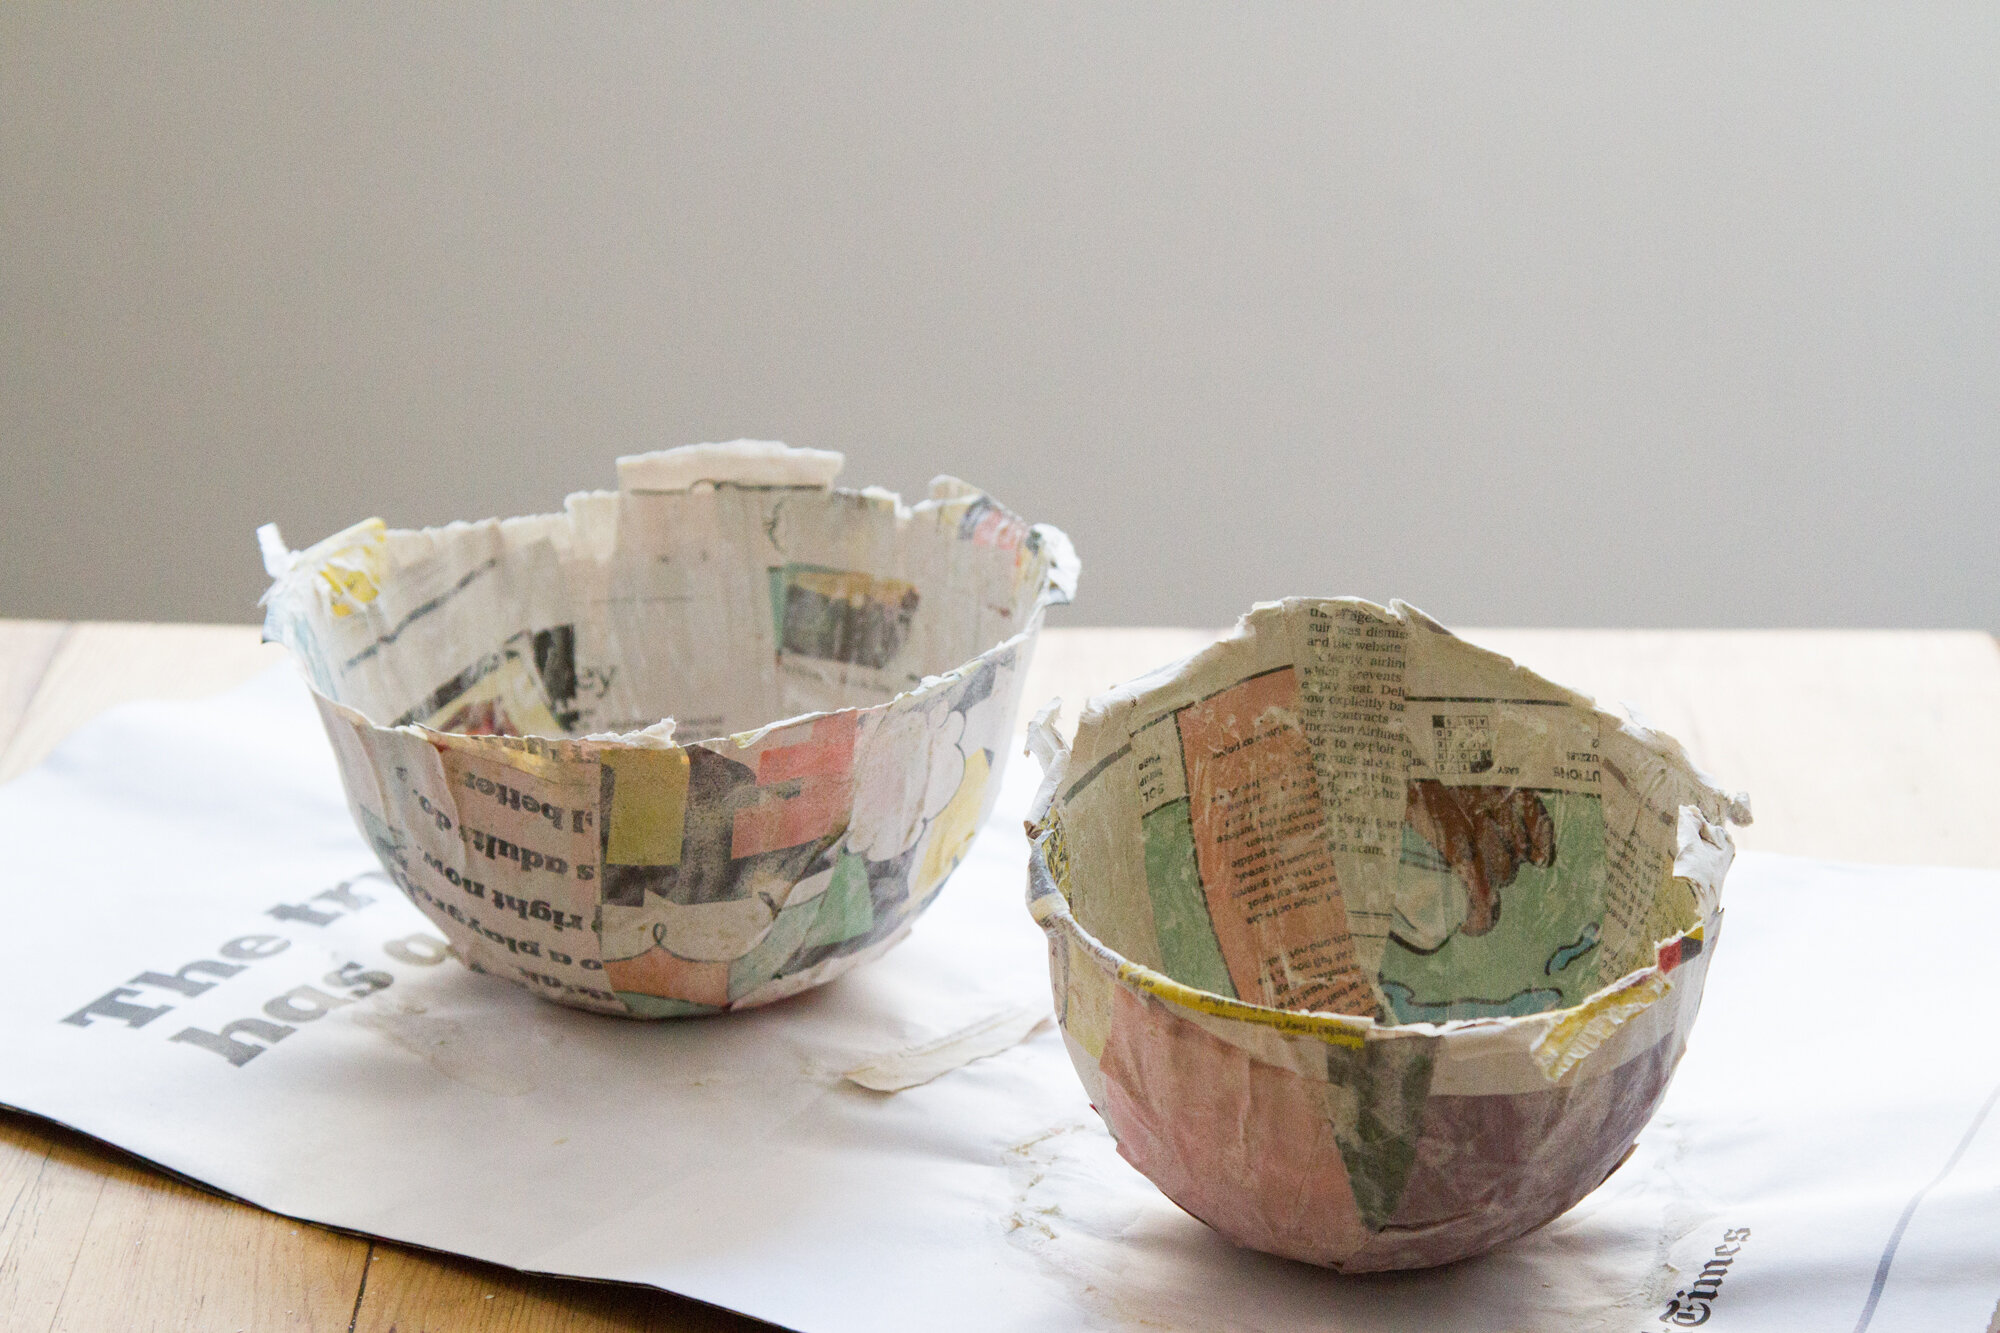
+ Once dry, flip the bowls upside down and gently tug the paper bowl off the mold. (I found it helpful to grab the tied up plastic film and apply gentle counter pressure to slide off the paper bowl.)
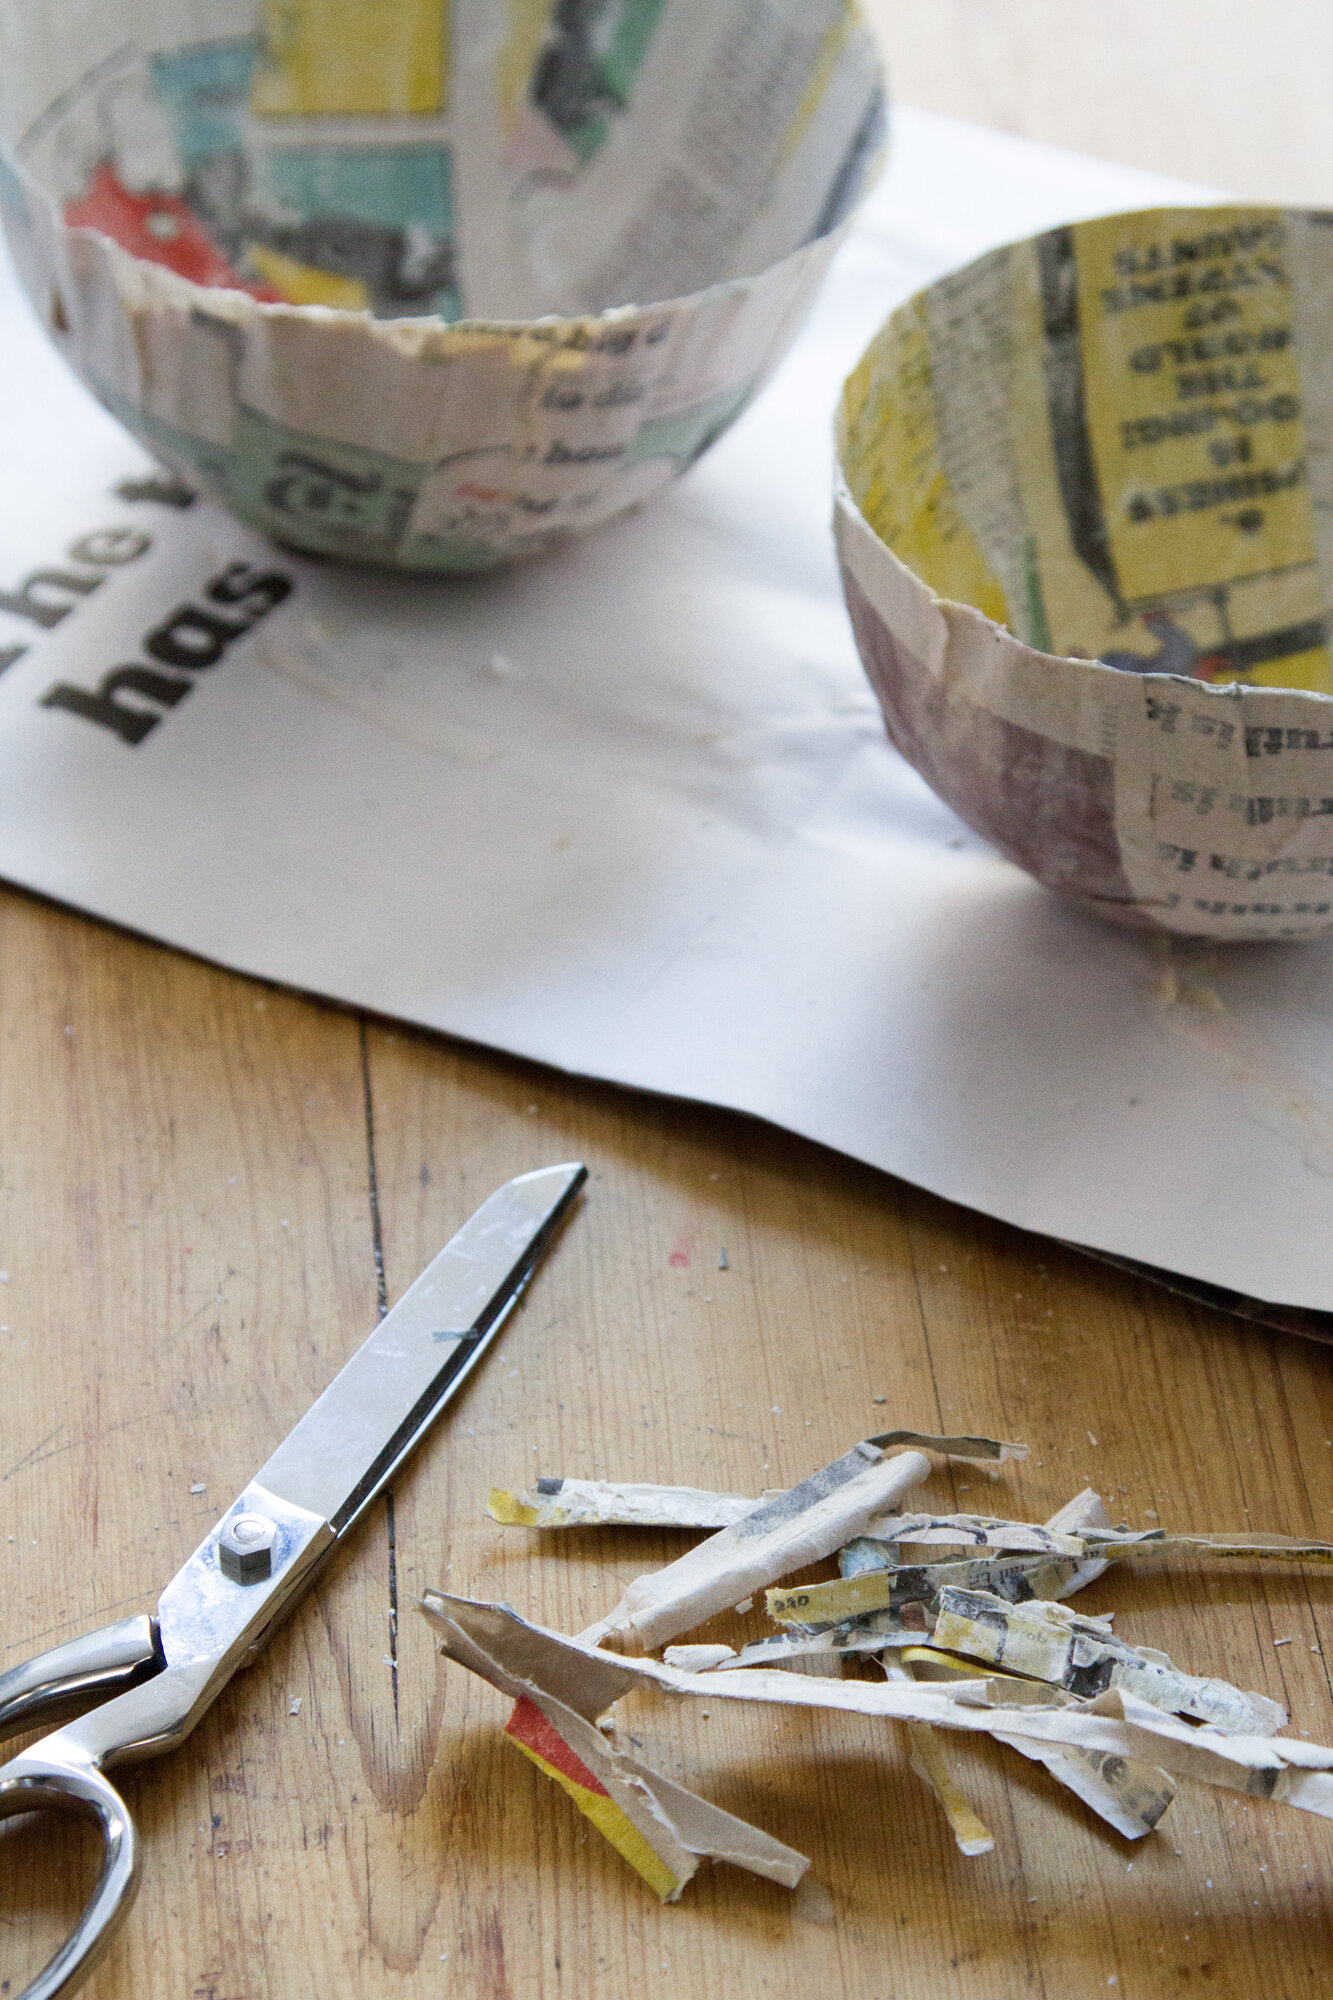
+ Trim edges (or not!) to your liking.
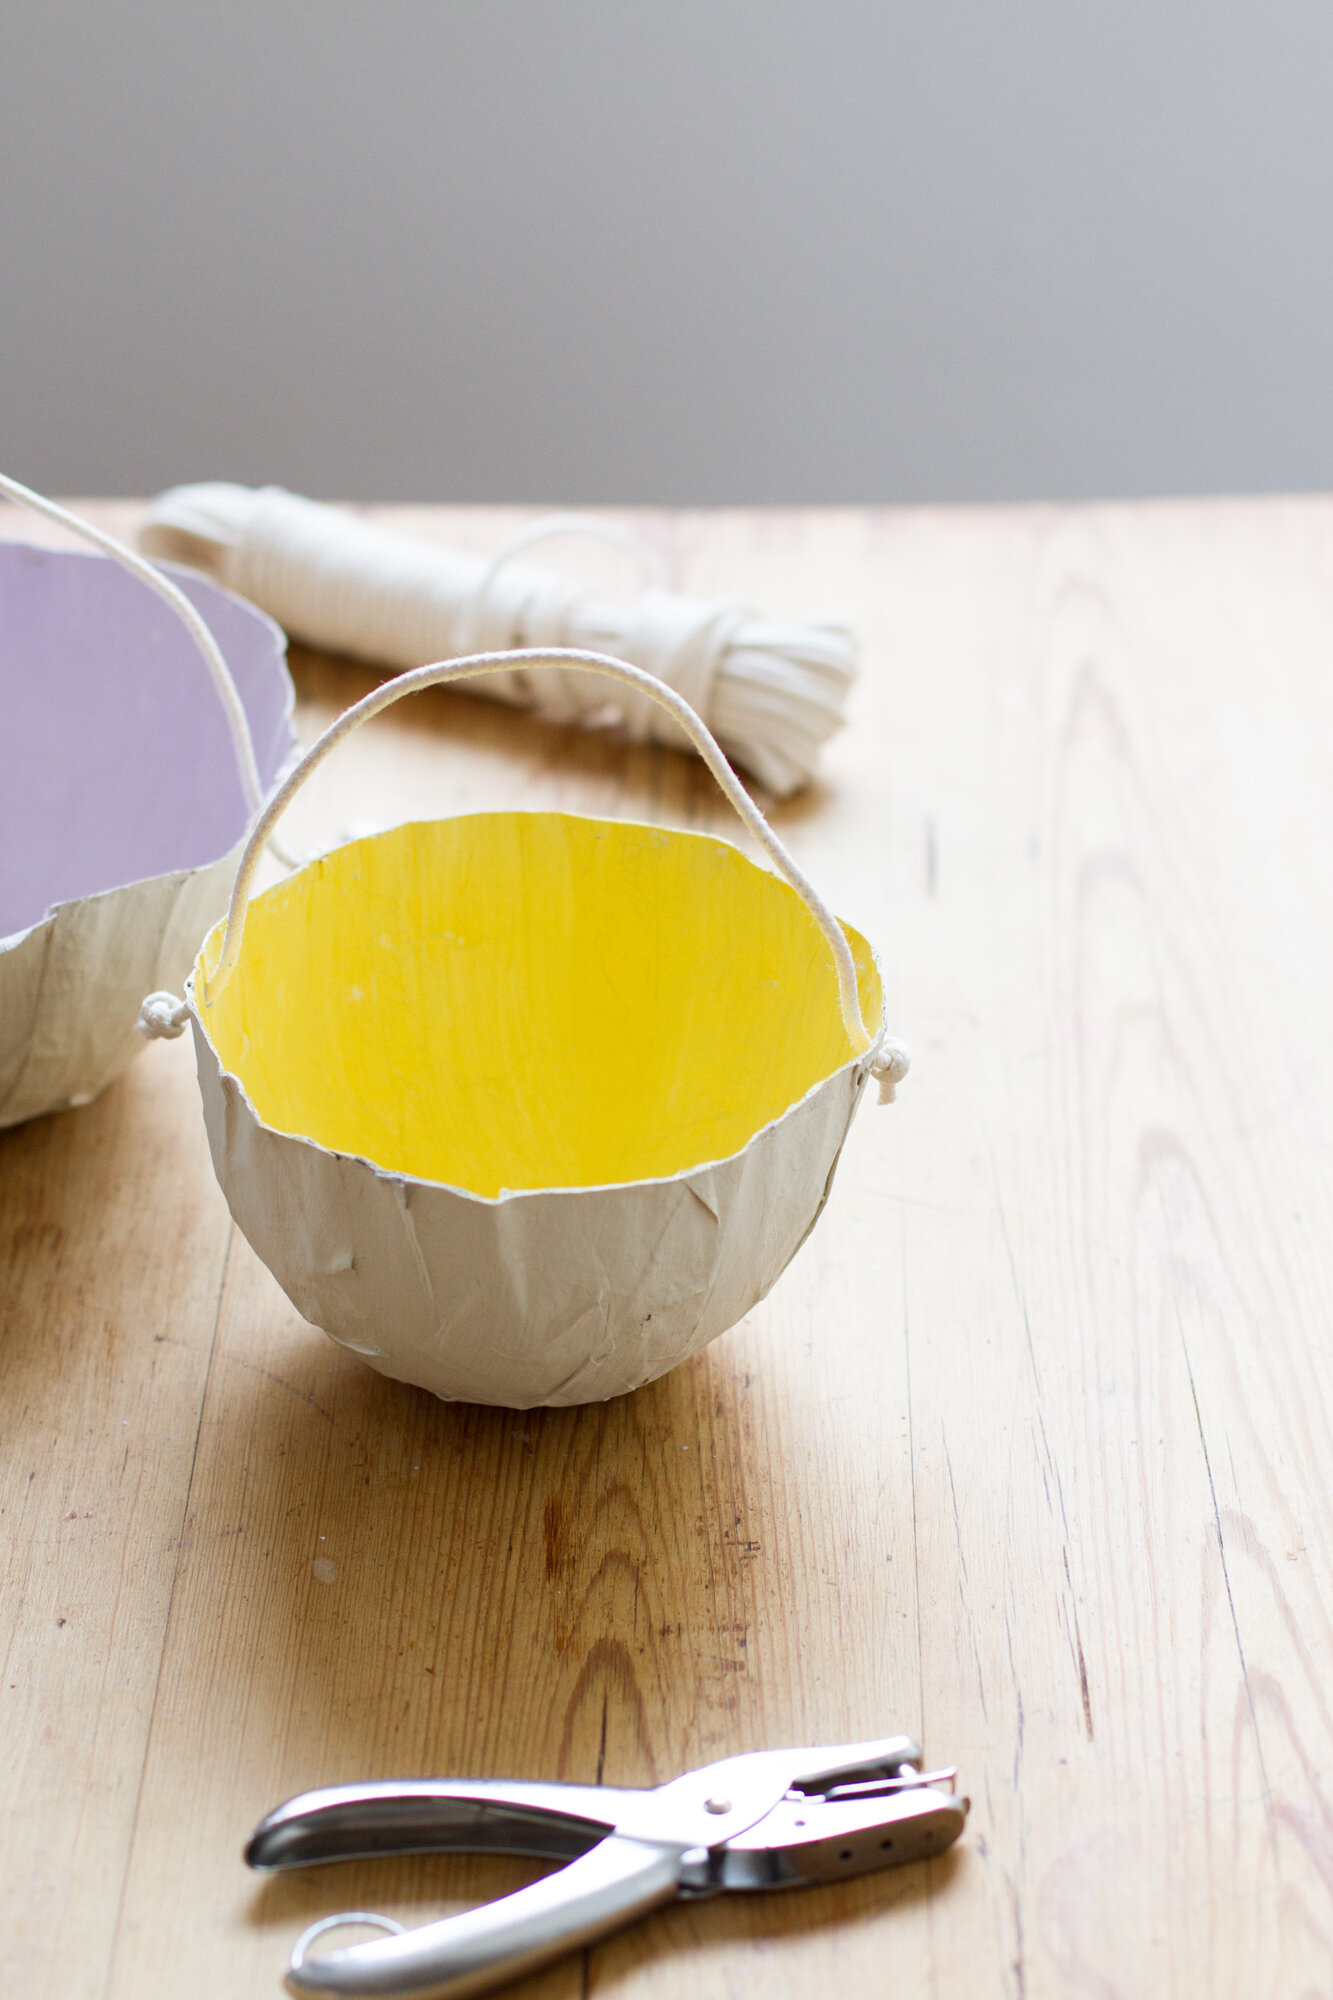
+ Using a hole punch, make two holes in opposing sides of the bowl.
+ Cut a length of cotton cord to make a handle. (I used thin cotton sash cord, which is slightly stiff and can stay upright on its own.) Knot one side of a piece of cord cut to your desired length. String the opposite end through the other hole and secure with a second knot. (Your knot can be on the inside or outside, as you wish!)
+ If you’d like to paint your bowl, start with the interior and finish with exterior. (I recommend painting and allowing the bowl to dry completely before affixing the handle)

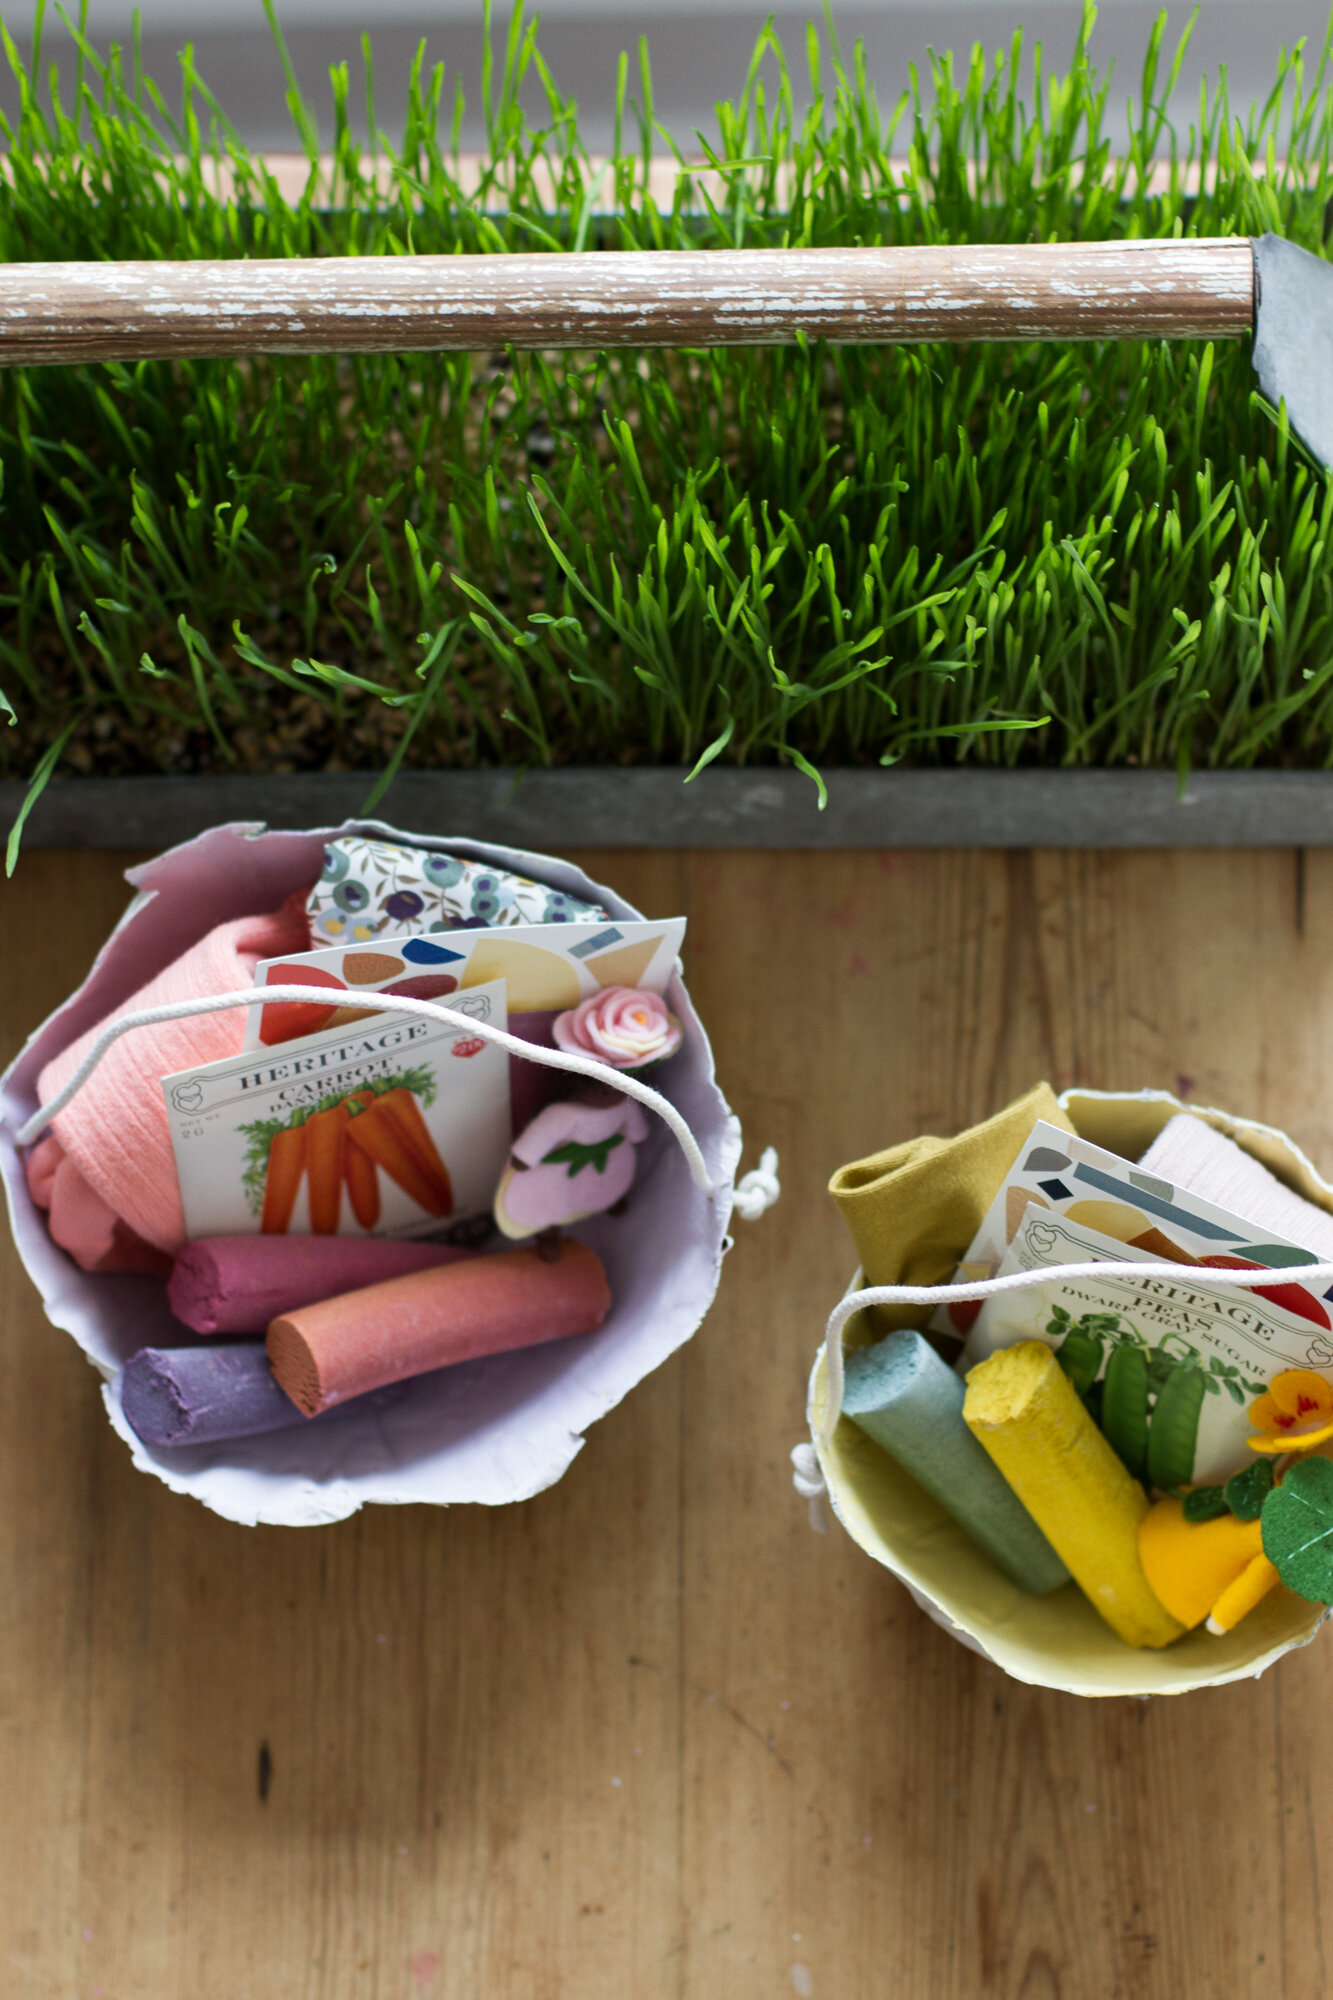
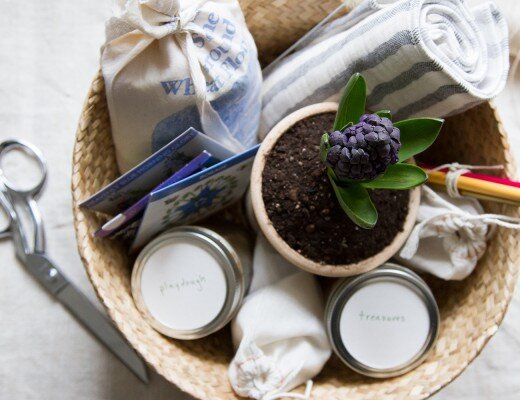
Stay tuned! Ideas for Easter basket goodies coming tomorrow!
PS. If you’re not into making bowls yourself—or you’d prefer something you can pour soup into—this post includes a few of my favorite bowls from RMTL sponsor, East Fork Pottery. You can find them alongside my other East Fork favorites. Use the code TEALEAVESFAVES for free shipping on your order. (Expires 4/15/2019; US shipping only.)
This post includes affiliate links, but is not sponsored. Reading My Tea Leaves might earn a small commission on the goods purchased through those links.

6 Comments
These are so pretty. Definitely going to make them tomorrow with my little guy. 🙂
So glad! Such a good project for little guys!
My son and I made these for him and his siblings today. Do you have any other suggestions for the handle on the basket? Trying not to buy anything new for this project 🙂
Truly any bit of string, ribbon, yarn, wire, or rope you might have would work!
I love the sunshine yellow one! Growing up in a hosehold where papier maché was used professionally (my mother and stepfather are puppet makers), I have always found that tearing the strips of paper works better than cutting it as they tend to blend and stick better. Just a little tip for those who want to try in the future.
Thank you!
Comments are moderated.