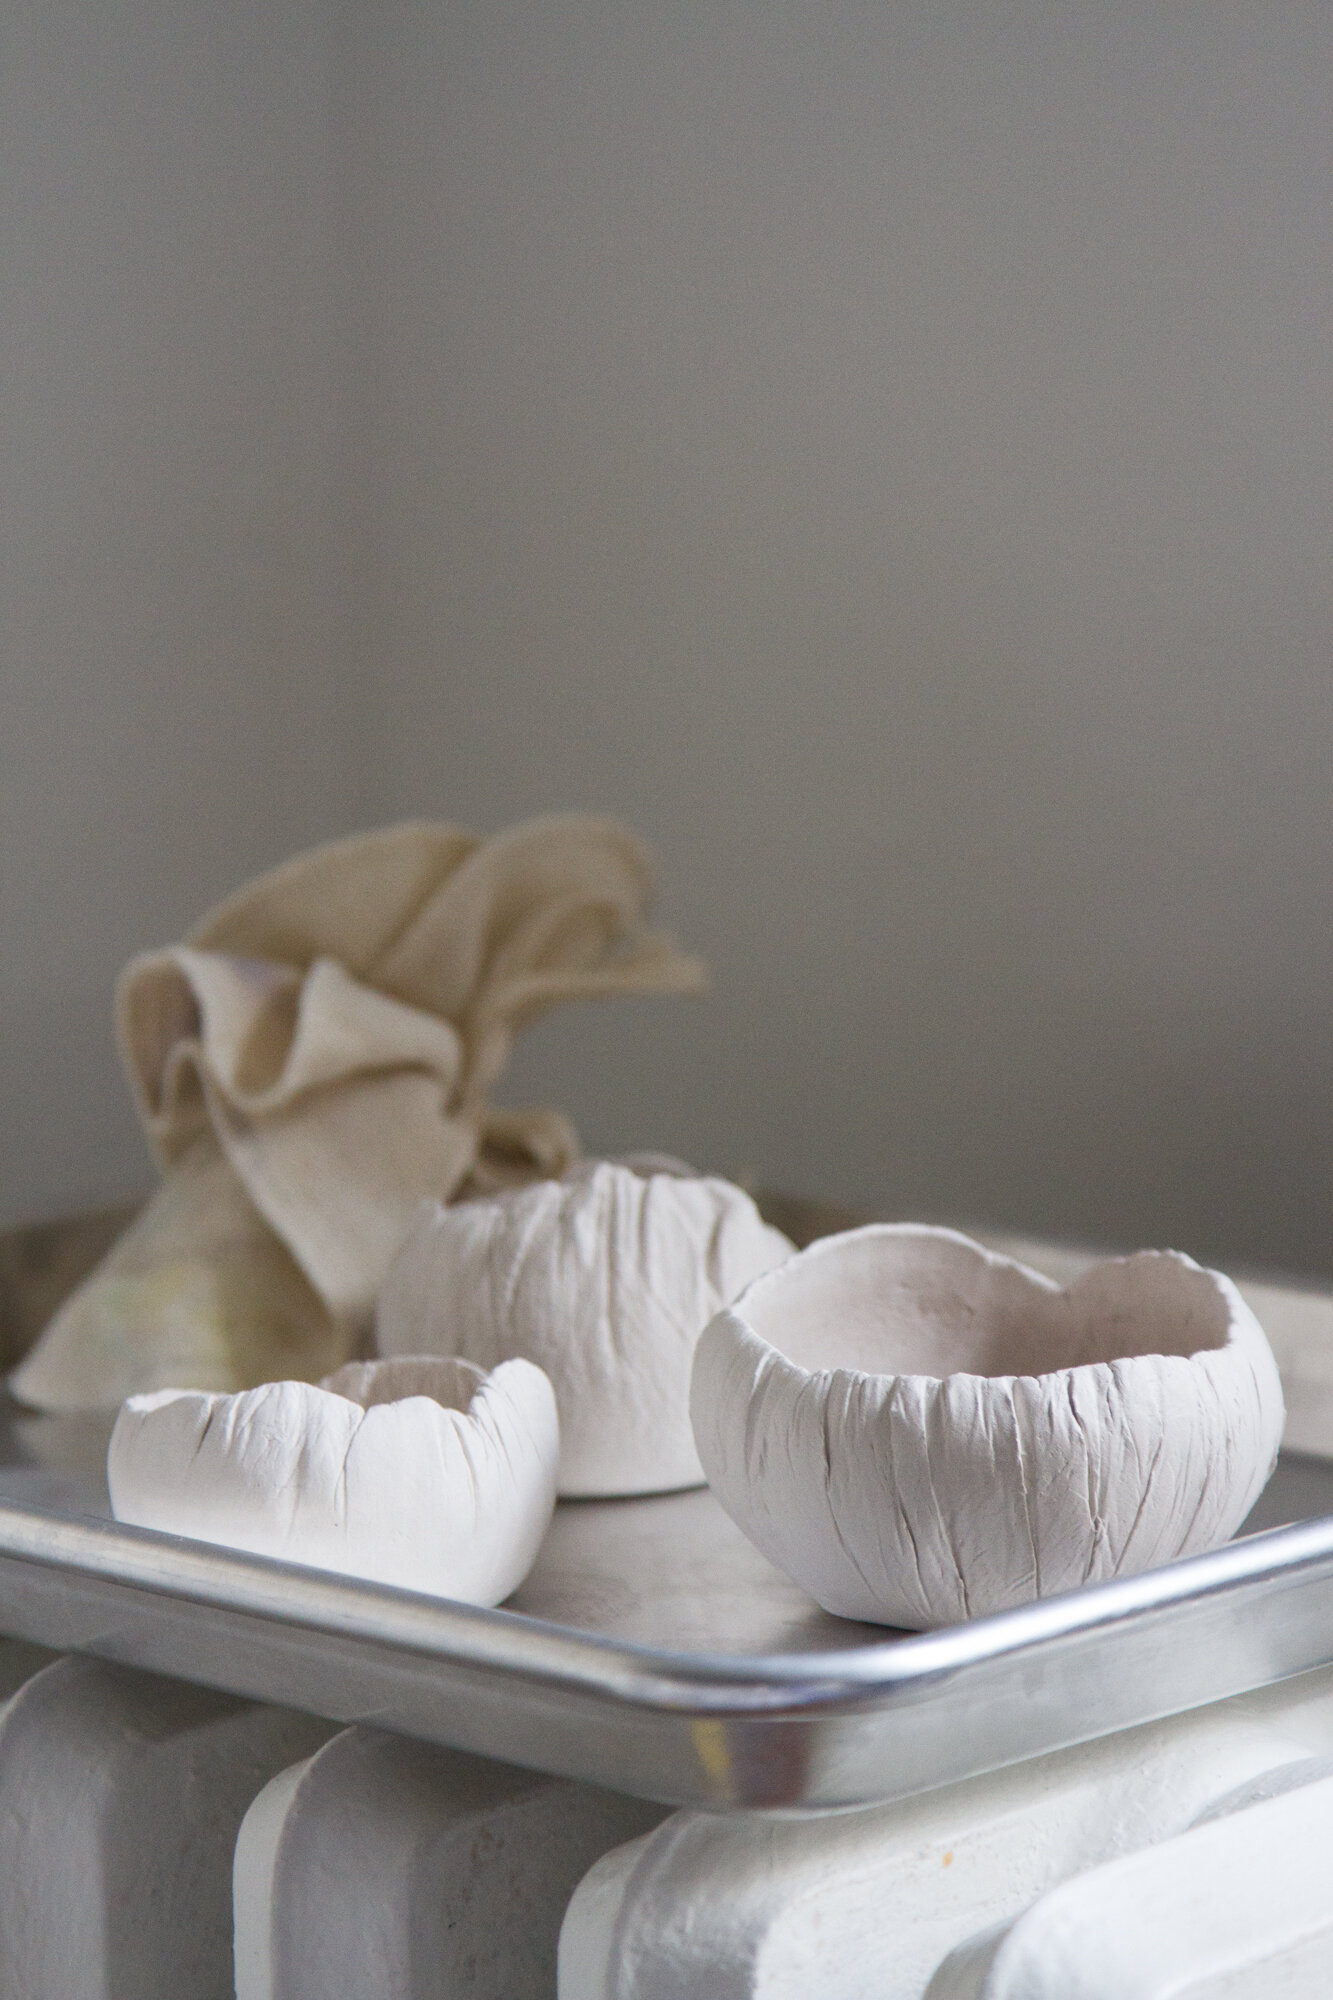
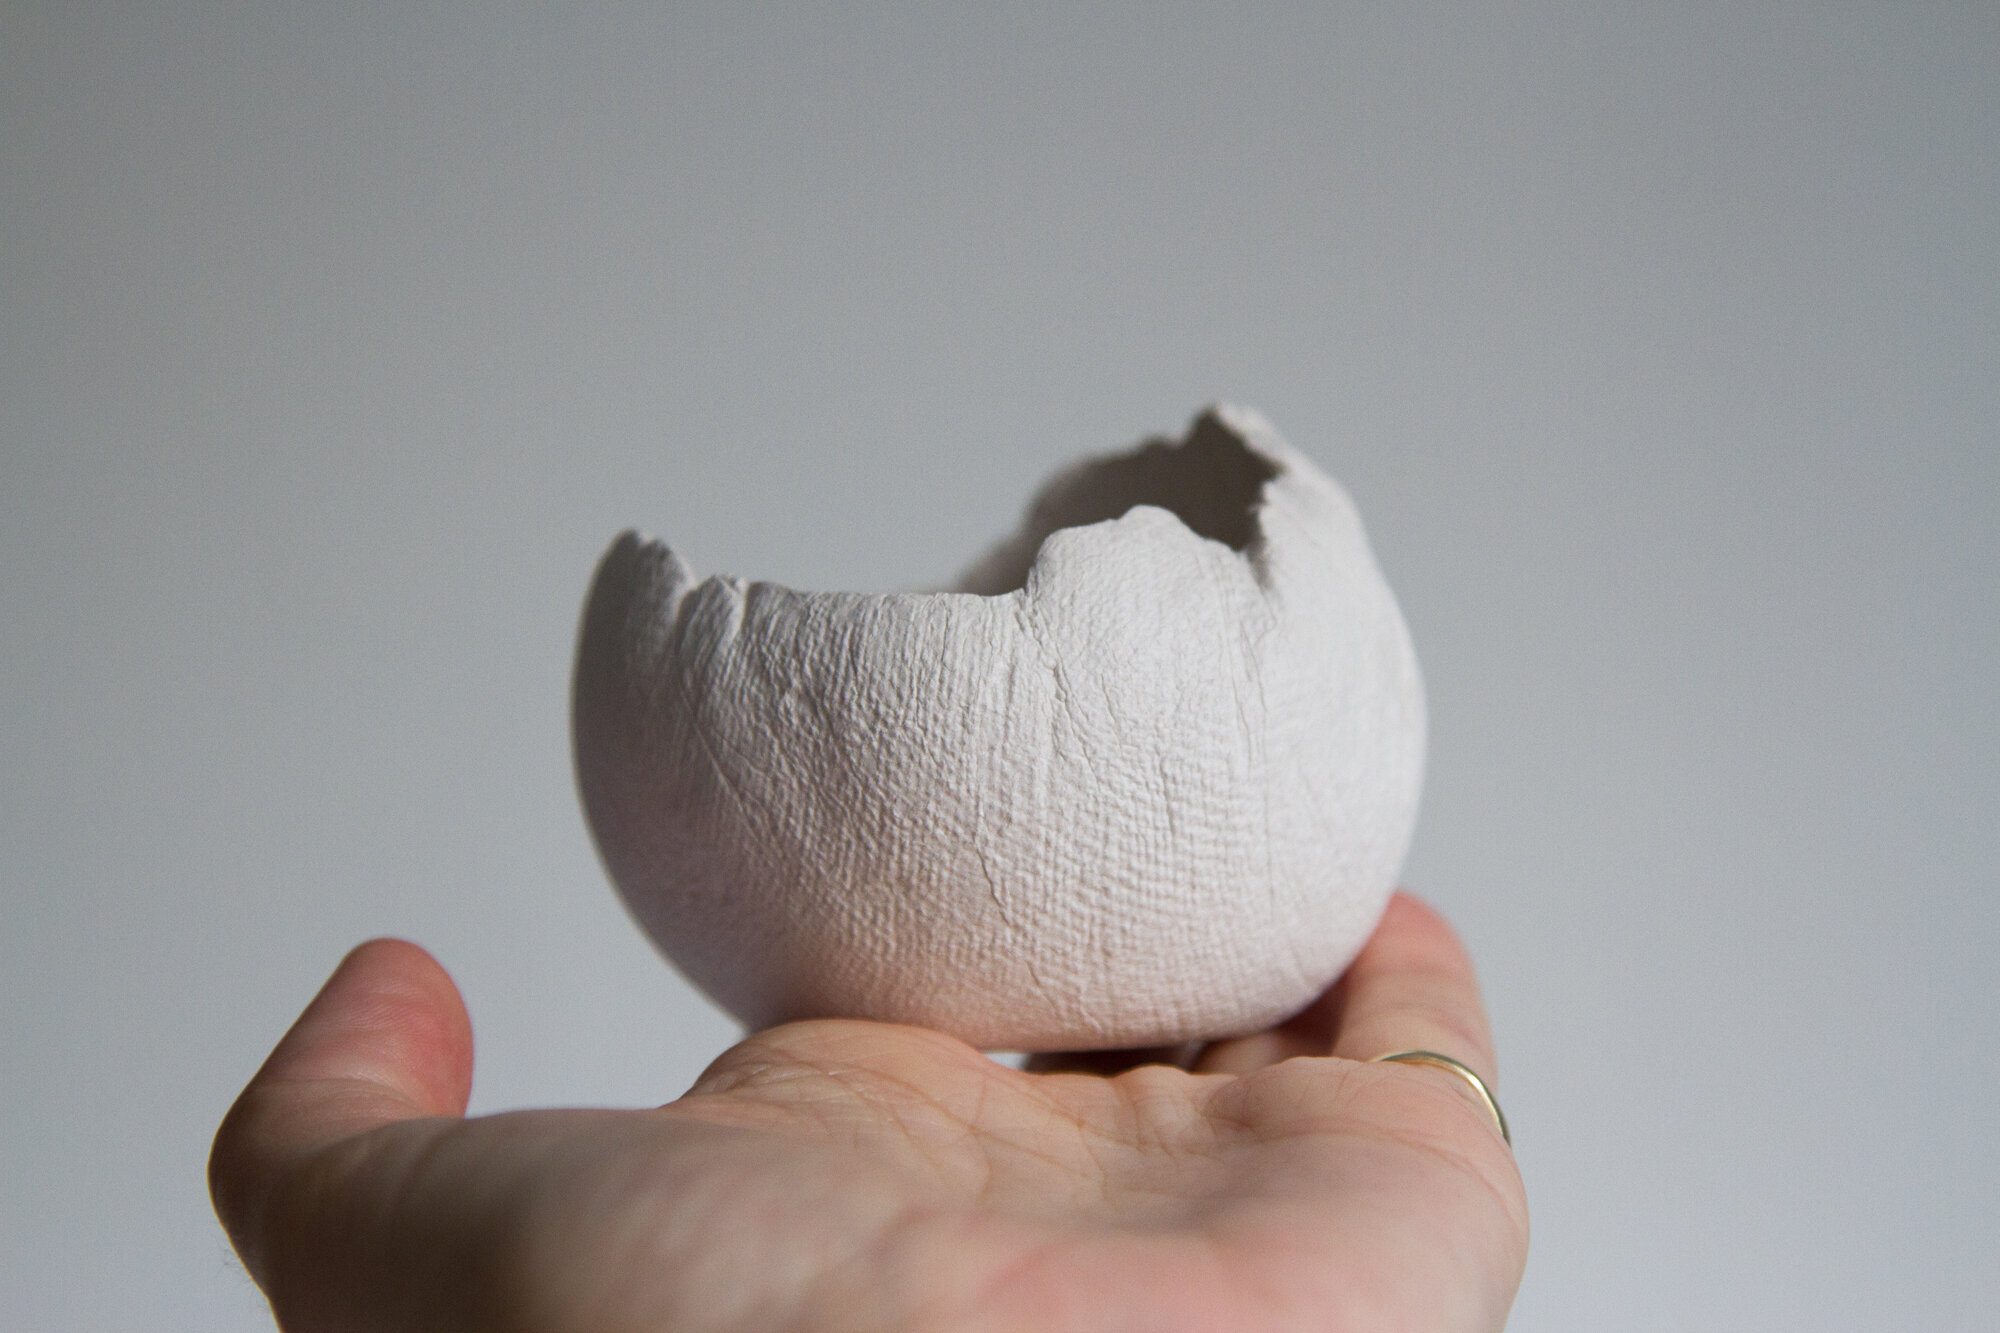
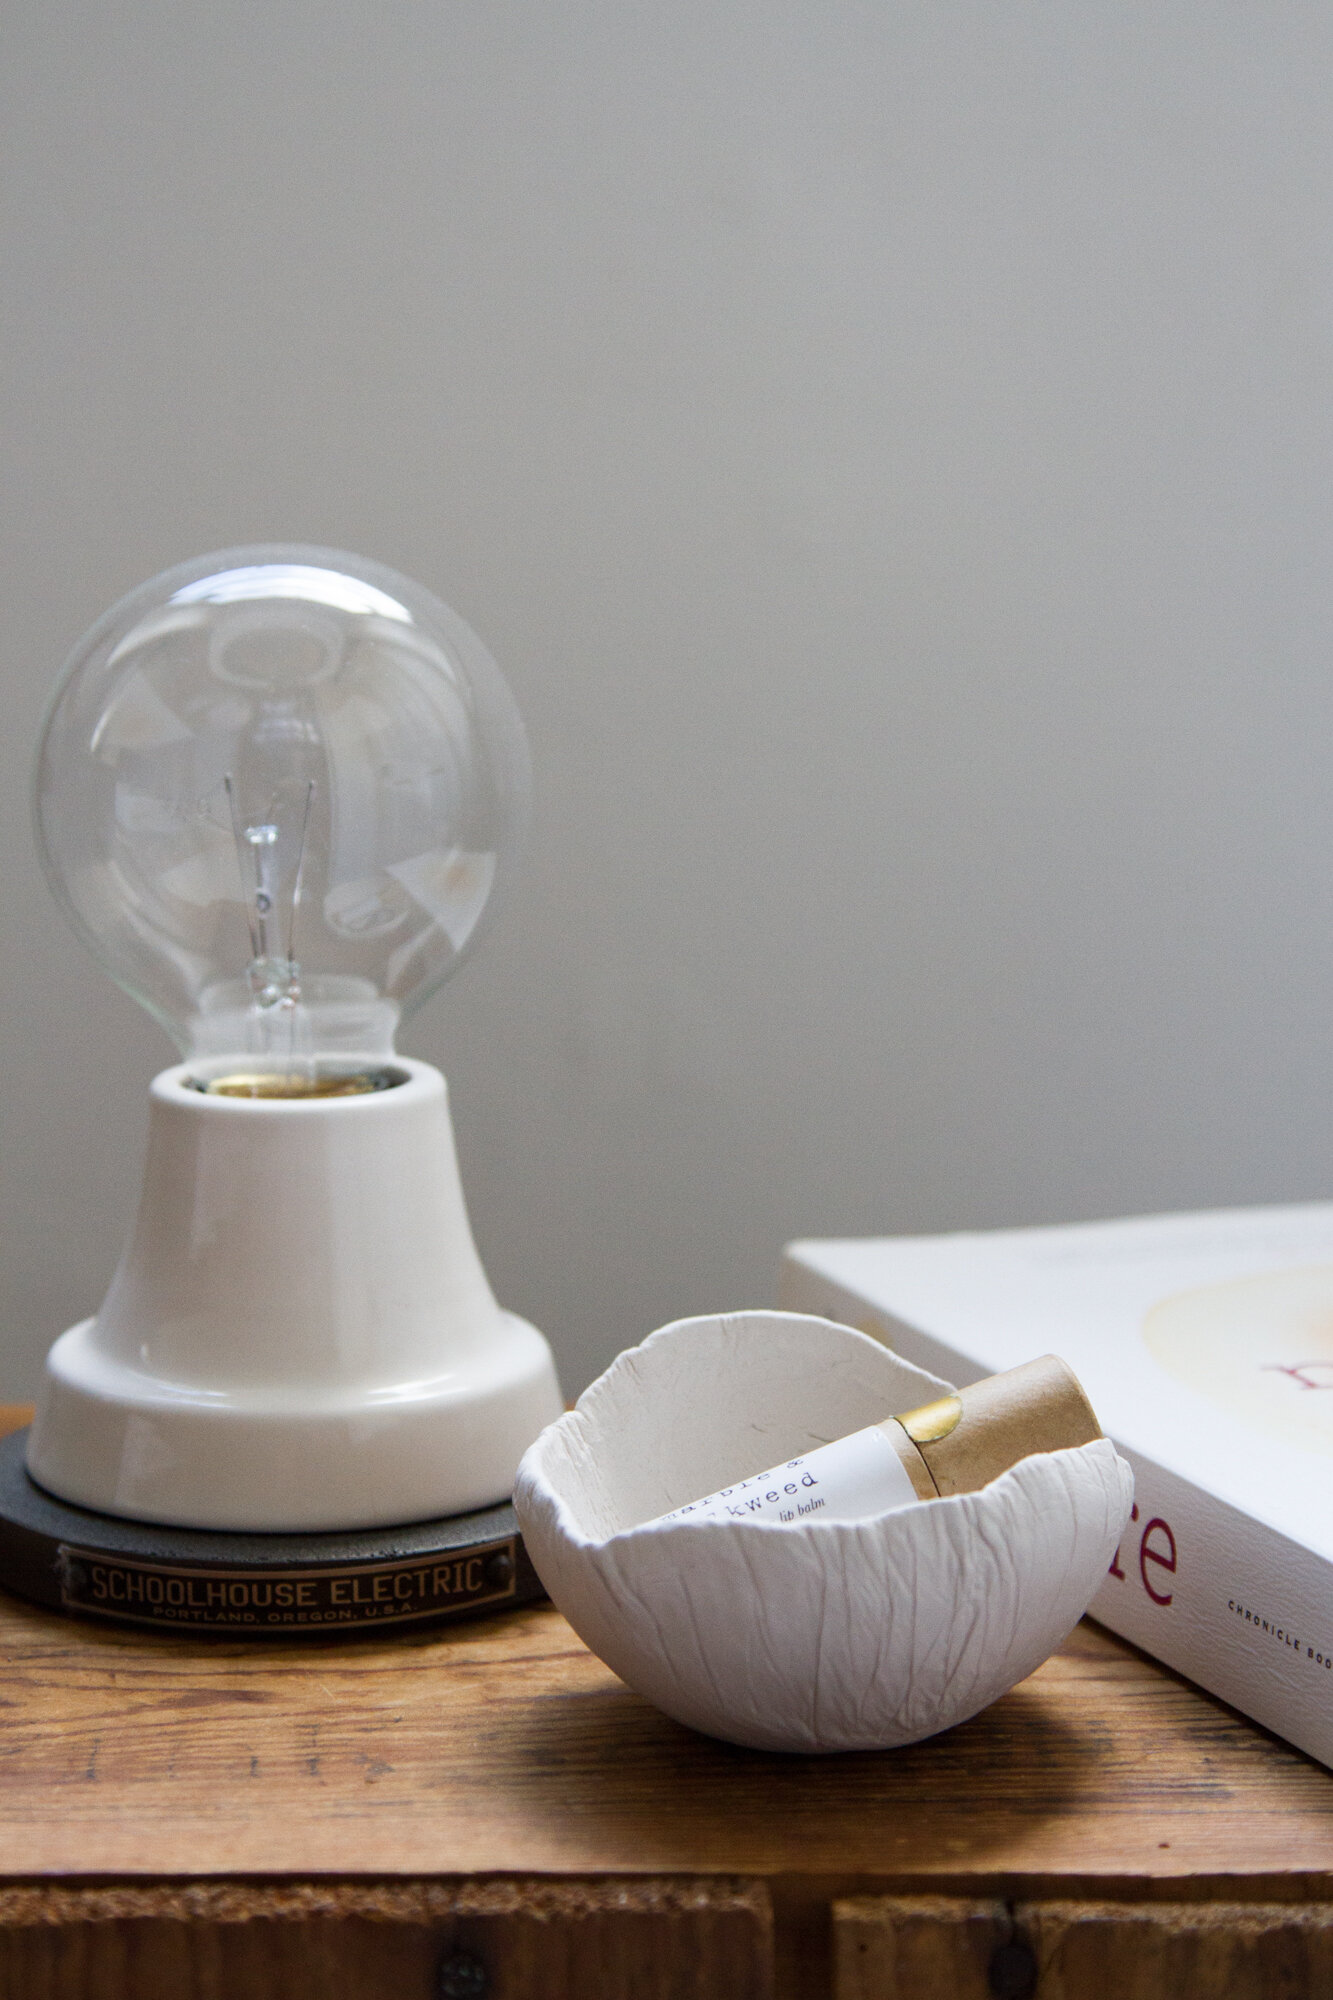
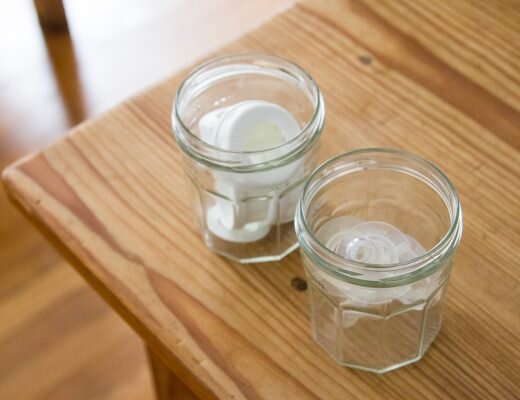
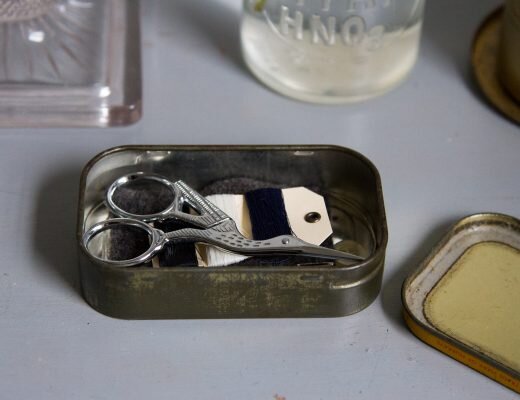
These clever clay catch-all vessels dreamed up by Rose Pearlman, remind me of barnacles in the very best way. And isn’t that fitting? On a dresser or shelf they can function in a similar way, filtering and safekeeping the good stuff—keys, and coins, and bobby pins—that might otherwise get swept away with the tide of household activity.
Rose writes, “every household has its own way of collecting and sorting belongings—books on a shelf, utensils in a drawer, toys in a basket—but the most challenging organization comes down to the tiny objects that get lost in a drawer or fall to the bottom of the toy bin. My solution to all the missing ear buds, vanishing hair ties, and collected acorns of the world are to gather them in small shallow containers, preferably ones that are pretty enough to have on a counter, small enough to fit inside a dresser drawer and durable enough to survive a toddler.”
In typical Rose Pearlman fashion, she came up with a simple, inexpensive, homemade version that achieves the purpose of clean, uniform treasure-catching, without falling into the trap of many at-home clay projects and looking too much like a kid’s craft.

For this project, Rose found DAS Air Hardening Modeling Clay to be the best material for its all natural, non-toxic, biodegradable ingredients, as well as its natural color, texture and durability. To keep the waste impact of this project low, she used biodegradable latex water balloons and a single sheet of plastic wrap to make all the vessels.
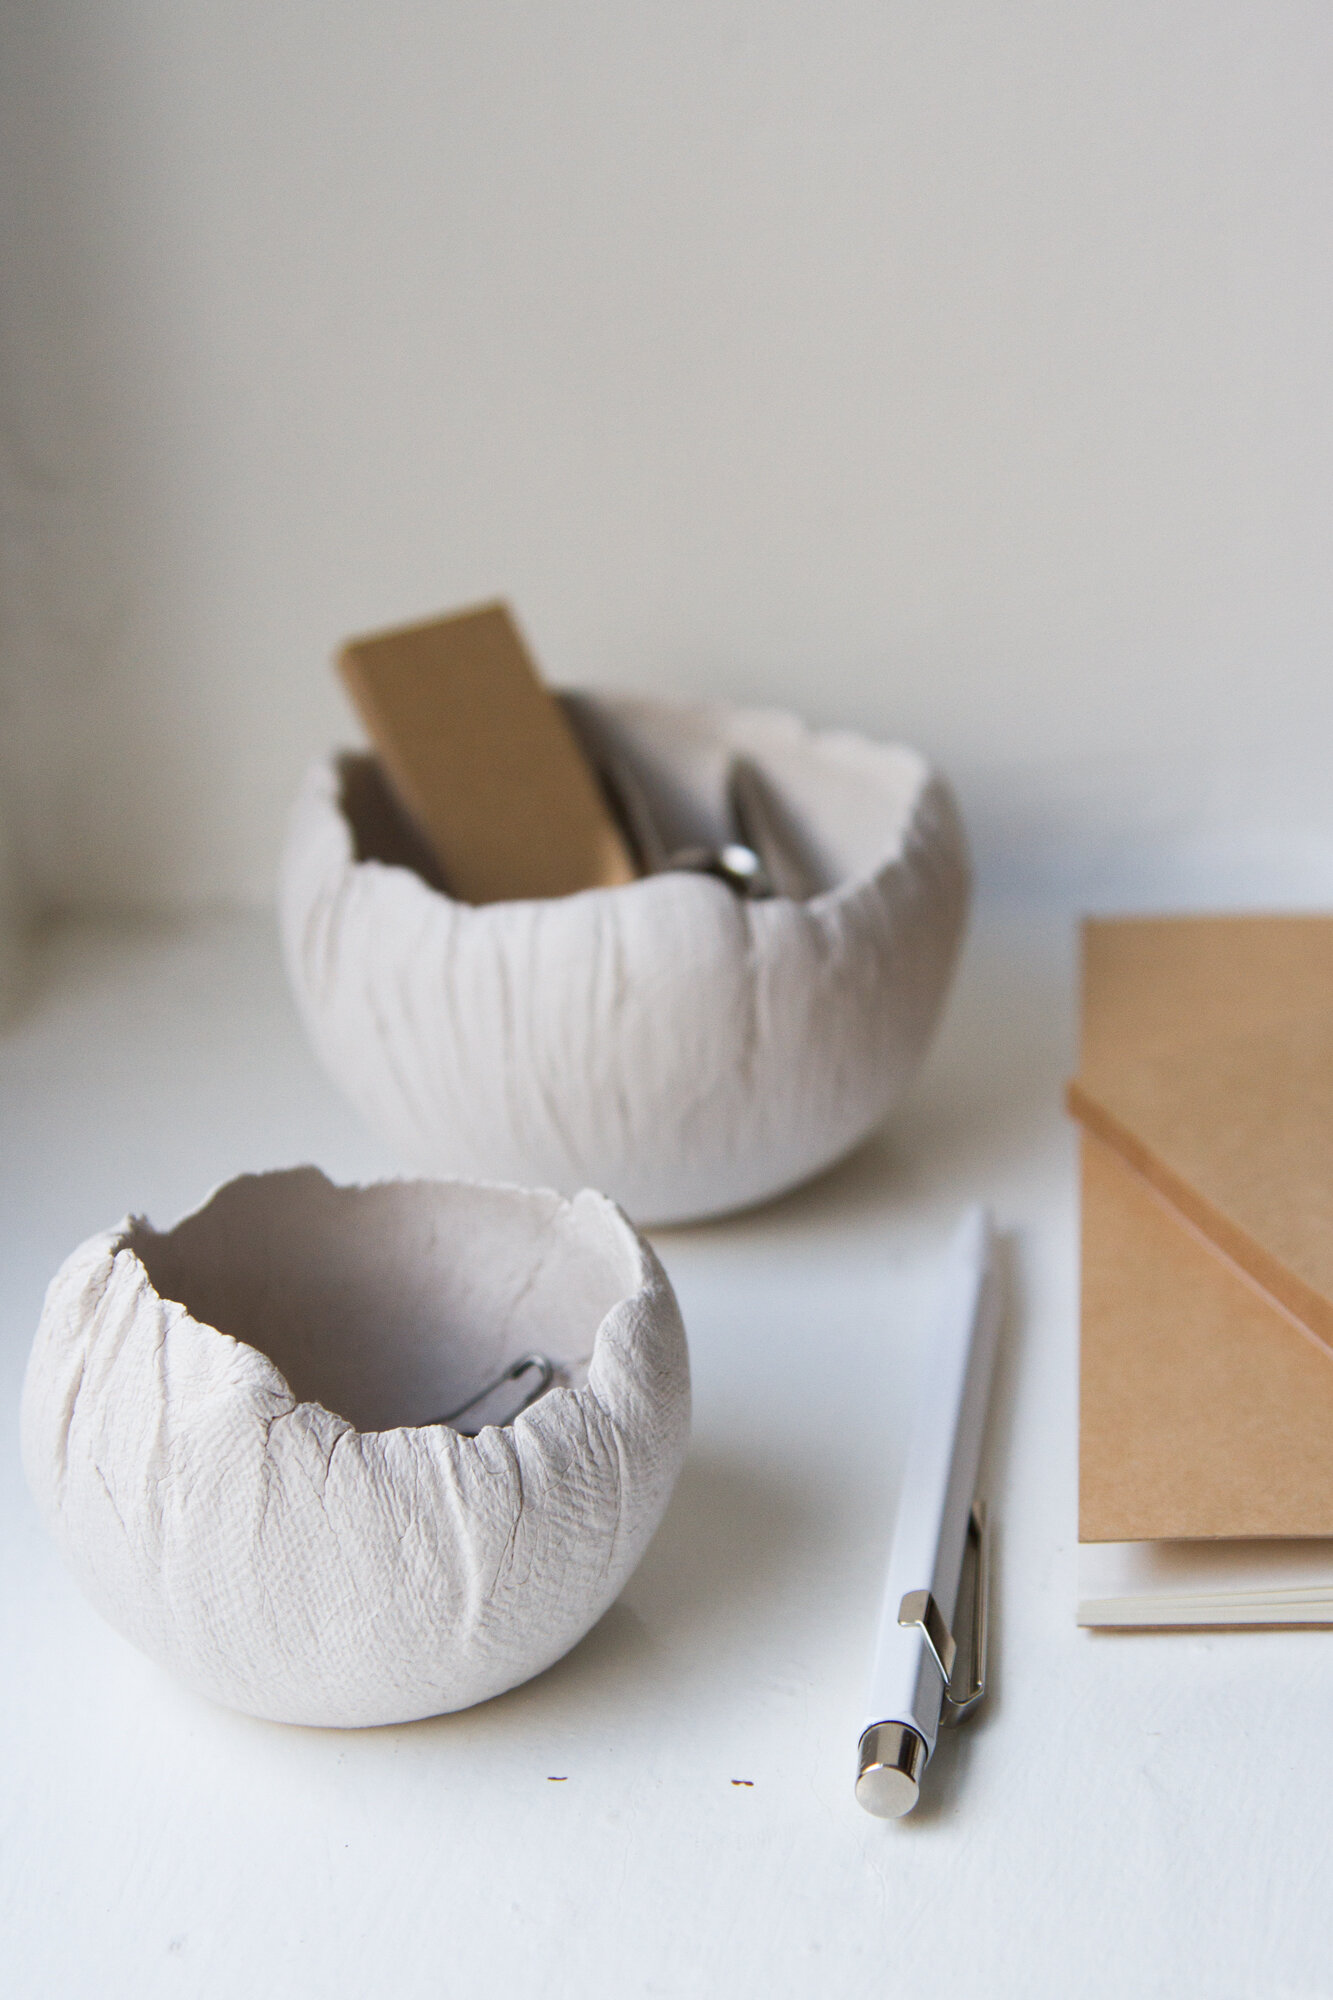
In making the vessels in my own home, I experimented with a few other workarounds to the disposable items, and found similar, though not identical, results. A bundle of lentils, I found could be gathered into a ball-like shape and used in place of the balloon. (This method worked best for the smallest bowls and it does result in a slightly flatter bottom and the kind of textured interior you might expect from pressing clay around a bundle of lentils. If you’d like a smoother look on the inside, you might try using flour or another fine pantry staple.)
I also experimented with using cloth in place of plastic wrap. For one of my bowls, I used a textured linen dish cloth to press the clay into a bowl shape and I really like the subtle pattern the linen left on the outside of the vessel. Overall, I concede that clear plastic and the balloon were undoubtedly the easiest materials to work with, in terms of being able to see the shape the clay was taking, working it into place, and achieving a rounded vessel shape. For those who might not keep plastic wrap stocked at home, I found that I was able to achieve the same effect using a cut-up piece of plastic bag that had come back with our laundry in lieu of plastic cling wrap.
All this to say, if you’re up for a bit of trial and error, feel free to experiment with alternative materials you have at home. If you’re feeling less certain, a balloon and a sheet of plastic wrap (or similar plastic film) make this project effectively foolproof. Step-by-step instructions and photos from Rose are below.
Materials:
+ DAS Air Dry Hardening Modeling Clay in white
+ Plastic wrap or film (a single sheet can be used multiple times)
+ Biodegradable Latex Water Balloons
+ Rolling pin or wooden dowel (optional)
Directions:
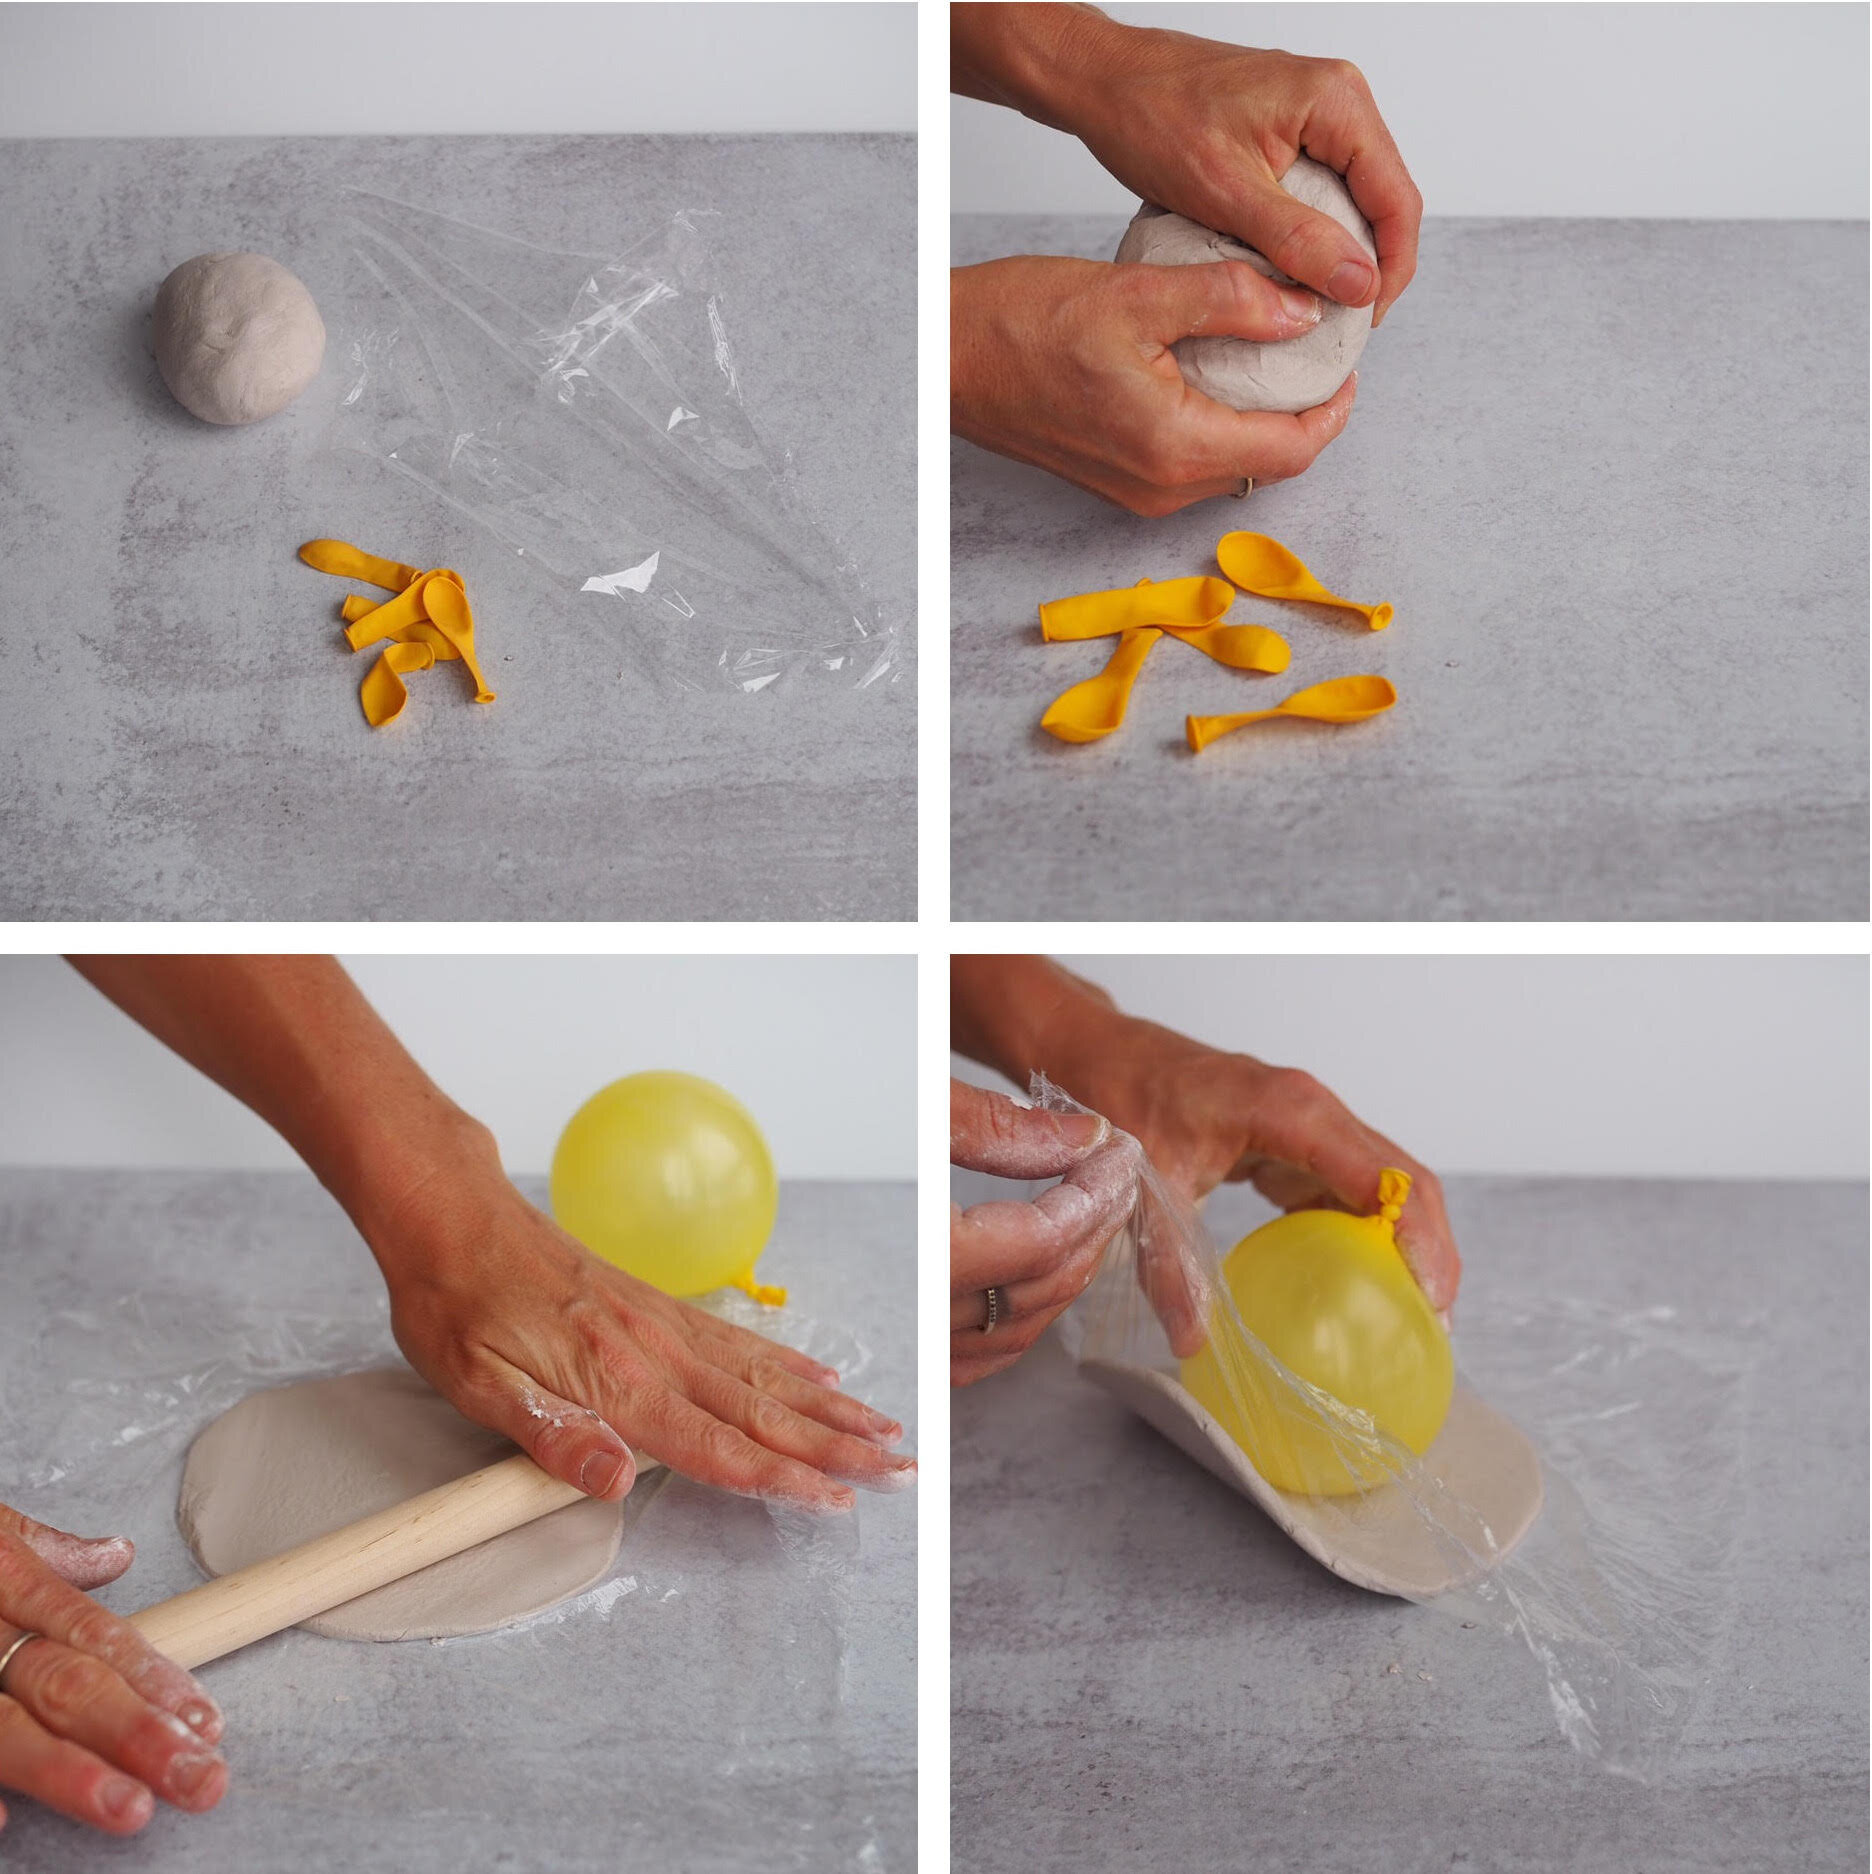
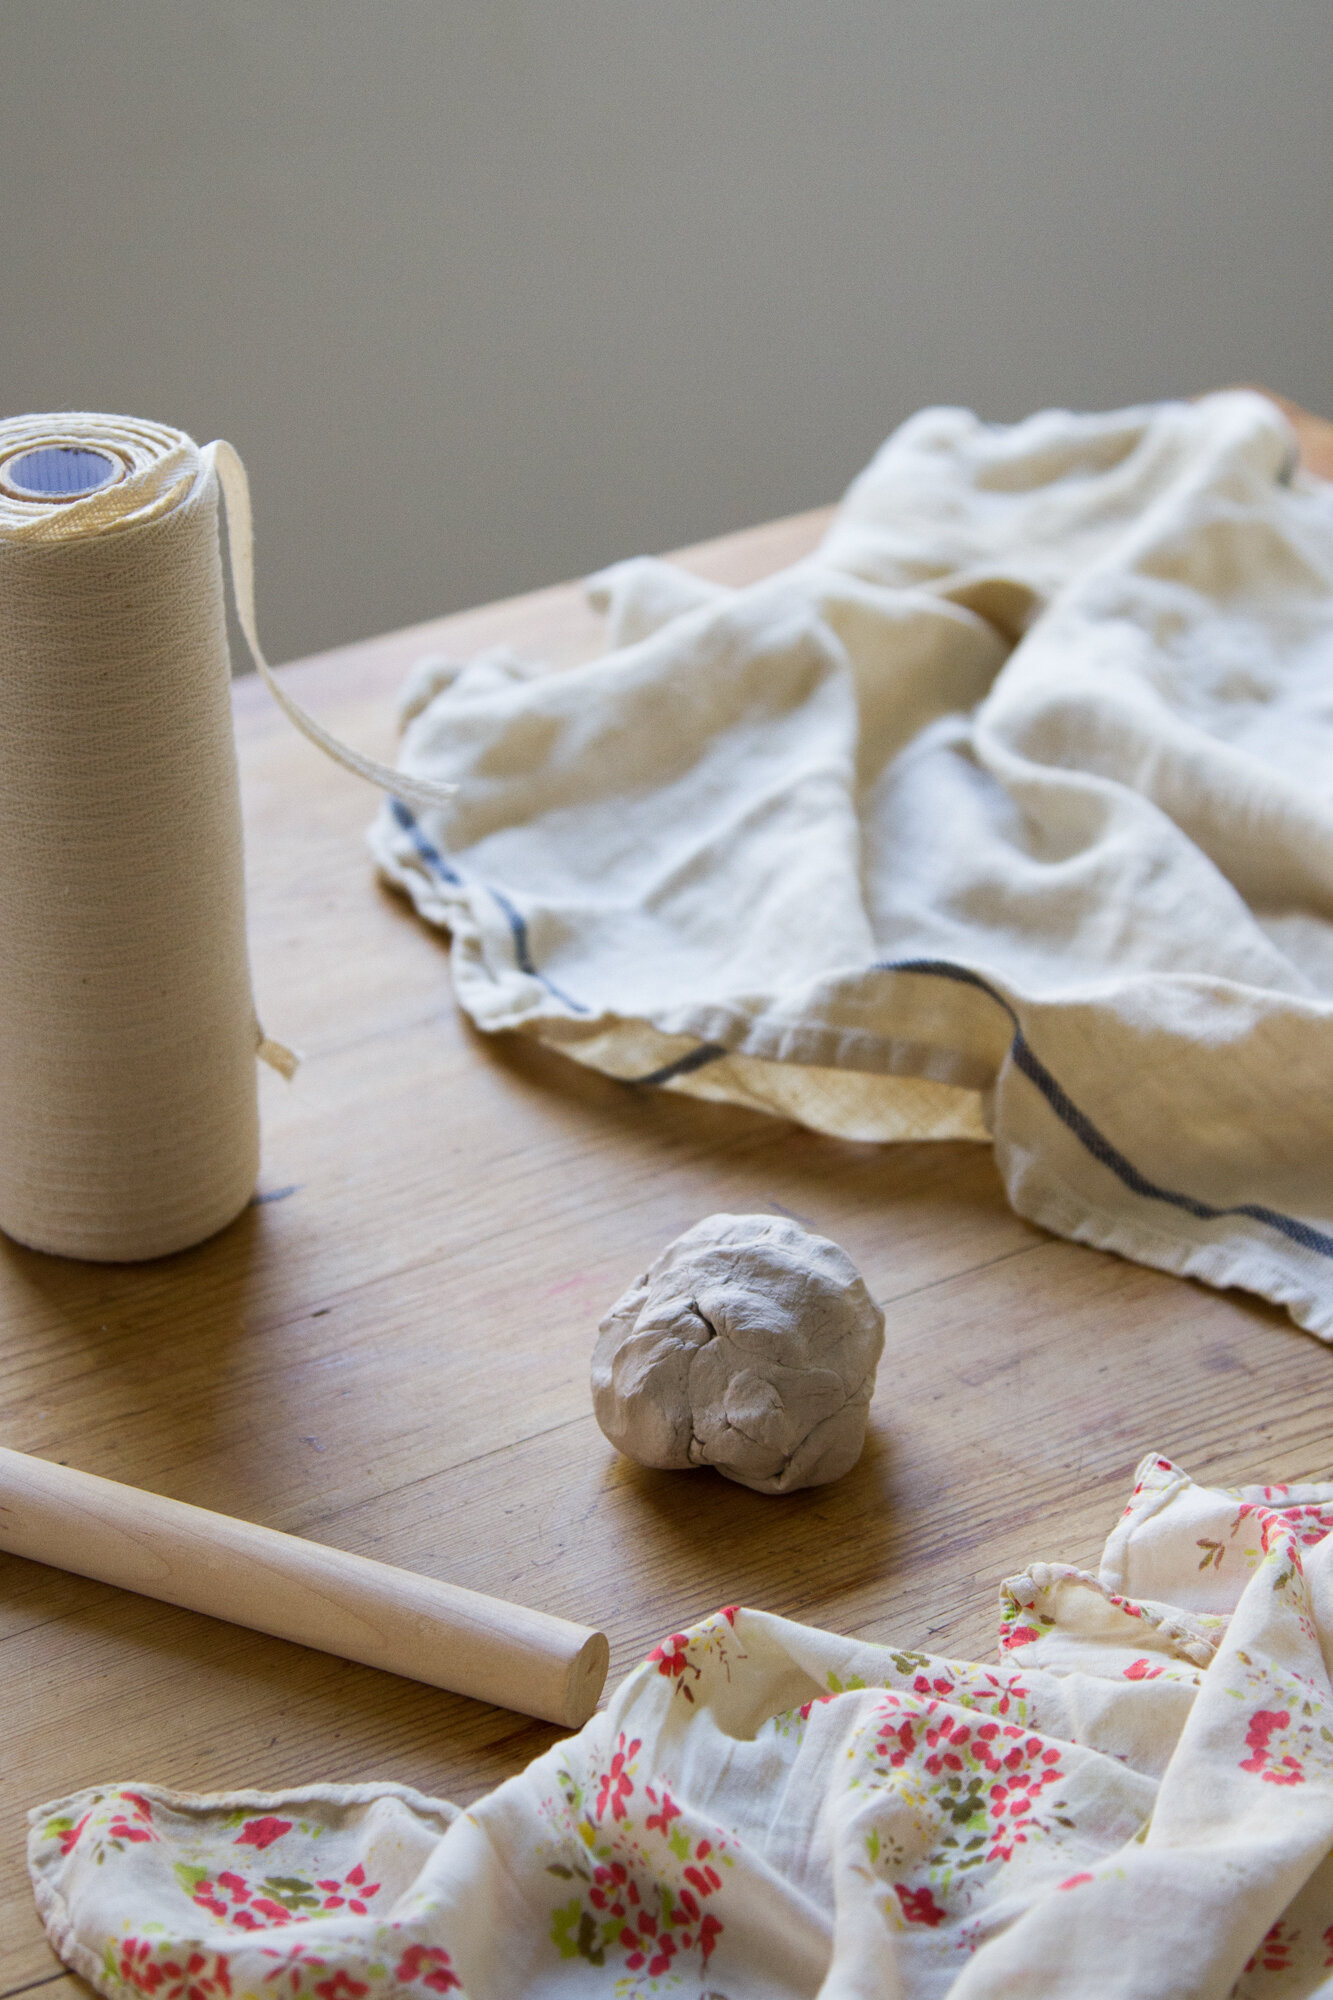
+ Soften a large handful of DAS clay, working it between two hands and forming into a round ball.
+ Flatten the clay ball using the palm of your hands to form a round disk. Continue to press the clay outward making the circumference wider. You can use a rolling pin if desired but do not roll it out too thin.
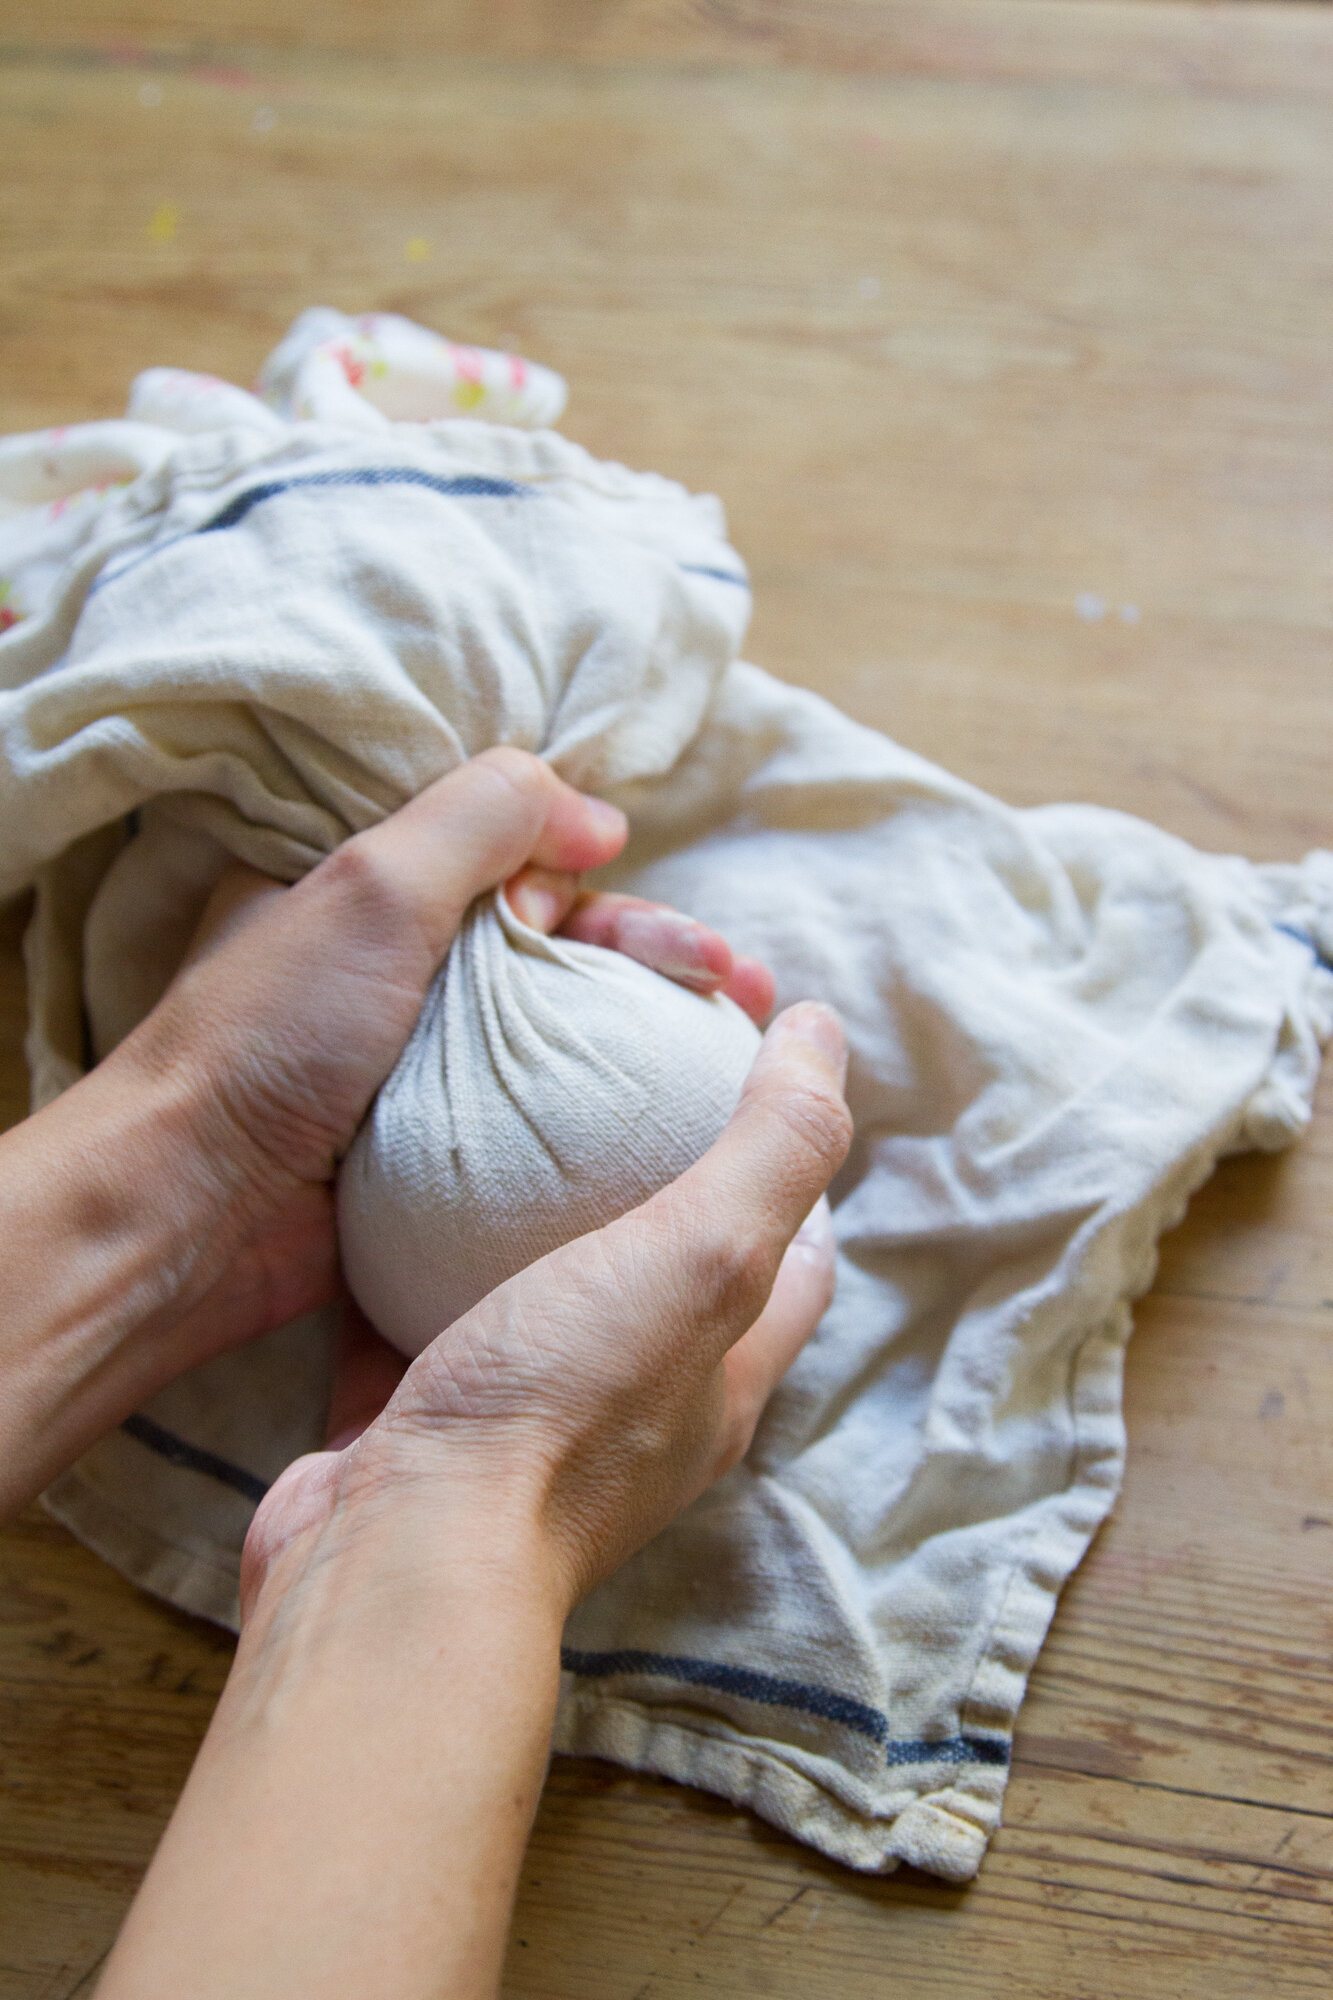
+ Blow up a water balloon but not to its maximum capacity; leave at least ¼ empty.
+ Cut off a piece of plastic wrap that will cover the balloon completely.
+ Place the clay disk in the center of the plastic wrap and the balloon on top of the center of the clay with the knot side of the balloon facing up.
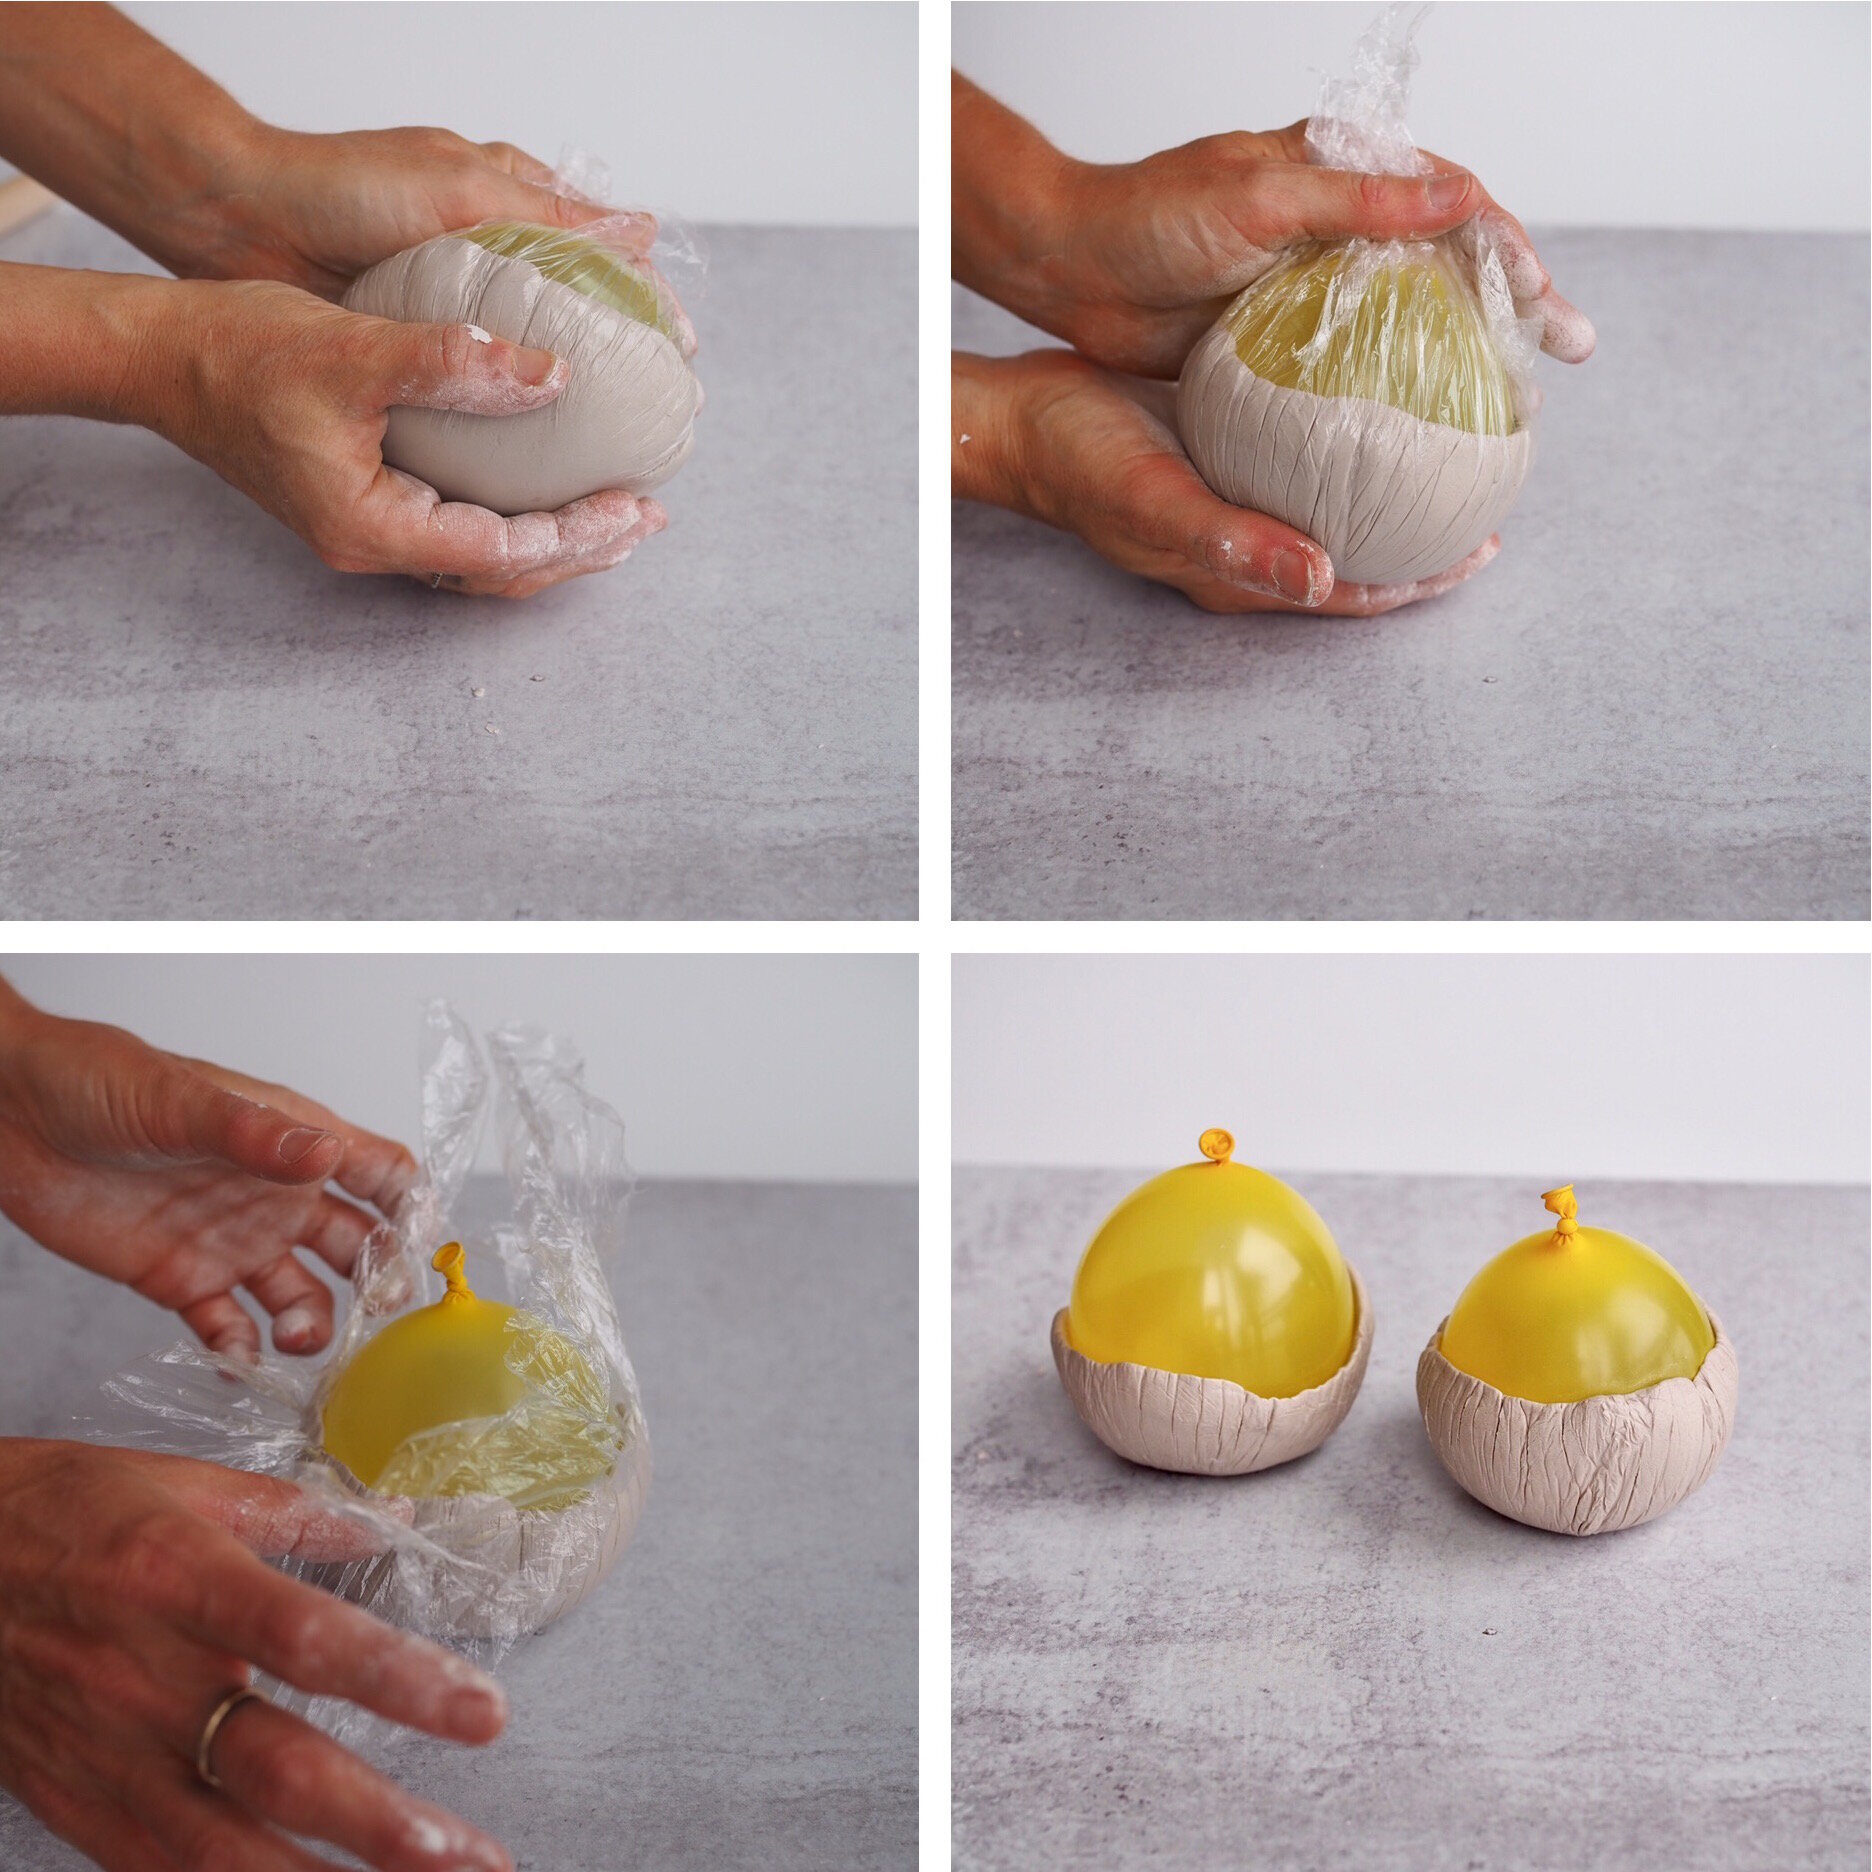
+ Bring the sides of the plastic wrap up over the balloon and twist the plastic at the end over the balloon.
+ Use your fingers to press the clay upward towards the tied end of the balloon, working around the balloon evenly.
+ Once you are happy with the size of the vessel, gently remove the plastic wrap.
+ Place the clay wrapped balloon somewhere safe to dry. Given the sun exposure and the thickness of the clay, it can take a few days to become completely dry. The balloon will naturally deflate over time or you can gently remove it when the clay becomes solid.
+ Once the balloon is removed, turn your vessel upside down to let the bottom dry out completely before using.
Thanks to Rose Pearlman for developing this project, writing the instructions, and capturing the imagery. Rose is an artist, teacher, and textile designer. With a background in fine arts and a love of well designed functional objects, her creations blur the lines between art and craft and pushes the boundaries with non-traditional techniques and materials. Rose teaches monthly rug hooking workshops in and around her home in NYC, and also welcomes commissions for one of a kind constructions in decor and home furnishings. Her work has been featured in fiber magazines, galleries, and numerous online design sites. Her new book Modern Rug Hooking comes out December 3, 2019 and is currently available for preorder wherever books are sold. She lives in Brooklyn, NY with her family.
Step-by-step process photos by Rose Pearlman. All other photos by Erin Boyle.
This post includes affiliate links. Reading My Tea Leaves might earn a small commission on the goods purchased through those links.

19 Comments
It looks amazing! Good job!
These are so pretty! Really enjoying this series. I can imagine these as good holiday gifts too. I did have one question: have you (or Rose) tried making these with holes on the side? I’m wondering if the clay is strong enough to work as a kind of hanging basket (to hold a plant or something else).
Totally! They’re so pretty and it’s so, so simple to make a whole bunch of them relatively quickly!
Oops! Reading too fast! Not sure about the hole! I imagine it would hold well depending on how thick you leave the clay and where you position the hole (and what kind of thing you’re hoping to hang in it), but Rose has used the clay more often than I have and might have a better sense!
As a potter, I would recommend against using this type of clay for plants unless you were going to keep it in another container and remove it for watering. I don’t think this clay holds up well to moisture.
Agreed! Reading too fast…again. A plant that doesn’t require soil like a tillandsia, would be great here! But these little vessels aren’t water-tight and are best used for the kinds of bits and bobs mentioned in the post!
Oh thanks to you all for the replies! I was thinking of an air plant—maybe I’ll experiment with holes and get back to you!
I love these types of hand done bowls. So sweet to have around! I’m a potter who wheel throws for a living but I have a small set of bowls that I made years ago in a similar way: draping a slab over a rounded form, and they are my favorite. We use them for dessert bowls (they are glazed and fired stoneware) and catch alls.
For alternatives to balloons, a stemless wine glass would have a similar shape. Would be worth a shot!
So great! A wine glass would the be right shape (ditto a pear, which I also considered using), but I can’t think of how it would work to remove a solid form from the narrower opening at the top! Lentils or flour work because you can untie the bundle and pour out the contents!
ah, I see the conundrum! I probably would dust with cornstarch and not mold the clay very tightly to the shape or too far down the tapered part (just use the bowl shape at the bottom). Then remove it when it’s stiffened enough to hold it’s shape but not so tight that it can’t be wiggled off. But I’m not familiar enough with this type of clay to know if that’s doable. The lentils or flour in a tea towel is genius anyway!
So lovely! But how on Earth do you get the clay so smooth. Do you as water or just work it for a long time? I’ve had trouble with the das air clay constantly cracking or not binding when even trying to make a ball Thank you and such a wonderful idea x
Didn’t use any water! Didn’t feel like I worked it for too long either, but I did try to work until the ball was pretty smooth!
These techniques used regularly with polymer clay are quite the thing and have been for a very long time. They’re pretty and you’ve done a nice job in your adaptation
Coolio.
I bet you could shape it around a pomegranate or an apple too!
Sure! Just the same thing to keep in mind as with a ball or pear or any other hard object…you won’t be able to have the same tapered top because you wouldn’t be able to remove the object from the hardened clay. The balloon and/or tied bundle work so well because the balloon deflates and the bundle can be opened and poured out to remove after the clay dries!
I made these as gifts several years ago! Used a stamp and ink pad we already had in a fun colour to stamp a repeating pattern into the clay when it was flattened out and then gently moulded them around a few small trinket bowls I already had. Fill with a few pieces of candy or some compostable (unbleached) packets of tea and voila!
How many bowls will one bar of clay make? (Clearly I recognize it depends on size, but this water balloon size, roughly.)
I made 13 with one bar.
Comments are moderated.