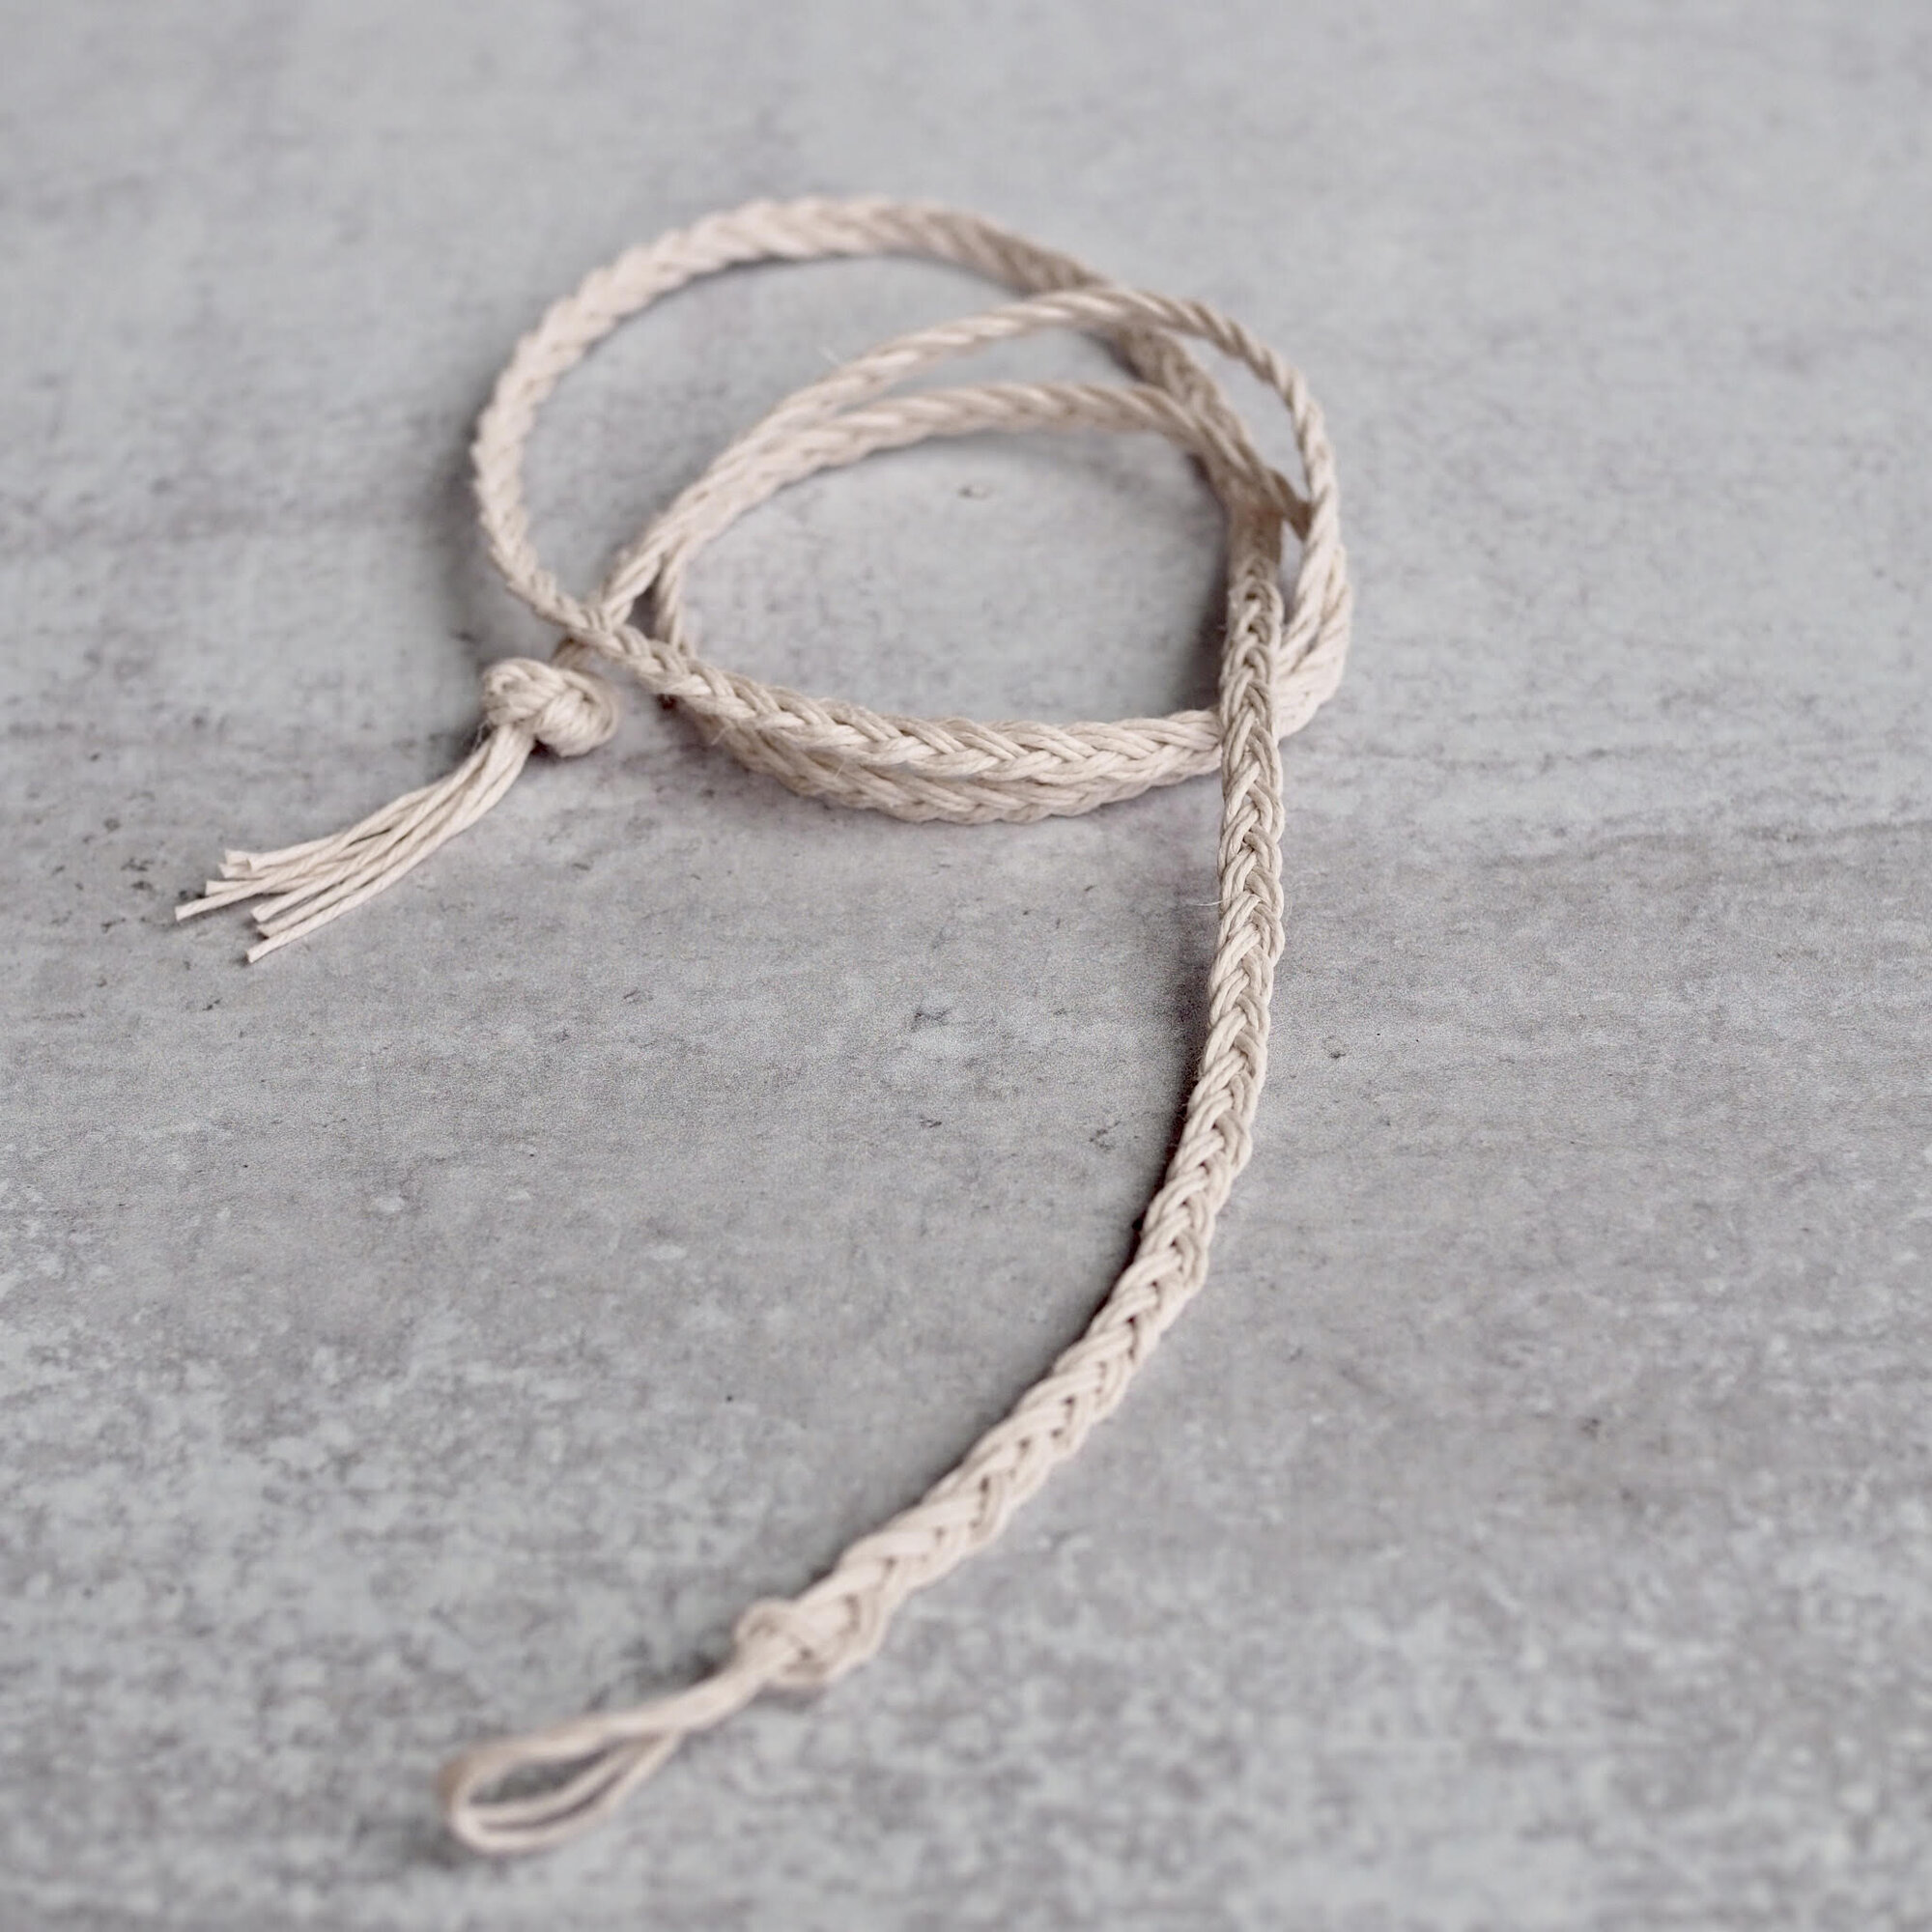
A few weeks ago, over coffee at our favorite place to catch up and brainstorm ideas, I told Rose that underneath my flowing gown of a dress there was a very unexpected and very present belly, growing seemingly before my very eyes. Faye, I told her, seemed to be suspecting something and had announced on our walk to school earlier that morning that my dress was a bit “too loose.” She gestured dramatically at her mid-section and let me know that she prefers dresses with “something here.” A waist, is what I gathered she was hoping for. I can’t be sure, but I think I had just been sartorially owned by my five-year-old. As I relayed the anecdote to Rose, she had, as she always does, a solution: a belt, not fussy or complicated, and something I could make myself in a matter of minutes.
Here’s that belt, which like most things that Rose dreams up, can be repurposed in about a million ways: “This eight strand braid can be so many things; a delicate belt to cinch a flowing dress, a simple tie for packaging gifts, or a touch of texture to tie back a curtain.” The finished product is delicate and understated but special enough to feel elevated beyond a simple piece of string. As for the tutorial, “it’s simple but involves braiding with four strands instead of three to create a more intricate-looking accessory. The natural hemp twine is strong, durable and will soften with use.” Roses’s instructions are below. To Faye’s delight, I’ve started wearing the belt as suggested.
Materials:
15 yards of hemp twine, 1mm thickness
Scissors
Safety pin (optional)
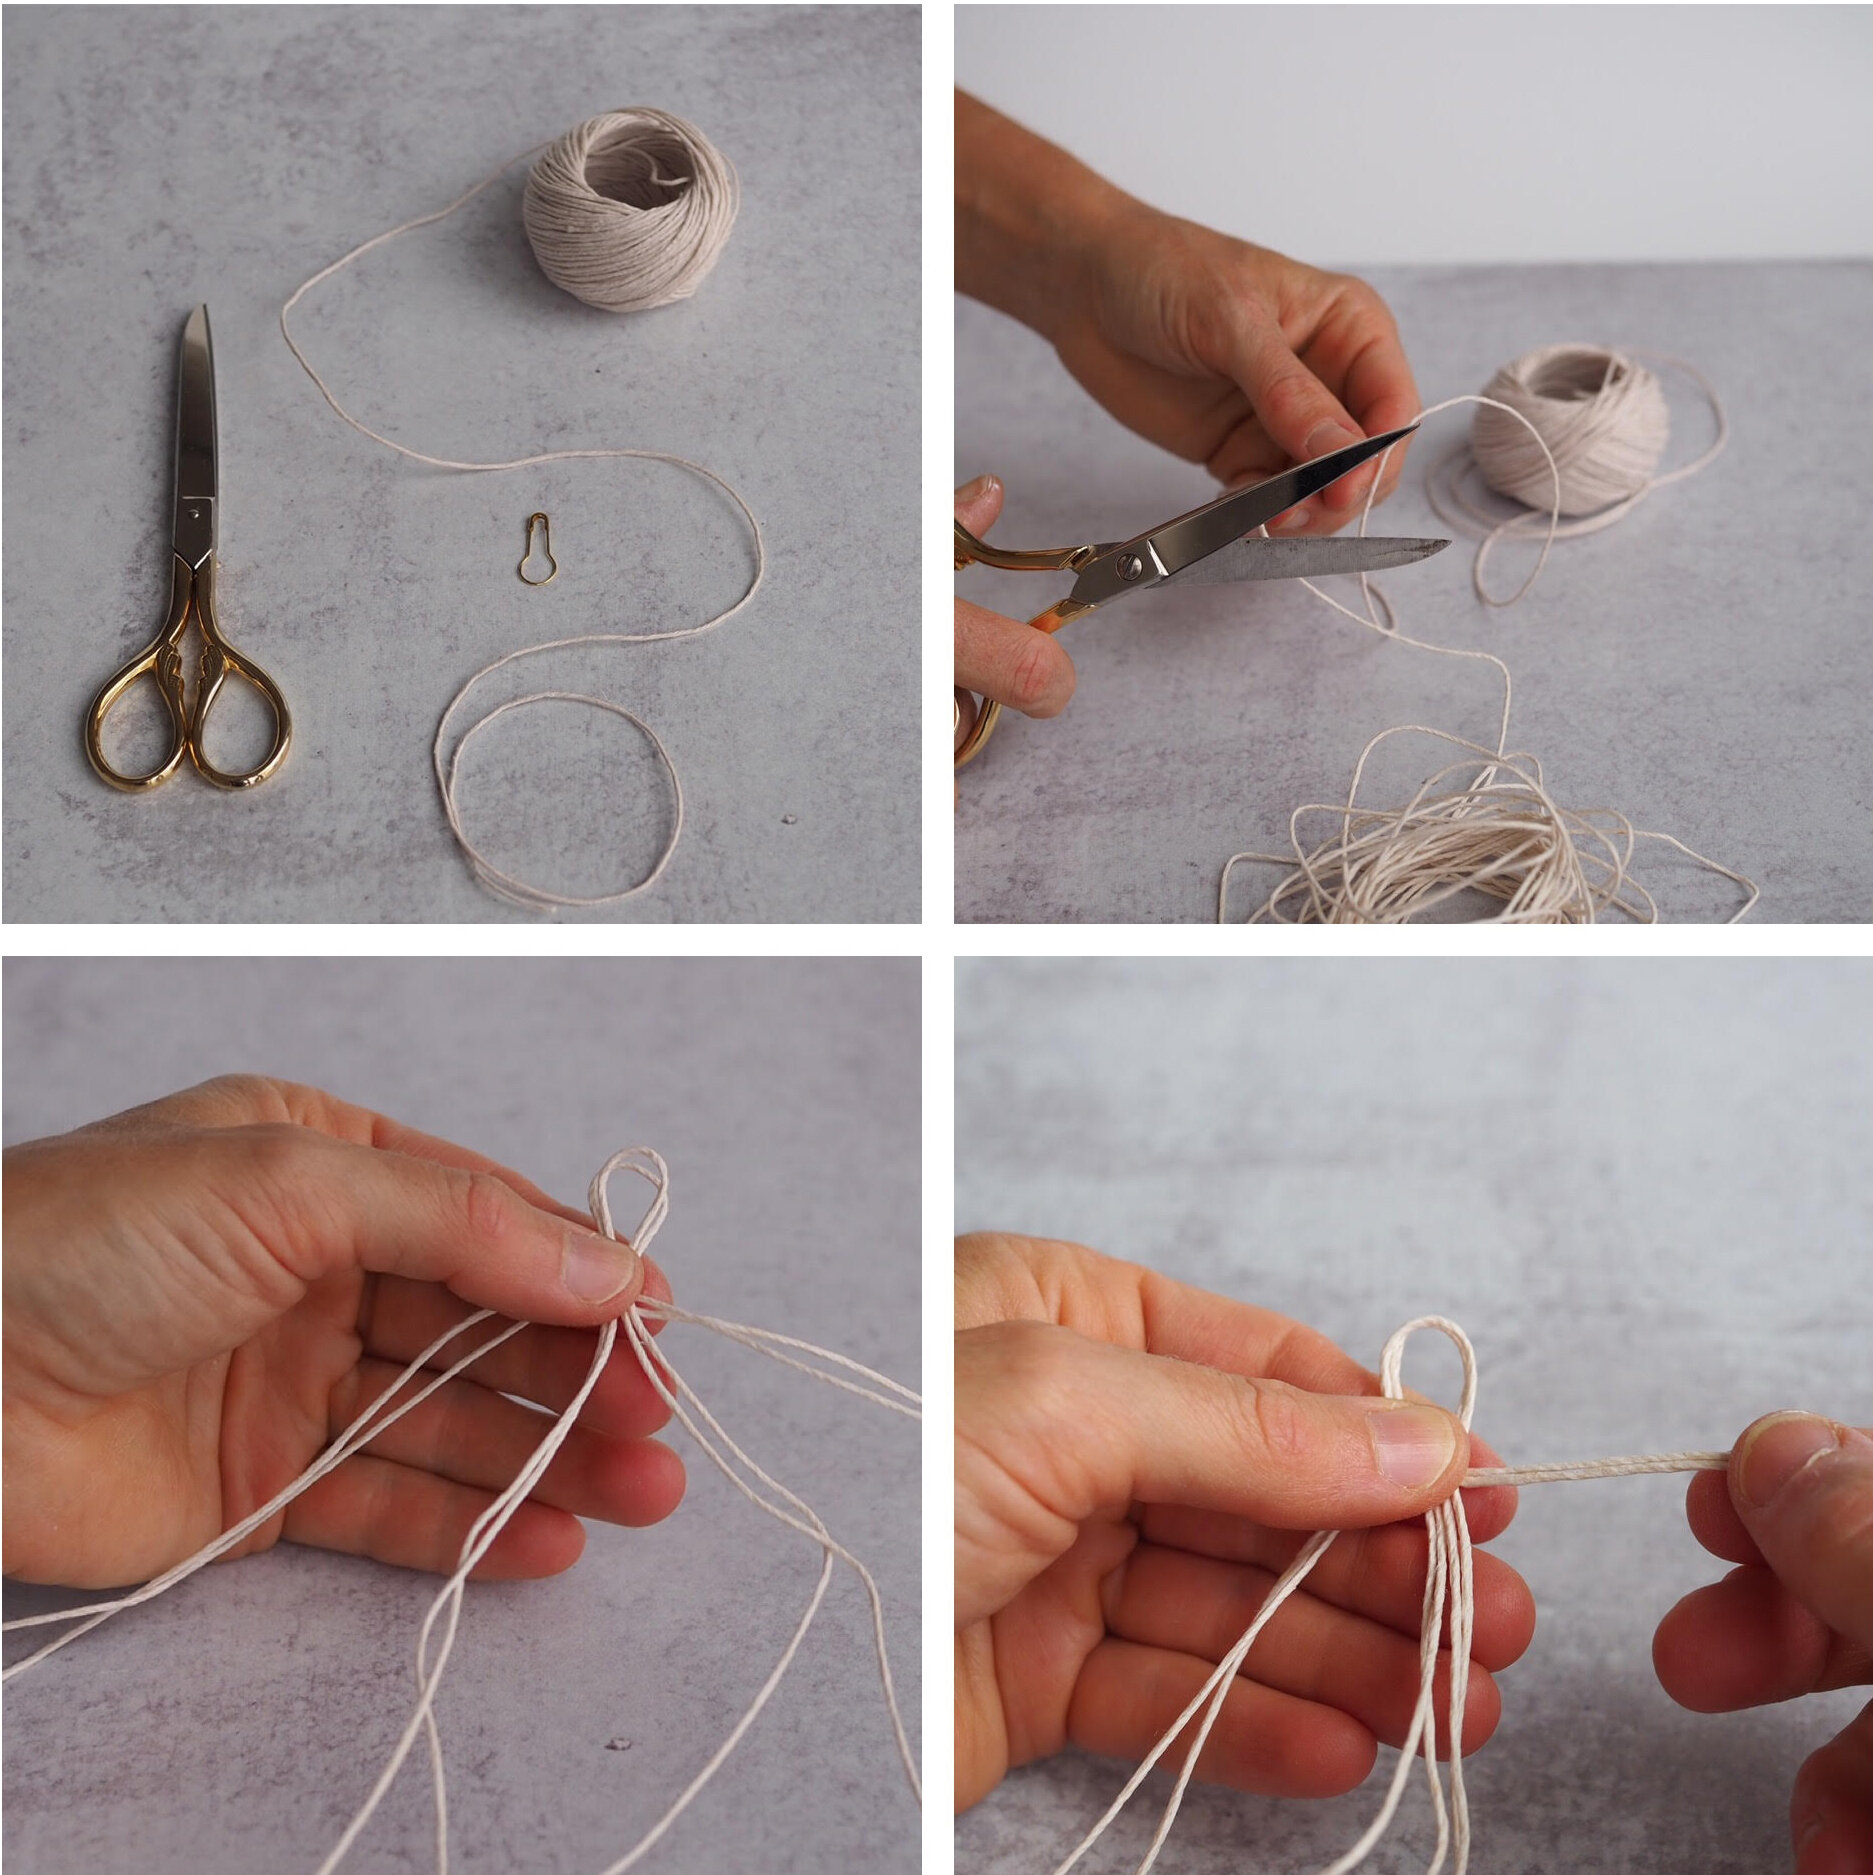
+ Start by cutting four lengths of hemp string, each around four yards; doubled, each strand should wrap around your waist twice.
+ Fold each length of string in half and bring all folded ends together to create eight hanging strings.
+ Keep two doubled strands together as center strings to create a 3/4” loop. Wrap the remaining two doubled strands around the center ones. Keep all the pieces in place by pinching them together where they meet with one hand.
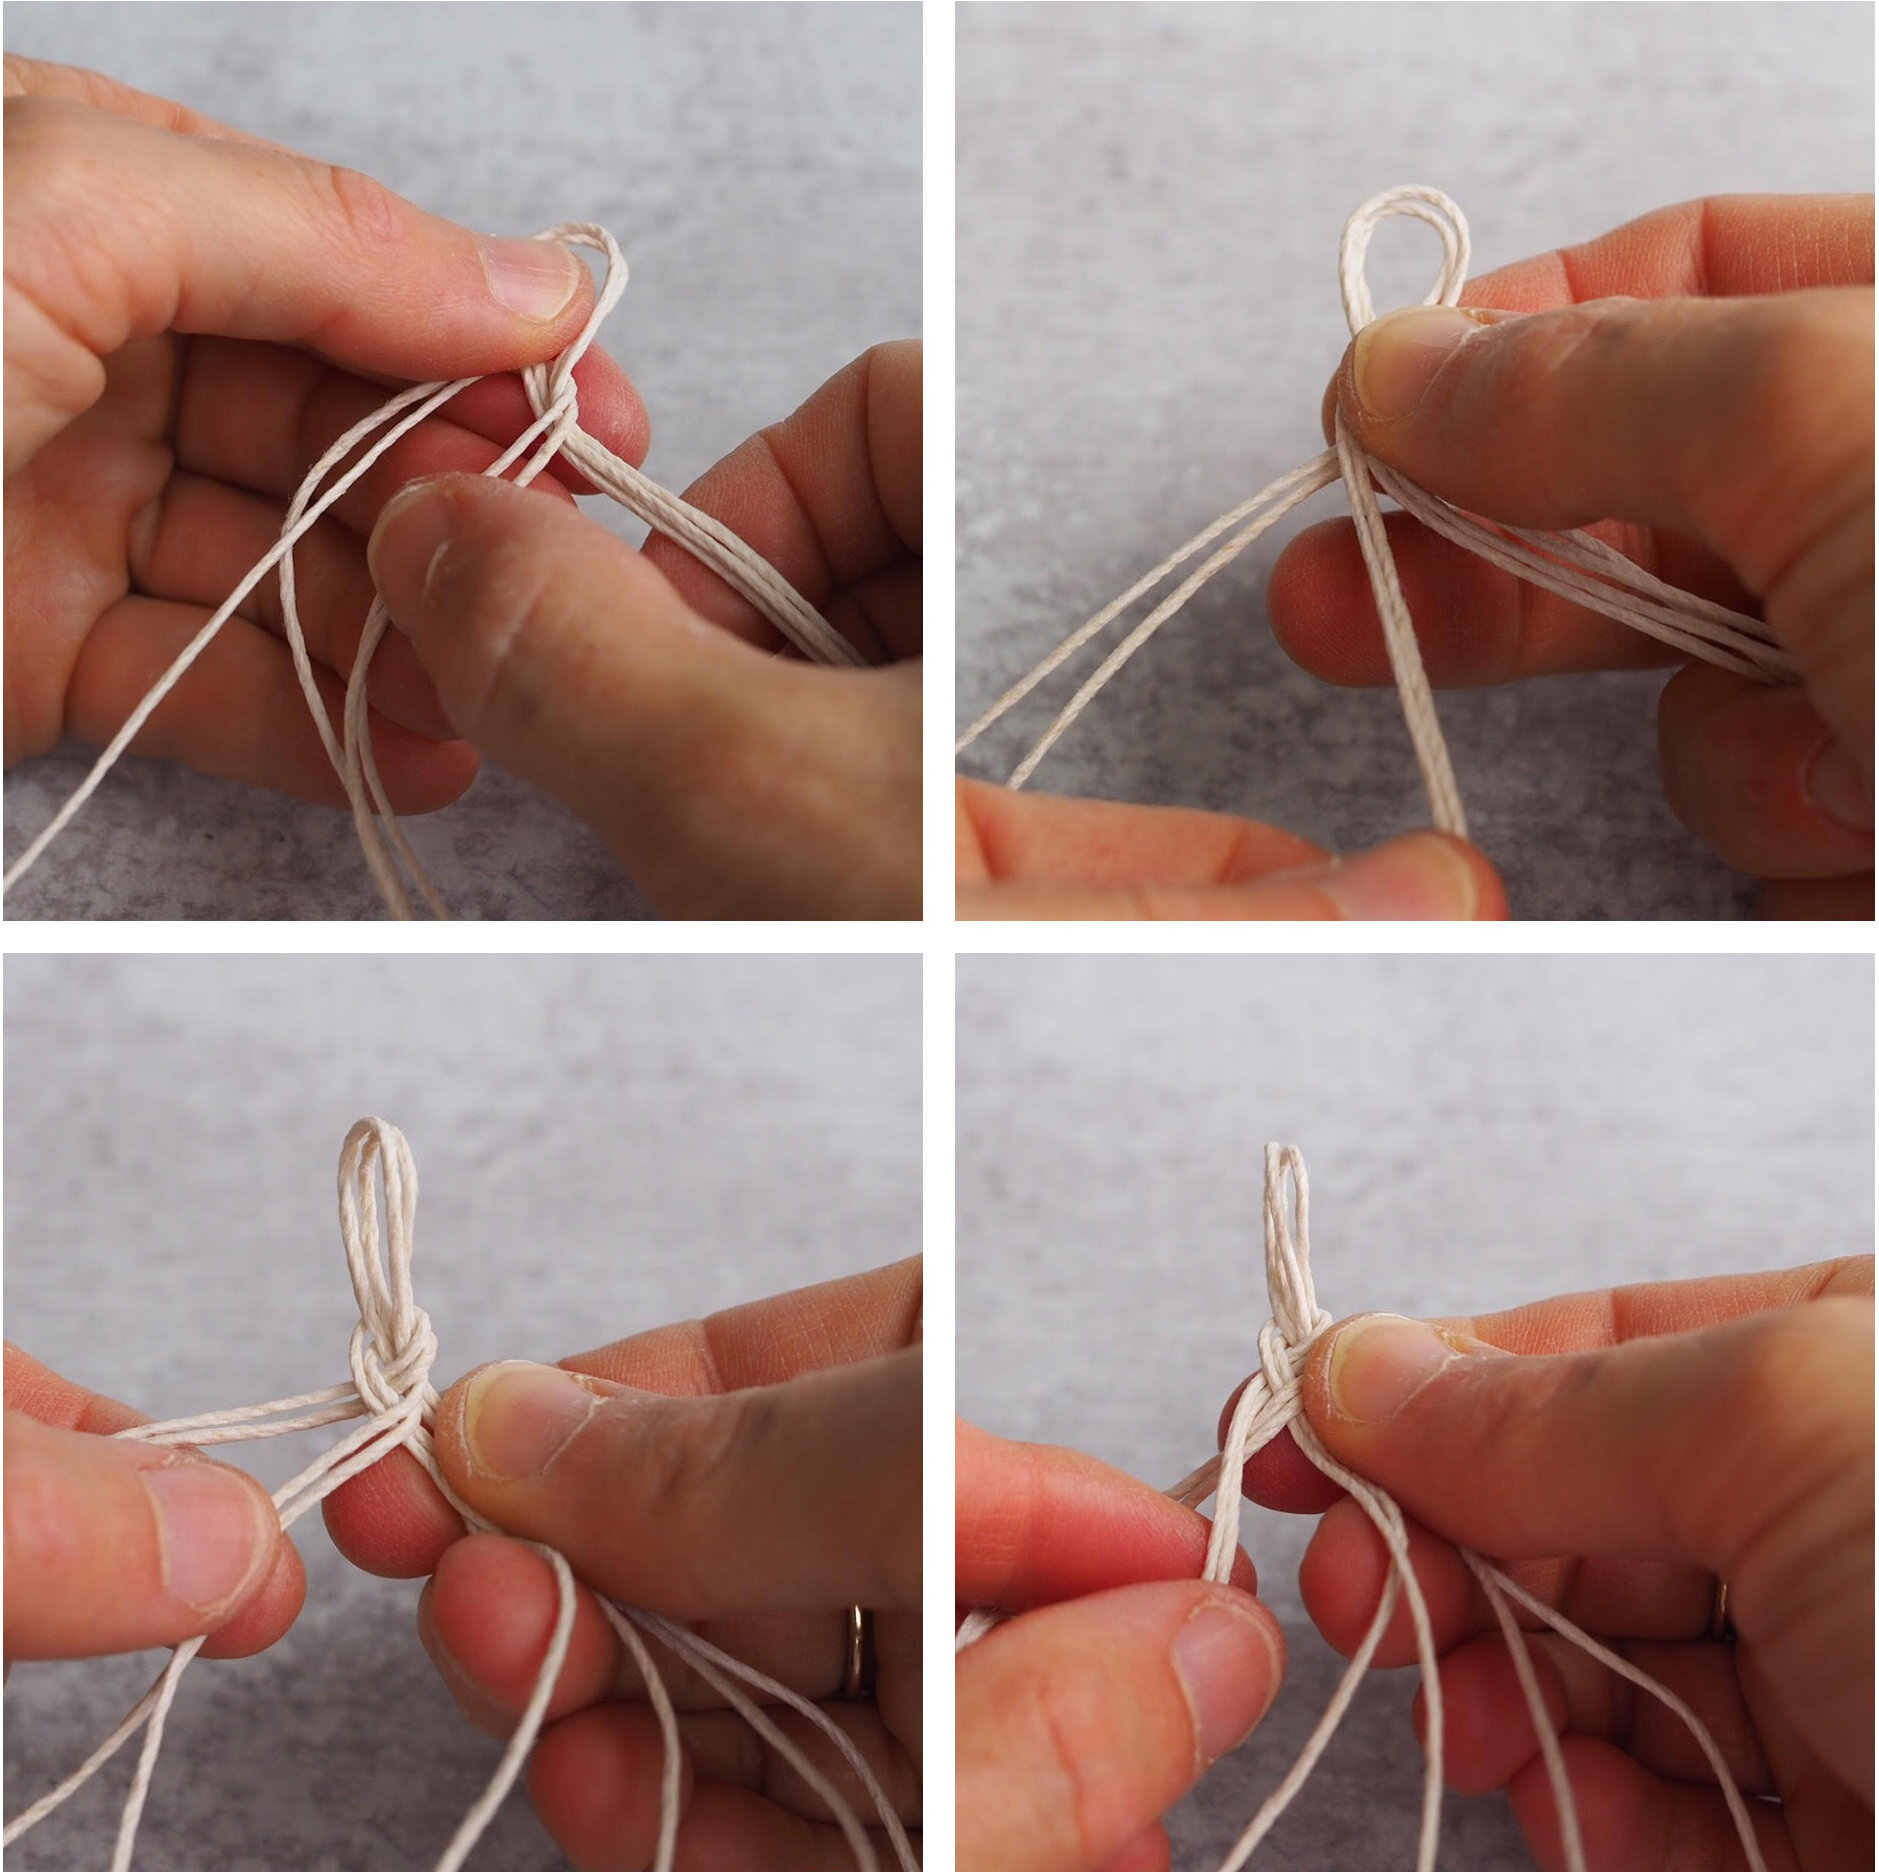
+ Working with four sections, you will begin to braid. Each section contains two strands.
+ Still pinching the top where the strings meet, bring the section on the far right across the middle two sections and pinch them in place.
+ Pass the section on the far left over that last section to the right.
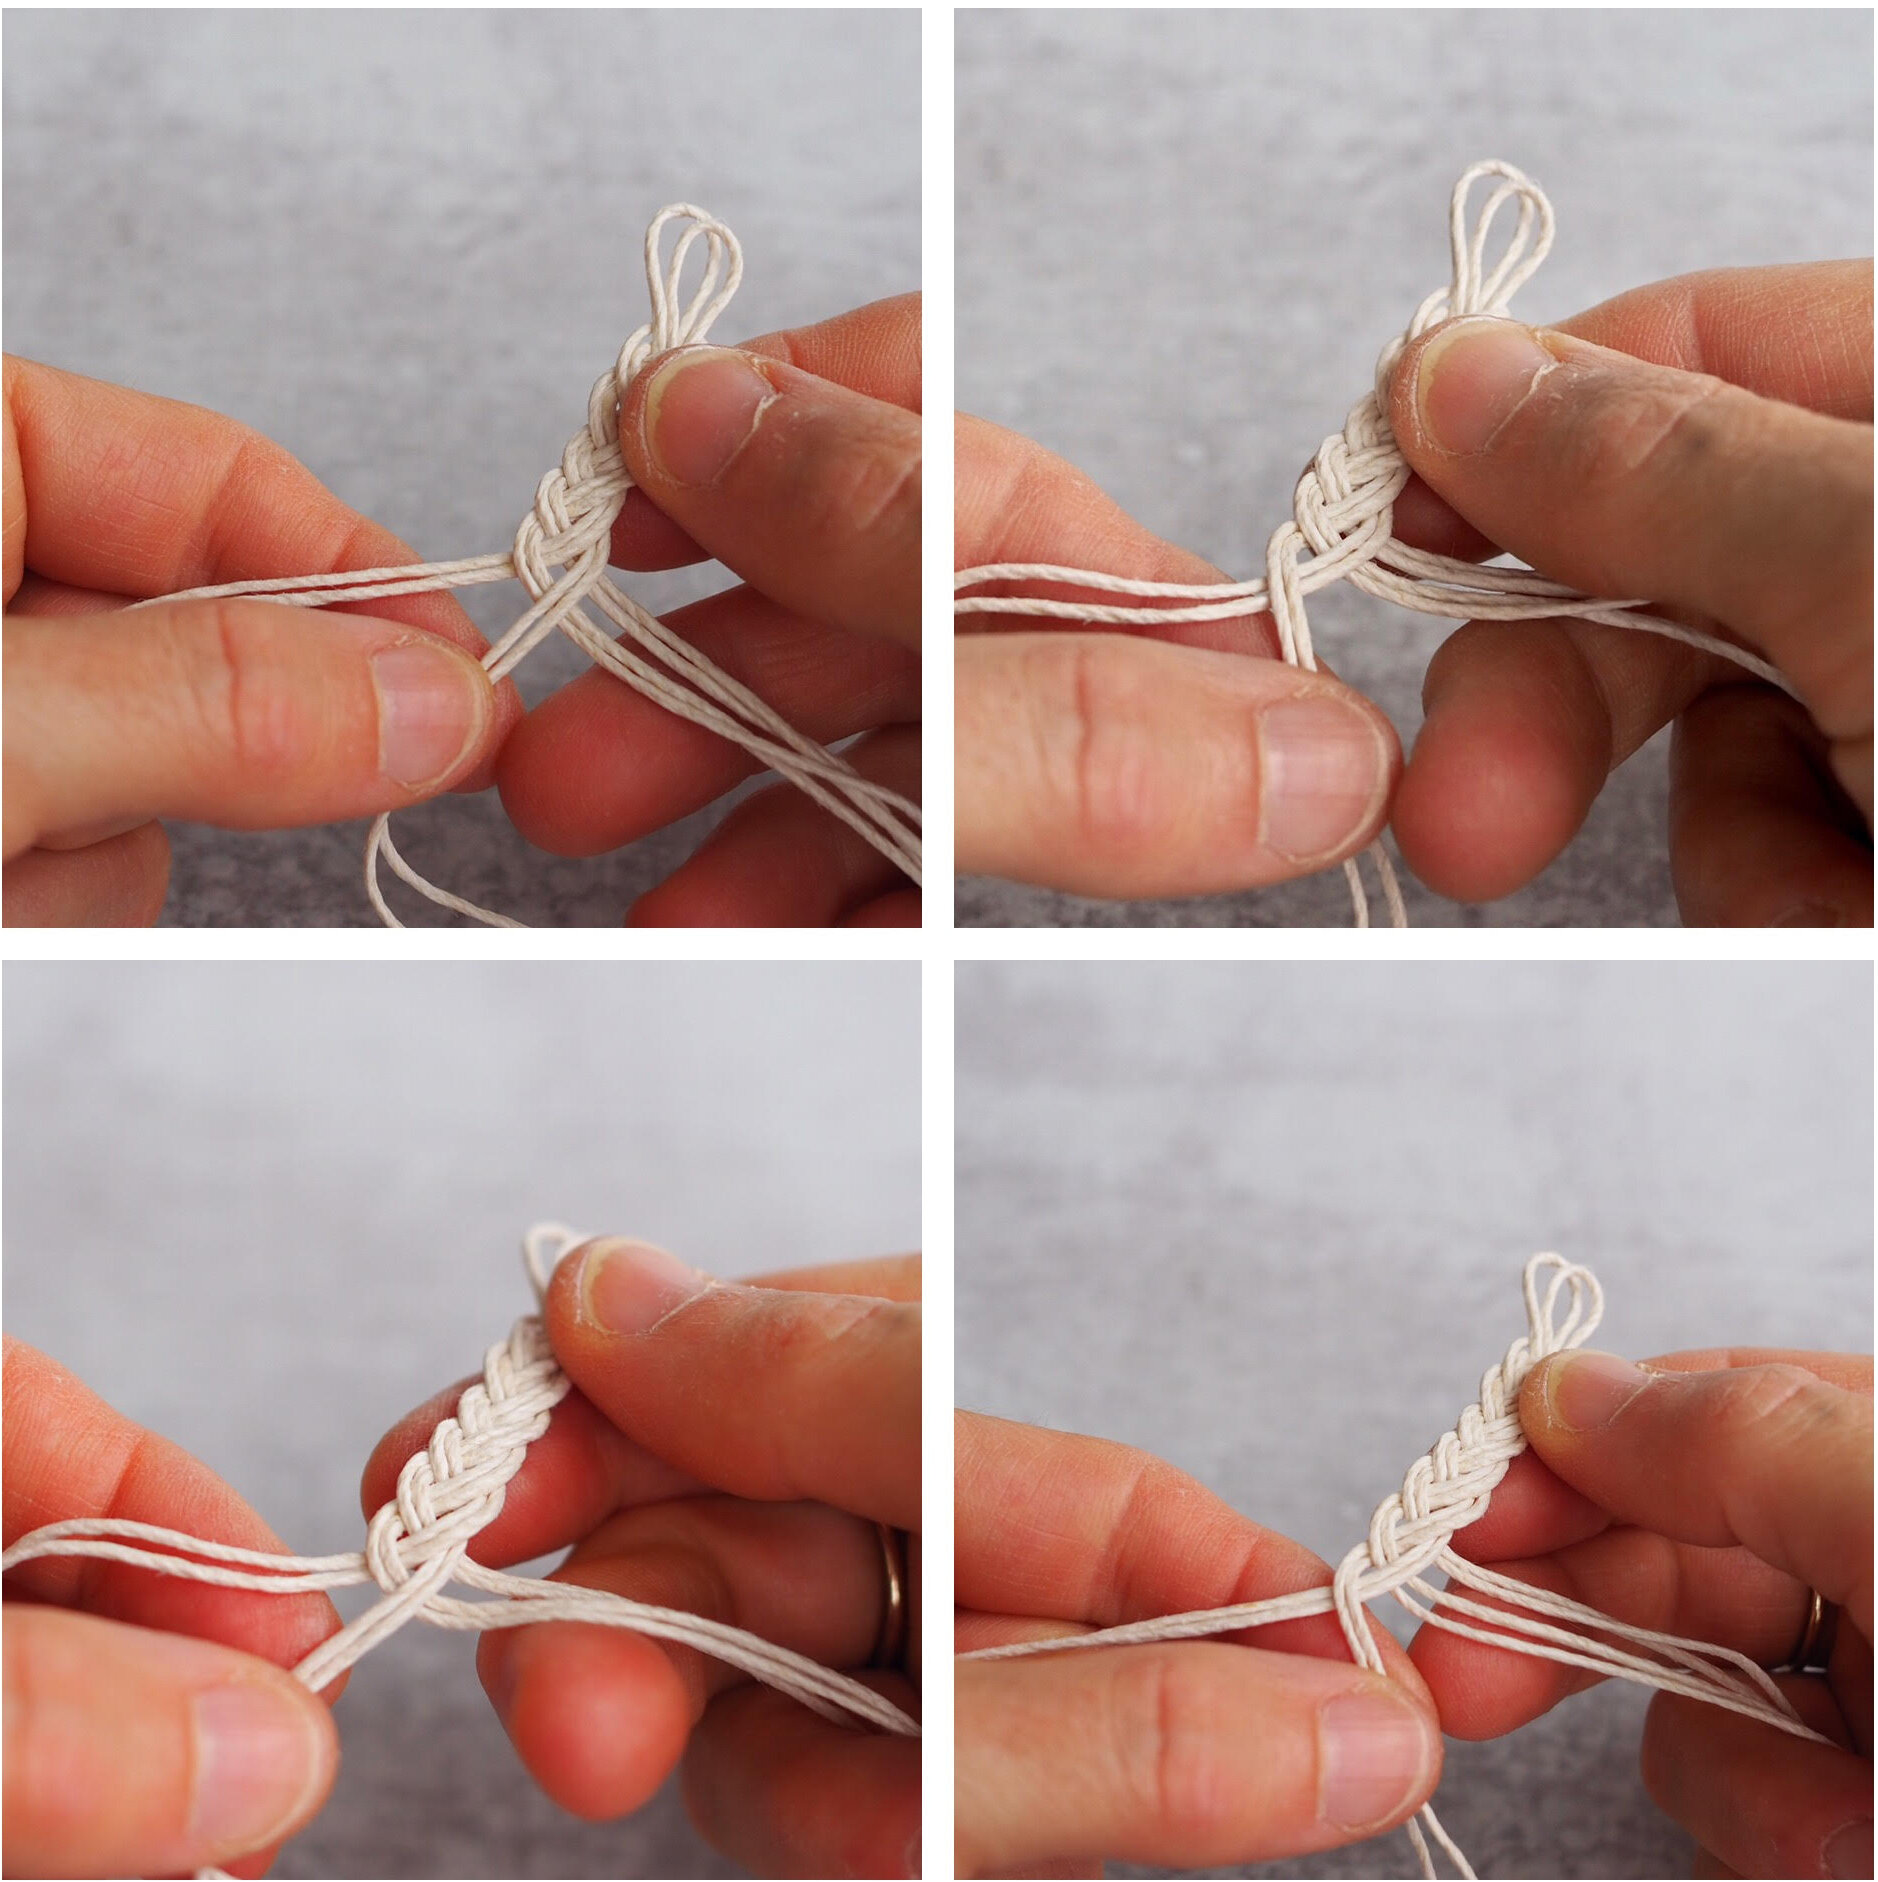
+ Continue the same way, passing the far right section over the middle two sections, then cross over the far left section to the one on its right.
+ Be sure you are not twisting the strings while you are braiding.
+ If it helps, you can safety pin the top of the braid to a cushion to stabilize the braid while you work.
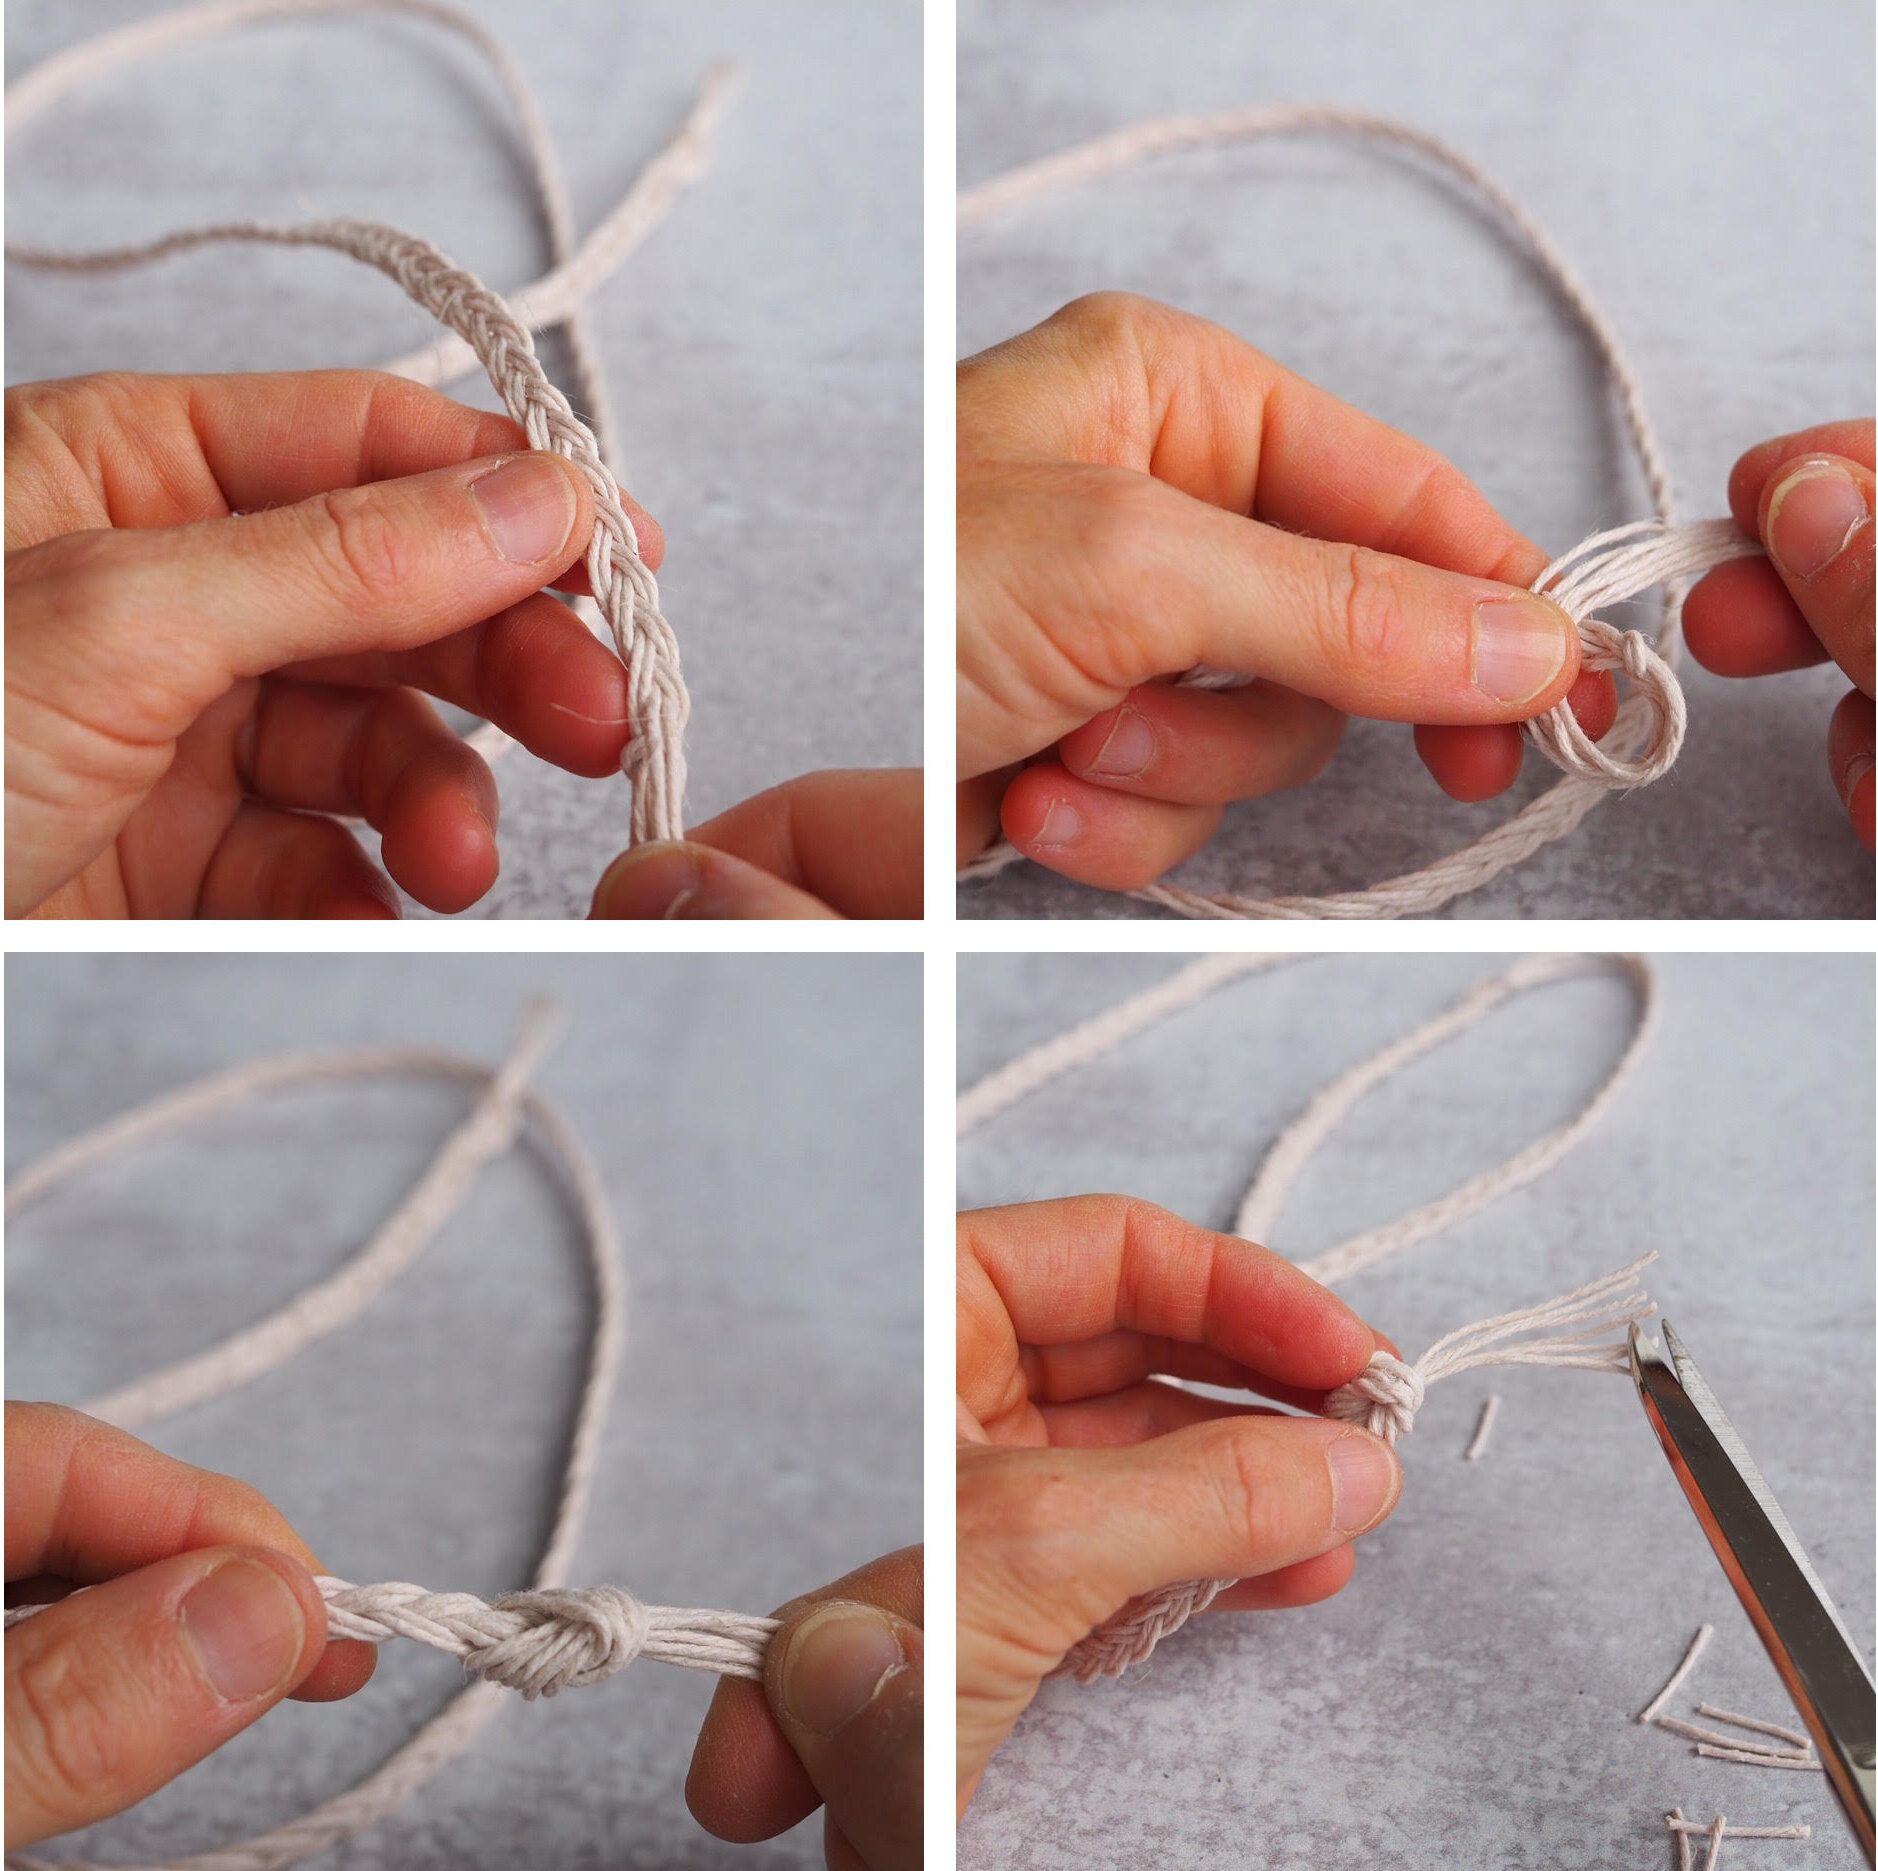
+ Continue until you reach your desired length, roughly a few inches longer than the circumference of your waist.
+ When finished braiding, tie a simple slip knot with all the ends together.
+ Trim the ends and you are finished.
All photos by Rose Pearlman.
Thanks to Rose Pearlman for developing this project, writing the instructions, and capturing the imagery. Rose is an artist, teacher, and textile designer. With a background in fine arts and a love of well designed functional objects, her creations blur the lines between art and craft and pushes the boundaries with non-traditional techniques and materials. Rose teaches monthly rug hooking workshops in and around her home in NYC, and also welcomes commissions for one of a kind constructions in decor and home furnishings. Her work has been featured in fiber magazines, galleries, and numerous online design sites. Her new book Modern Rug Hooking comes out December 3, 2019 and is currently available for preorder wherever books are sold. She lives in Brooklyn, NY with her family.
This post includes affiliate links. Reading My Tea Leaves might earn a small commission on the goods purchased through those links.


No Comments
Comments are moderated.