In New York City there tend to be two types of closets: the ones that are too small and the ones that are non-existent. In this extremely simple project, Rose Pearlman solves for both. She showed me how to take a simple cord made from cotton clothesline and turn it into a versatile closet organizer—or, dare I say, a closet in and of itself.
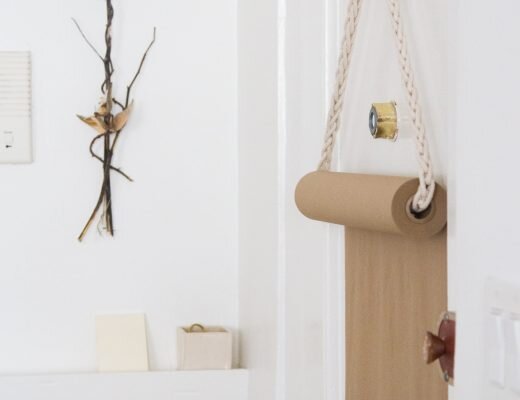
The project uses the same simple cording technique shown in her paper roll hanger, only this time we added hangers and hooks and got rewarded with more storage space that’s pretty to look at, too.
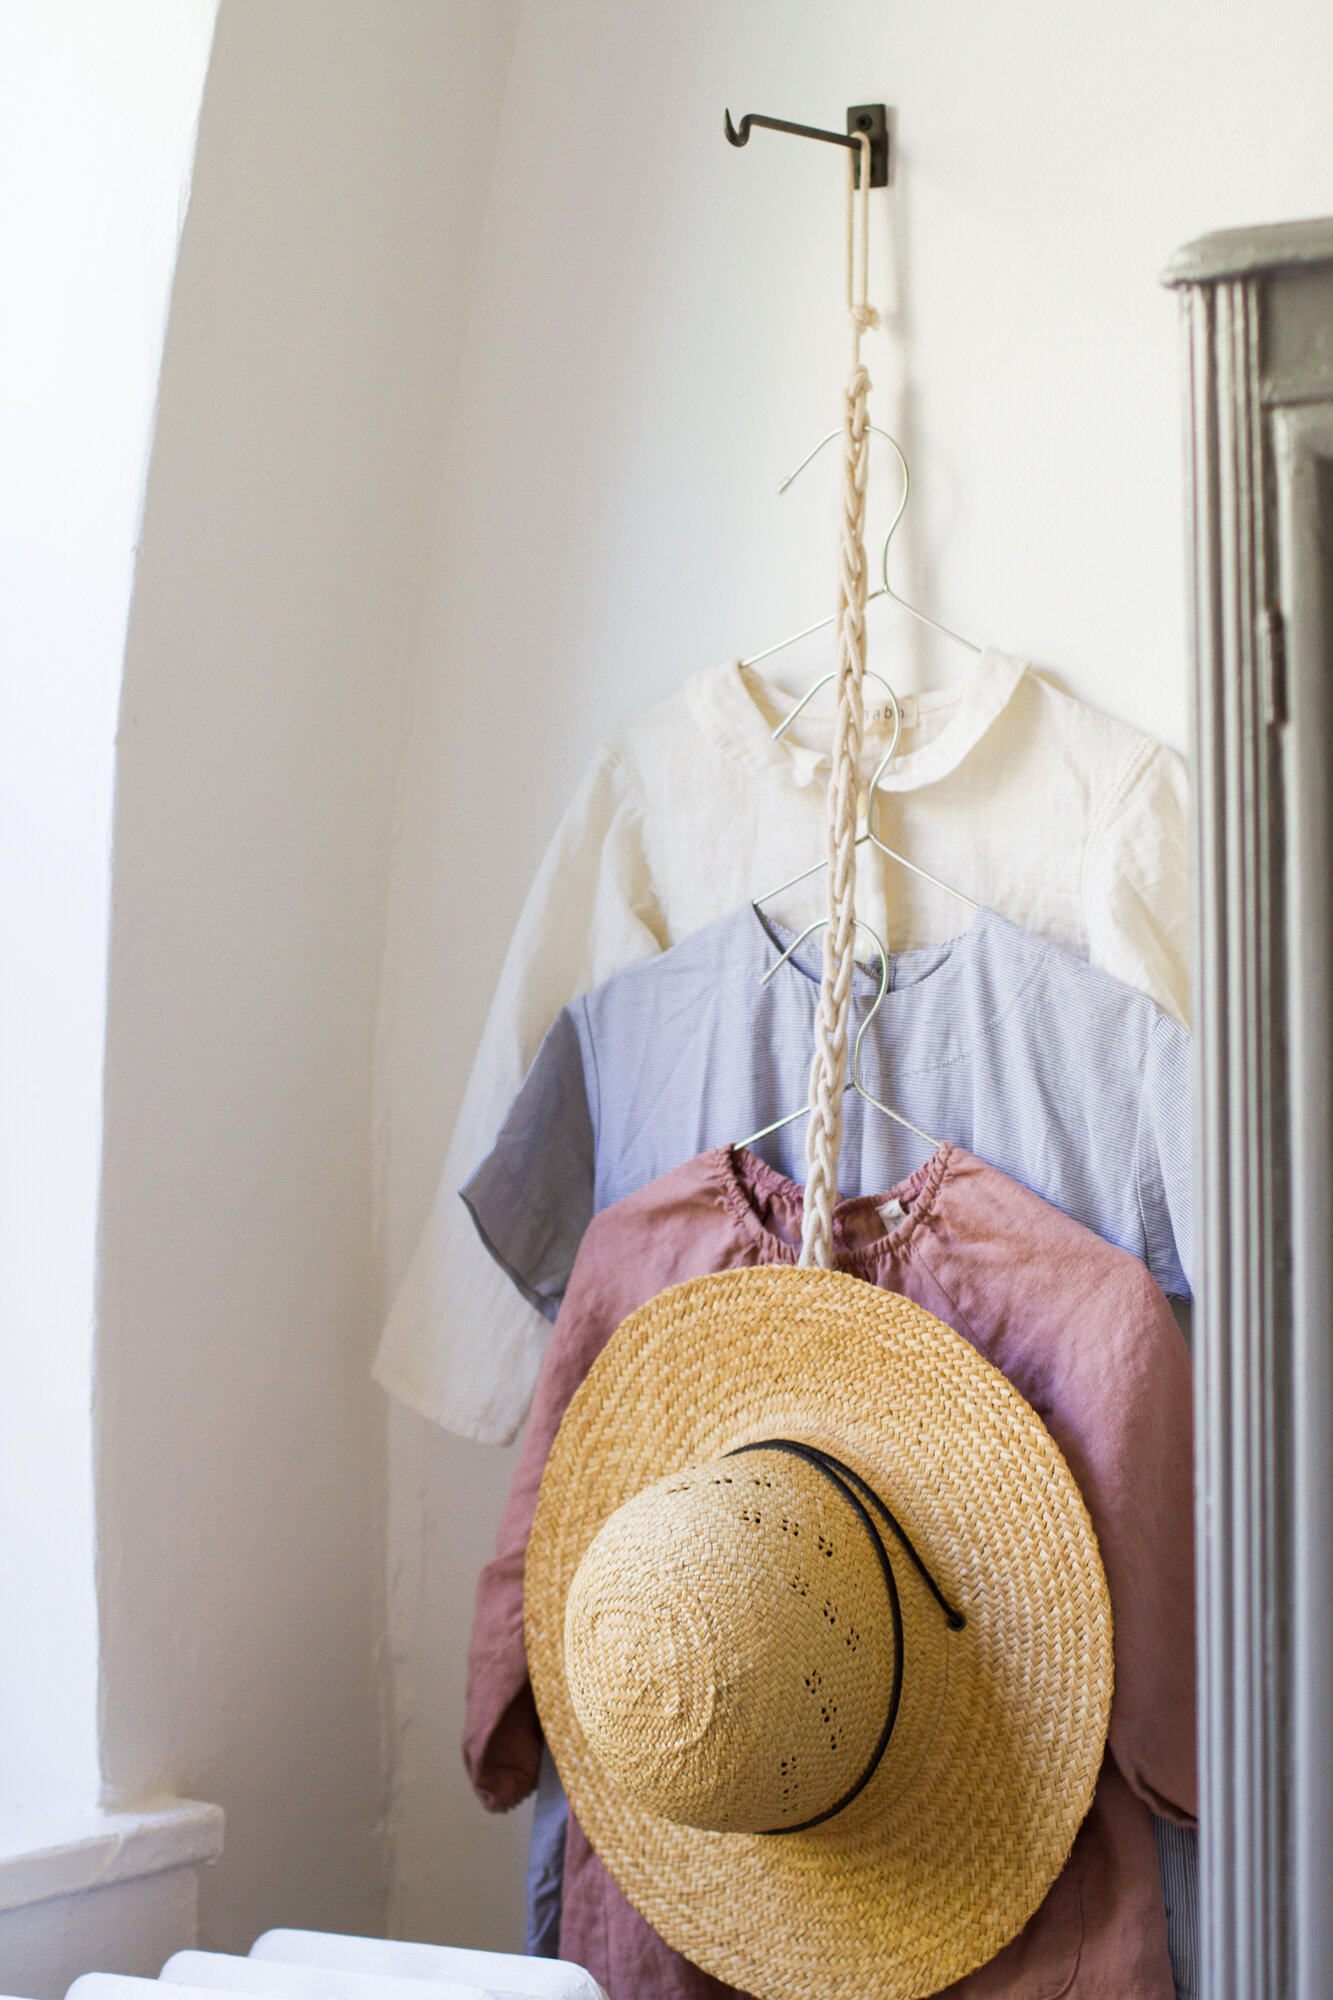
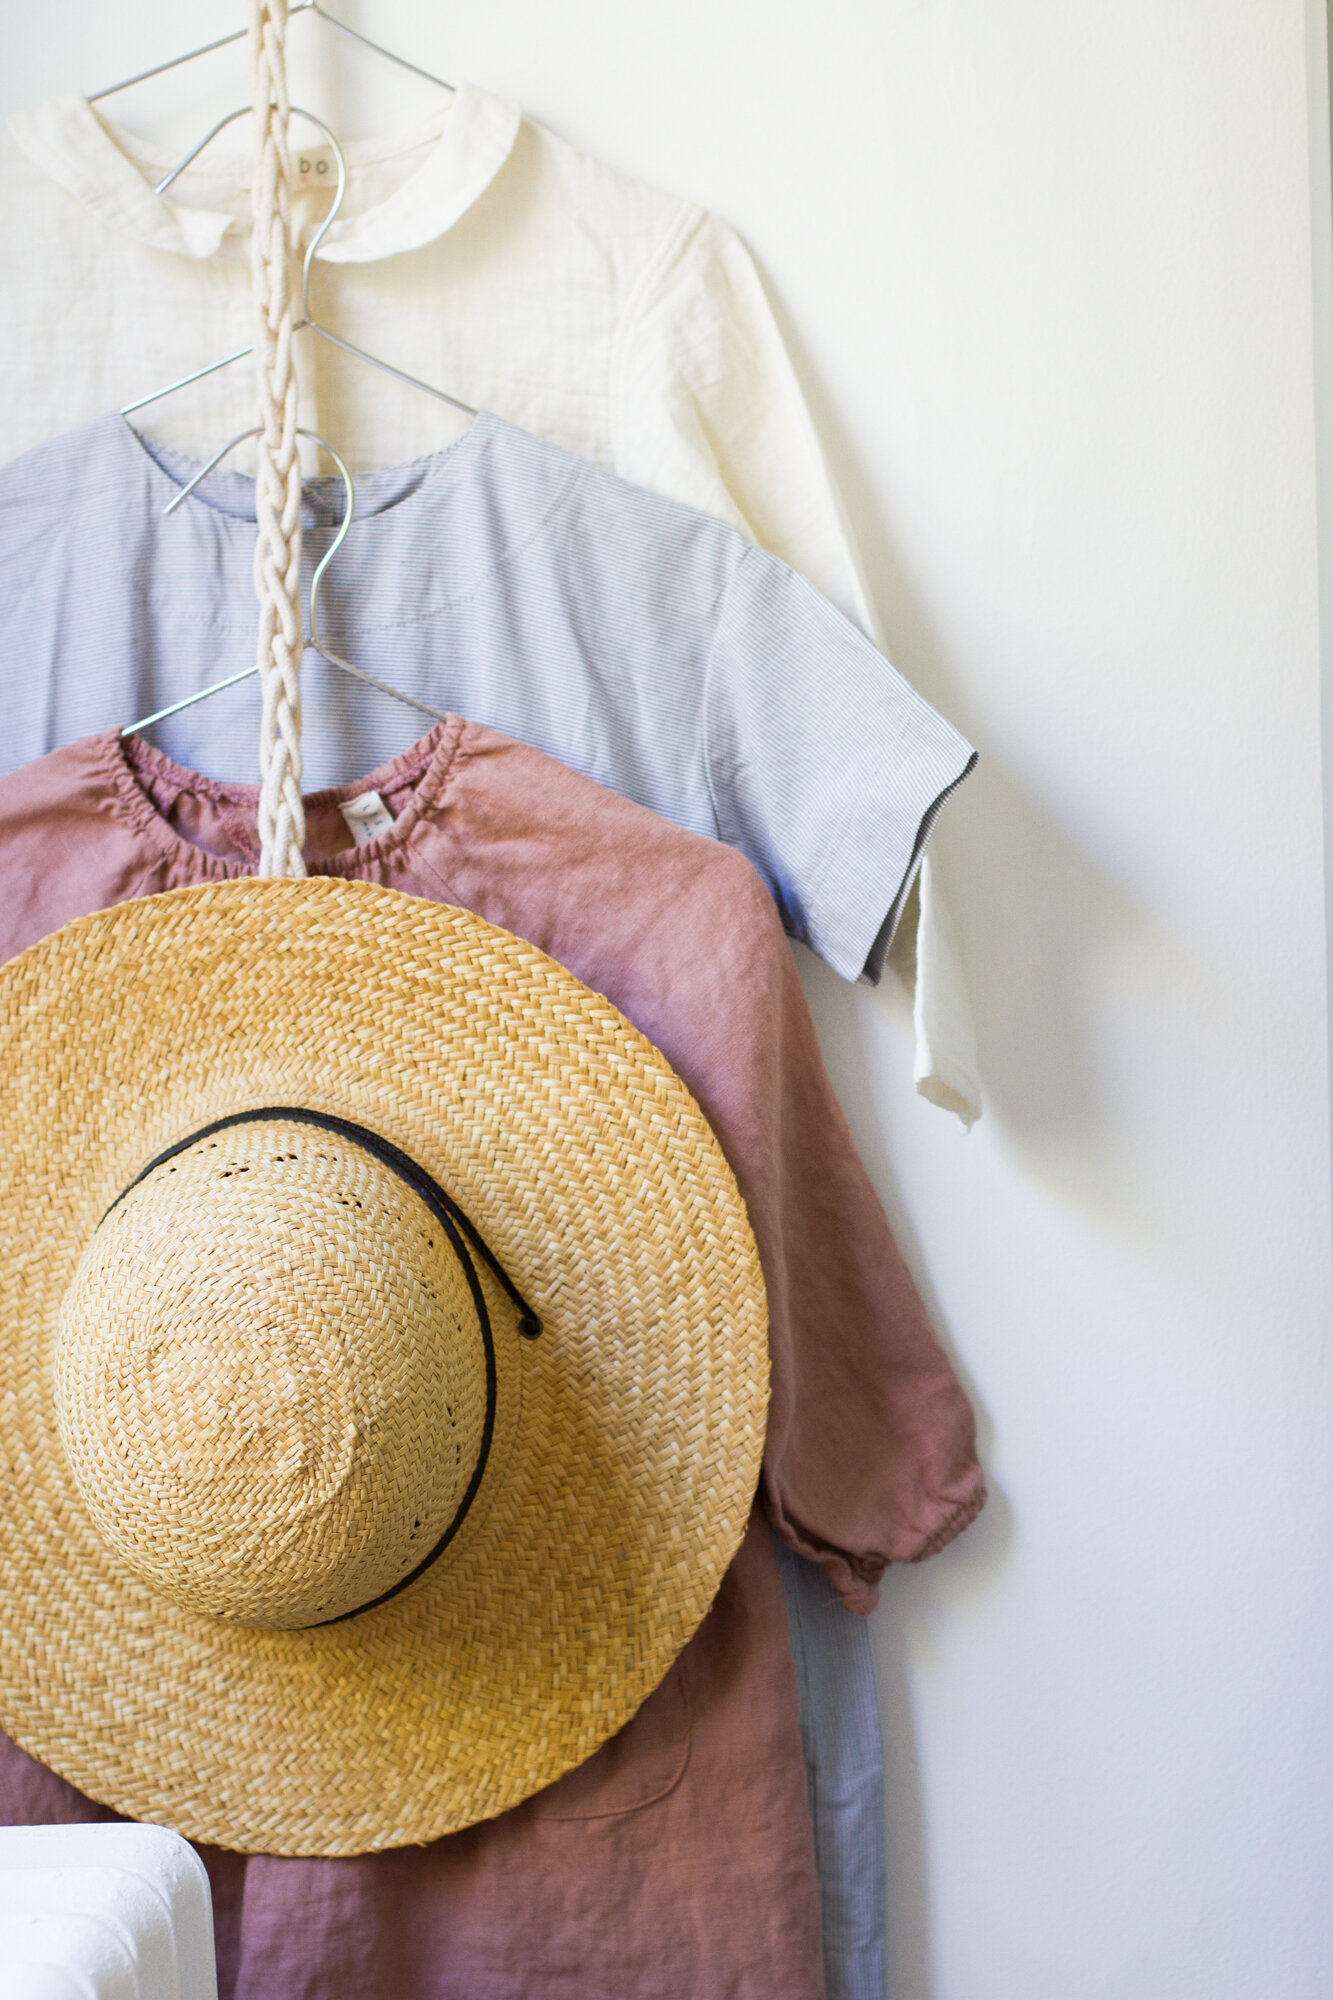
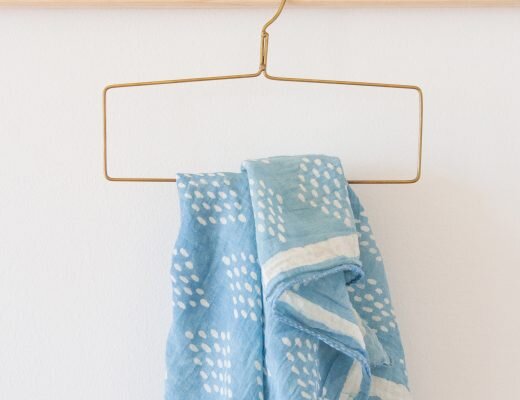
Our family of four shares just one closet, so we sort most of the kids’ clothes into soft-sided bins in their wardrobe. This week, I made a corded clothes hanger to hang on an existing hook in their room. It created the perfect place to hang the small dresses and shirts that benefit from not getting too squished in bins.
I added a small j-hook to the bottom of the cord for hanging Faye’s sunhat.
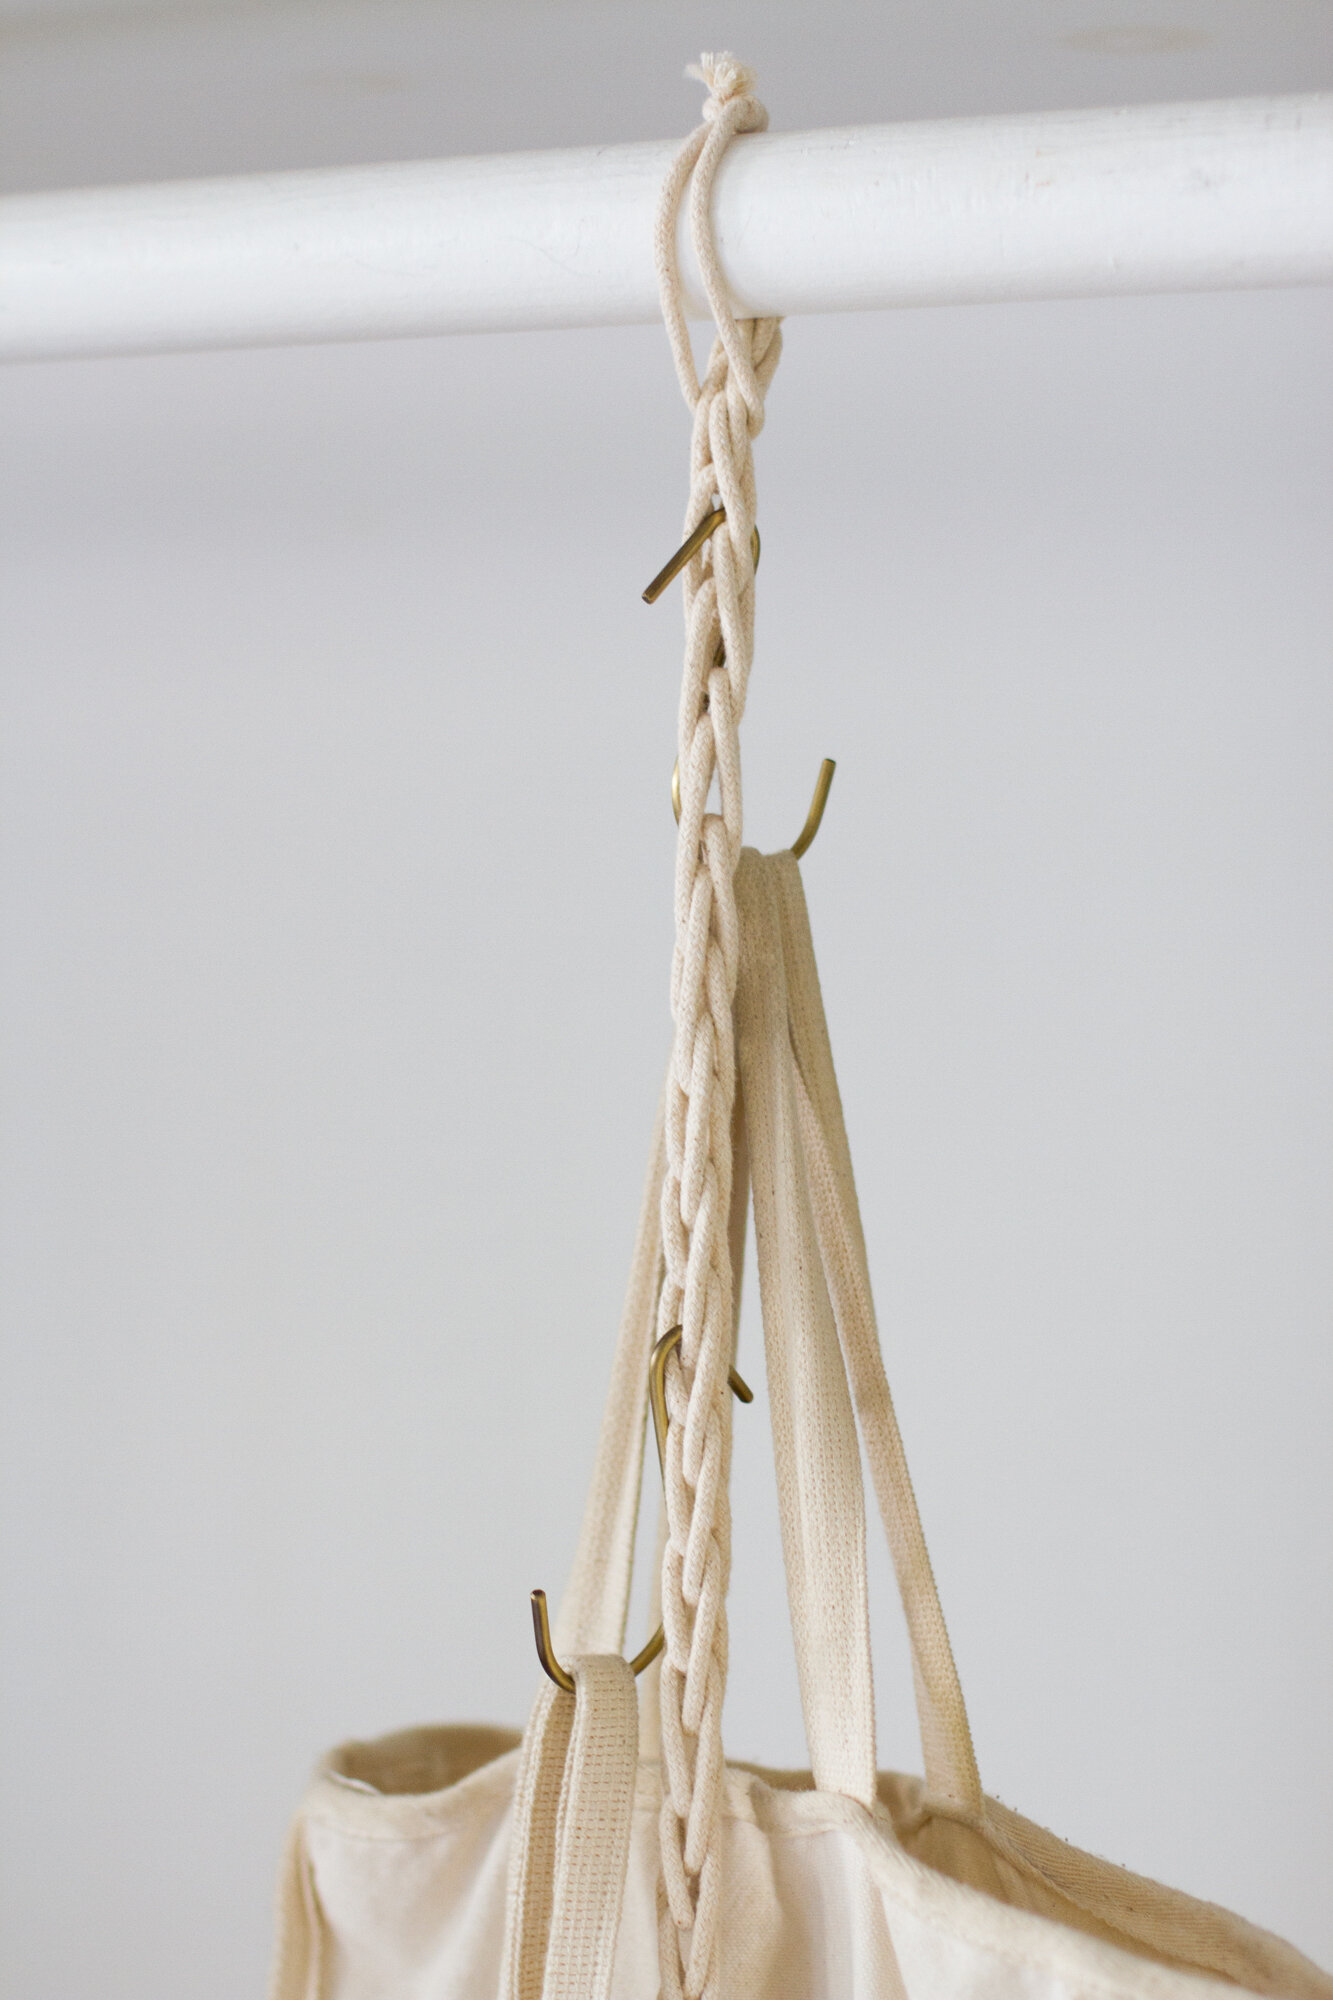
In other spot, I used all hooks instead of hangers. I looped and cinched the cord over our wooden closet rod and added hooks on alternating sides to create an organized catch-all for totes and reusable grocery bags.
For capsule closet enthusiasts (or anyone who likes to do a little advance planning), this corded hanger can also function as a spot to plan outfits and have pressed clothes neat and ready for the next day.
As Rose says, “all you need for this tutorial is two fingers, ten minutes and some rope.” She gives the step-by-step instructions below:
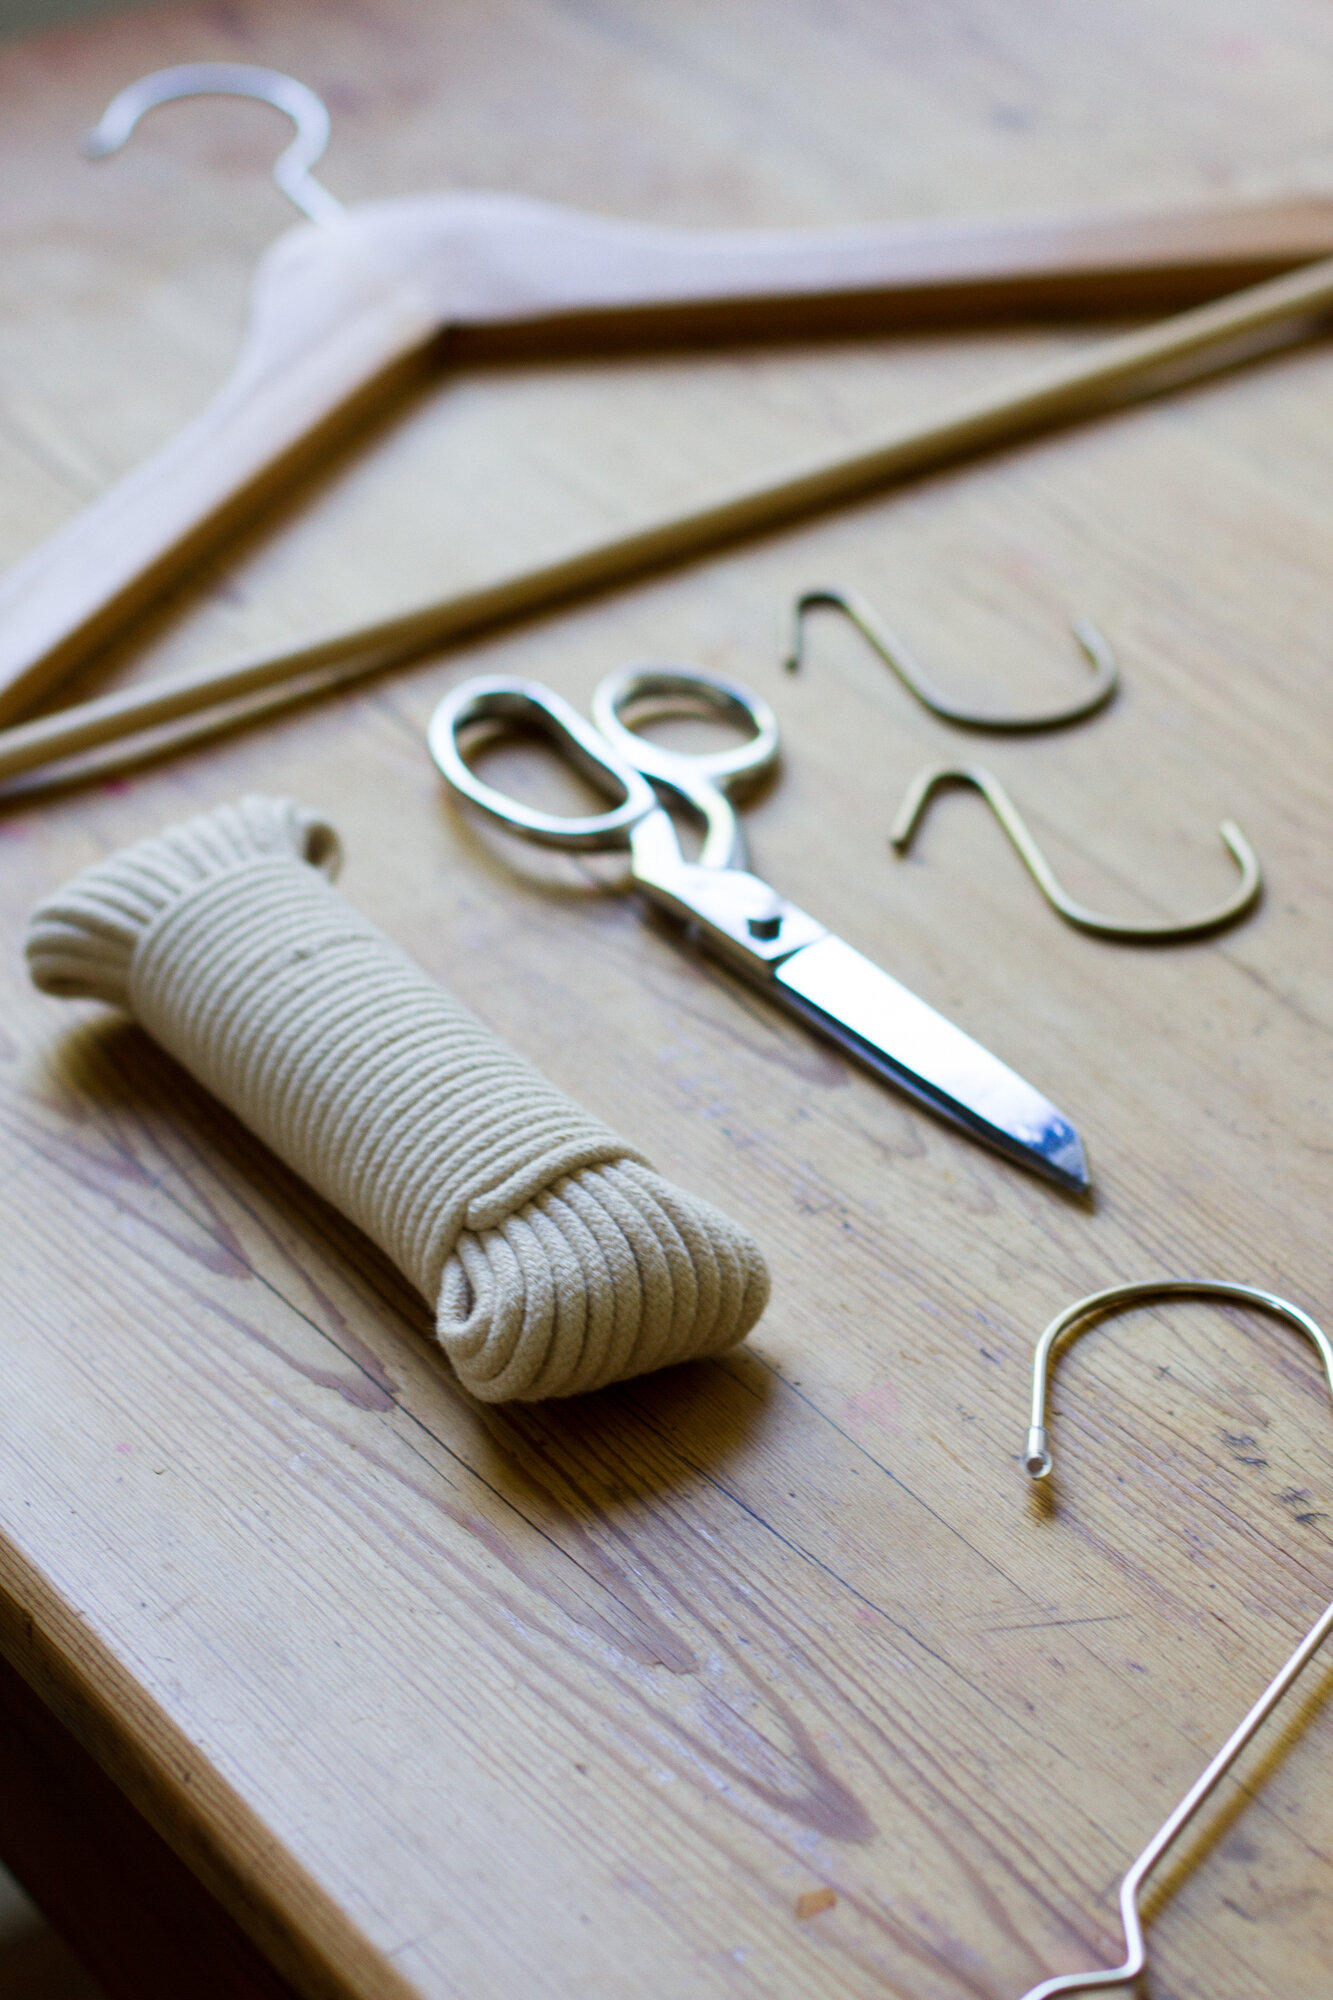
Materials:
+ 18-feet of cotton rope (size #6 pictured but you can use a wide variety of string/rope)
+ Scissors
+ Hangers or hooks
Directions:
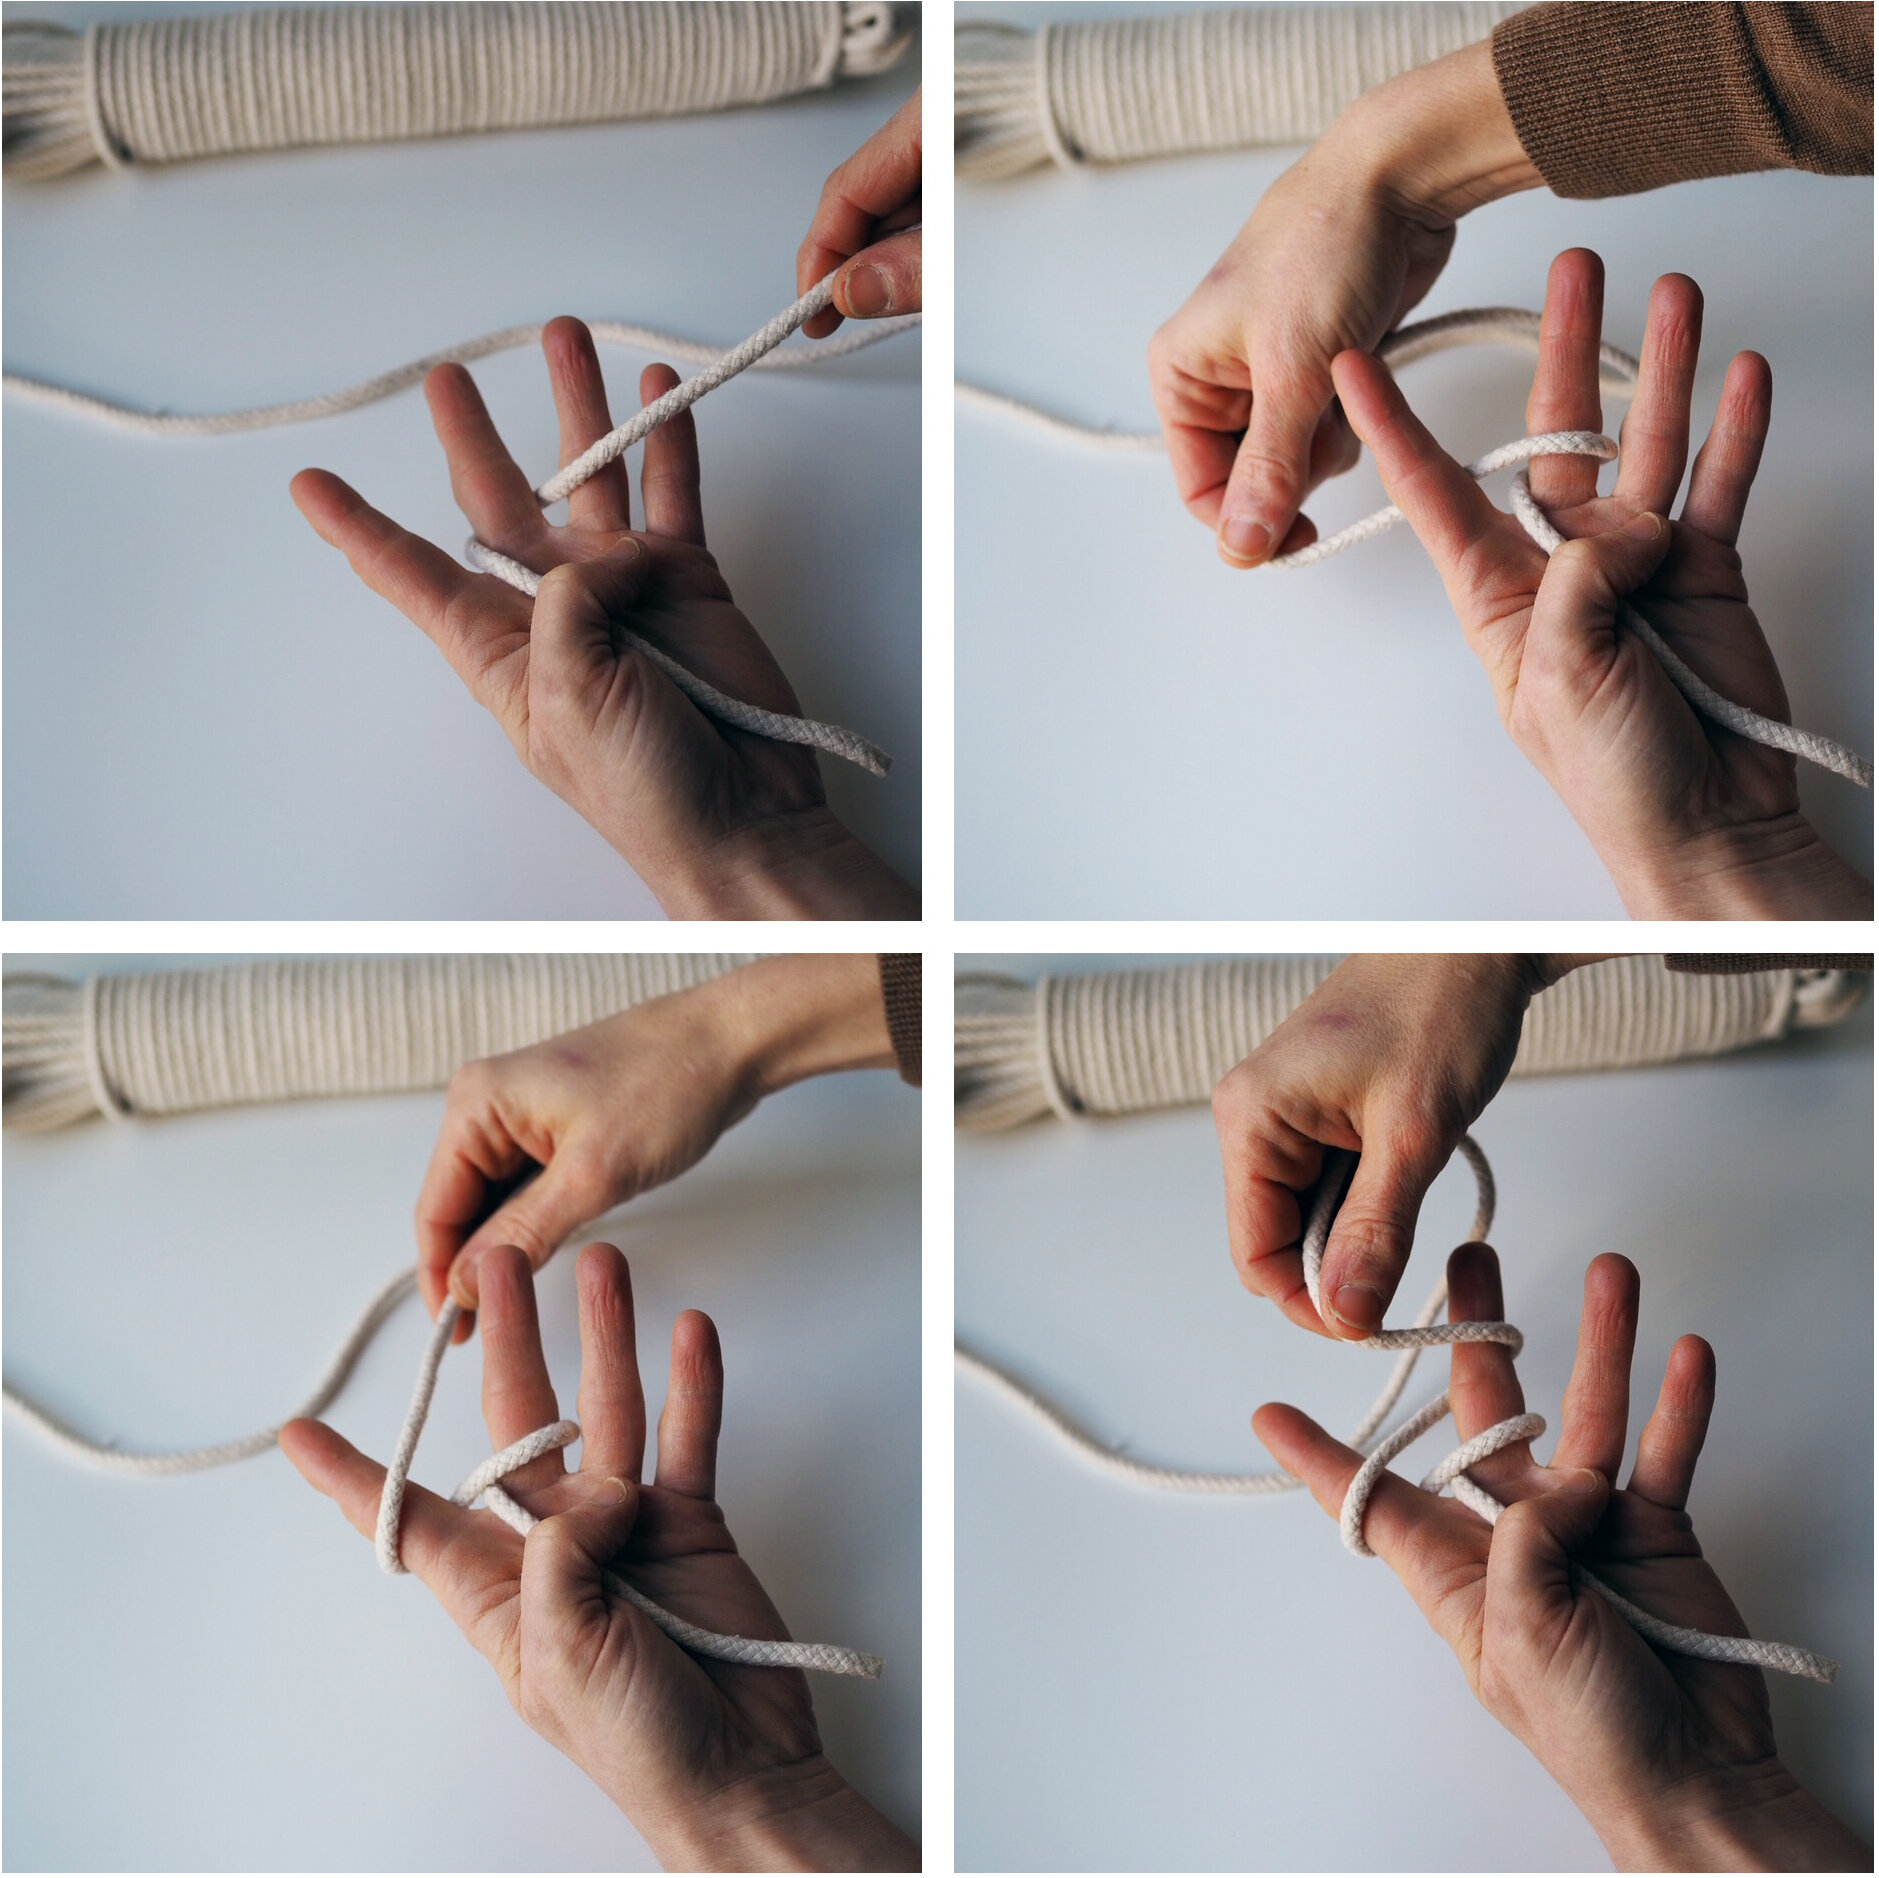
+ Start by holding the tail end of your rope in the left hand. Leave an 6-inch tail in the front of your palm and bring the remaining cord between your pointer finger and your middle finger of your left hand.
+ Working with the long end of the cord, wrap the cord around your middle finger (clockwise) to the front of your hand, then circle it back between your fingers at a diagonal and wrap counterclockwise around your pointer finger.
+ Continue back between your two fingers again at a diagonal and once more around your middle finger and through the two fingers to the back of your hand (clockwise). You are making a figure 8 with the cord around your two fingers.
+ You should have two loops around your middle finger, and the working cord is hanging in back of your left hand. Working with the two loops on your middle finger, carefully bring the loop on the bottom over the top loop and off your finger. You will have one loop remaining on both of your fingers.
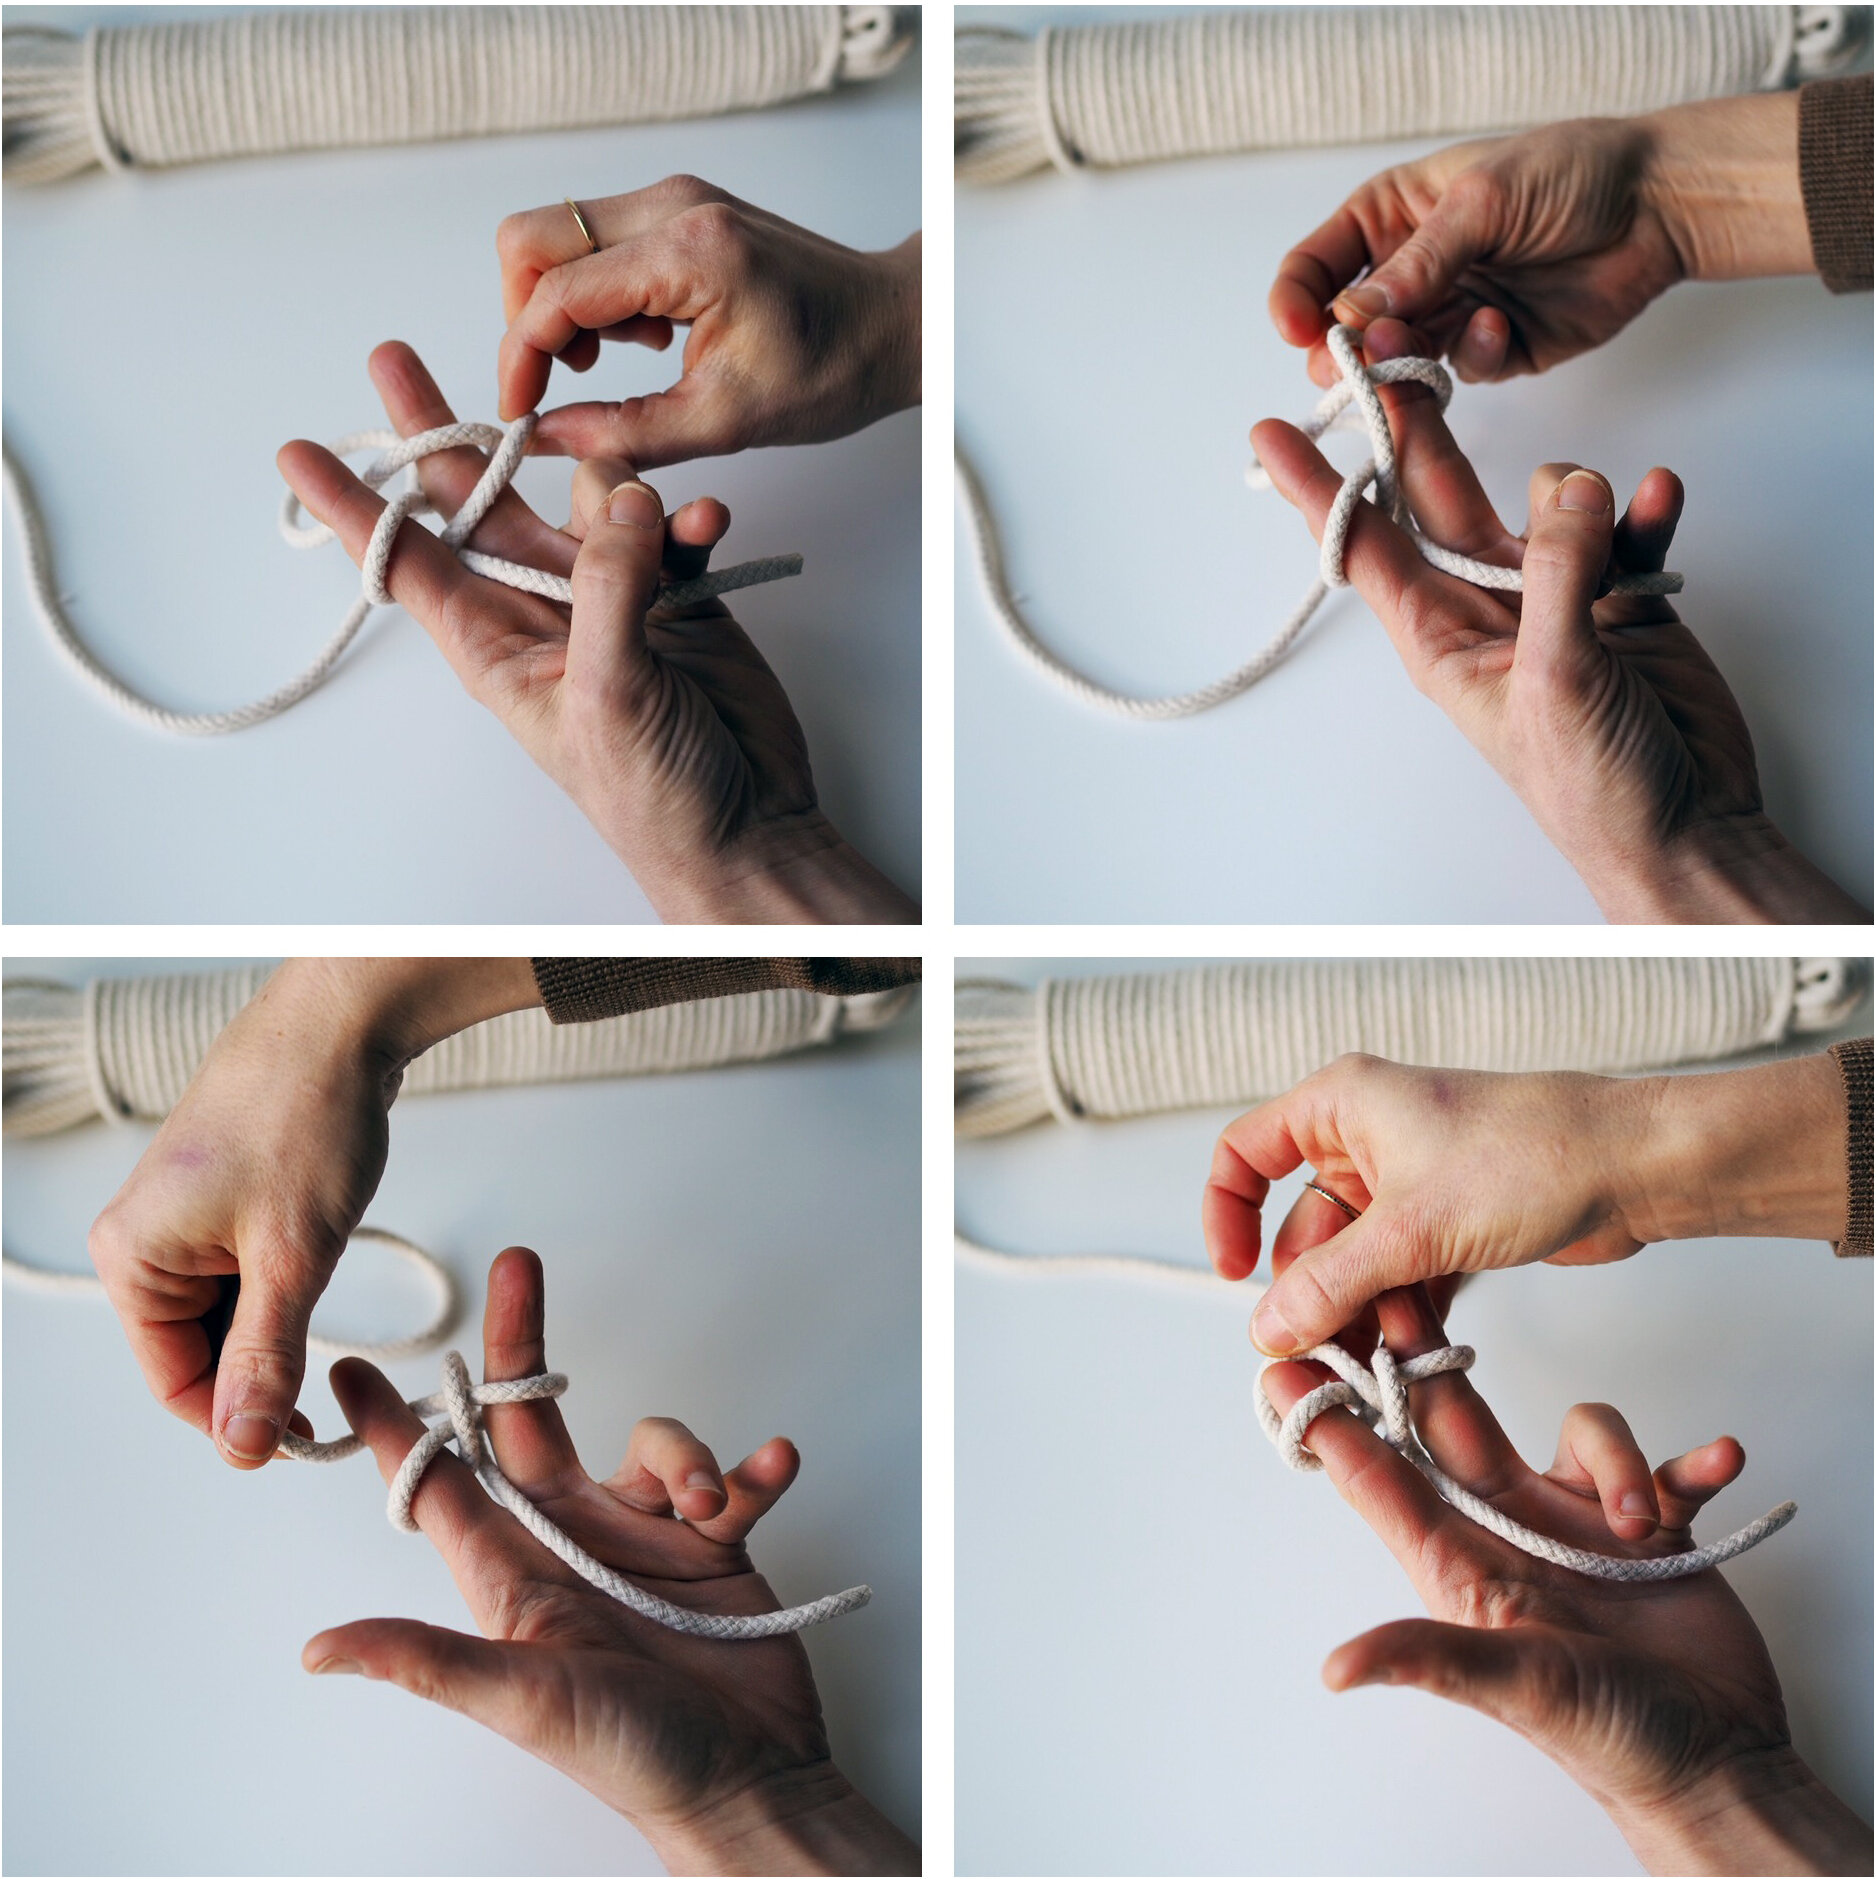
+ Now wrap the working rope counter clockwise around the pointer finger to create a second loop. Let the working rope hang in back of your hand as you pass the bottom loop over the top and off your pointer finger. You just completed your first knot on both sides.
+ You will continue to cord in this manner making a figure eight around your two fingers and sliding the bottom loop over the top. Pull the tail end of the rope (lying in front of your palm) down to lengthen out the cord as you work.
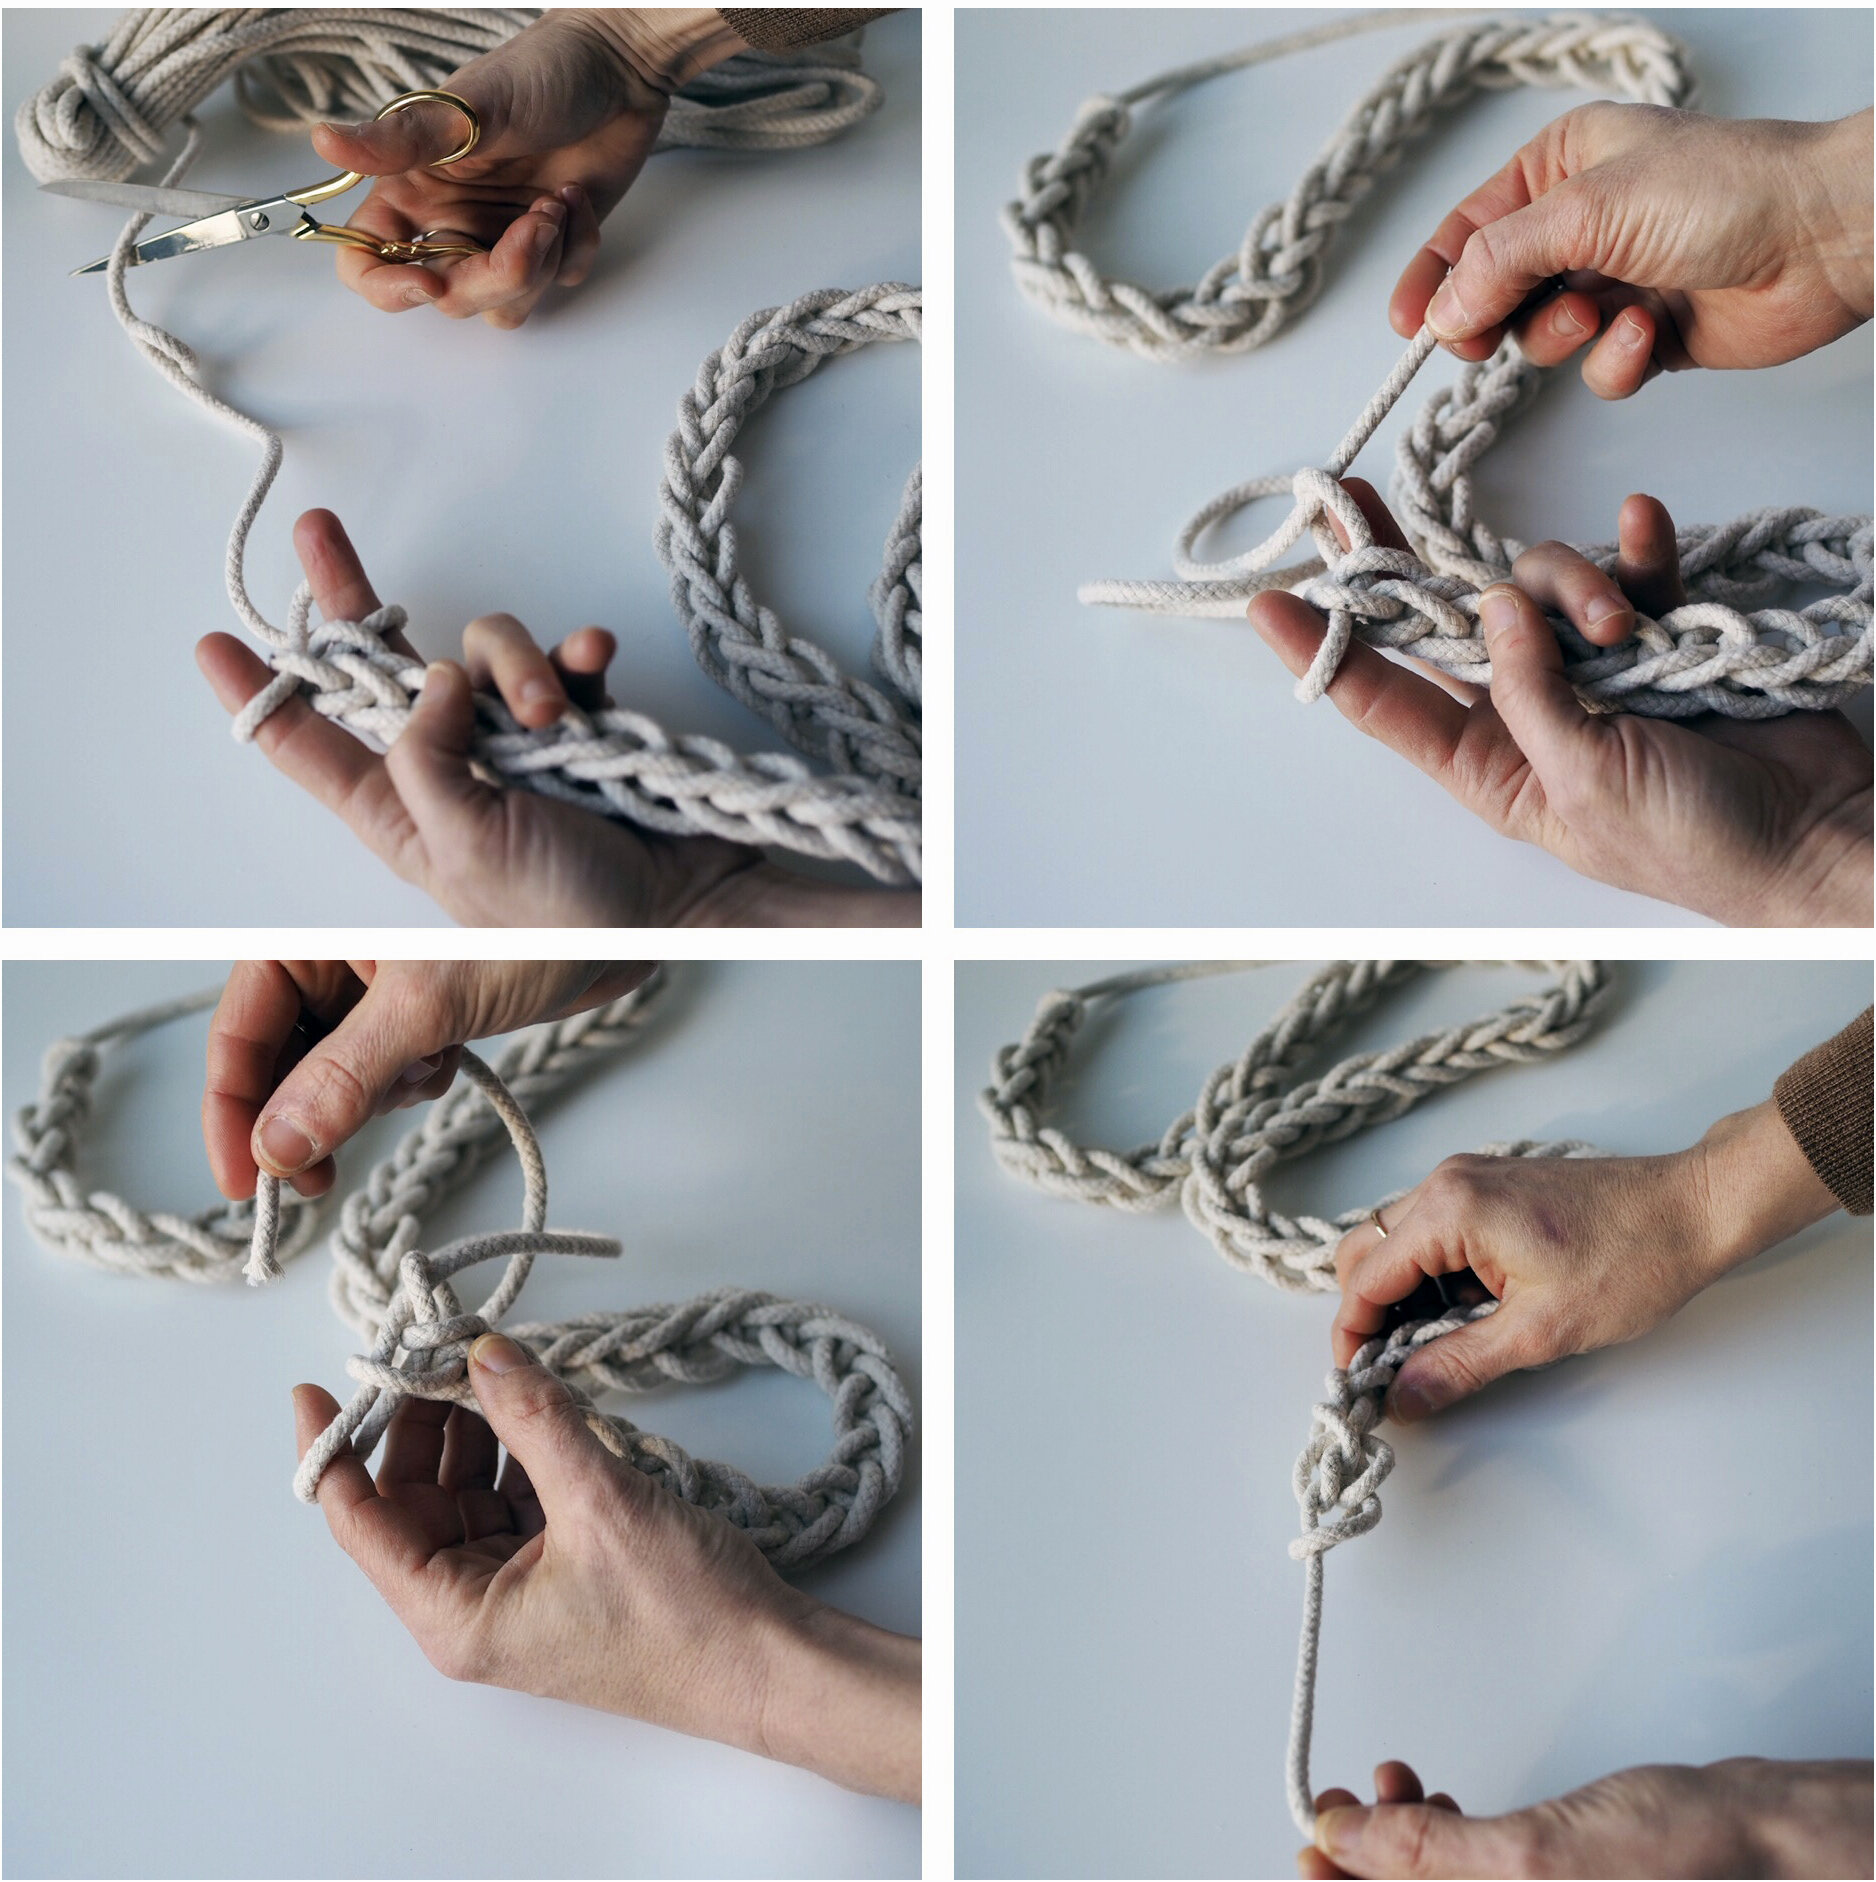
+ When you reach your desired length, cut a 6-inch tail end from your working rope. Thread the cut end through the single loop on the middle finger (from the inside out) releasing the loop from your finger. Then thread the tail end through the pointer finger loop (from the inside out) and off your finger. Pull tight to cinch together.
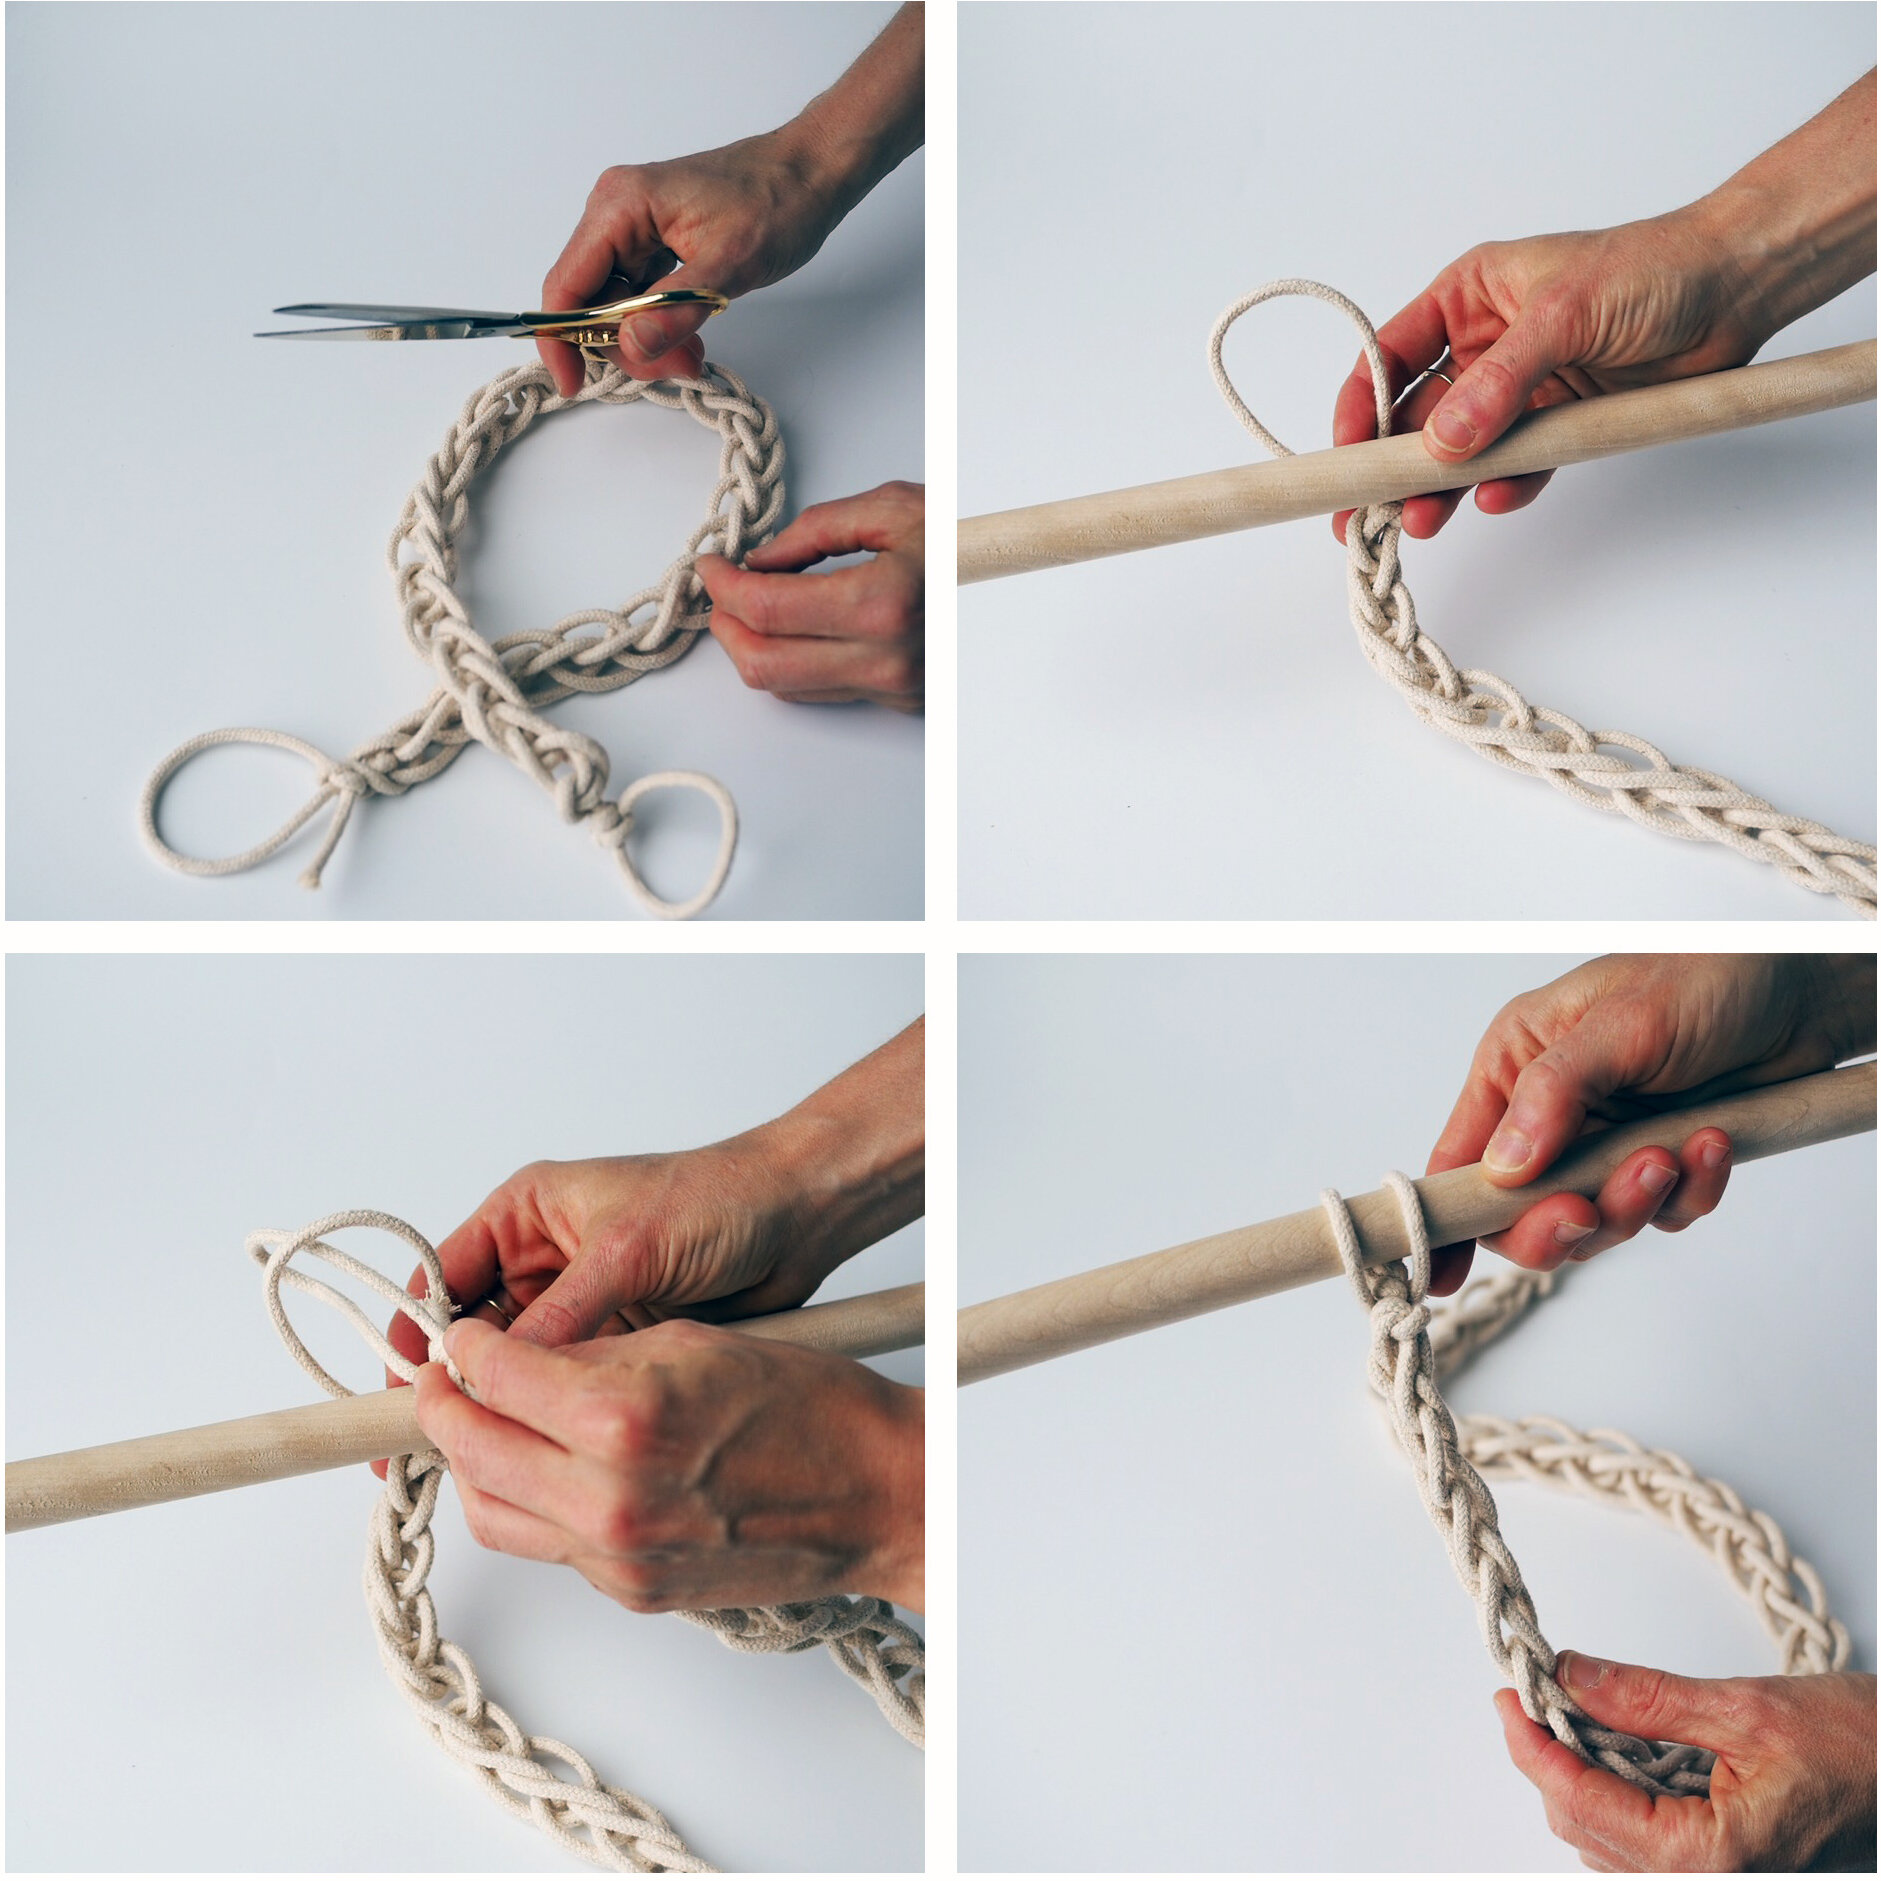
+ If you prefer having an extra large loop for hanging on the top and on the bottom of your cord, simply tie the extra cord into a loop and secure with a knot.
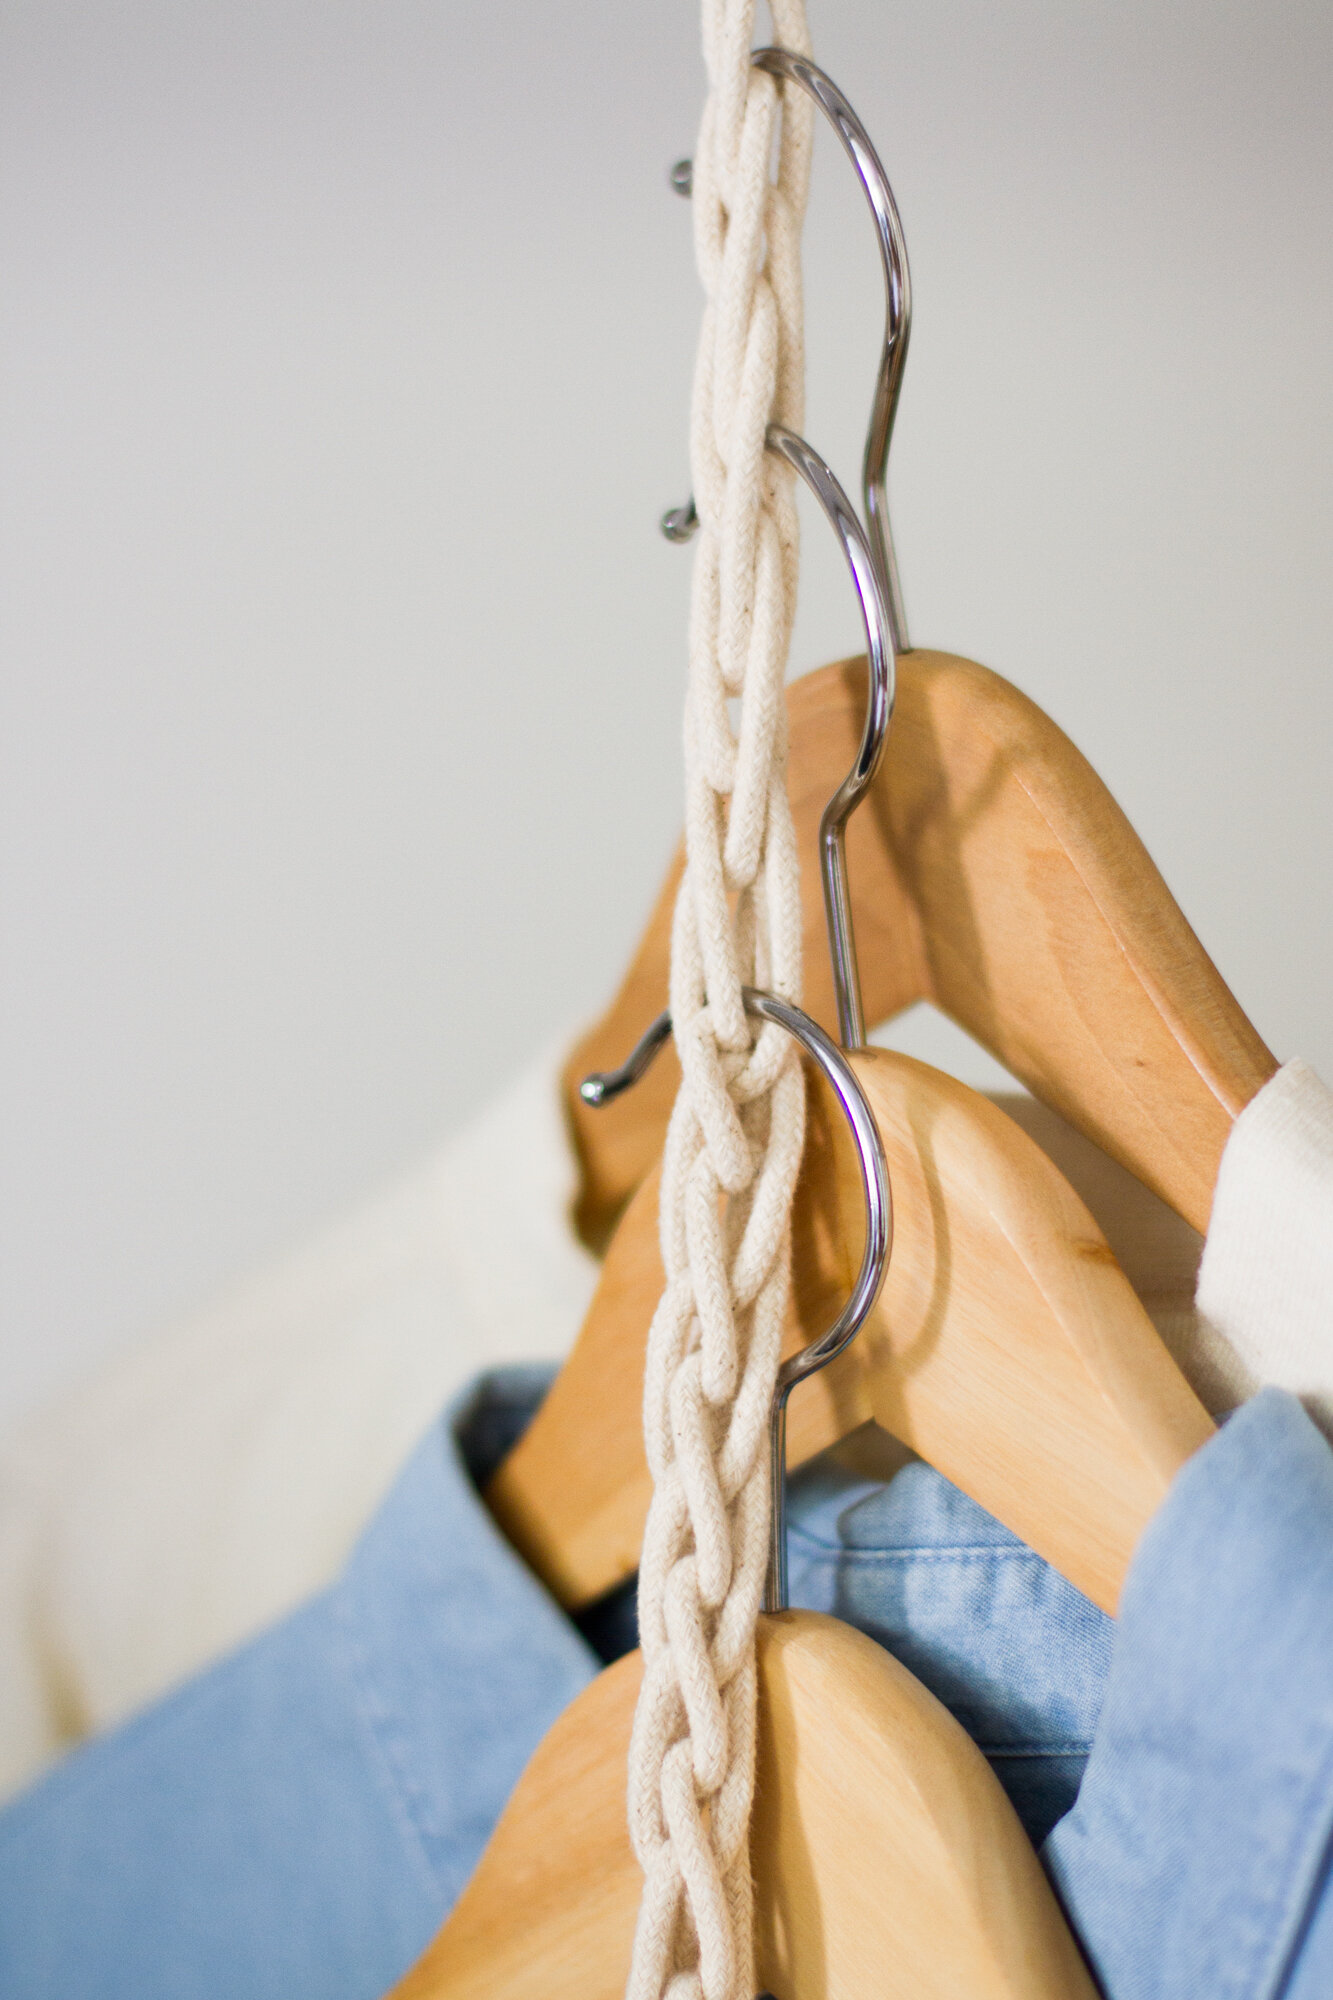
+ The large loop on the top or bottom of the cord can be used to hang from a hook or off a coat hanger. If you have a metal or wooden rod in your closet, you can secure your cord to the pole by threading the tail end of the cord through the opposite loop and around the closed pole.
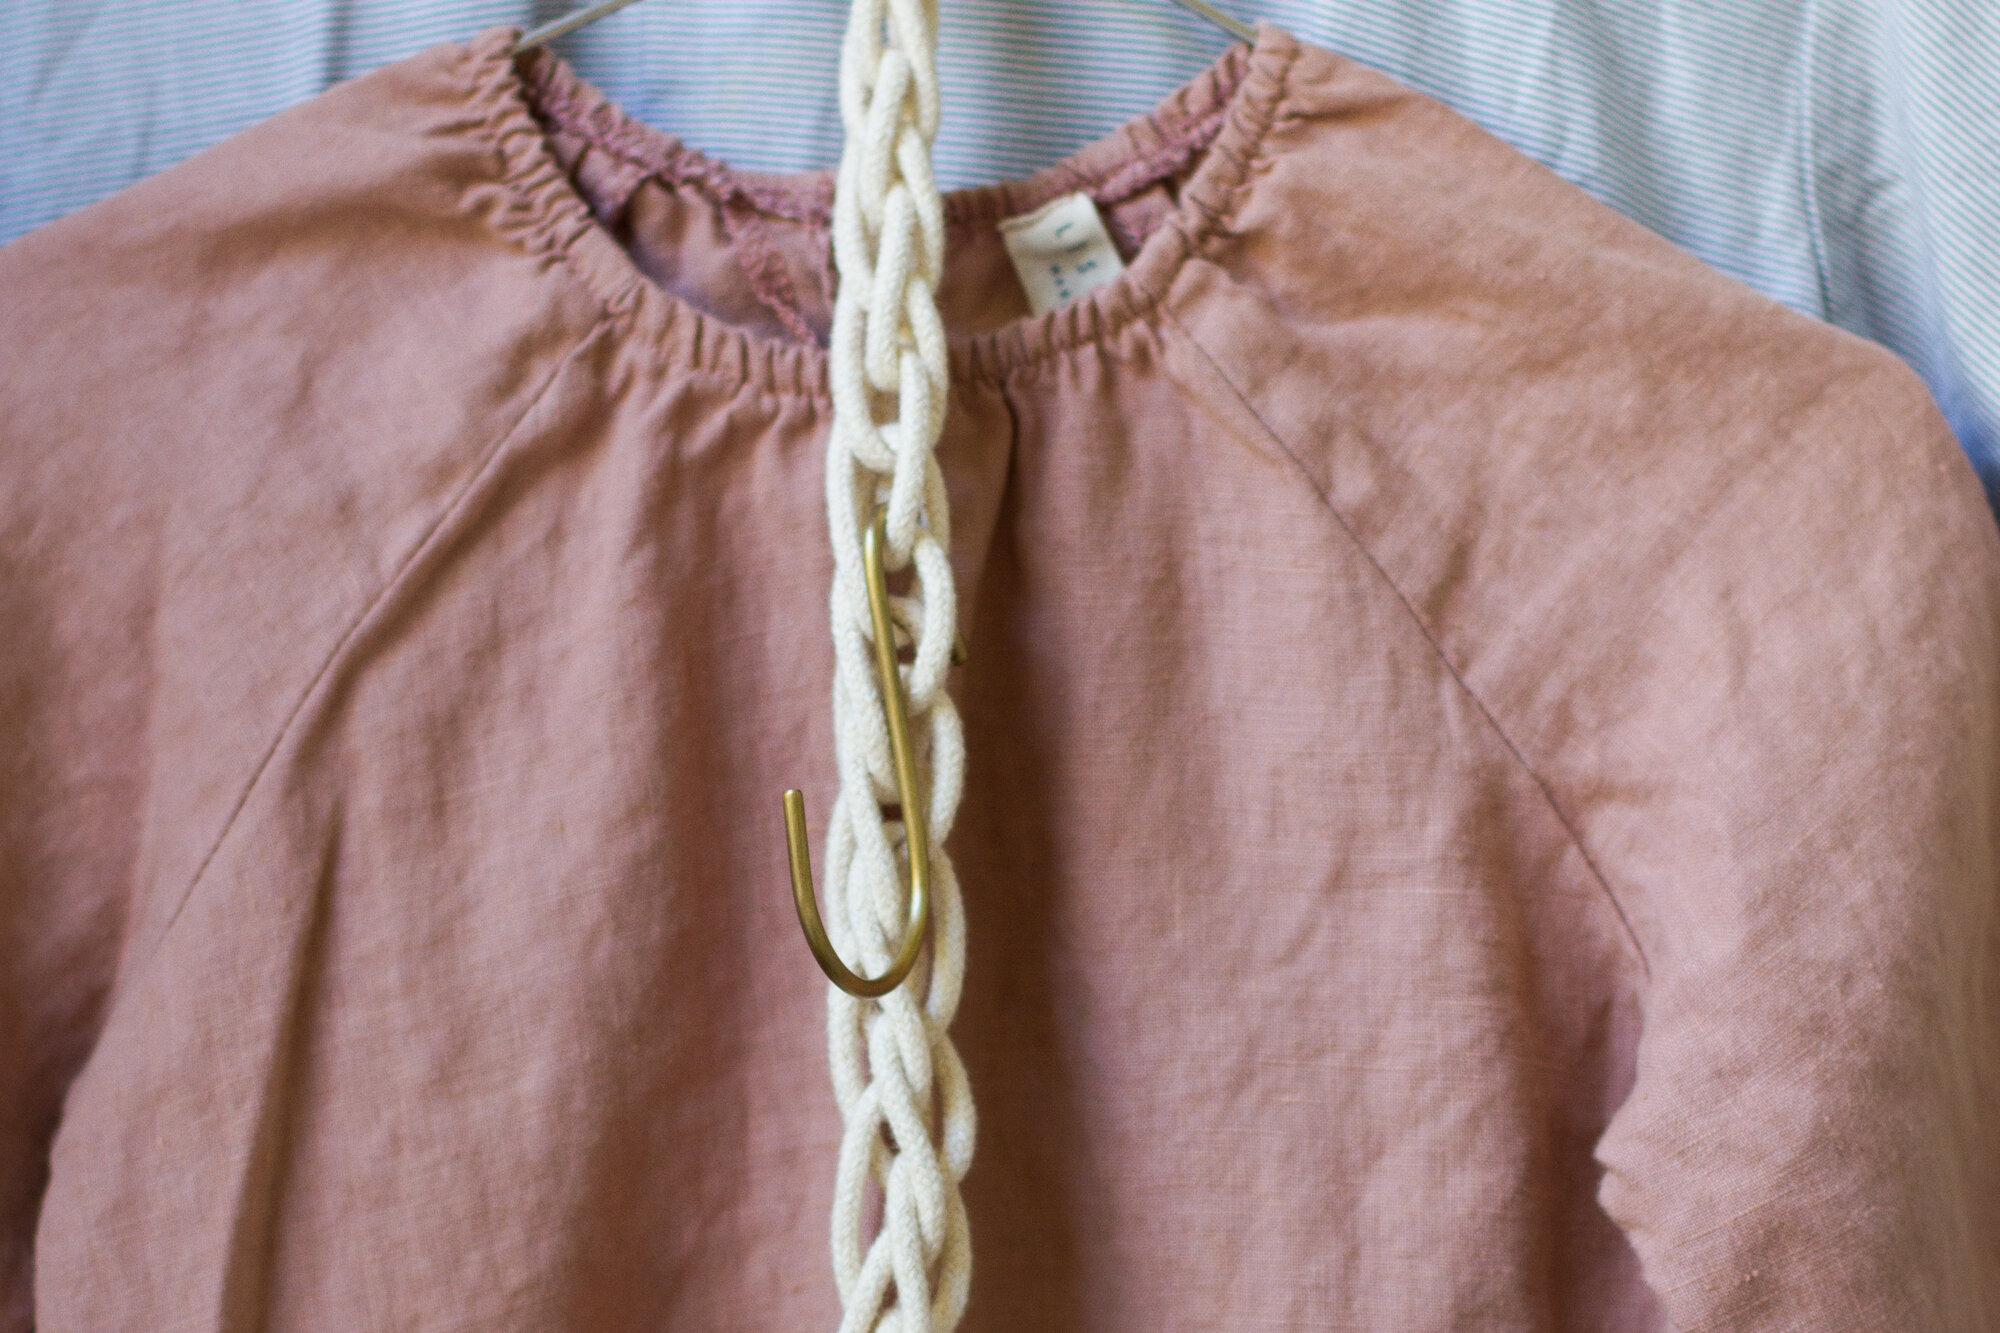
+ To hang multiple hangers off the rope simply insert the metal hook of each hanger finding the natural openings in the woven fiber. Continue to stack hangers working top to the bottom. The cord should hang in front of the hangers so additional hangers can be placed when needed.
Step-by-step instruction images were taken by Rose Pearlman. All other photos by Erin Boyle.
Thanks to Rose Pearlman for developing this project and writing the instructions. Rose is an artist, teacher, and textile designer. With a background in fine arts and a love of well designed functional objects, her creations blur the lines between art and craft and pushes the boundaries with non-traditional techniques and materials. Rose teaches monthly rug hooking workshops in and around her home in NYC, and also welcomes commissions for one of a kind constructions in decor and home furnishings. Her work has been featured in fiber magazines, galleries, and numerous online design sites. Her new book Modern Rug Hooking comes out December 3, 2019 and is currently available for preorder wherever books are sold. She lives in Brooklyn, NY with her family.
This post includes affiliate links. Reading My Tea Leaves might earn a small commission on the goods purchased through those links.

9 Comments
I love this idea! I did the paper roll hanger project a few weeks ago and it came out great. I’ve been trying to think about how I can use the same method and my leftover clothesline for something else, and this nailed it!
Perfect!
This timing is so perfect! I was just dreaming of something so similar to this for hanging pot lids from the ceiling, but I hadn’t looked into how I might knit (?) that together. I also need a place for clothes (I have a new place with zero storage) and might be stealing this idea for that as well. Thanks for sharing this, and so many other inspiring ideas! <3
I’m curious, do you keep certain things on hand for when these sorts of projects pop up? I’d love to have a small basket of go-to supplies, fabric scraps, saved brown paper from packaging etc. that can be used for projects like this. Like an ‘alternative use toolbox’. I feel like I need to re-train my brain on how to re-use things rather than just buying a new thing y’know? Haha.
I do! I keep a small bag of fabric scraps in the closet and another small bag filled with rope, ribbon, and string. When I know I’ve got a use coming up for things like brown paper packaging, etc, I put it aside, but I don’t have a huge amount of extra space, so I only keep a small stockpile!
i have an internal monologue any time something is getting thrown out or recycled – how can i reuse this? i’m well stocked with so many odds and ends but now i have to commit to actually using it. started a challenge with myself called 7 days. right now: making, i used a salvaged leather strap (naughty puppies!) to make an earphone wrangler and i love it! more projects this way: https://tps-steph.blogspot.com/2019/06/0041-7-days-making.html
ps. beautiful project! bookmarking for my future home 🙂
This is one of the best organizing projects ever! I live in Turkey and closets are rare- most people like me who live in older apartment buildings have wardrobes. I’m looking forward to making a corded clothes hanger this weekend.
The minute I saw this project I thought “what a great way to store circular needles.” I’m going to make one this week. Thank you for a great project.
At long last, a solution to the bike helmets that are always knocking around on our entryway floor!
Comments are moderated.