It’s a chief joy of mine to find something that someone else discarded and to make it mine. One woman’s trash becomes another’s treasure and not much of anything goes to waste. With the exception of our bed frames and our crib, we’ve found the rest of our furniture on Craigslist and eBay and at old fashioned tag sales. But every so often, we’ve also found a treasure curbside, abandoned there for trash pickup or neighborly treasure hunting.
Purchased or found, most of our furniture finds have included hauling the piece home, washing it up, and maybe doing a bit of light sanding or painting (or both) to freshen it up a bit. But in April I collected this new-to-me dresser that needed more than a little care and quite a bit more imagination.
I’d been wanting to swap our changing table for a taller wardrobe or dresser for months. I’d pinned similar pieces on Pinterest. I’d scanned local listings and eBay. I’d hunted around antique shops near my hometown. I was anxious to make better use of the vertical space in Faye and Silas’s room and Silas’s squirminess during diaper changes is only matched by his older sister’s before him, so we felt ready to replace his changing table with something that could make better use of the space, especially because there’s no closet in their room.
When we spotted the tall piece of furniture on the street near our apartment, I was immediately hopeful, but the dresser was in objectively rough shape. Originally a kind of Art Deco china cabinet with glass doors, there were at least seven layers of paint, missing moldings and pulls, and one perplexing label-maker made sticker. It looked far more like trash than treasure and I almost left it curbside, but my dad was in town and so I took advantage of the extra set of hands and hauled it home. A few weeks later, it was ready for prime time.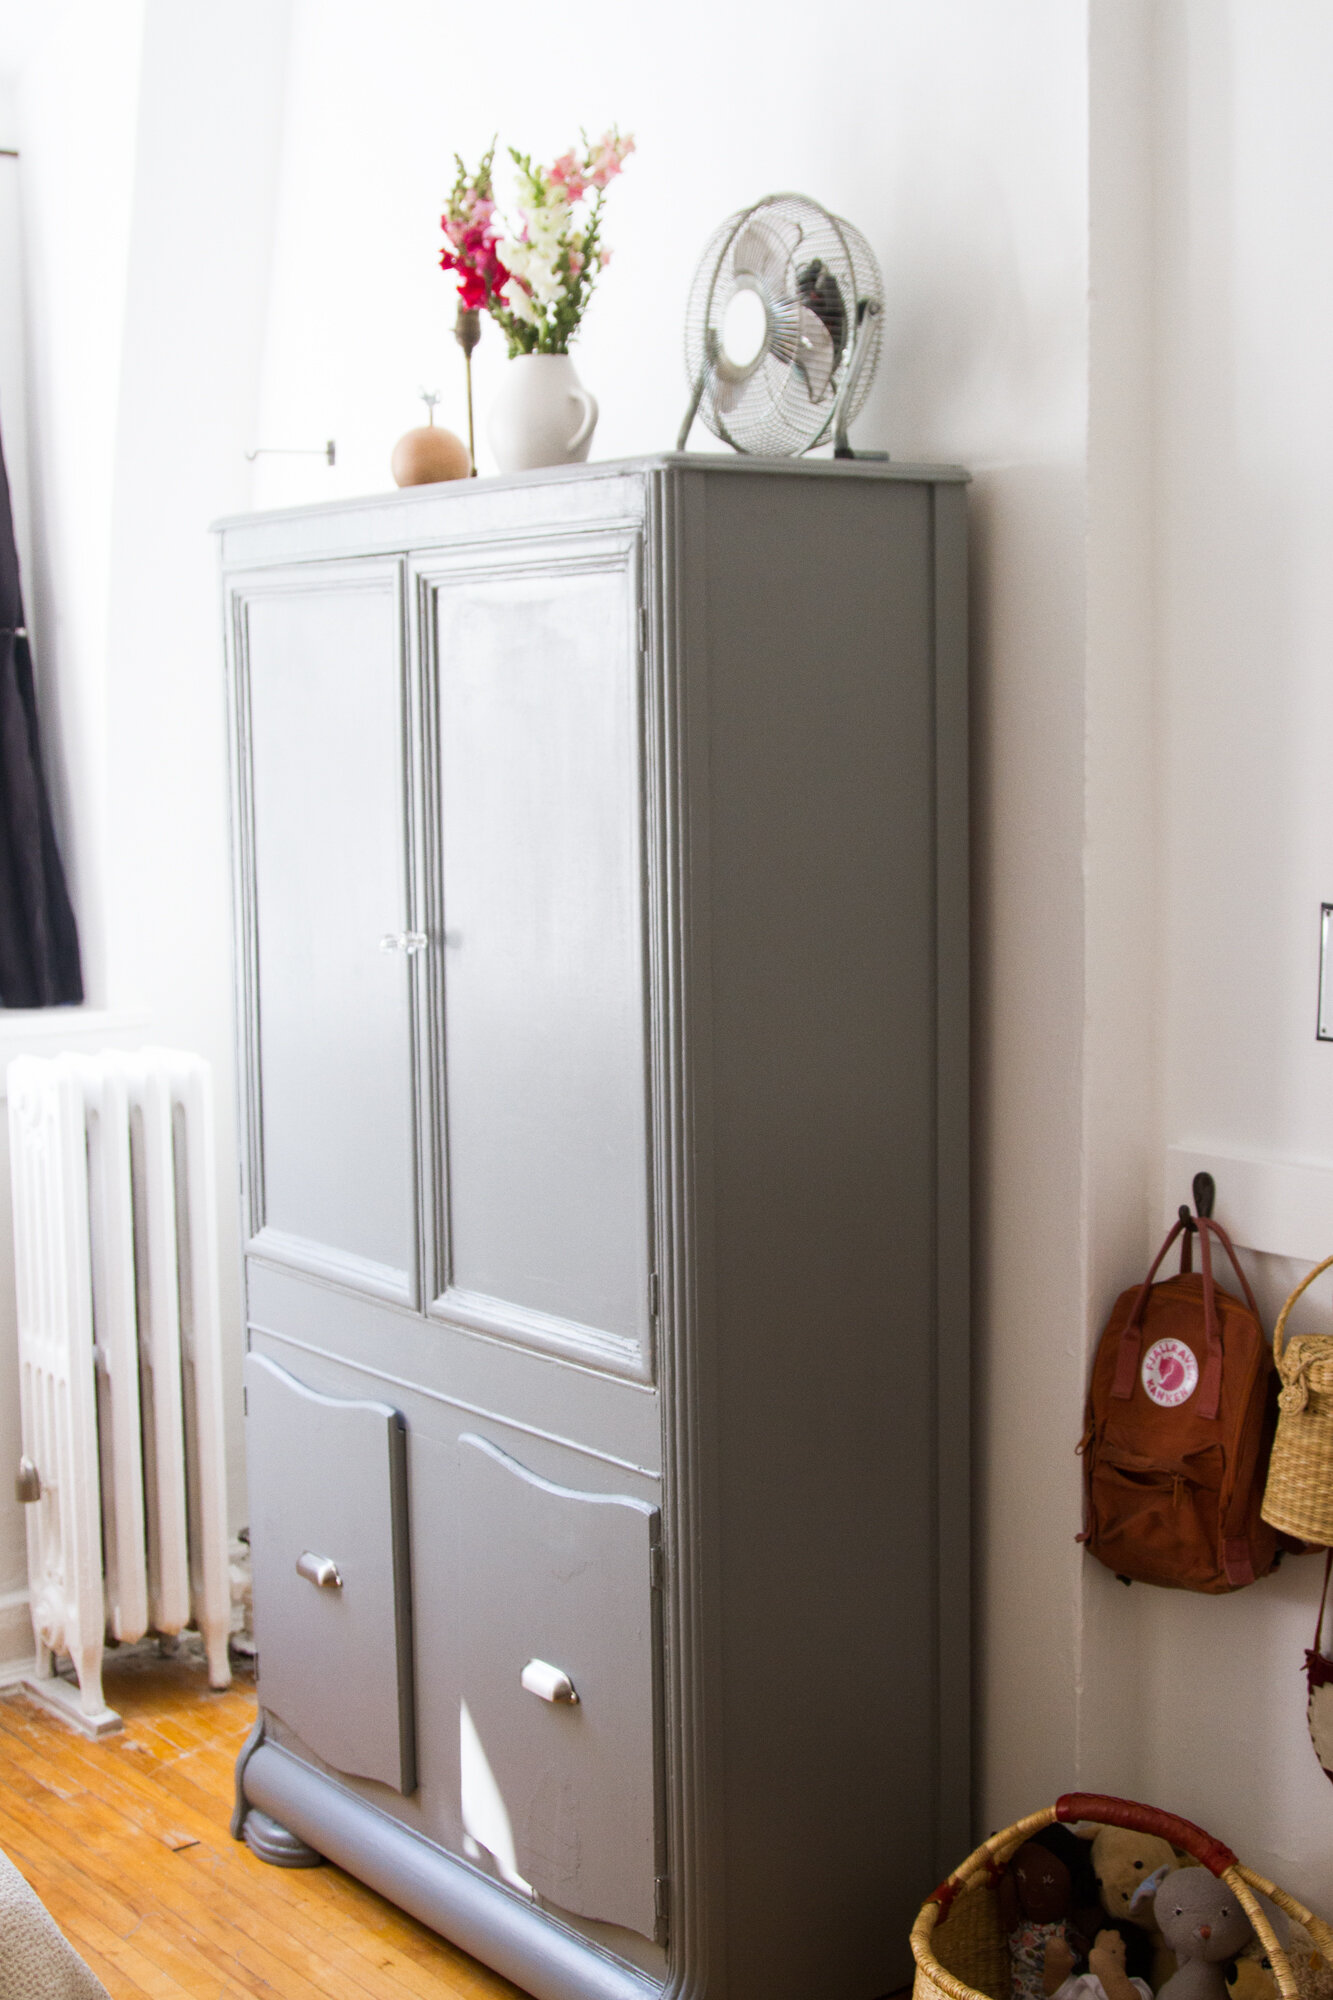
For anyone’s who’s interested, here are a few of the nitty gritty details that might behelpful for any treasure hunting you’re doing:
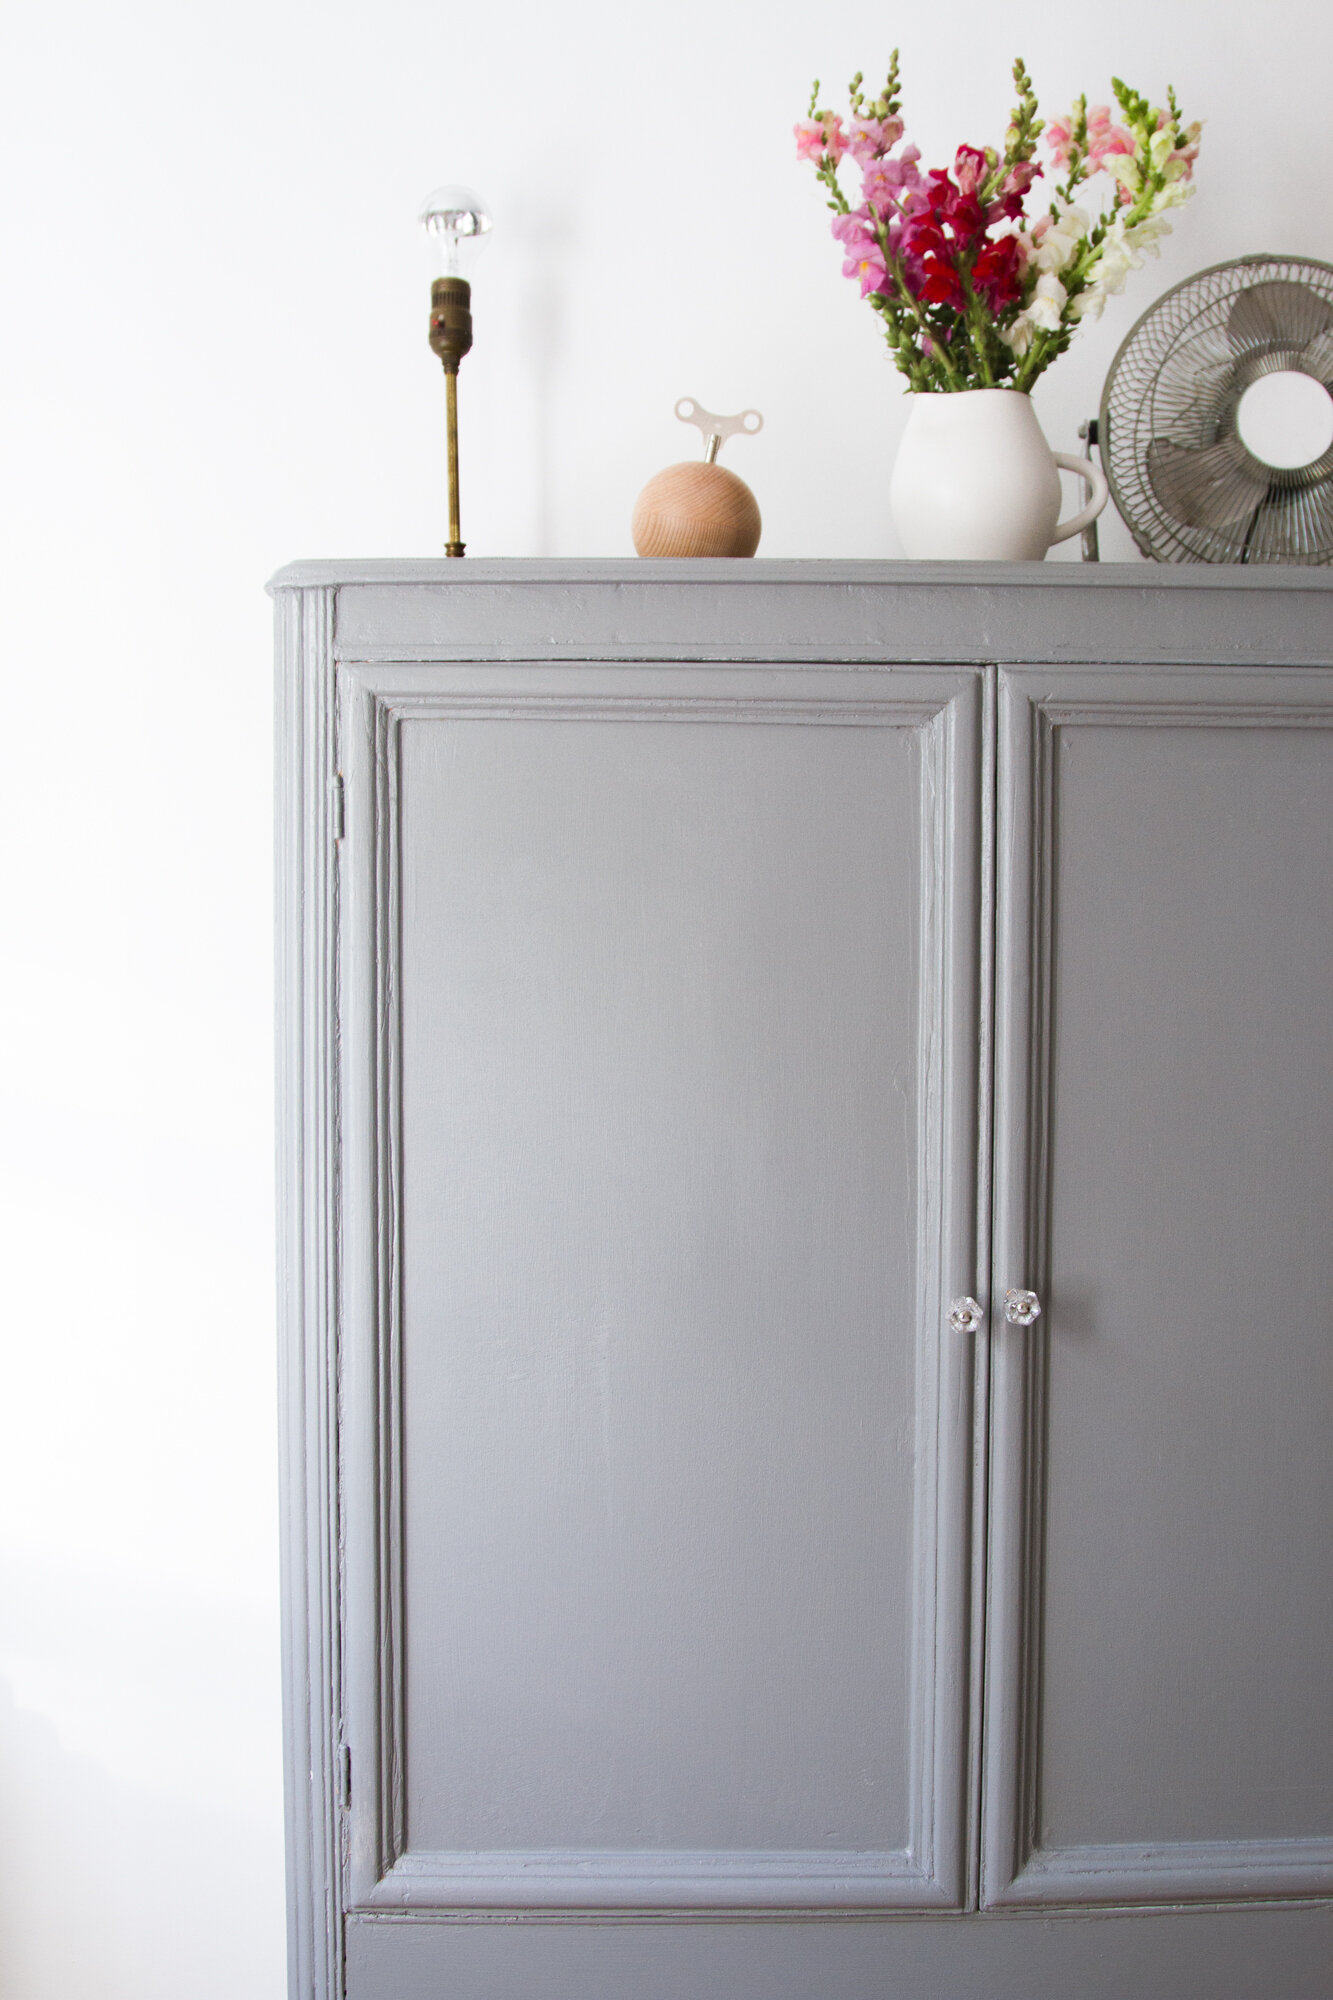
I started the project by removing the decorative moldings on the top of the dresser. It gave the piece the simpler, more streamlined look that I preferred, but it also served to make the top of the cabinet more useable for storage.
Next, I removed the glass panels from the doors. I didn’t want to have to worry about my kids shattering the large panels. I originally planned on replacing the glass with fabric tacked to the inside of the door frames—Faye and I even picked out sweet fabric together—but after a few weeks of Silas putting his hands through the fabric, I decided a solid replacement would be preferable. Two sheets of birch veneered plywood cut to size at the hardware store, and some wood glue later, and I had myself solid doors.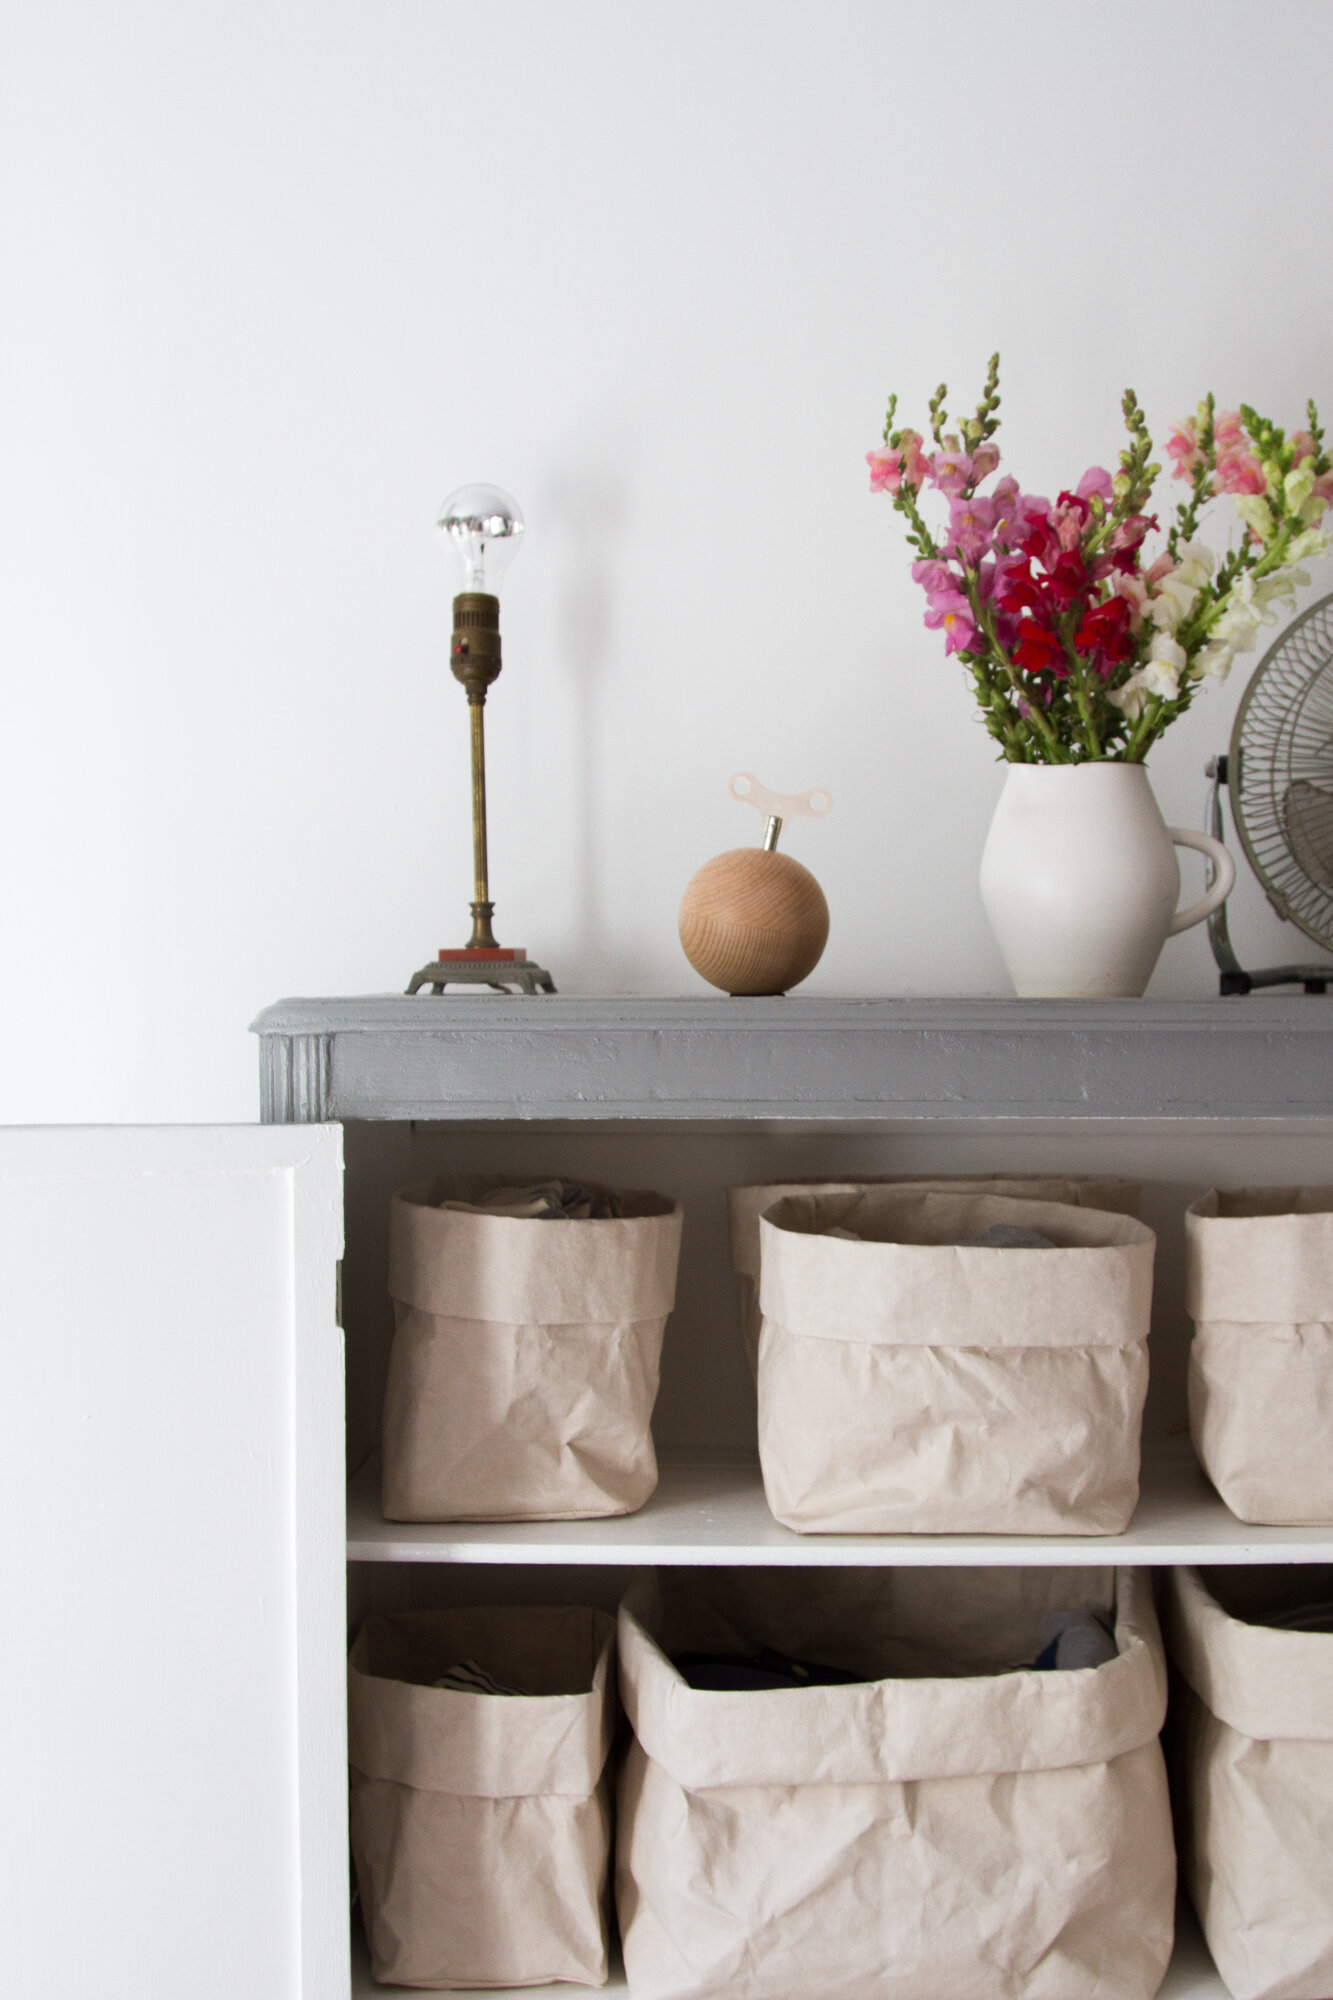
The toughest conundrum was knowing that the dresser almost assuredly had lead paint. I didn’t want to sand it myself, and certainly not in our apartment, so we took advantage of the extremely serendipitous timing of our lead paint remediation and I paid the gentleman doing the work to strip the dresser safely for me. (If you plan to remove lead paint yourself, definitely do your research and make sure you do it safely.)
After the paint was removed and the plywood glued in place, I used a bit of wood filler to fill in spots where original veneer was missing and to fill in the gaps around the plywood panels. 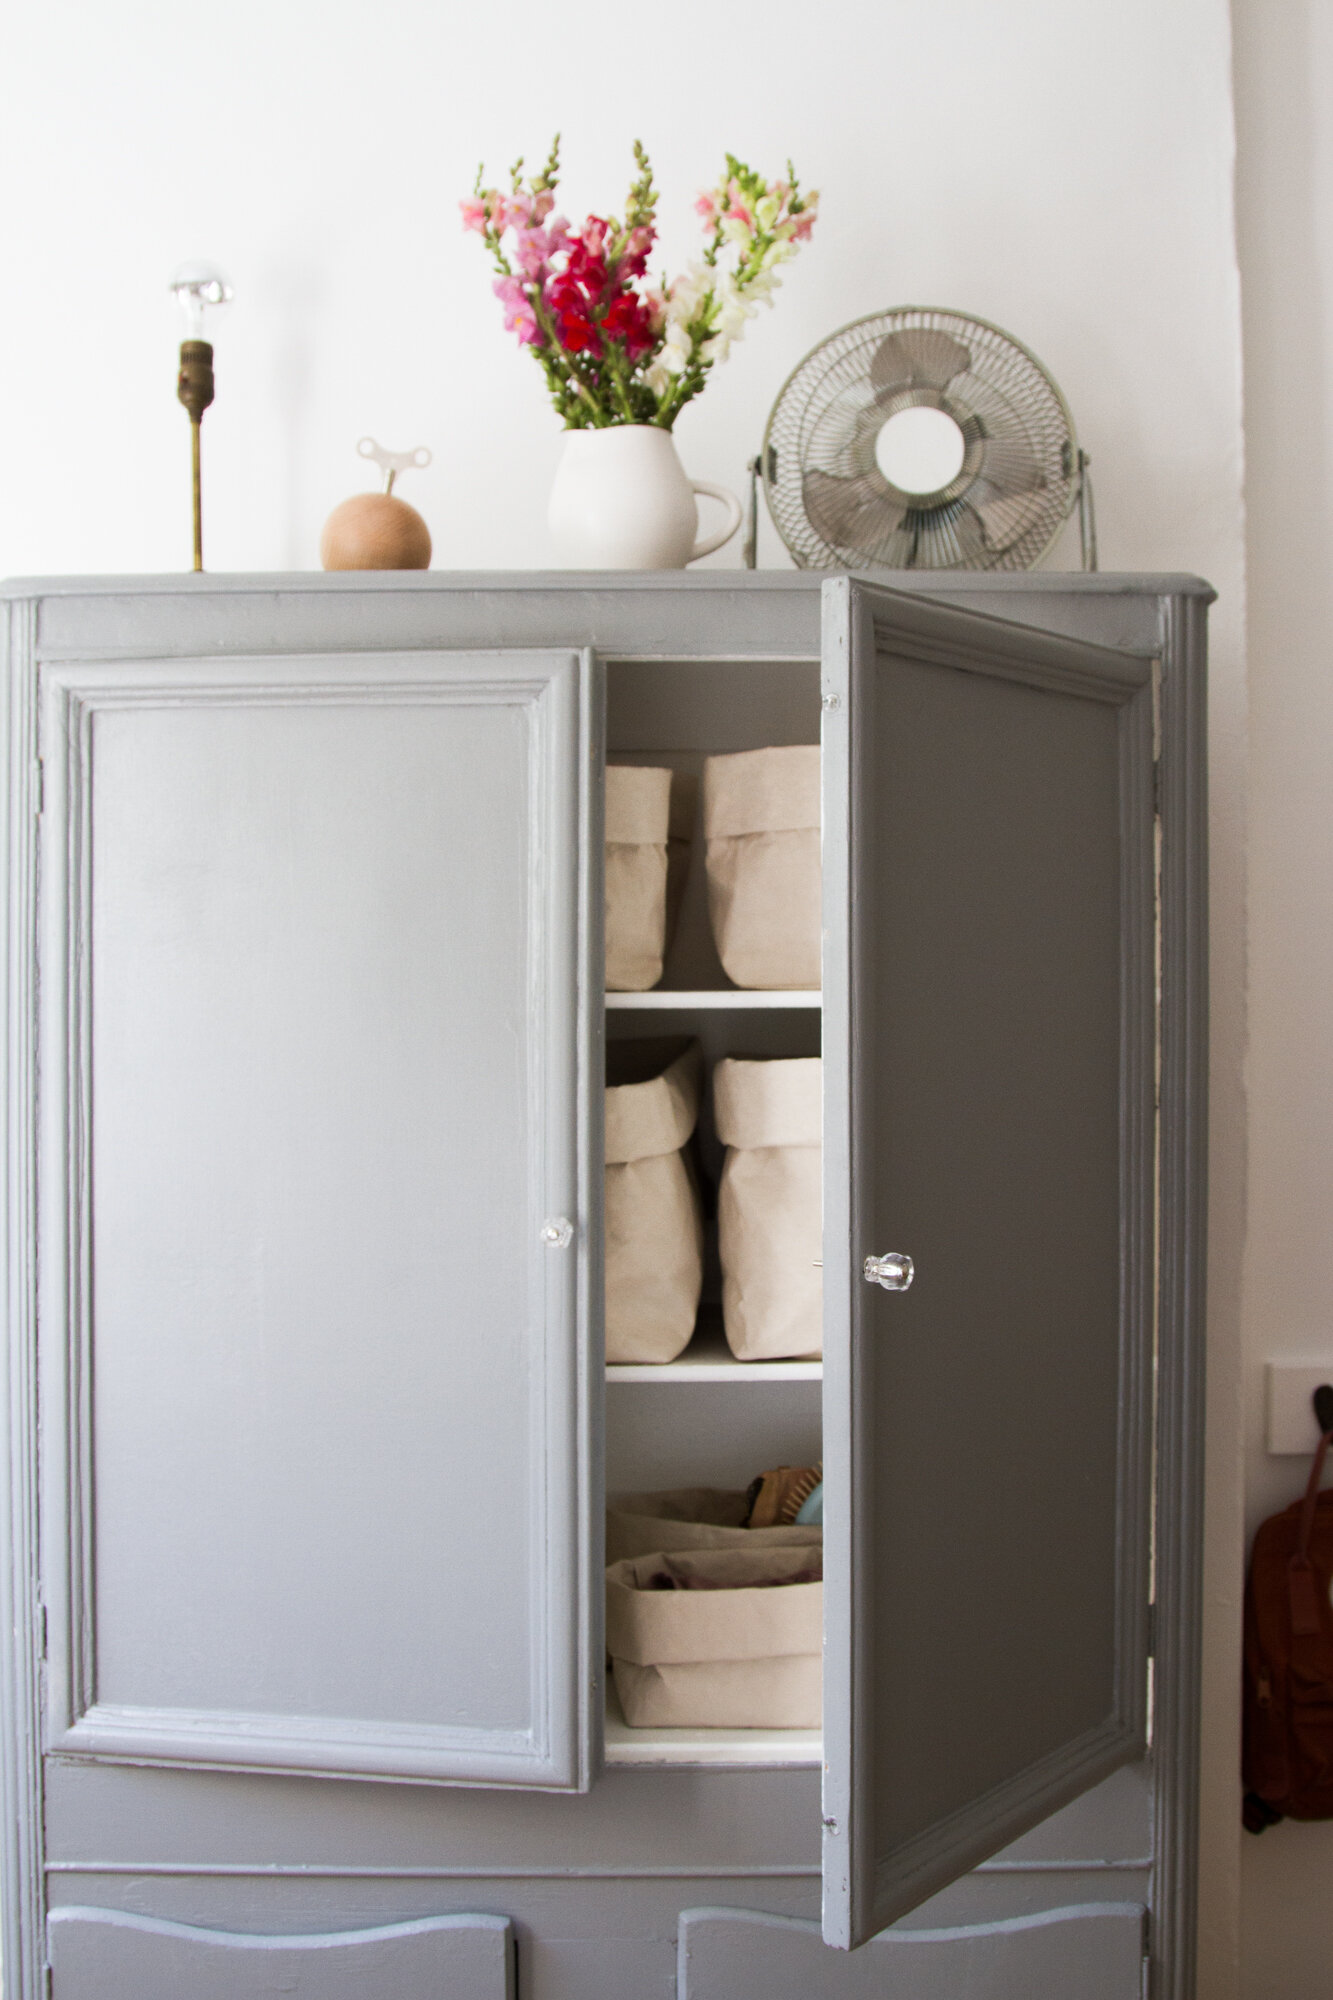
To finish, I primed and painted the dresser before we moved back into our place in June. The exterior paint was generously provided by Farrow & Ball. I went with Faye to their Brooklyn store to choose a color and despite encouragement to choose something quite a bit more vibrant, she insisted on painting it gray. We settled on their Plummet paint in an eggshell finish. It’s a really lovely grey—not too purple but still with a hint of blue. On the inside, I used the same Simply White from Benjamin Moore used throughout the rest of the house.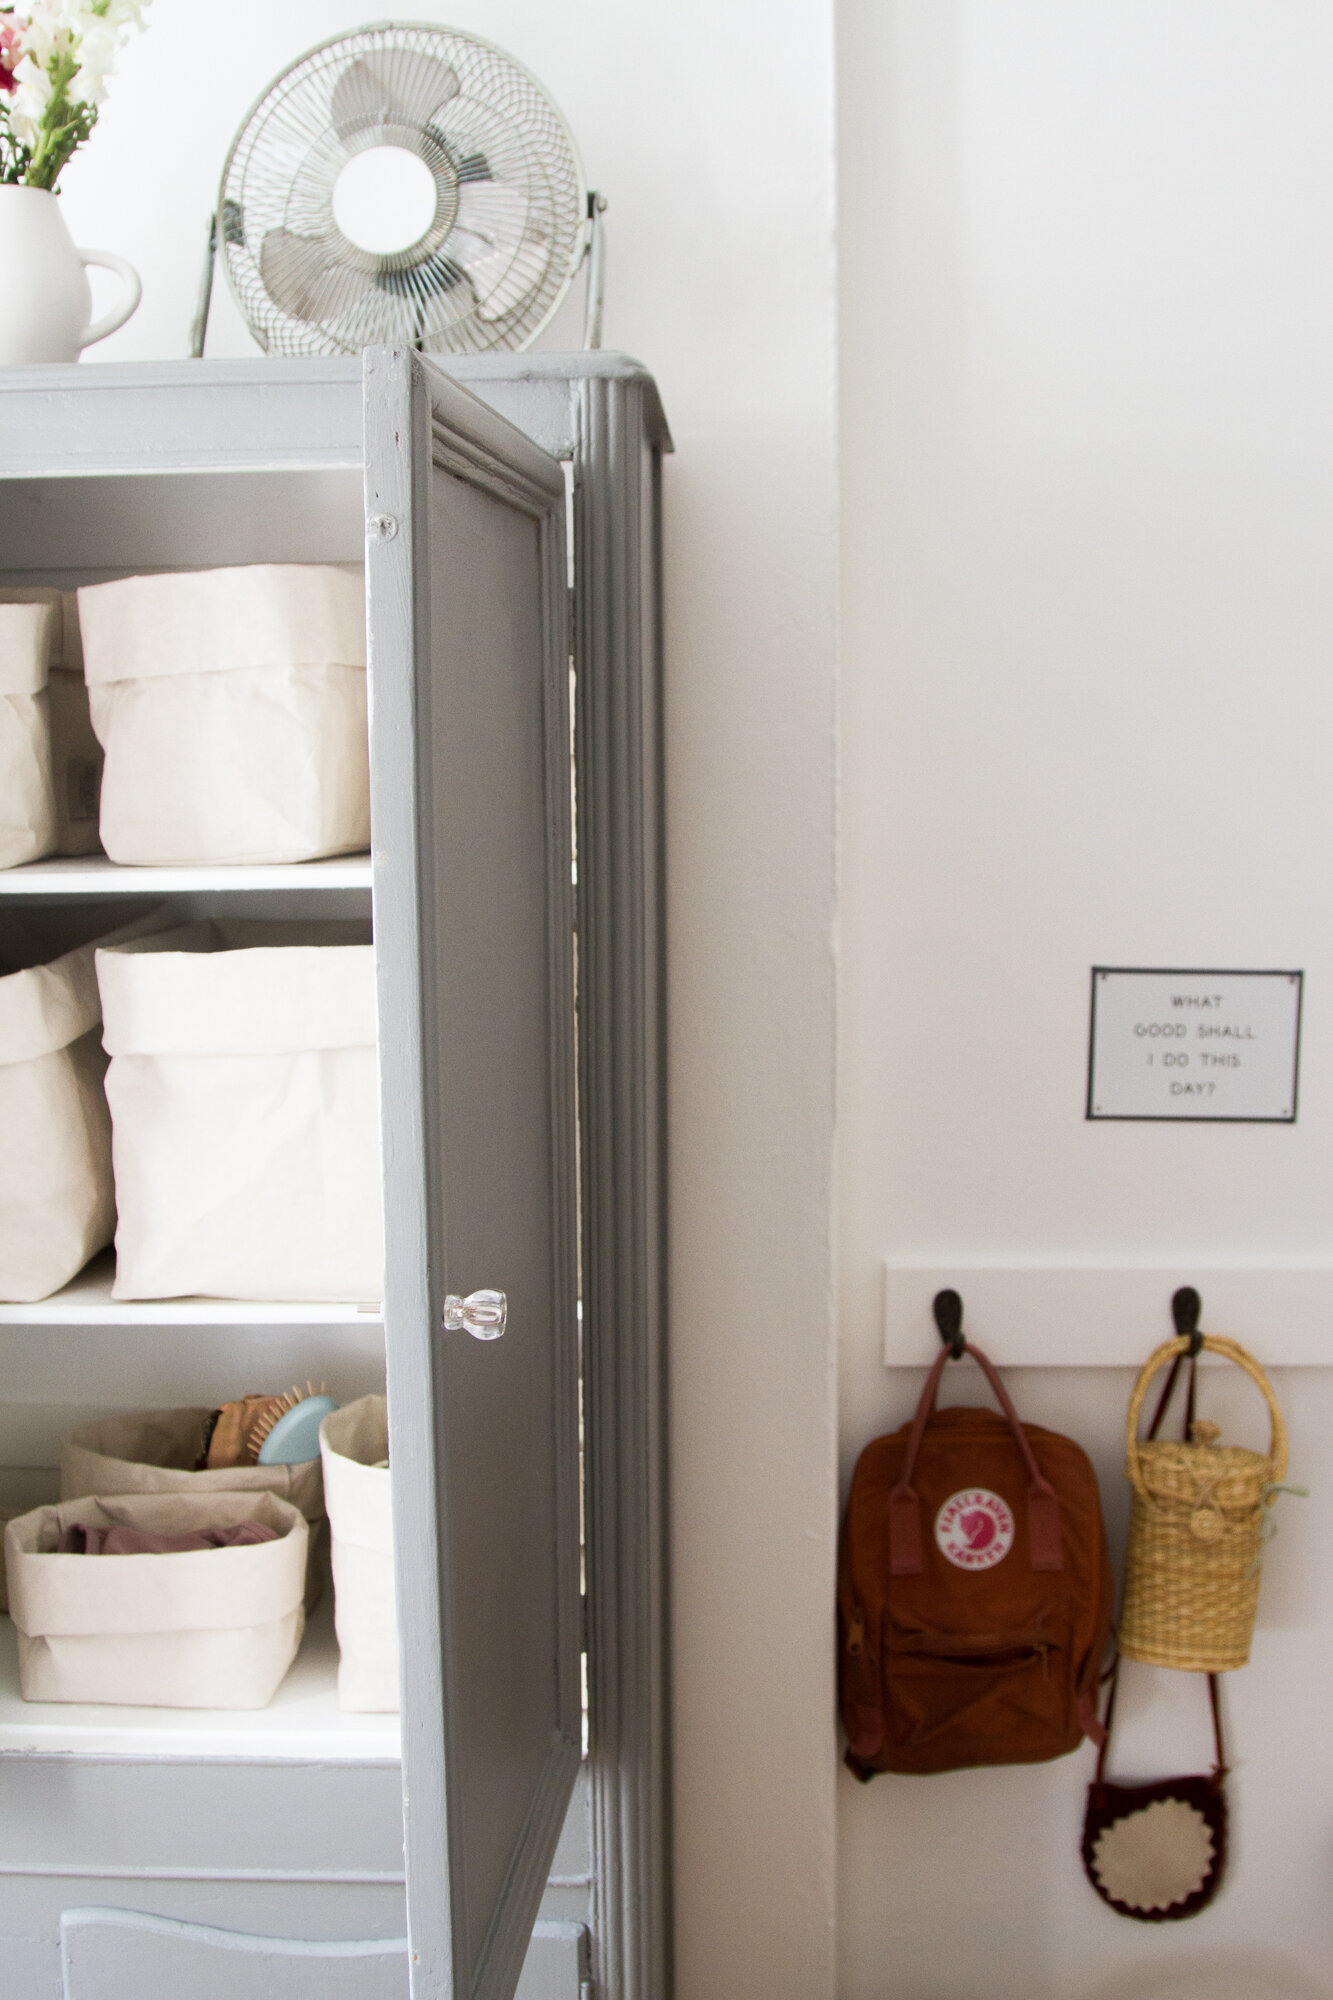
To replace missing cabinet pulls, I bought these tiny 1-inch Glass Knobs from Historic House Parts. For the bottom drawers, we used two Brushed Nickel Bin Pulls sent from Rejuvenation. (To keep our little guys safe from a tall dresser tumble, we used simple Corner Braces from our local hardware store to screw the dresser directly into the wall.)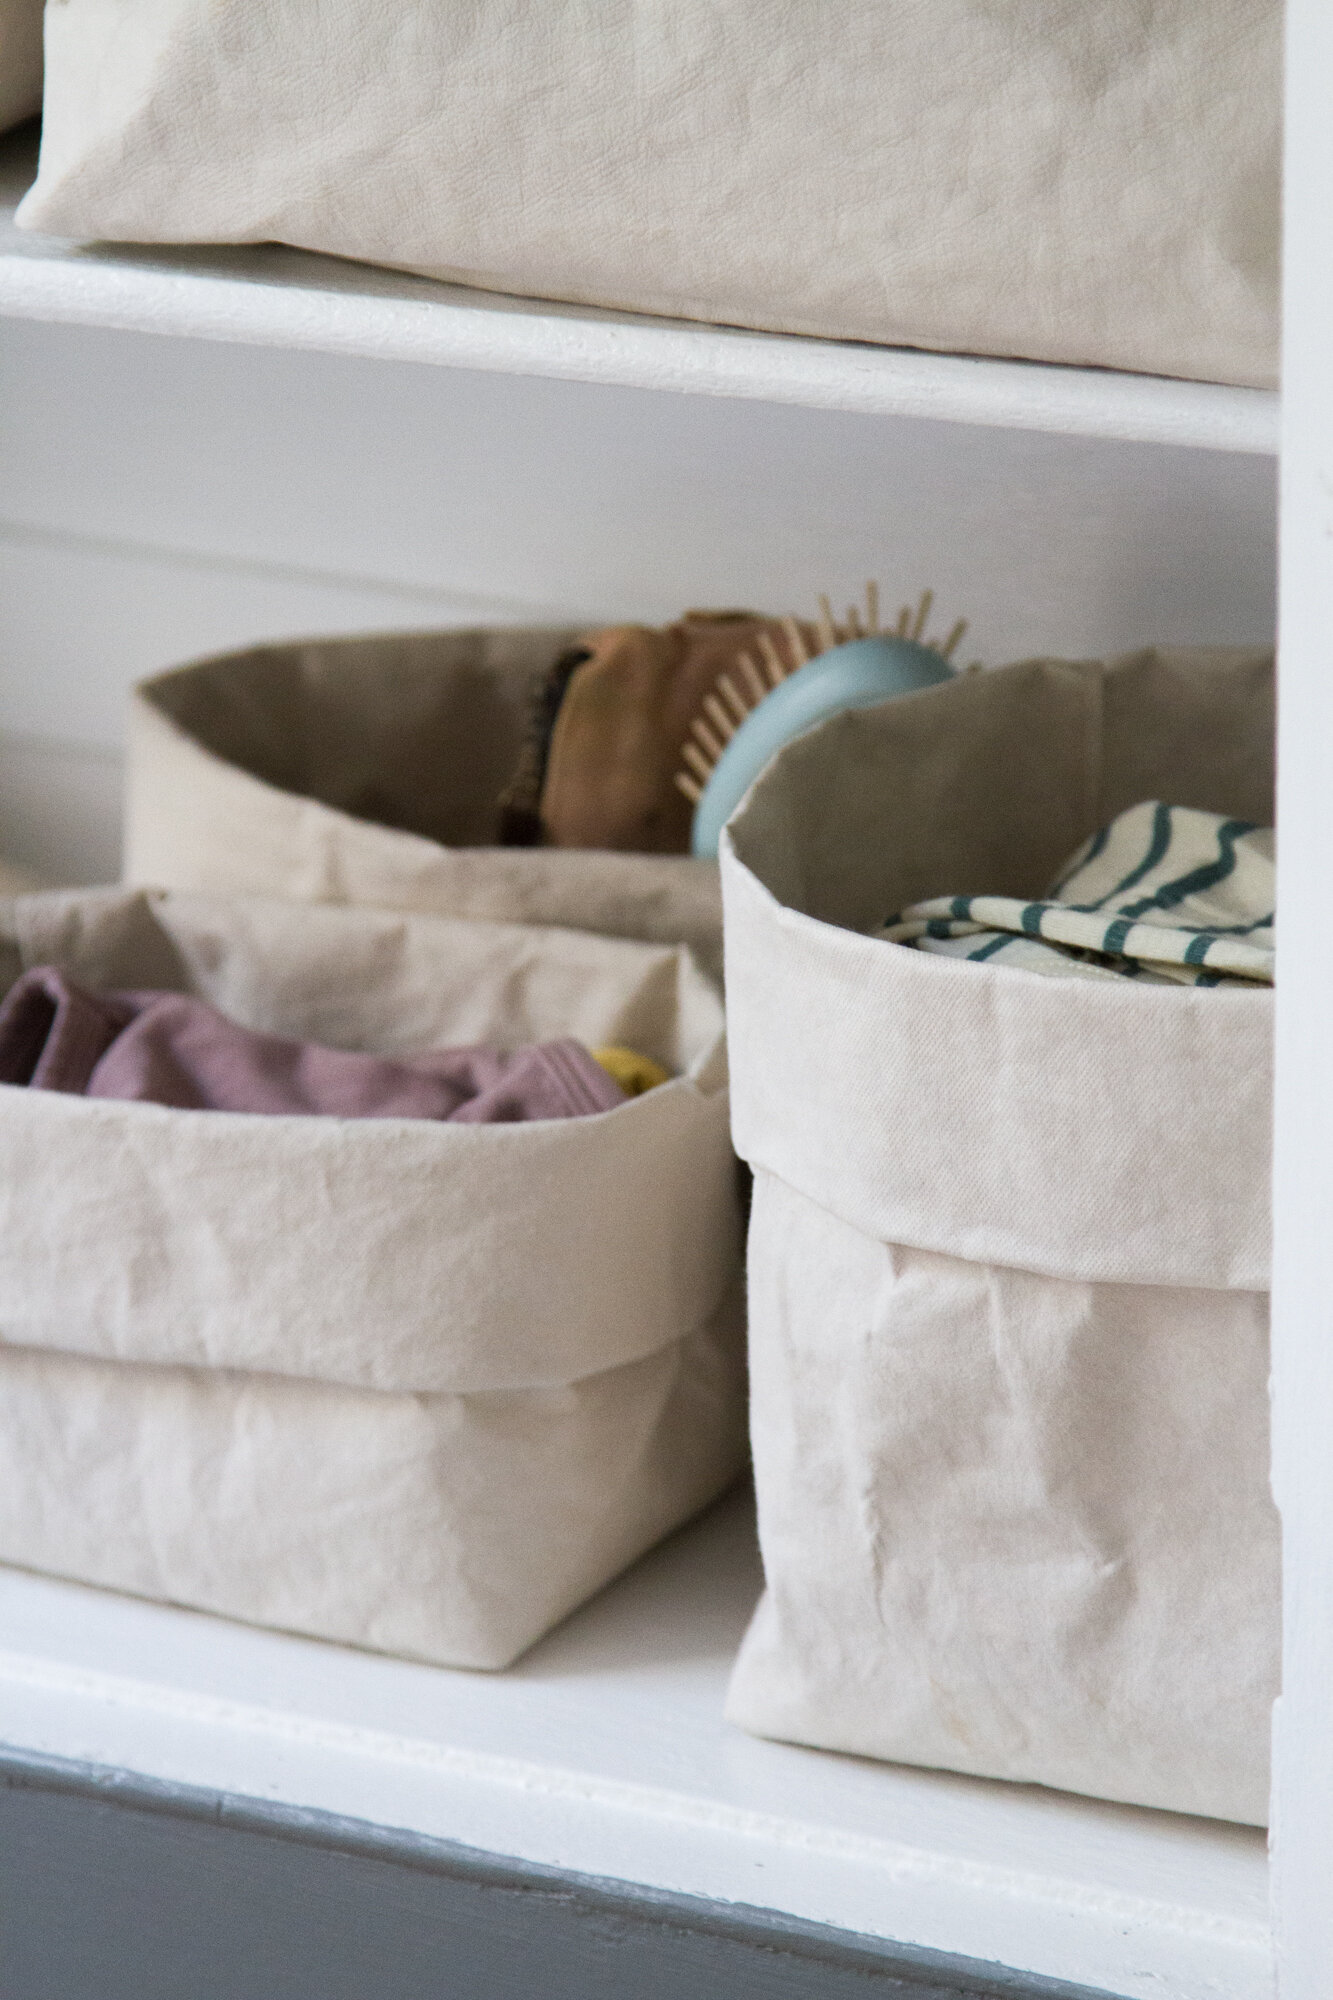
Finally, I used a variety of differently sized Paper Bags provided by Uashmama (in the Cachemire color!) to sort clothes and keep them organized in a small space. I like to let Faye pick out her own clothes, so the bags make it super easy to let her take a look and select a shirt or shorts, etc., without sending tiny piles of stacked t-shirts into disarray.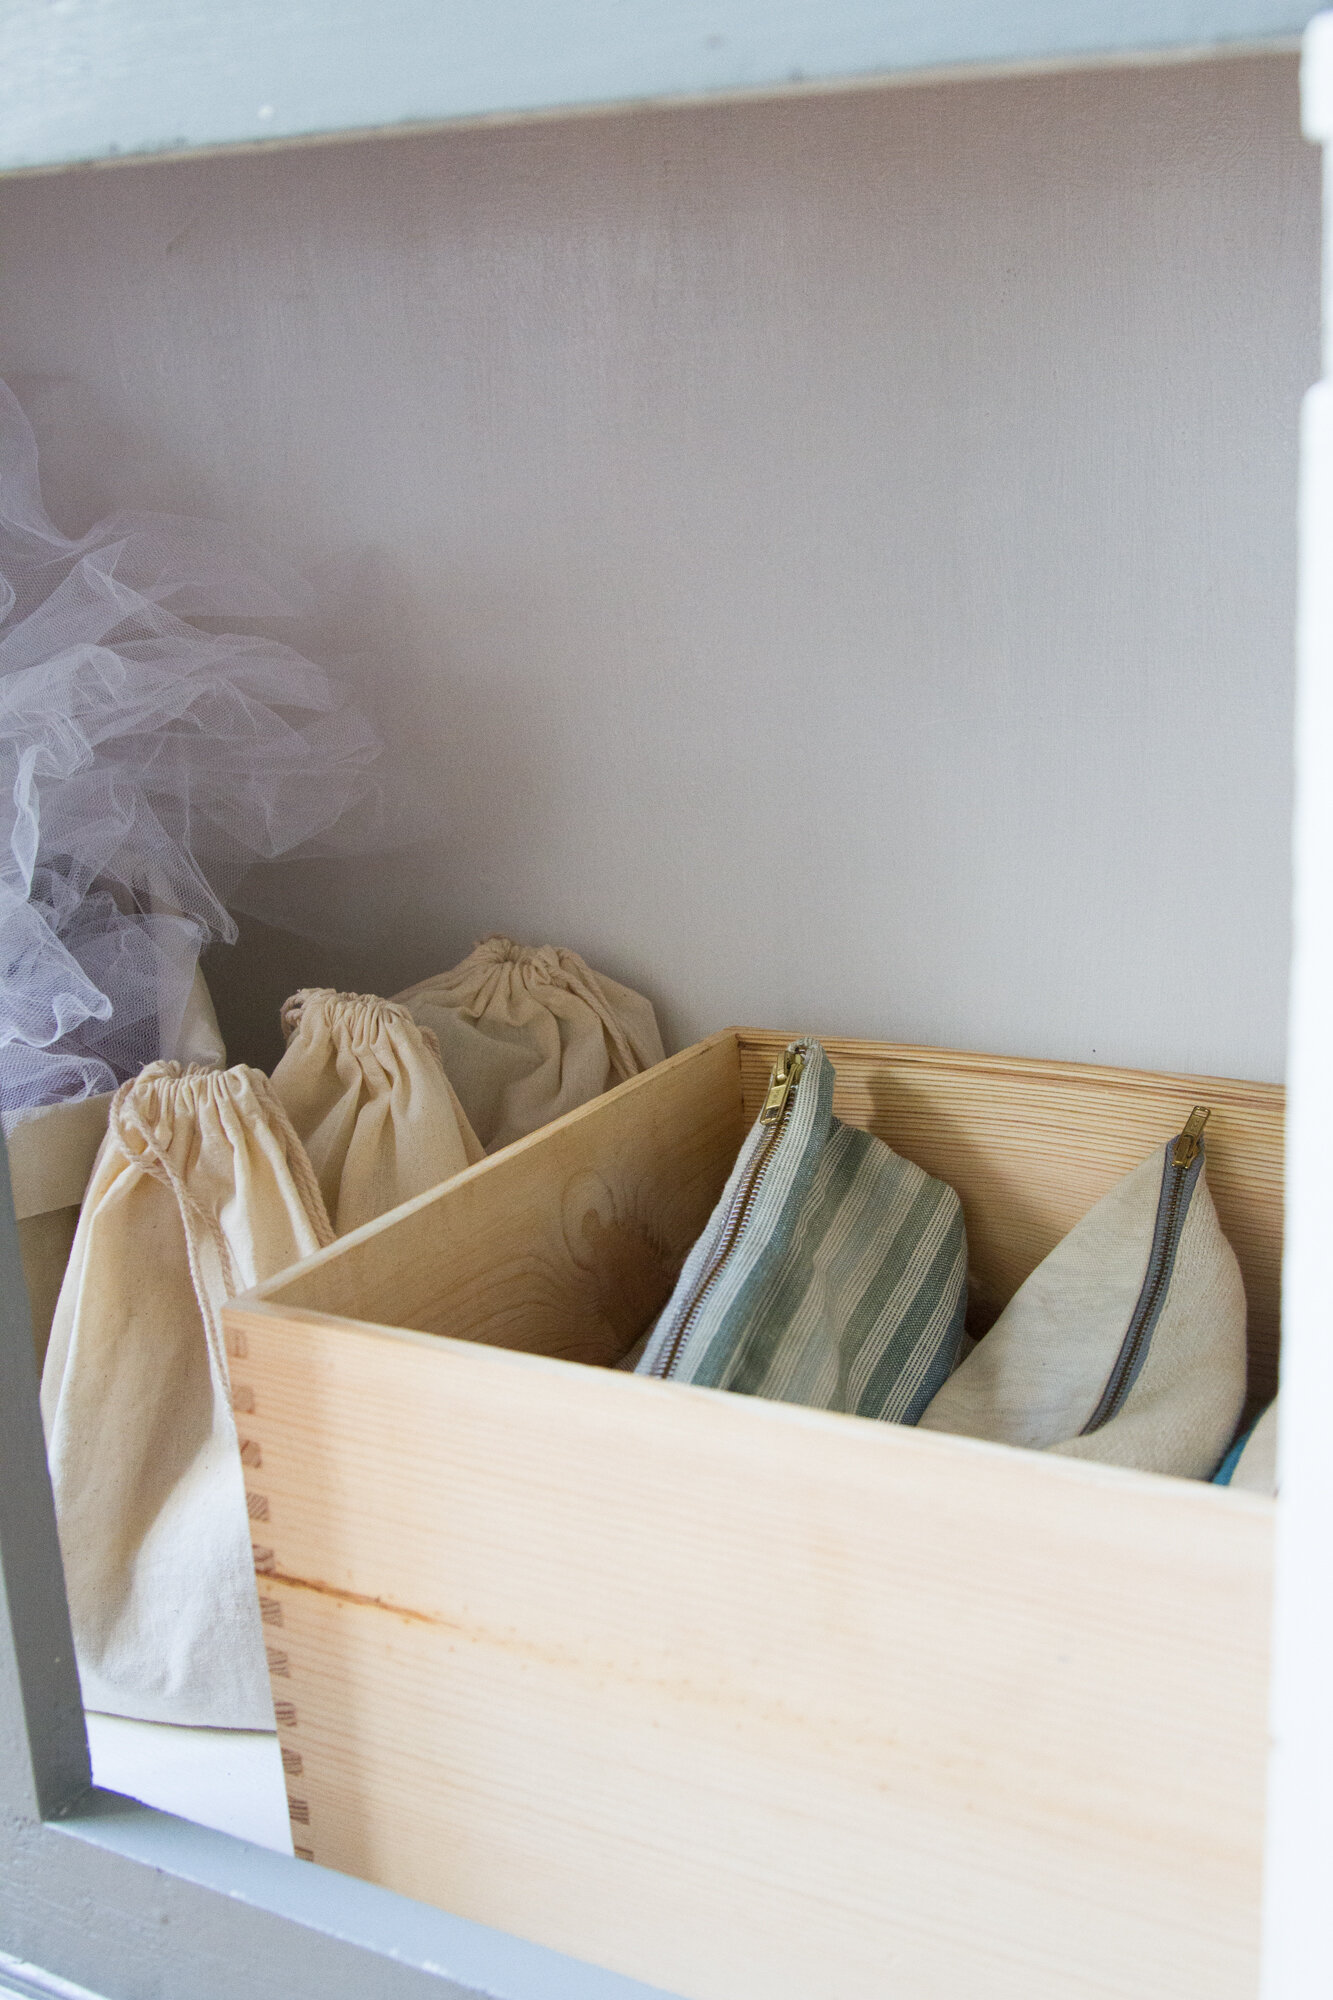
On the bottom of the shelf, we’re storing unruly play silks and tutus and our assortment of games and puzzles. (I store them in zipped pouches and drawstring bags because whoever decided puzzles should come in enormous cardboard boxes did not live in a small space with a penchant for order.)
Other things:

29 Comments
Gorgeous! What style/size are those large wide paper baskets?
Those are the XXL size. (I trimmed off the tops and sewed them into a little washable play mat ;))
I was once walking home from the market with a bottle of wine in my (oversized) jacket pocket and saw this beautiful vintage bar cart on wheels discarded onto our San Francisco street. In my effort to claim it and roll it back to our apartment the bottle fell out of my jacket and shattered on the sidewalk. It was such a fiasco at the time, but every time I look at that bar cart I think it was totally worth the $15 and the hassle! Cheers to finding great pieces on the curbside!
Oh man! No fun, but no doubt worth the spilled wine!
Oh man, this kind of project is one of my absolute favorite things in life. Turned out beautifully!
Ha! Same! Thanks so much!
I love it!! I am in the middle of reupholstering two pieces passed down to us that were no longer wanted. One, a bench (all done whew!) and a chair. Its tedious but feels oh so good when done! I’m picky about what we accept because it needs to not only serve a purpose in our current space but in our next one as well.
So satisfying! I haven’t been brave enough to tackle reupholstery! Inspired!
What a great find and restore! 🙂 I wish I had the talent to do this. People say you can do anything lol they have never met my klutzy/no paint talent lol.
Enjoy reading and seeing your creative ways of living in a small space.
Aw, thanks so much, Sherrill! Glad to have you here!
So lovely — I wish there was a ‘before’ shot!
There is! If you click on the Art Deco link you’ll see it!
What a transformation!!!
I admire your vision for seeing the possibilities. Also, those zippered bags are so charming. I also have some for things in my vanity like my epilady and my clarisonic. I like my beauty tech but I don’t like to look at it.
Ha! Perfect.
Agree – where are the zippered bags from? Love love them (yes, I have far too many zippered pouches already, of course).
These ones have all been collected over the years from my friend Rebecca Atwood! Not sure if she’s still selling them!
As always, a serendipitous post for me! At the weekend my partner and I screeched to a halt outside a junk shop to purchase the PERFECT sized chest or drawers for our bedroom. Made of solid oak, it weighs a ton. The varnish has gone pretty orange-y, so my initial idea was to sand it right down, but the more I look at it the more I think it would look so elegant painted in an off-white eggshell (I don’t have a weird thing about painting wood – whatever you need to do to make that piece work for you, do it). Your post has made me even more eager to get started! I absolutely *love* transforming furniture.
Another thing I love about your posts: all your links open in new pages. It drives me nuts when others don’t do this!! I wanna be able to see the new link when I finish reading the article, not before. A small thing, but thanks for doing this!
A recent windfall of assorted canvas bags from Amazon has been looking for uses and puzzles – you delightful genius! I cannot wait to sort our pieces from bulky and unsightly boxes to bags. I might even get “fancy” and print little pictures of the puzzles to create tags.
I was wondering about this! I want to make the leap to get rid of clunky boxes. My three year old loves her puzzles, but I fear she will forget what they are without the picture on the box…
hasn’t been a problem for us!
Beautiful! I’m inspired to be a little more confident around my curb “purchases”
This post is so inspiring!! The completed dresser is so beautiful! Thank you for sharing all the steps you took to arrive at this completed project – helps me think outside the box for future curbside finds.
So glad! It was so fun to be able to transform it!
This turned out so good!!! Very inspirational. I’ve never done a project like this before. Wondering if you’d be willing to share the cost of the project? Thanks for always posting such beautiful, simple ideas.
Thank you and good question! Rough estimate, I’d say ~$100. (Paint: ~$40; Hardware: ~$30; Plywood: $15; Wood glue/wood filler/sandpaper: ~$10)
Scratch that! I forgot that I also paid the gentleman doing our lead paint removal $100 to strip the lead paint, so closer to $200 (my own time and labor not included)!
I love the uashmama bags and am wondering if you have any suggestions since your are using them for your kids clothes as to white size is a good fit for kids underwear, t shirts and bottoms. Thanks
I’d definitely take a look at the measurements and choose what works best for you! Ours are on the little side because I like things that way, but there are so many sizes, I’m sure you could find something to work! One bit of advice: I lopped the top off a few of our larger bins because we didn’t need the extra length and they were easier to fold that way!
Comments are moderated.