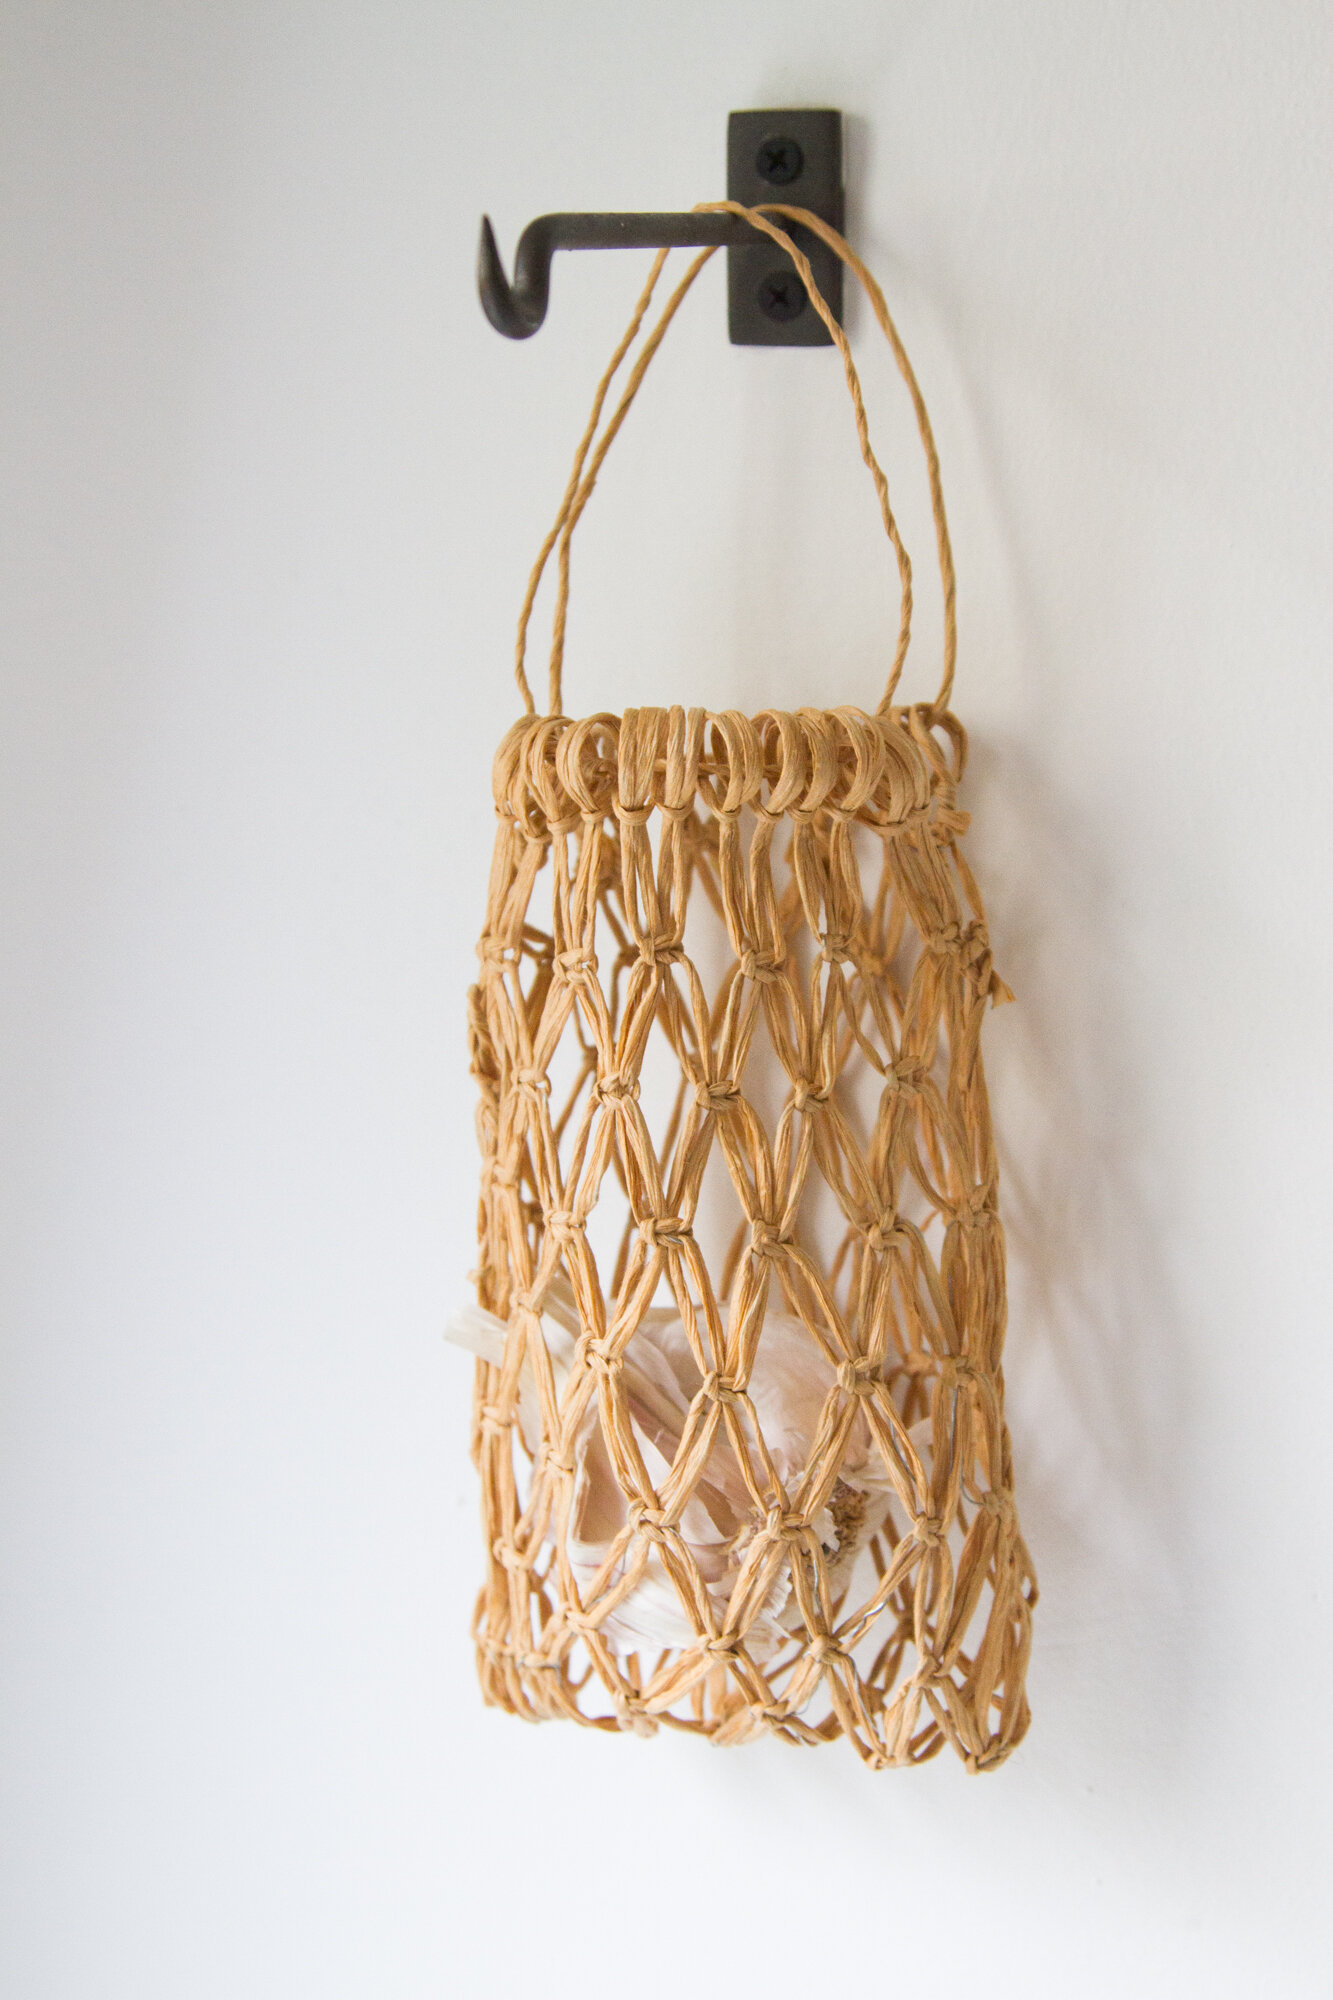
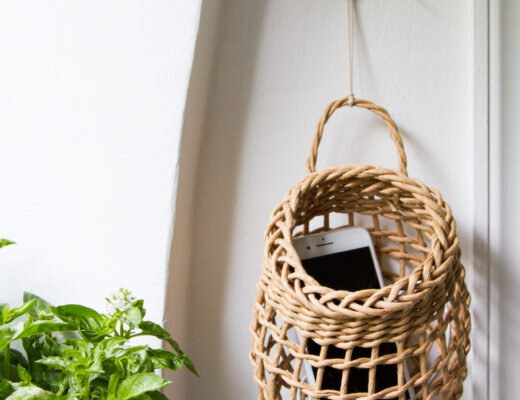
Garlic and shallots, hair ties and comb, a small glass bottle and a posy of your favorite flowers, a bundle of treats for a friend…. dare I suggest, a cell phone? No matter the specifics, there are a hundred ways to put little basket to good use.
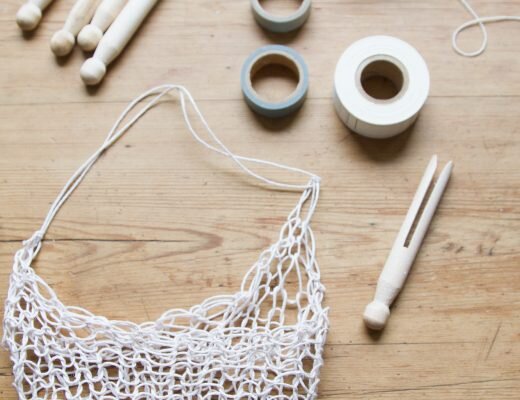
In this tutorial, Rose Pearlman teaches us a simple macramé technique to tie square knots and end up with a basket. To create structure, she’s used floral wire in lieu of string. The result, Rose explains, is “a macrame basket that gives the appearance of natural fiber, with the structured shape of a vessel. The floral wire used is thin enough to tie knots but strong enough to maintain an open net appearance when holding objects.”
I’ll be the first to admit that this project intimidated me. I’d never made a macramé anything, and Rose’s bag was so neat and perfect I was certain I’d never be able to recreate one of my own. Save yourself the worry I caused myself.
The square knot technique is easy to learn and super quick to execute. Sure, as a first-timer there are areas where I could have made my knots tighter, or decided to leave smaller, and more even gaps between them, but the beauty of the project is that even a novice attempt at the craft will yield practical and pretty results. Rose’s instructions and list of materials are below:
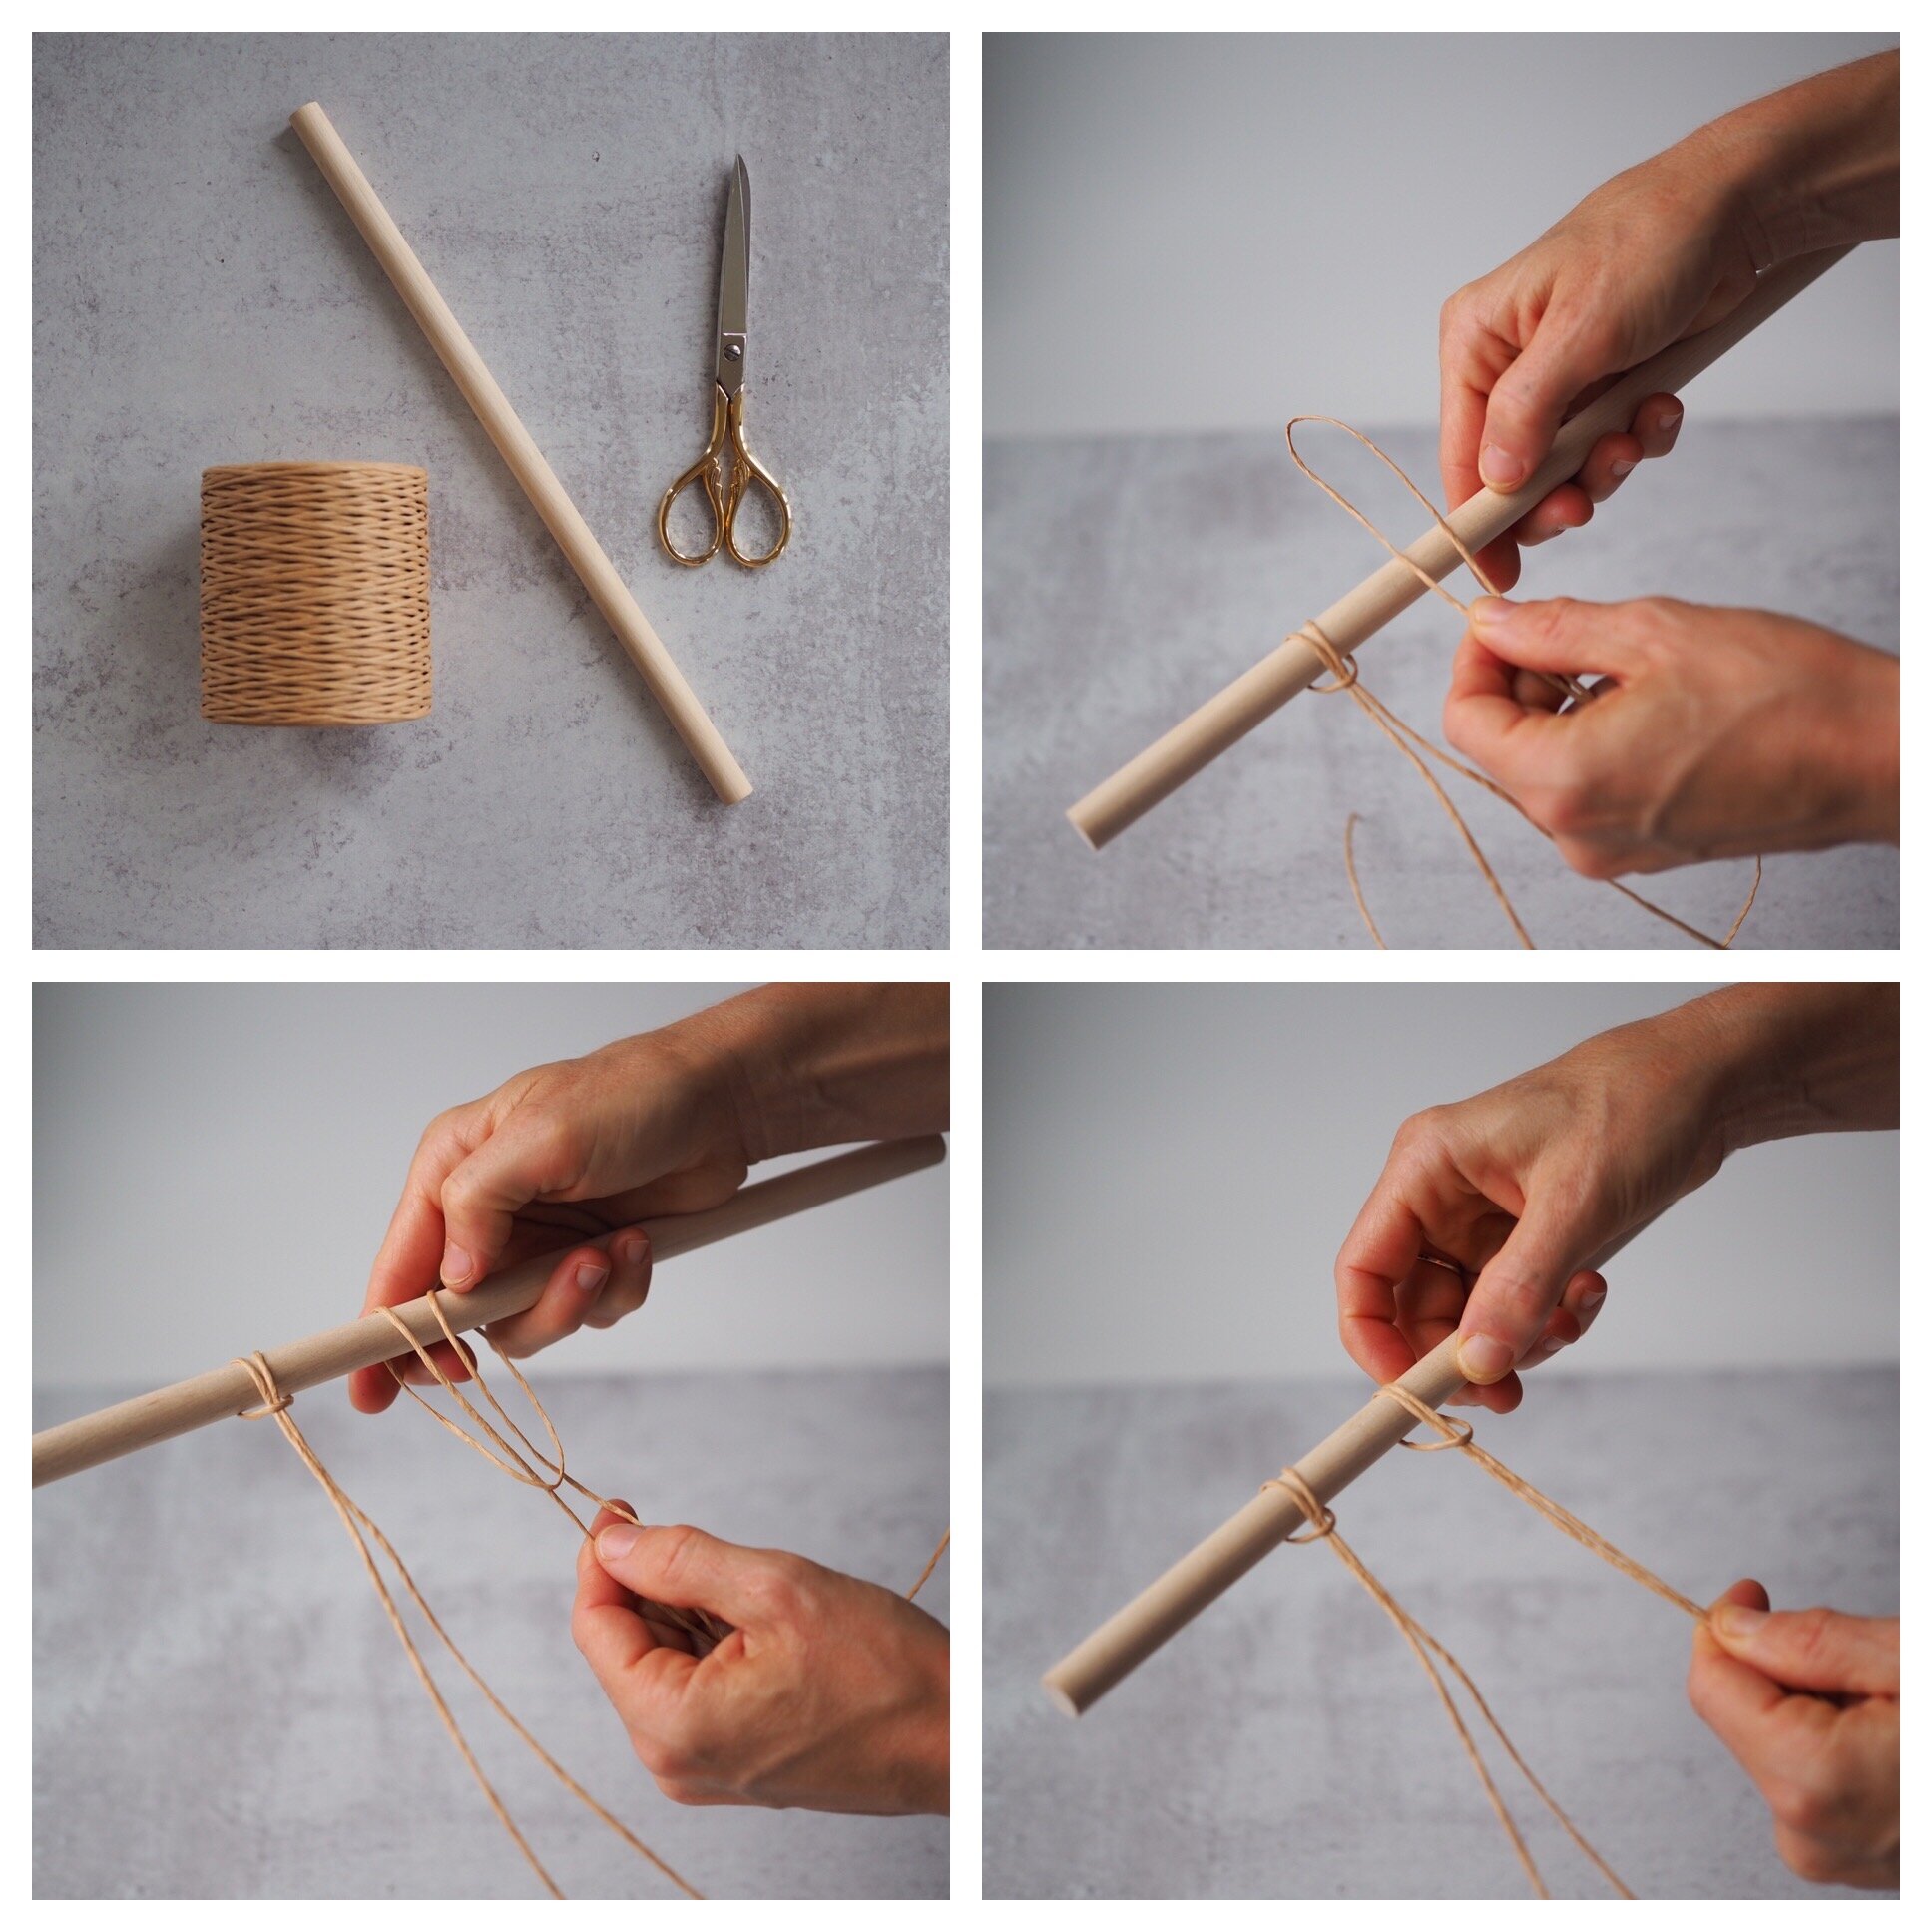
Materials:
+ 2 oz paper covered floral wire
+ Packing tape or string
+ Ruler
+ Scissors
Directions:
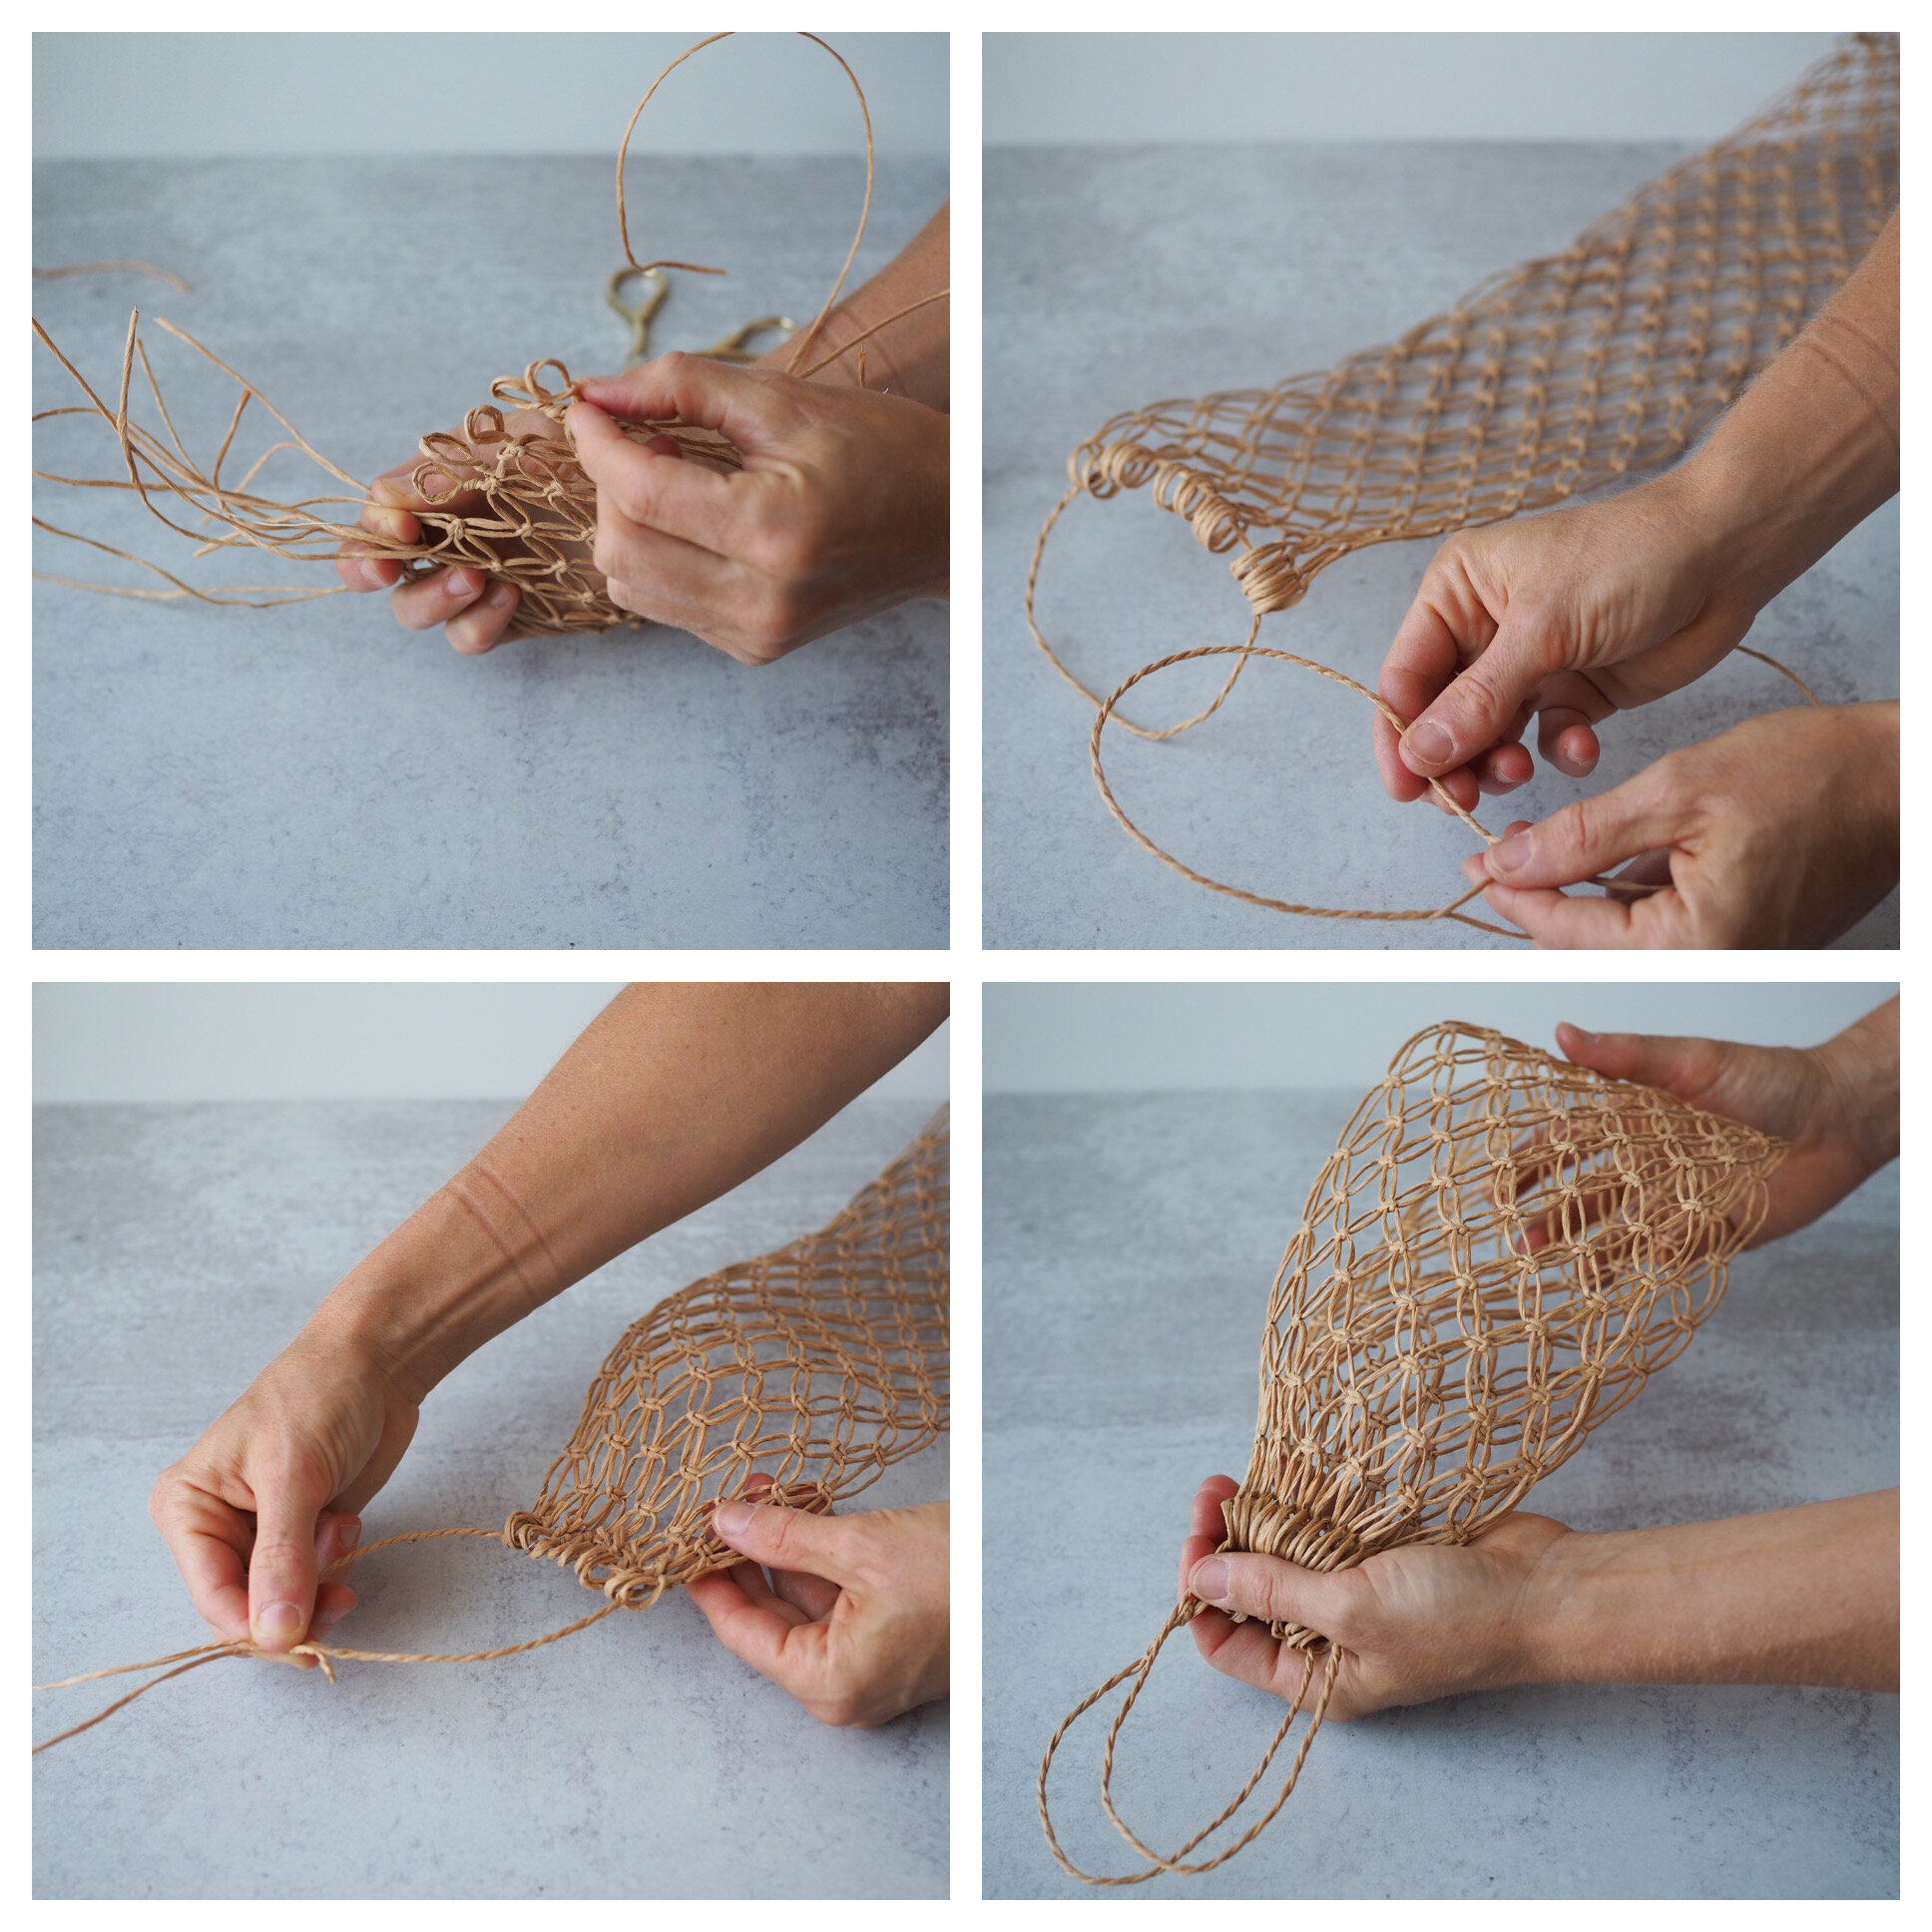
Part I: Cast on stitches
+ Cut 12 pieces of floral wire roughly 8-feet in length each. (This basket can be easily adjusted in size simply by how many pieces of wire you cast on and how long you’d like the main body. Erin used roughly 6-foot lengths to make a slightly squatter final bag.)
+ Begin by folding each piece of wire in half. Place the folded loop over the top of the dowel. Loop the ends of the wire through the hole and pull, forming the cast on stitch.
+ Repeat for the remaining 11 pieces of string.
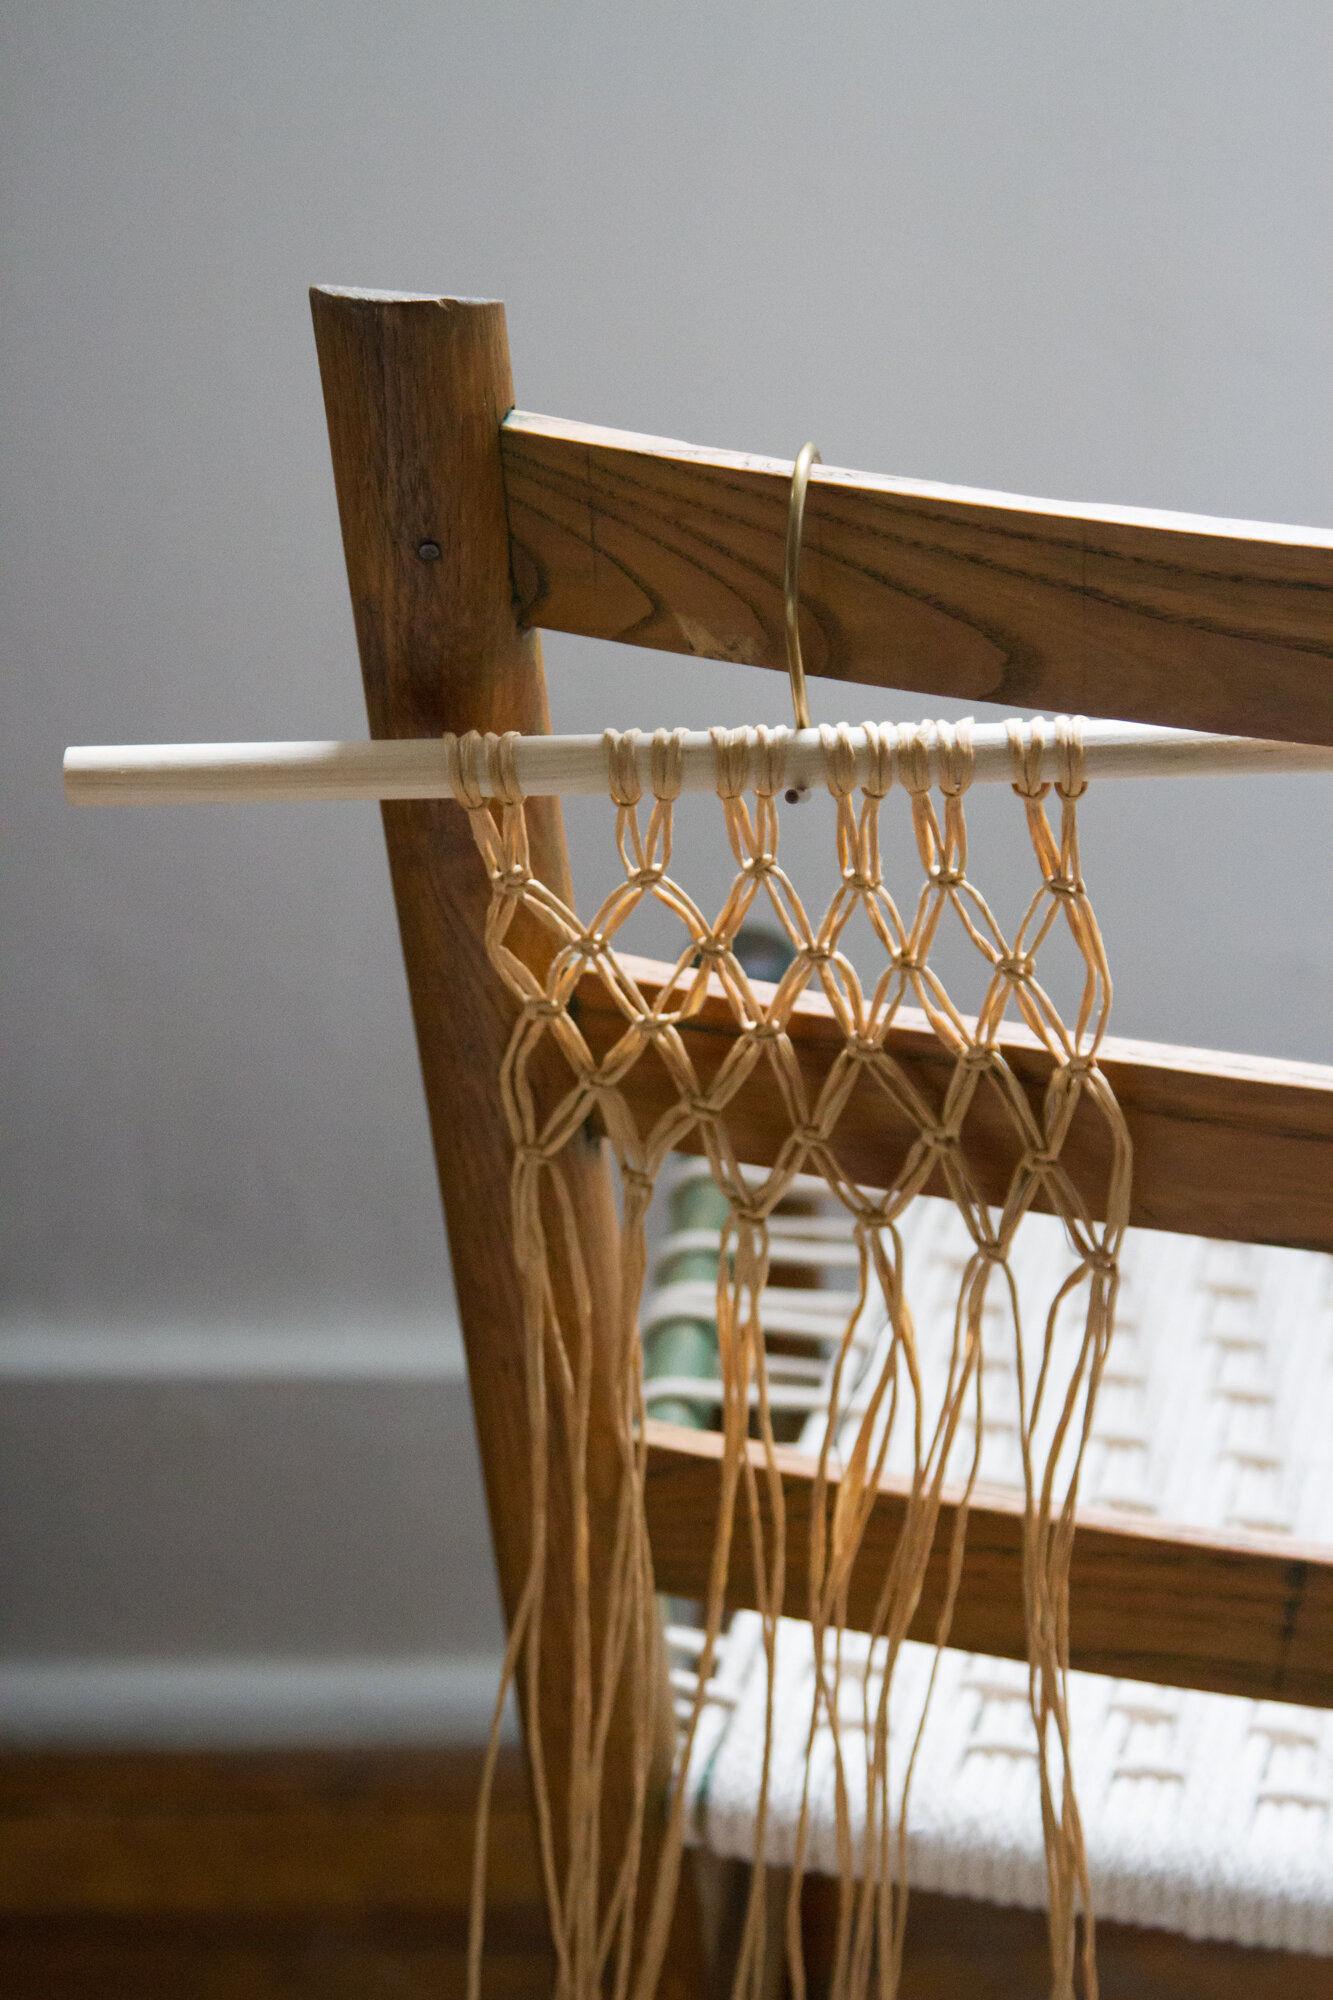
+ With all the wire secured onto the dowel fasten the dowel to a working surface (like a table) with packing tape. Or, tie a piece of string to either end of the dowel to hang off of a knob or hook.
Part II: Macrame technique / The Square Knot
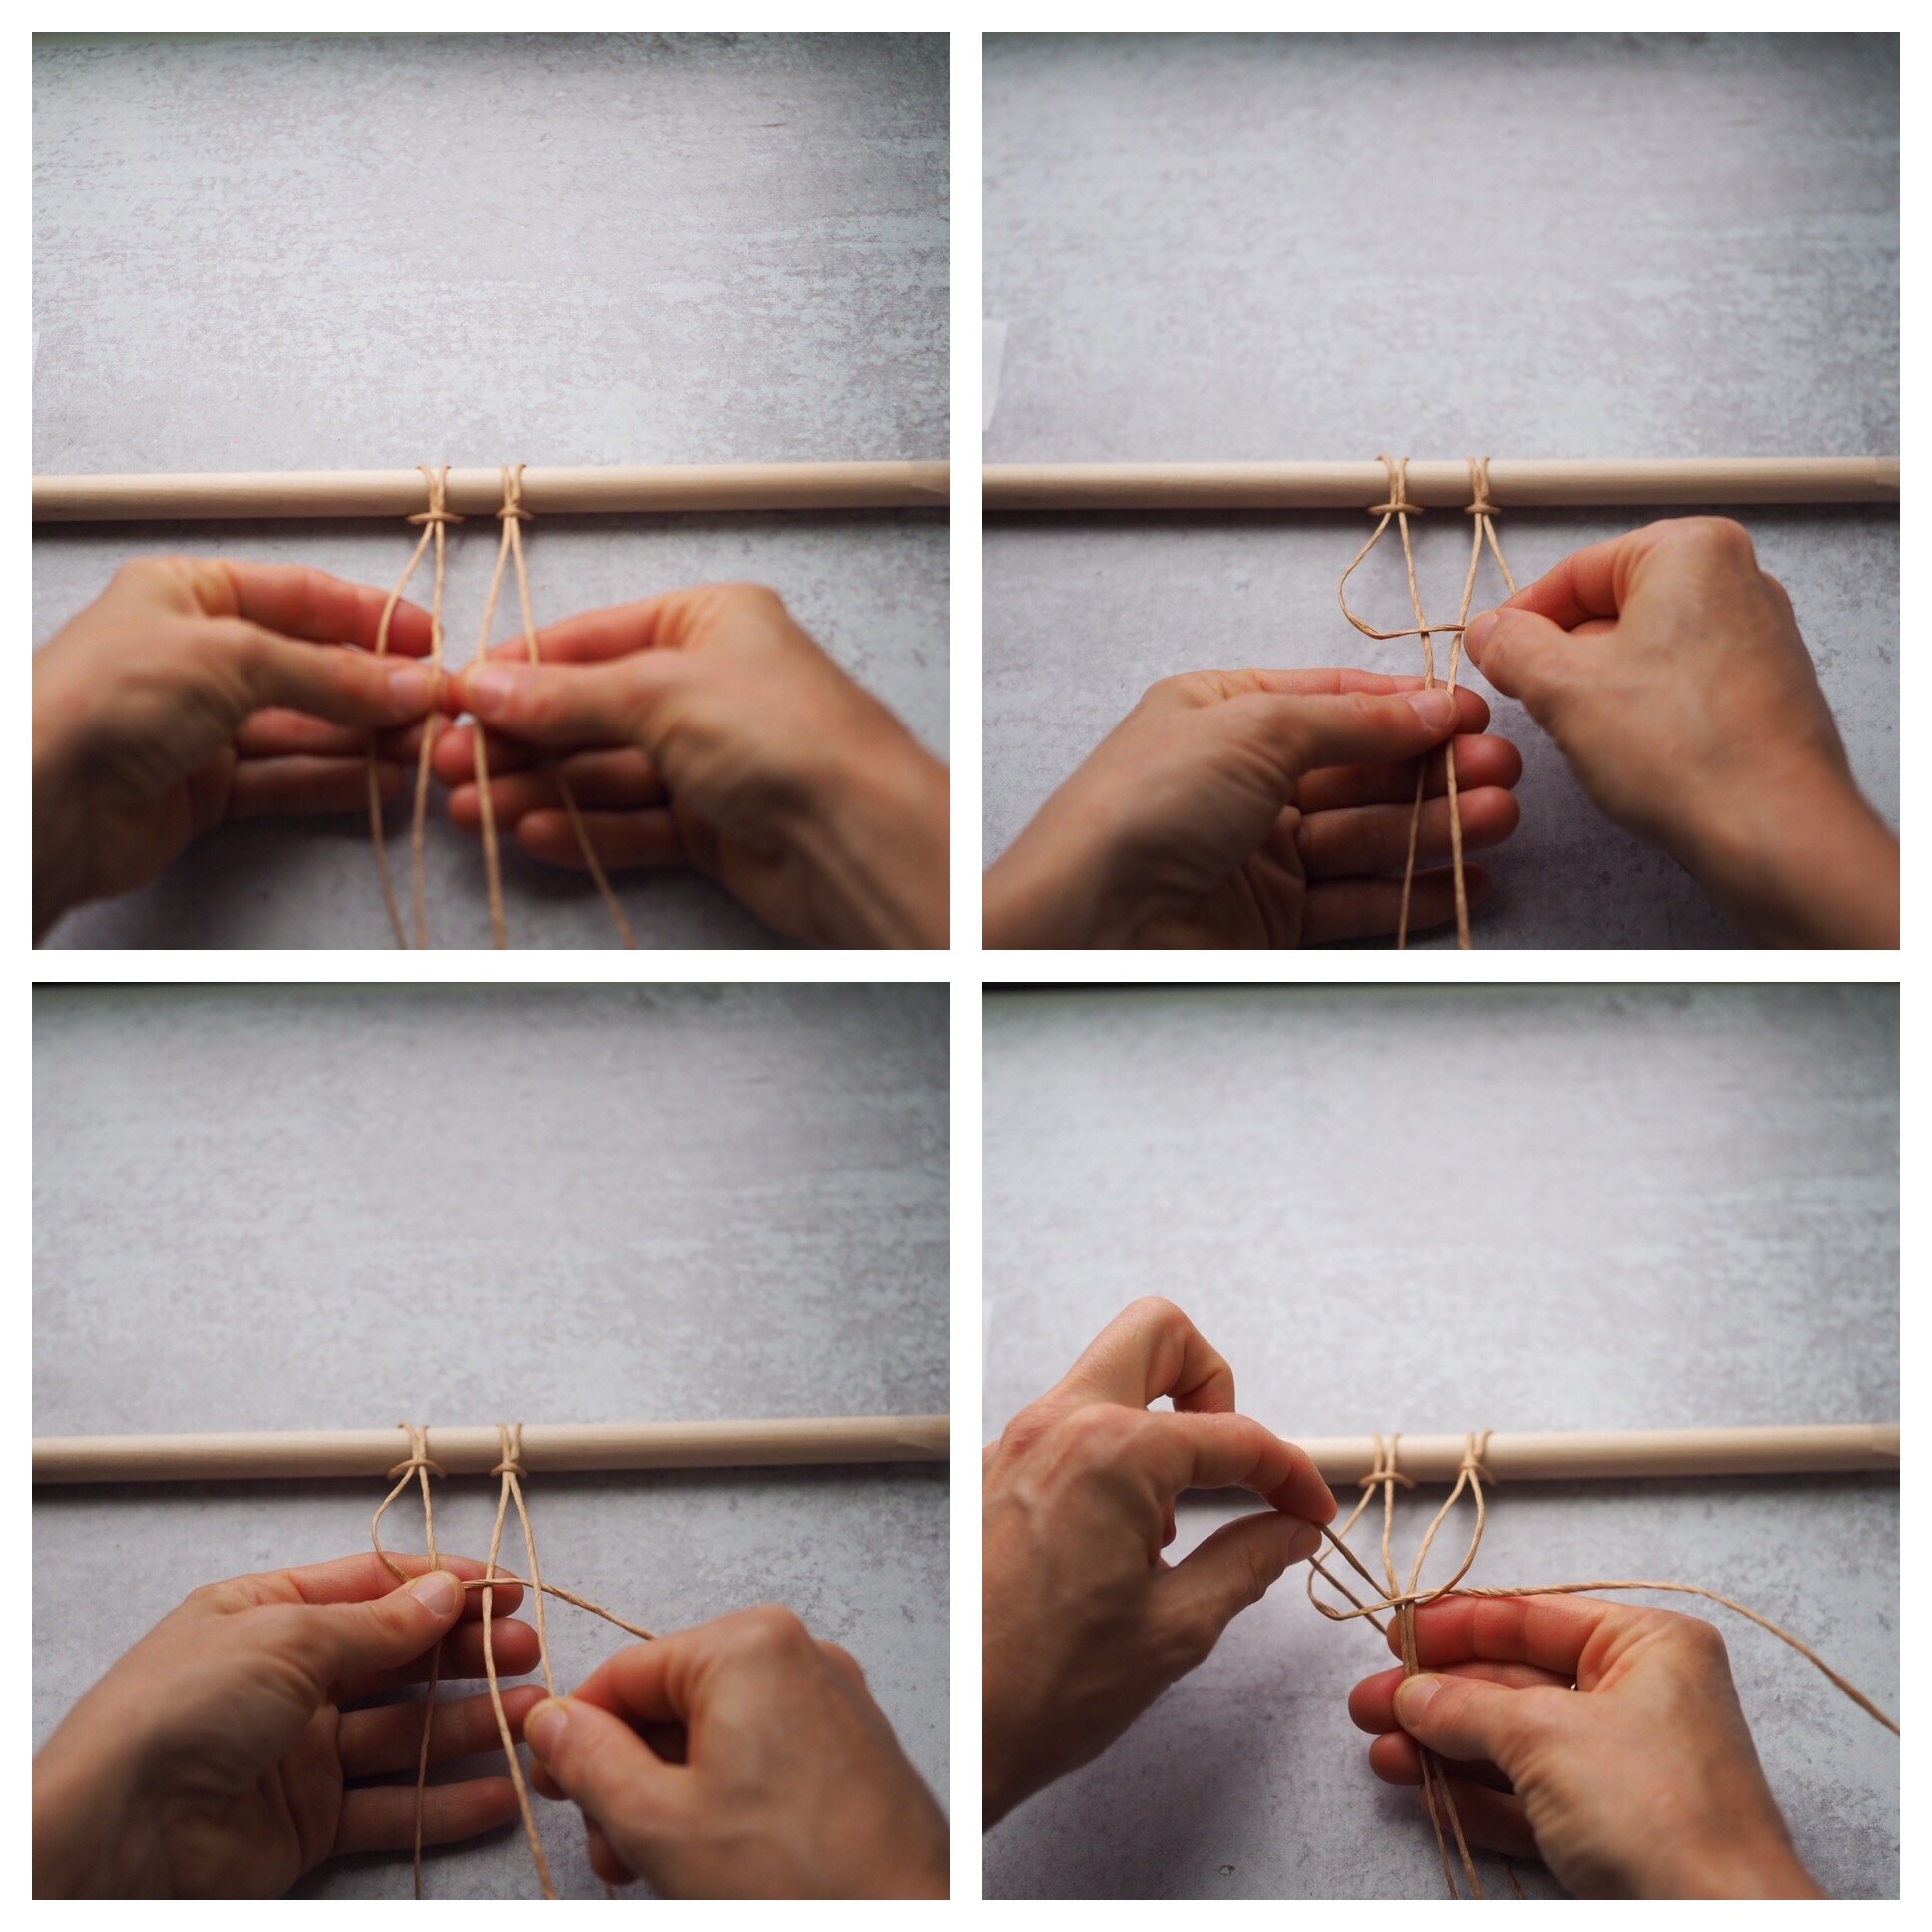
When making your bag, you’ll be applying this square knot technique to all twelve strings attached to your dowel, working 4 strings at a time. The photos in this section show Rose working with only two strings at a time in an effort to demonstrate the technique.
+ You will start to knot with the first four wires on the far left of the dowel. Cross the first string on the far left over the middle two hanging wires, forming a number 4 shape.
+ Bring the string left on the far right over the previous traveling string, up and under the two center cords and out through the 4-shaped loop on the far left side. Pull both working strings (on the left and right) out to either side and up to about ½ -inch from the top; tighten to secure your first knot. (In case it’s helpful, here’s a simple video highlighting the square knot.)
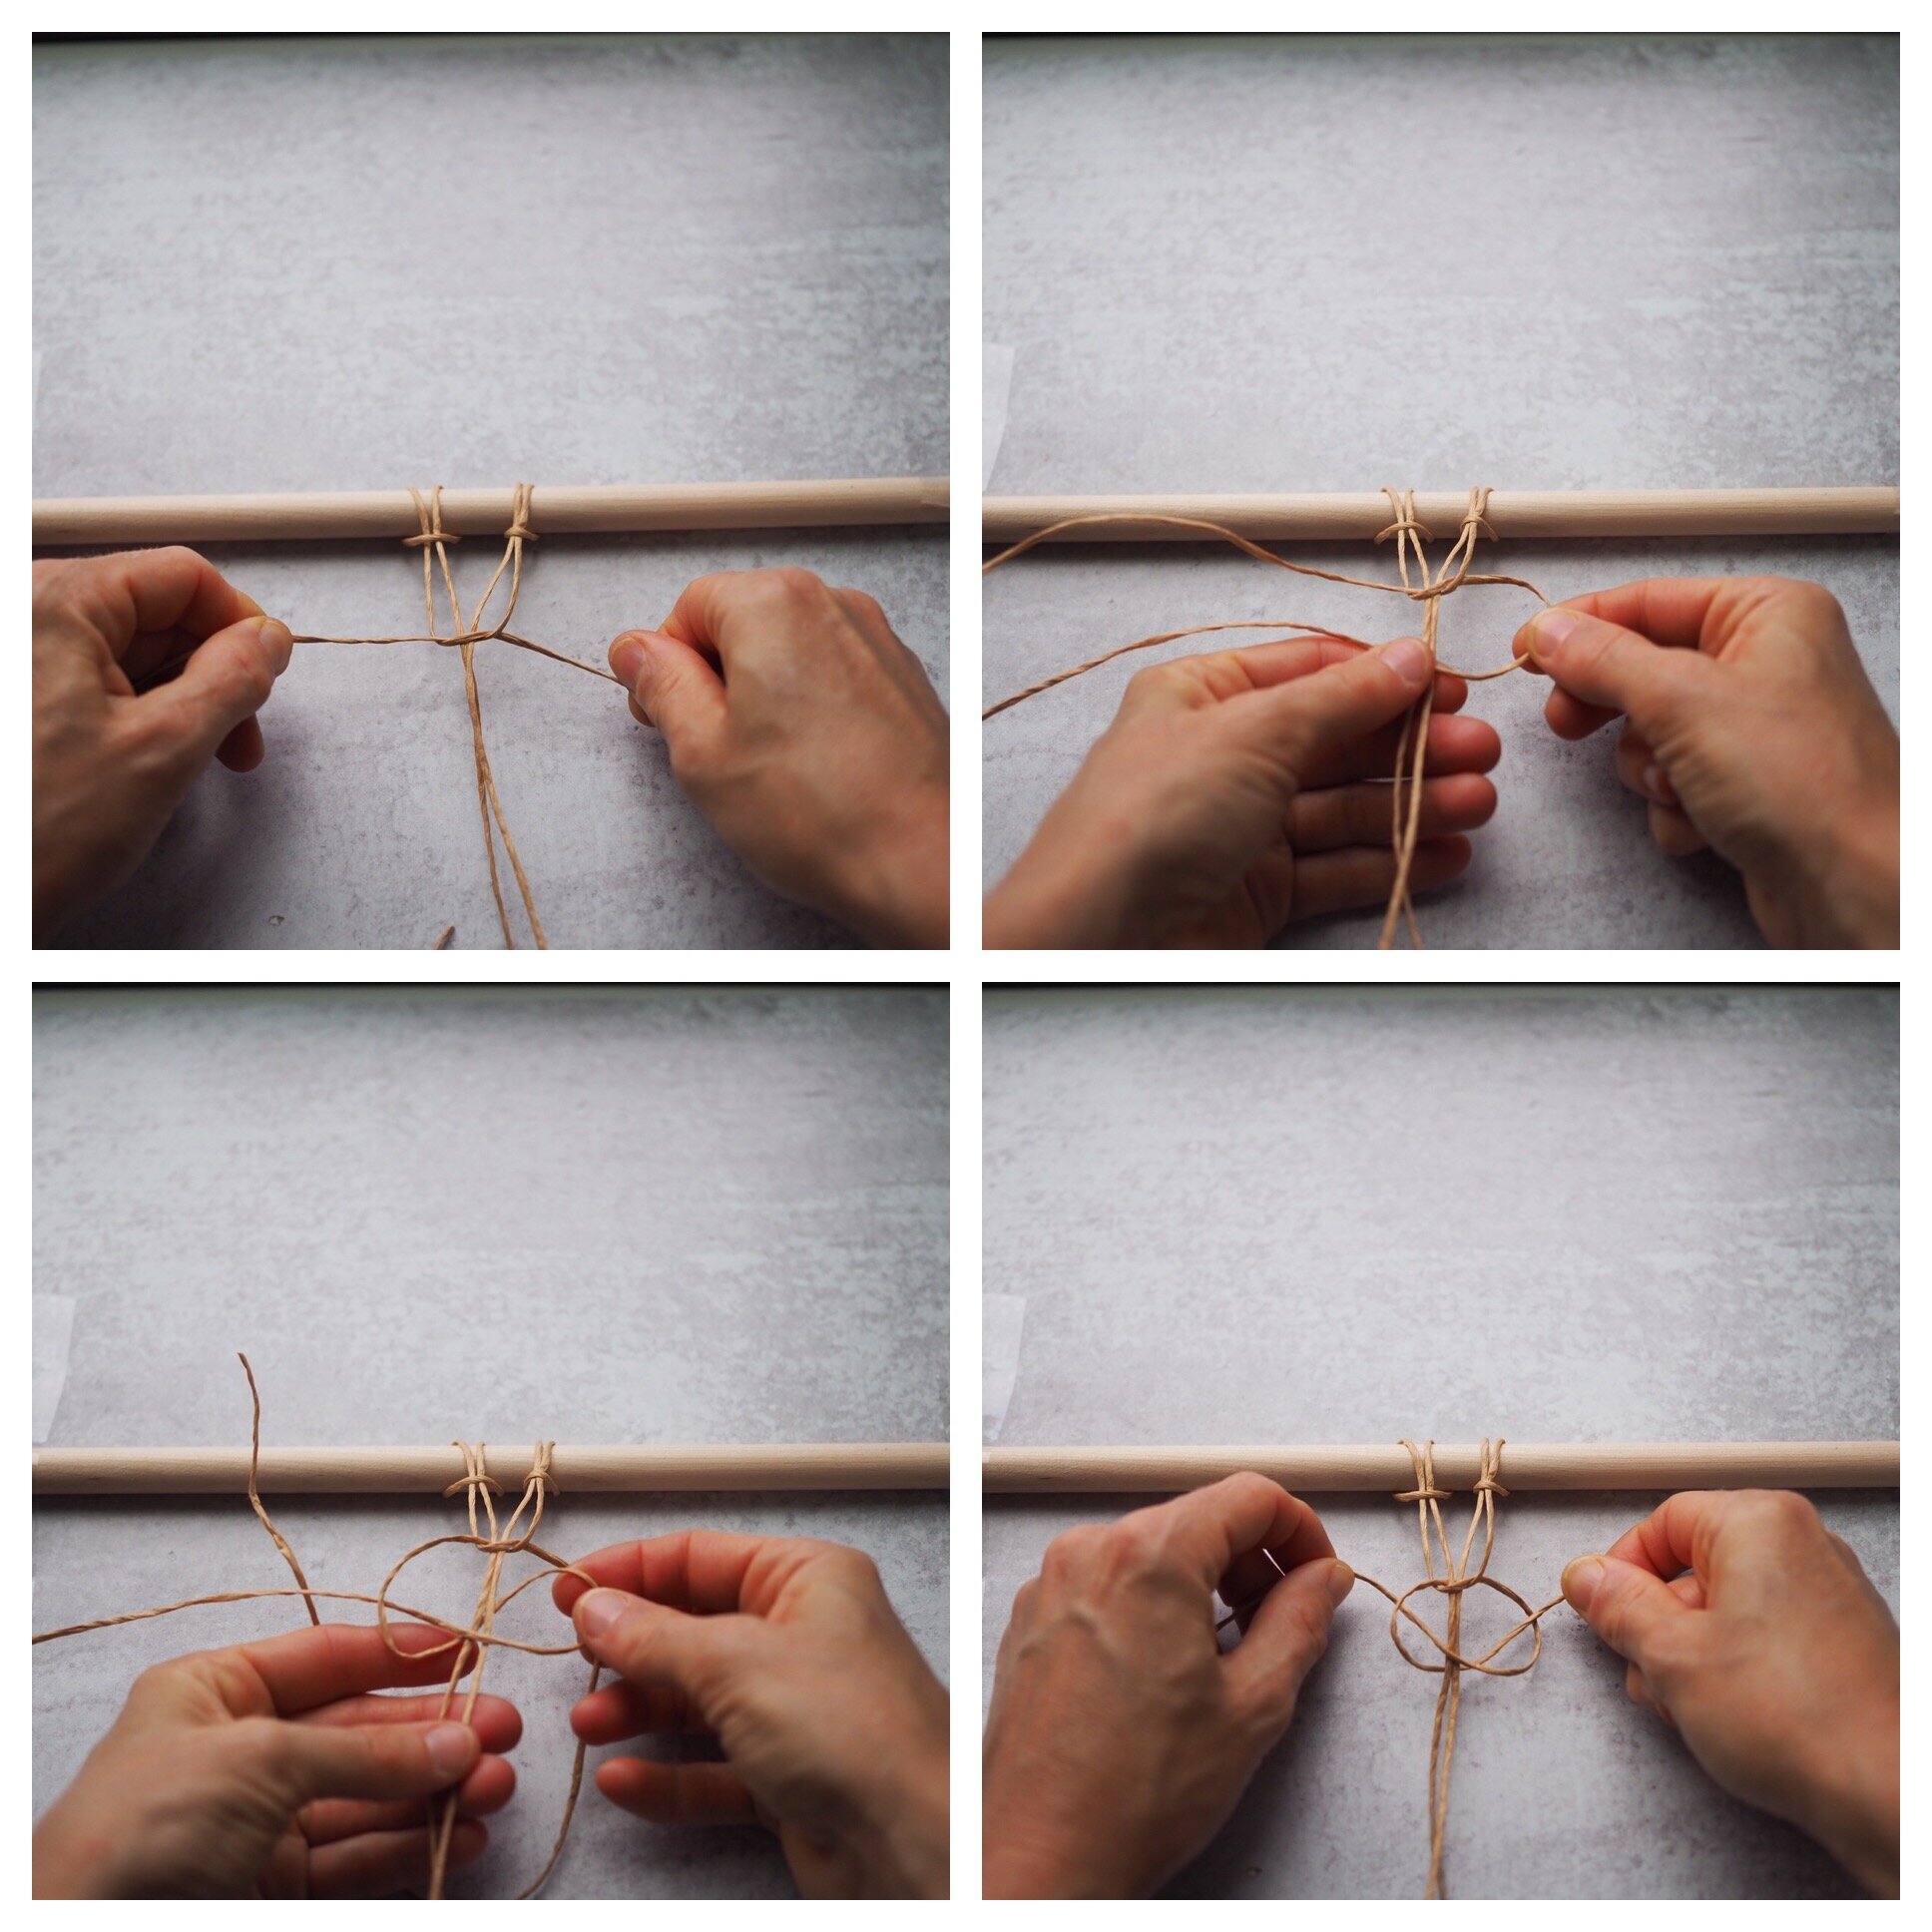
+ You will now reverse the direction working with the same four wire strings. Now the two wire strings on the far right will travel over the two center wires and out to the side, forming a letter P shape.
+ The wire on the far left will go over the traveling string, up and under the two center wires and out through the P-shaped loop. Pull both the right and left wires out and up to secure a second knot underneath the last one. You completed your first square knot.
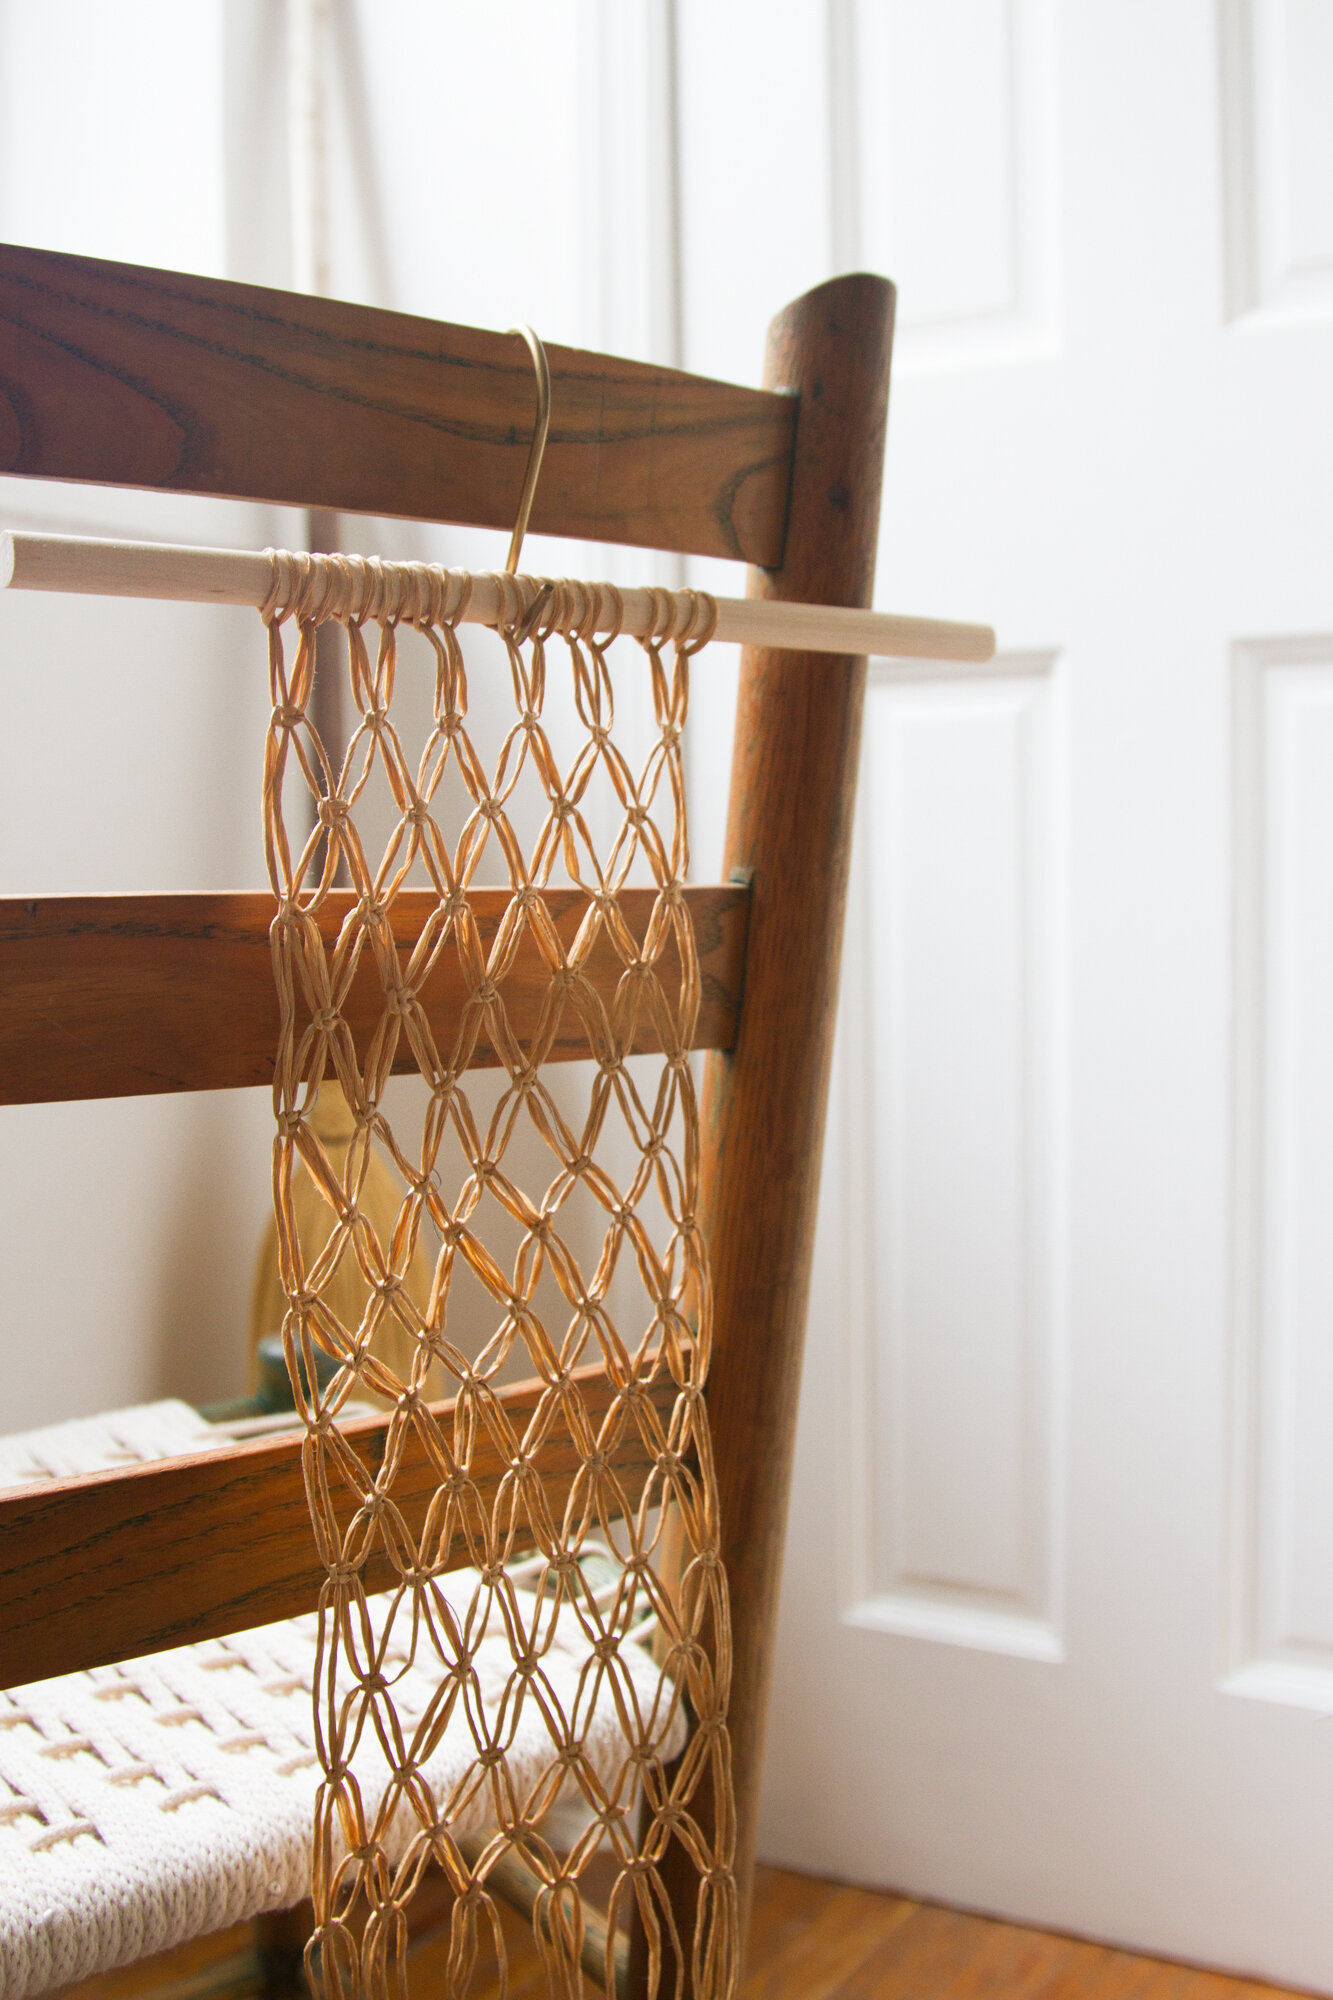
Part III: Macrame the body of the bag
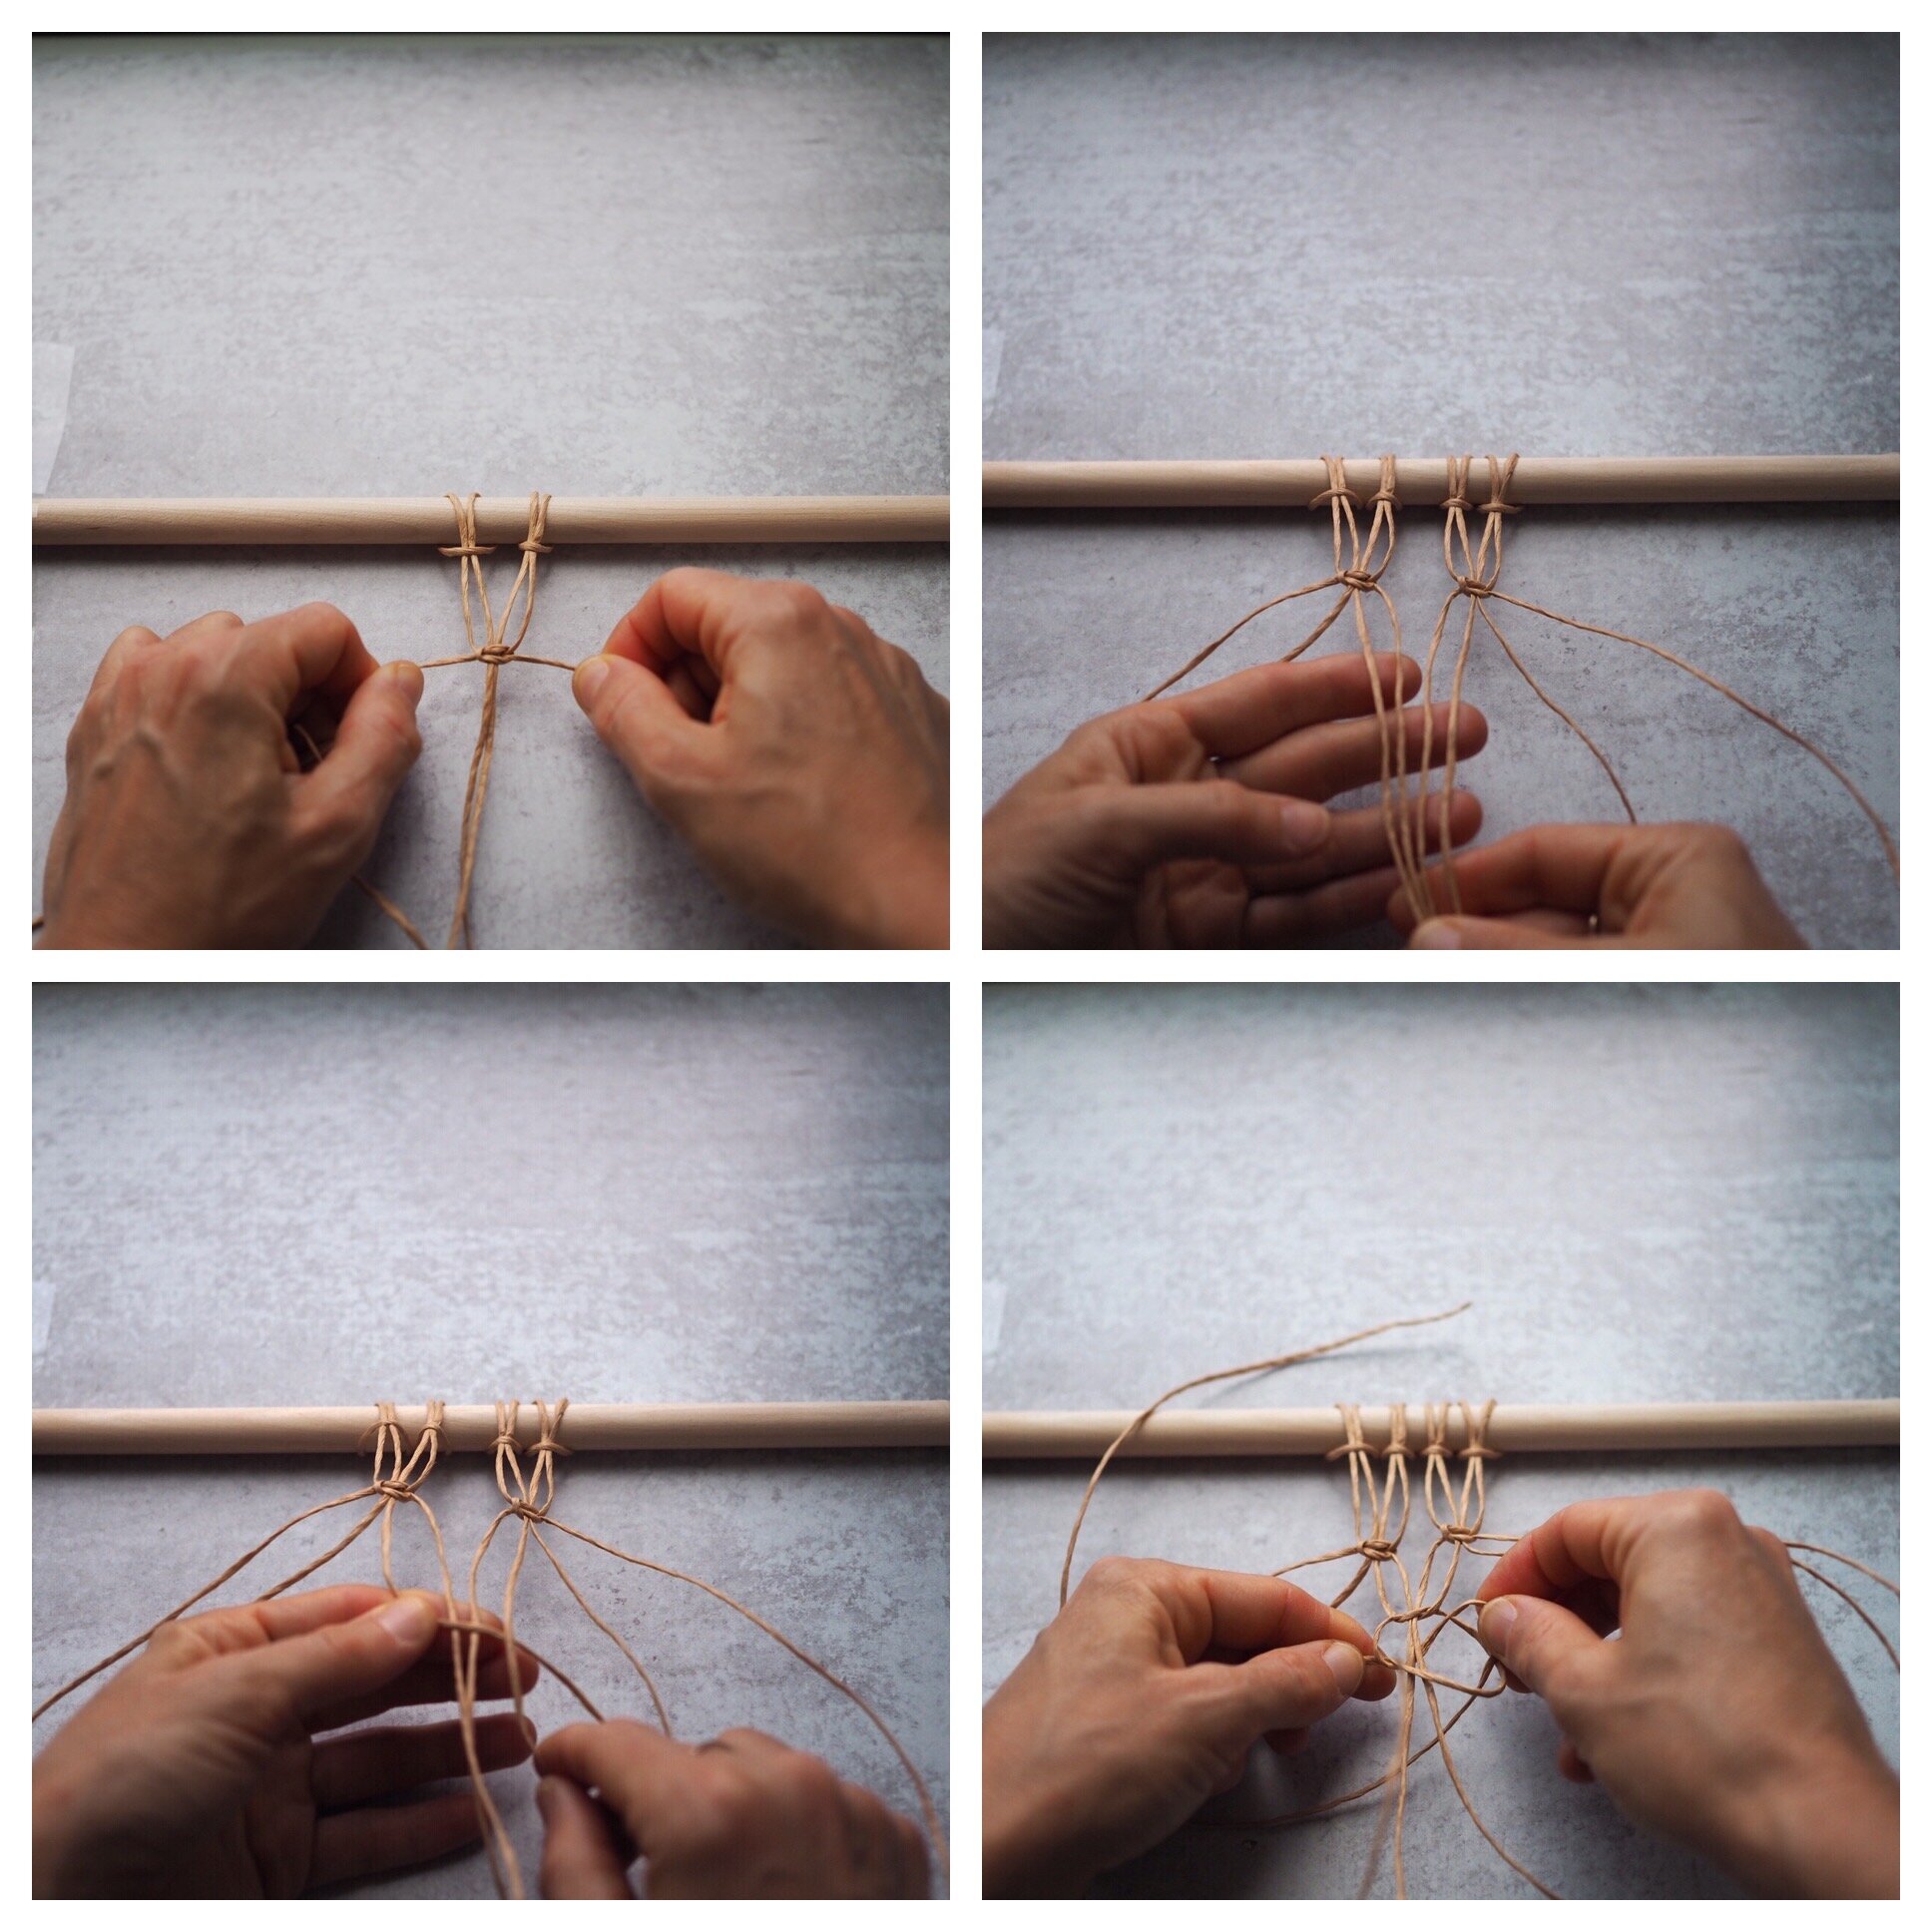
+ Continue down the row for the rest of the wire strings, working in groups of four. Make sure to line up where you secure a knot in each set of the wires.
+ For the next row of square knots, you will begin again on the left side of your piece. This time skip the first two pieces of string and use next four wire strings, (two from the first knot, two from the second knot above). In this way you are staggering between the last row of knots.
+ Work the same square knots along the second level. You will have two pieces of string left over on each side. Secure all your knots evenly along the row.
+ To begin the next row, go back to the very far left four wire strings, and work in the same manner as the first row.
+ Continue on this way until you have approximately 18-inches or your desired length. Make sure to alternate between the first row and the second so that your knots are staggered. Spacing between the square knots is up to you. For a fine netted bag leave roughly ½-inch between knots.
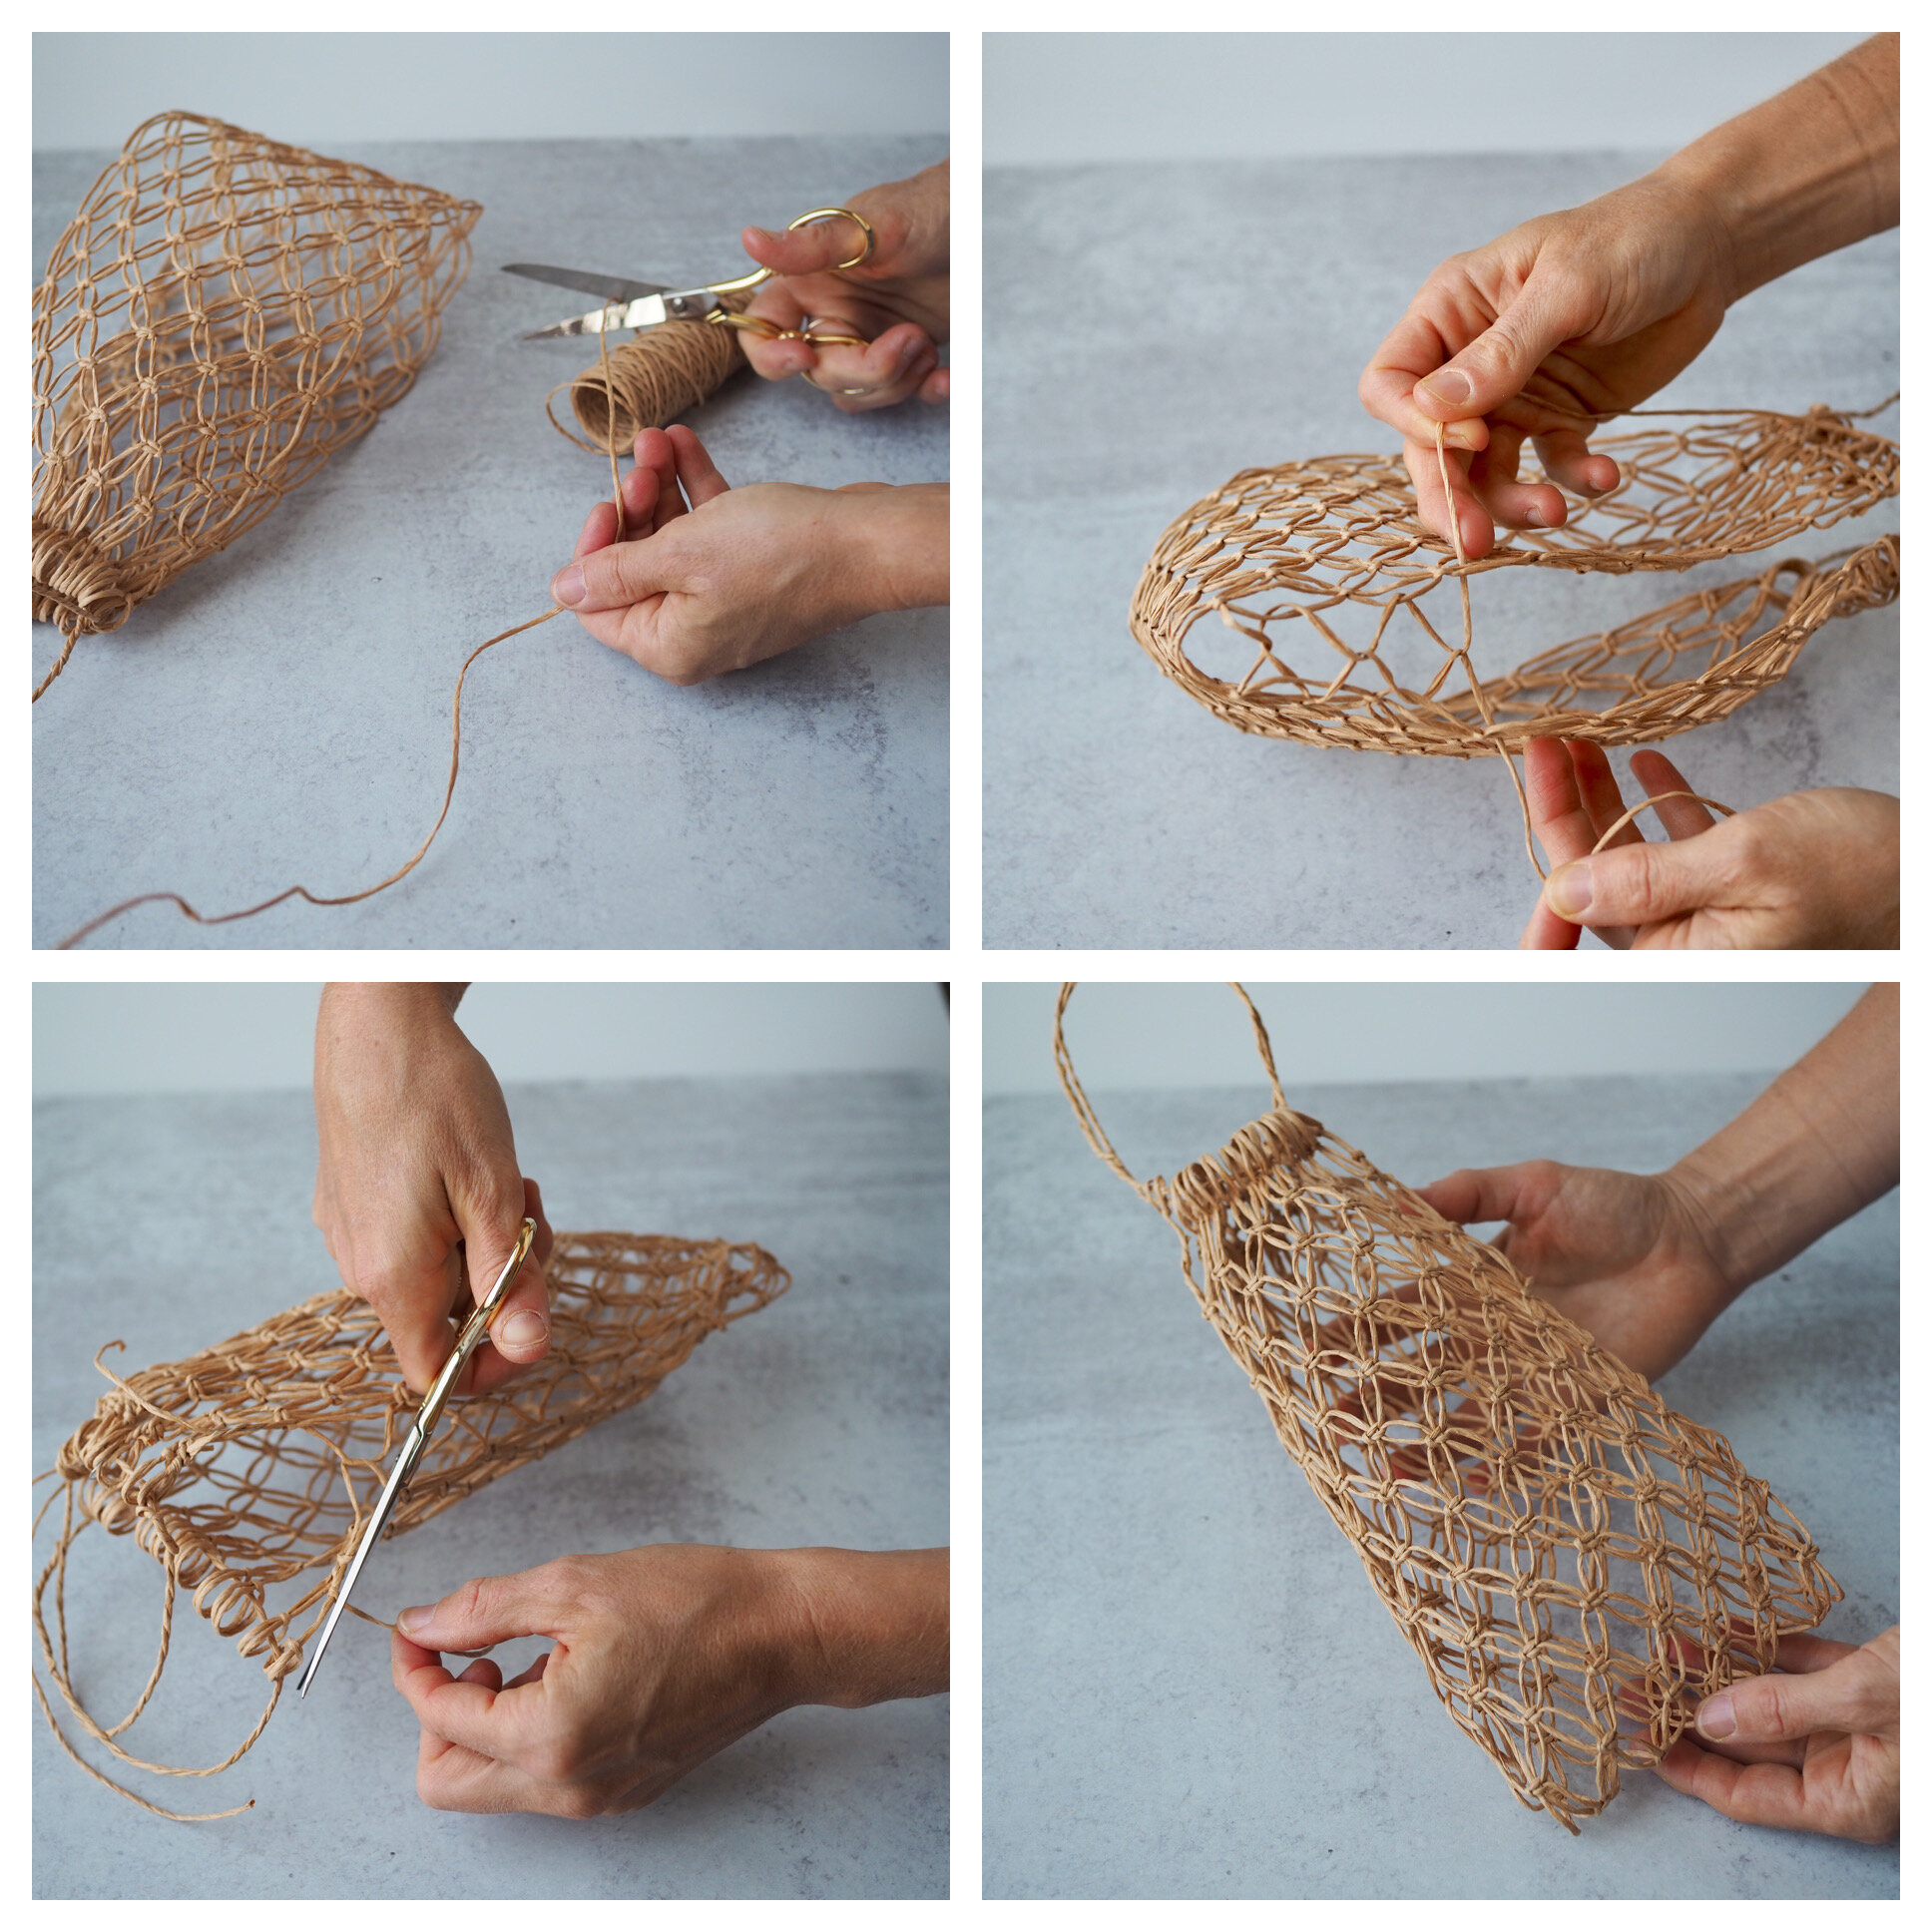
Part IV: Finish the bag
+ Start by cutting 2- 24”-inch pieces of wire. Working one at a time fold each piece of wire in half and twist the two sides together tightly. Repeat for the second wire.
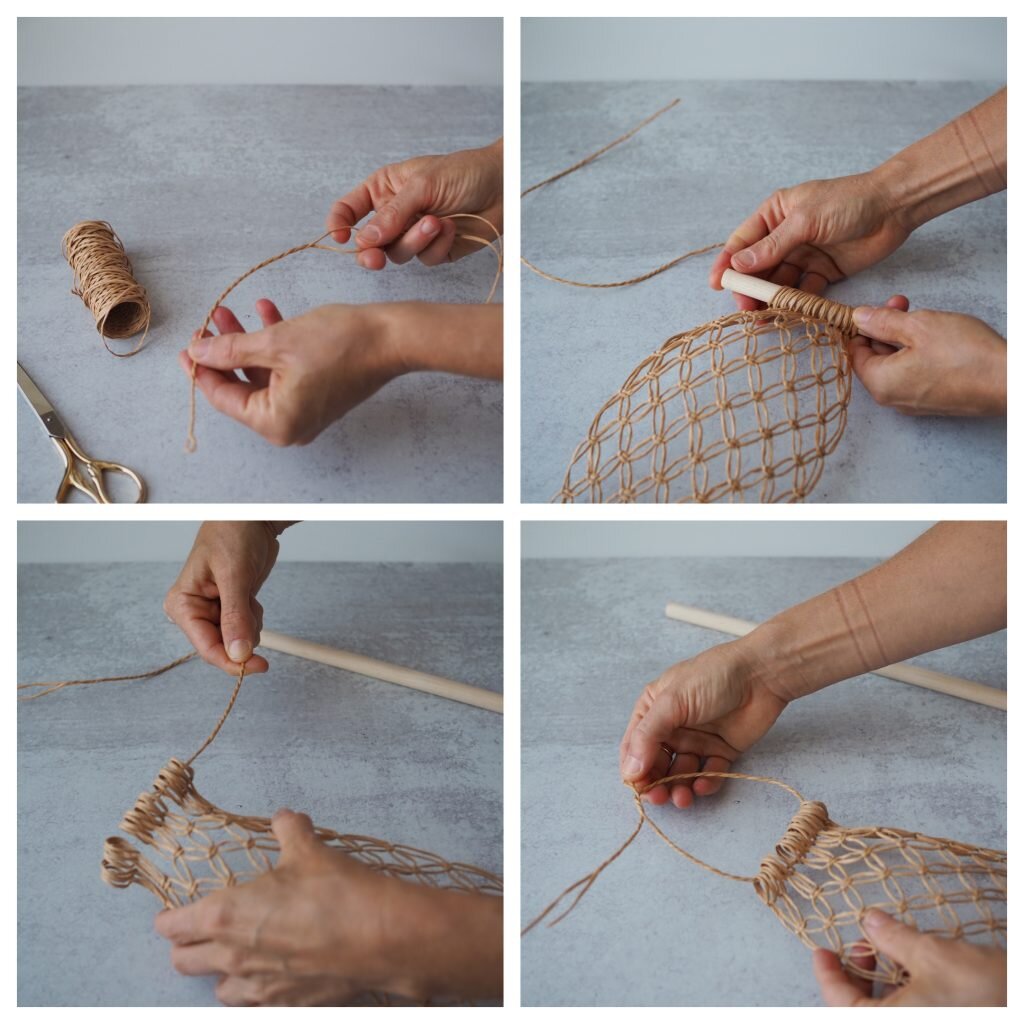
+ Carefully remove the dowel from the loops by slipping it gently out through one end.
+ Thread one of your twisted wires through the released loops and secure in place by twisting the two ends together. This secured end can lie inside the loops so it stays concealed.
+ To create the loops for a handle on the opposite side, you will work with two strings at a time. Folding the wire into a small loop (similar in size to the cast on loop) twist to secure in place. You will create 12 loops in all. Trim off any extra length with a scissor.
+ Thread the second twisted wire through the loops you just created and secure by twisting the ends.
+ Gently fold your macrame piece in half so the two handles line up.
Cut two additional pieces of wire each 24”.
+ Working one side at a time fold the extra wire in half. Starting from the bottom corner weave the two sides of the bag together crossing your wire in and out of the outer edge. Make sure to go in and out of the existing loops along the side. Stop 1-2 inches from the top so your bag can open wide. Twist any remaining wire to secure in place and cut off any extra.
+ Repeat for the second side.

Thanks to Rose Pearlman for developing this project, writing the instructions, and capturing the imagery. Rose is an artist, teacher, and textile designer. With a background in fine arts and a love of well designed functional objects, her creations blur the lines between art and craft and pushes the boundaries with non-traditional techniques and materials. Rose teaches monthly rug hooking workshops in and around her home in NYC, and also welcomes commissions for one of a kind constructions in decor and home furnishings. Her work has been featured in fiber magazines, galleries, and numerous online design sites. Her new book Modern Rug Hooking comes out December 3, 2019 and is currently available for preorder wherever books are sold. She lives in Brooklyn, NY with her family.
Step-by-step process photos by Rose Pearlman. All other photos by Erin Boyle.
This post includes affiliate links. Reading My Tea Leaves might earn a small commission on the goods purchased through those links.
10 Comments
So cool! This seems like a fun indoor thing to do, considering it has already started snowing and it isn’t even November yet… sigh.
Totally! So easy once you get the hang of it and such a good craft to tackle on a snowy day!
This looks more like jute twine than floral wire?
It does! But it’s not jute. It’s paper wrapped floral wire! There’s a link to the specifics if you’d like to take a look.
I love these tutorials! Simple and beautiful with a touch of can-do.
Also, your cast iron wall hook is beautiful. I’ve been looking for something along those lines. Where did yours come from?
So glad! I found the hook years and years ago when Brook Farm General Store still had a shop in the city!
I want to try this! What gauge wire is needed?
Linked in the post above, but we used a 21 gauge paper-covered wire!
non comprendo come fare gli anelli alla fine della borsa…quelli iniziali ok ma quelli finali?
Thankyou! That is the best solution❤
Comments are moderated.