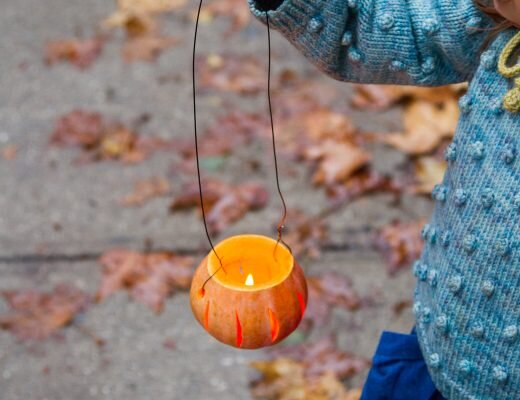
Perhaps you need a basket for your string. Or your very adorable pears. Or maybe you just need to put your fingers and brain to work on something that isn’t a computer. Whatever the case, consider this my plea to give this very satisfying project a shot.
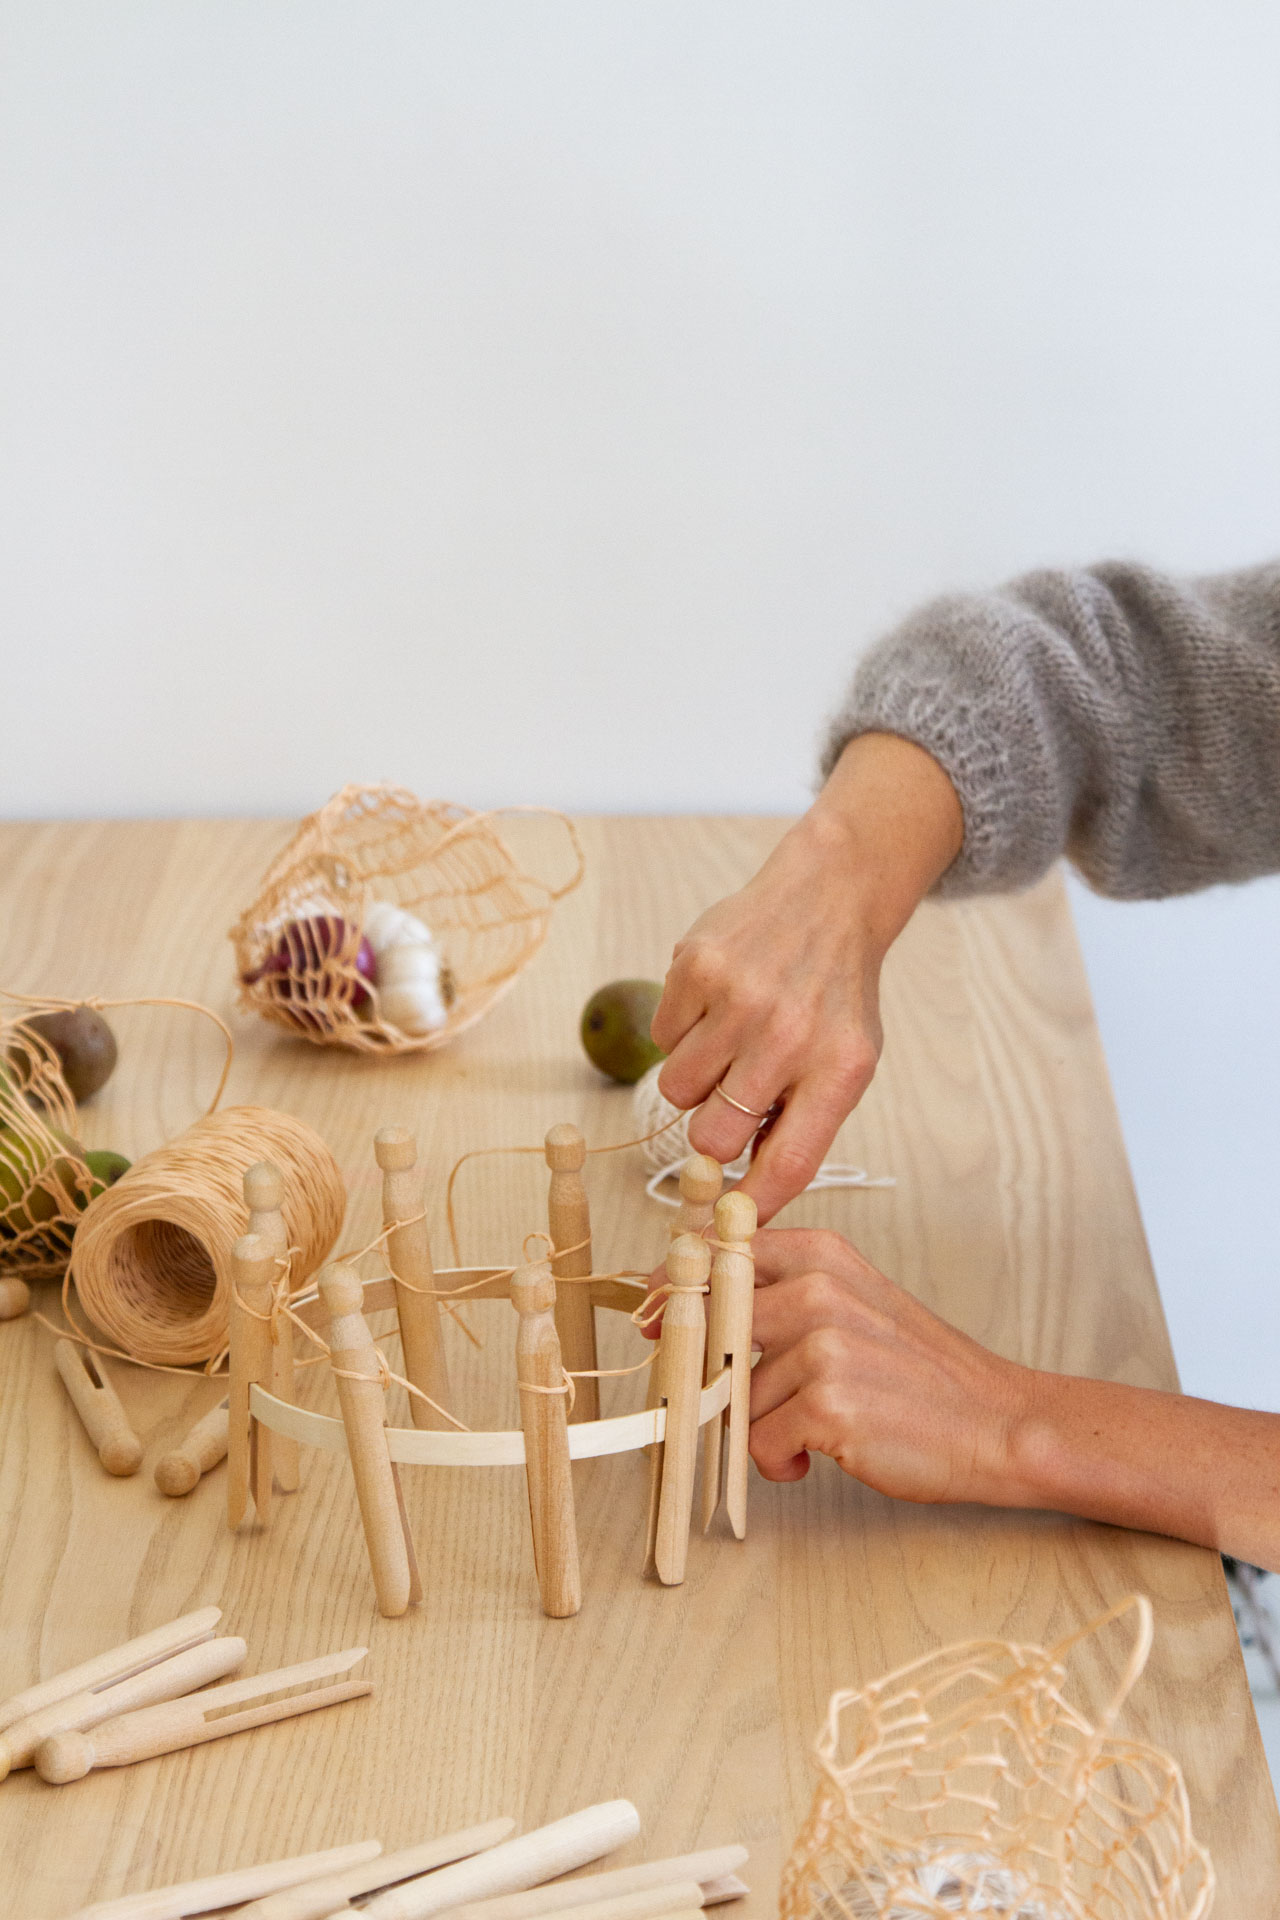
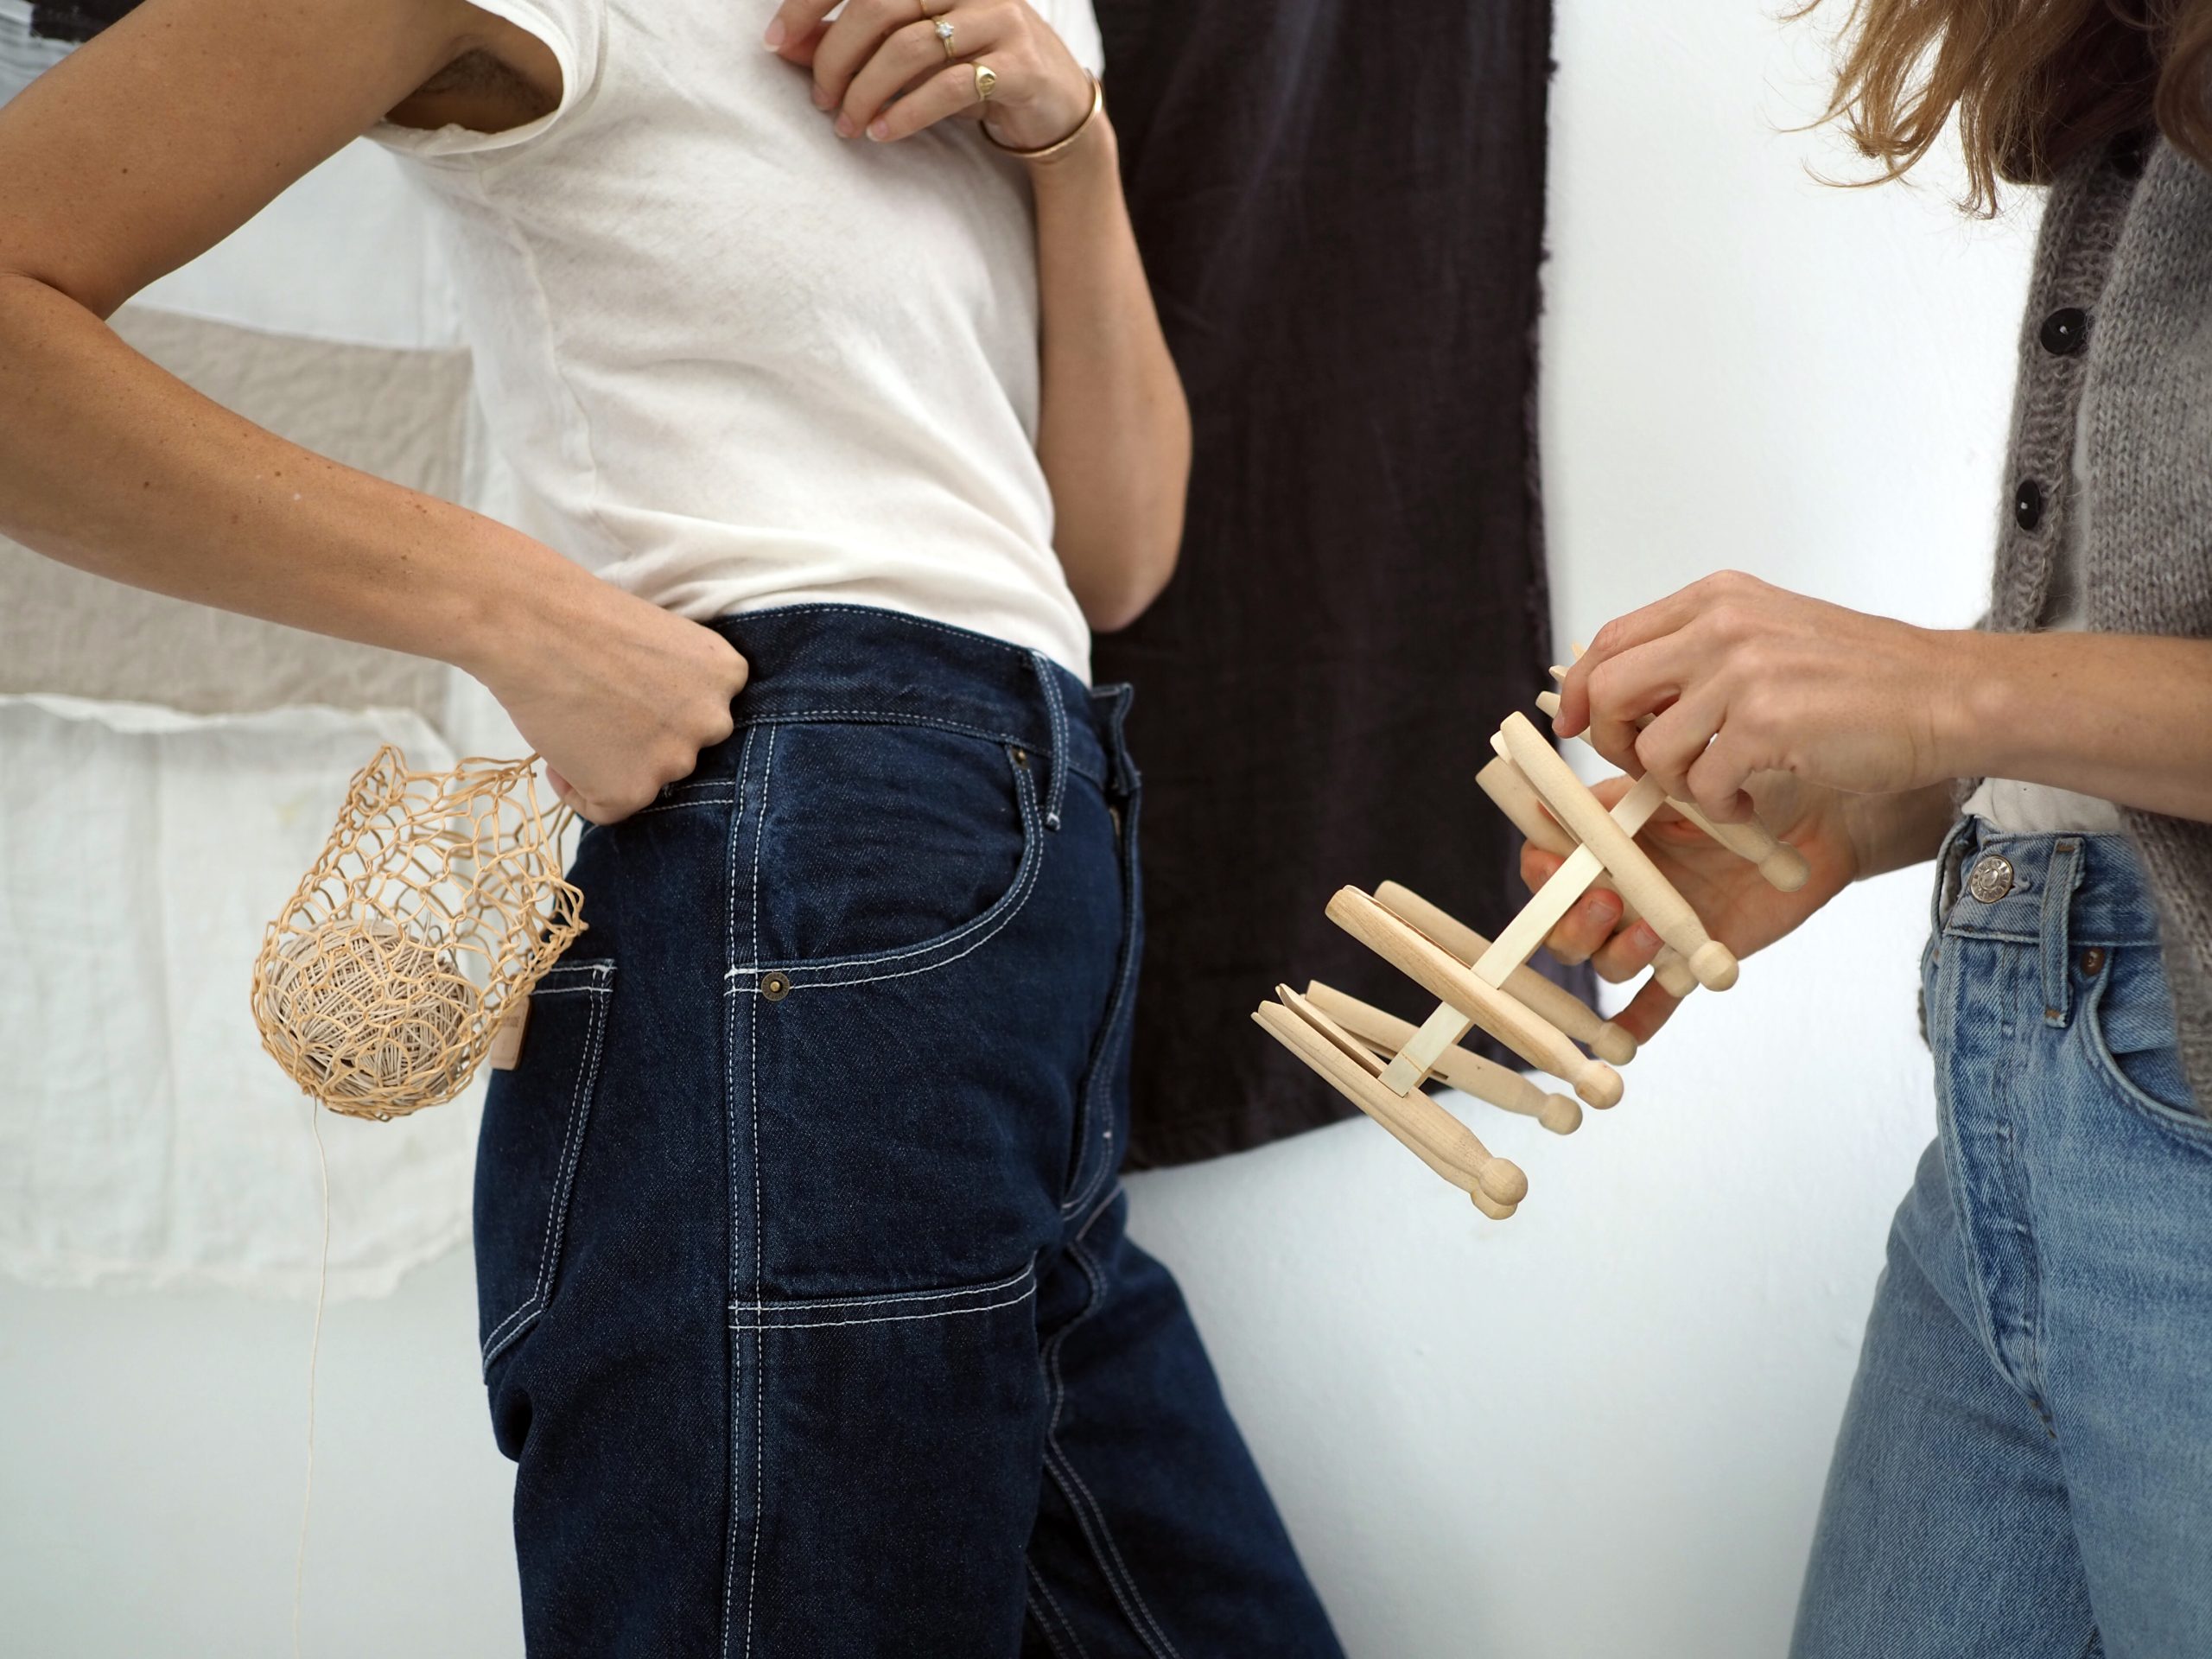
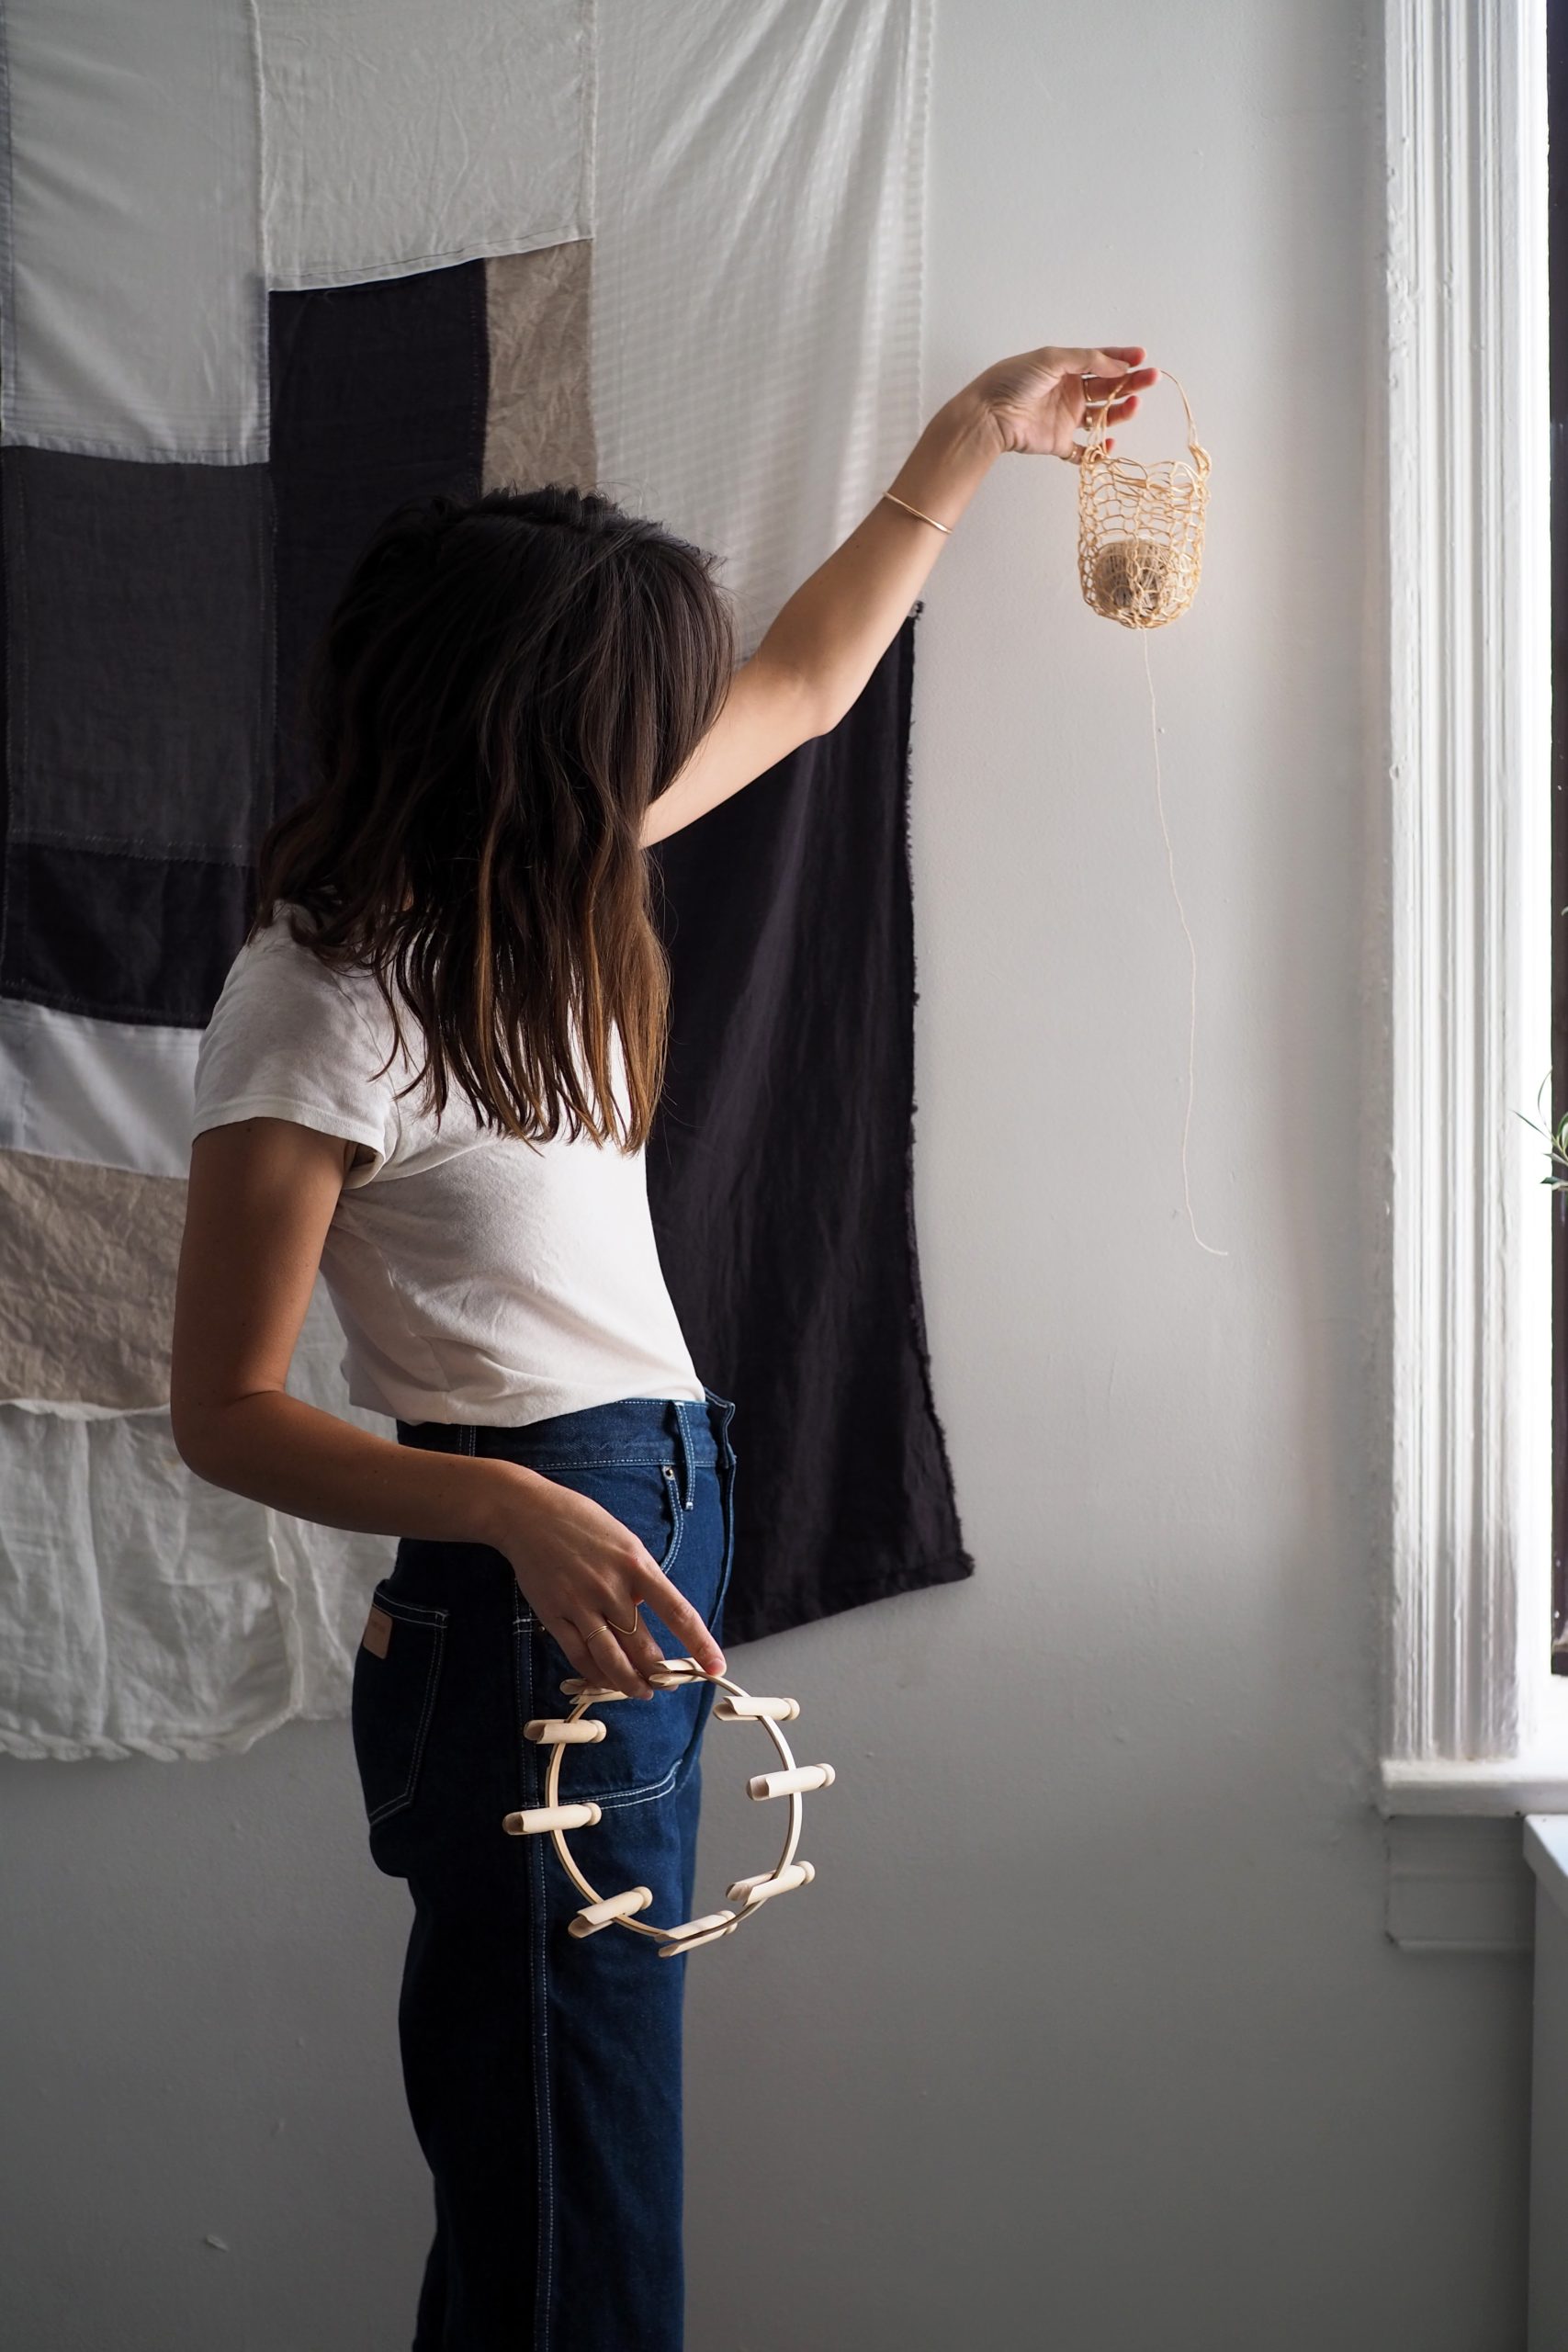
The beauty of this project lies not only in the beautiful organic basket it produces, but in the simplicity of the materials needed to make it: an embroidery hoop, nine clothespins, and a spool of paper covered floral twine. Plus you!
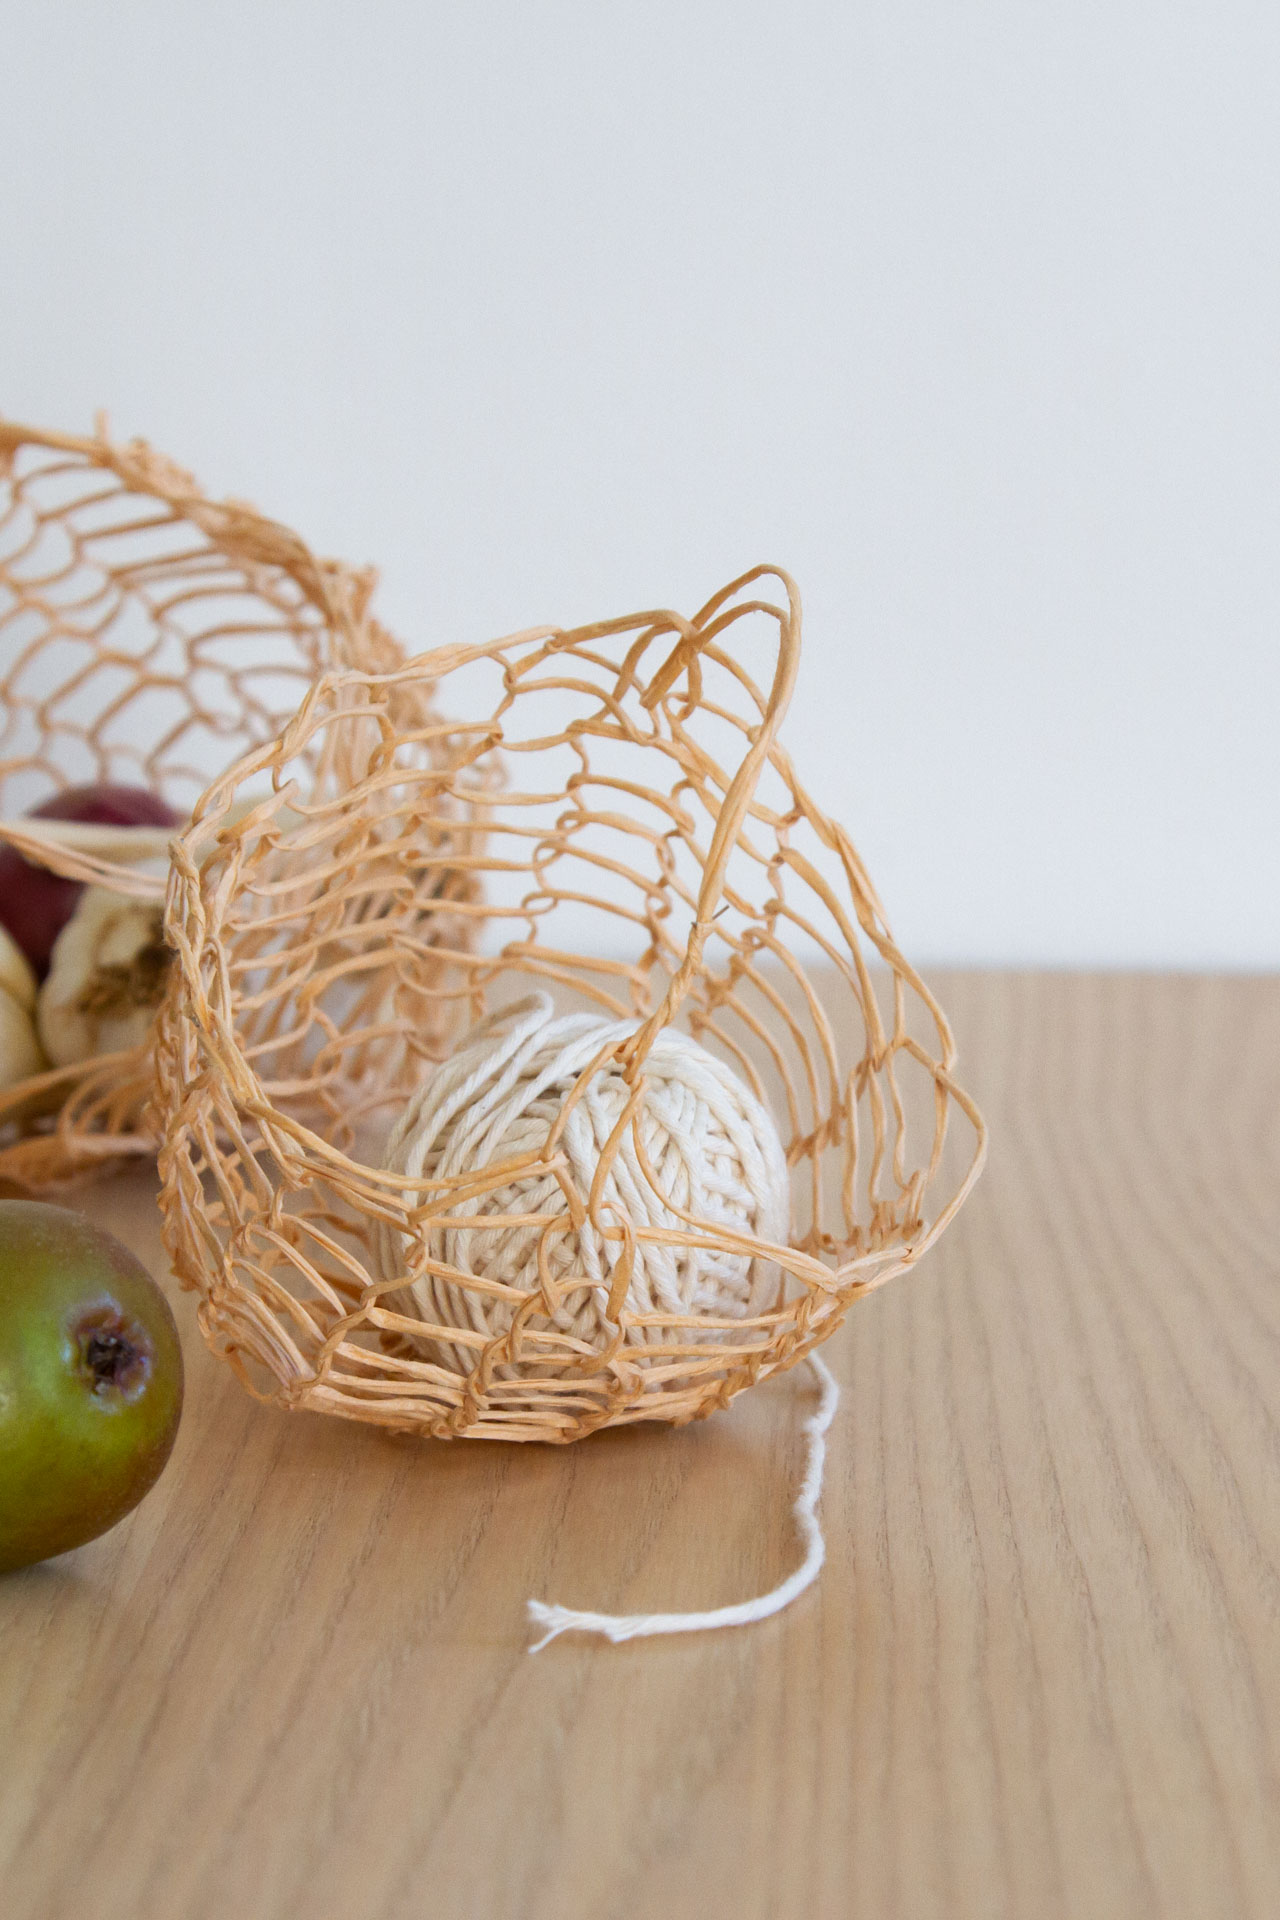
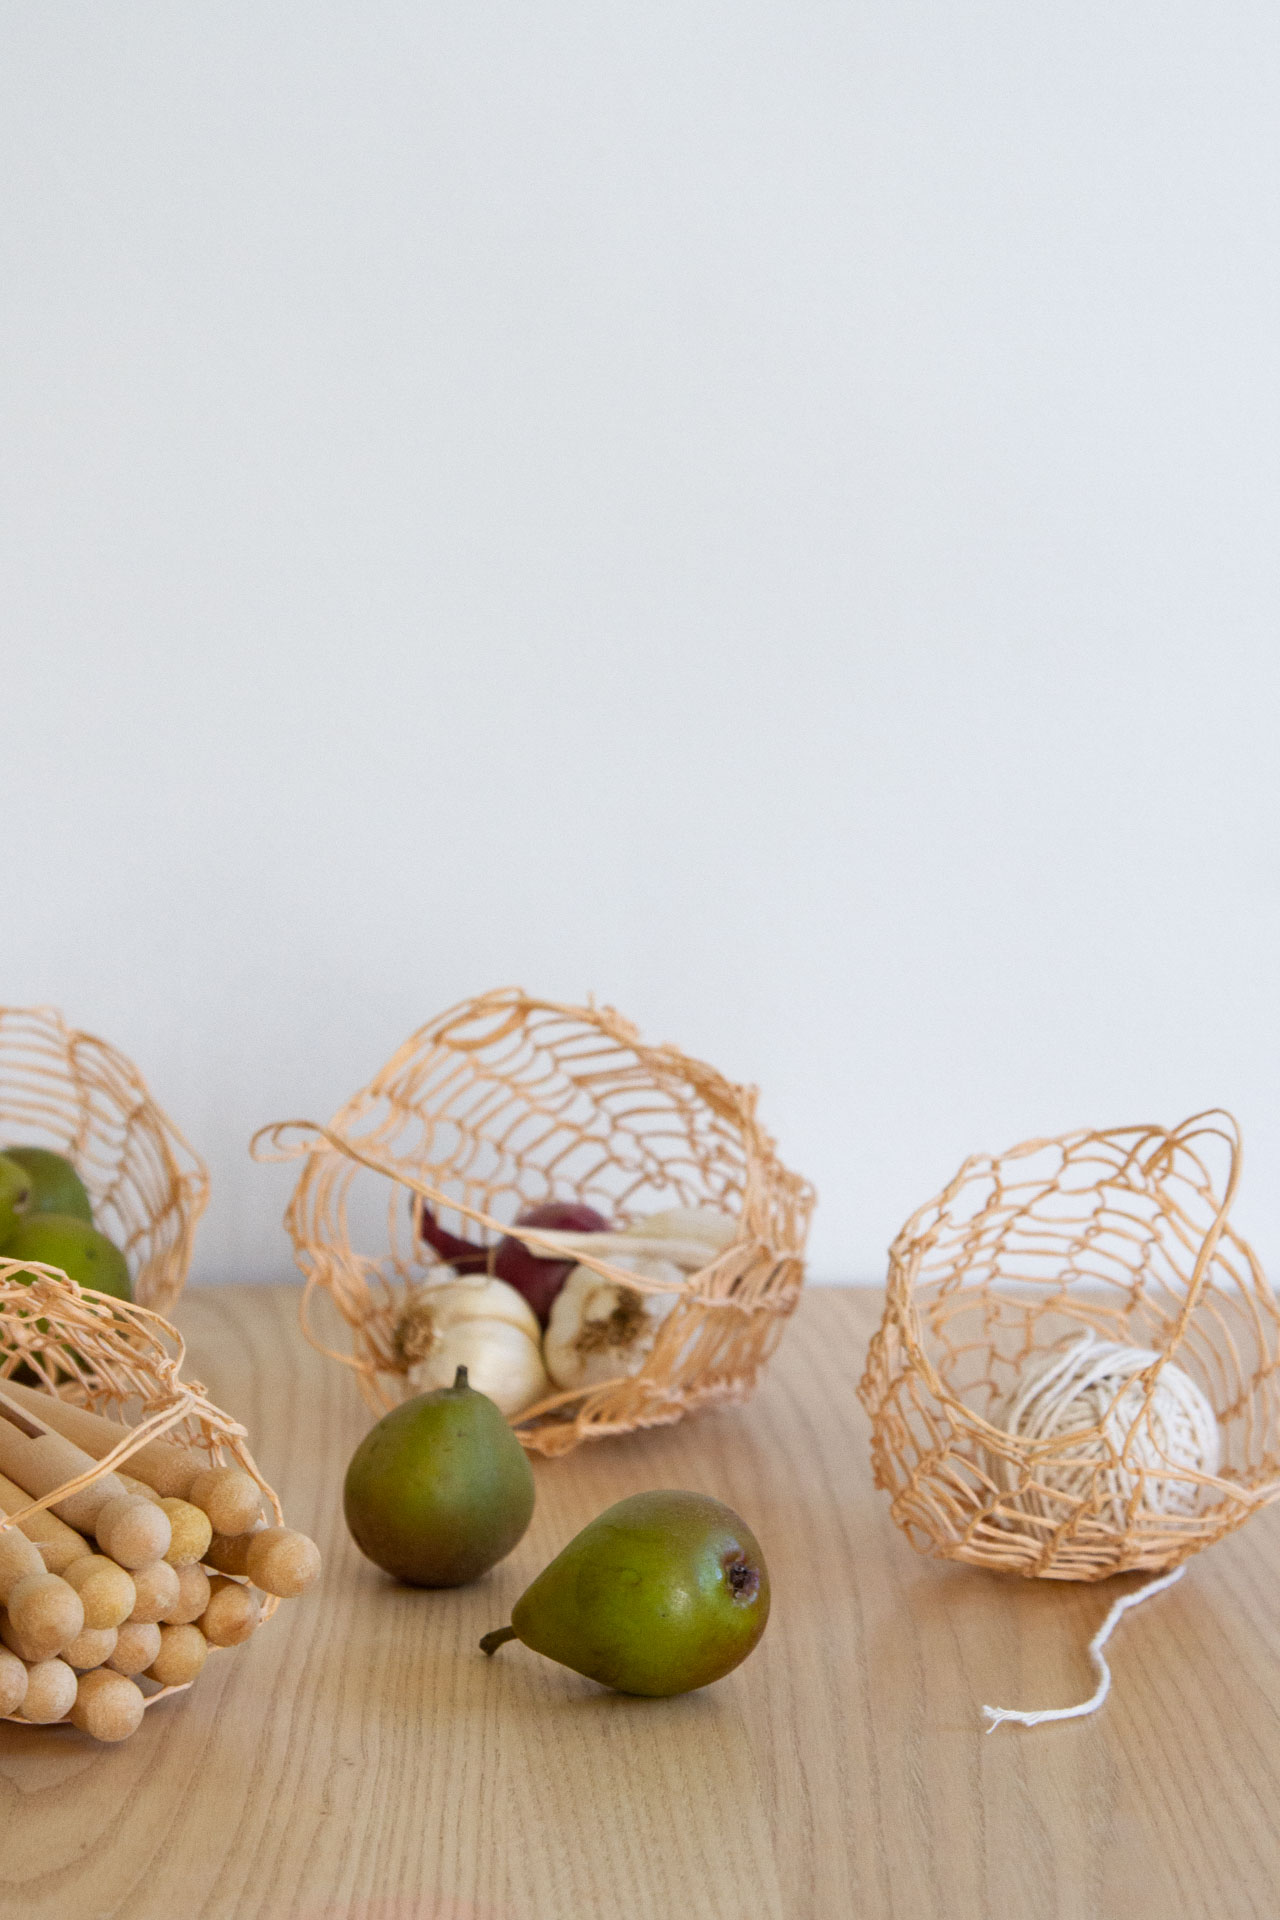
The technique shown here is the same one Rose used to make her string bag and you might recall the floral wire from the structured macrame basket. Put together they make a beautifully delicate and exceptionally sturdy little basket. The finished vessel is ideal for passing a ball of string through and calling a dispenser, but don’t let that stop you from putting it to use for anything else you might to round up: garlic, or miniature pears, or clothespins in waiting.
If you haven’t been brave enough to try the string bag or macrame basket we made a few years ago, I hope this little basket will give you the boost of confidence to try your hand at something new. It’s little so the basket takes no time to shape up and the process is so simple and satisfying, you won’t be able to stop with one.
For folks who benefit from visuals, Rose has the step-by-step images below and we’re putting together simple videos on Instagram to help nudge you in the right direction. Let us know what you think and show us your finished beauties!
The finished basket makes the perfect dispenser for string or yarn or whatever else you’re trying to keep tidy and accessible, but don’t let that stop you from putting all sorts of other things in it.
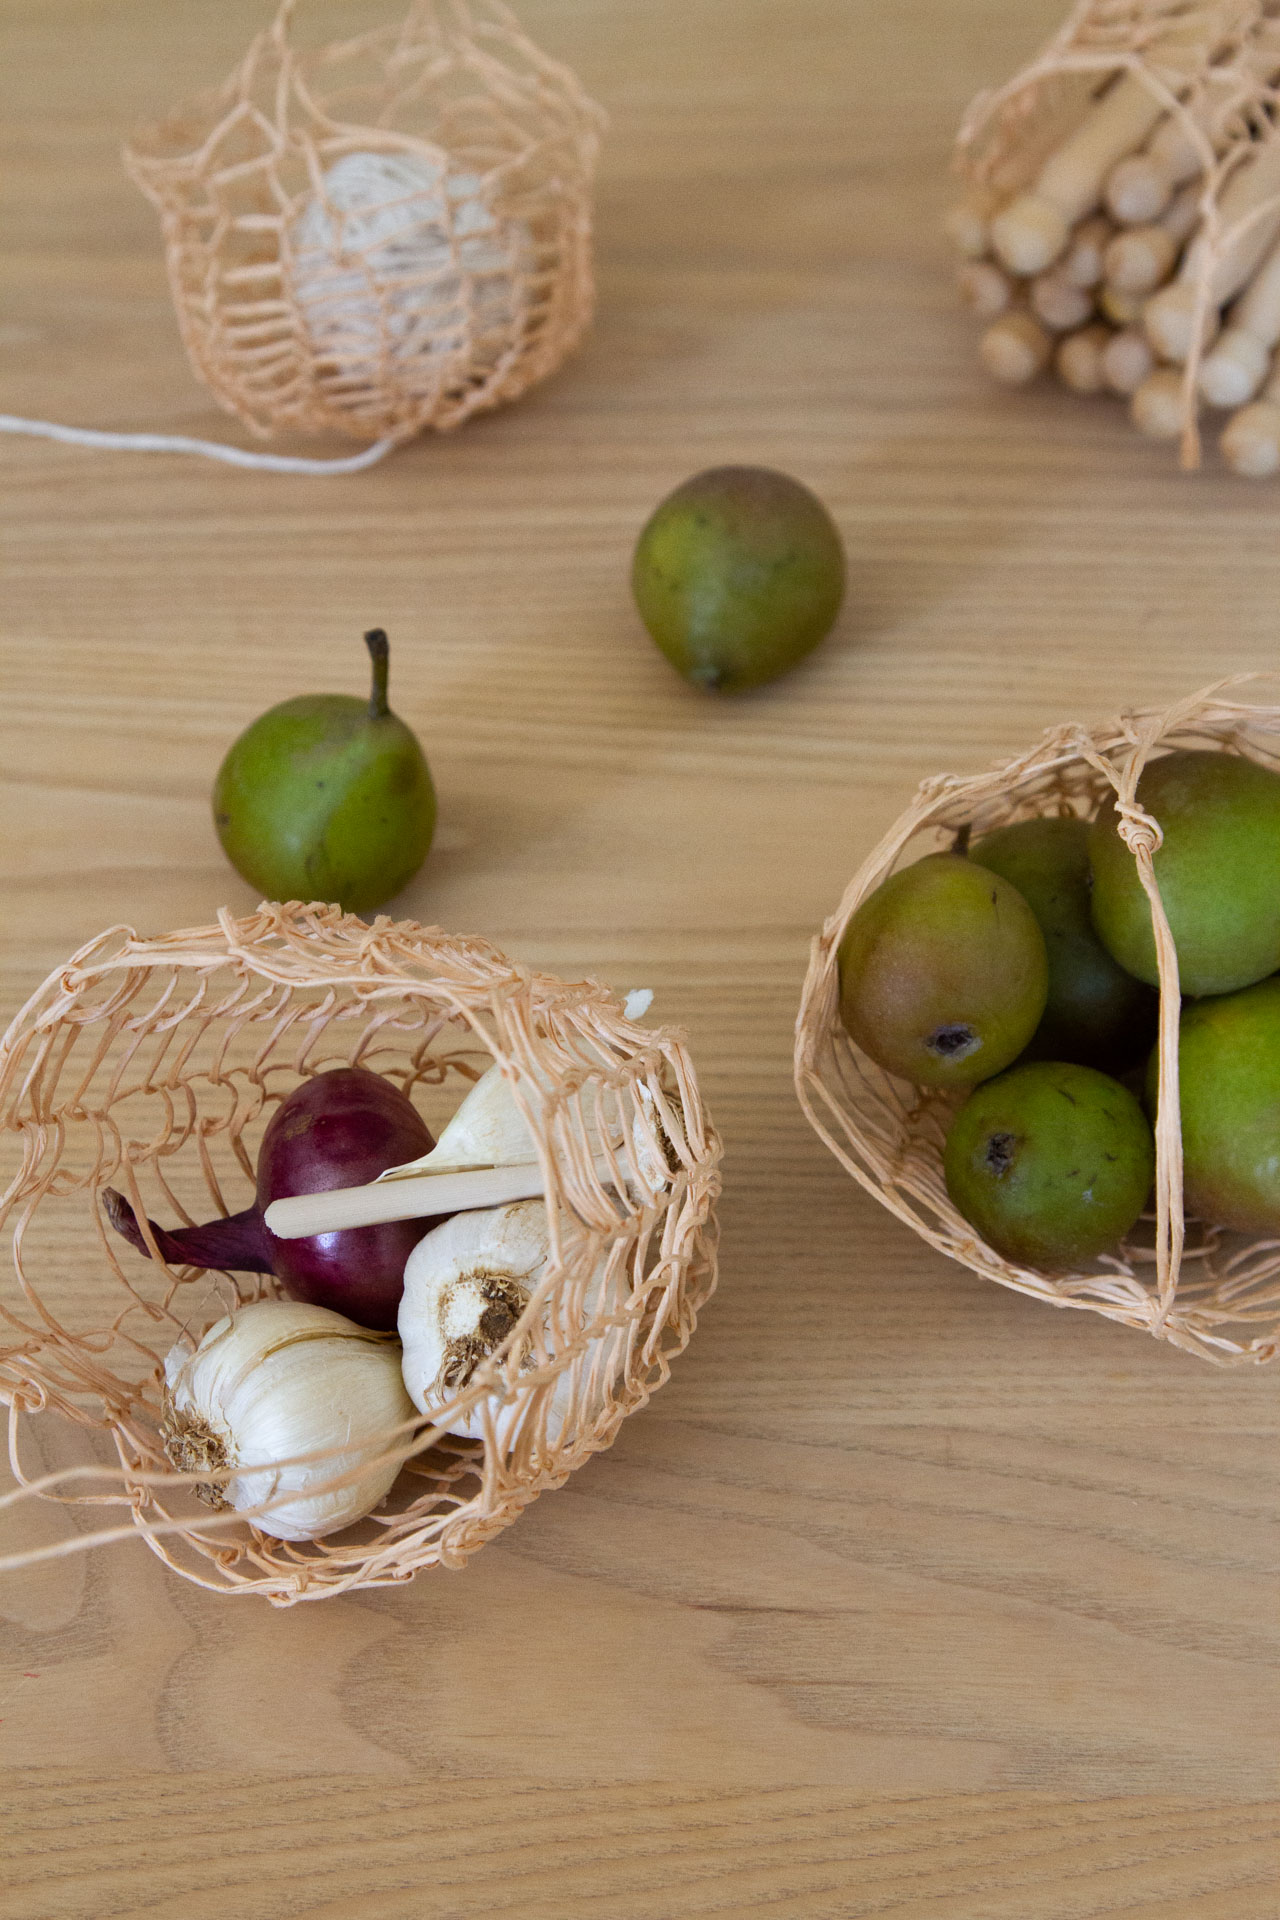
Shaped into little round baskets, these become the perfect garlic keepers, clothes pin holders, tiny carryall for tiny pears!
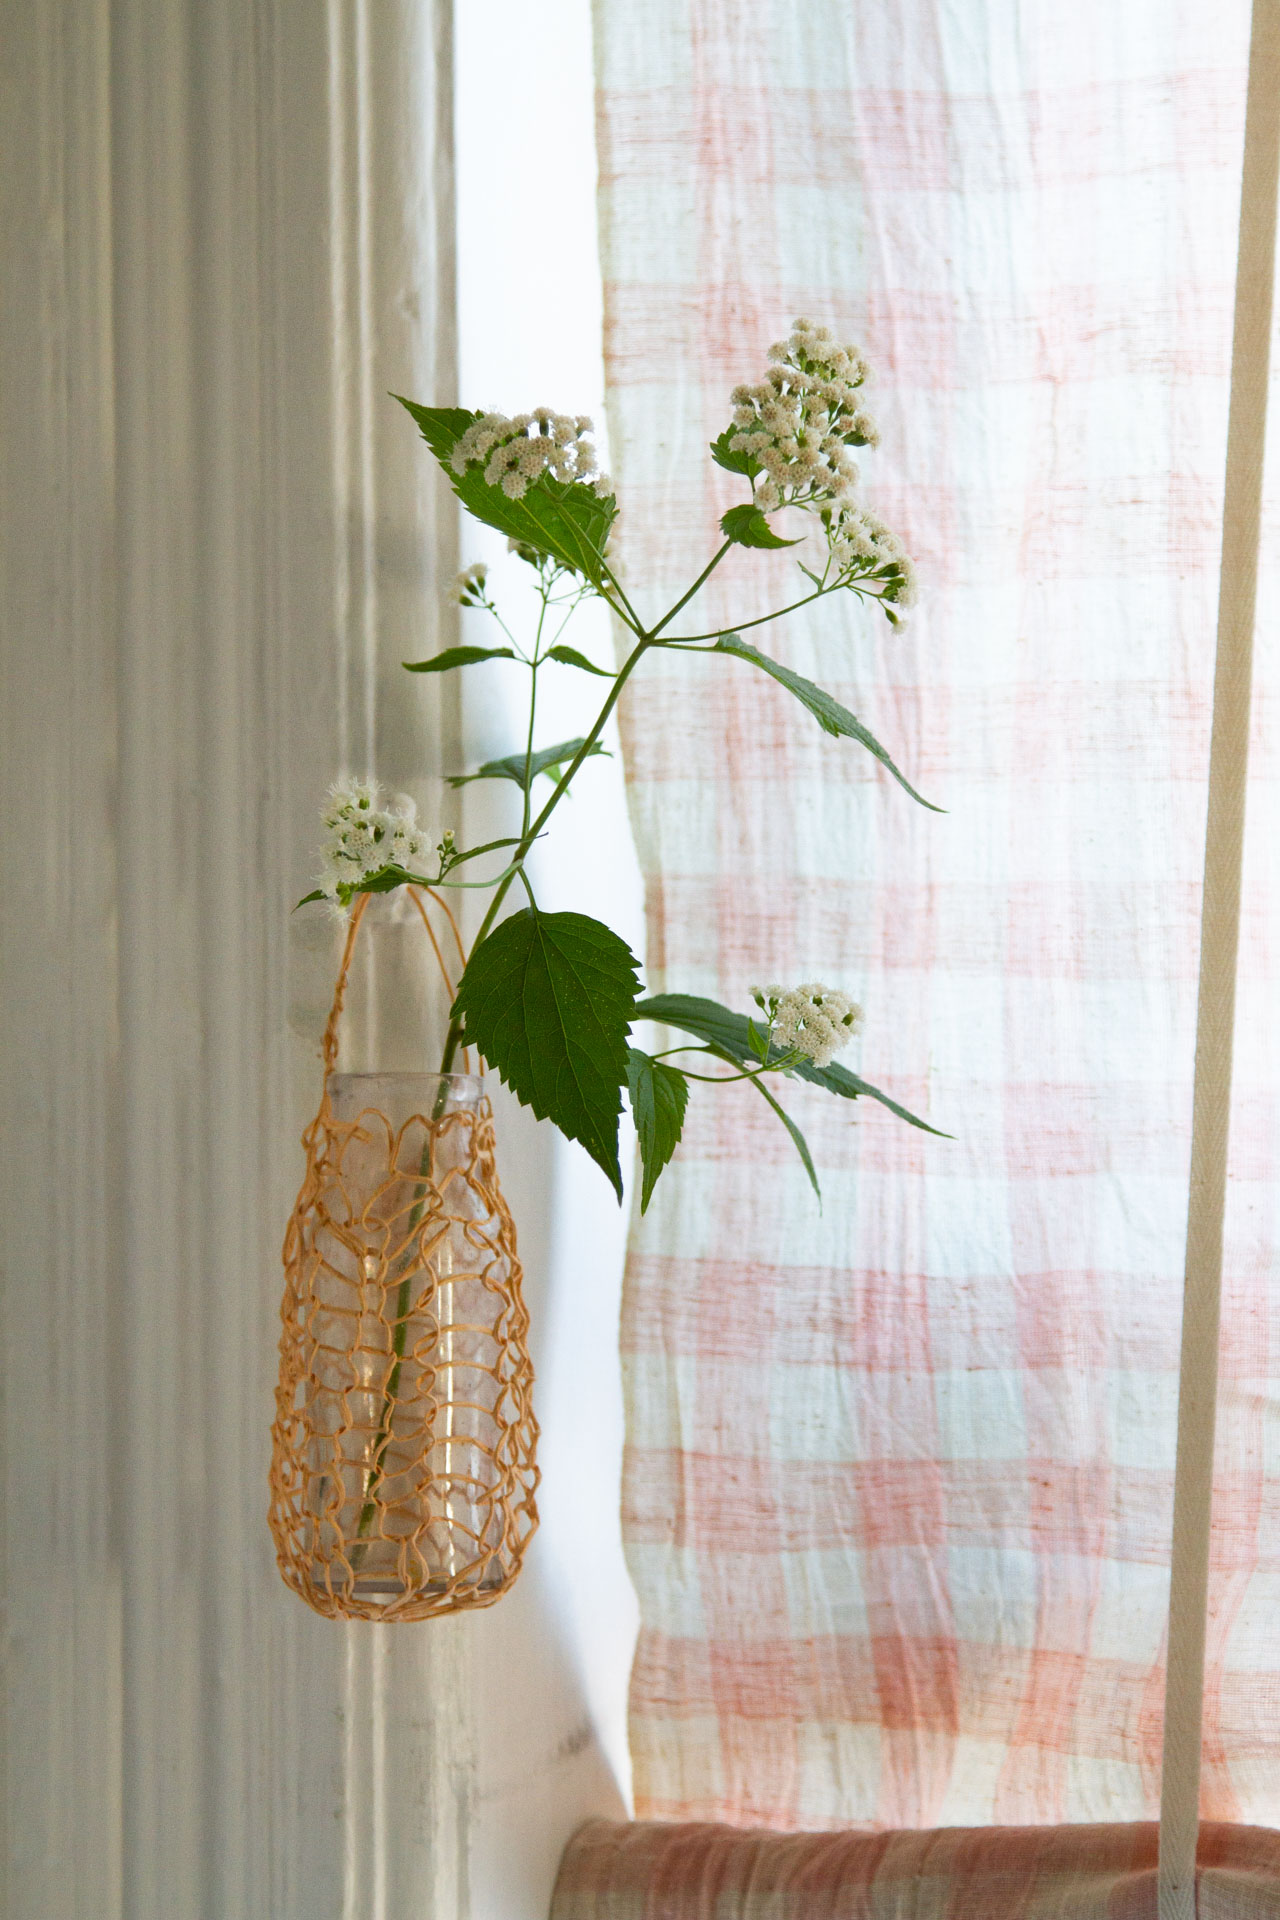
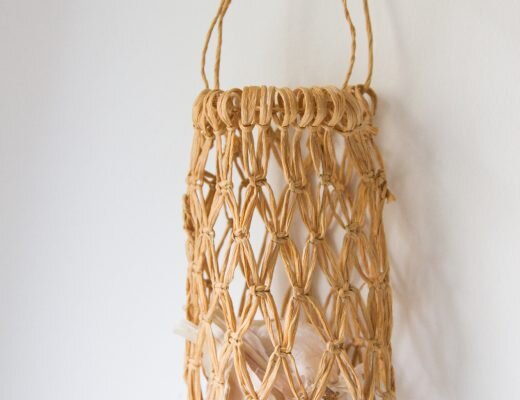
Don’t be afraid to mold the finished basket around any kind of vessel you like. Here, we took a round little basket and pressed it into shape to make the perfect sleeve for a vintage bottle.
Floral Twine String Dispenser
Materials:
+ One side of an 6-inch embroidery hoop (To make a larger bag you can use a hoop that is wider. If you don’t have an embroidery hoop handy, you can replace the embroidery hoop with a small corrugated cardboard box.)
+ Nine round wooden clothespins for a 6-inch hoop (you might need a few extra if they crack while placing them on the hoop)
+ Paper coated floral twine wire (a few yards should be enough for a small bag)
+ Scissors
Instructions:
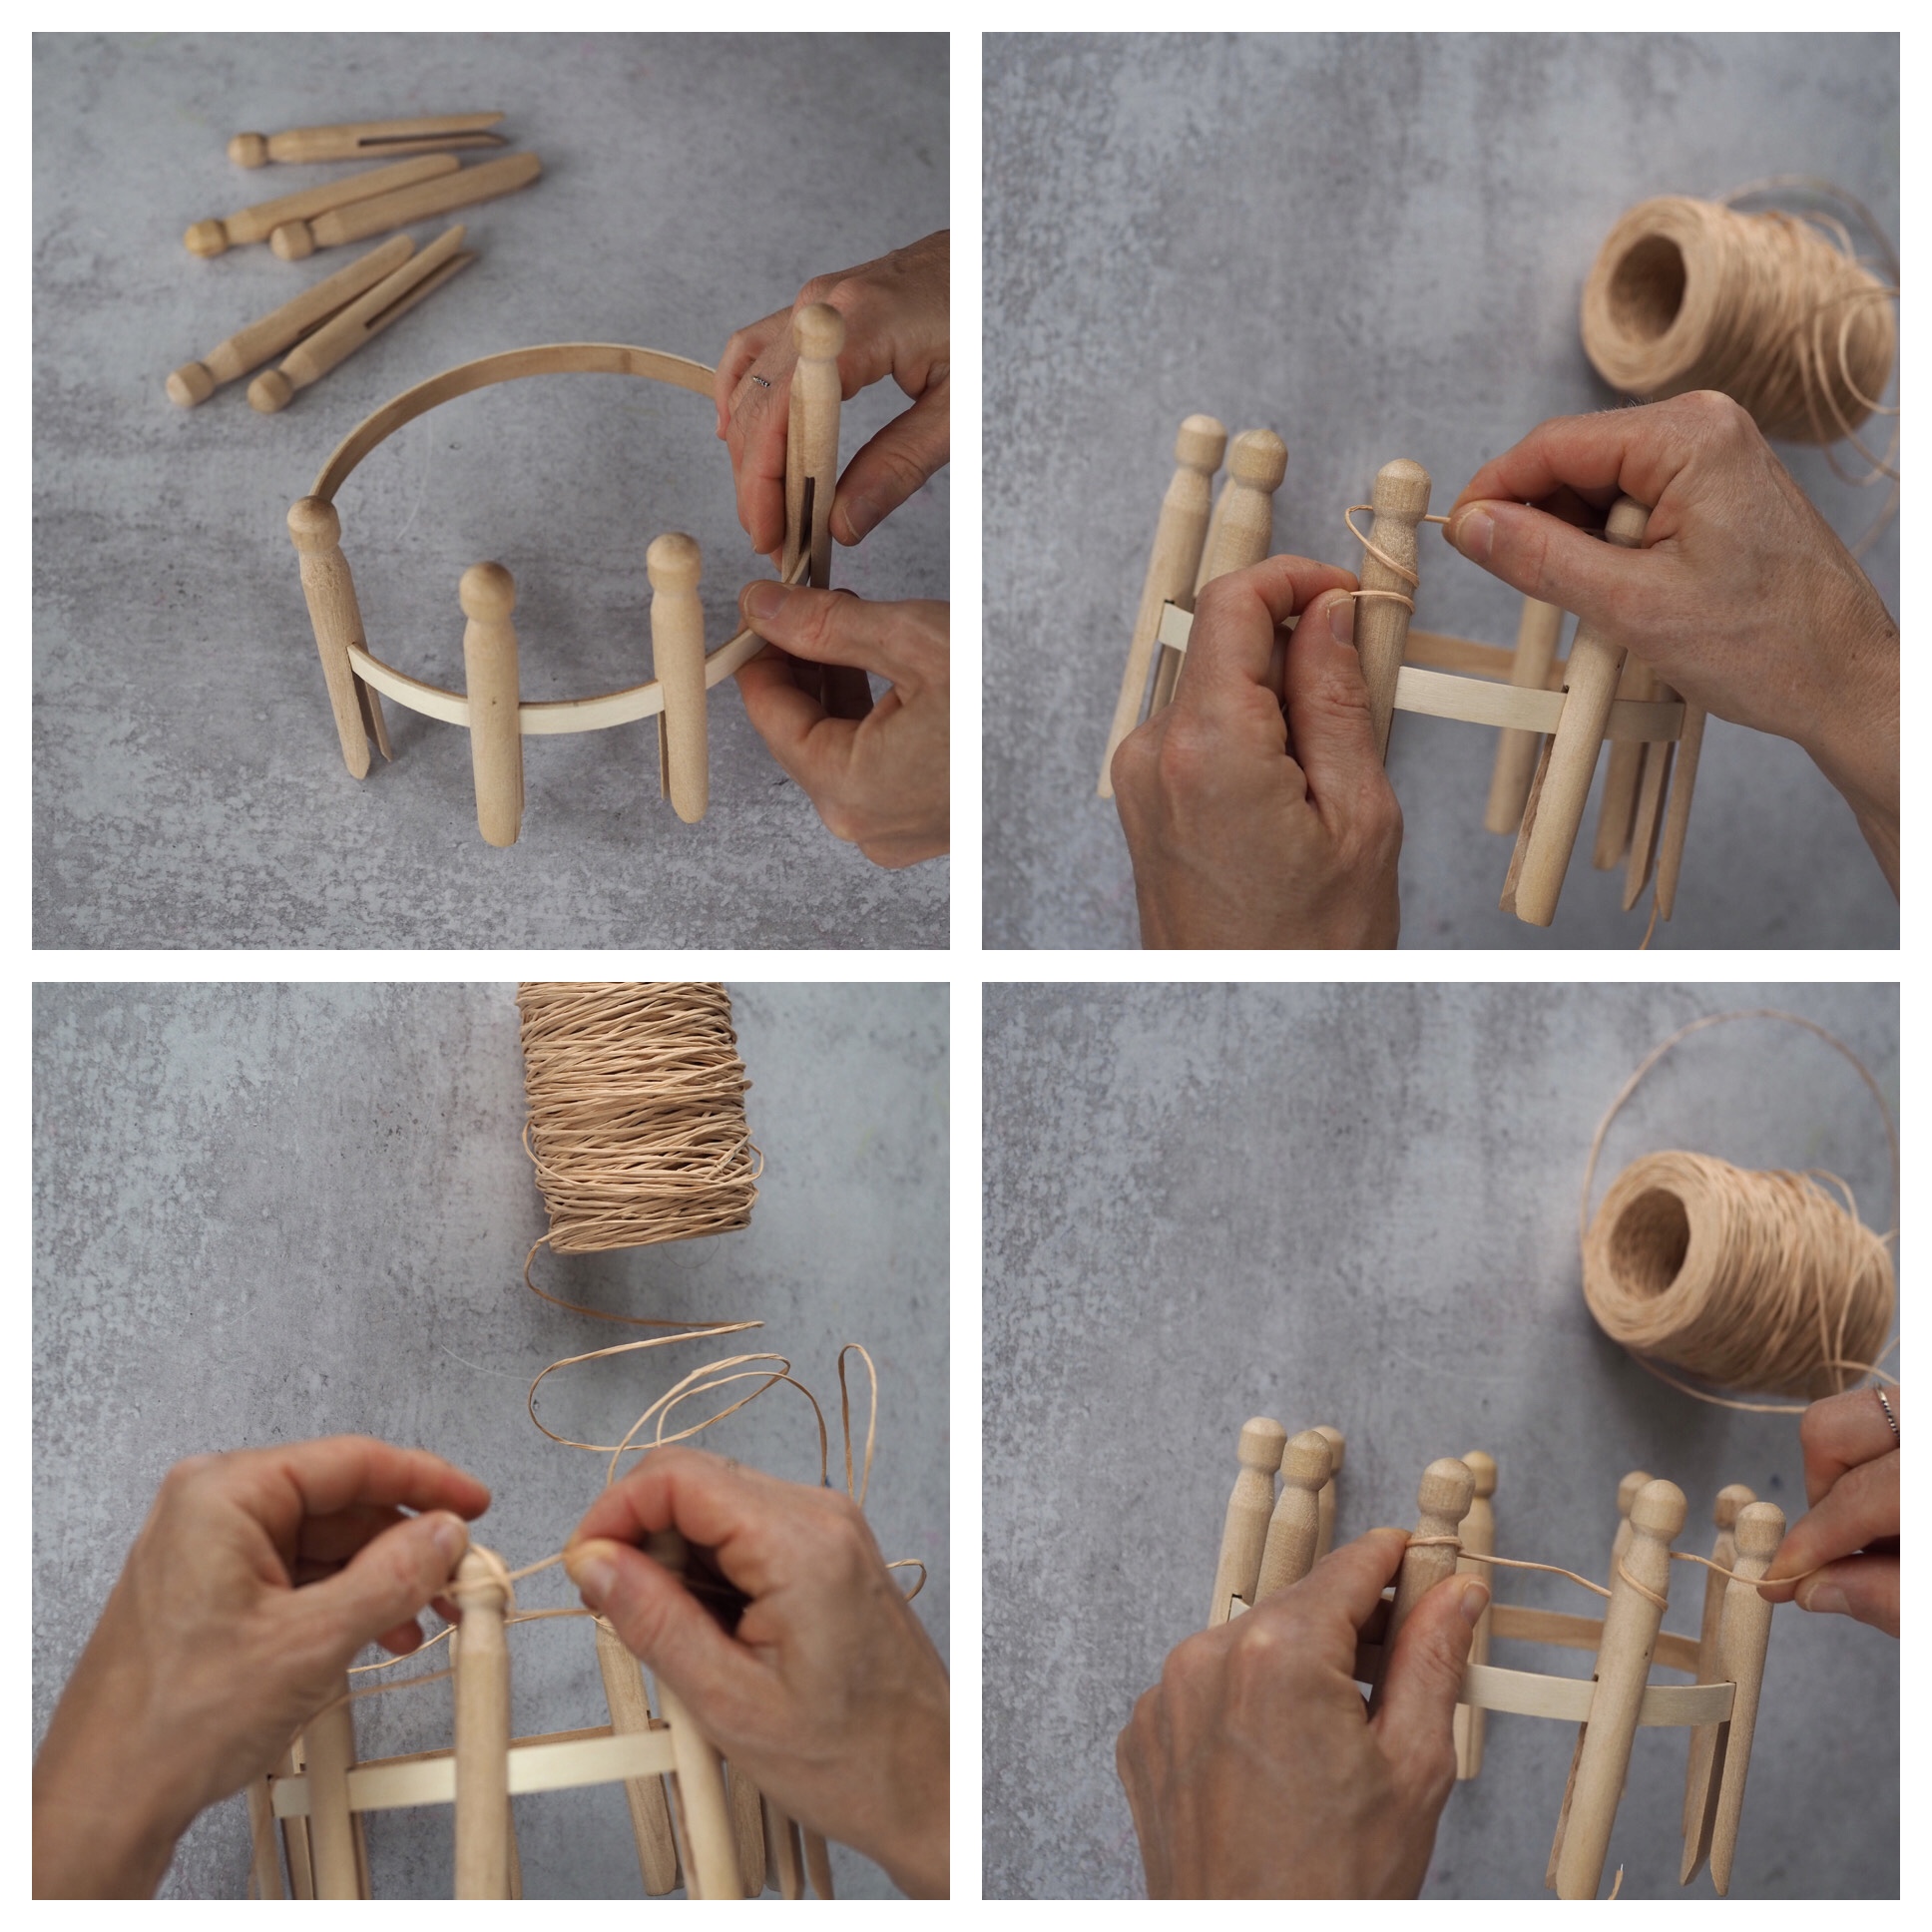
+ Place the wooden clothes pegs onto the perimeter of the wood circle frame. Place the pegs roughly 1.5 inches apart, and press down firmly making sure each peg fits tightly.
+ To begin, place a 9-inch tail end of the twine through the center of your frame. (This tail will serve as the handle of your bag and will be incorporated into the pattern later.)
+ Wrap the working twine (from the ball) twice around one of the pegs, clockwise. You can wrap the tail end of the string around the bottom of a peg so it doesn’t get in your way.
+ You will then pass the bottom loop over the top loop and off the peg. (Don’t pull too tightly or the tension will be too tight when you begin to weave.) Repeat to the next peg to the right, looping twice (clockwise) and passing the bottom loop over the top and off the peg. Repeat for the remaining pegs until you are back to the first pin with a single loop on it.
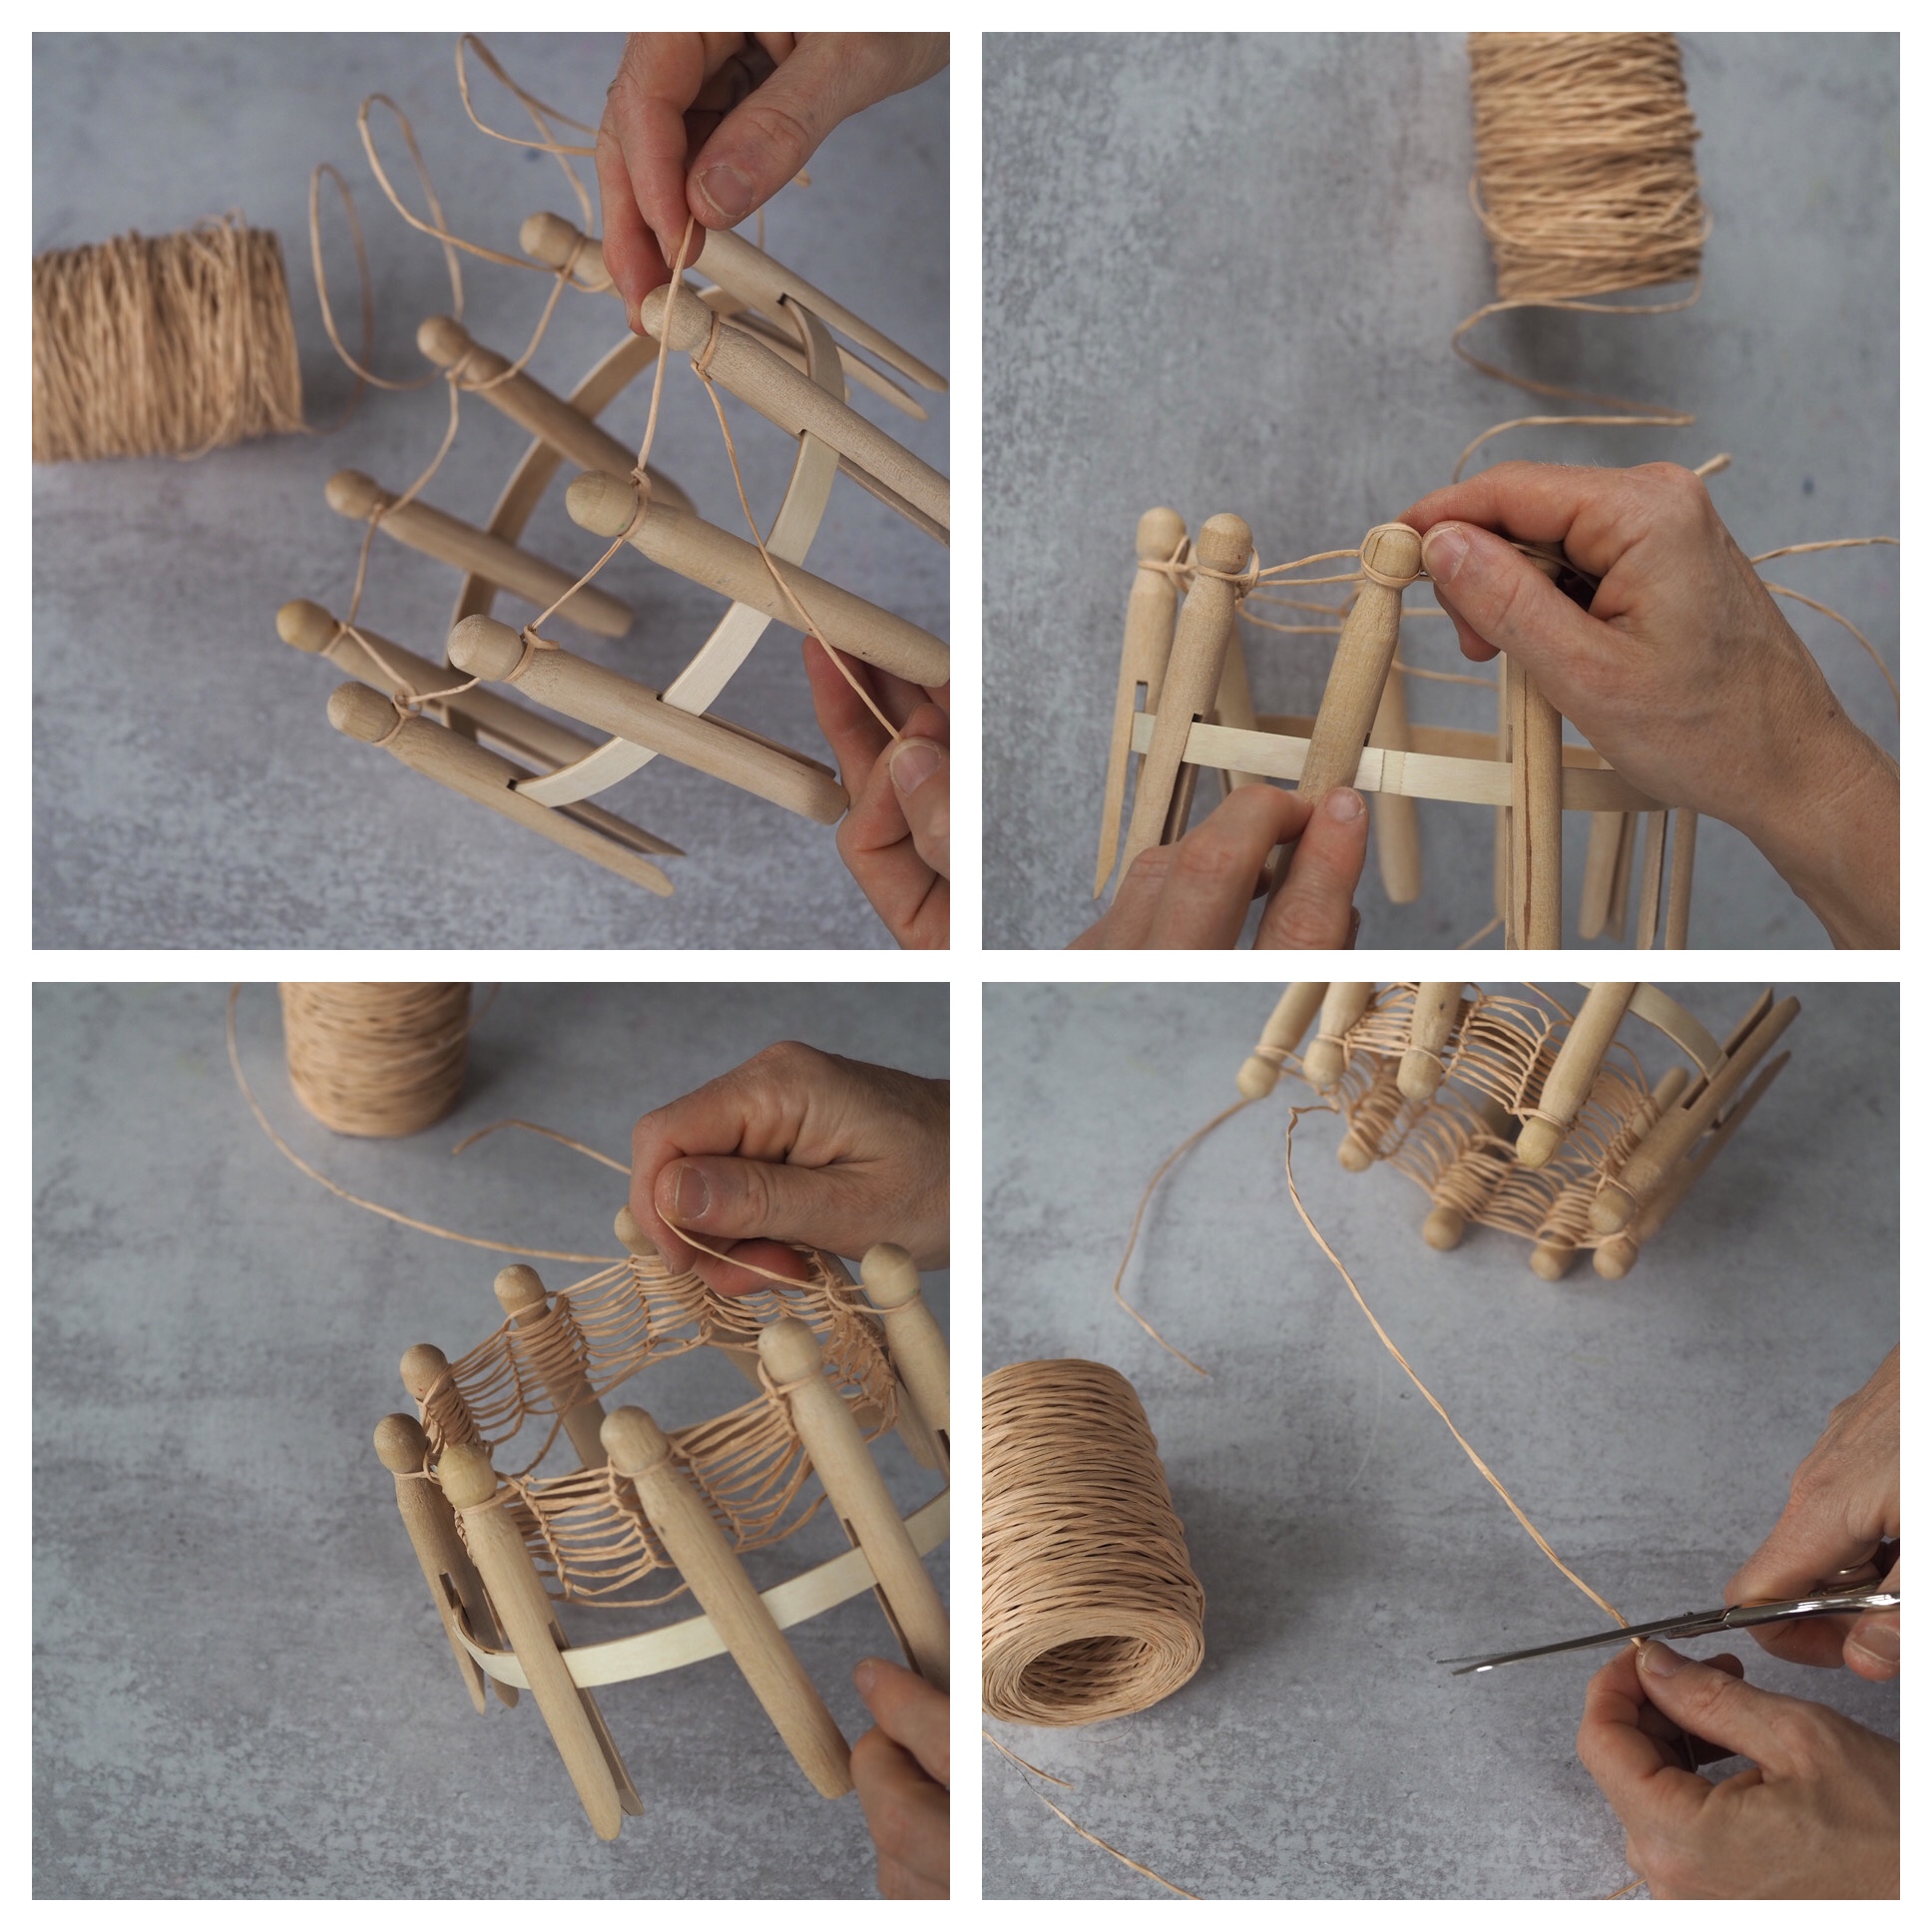
+ To begin weaving, you will not loop the string around the peg. Instead, simply bring the string in front of the peg with one loop below it.
+ Pass the bottom loop over the top string and off the peg. Repeat this technique on all the pegs, rotating the loom to the right. (The first rotation is the hardest! But the twine will loosen up significantly on the subsequent rounds. To help with the tension, move the pegs from side to side to loosen the twine as you work.) Weave in the round roughly 12-14 rotations depending on the size you want your bag. The bag will stretch and open significantly once off the frame.
+ Once you reach your desired length, you will begin to cast off. Cast off starting on the same peg that you began weaving (where you can find the tail end). Cut the string, leaving a 9-inch tail.
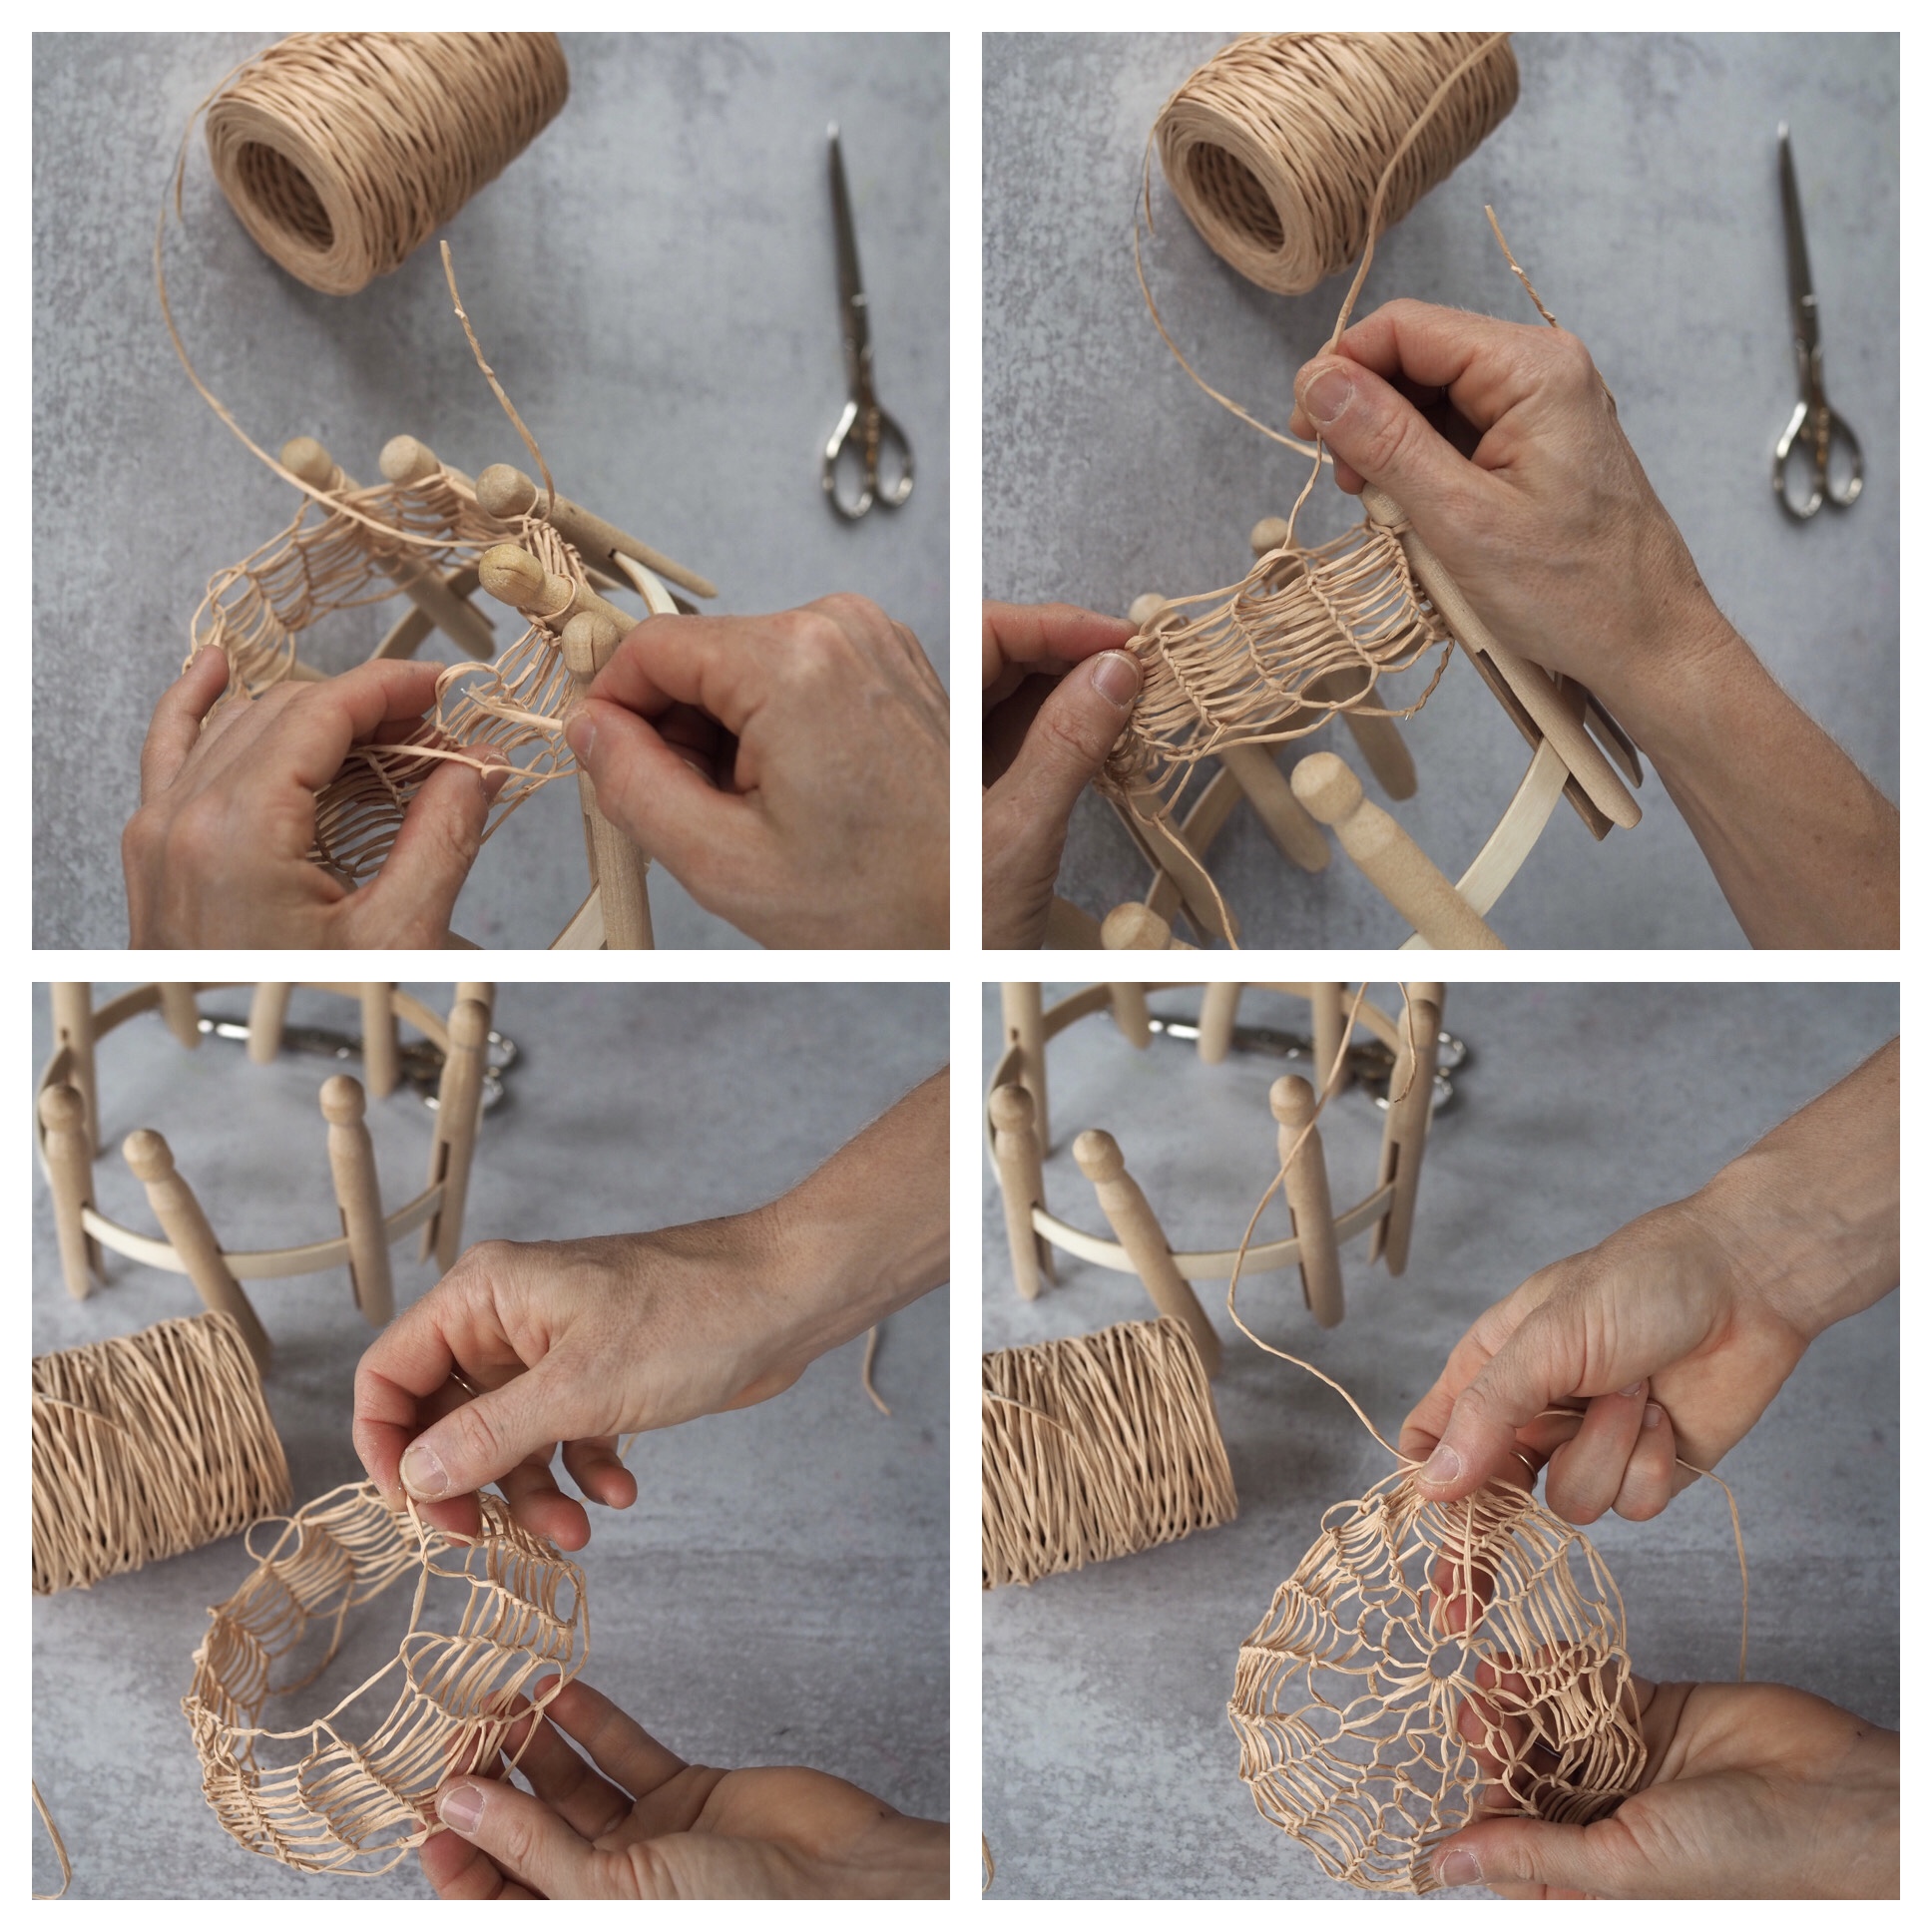
+ Carefully slip the first loop off the pin and pass the tail end through the loop (from front to back). Repeat for all the loops and pegs.
+ Pull the tail end to cinch the bottom of the bag together.
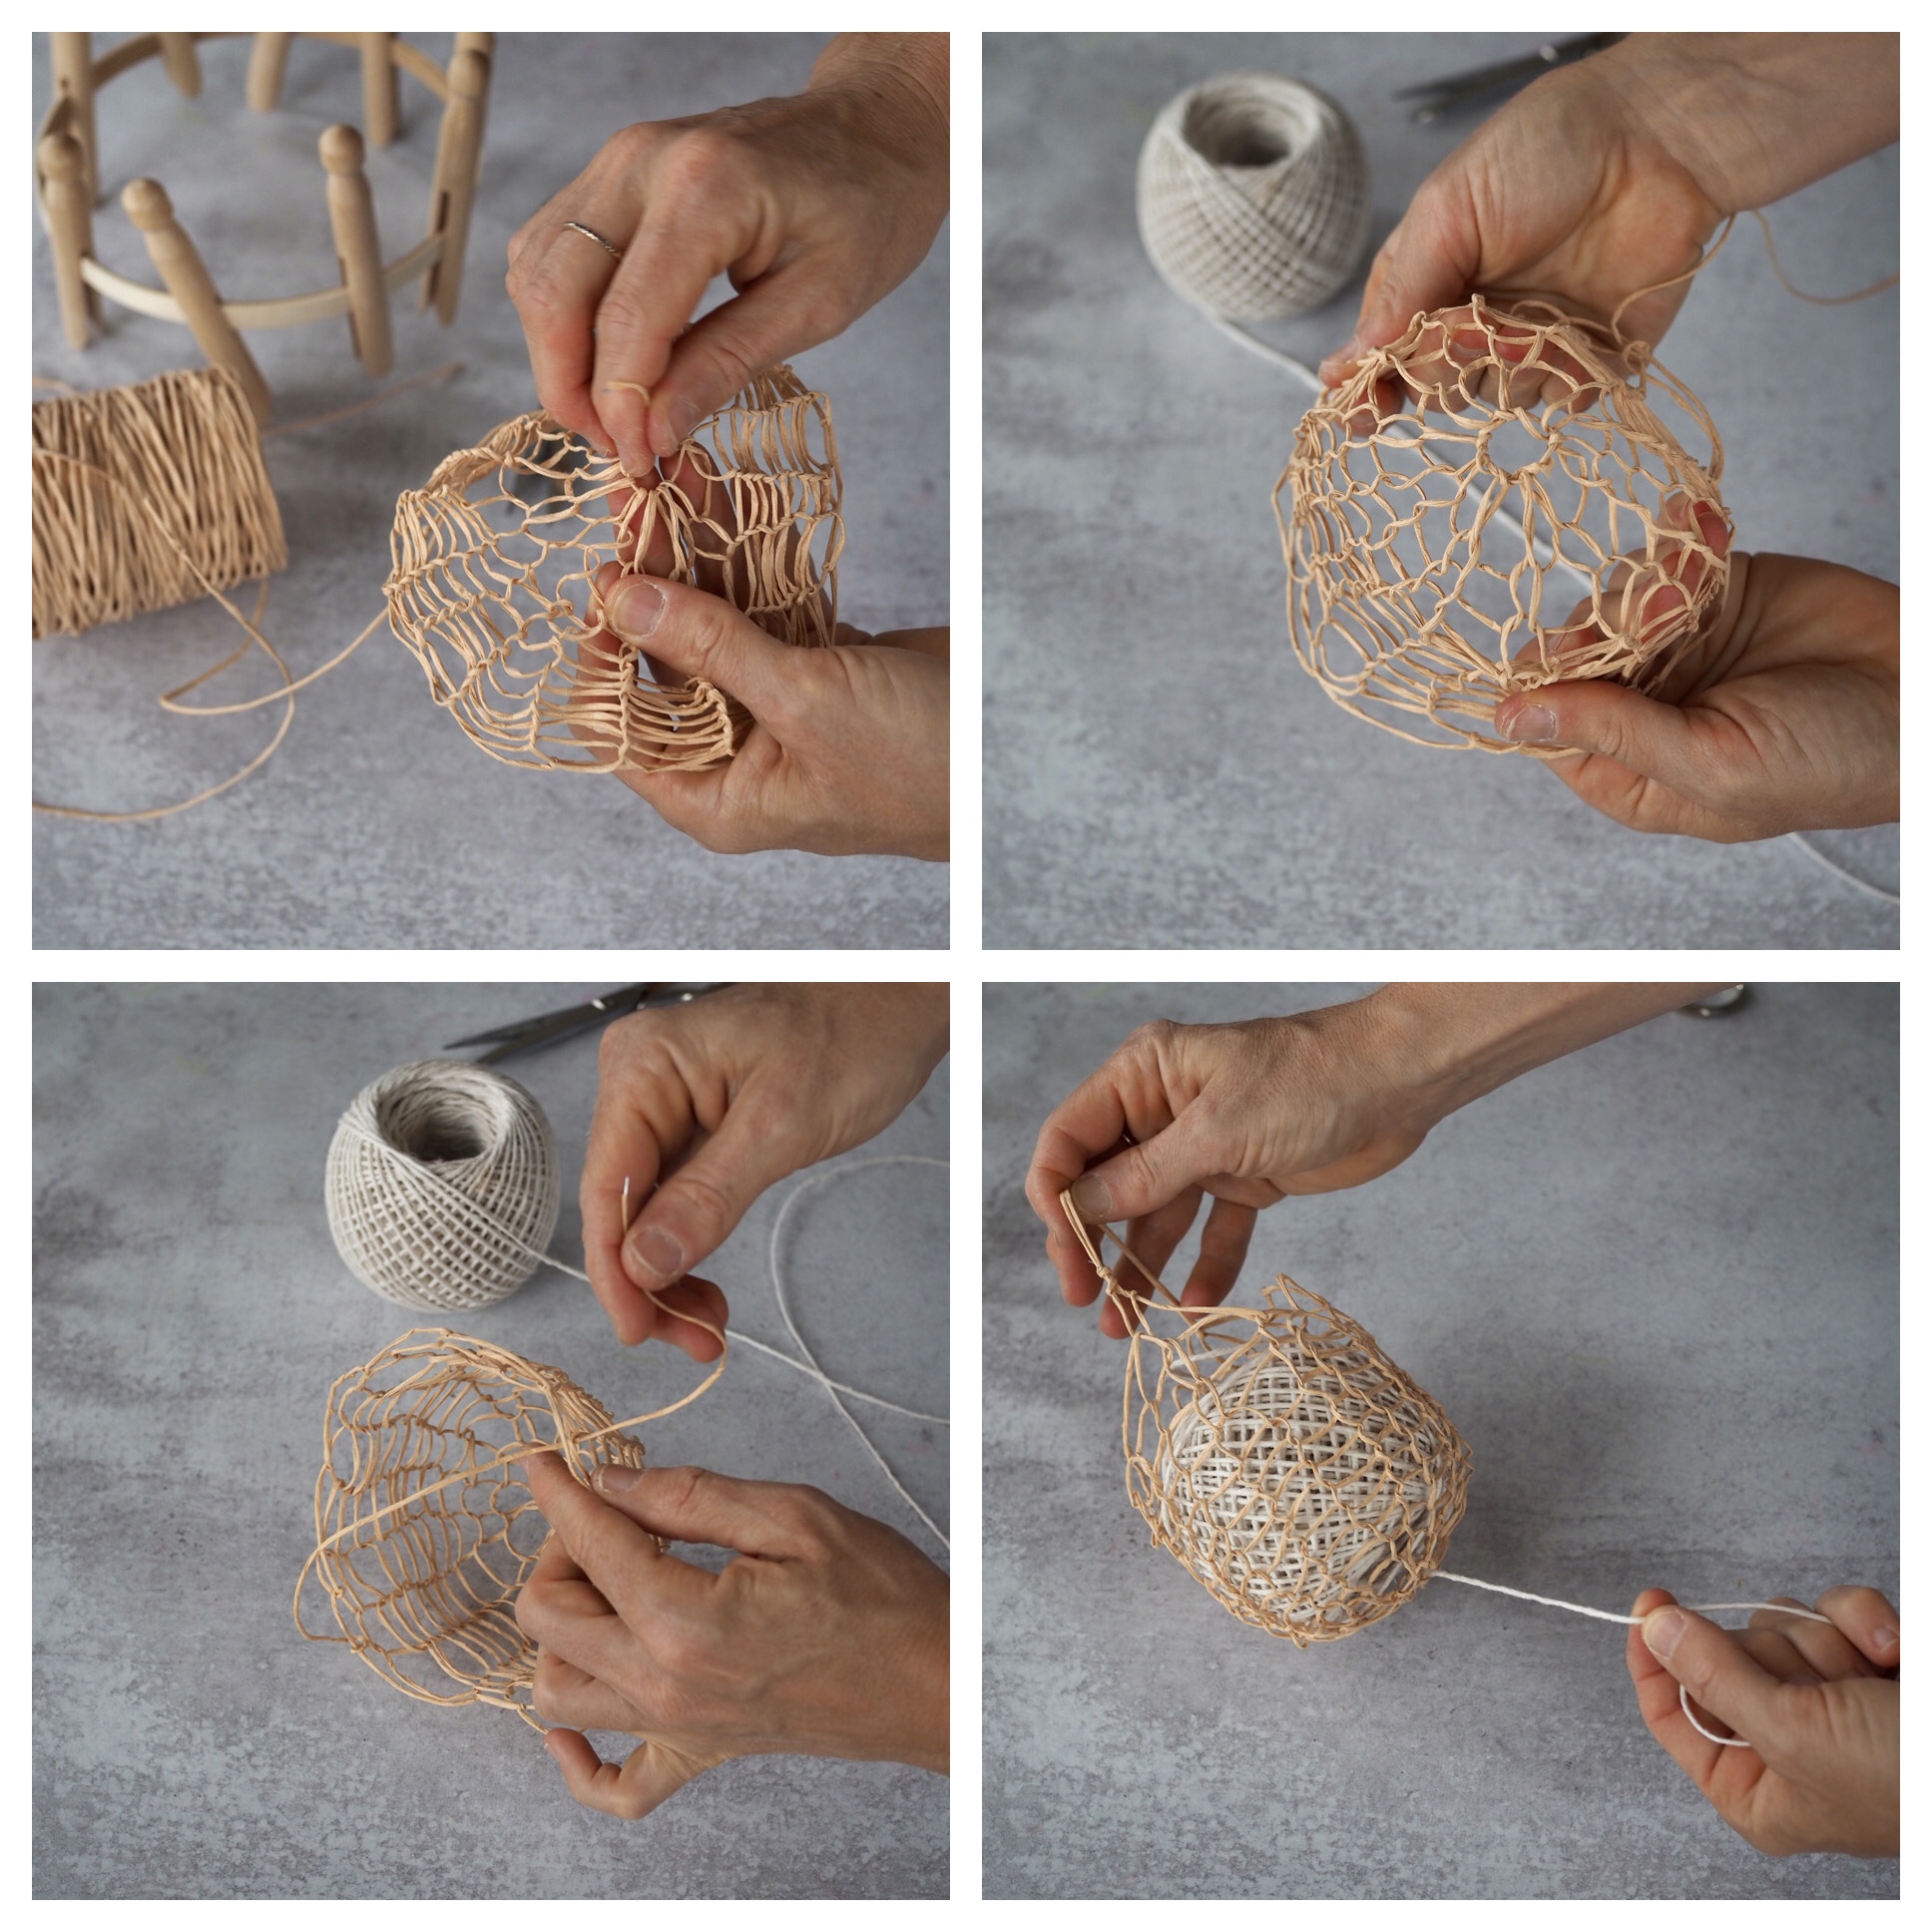
+ Wrap the tail end through the bottom center loop, evenly, and cut any excess twine.
+ To make a handle, use the tail end of the twine at the start of the bag. Connect it to the opposite side of the bag, weaving it through an available loop. Bring the tail end back over to where it started and secure by wrapping it around the available wire a few times.
+ Shape your bag by pulling it downward and outward, until it forms an organic, roundish shape. If using as a string dispense, place the ball of twine or string into the basket, sending the tail end through the center hole on the bottom. Hang and use!
//
Thanks to Rose Pearlman for writing this tutorial and photographing the step-by-steps. Rose is an artist, teacher, and textile designer. With a background in fine arts and a love of well designed functional objects, her creations blur the lines between art and craft and pushes the boundaries with non-traditional techniques and materials. Rose teaches monthly rug hooking workshops in and around her home in NYC, and also welcomes commissions for one of a kind constructions in decor and home furnishings. Her work has been featured in fiber magazines, galleries, and numerous online design sites. Her book Modern Rug Hooking is available wherever books are sold. Follow along with her functional craft projects at @art_objects_ She lives in Brooklyn, NY with her family.
This post includes affiliate links to online shops. Reading My Tea Leaves might earn a small commission on the goods purchased through those links, but most of these supplies can be found locally right in your own community. If you’d like to support this site directly, you can contribute directly here. Thanks so much for supporting this work.

9 Comments
Looks perfect for holding a couple pairs of mittens to hang on a hook by the door 🙂
This is so awesome! I am always inspired by the projects that you share with us 🙂
This project looks so awesome… BUT I’m really just here to say: thank you for not linking out to Amazon! In my own personal (I’m sure totally eye-rolly to all my friends and family) mission to stop supporting Amazon I’m always sort of shocked at how many sites—even/especially ones that talk a lot about supporting small businesses—always just link out to Amazon. And, like, I get it! It’s amazing and easy and almost always cheaper and is delivered at the prime speed of sound…butttt it’s really also the literal worst. So. Thank you! Totally buying this floral wire from Emily’s bonkers wreath emporium in Linwood, NC, even if the shipping is $6. I hope Emily can get something nice for her family… like health insurance.
Thanks for saying so! No ethical consumption under capitalism et cetera, et cetera, and sometimes it feels like a fool errand to choose one behemoth over another, but still doing my best to avoid Amazon!
i agree! so sick of everyone linking to amazon.
so pretty and useful! maybe a silly question but can i use regular clothespins?
You can definitely try! The rounds ones are really perfect both for securing tightly to the hoop and for easily sliding the twine over and off as you weave, but in theory regular would probably work!
I see you in your cute Rudy Judes!
Literal months later I finally got around to doing this wonderful project! It was easy and very satisfying! There were two places I got caught up a little bit in the instructions and found myself starting over a few times until it clicked. In case anyone is a dolt like me and combing the comments to see if anyone else was missing their eureka moment (like I was last night), I tweaked the instructions to fill in my own mental gap in case that’s helpful for someone else:
+ You will then pass the bottom loop over the top loop *keeping the top loop around the peg and just moving the bottom loop up, over the top loop, and off the peg. You may have to hold the top loop against the peg to get the bottom loop up, over it, and off* (Don’t pull too tightly or the tension will be too tight when you begin to weave.) Repeat to the next peg to the right, looping twice (clockwise) and passing the bottom loop over the top and off the peg. Repeat for the remaining pegs until you are back to the first pin with a single loop on it.
AND:
+ To begin weaving, you will not loop the string around the peg. Instead, simply bring the string along the front of the peg with one loop below it. *The “front” of the peg is the side on the outside of the hoop.* (CRUCIAL, HA!)
+ *Pull the bottom loop up, out, and over the flat string you have placed above it, taking the bottom loop off the peg. You are essentially creating a new “loop” in place of the bottom loop.* Repeat this technique on all the pegs, rotating the loom to the right. (The first rotation is the hardest! But the twine will loosen up significantly on the subsequent rounds. To help with the tension, move the pegs from side to side to loosen the twine as you work.) Weave in the round roughly 12-14 rotations depending on the size you want your bag. The bag will stretch and open significantly once off the frame.
Made a version of this using a (thrifted) 24-peg knitting loom and looping each stitch over 2 pegs (giving 12 stitches around). It took a few tries to work out the tension but the result is charming!
Comments are moderated.