I regret to inform you that it’s still January. Happily, Rose Pearlman is back with a tutorial that might help us to pass the time or otherwise forget our woes. I have to be honest: This flower press tutorial landed in my inbox during a fit of real-life purging. I’d spent the morning wantonly tossing my children’s artwork in the recycling bin, but even the ruthless among us can admit there’s something very lovely about hanging on to the magic of flower blossoms for a little longer. Especially in the bleak midwinter. For you and for me, here’s more from Rose:
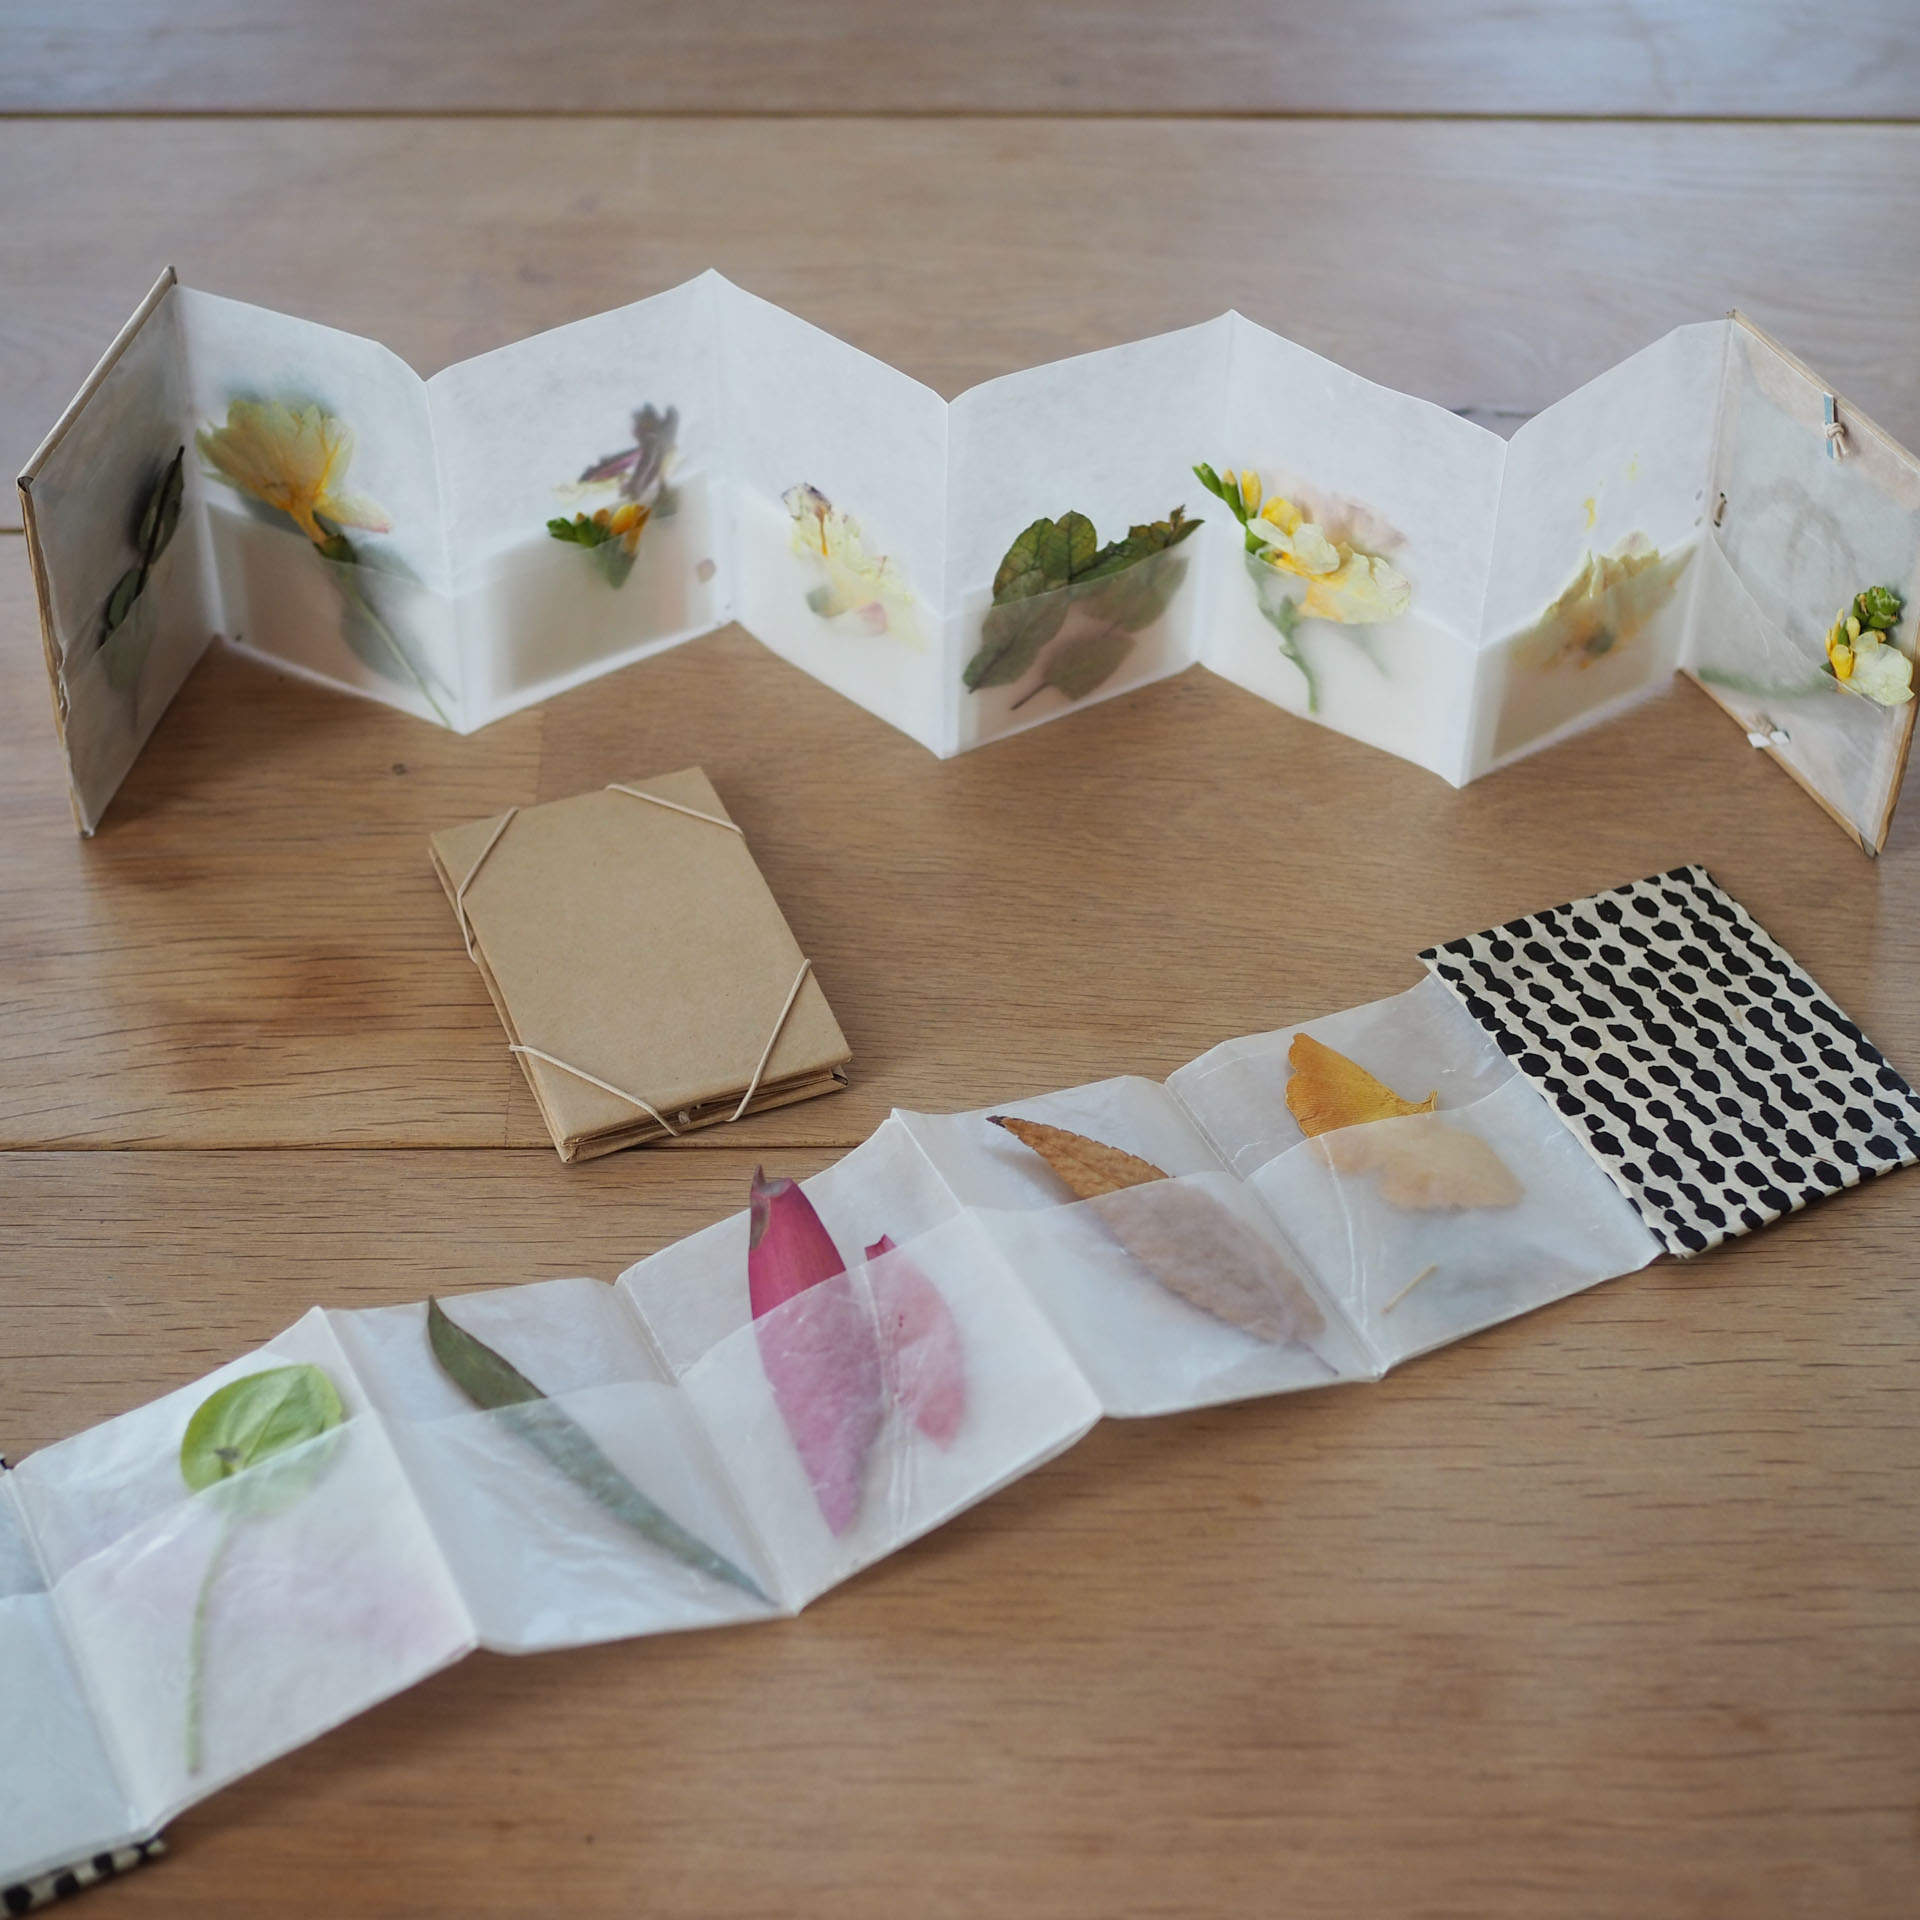
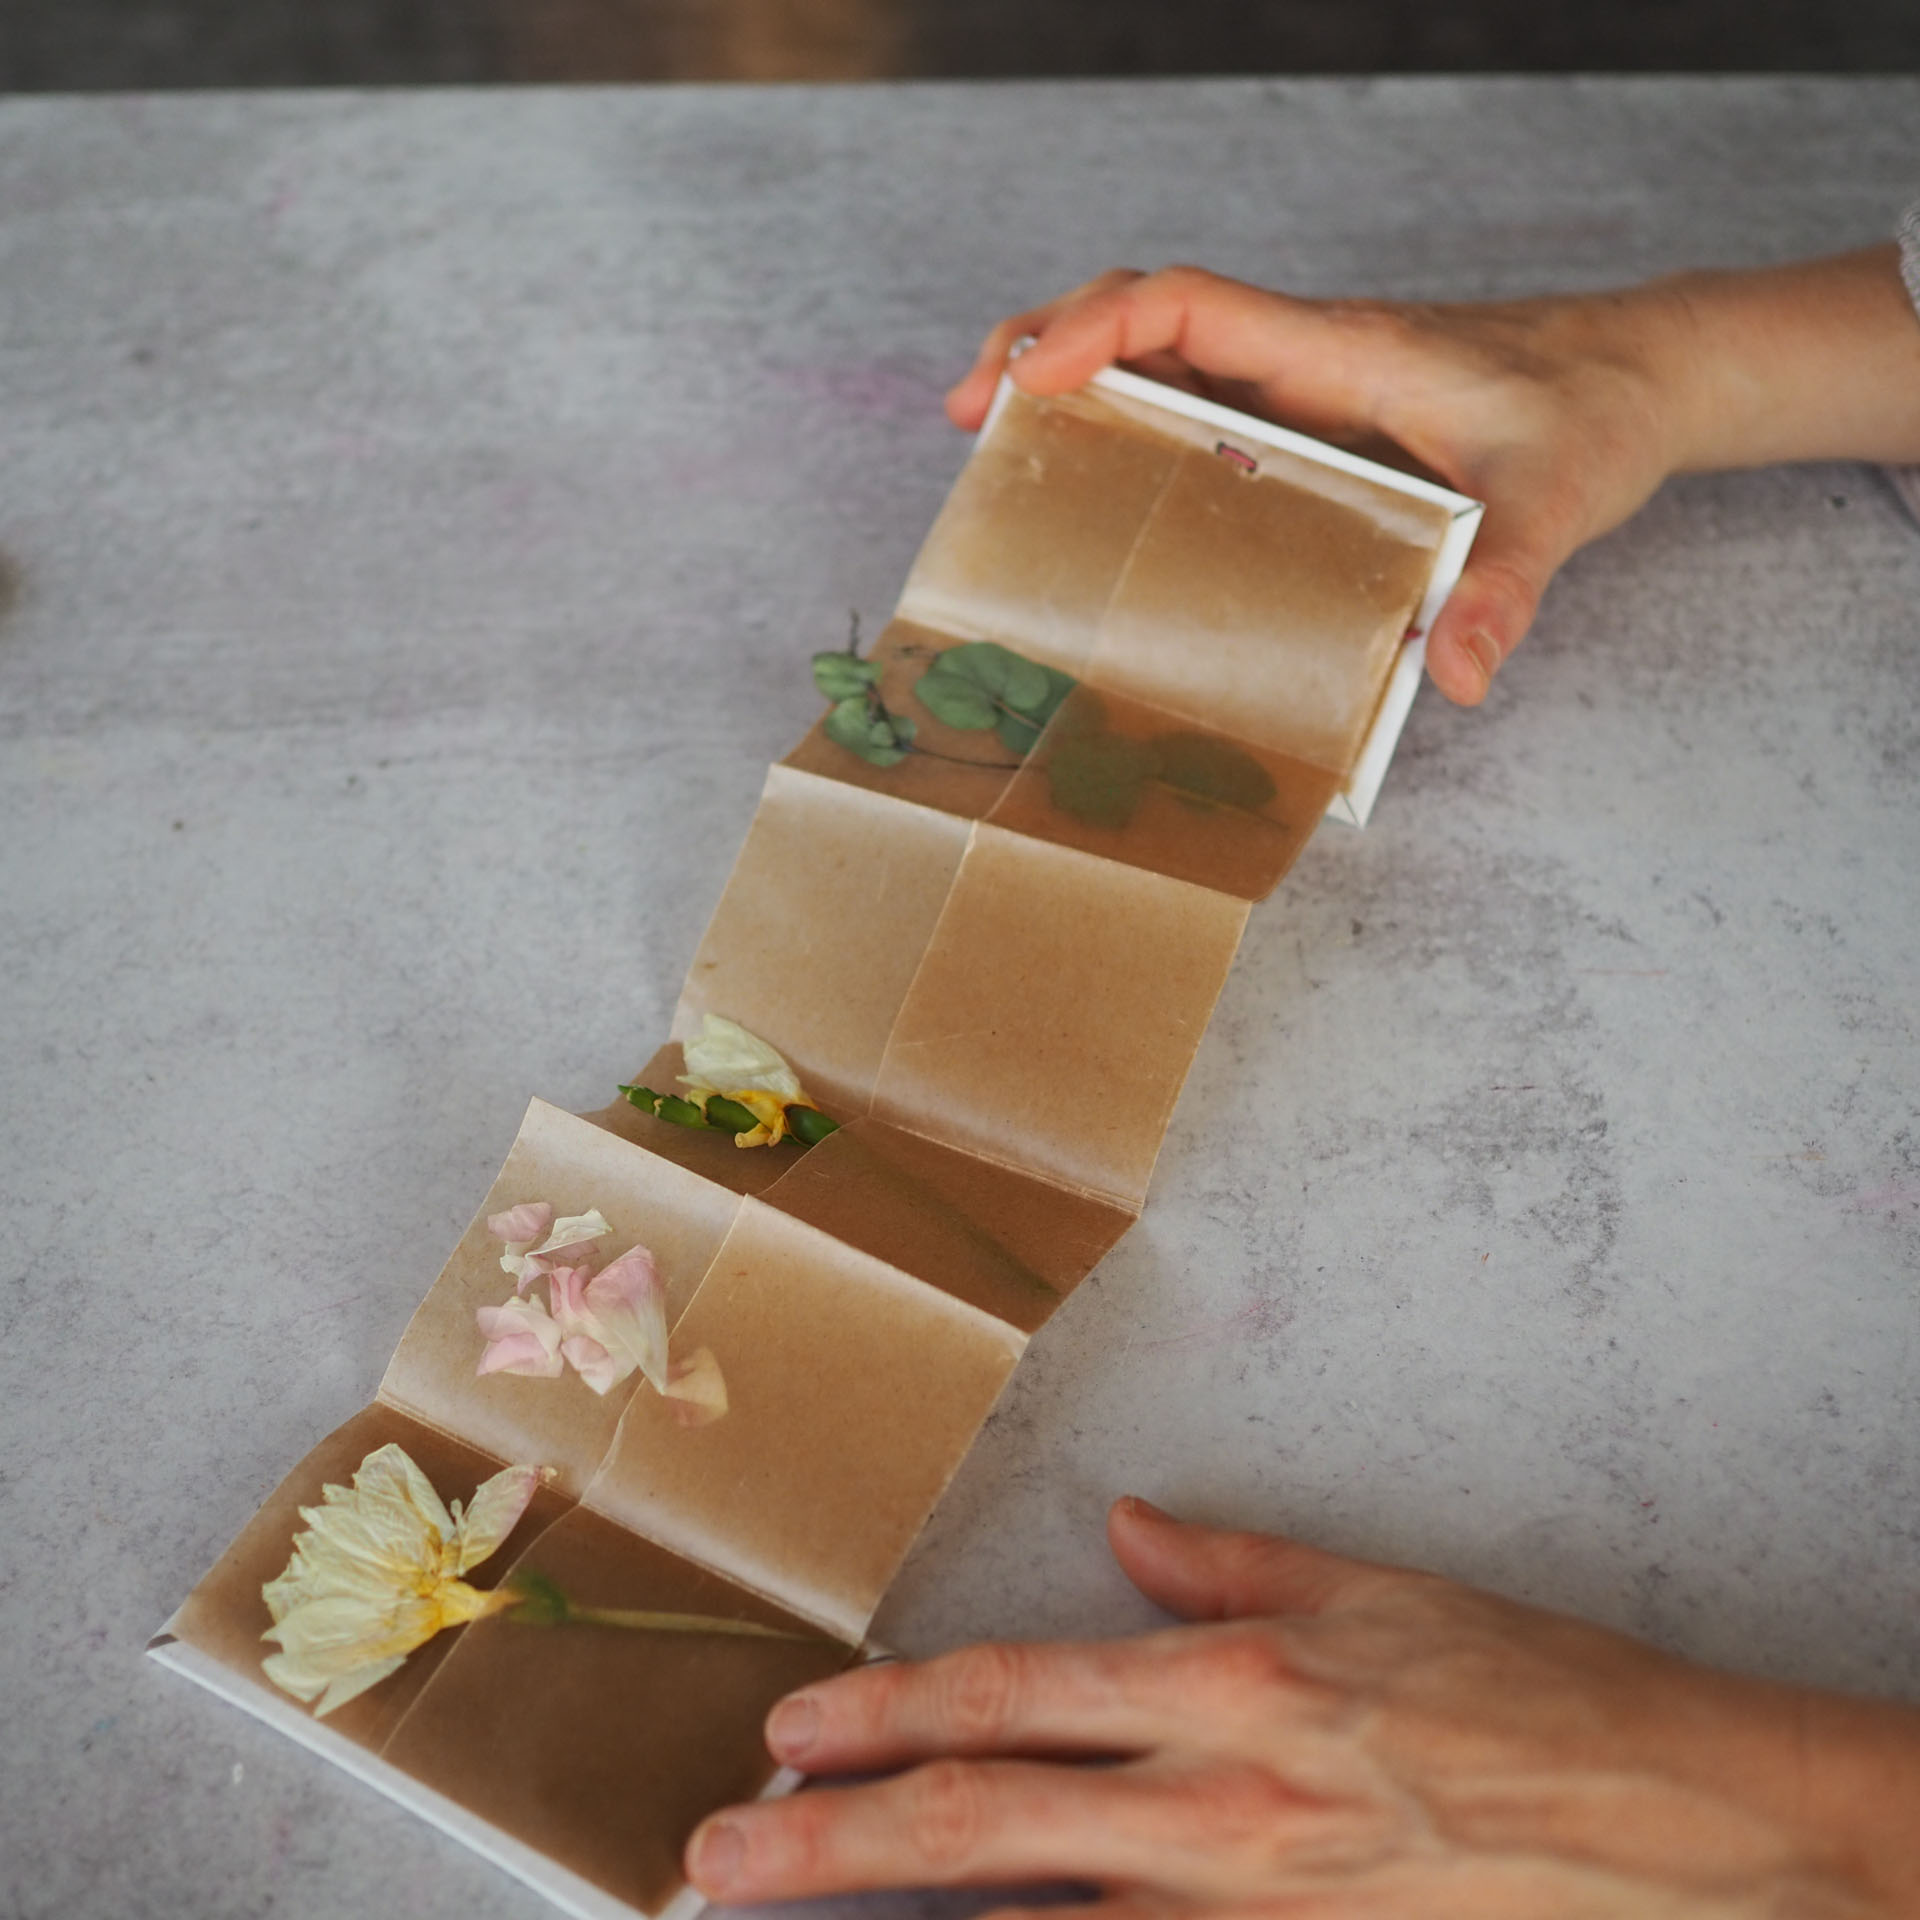
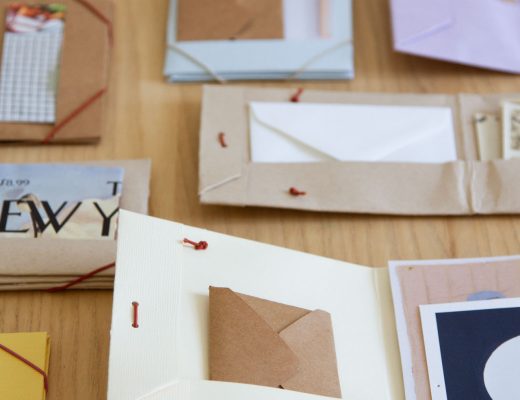
This flower press is based on a simple accordion notebook tutorial, where folded paper makes a double sided pull out sketchbook. For this project I swapped out common paper for water-resistant and translucent kitchen paper, and folded up edges into pockets to accommodate petals and leaves. Not only is the kitchen paper very thin and durable, but it also comes in long rolls that can easily be torn and folded to make the booklet.

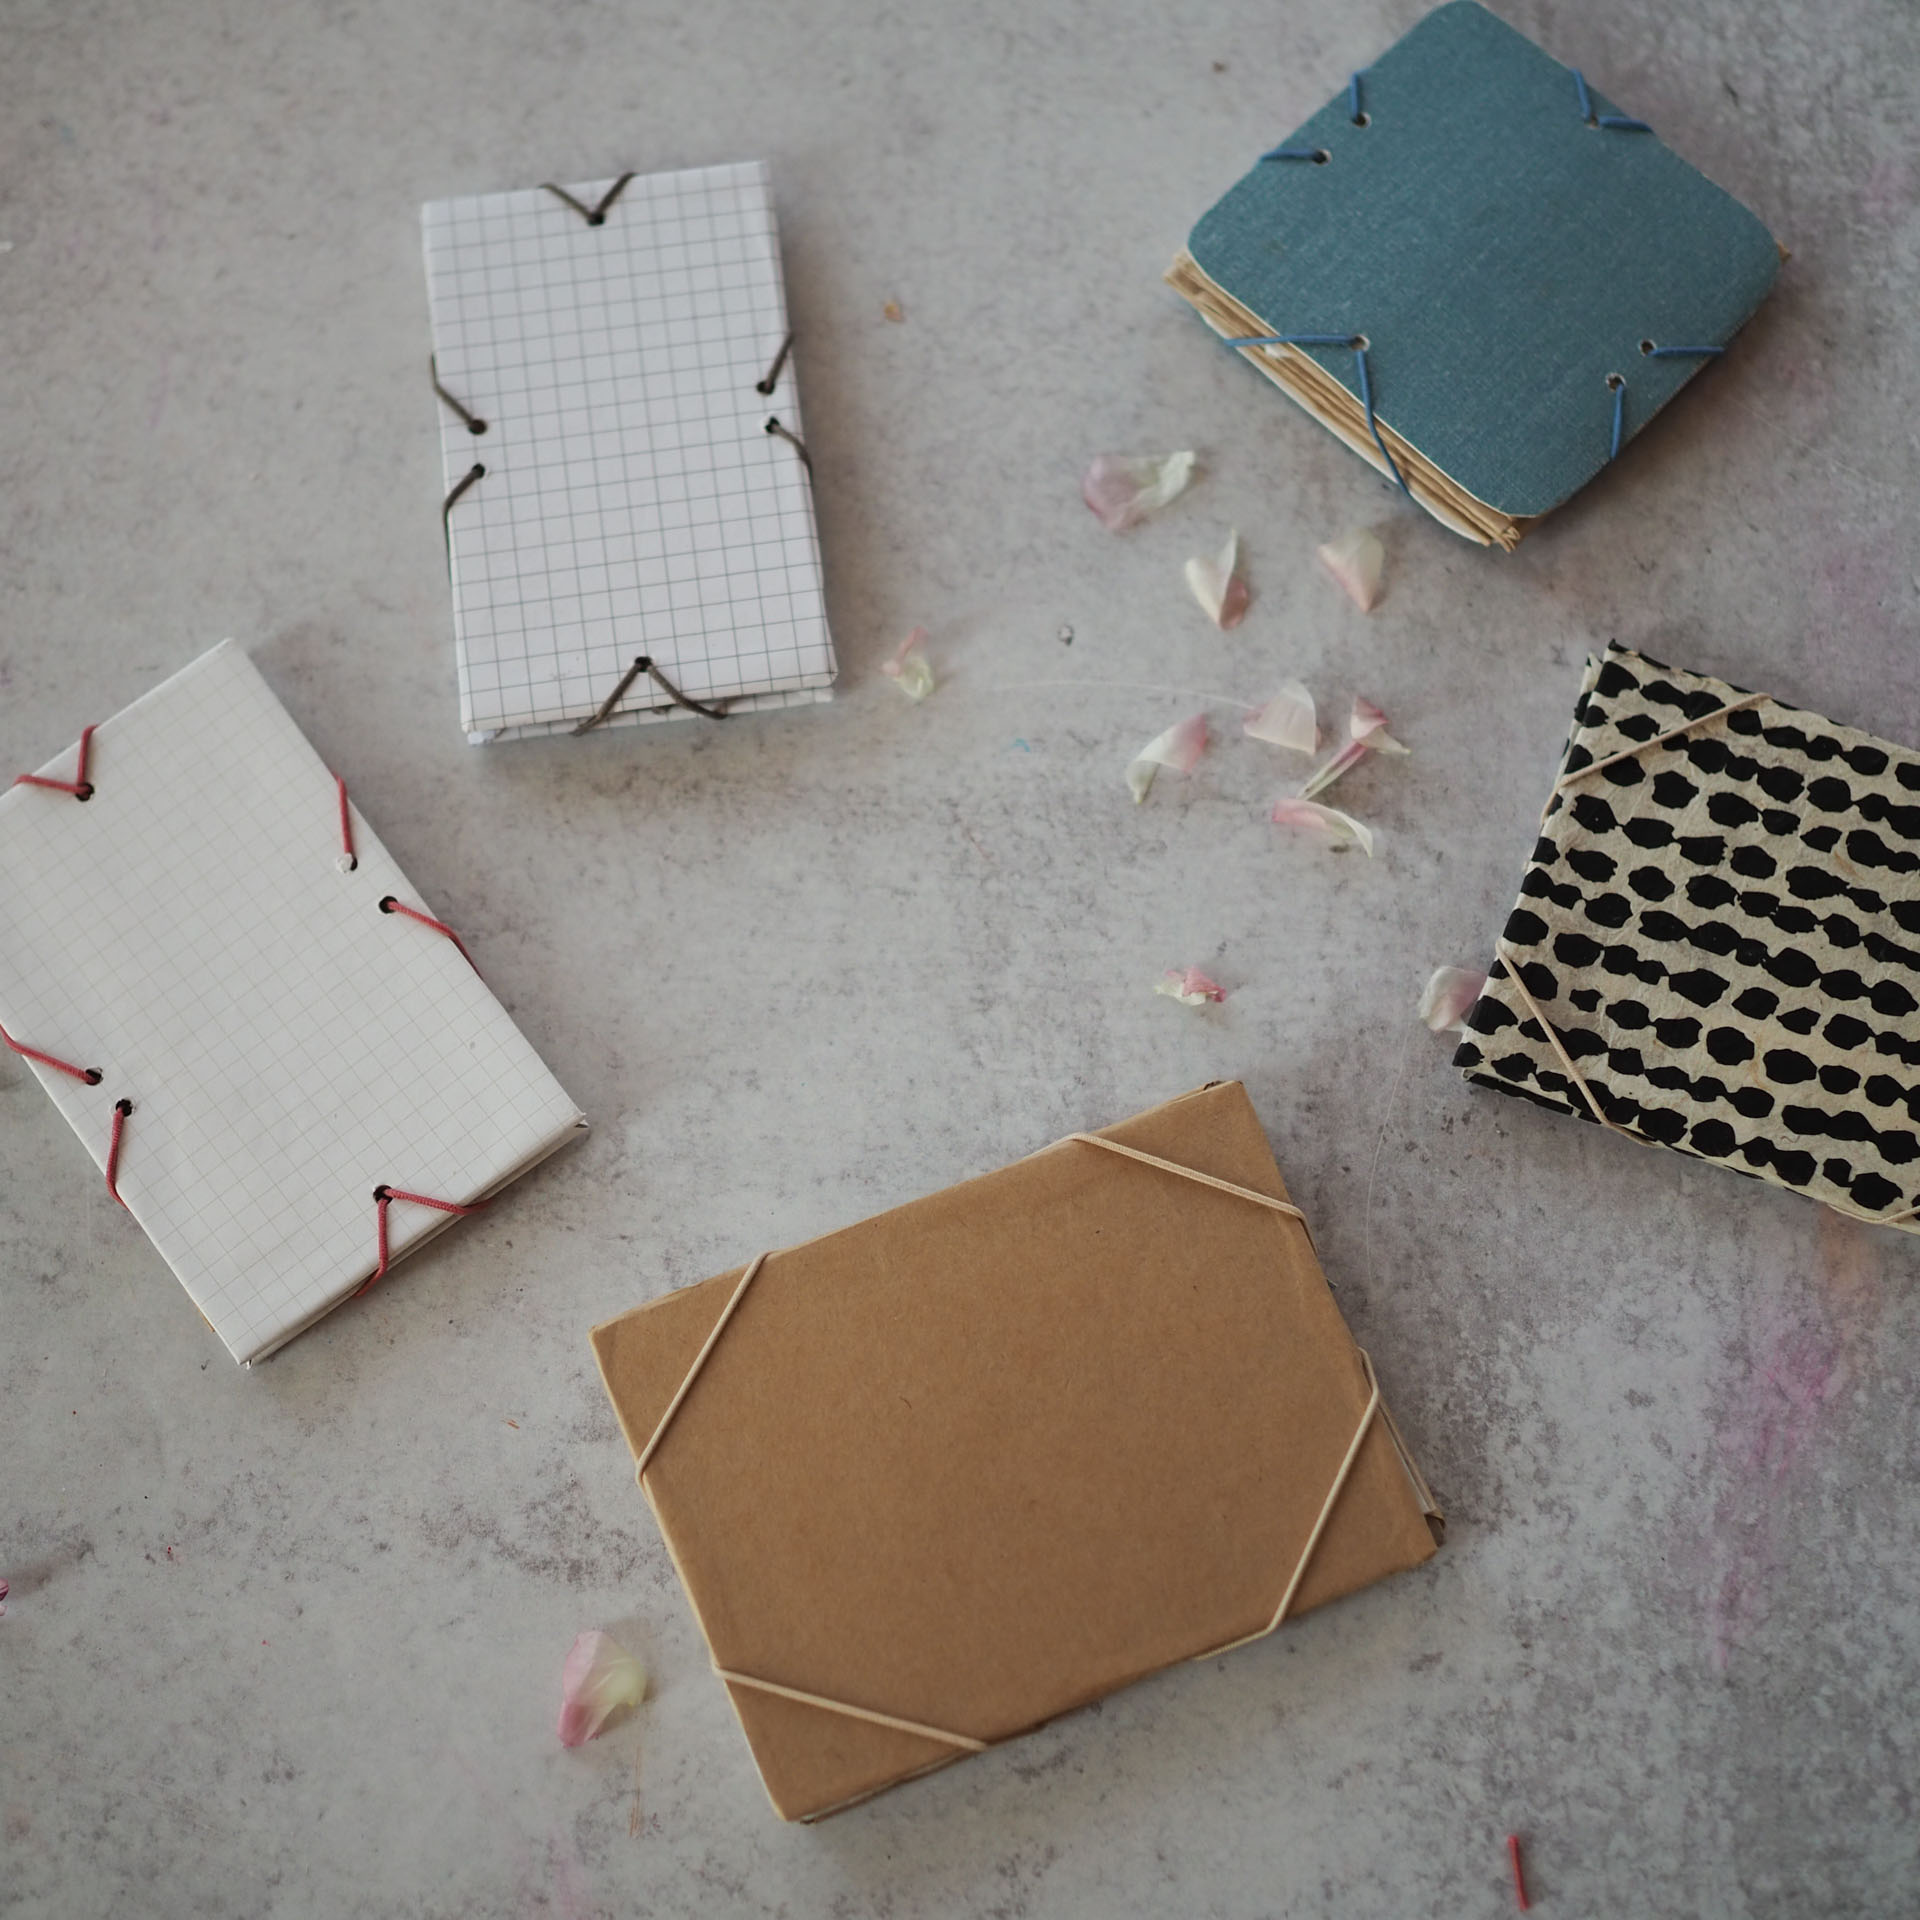
While the finished press pictured is roughly 3 ¾”x5”, the paper size is only suggested. Feel free to go longer to make a larger press with wider pockets.
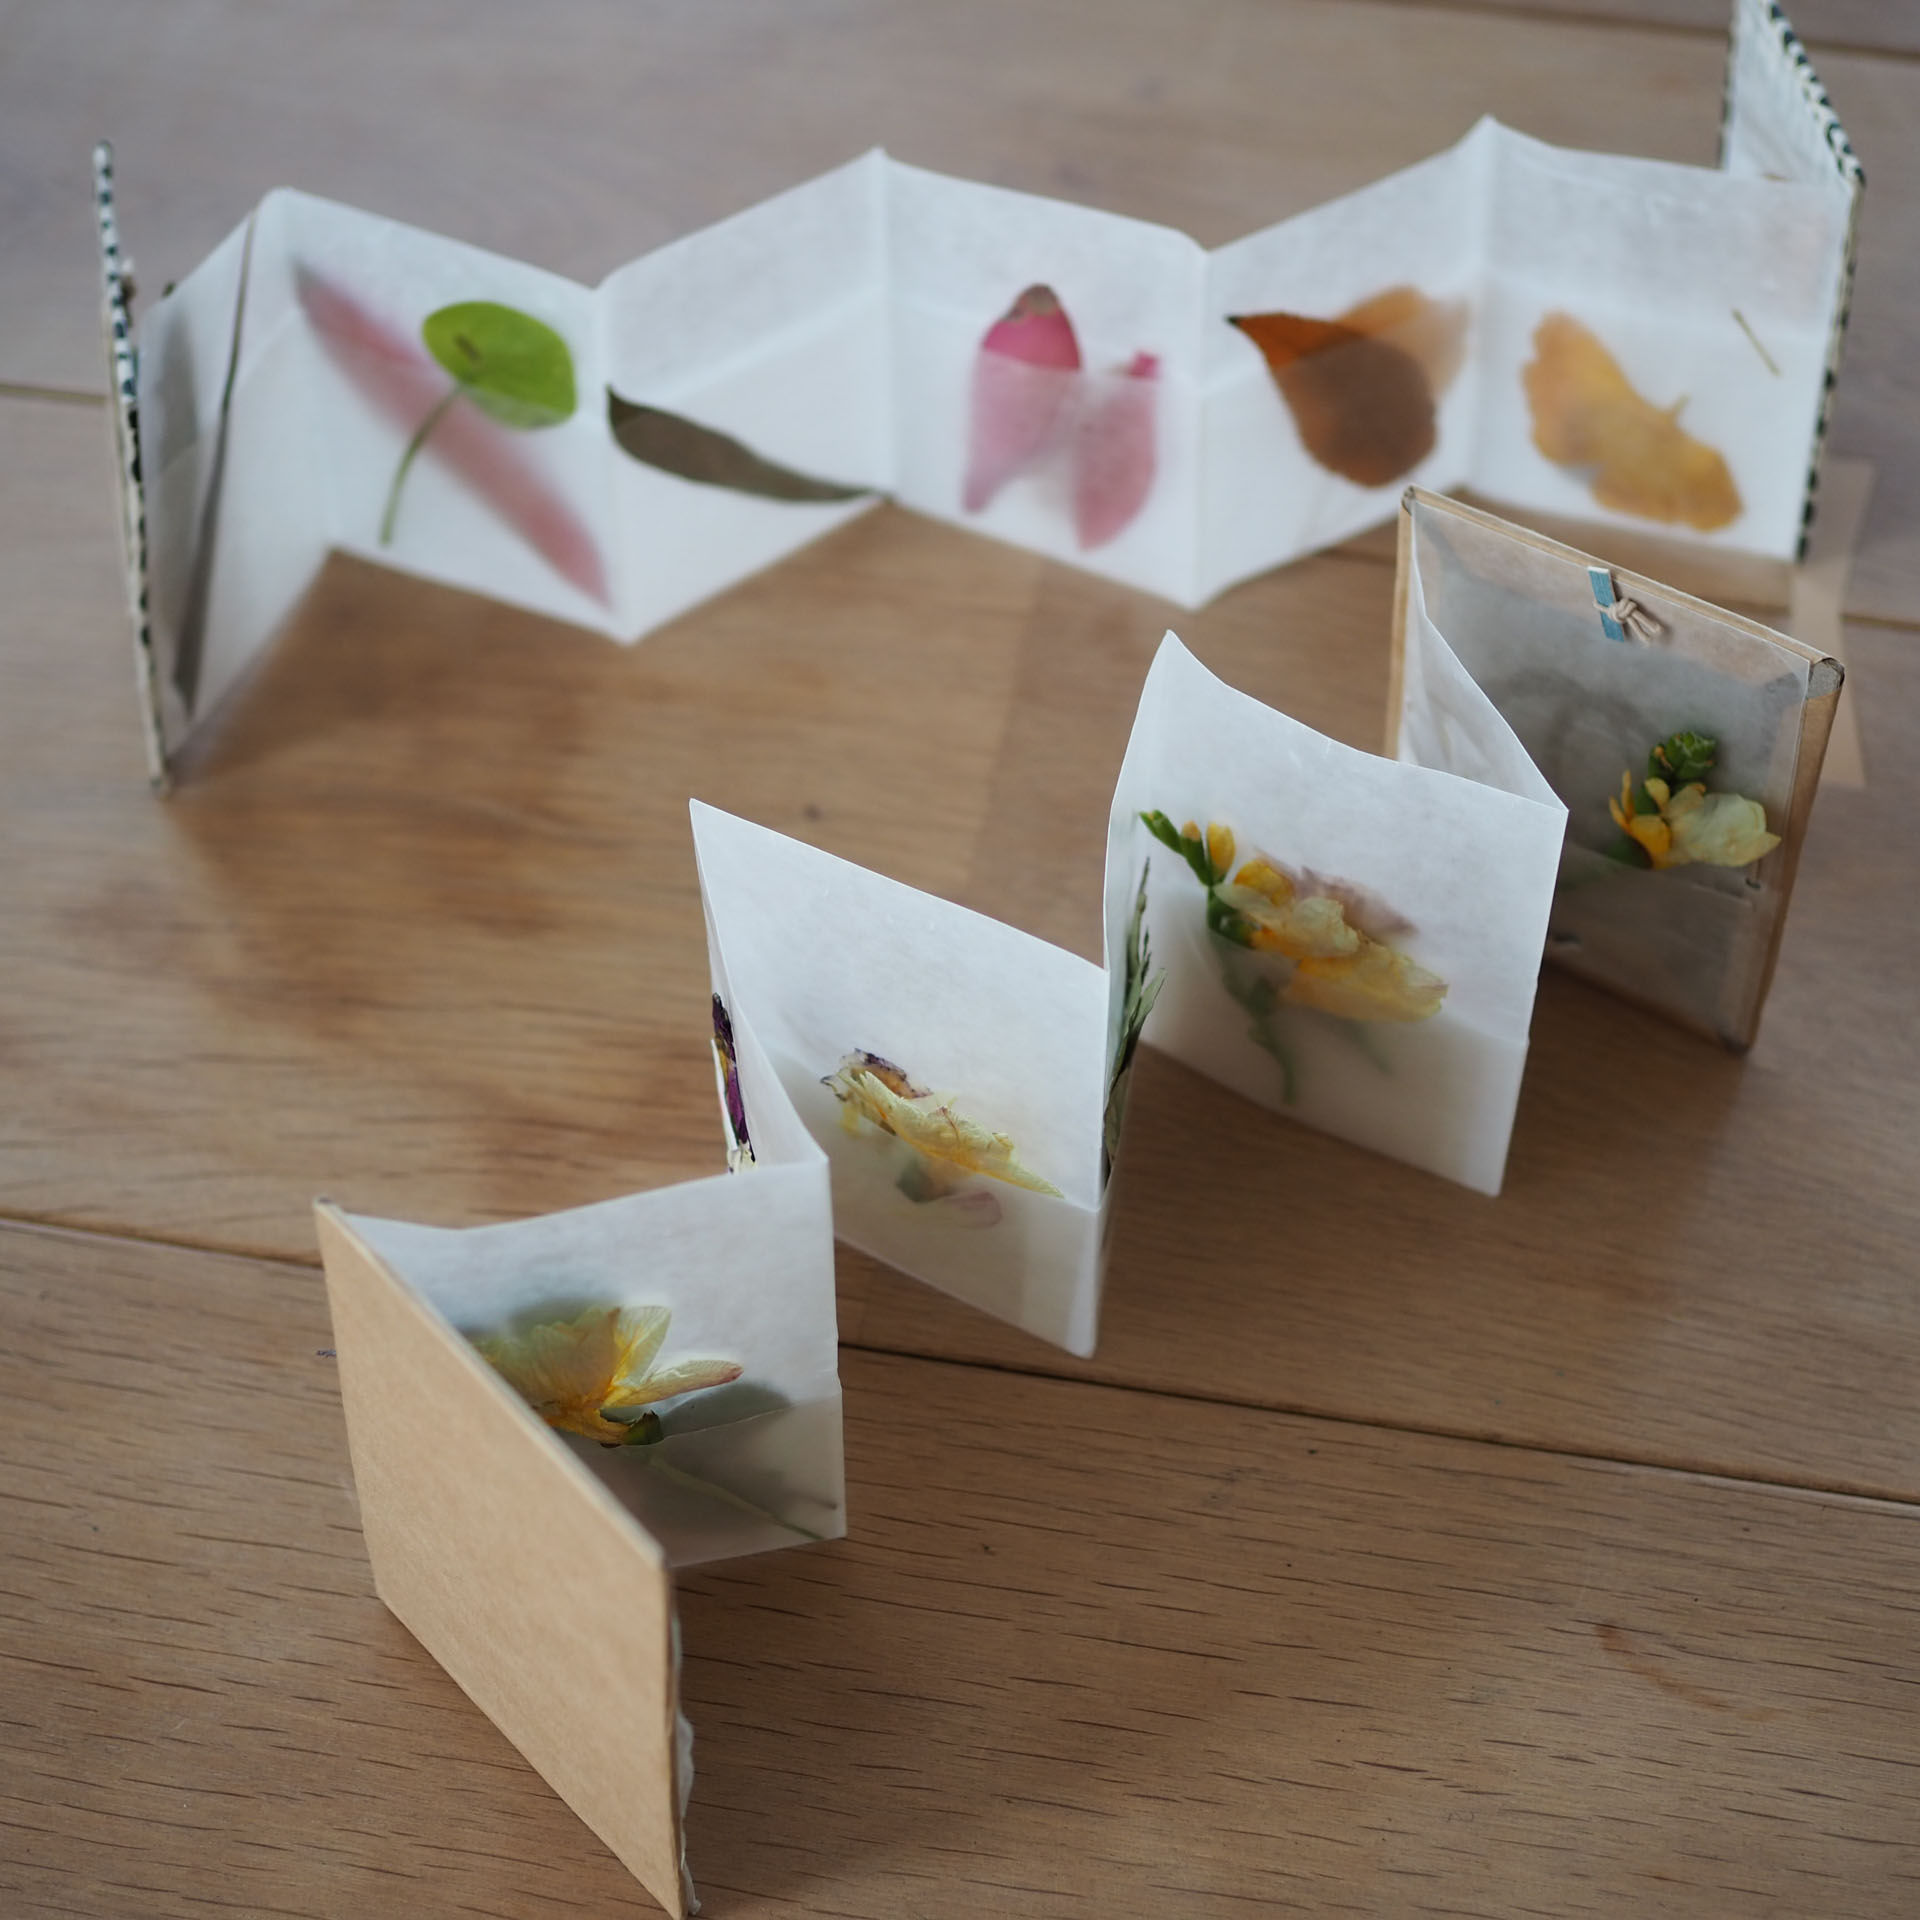
To view, the press can be opened wide to expose all the pockets at once, or thumbed through like pages in a book. With eight pockets on one side and six on the other side, there’s a lot of storage space for saving small floral bouquets and found leaves. The double-sided elastic will securely press all the pages together but feel free to place the press under weighted books or objects for quicker results.

Materials:
+ a small piece of recycled cardboard (non-corrugated works best…think cereal box, or the back of a sketchpad)
+ a long sheet (roughly 18”x12”) of kitchen paper. I use waxed kitchen paper, but parchment paper works too.*
+ glue (regular school glue or glue stick)
+10-inch piece of round elastic cord
+ small hole punch or awl
+ sheet of paper (wrapping paper, Kraft paper, up-cycled kid’s artwork, note-book pages- any light-weight paper will work)
+ scissor
+ pencil
* For the flower press I like to use kitchen baking paper for the delicate translucence, and water resistant benefits. However, you can make this press with whatever thin weight paper you like. Just be sure that the paper is not too thick and can be easily folded and creased a number of times without too much bulk. Kraft paper makes a great alternative and a sturdier booklet.
** Feel free to adjust the dimensions of the paper to create a larger or smaller press.
Instructions:
To make the folded accordion pockets
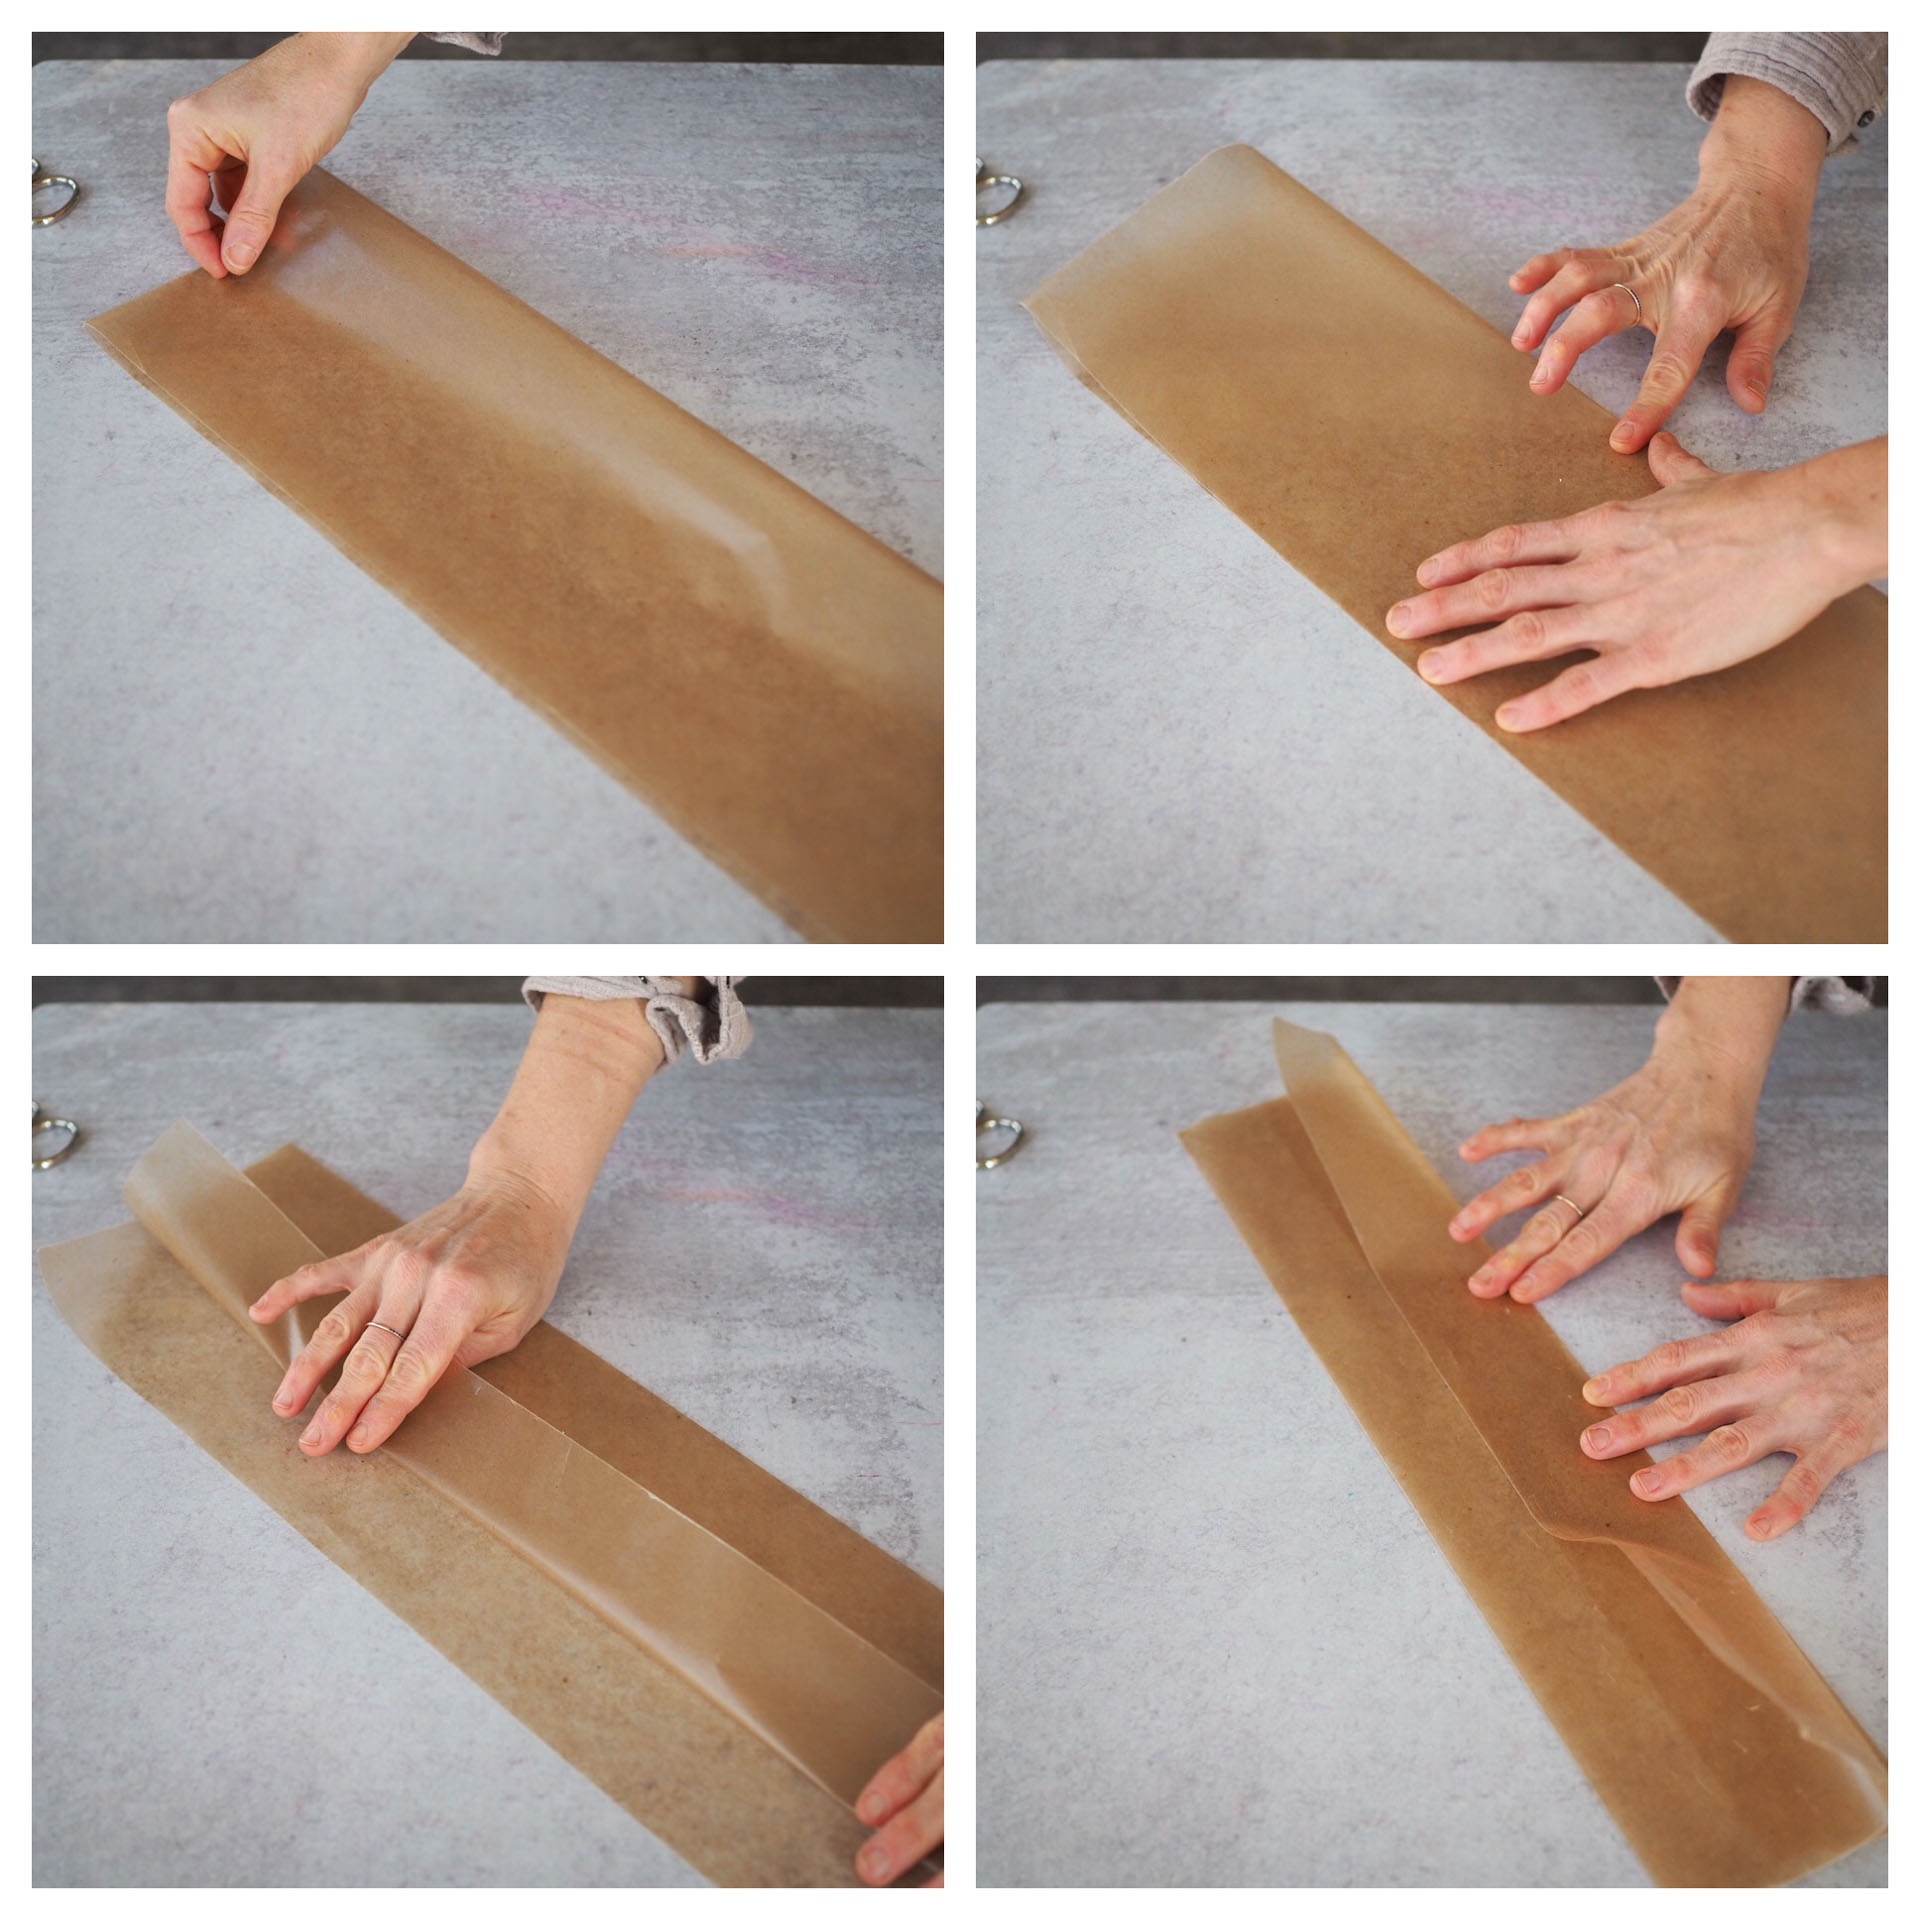
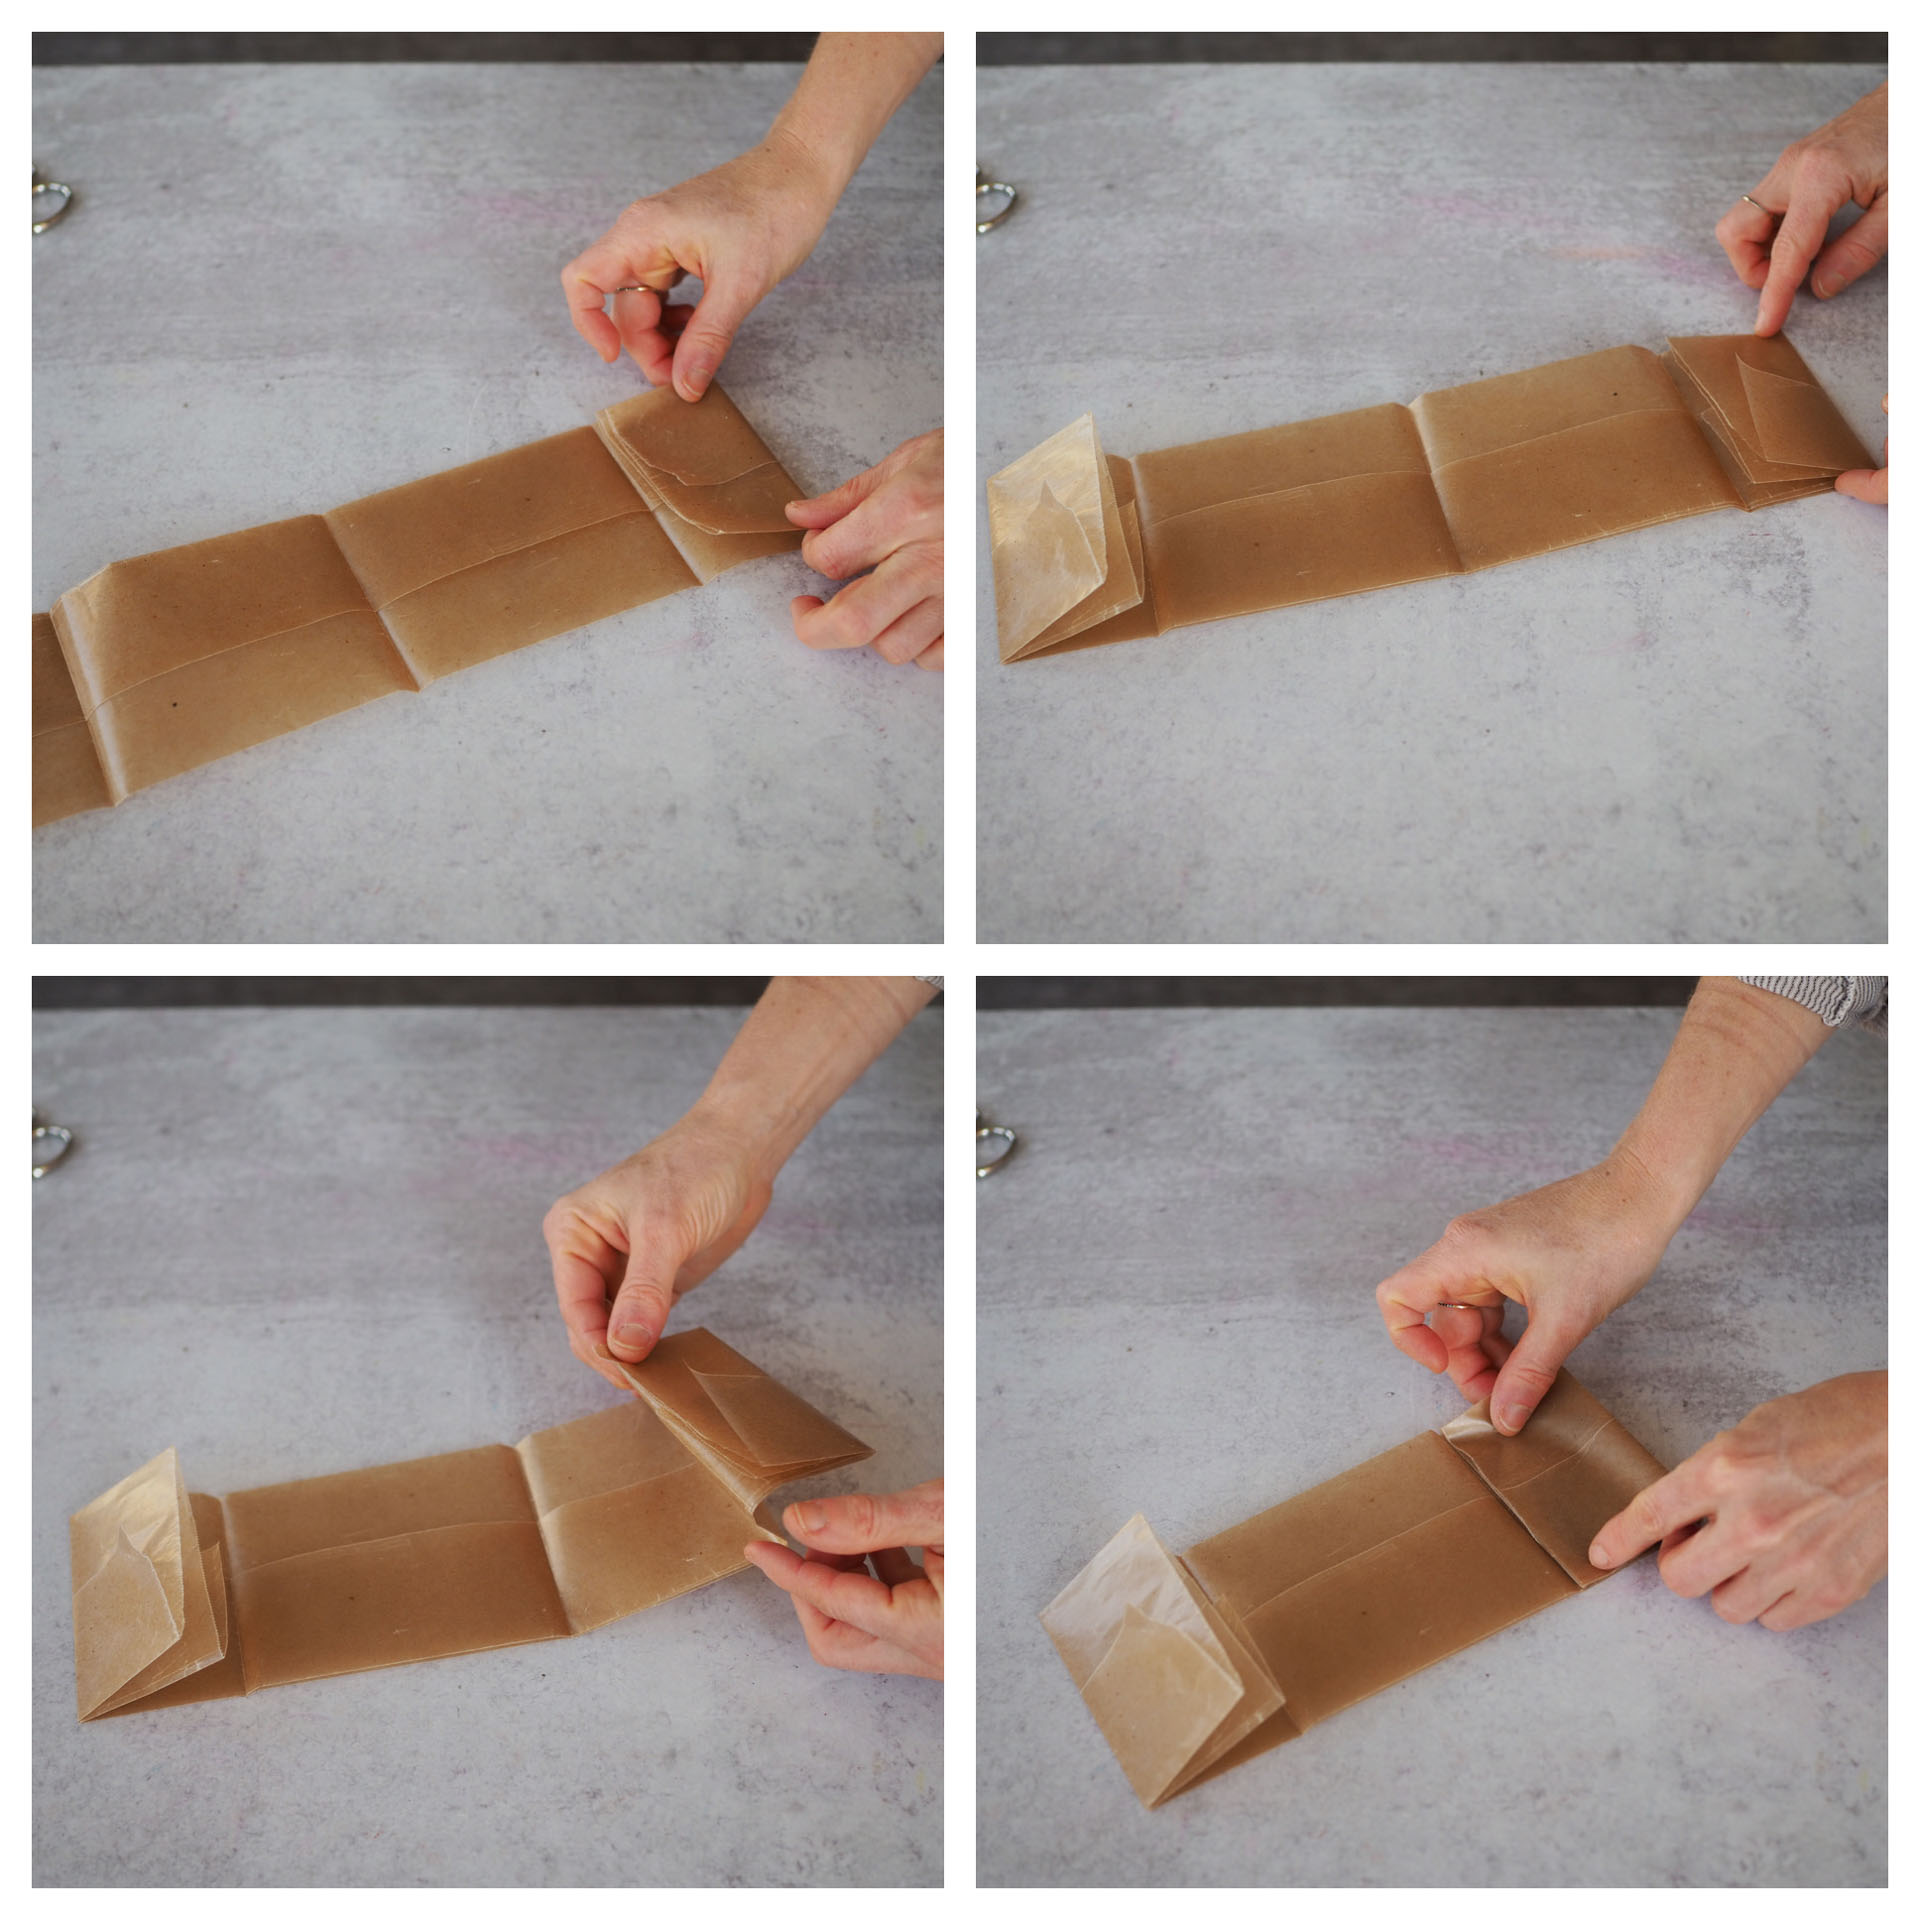
+ Fold the long sheet of kitchen paper in half length wise (so the paper folds to roughly 18”x6”) Crease the fold well.
+ Fold one of the long 18” sides back down towards the fold about 2”. Crease well.
+ Flip the long rectangle to the other side and fold down the other 2” edge (towards the fold) to match the other side. Crease well.
+ Fold the long thin folded rectangle in half, matching up the short ends and creasing in the center.
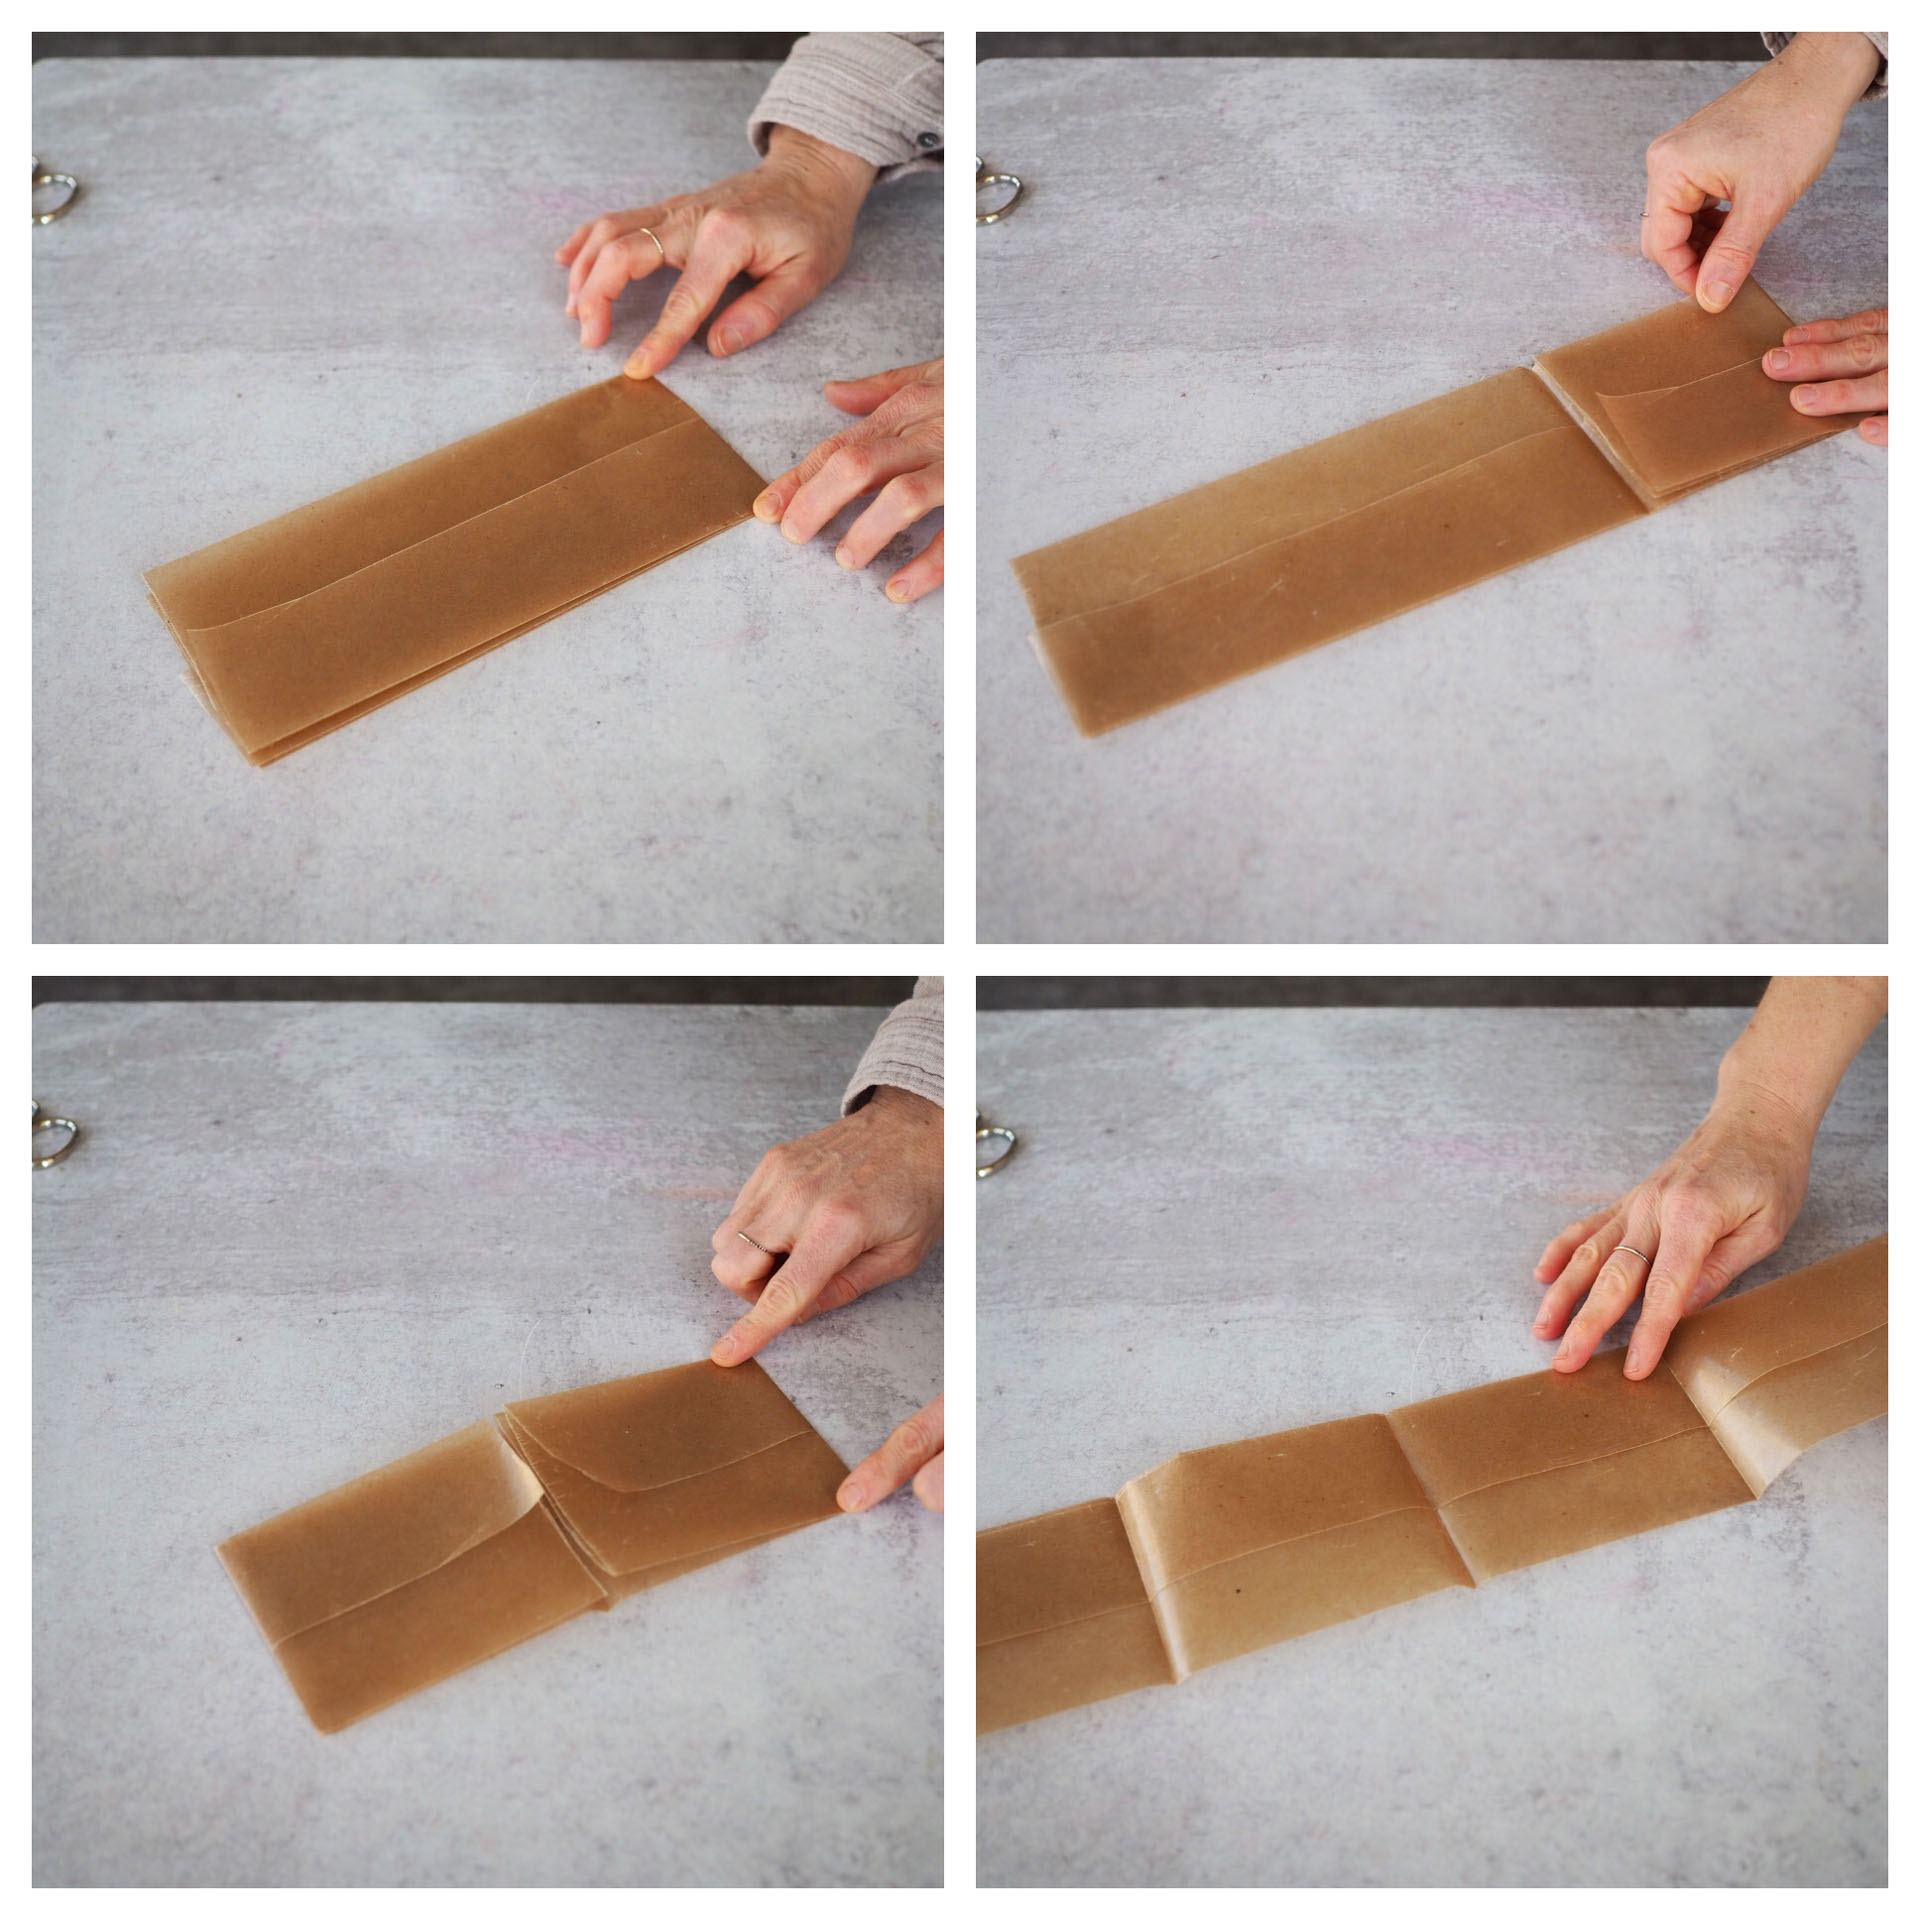
+ Open the center crease you just made and fold one short side in-towards the center fold. Crease well.
+ Repeat that last step for the opposite side.
+ Open up the folds.
+ Again, fold one short side in to the first fold you just made and crease well.
+ Repeat for the opposite side.
+ For this last fold you are going to match the second crease from the edge, to the center fold and crease well.
+ Repeat on the opposite side.
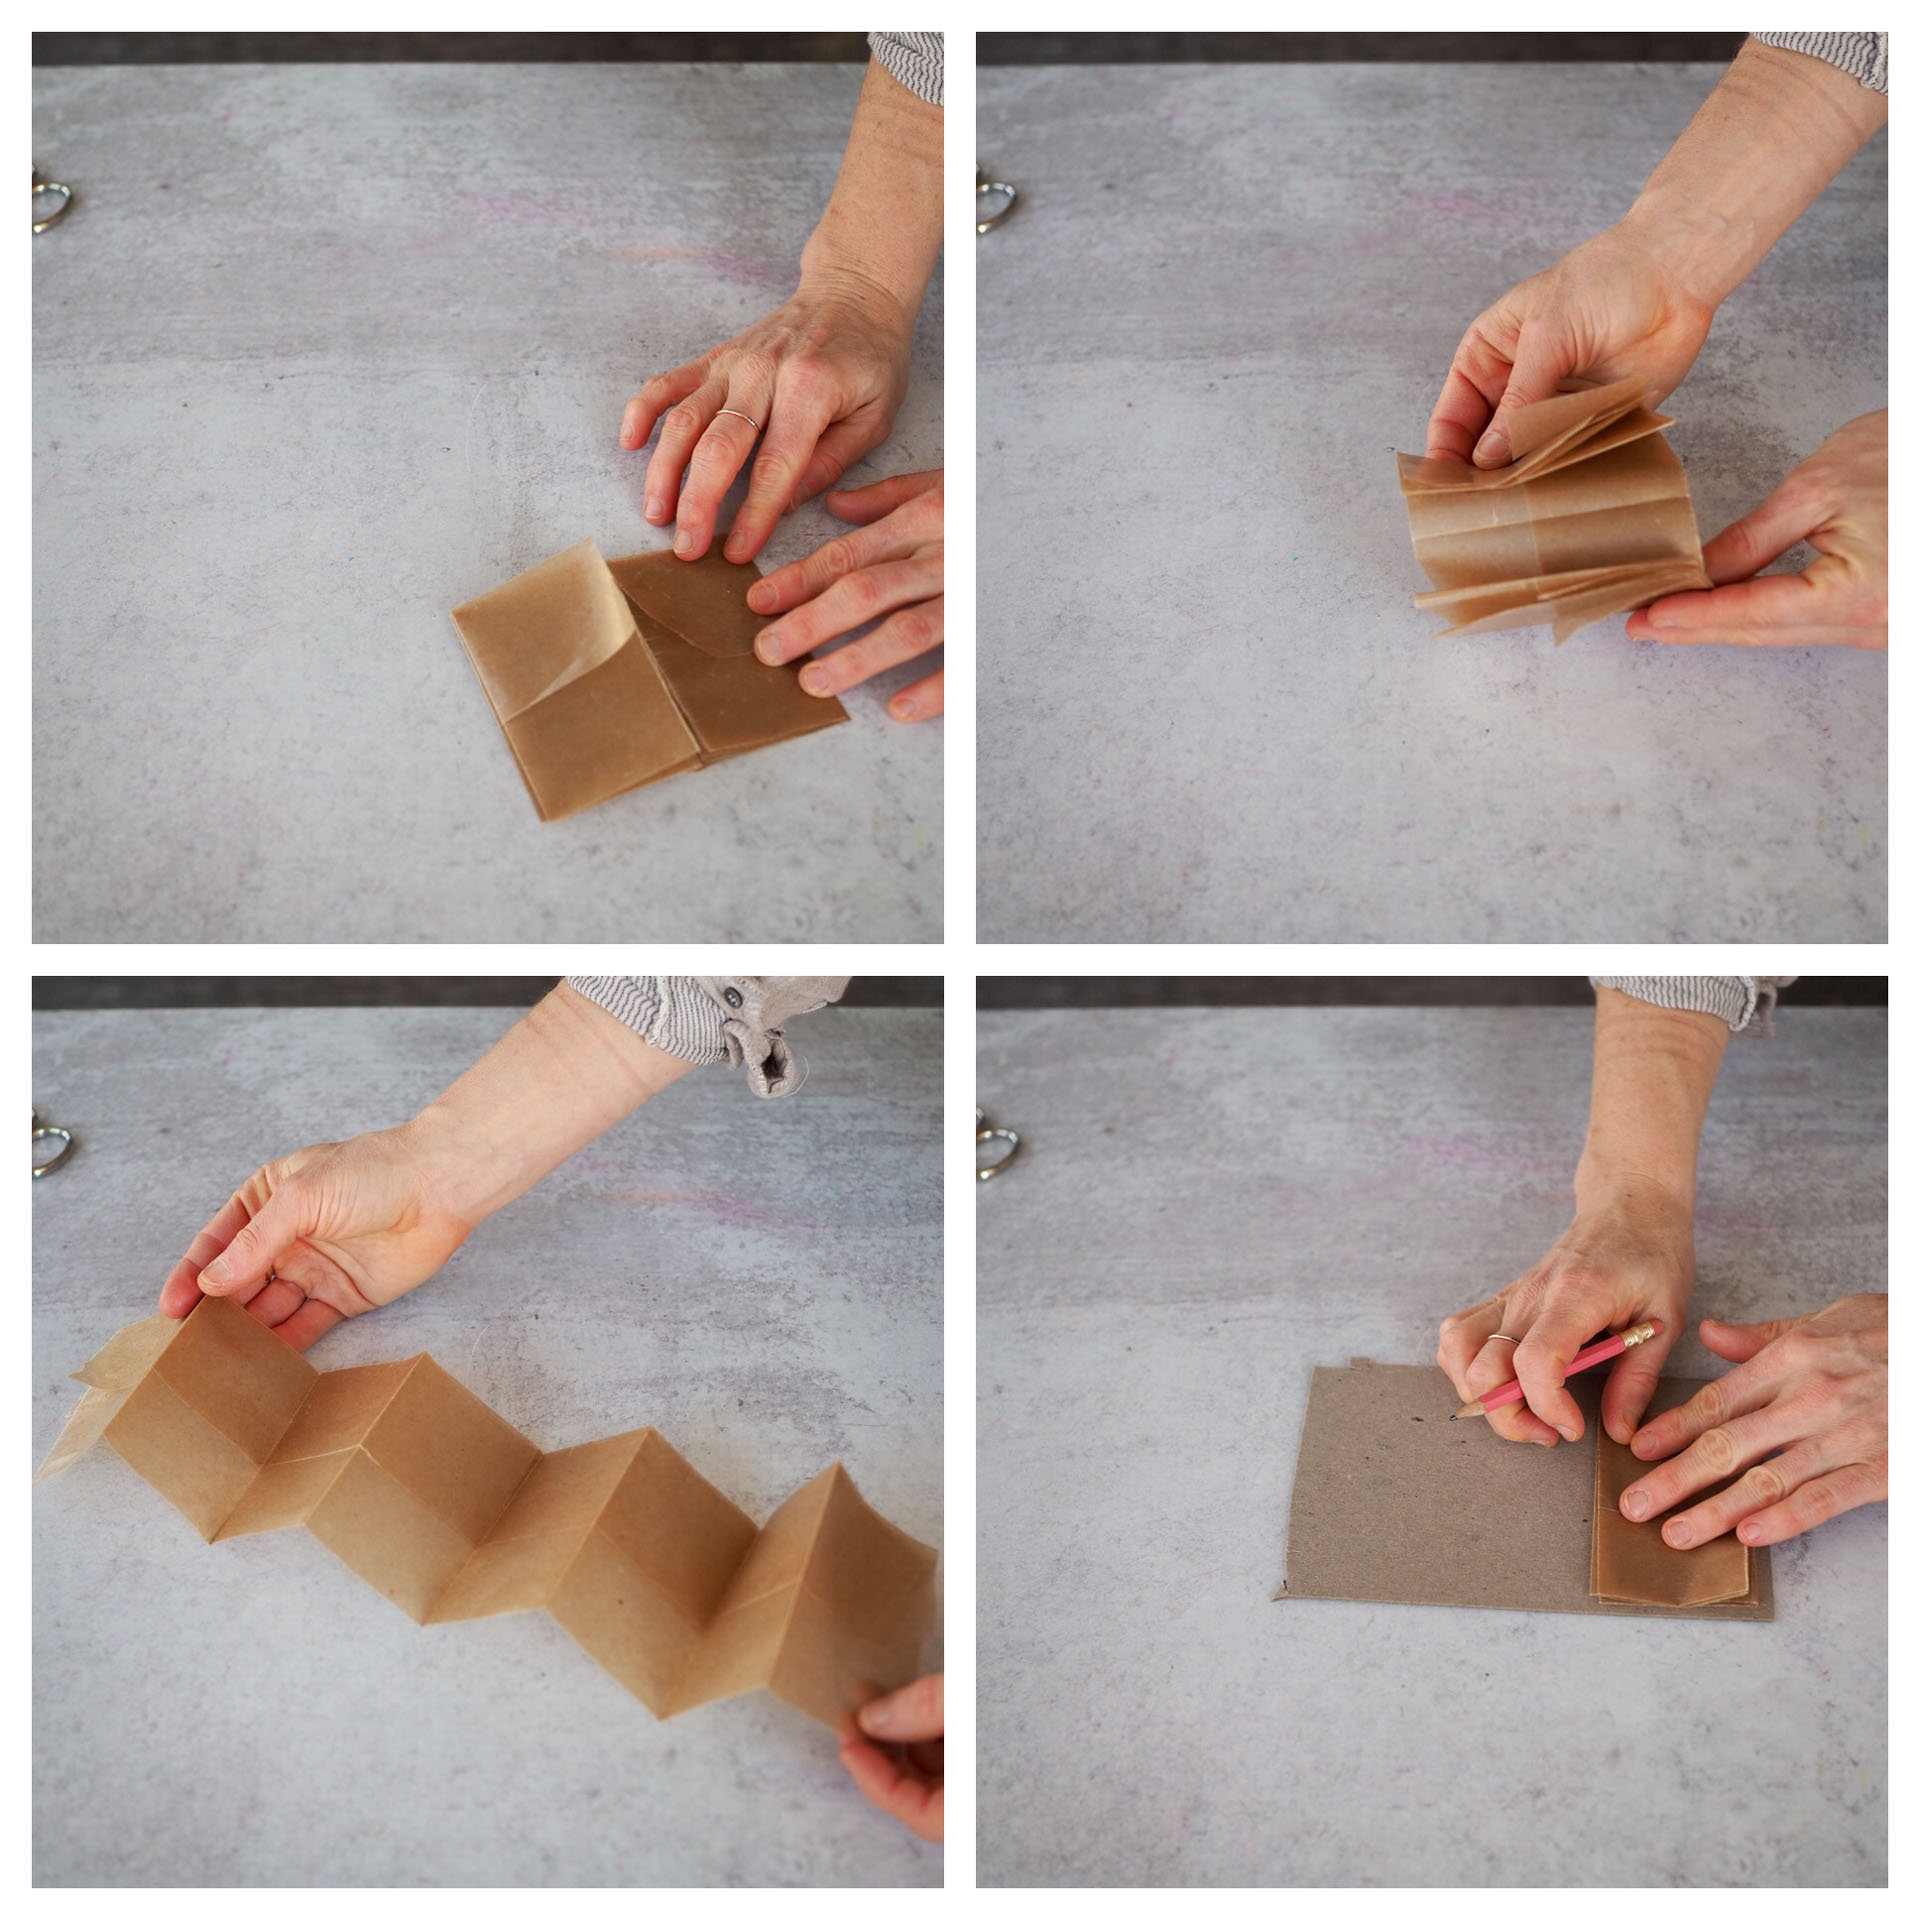
+ Now that all the folds have been made fold together your accordion book, making sure each page goes forward and then back. This will mean that the center fold needs to bend in the opposite direction than the way it was originally creased.
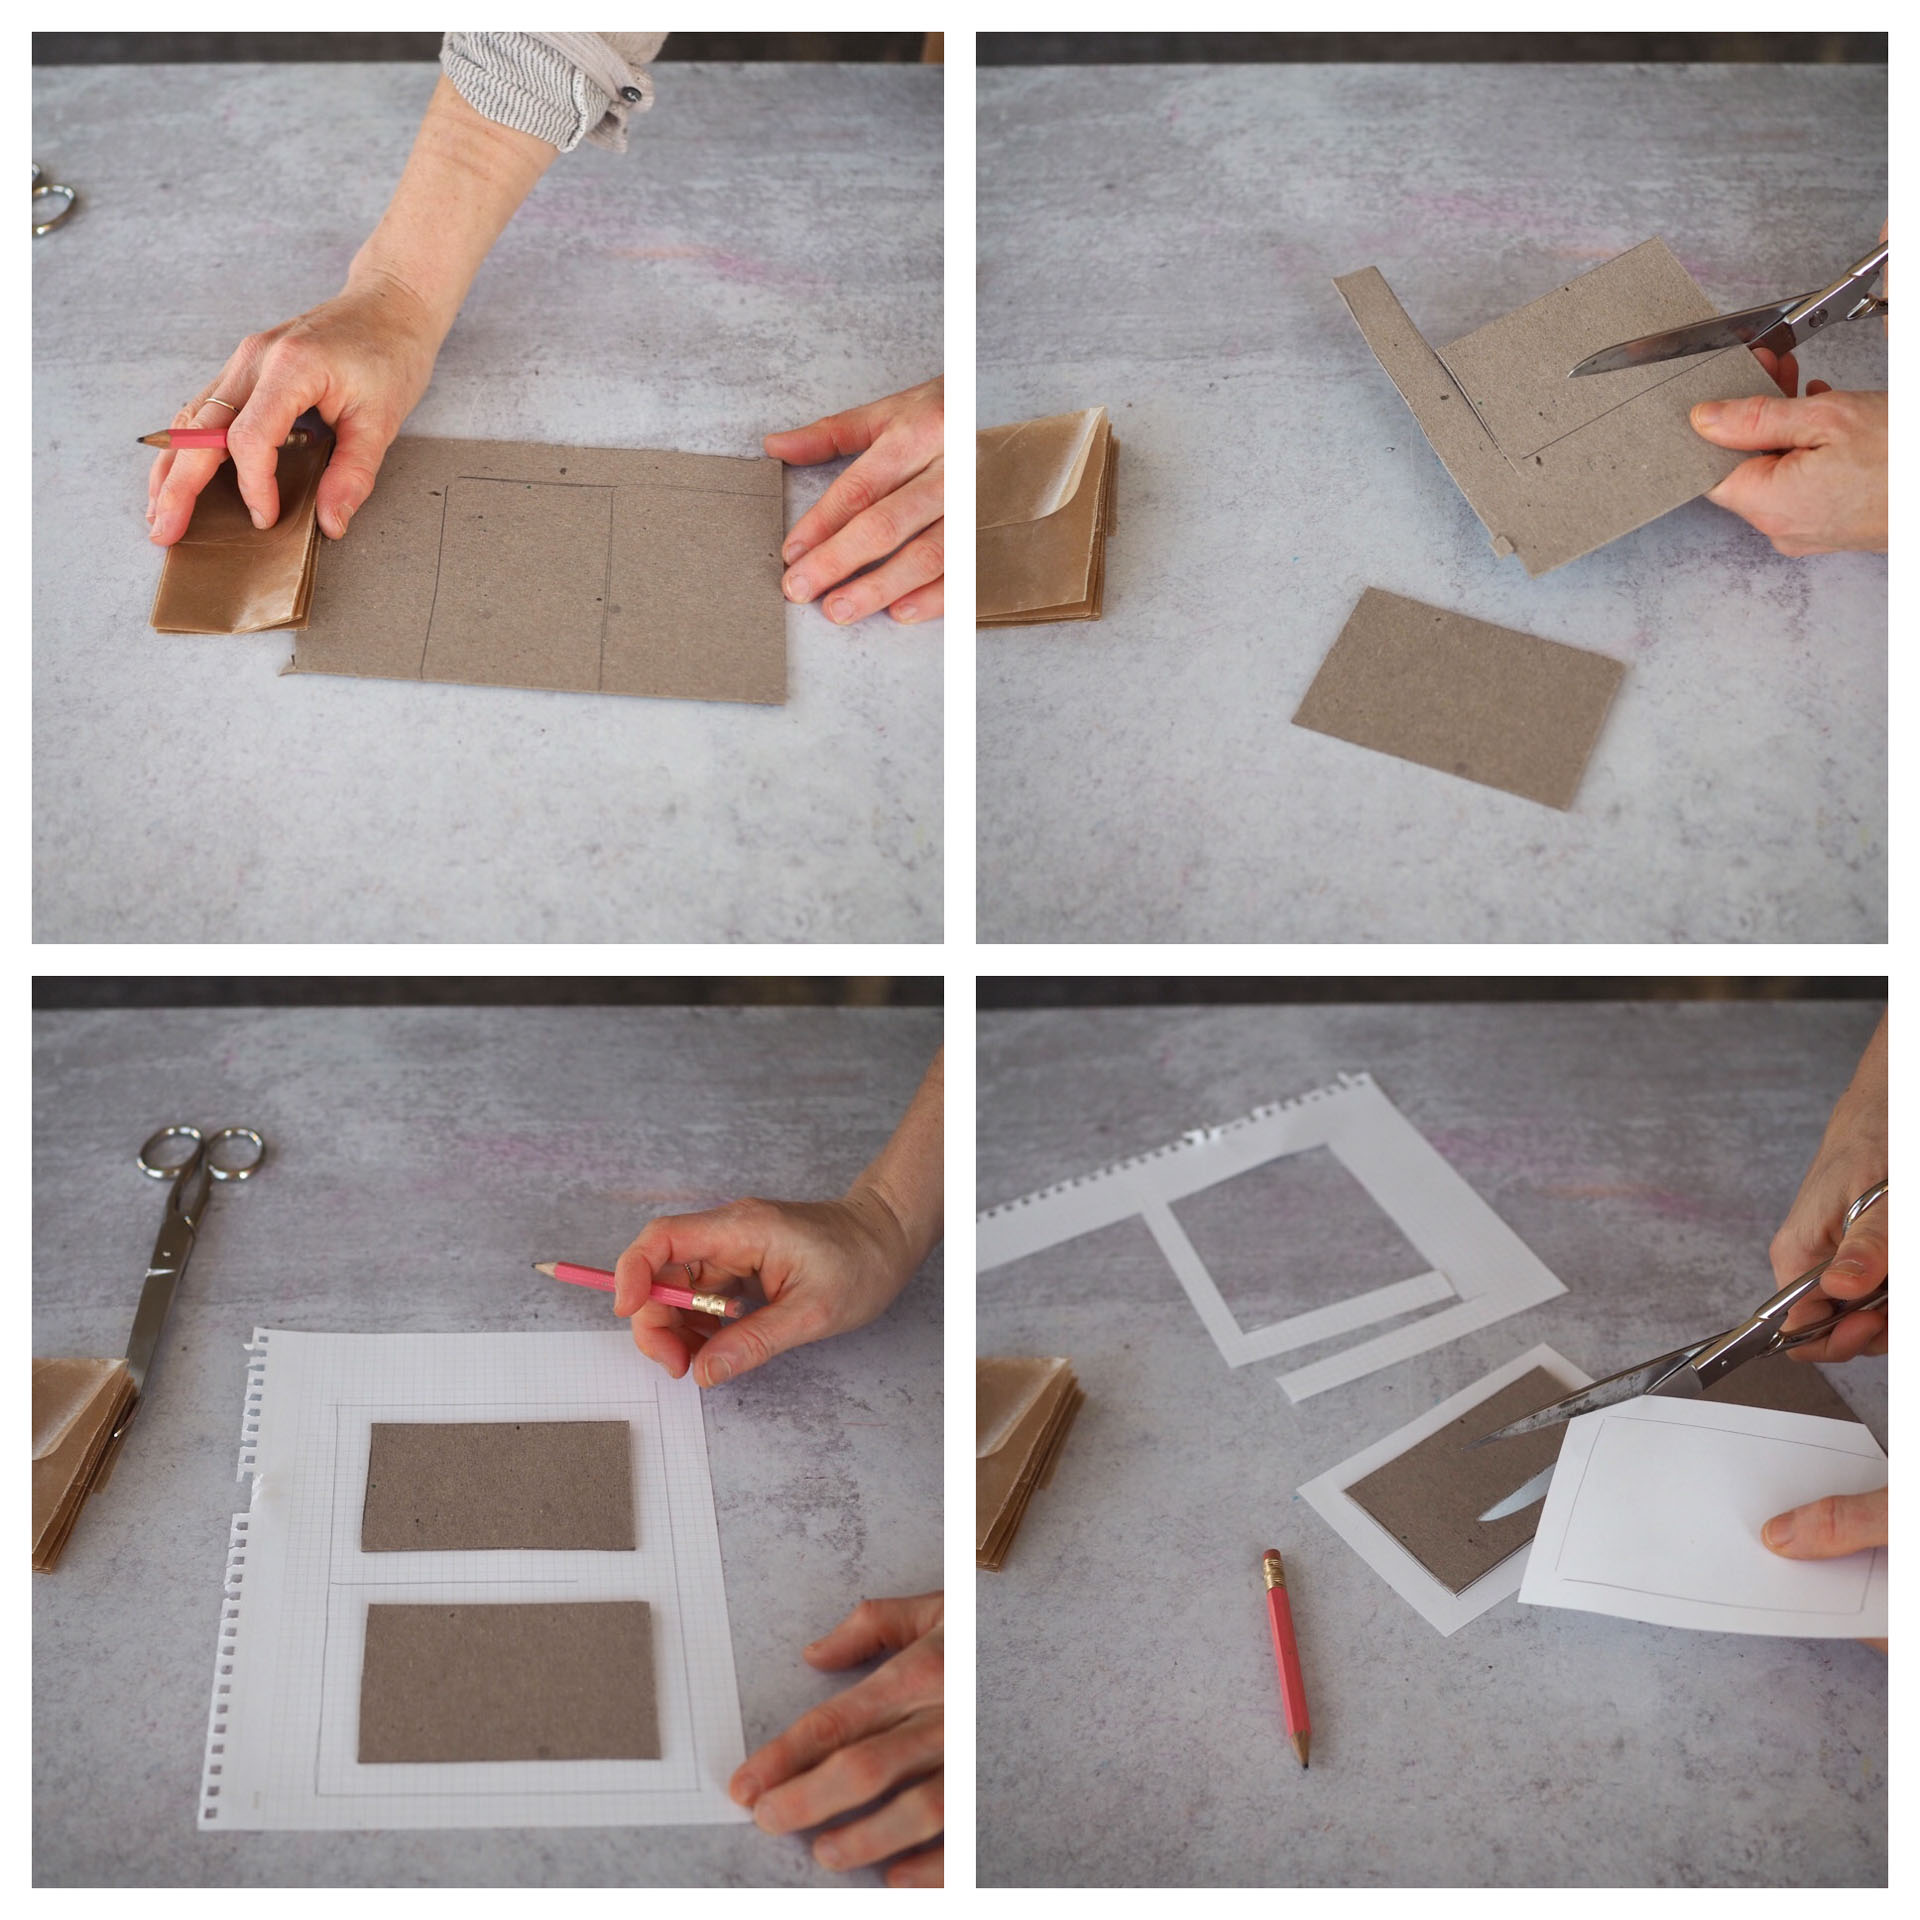
To make the cardboard front and back:
+ With a pencil trace around the accordion booklet onto the cardboard sheet
+ Repeat for the second book end leave a little extra space around each outline.
+ Cut out the rectangle shapes from the cardboard, cutting slightly outside the traced line so the the cardboard circumference is slightly larger (¼”) than the original.
+ Use the cut-out cardboard trace its perimeter onto the “wrong side” of your paper. Leave a large 1”-2” margin around the rectangle.
+ Repeat for the second piece
+ Cut out both rectangles from the paper (be sure to leave the extra 1”-2”” border).
+ Glue the “wrong side” of the paper to the cardboard rectangle. Spread the glue evenly onto the inside of the traced rectangle and match up the cardboard shape when attaching the two parts.
+ With scissors, cut off the triangle corners on all sides. You will want to cut right up to the cardboard corner.

+ With one side at a time, apply glue evenly to the flap and carefully bring the edge up and over to the front of the cardboard.
+ Repeat for the remaining three sides. Make sure that that the side flaps are neatly tucked over the edges.
+ Repeat all the steps for the second cover.
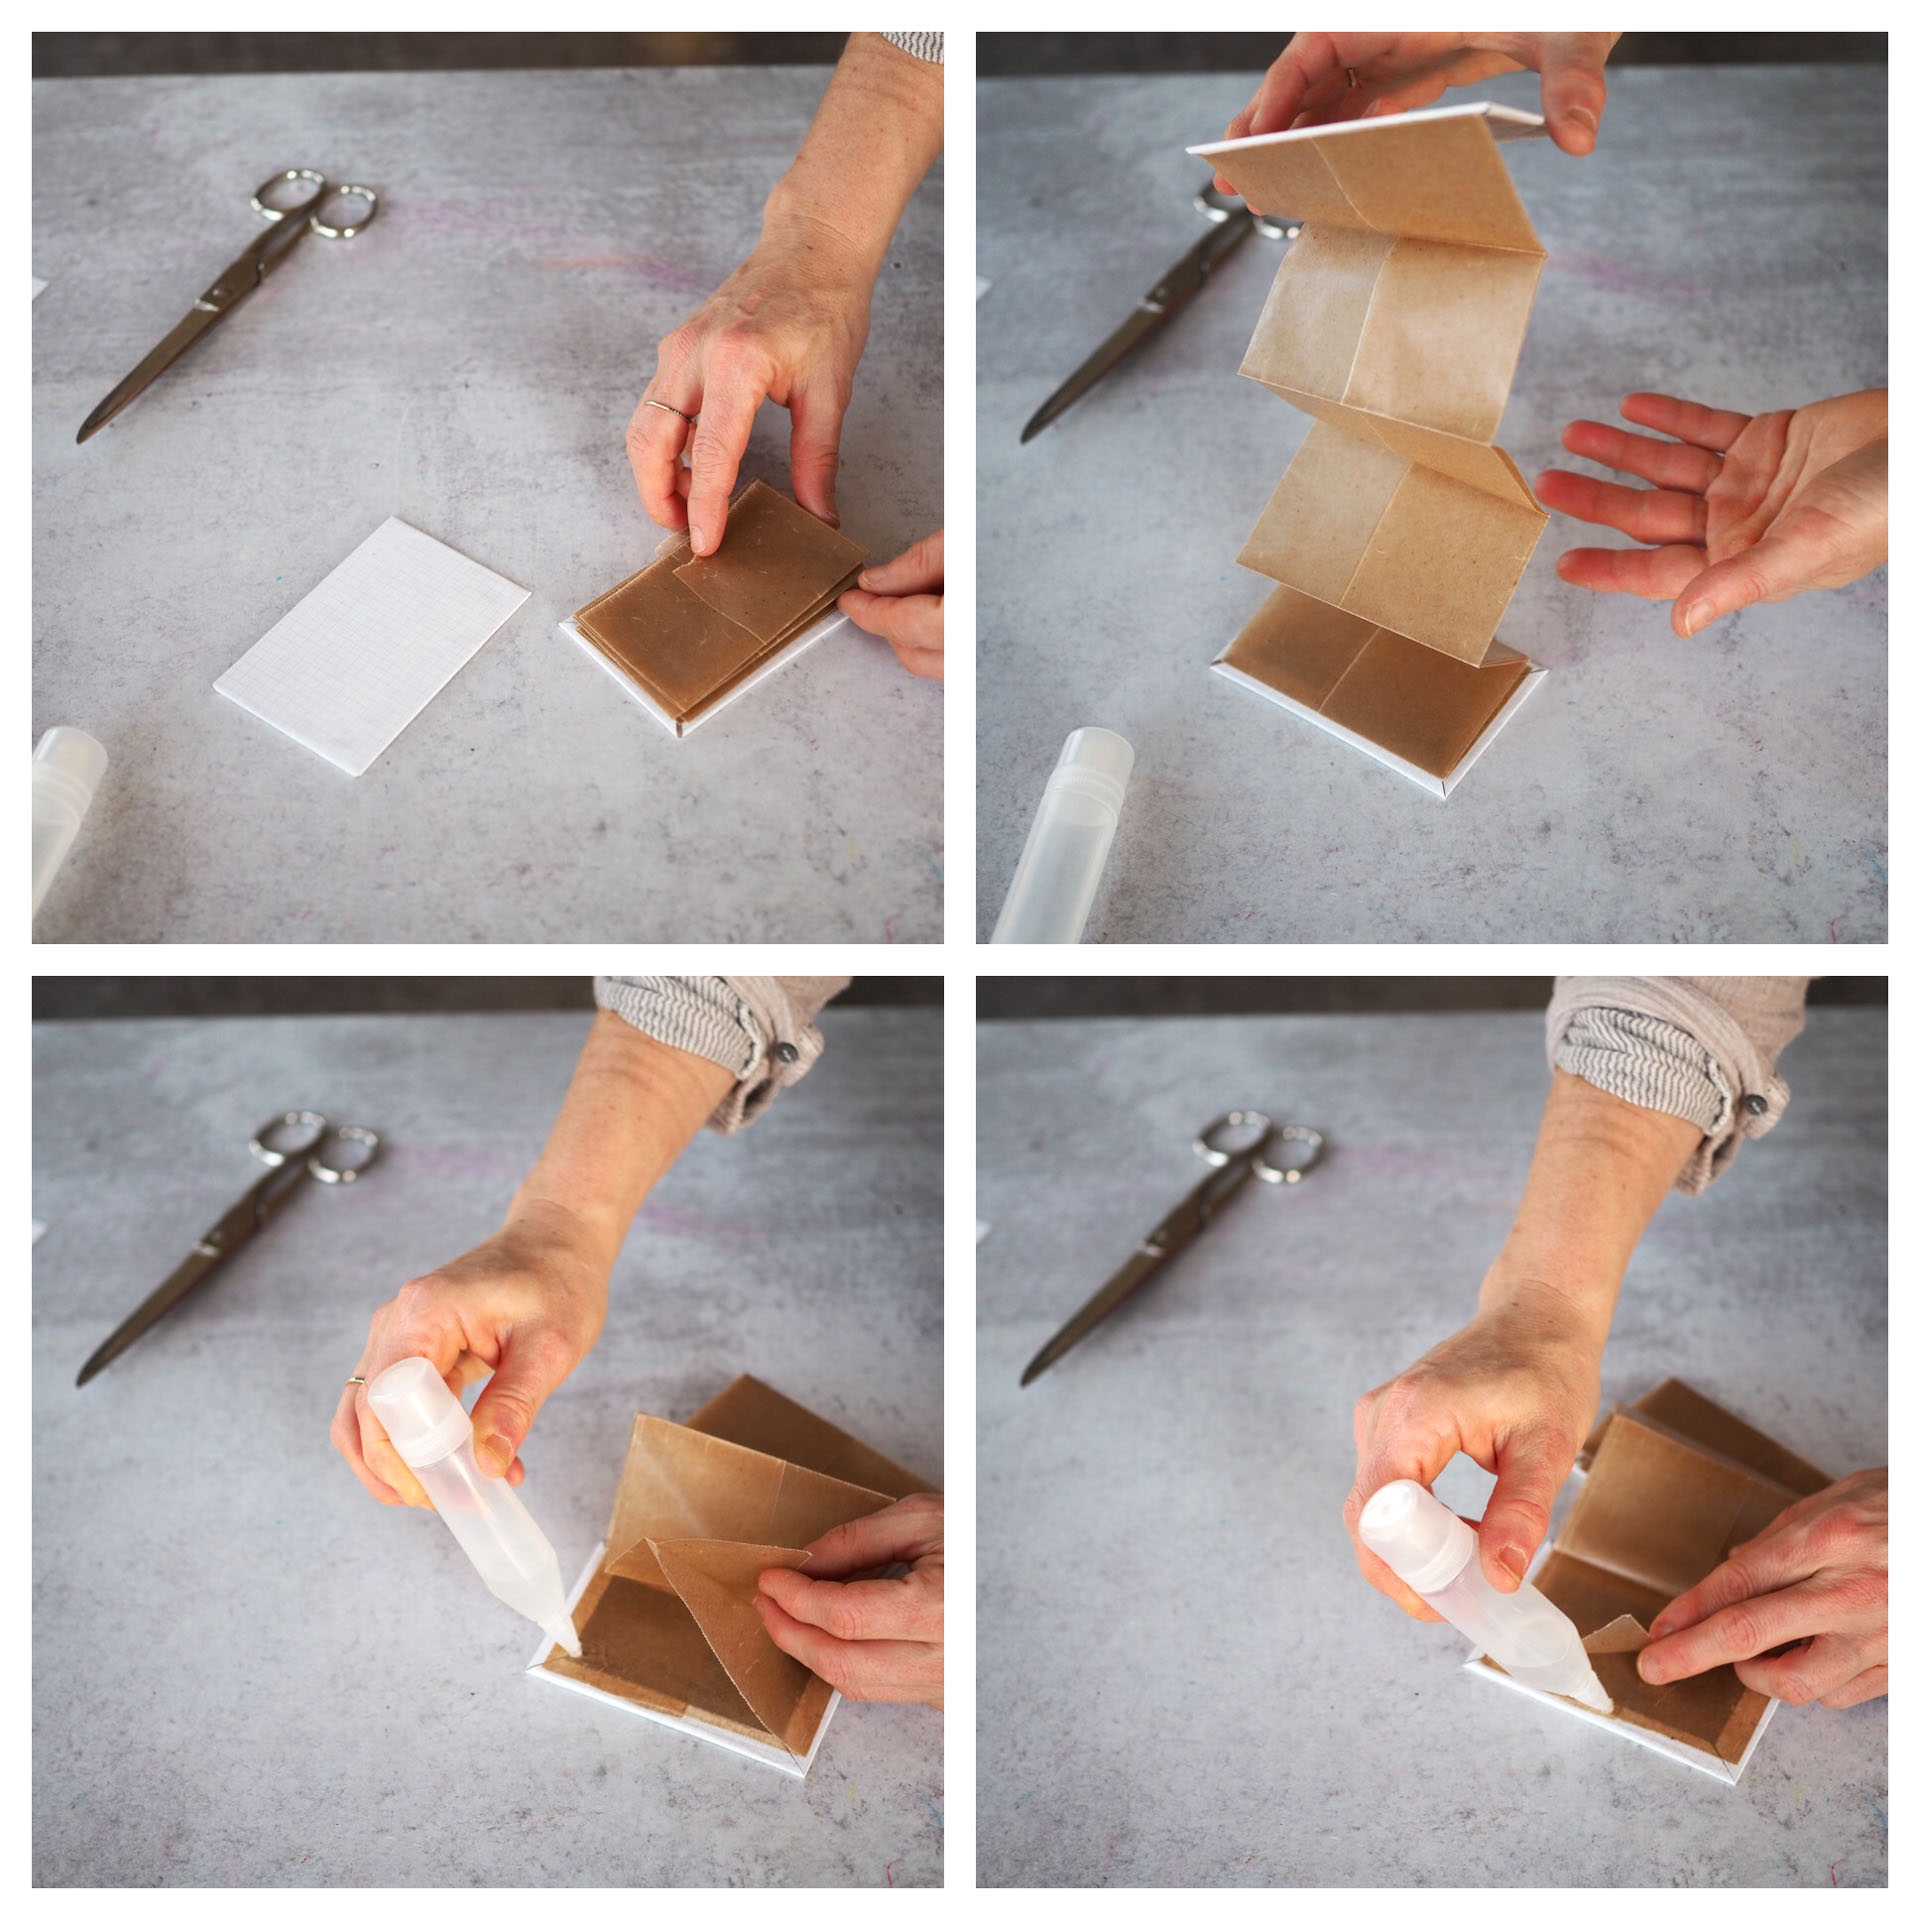
+ Evenly spread the glue to the “wrong side” of the cardboard cover. Carefully line up one side of the folded accordion book sides to the inside of the cardboard cover. Press down and let the glue set.
+ Repeat for the second side.
+ The first and last page of your accordion book will need a little glue to adhere further to the cardboard. Also note, the side edge of the first and last page will also need a little glue along one edge of the flap.

Attaching the elastic closure:
+ With a small hole punch or awl make six holes on one side of the cardboard cover. (Two adjacent holes in the center of each long edge (¼” from the edge) and one center hole on each short edge (¼” from the edge.)
+ Cut the elastic in half.
+ With the two elastic ends together, thread both from the back (wrong side) of the cardboard cover to the front. Then with one elastic end, thread through the adjacent side hole (from the front to the back) then thread from the back to the front through the hole next to it, and lastly, from the front to the back to the last hole.
+ Repeat for the second elastic on that side.
+ On the back side of the cardboard cover tie the two elastic ends together on both sides. When securing the knots, you want to make sure there is a tiny bit of slack in the elastic, just enough so once tied the elastic can stretch to wrap around the press.
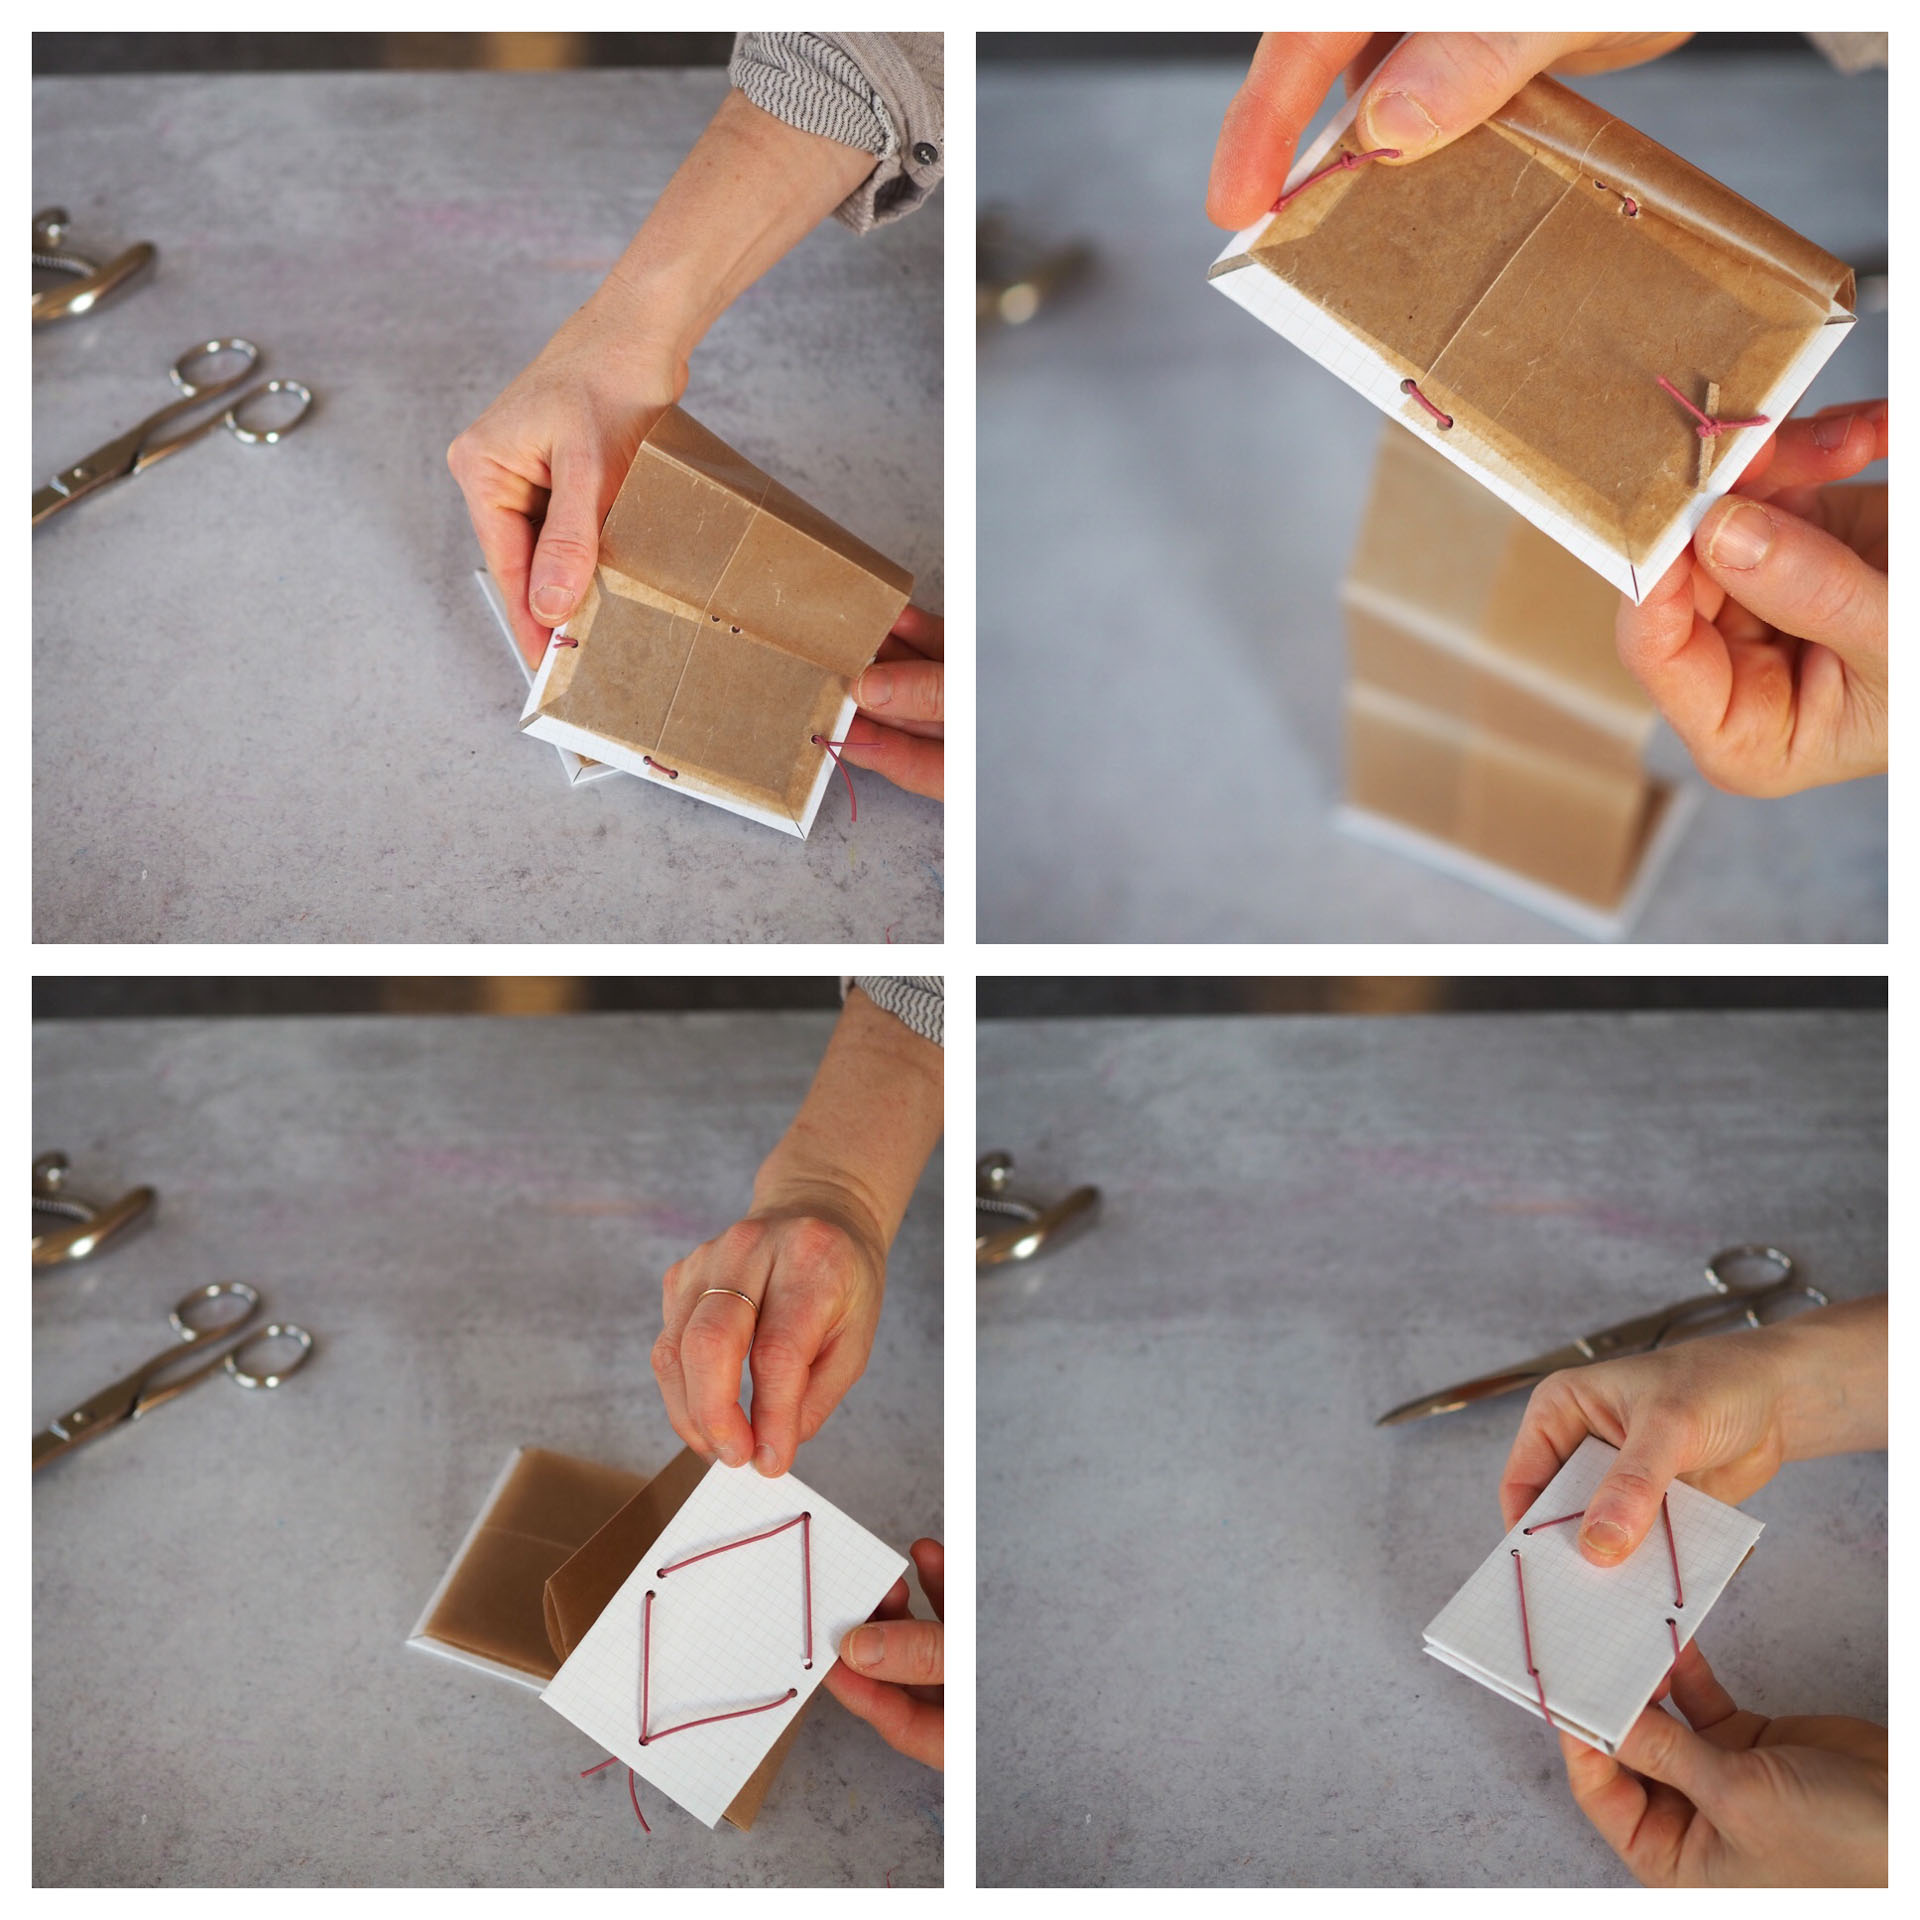
+ To prevent the knots from sliding out of the punched holes, use an extra piece (1/4”) of cardboard and place inside the knotted ends, if needed, secure the cardboard bits to the inside of the cover with glue.
To use:
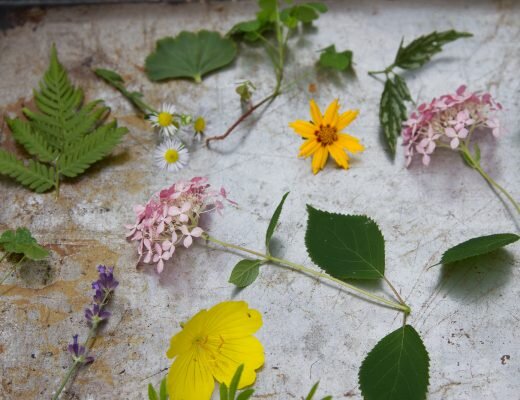
Place dry flowers and leaves into the accordion sleeves on both sides of the pull-out. Press the two sides together and pull the elastic down over each corner to flatten. You can also place the press underneath a heavy object to increase the weight and quicken the pressing process.
//
Thanks to Rose Pearlman for preparing this tutorial and imagery. Rose is an artist, teacher, and textile designer. With a background in fine arts and a love of well designed functional objects, her creations blur the lines between art and craft and pushes the boundaries with non-traditional techniques and materials. Rose teaches monthly rug hooking workshops in and around her home in NYC, and also welcomes commissions for one of a kind constructions in decor and home furnishings. Her work has been featured in fiber magazines, galleries, and numerous online design sites. Her book Modern Rug Hooking is available wherever books are sold. Follow along with her functional craft projects at @art_objects_ She lives in Brooklyn, NY with her family.
This post includes some affiliate links to online shops. Reading My Tea Leaves might earn a small commission on the goods purchased through those links, but most of these supplies can be found locally right in your own community. If you’d like to support this site directly, you can contribute directly here. Thanks so much for supporting this work.
10 Comments
Still January means enough* time between now and Spring Equinox to make these for my kids baskets. *Maybe enough
Amazing. I think you and Rose are geniuses and I love these collaborations so much – thank you for sharing them. Pretty kid projects have literally gotten me through 2 years of pandemic parenting!
It’s really beautiful Thank you !
This is so pretty. I don’t own a flower press. Any suggestions on how to press flowers without one ?
Thanks
Hi Jamie! Look no further! These are instructions for how to make your own press! You can also do my tried and true method of sandwiching flowers between the pages of heavy books! Use waxed paper or parchment paper if you’re worried about accidentally discoloring the pages!
Thank you so much. I’m off to get some flowers to press
hi erin! do you think your homemade fabric paper might work for the outside?
hope you and the kiddos emerged from quarantine (relatively) unscathed. xo
i actually think since you’re gluing the paper to the cardboard that just brushing glue on the back of the cardboard and stretching the fabric over the edges would be the route i would take! the starched fabric would be kind of an unnecessary added step for this use!
Oh grear point – thanks! Will try it this weekend.
Found my way here from the accordian photo post. I’m excited to try this fun photo holding idea!
May I ask what kind of a glue (or glue holder) was used in the flower petal tutorial? I struggle so much with refilling white glue because the tip always dries and gets blocked, but I also don’t want to keep buying tiny glue sticks / clear glue.
Comments are moderated.