File this under something I wasn’t sure I’d be able to pull off, but here I am, alive to tell the tale and not having suffered a crafting-induced hissy fit four days before Christmas. (Mostly!) In case you’re looking for something handmade to pull together in the next few days, here’s a simple how-to for a gift that won’t push you over the edge of crafting misery or cost more than a few dollars to make.
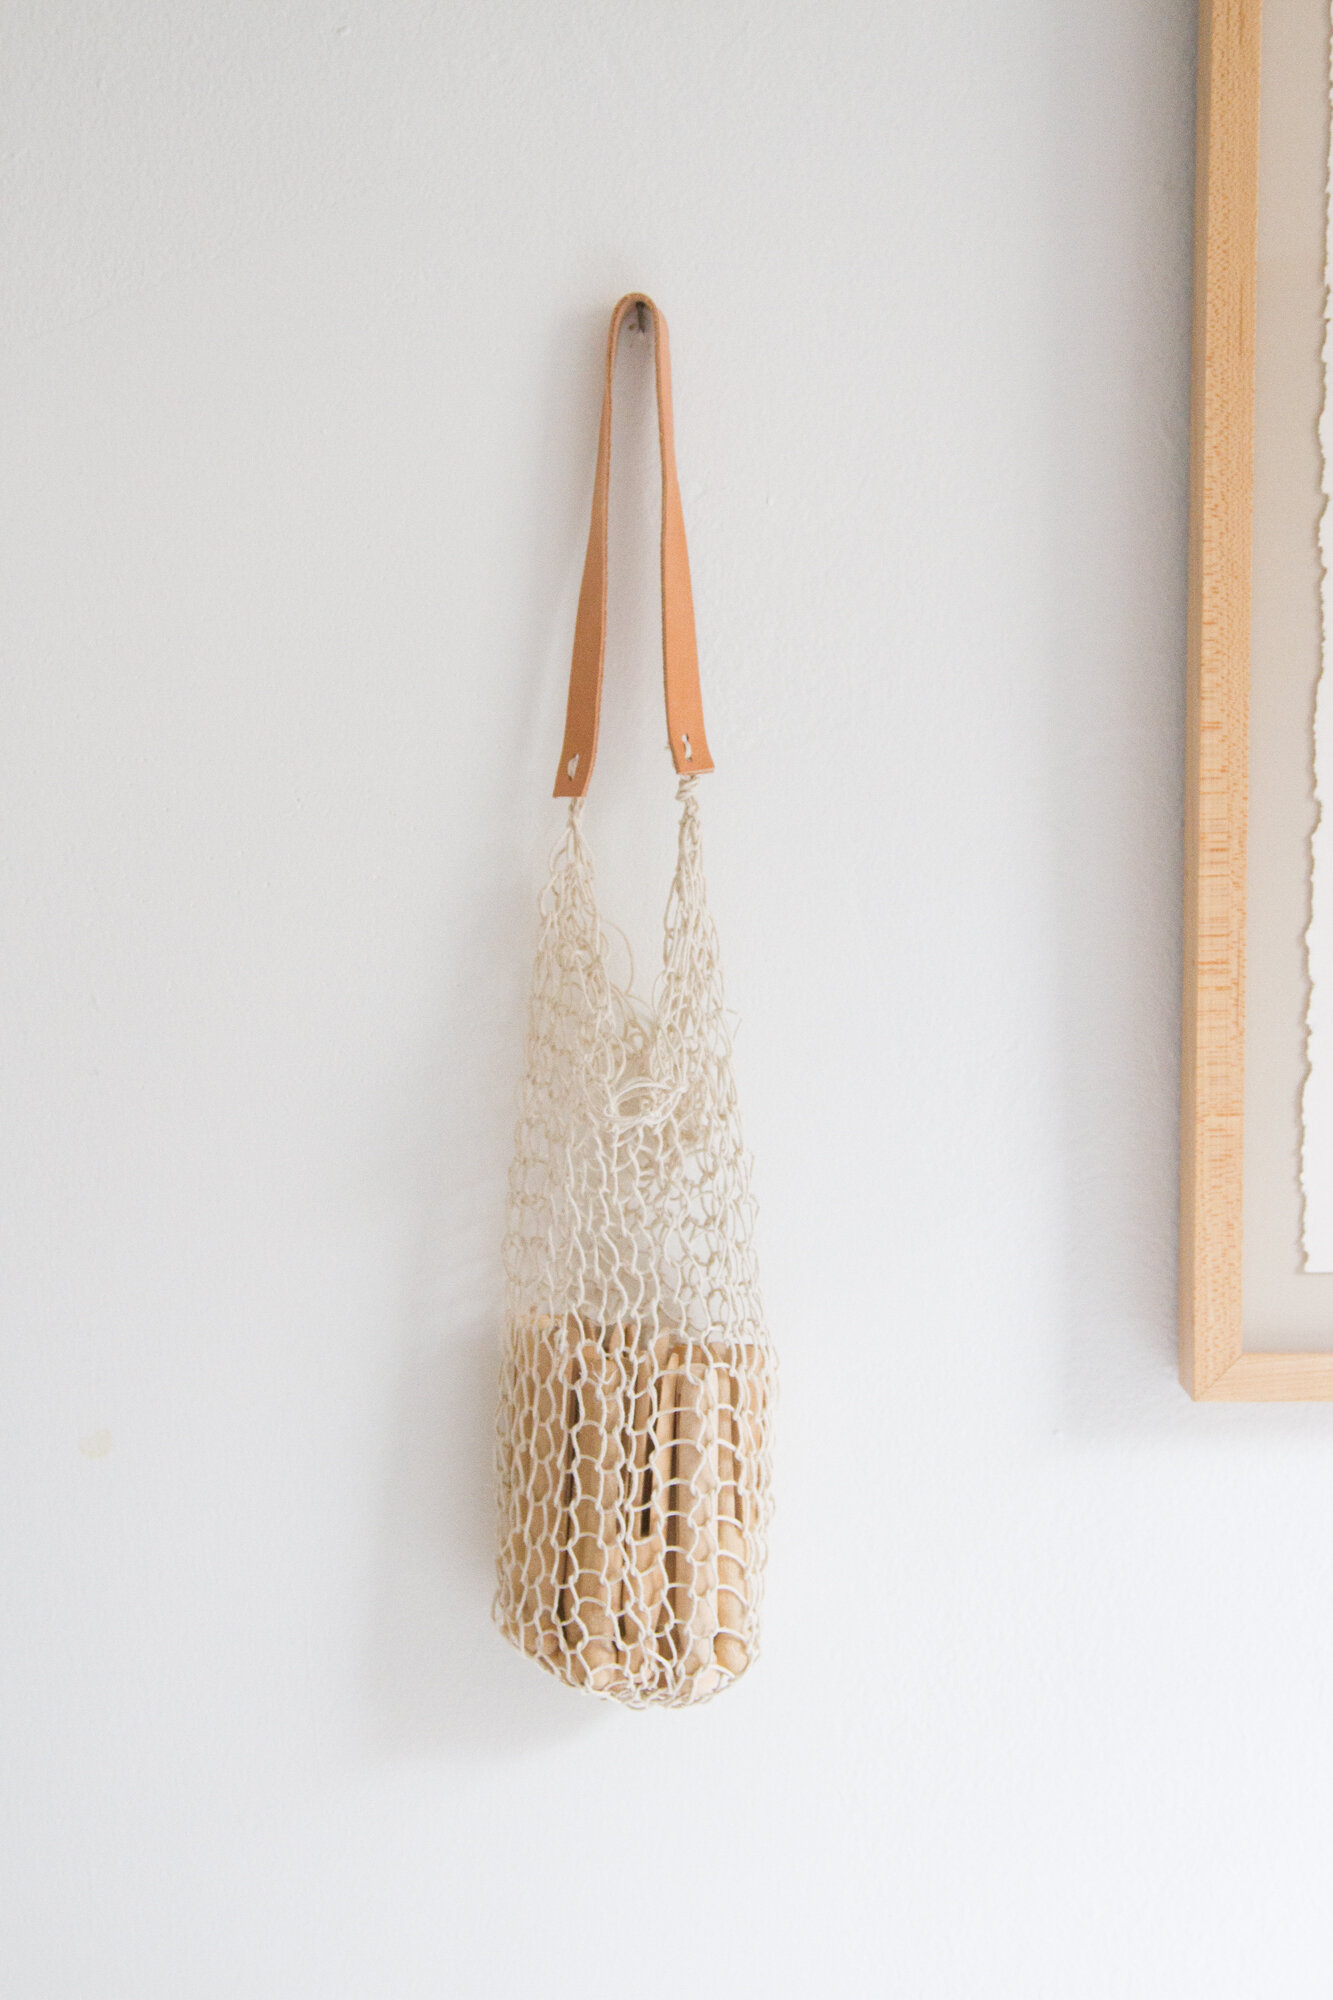
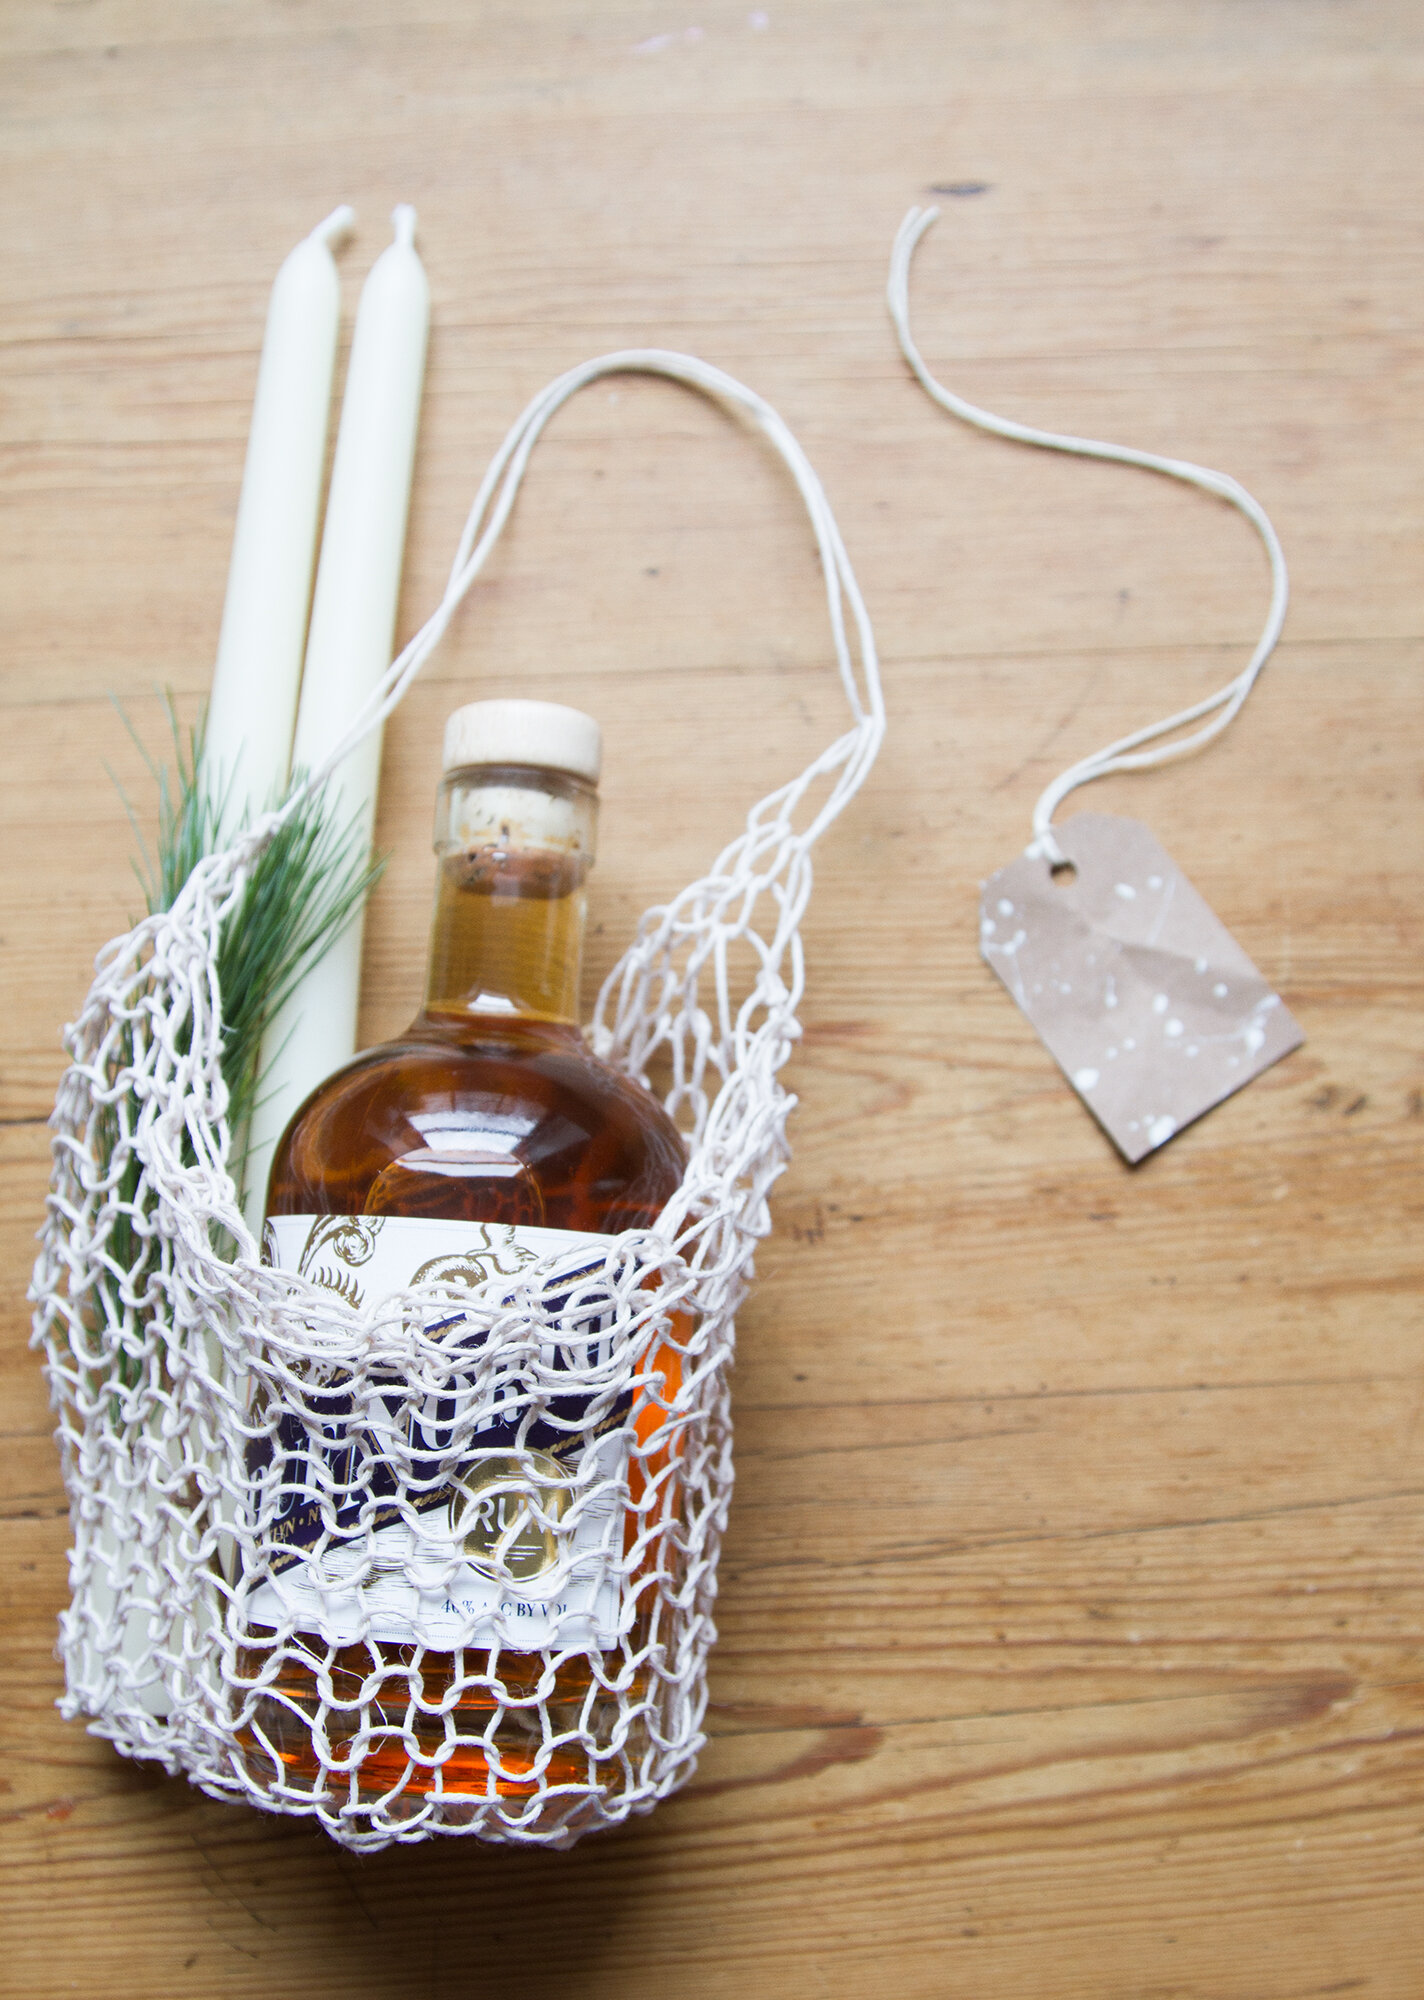
You could give it with no more than pine sprig inside, or fill it up with tiny treasures, or something even fancier, a festive bottle of rum, say. A homemade jug of egg nog? Whatever suits your fancy is the right answer.
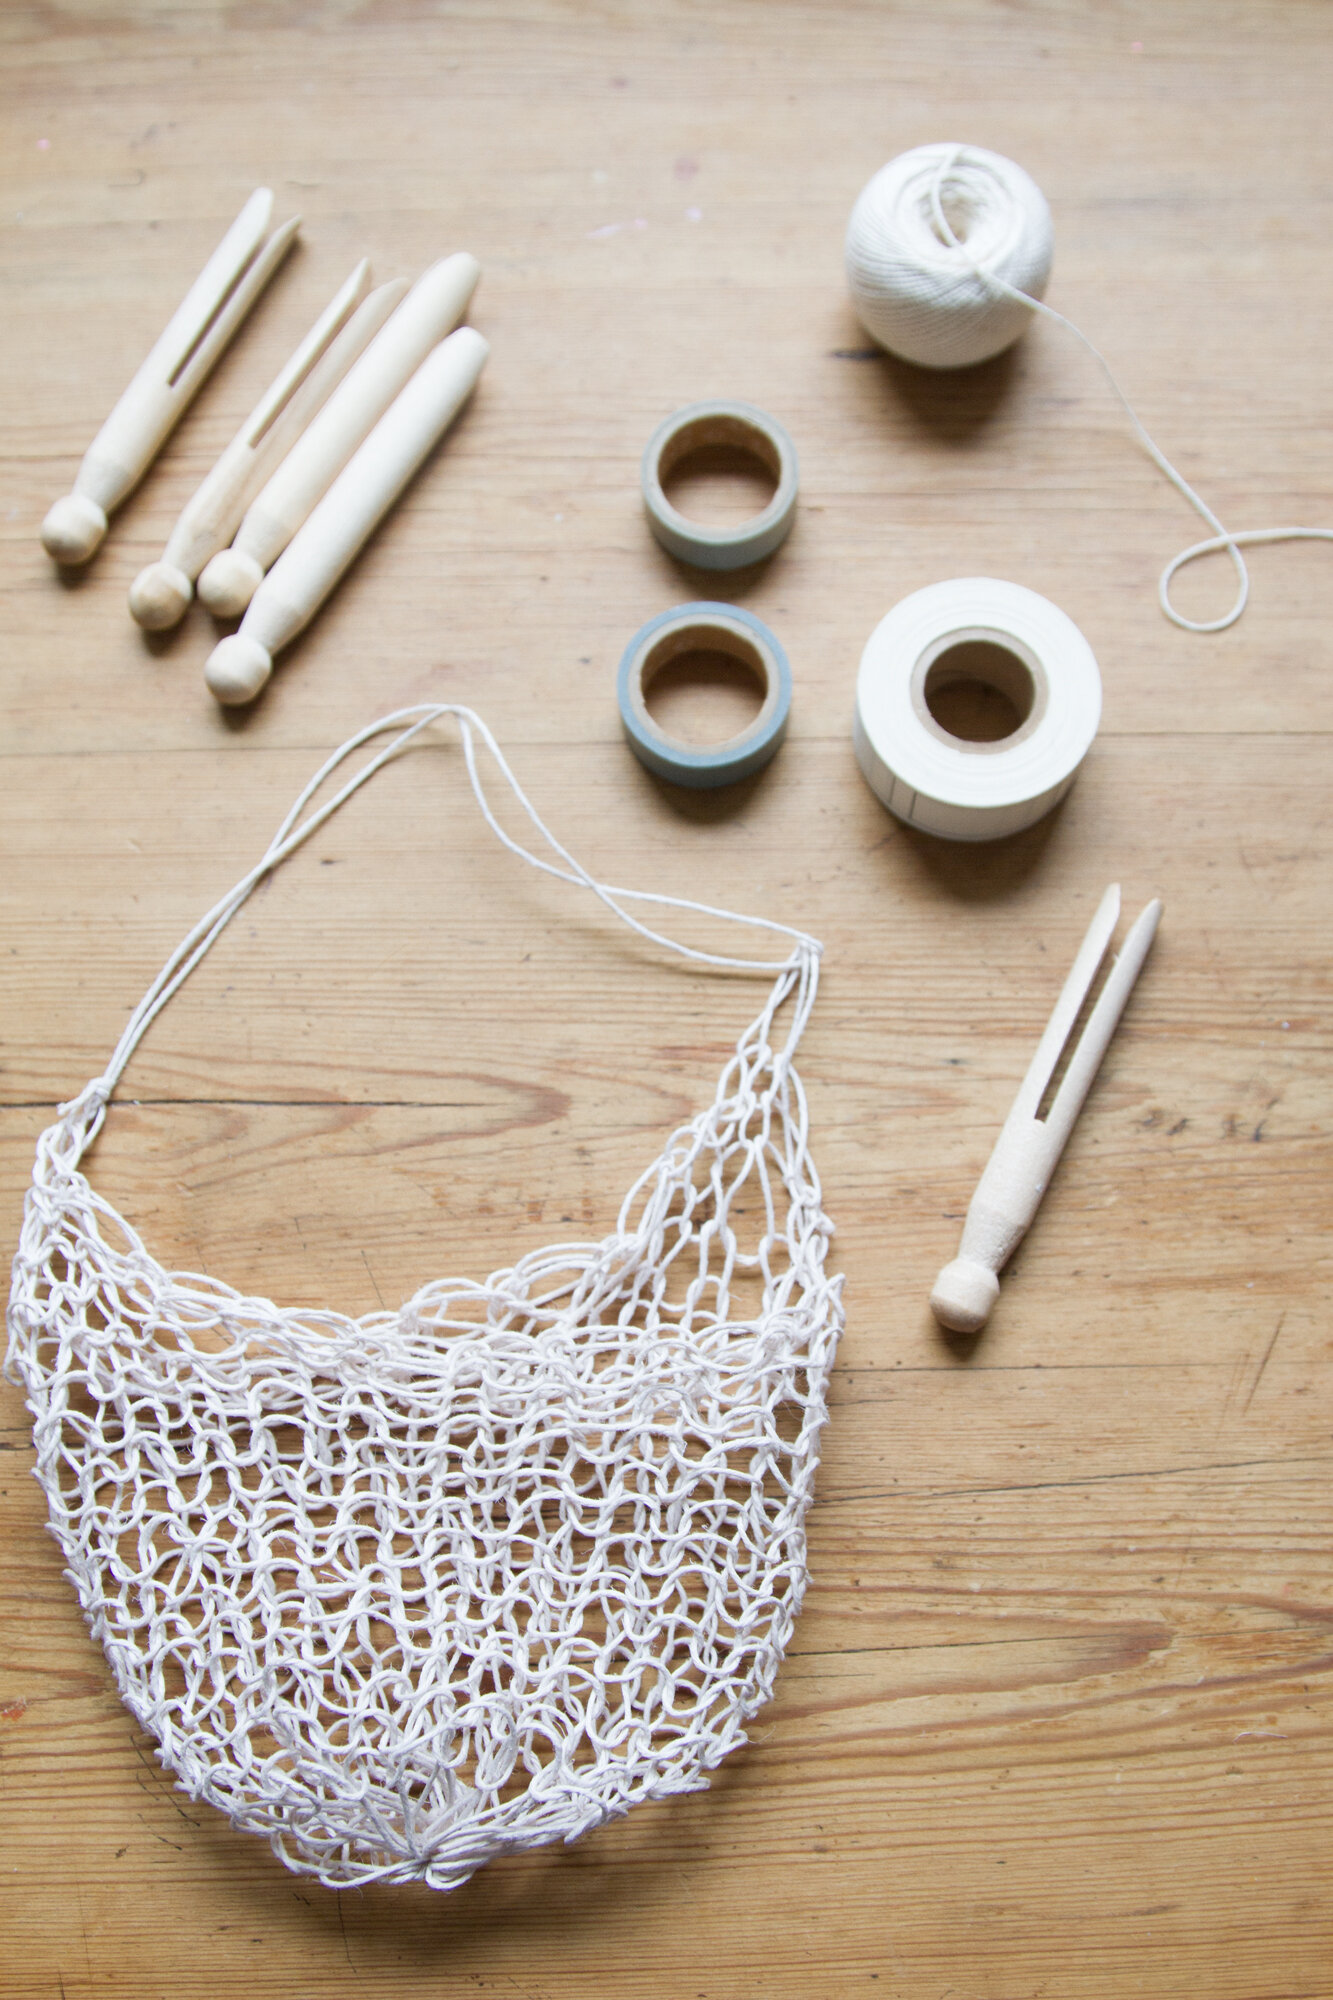
If you have a crafty friend, you could also gift the supplies themselves—20 or so clothespins, a ball of string, and an embroidery loop—and the promise of spending an afternoon weaving together.
We have Rose Pearlman to thanks for the idea and instructions. I made my own bag following her guide. More from Rose below:
String Bag
What you need:
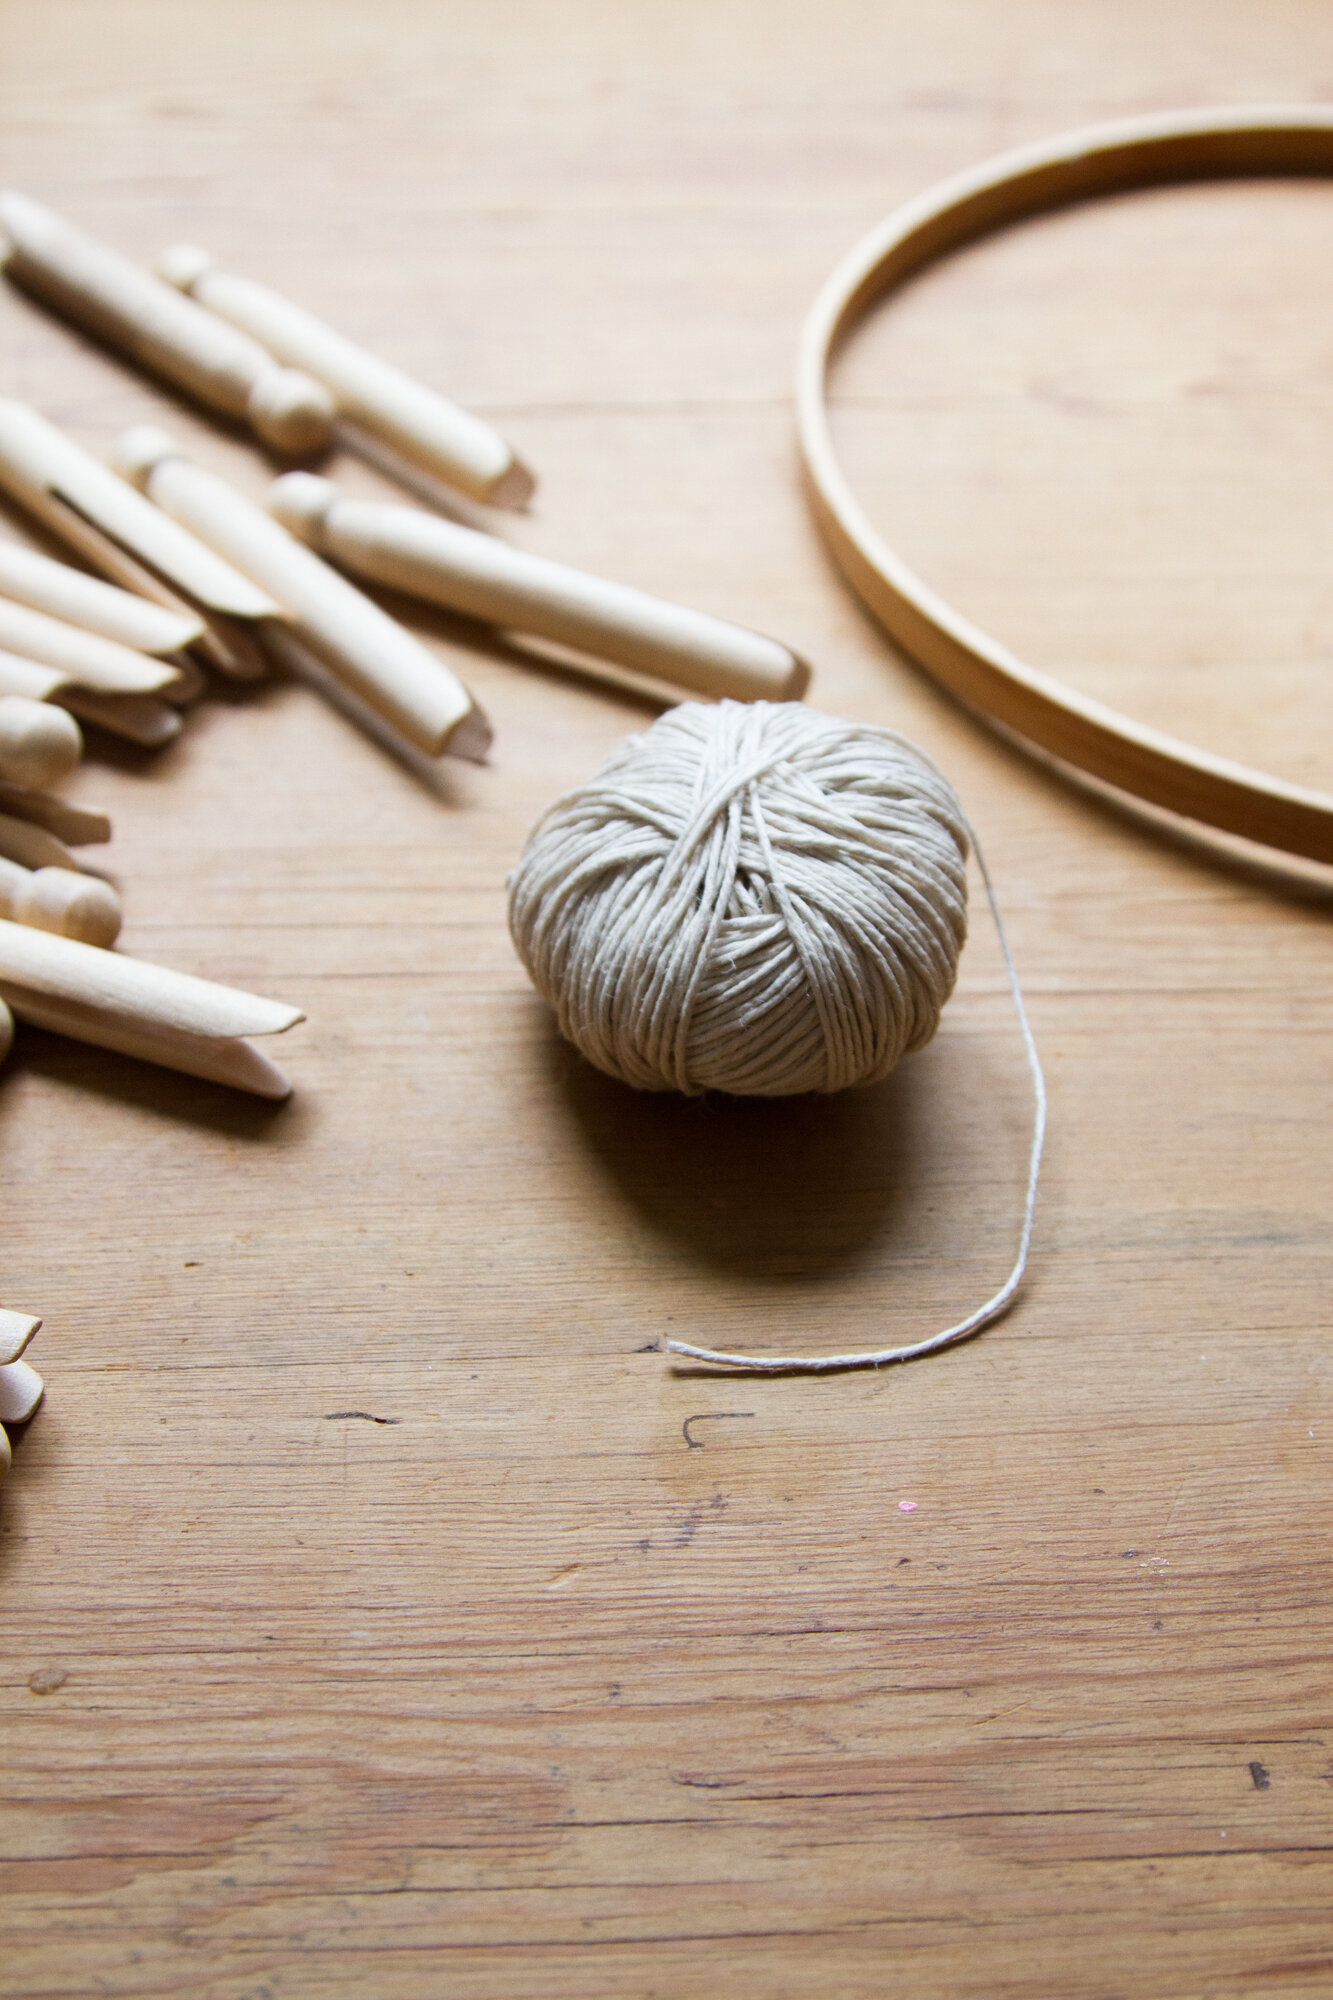
+ One side of an embroidery hoop (the one pictured is ~9-inches and works well)
+ 18-20 wooden clothes pegs for a 9” hoop (you might need a few extra if they crack while placing them on the hoop)
+ Hemp, linen, or cotton twine or string (roughly 120 yds.)
+ Scissors
+ 12-inches cotton cord/leather strap (optional)

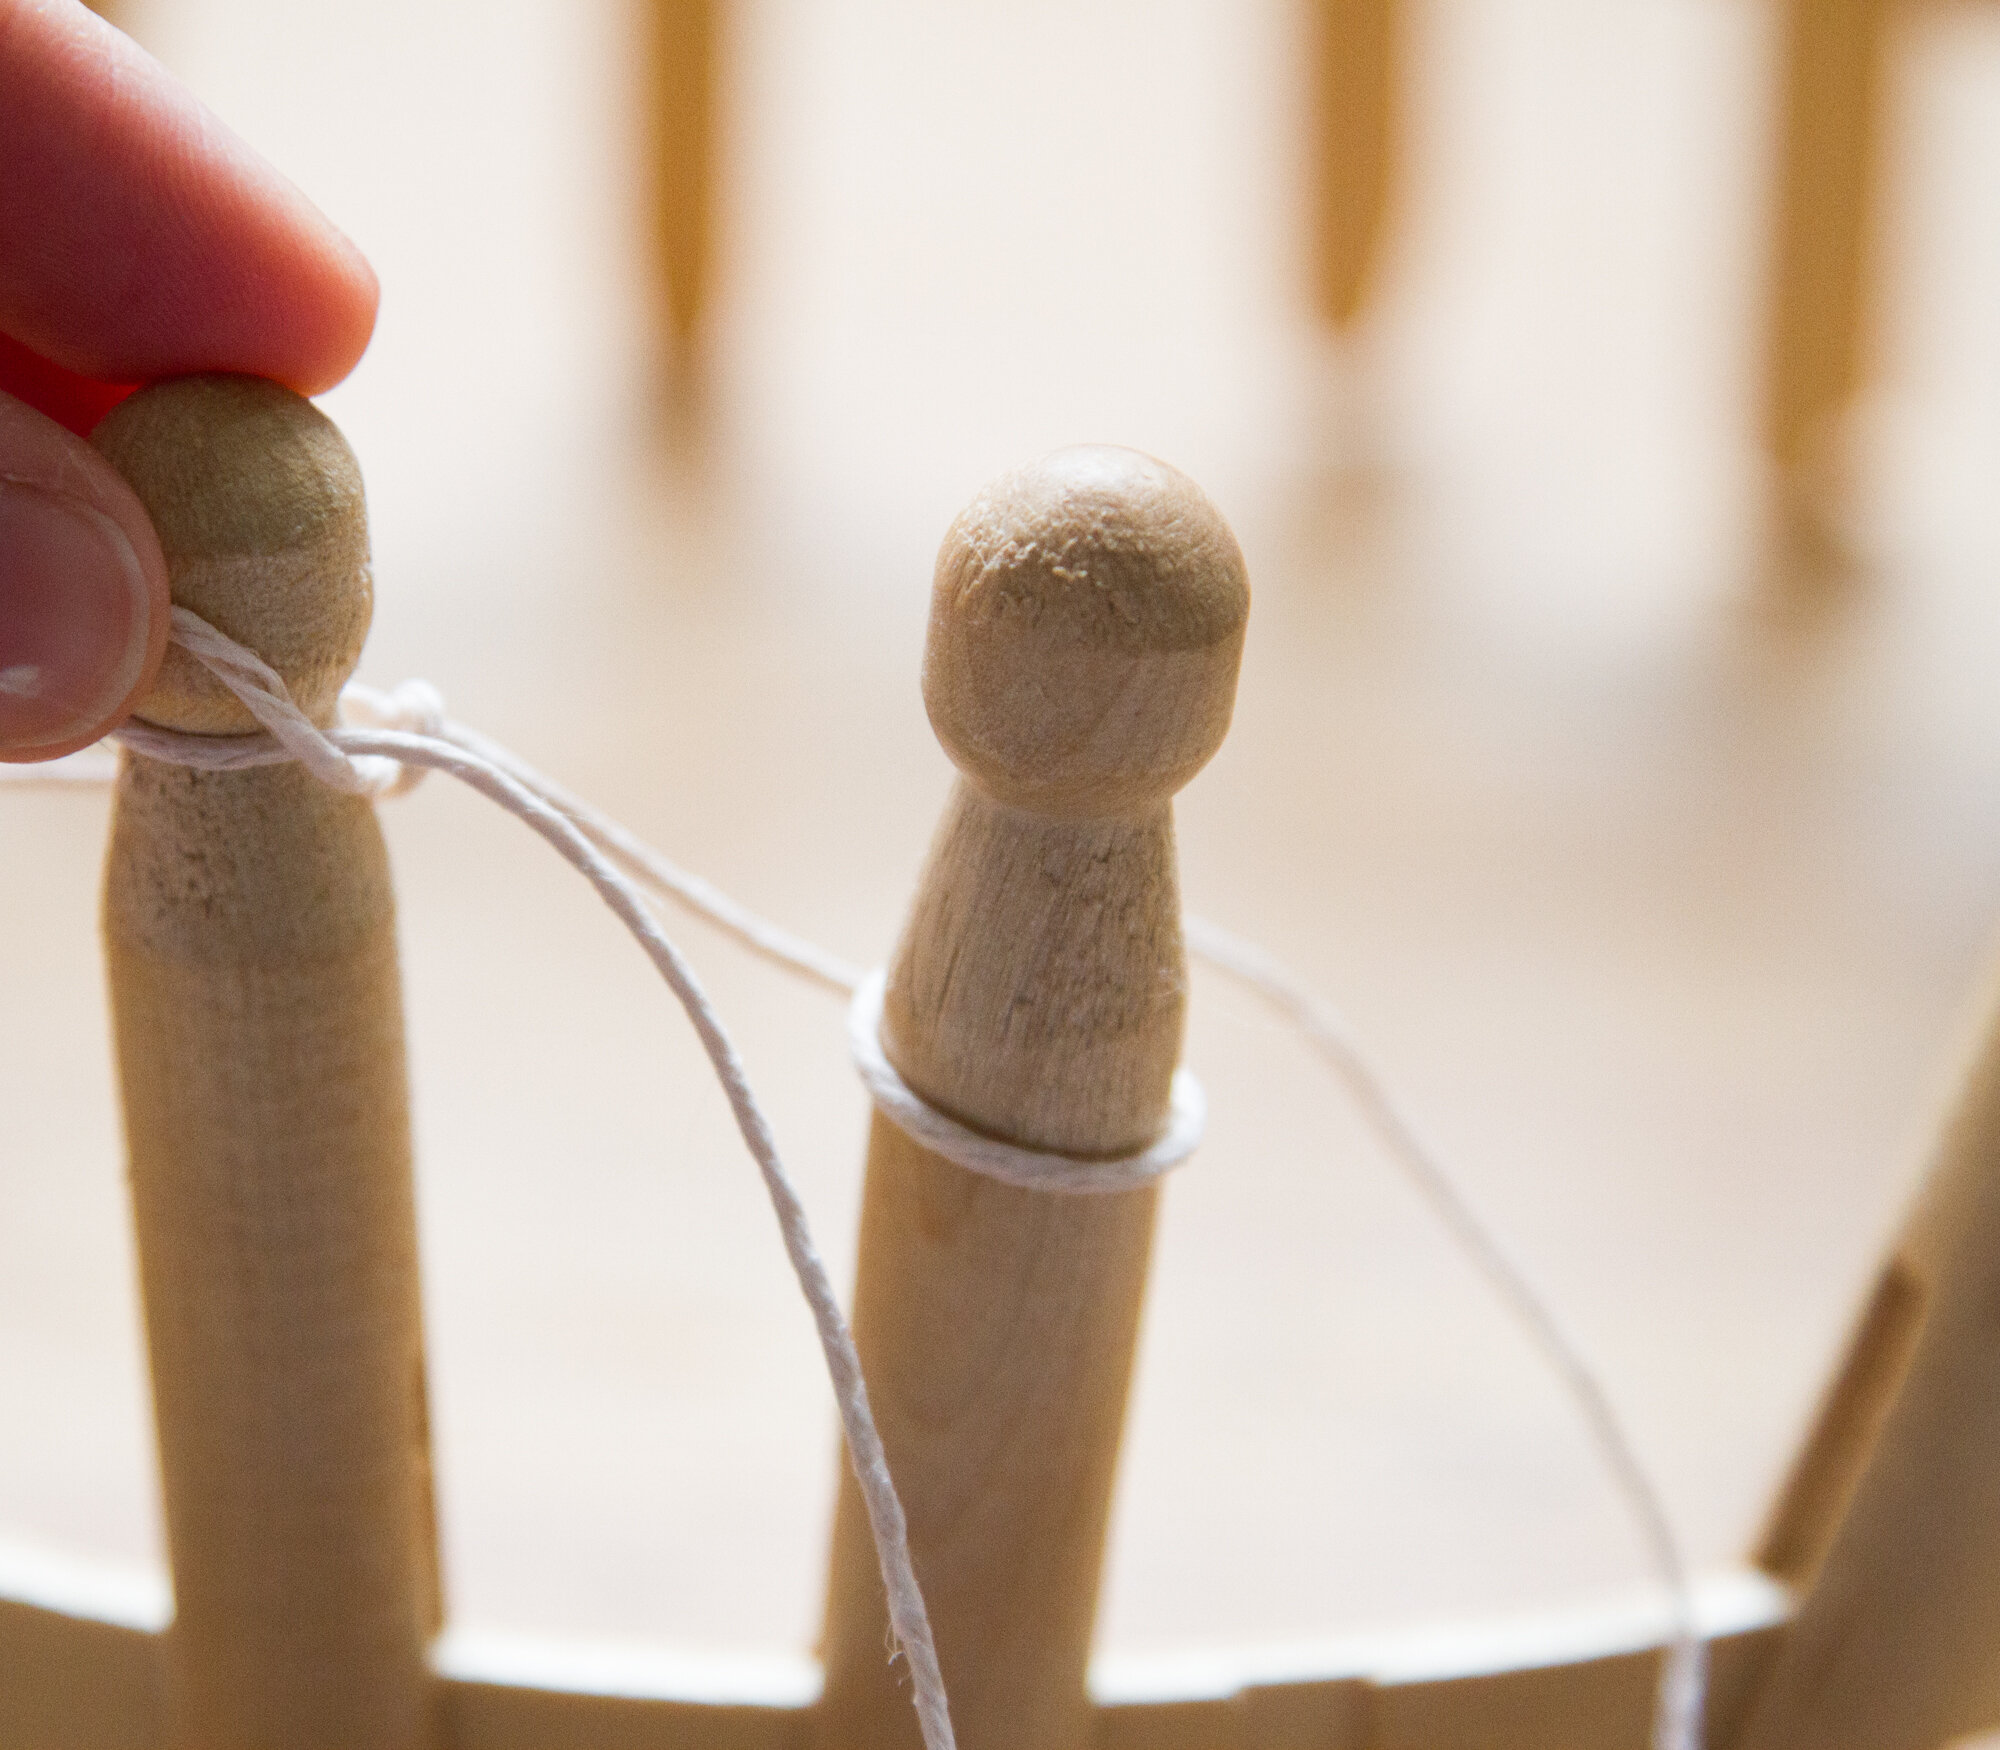
+ Place the clothes pegs onto the perimeter of the embroidery frame. Place the pegs roughly one inch apart, and press down firmly making sure each peg fits tightly.

+ To begin, place a 20-inch tail end of the string through the center of your frame. (This will be long because it will be the handle of your bag.) Wrap the string (from the ball) twice around one of the pegs clockwise. You can wrap the tail end of the string around the bottom of a peg so it doesn’t get in your way.
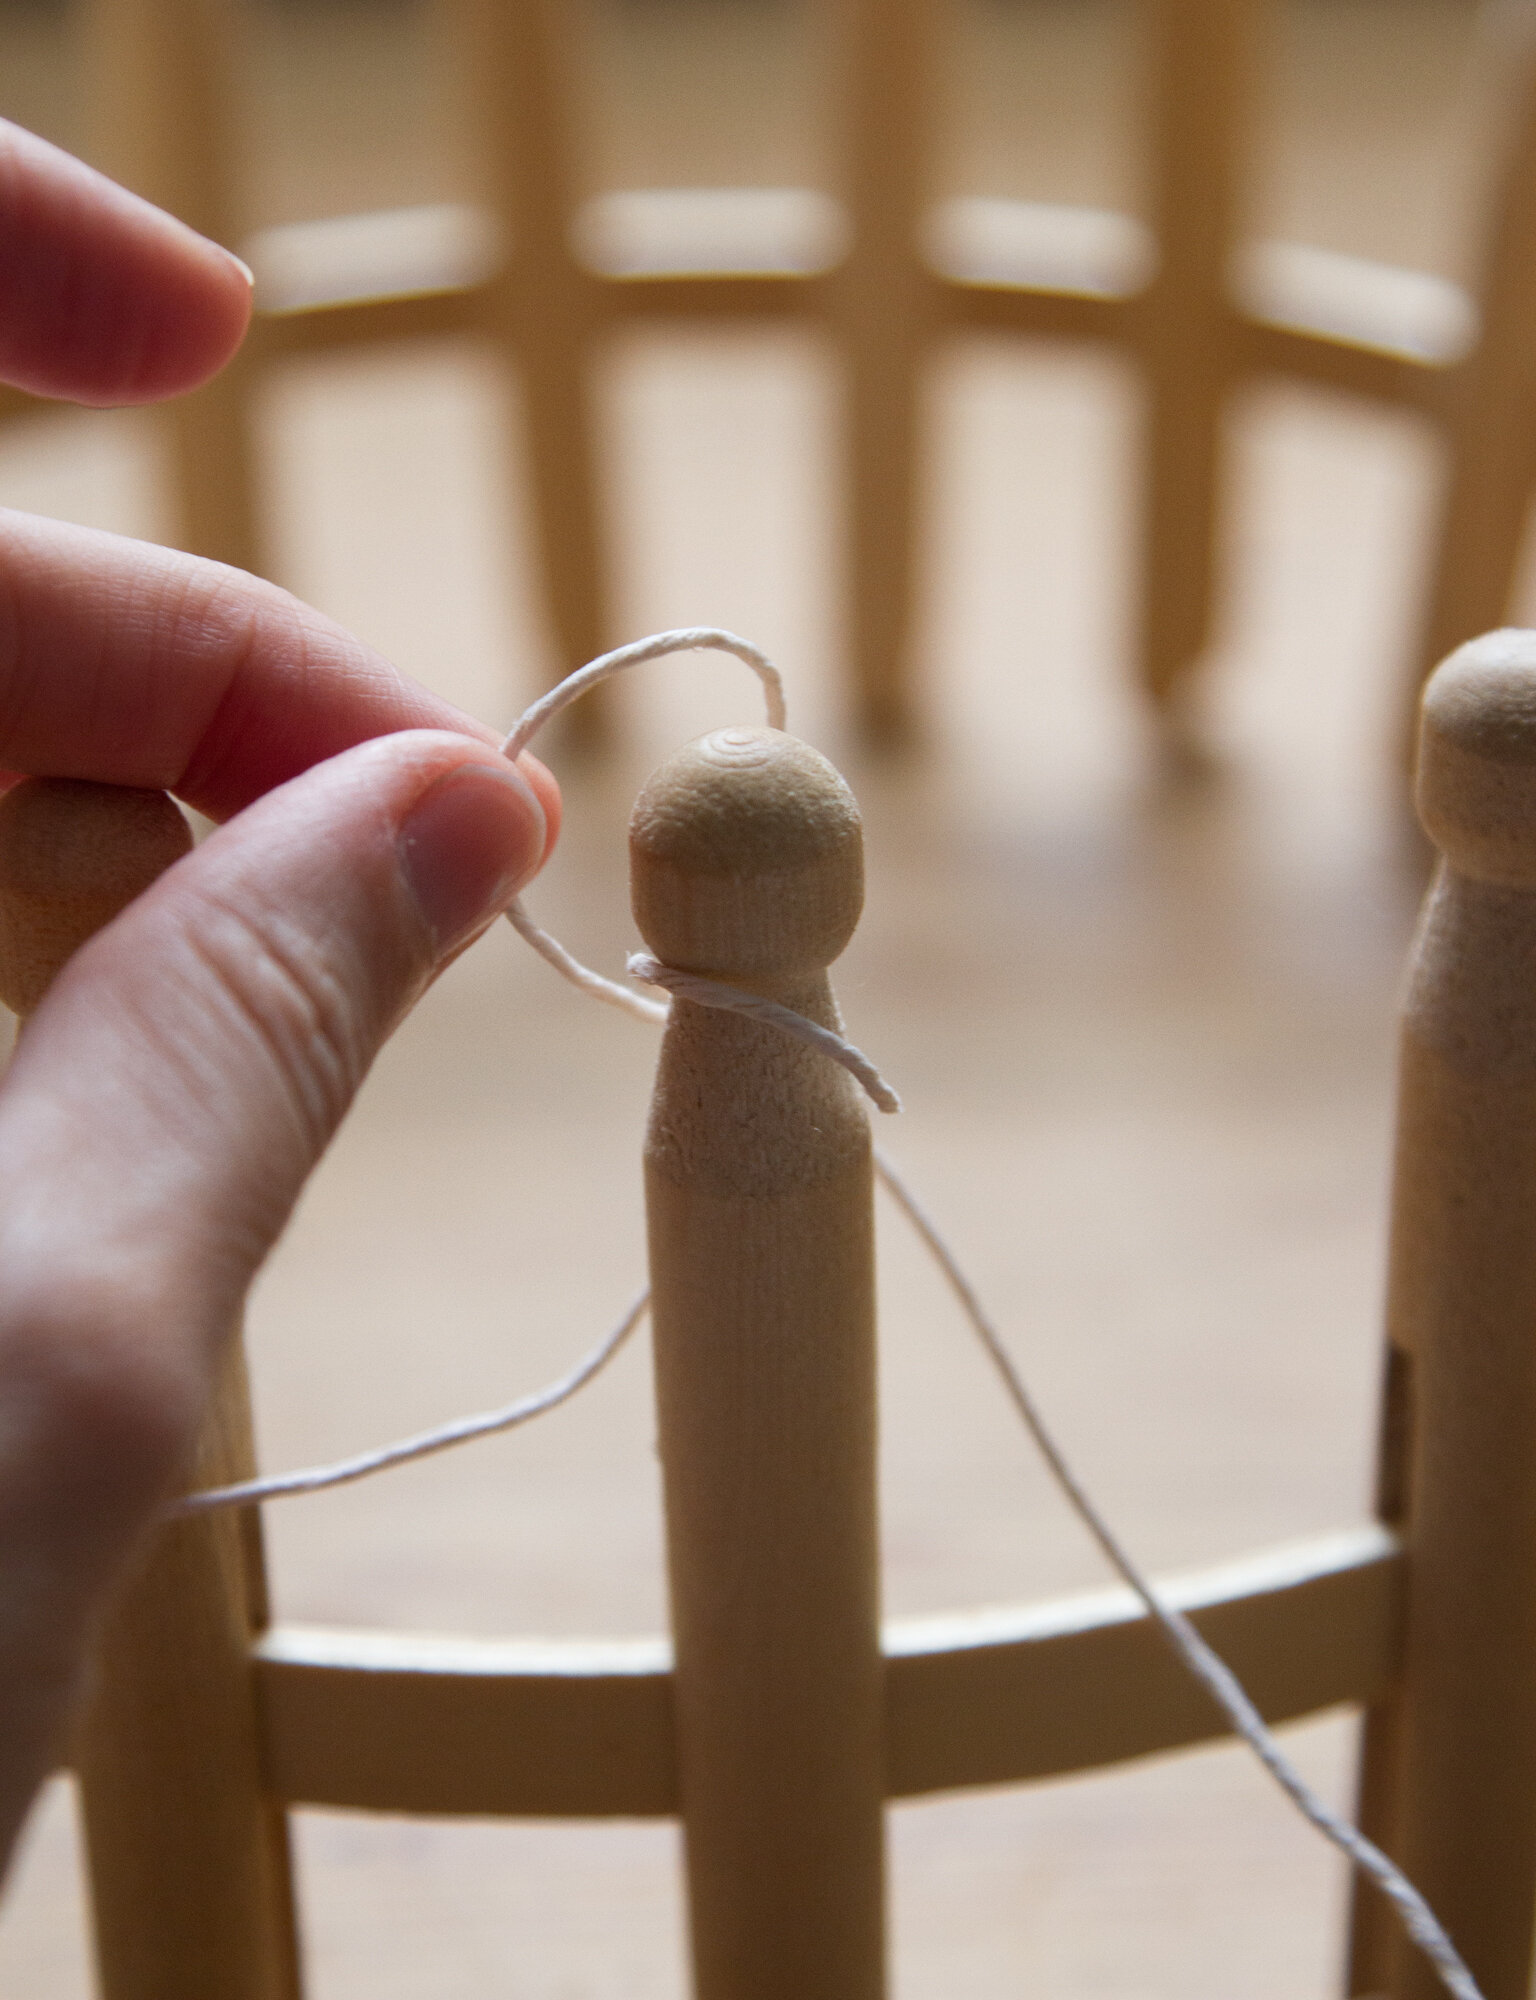
+ You will then pass the bottom loop over the top loop and off the peg. Repeat to the next peg to the right, looping twice and passing the bottom loop over the top and off the peg. Repeat for the remaining pegs until you are back to the first pin with a single loop on it.

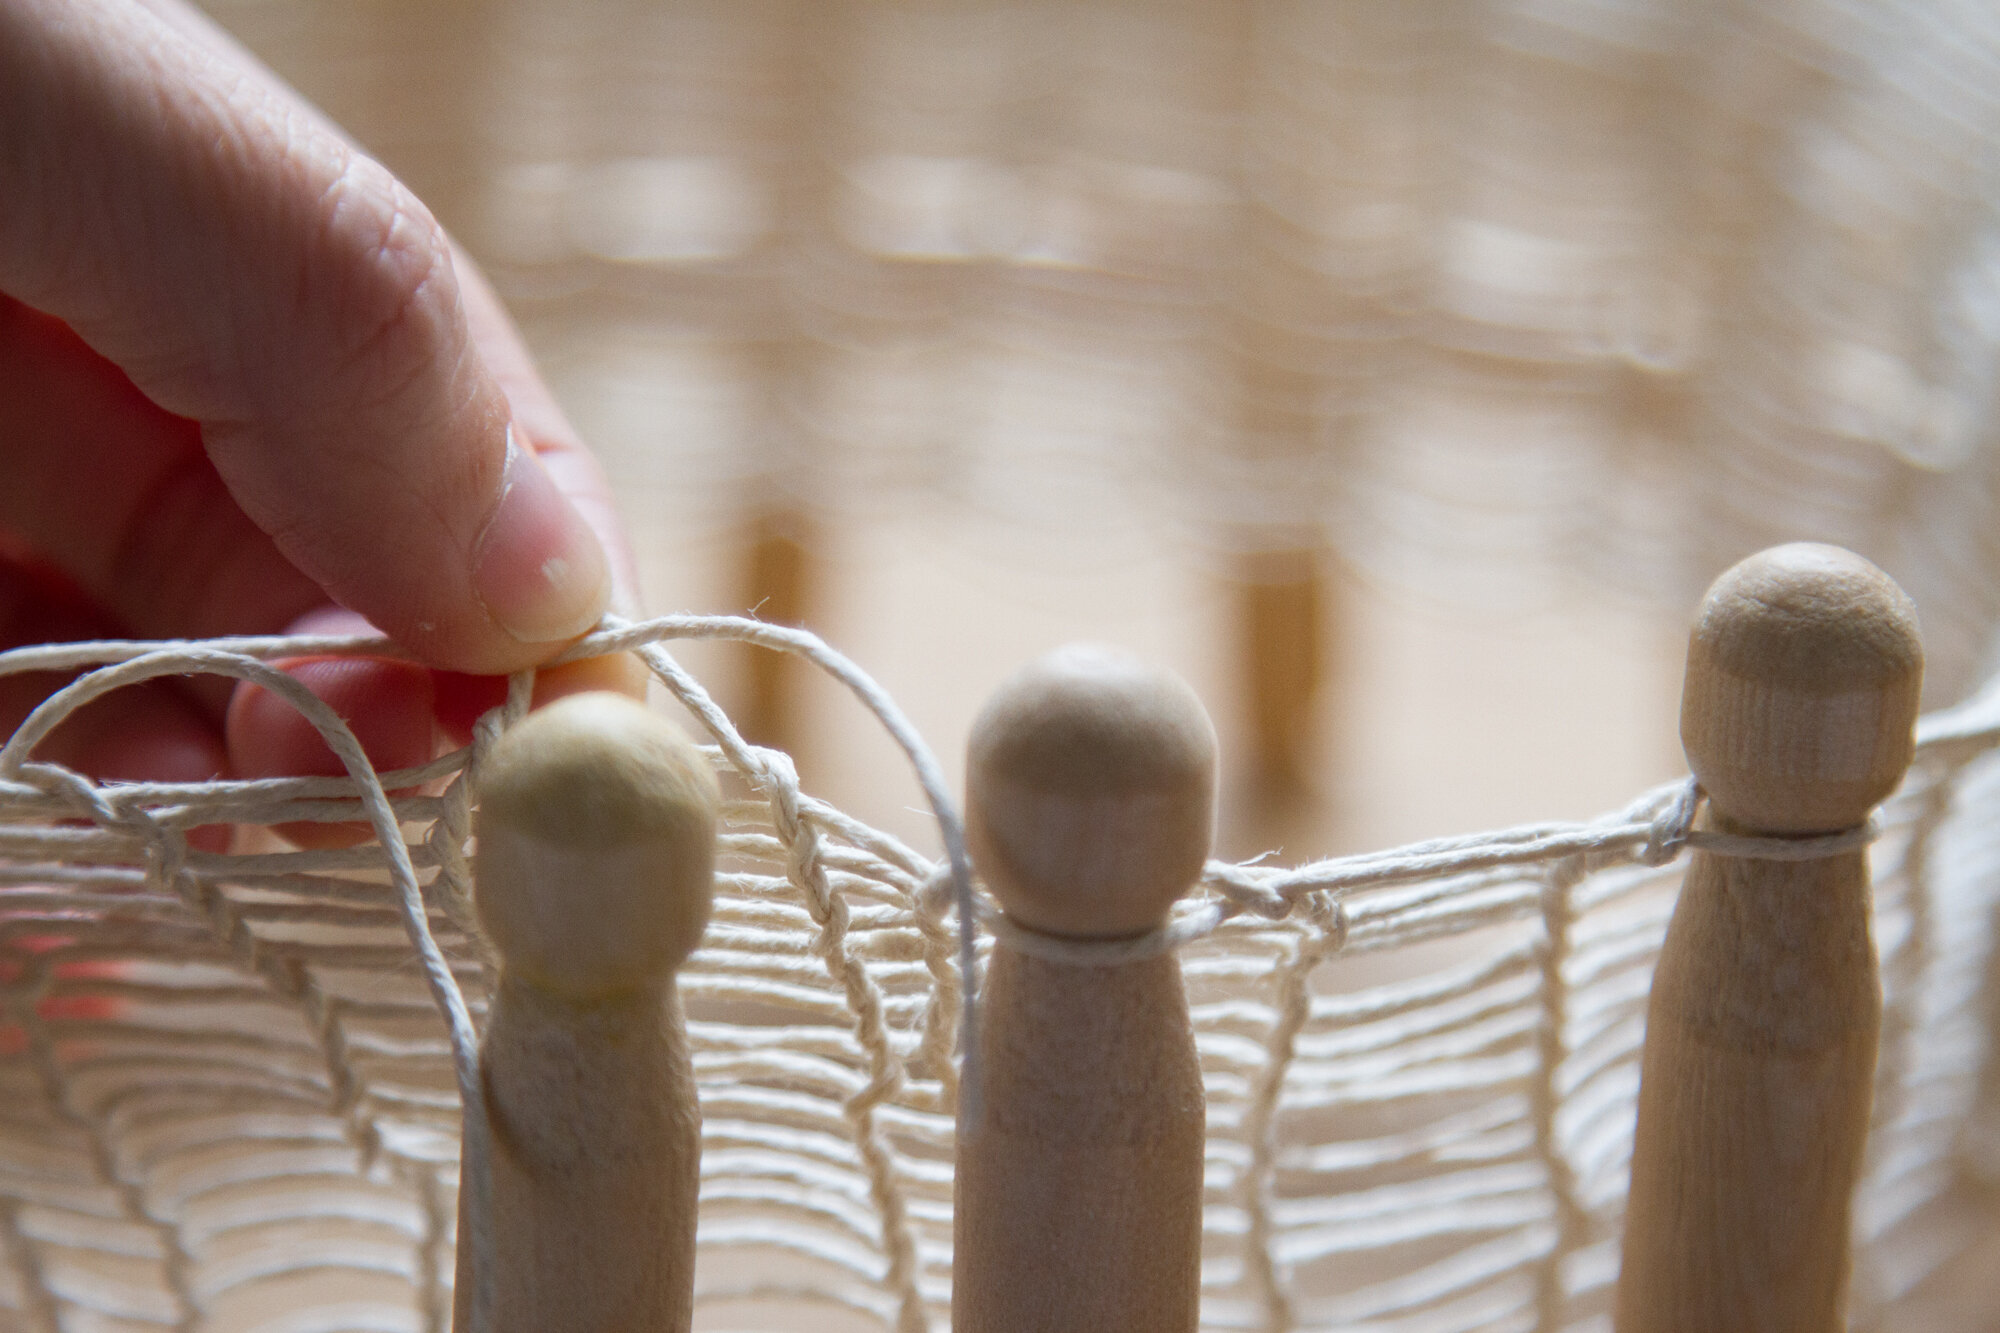
+ To begin weaving, you will not loop the string around the peg. Instead, simply bring the string in front of the peg with one loop below it.
+ Pass the bottom loop over the top string and off the peg. Repeat this technique on all the pegs, rotating the loom to the right. You will need to go around the circle many times to form the bag. The fiber will stretch significantly once off the loom. Weave in the round for 4-6 inches depending on the size you want your bag. The bag will stretch significantly once off the frame.

+ Once you reach your desired length, you will begin to cast off. Cast off starting on the same peg that you began weaving (where you can find the tail end). Cut the string, leaving a 12-inch tail.
+ Carefully slip the first loop off the pin and pass the tail end through the loop. Repeat for all the loops and pegs.
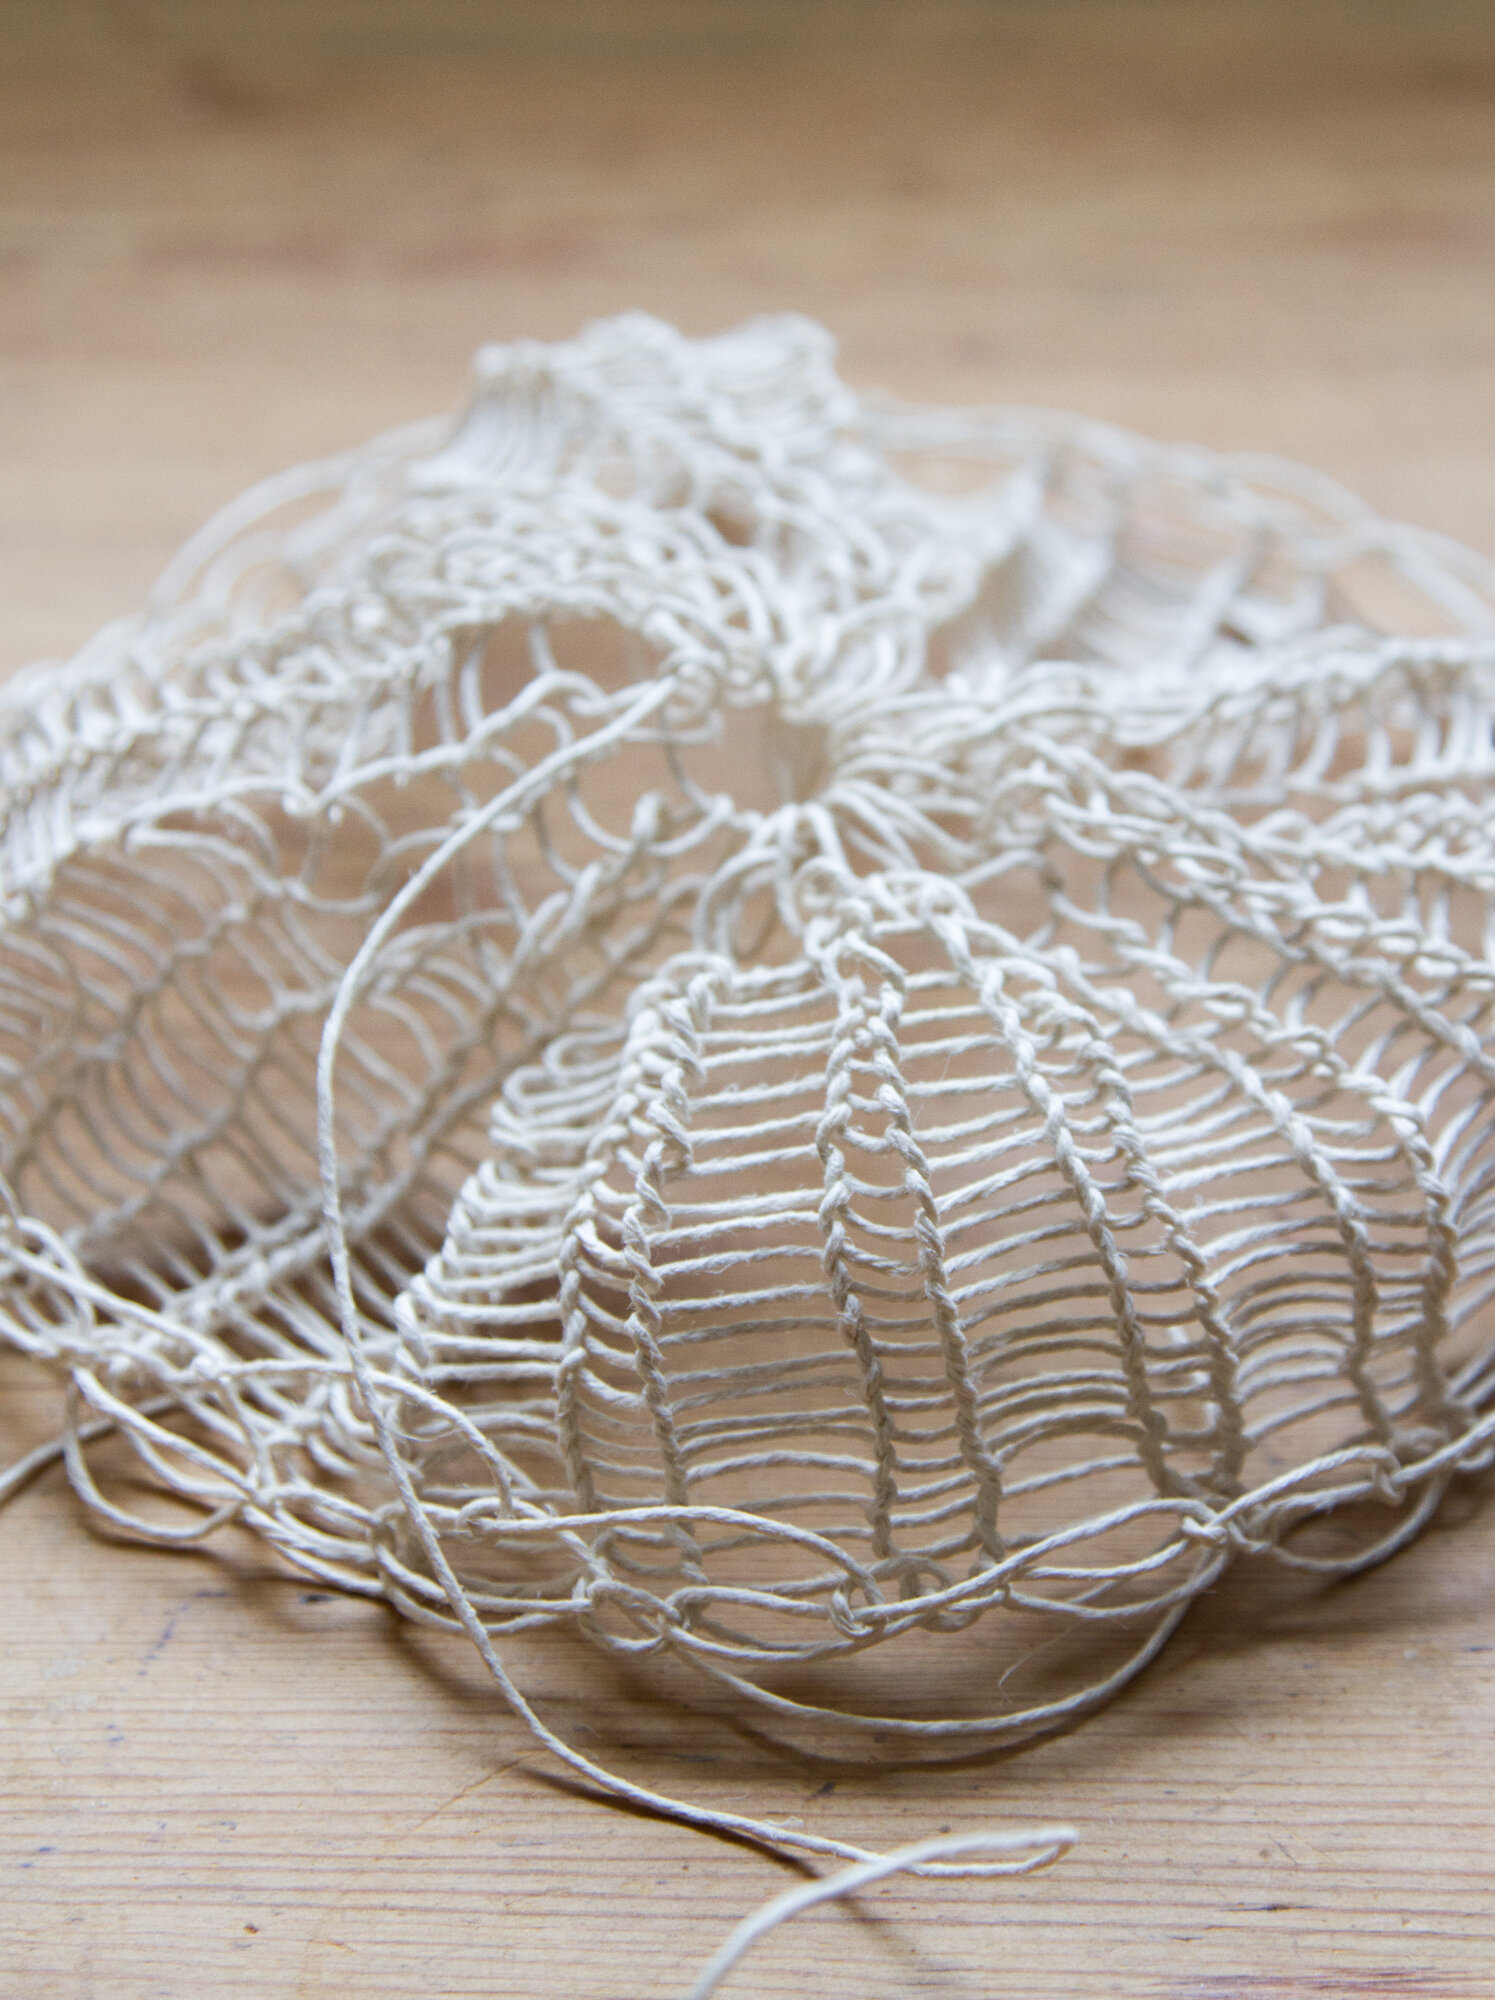
+ Pull the tail end to cinch the bottom of the bag together. Tie a few secure knots through the adjacent loops and weave the tail end into the bag.
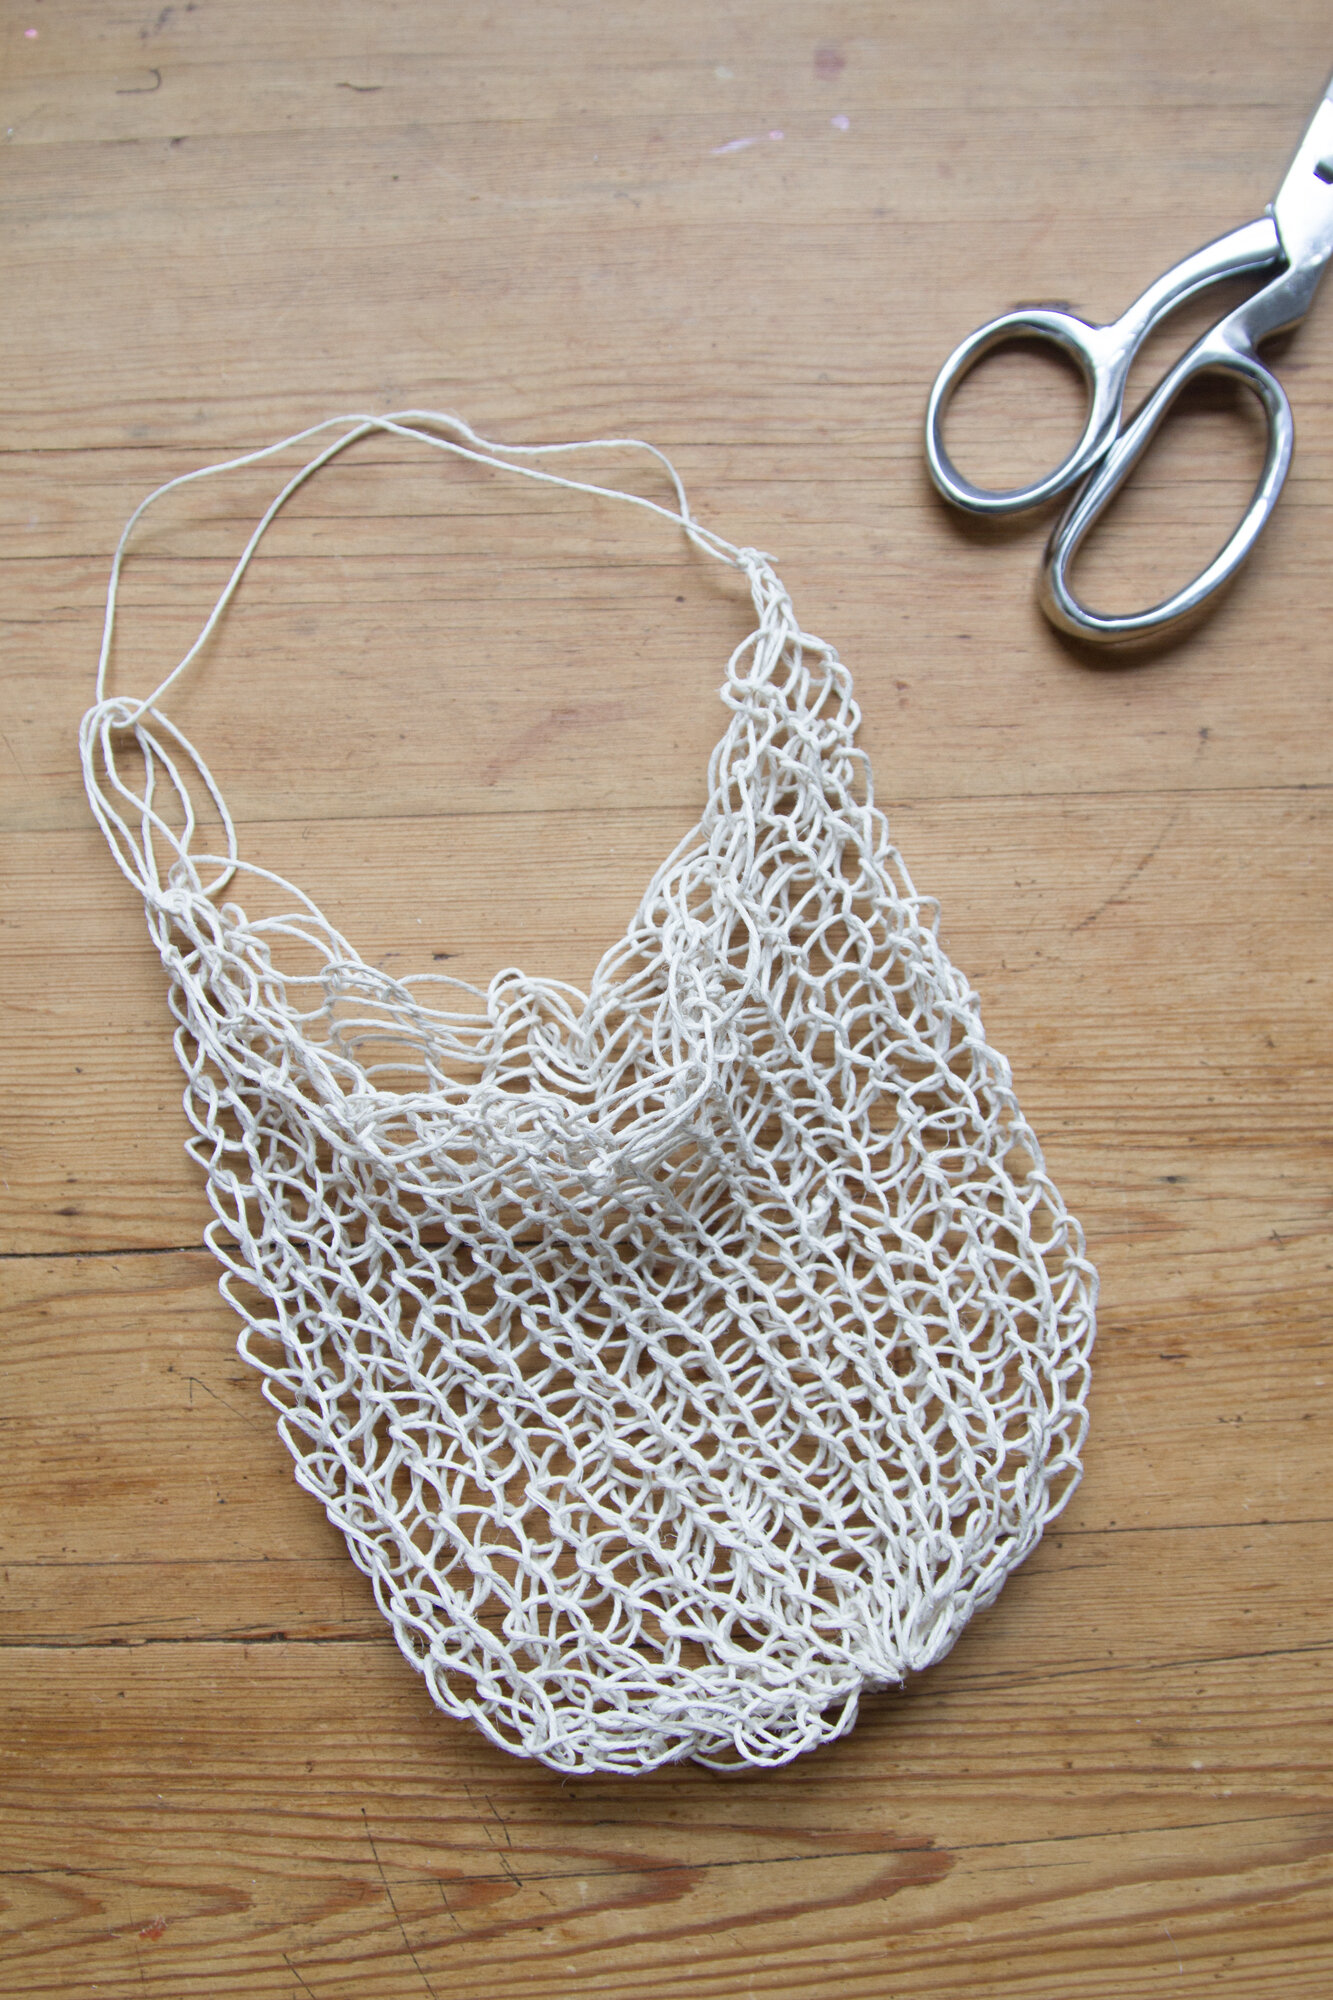
+ To make a handle, use the tail end of the string at the start of the bag. Connect it to the opposite side of the bag, weaving it through an available loop (or two). Bring the tail end back over to where it started and secure a knot.
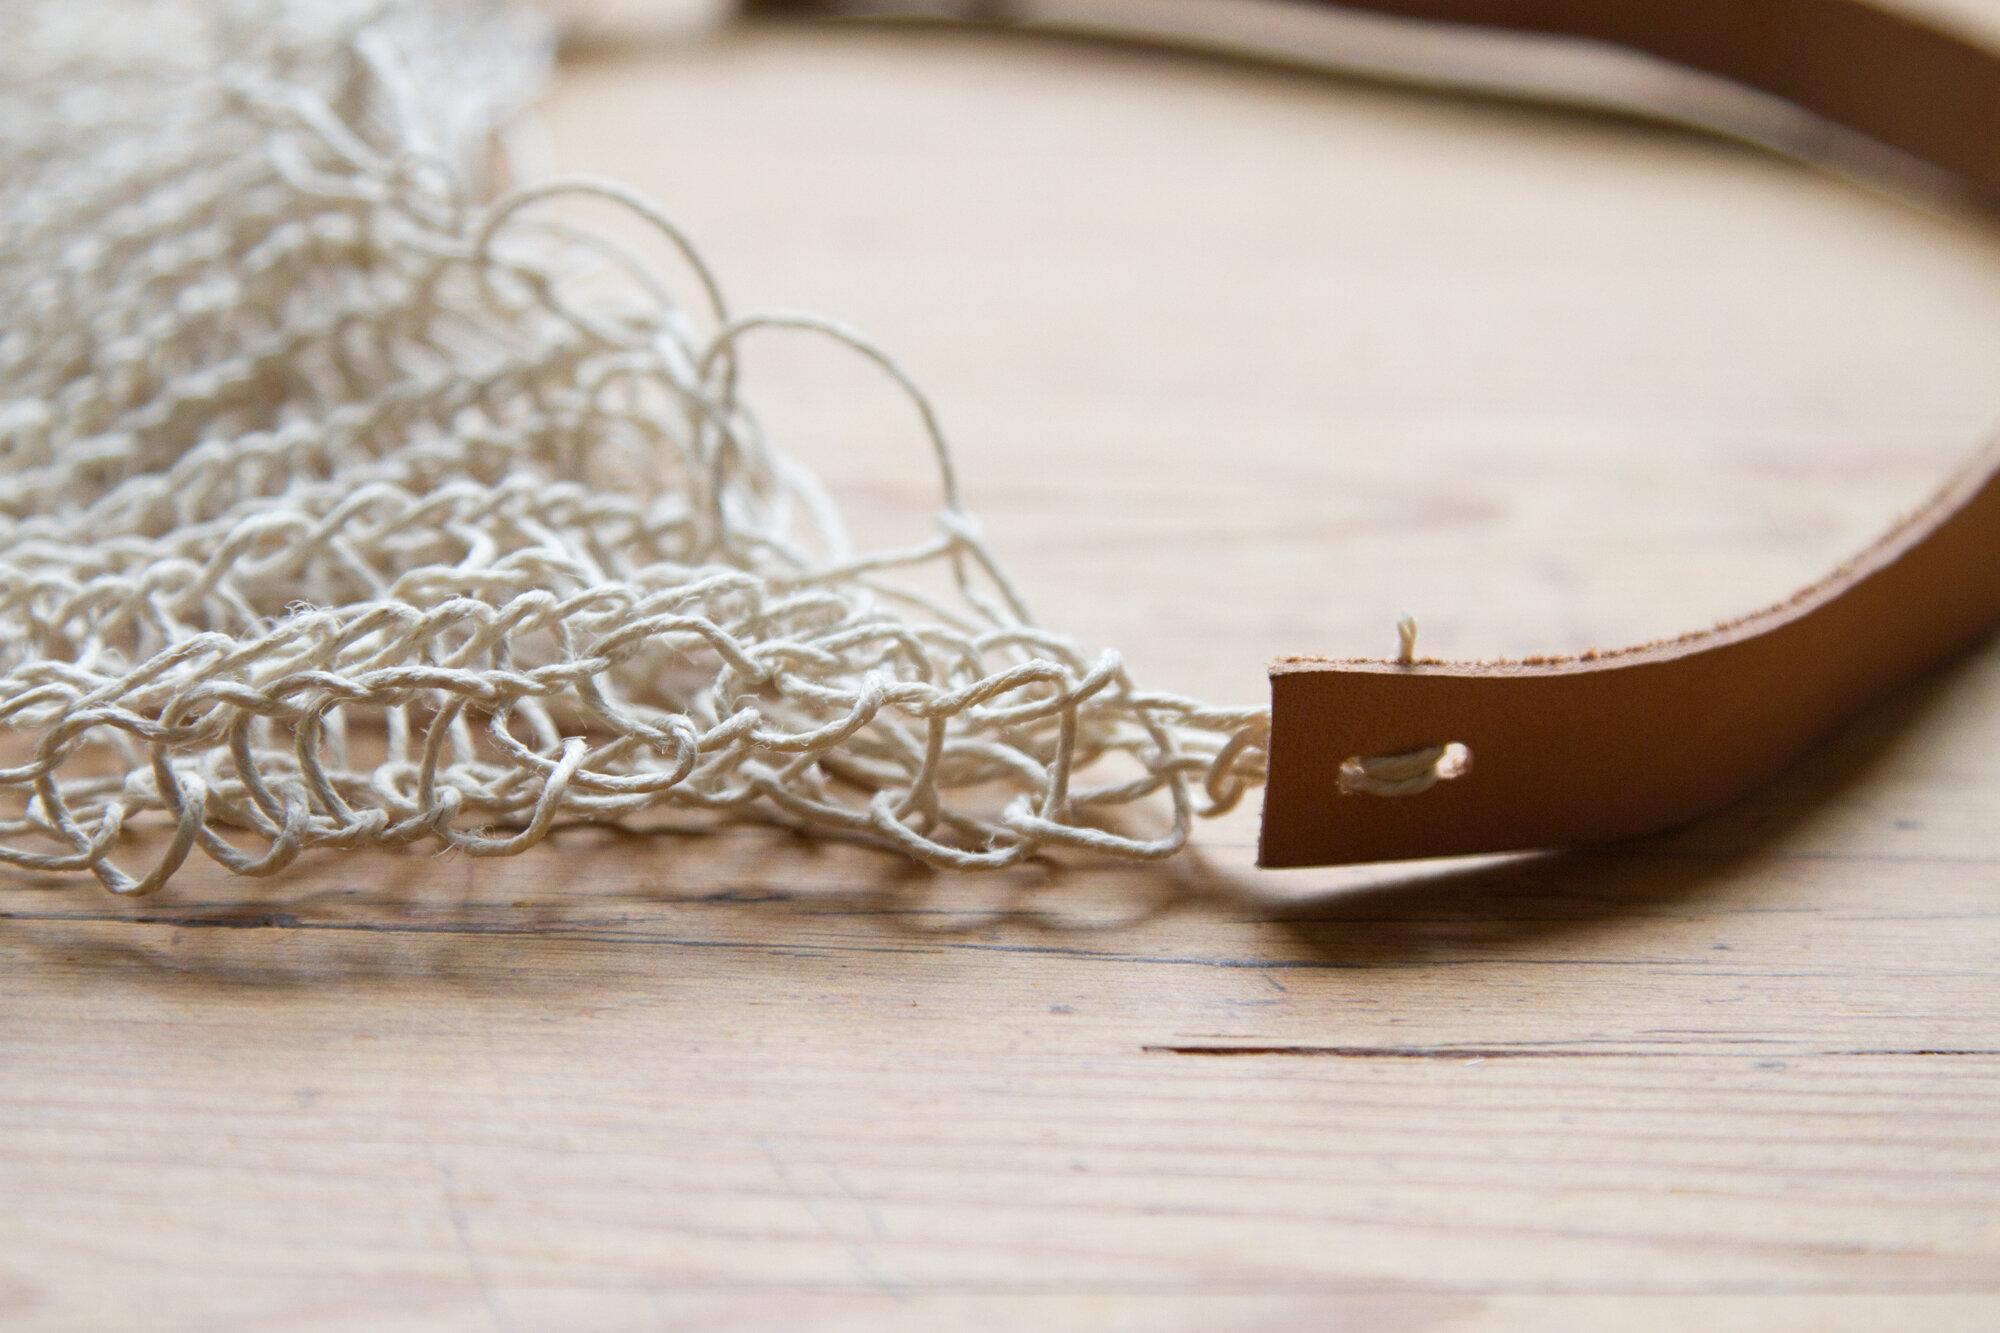
+ If you prefer a wider handle you can use extra string to tie a strap onto either side of the bag.
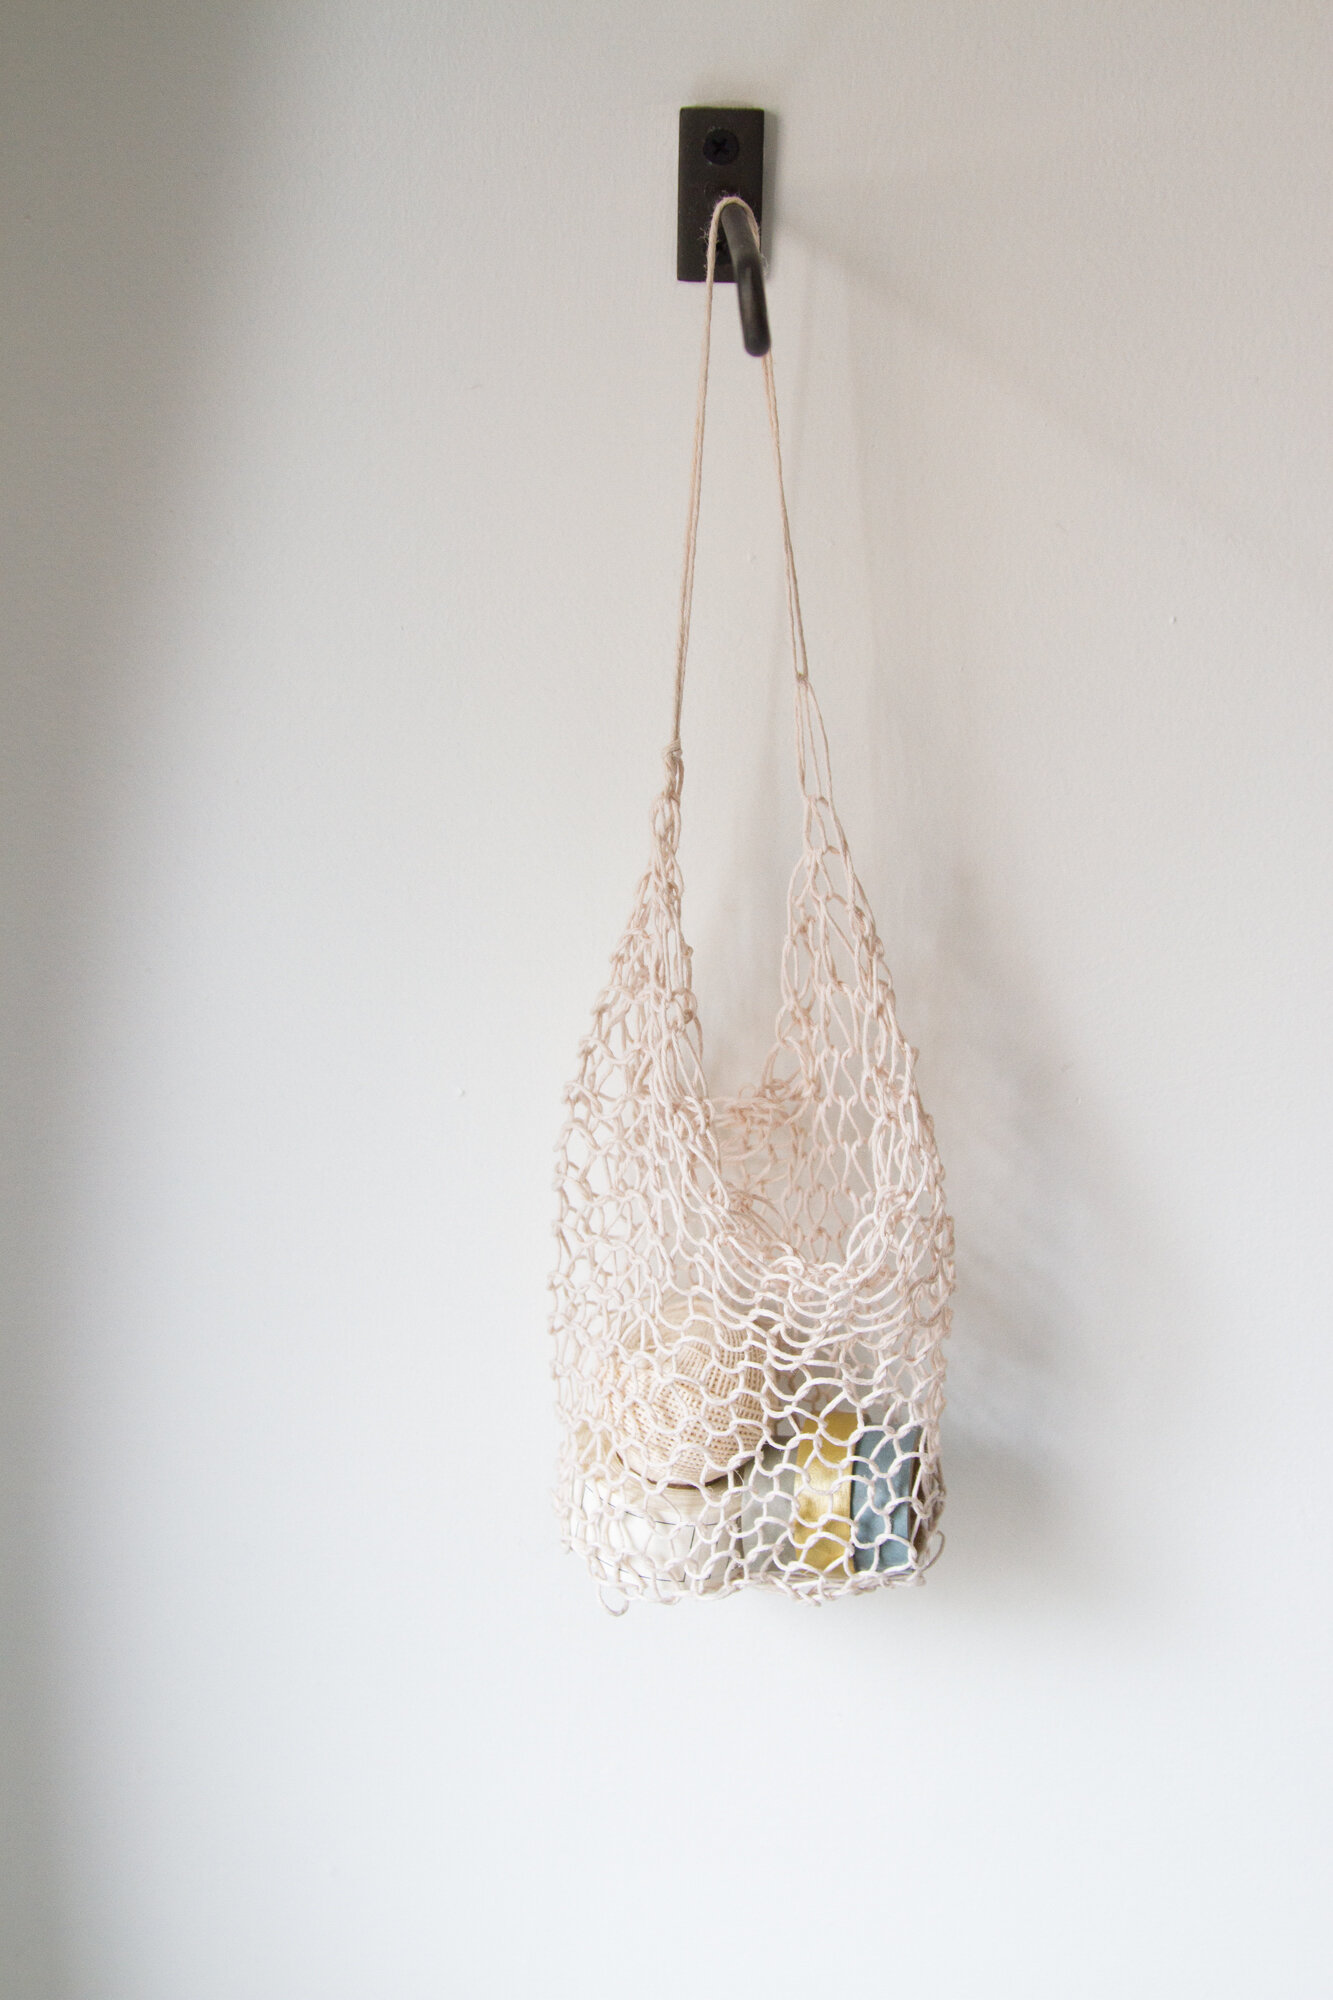
+ Shape your bag and use it to package small gifts and treasures.

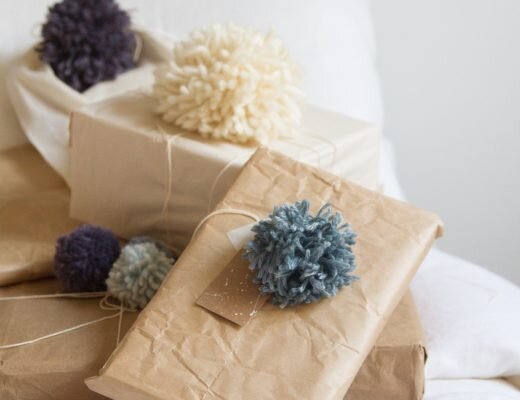
PS. If you’re looking for something else to give, might I suggest candied orange peel? Add a pompom?
Thanks to Rose Pearlman for developing this project and writing the instructions. Rose is an artist, teacher, and textile designer. With a background in fine arts and a love of well designed functional objects, her creations blur the lines between art and craft and pushes the boundaries with non-traditional techniques and materials. Rose teaches monthly rug hooking workshops in and around her home in NYC, and also welcomes commissions for one of a kind constructions in decor and home furnishings. Her work has been featured in fiber magazines, galleries, and numerous online design sites. Her new book Modern Rug Hooking comes out December 3, 2019 and is currently available for preorder wherever books are sold. She lives in Brooklyn, NY with her family.
This post includes affiliate links. Reading My Tea Leaves might earn a small commission on the goods purchased through those links.


19 Comments
WOW!!! Very cool!
This is technically loom knitting, not weaving-you are actually creating knit stitches! Fun idea.
Love it this project, I was searching for a quick project to replace plastic bags. I must say, your photos are so good to the point of being distracting!! You go girl!
gonna have to try this out, it looks darling! And somewhat simple 🙂
looks beautiful – cant wait to try it! talking making gifts this way: https://tps-steph.blogspot.com/2018/12/0025-tps-gift-making.html
Love it!
Yep, very clever idea using the hoop and clothes pins, and string to make the bag. As stated in one of the previous comments, this isn’t weaving, but loom knitting ( and right away reminded me of spool knitting but on a giant scale, think wooden spool with nails in it, or the little wooden ladies with points on their heads and a hollow body)
You’re absolutely right! This is what I thought of when I first saw it. It is a great idea for shopping bags though. By the way, I spool knit all the time
Hi Erin,
I have been desperately wanting success with this, but despite trying like 6 times I had no success. I think I found that the instructions and the photos didn’t seem to correspond (or at least how I was interpreting it). It seemed like one end of the string (the tail) needed to be free at all times, but the 4th instructional photo looks like 2 ends of the string are being looped around each peg. I realise this is a difficult thing to instruct (as it’s been difficult for me to describe where my problems lie!) but I was hoping you might have some words of guidance for me!
Thanks!
Sorry you’ve been struggling! I’m not exactly what you mean, but only end of the string travels around the circle! Let me know if you have more questions and I can try to help troubleshoot!
If you look at a round-loom knitting tutorial on line, you will quickly see that this is simple round loom knitting and it is easy to do!
Finally made this bag, love how easy it is. Now to make in different sizes and colours. I sew a cotton handle on with pretty fabrics
Hi Erin, thanks for this! What type of cord are you using here?
Thank you!!
This is the hemp twine!
I think I’m going to do this! Except, I’m planning on making my own twine/string as well– from plastic bags! Less attracted, more “reduce, reuse, recycle” !
So great! I bet it will look terrific! Would love to see a photo when you’re finished!
you have a youtube video?
i’ve got videos saved on my instagram page!
Finally making this. Loving it.
Comments are moderated.