
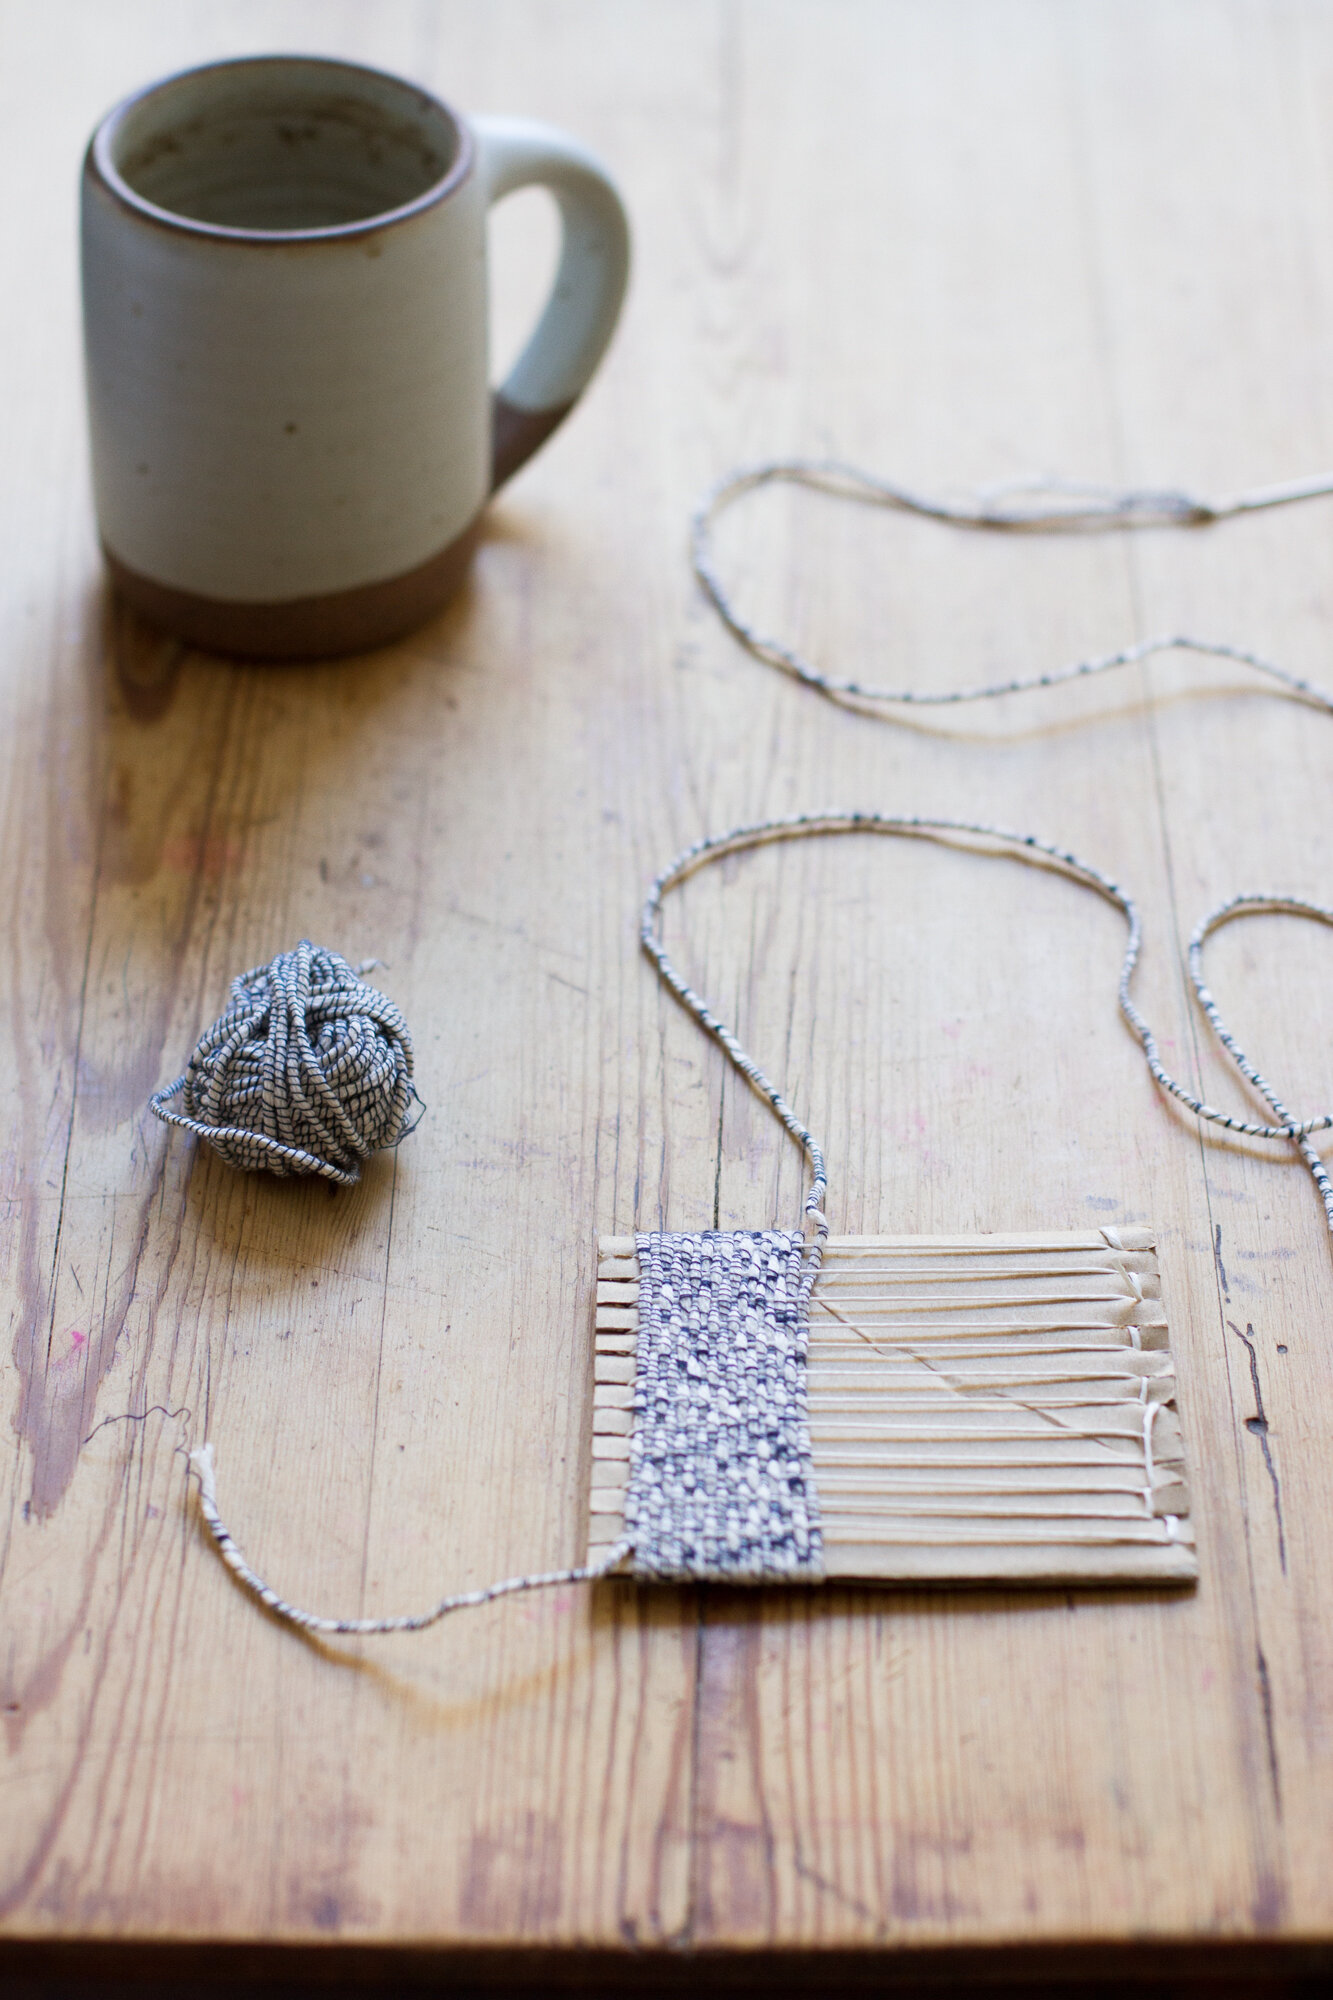
In case you need a tiny project to keep you company on a long train ride this week, or to help you quiet your mind and transition from work to wonder, here’s a tiny woven pouch project from Rose Pearlman. It ticks off all the usual requirements of being both beautiful and useful, and its diminutive size means it provides a solid helping of whimsy without being too onerous to finish.
I used a small bundle of Japanese wrapped cotton cord to make mine, but humble butcher’s twine is also great, as Rose shows below, and just about any kind of leftover string or yarn could be used depending on your stash and your style.
It’s not a mindless project, per se, and it does require a bit of concentration, but the concept is simple and the reward is quick to come and satisfying. It’s the perfect project to occupy an older child in your midst, and you wouldn’t be wrong to tuck the materials into an Easter basket or travel bag for making at a later date.

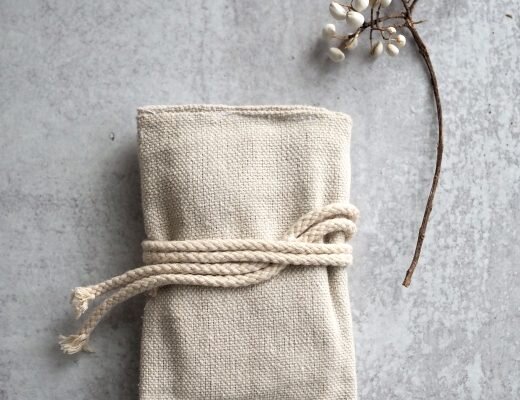
Once complete, the possibilities, though tiny, are endless. I’ve tucked a glass bottle in mine and added a few tiny flowers. It could be a place to tuck a few extra clothespins, a storage spot for bobby pins, an elegant place to hide a neighbor’s house key in plain sight, the place to convince your family members to please, please return the nail clippers, et cetera. Weave one for a small child and you’ll see it filled with pebbles, and acorns, and bottle caps, not to mention whatever other treasures they pick up on the route home from school. Materials and directions from Rose are below.
From Rose:
Whether foraging for delicate bits of nature to bring home or toting around a much needed chapstick, the pouch is a tiny space for holding treasures close.
This woven pouch tutorial uses a small piece of cardboard to construct a simple two-sided loom. By weaving the front and back of the cardboard and working in the round, you create a small pouch that does not require any additional sewing or piecing together. This is a great project for using up any remnants of yarn or string.
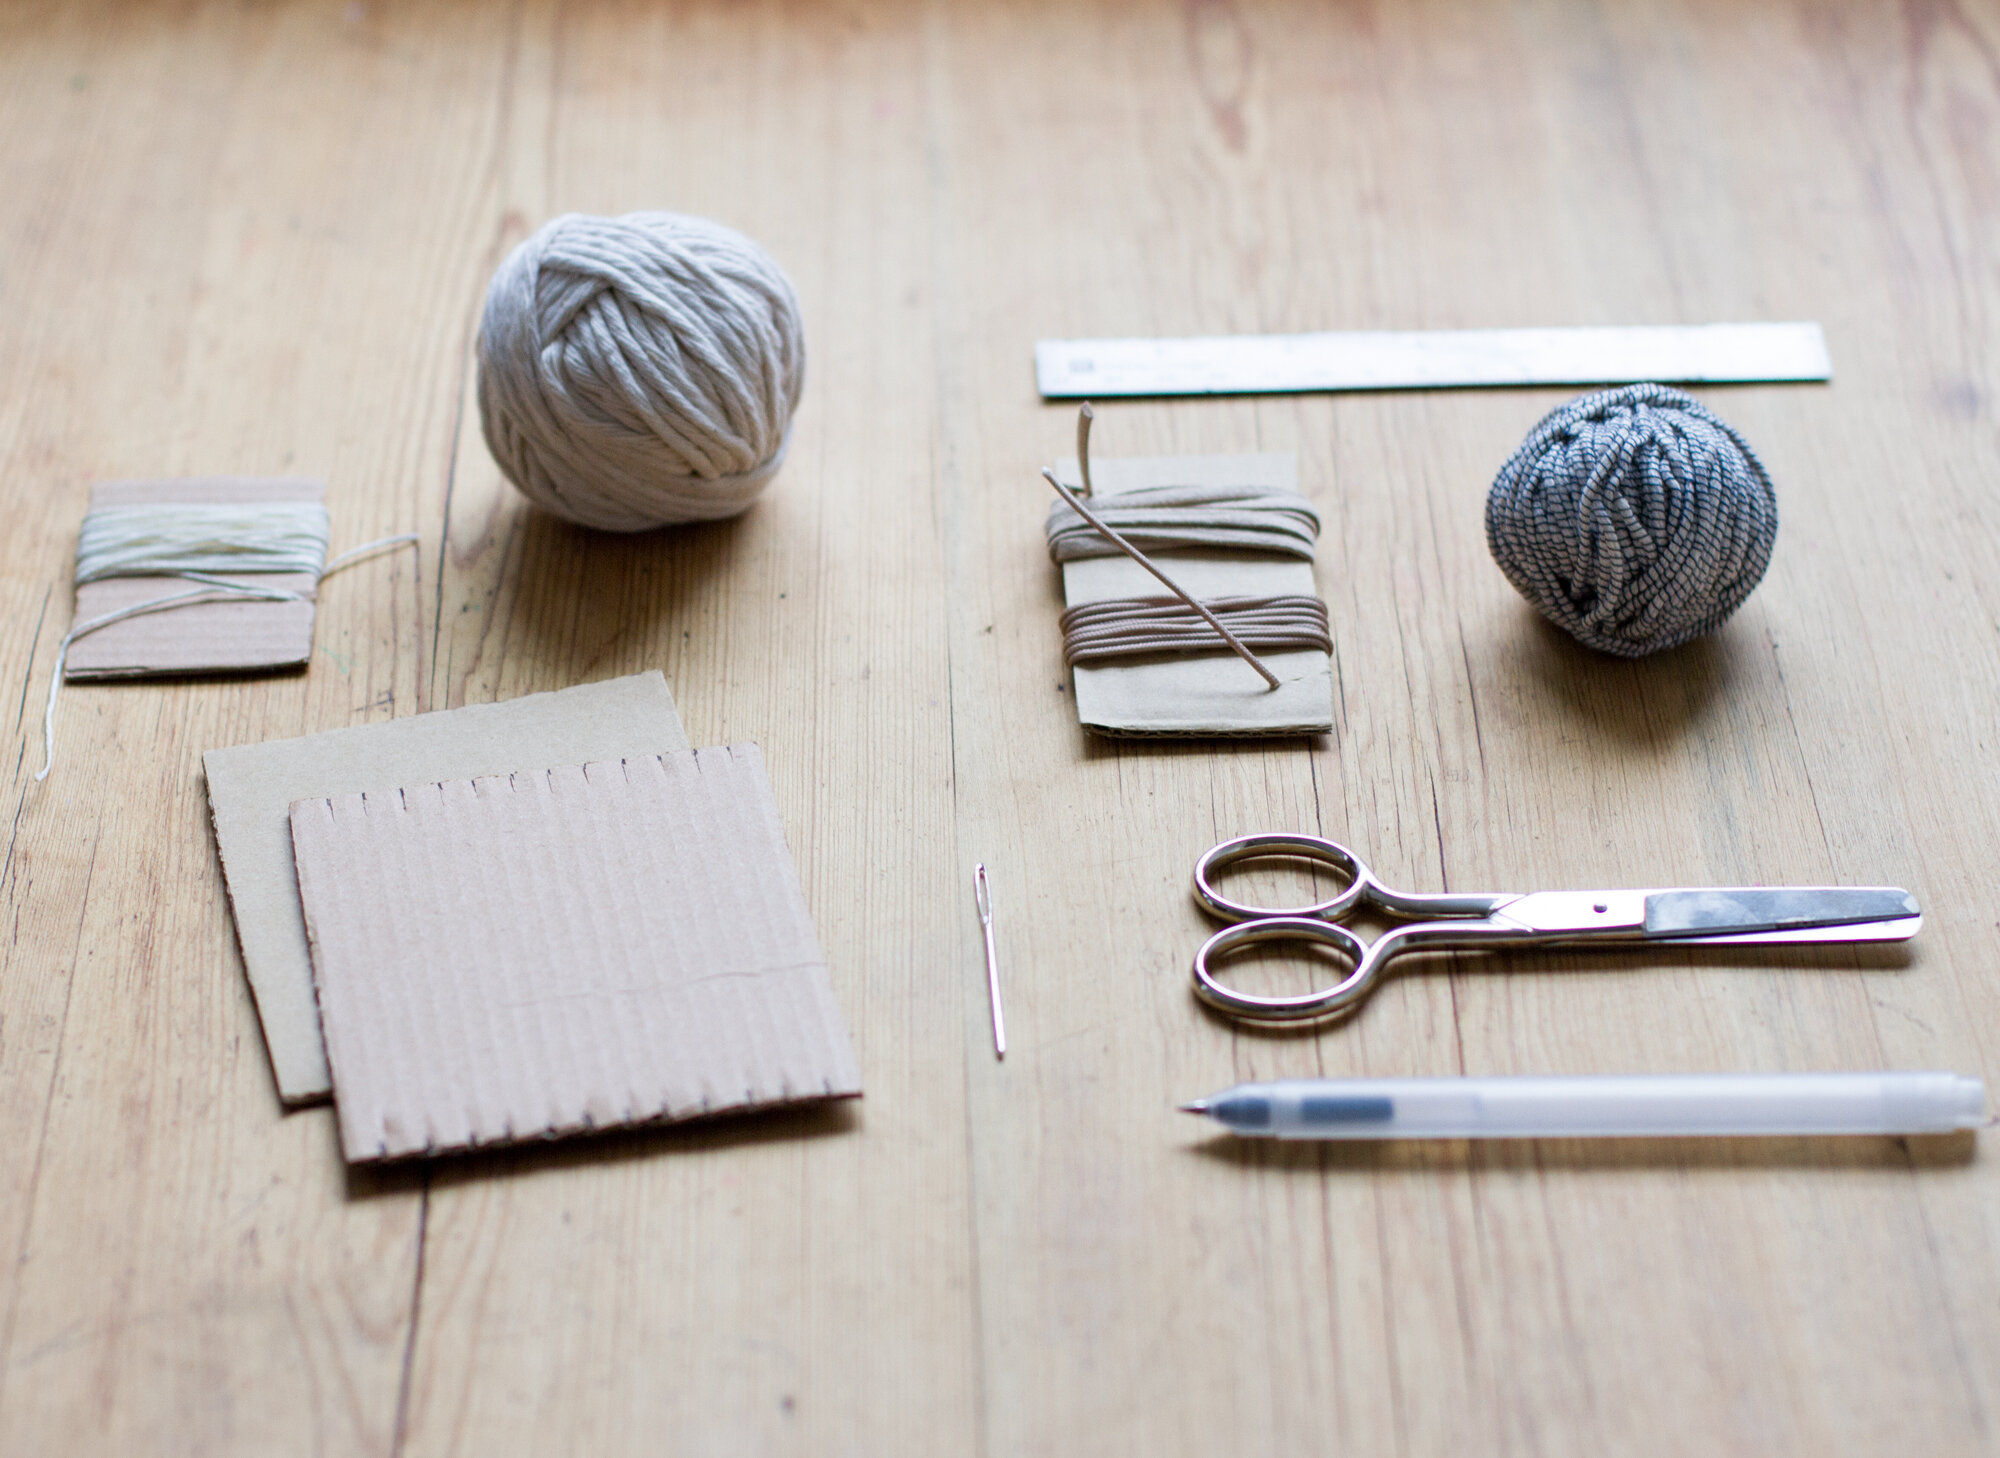
Materials:
+ Corrugated cardboard roughly 3 ¼” x 4” for a small pouch
+ Cotton string or yarn/fiber of choice for weaving, (roughly 5-6 yards.) I used kitchen twine (similar). (Erin used a special Japanese wrapped cotton string.)
+ 3 yards of strong string to create the warp (even dental floss will do!)
+ ¾ yard of cord or extra string for the cord tie or necklace strap
+ Ruler
+ Pen/pencil
+ Scissors
+ Darning needle
Directions:
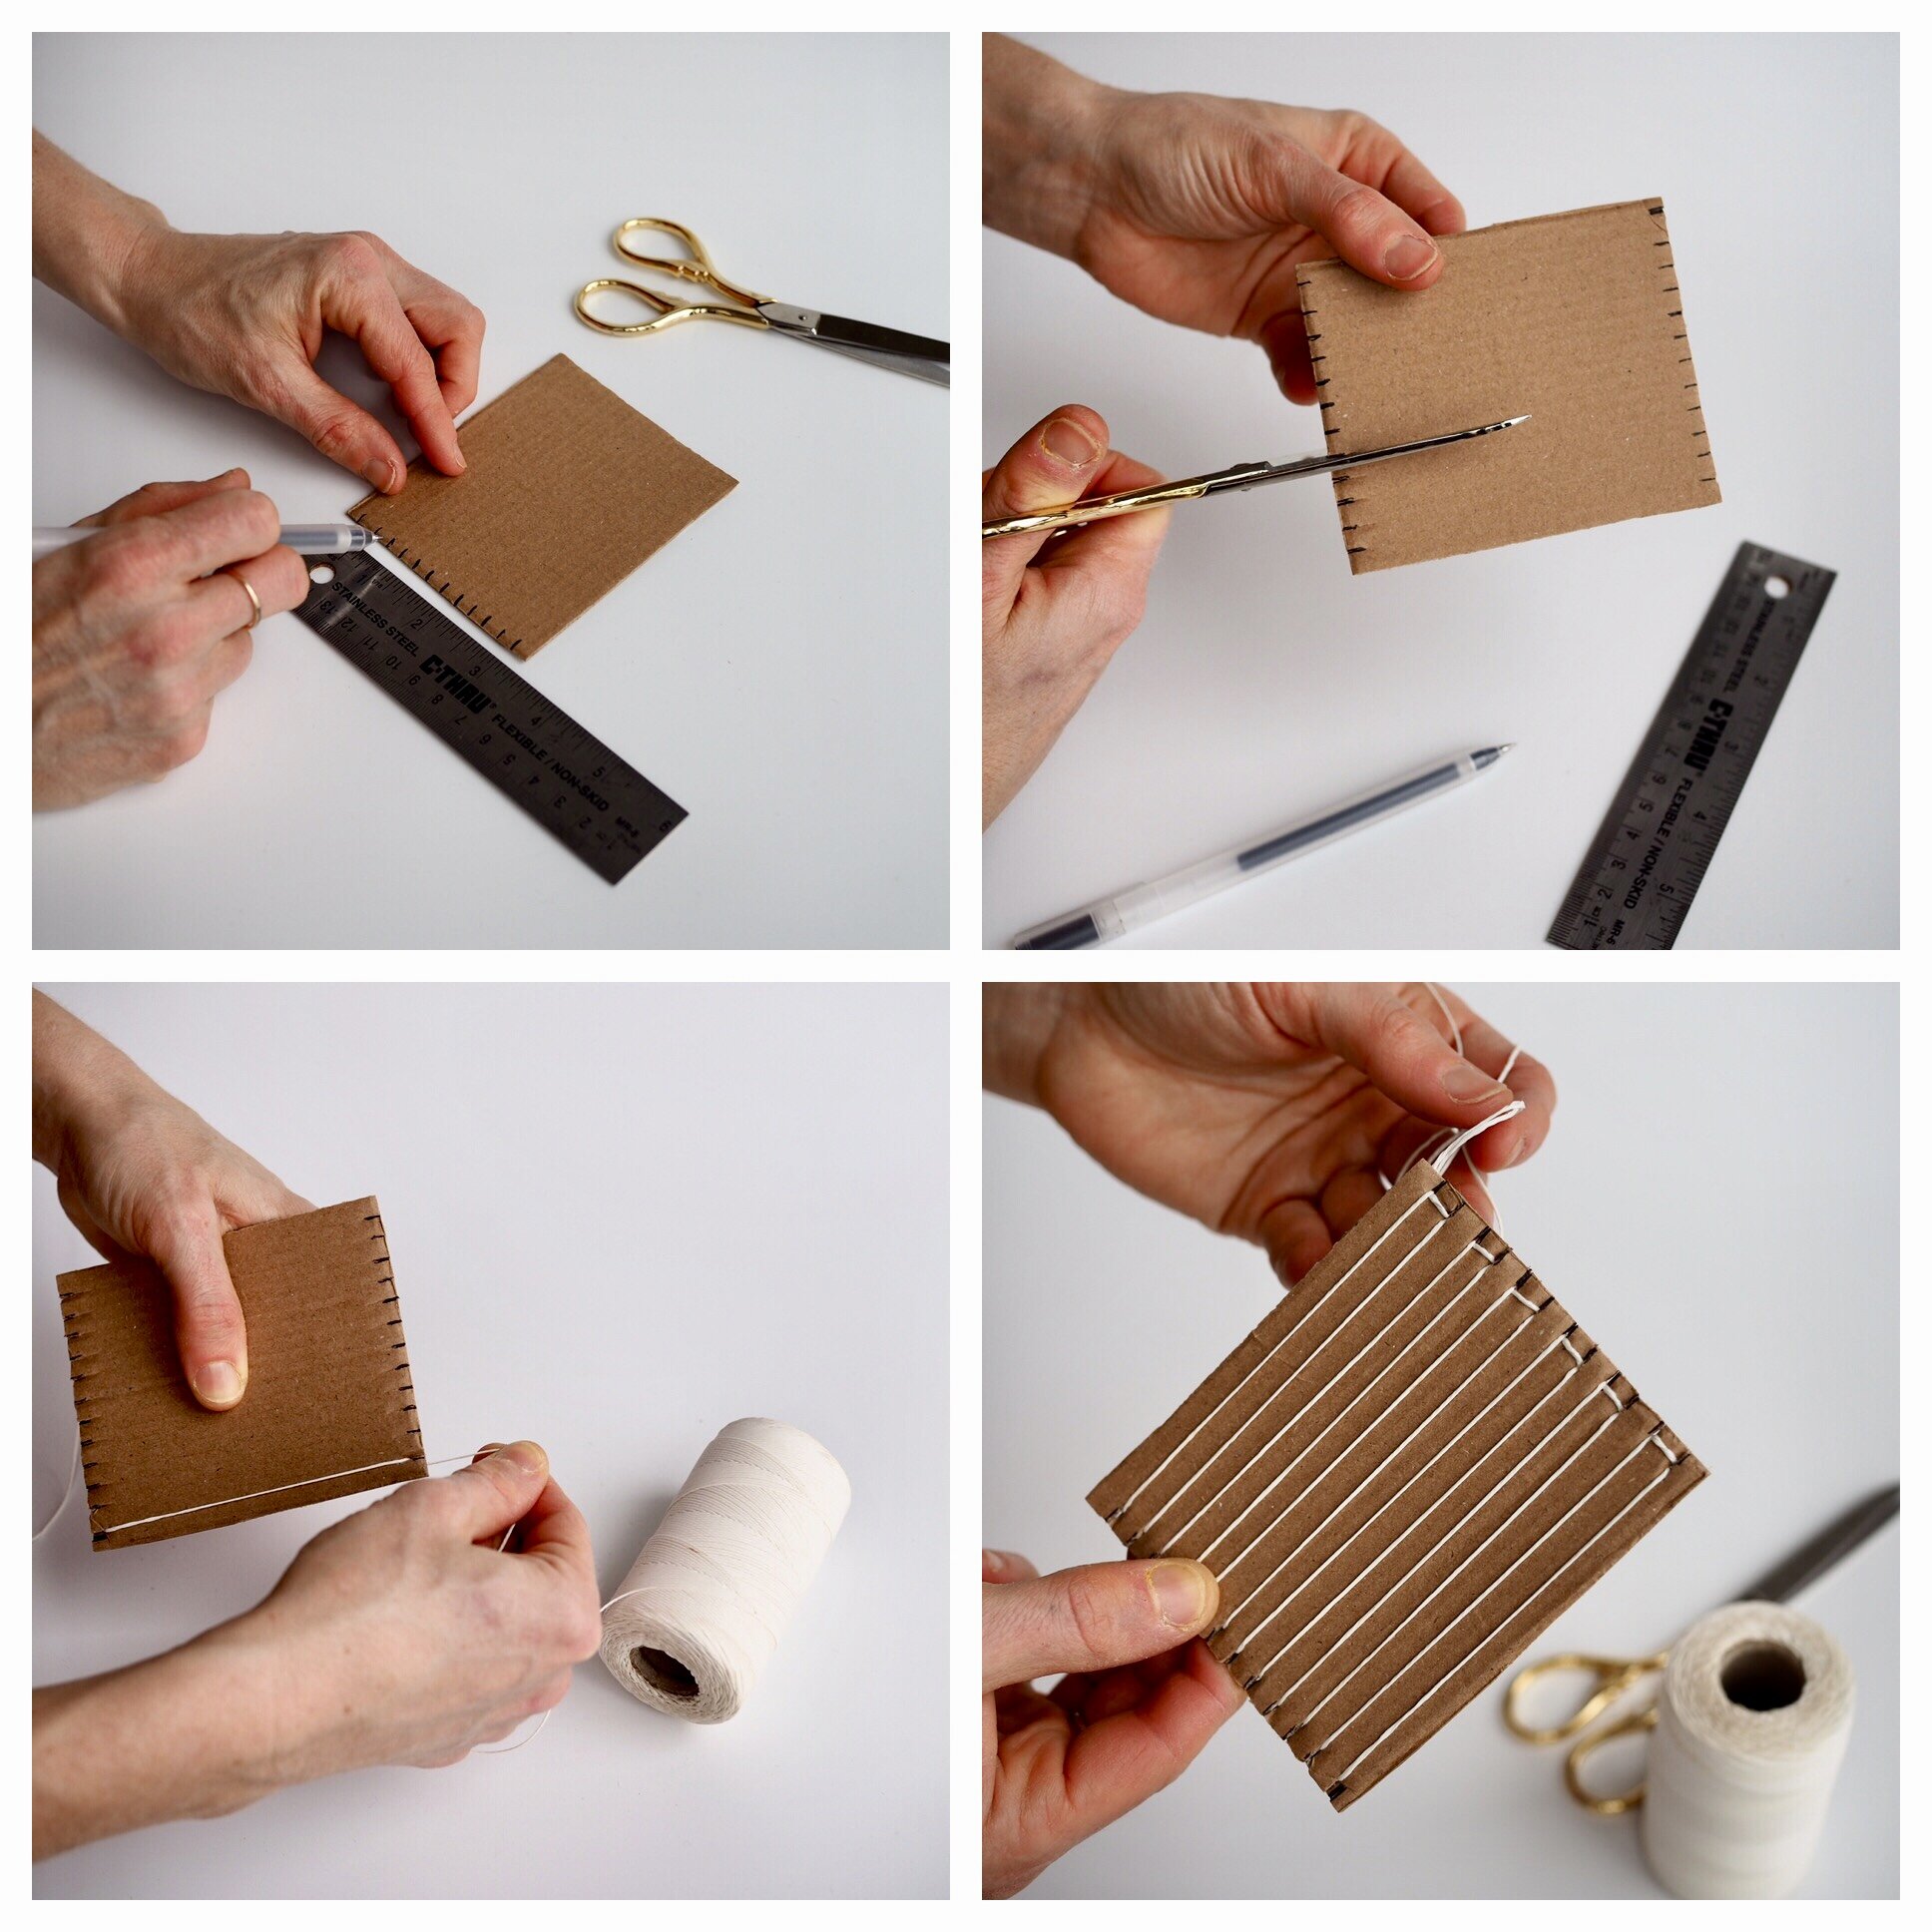
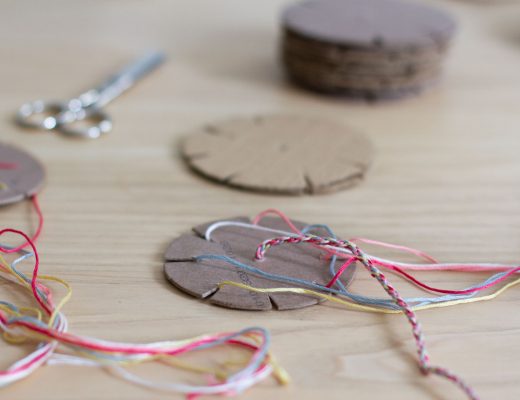
+ Start by cutting out a 3 ¼”x 4” rectangle of corrugated cardboard.
+ On the two short sides of the cardboard mark off ¼” segments along the top and bottom edges using a pencil or pen. These marks should line up.
+ Using a scissor, cut ¼” slots along the pen marks making small notches in the cardboard.
+ With the 3+ yards of strong string, begin to warp your loom starting from the upper right corner notch. Leave a 3” tail to weave in later, bring the working string down from top notch and through the notch on the opposite end of the cardboard. Continue to bring your string up and around the back of the cardboard and through the same notch that you started in. Wind the string around the front of the second notch. Bring the string down the back of the cardboard through the second bottom slot and up to the front and again through the second upper notch. Wrap the string around the back of the third notch and continue to warp your loom in this manner.
+ You will notice when warping your loom that every other top notch will have a visible wrapped string, and the backside of the cardboard loom will have the alternate wrapped notches. Make sure you have set your warp up so that the tension is nice and taught and the string is through every cut slot.
+ When you reach the last upper left notch of your cardboard loom, cut 3” of extra string and wrap it through the existing notches so it will not be in your way when weaving. Repeat for the extra string at the start of the loom. These end strings will be woven into the final pouch when finished weaving.
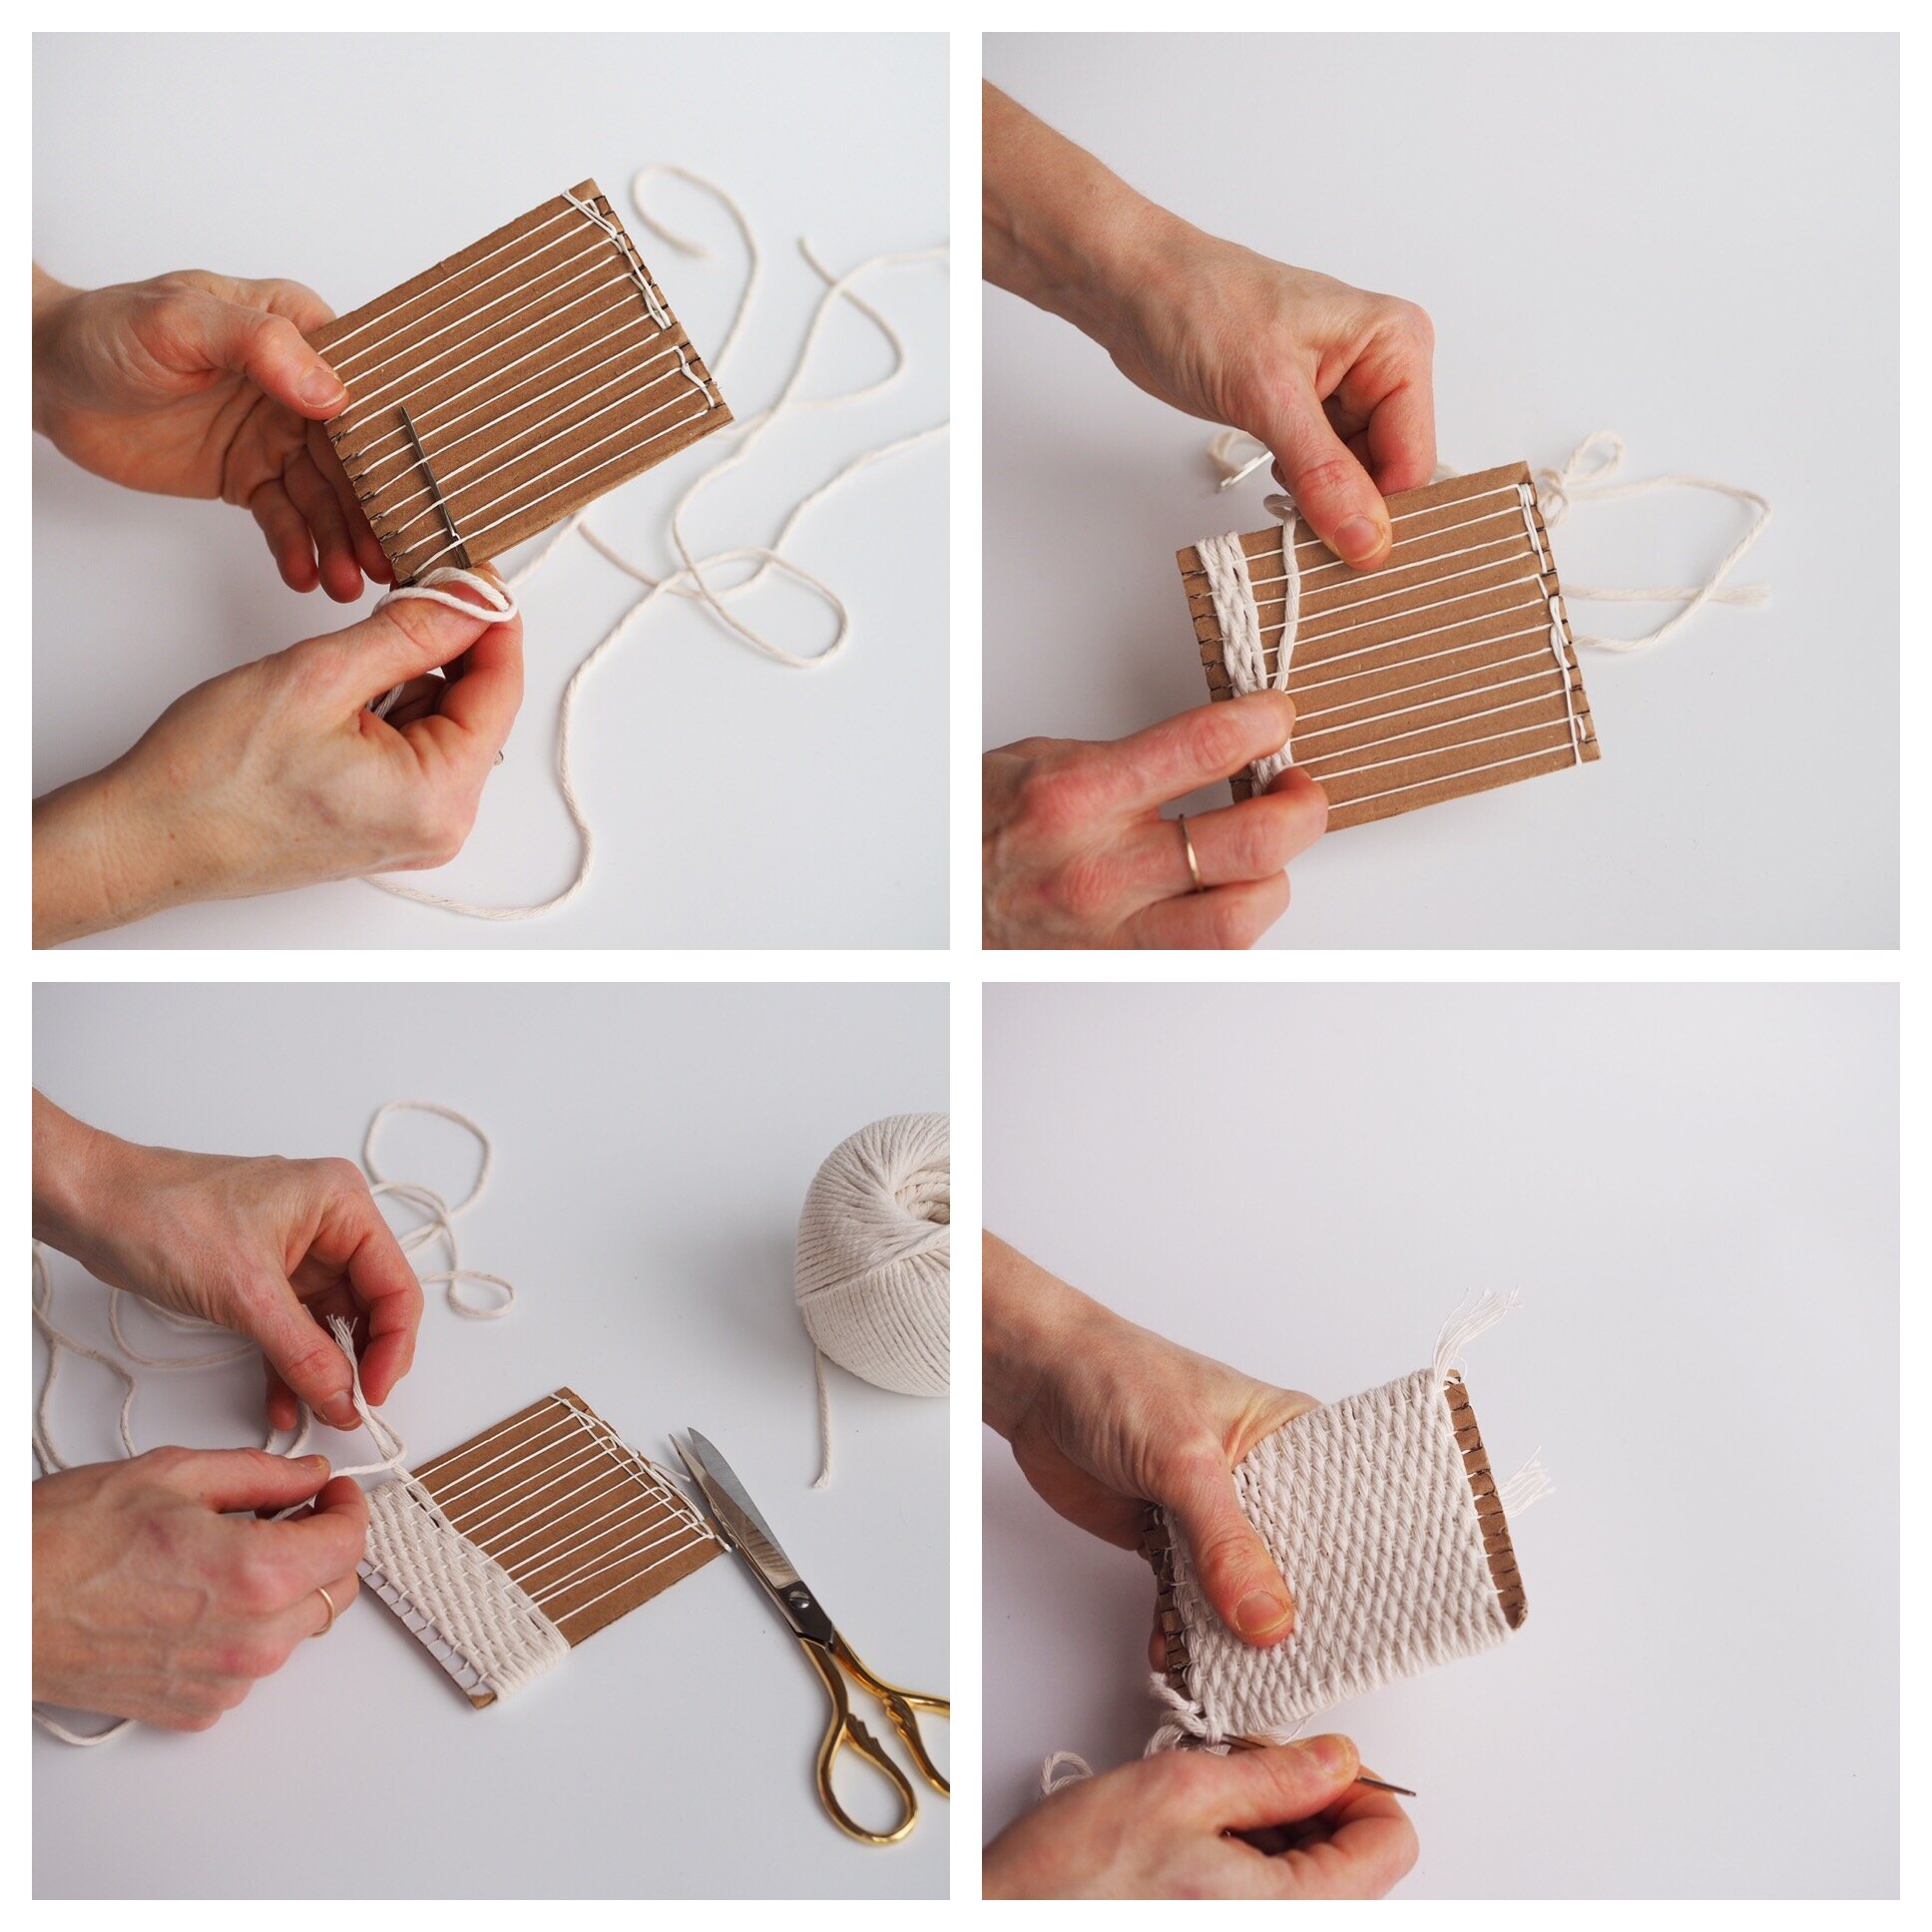
+ To begin weaving, thread a long piece of fiber with your darning needle.
+ Start to weave on the bottom right of your loom. Alternate between going under and over every string, creating a basic tabby stitch. Pull your fiber all the way through until there is 3” of a tail left. This tail will be woven in at the end. When you finish weaving the last warp string on the front of your cardboard, turn it to the back and continue with alternating over/under on the back of the loom.
+ In this way you will be weaving on both sides of the cardboard; be sure you alternate going under and over each warp thread and weaving in a circle.
+ Check your work for accuracy every few rows to be sure that the alternate stitch is directly above. Press down on the fibers to create a tightly woven pouch. Packing your fibers tightly will ensure that you have a densely woven fabric able to securely hold small objects.
+ When you use up the length of your working fiber and need to add another strand, overlap the two tail ends for a few stitches and continue with the new fiber. These tail ends will be woven in at the end and concealed inside the pouch.
+ Continue to weave until you are 3/4” from the top of your loom. If you want to add a drawstring here, weave an alternative shorter piece of cord (sting) through the front and back of the next round. The tail and start of this cord can be used as a cinch tie or to wear your pouch as a necklace. Rethread your darning needle back with the original fiber and continue to fill the rest of your loom.
+ Fill your loom to the top, making sure you have very little extra space left and the fibers are all packed in tightly. Cut any fiber to 3” (not including the drawstring) and weave in all remaining tails into your woven work.
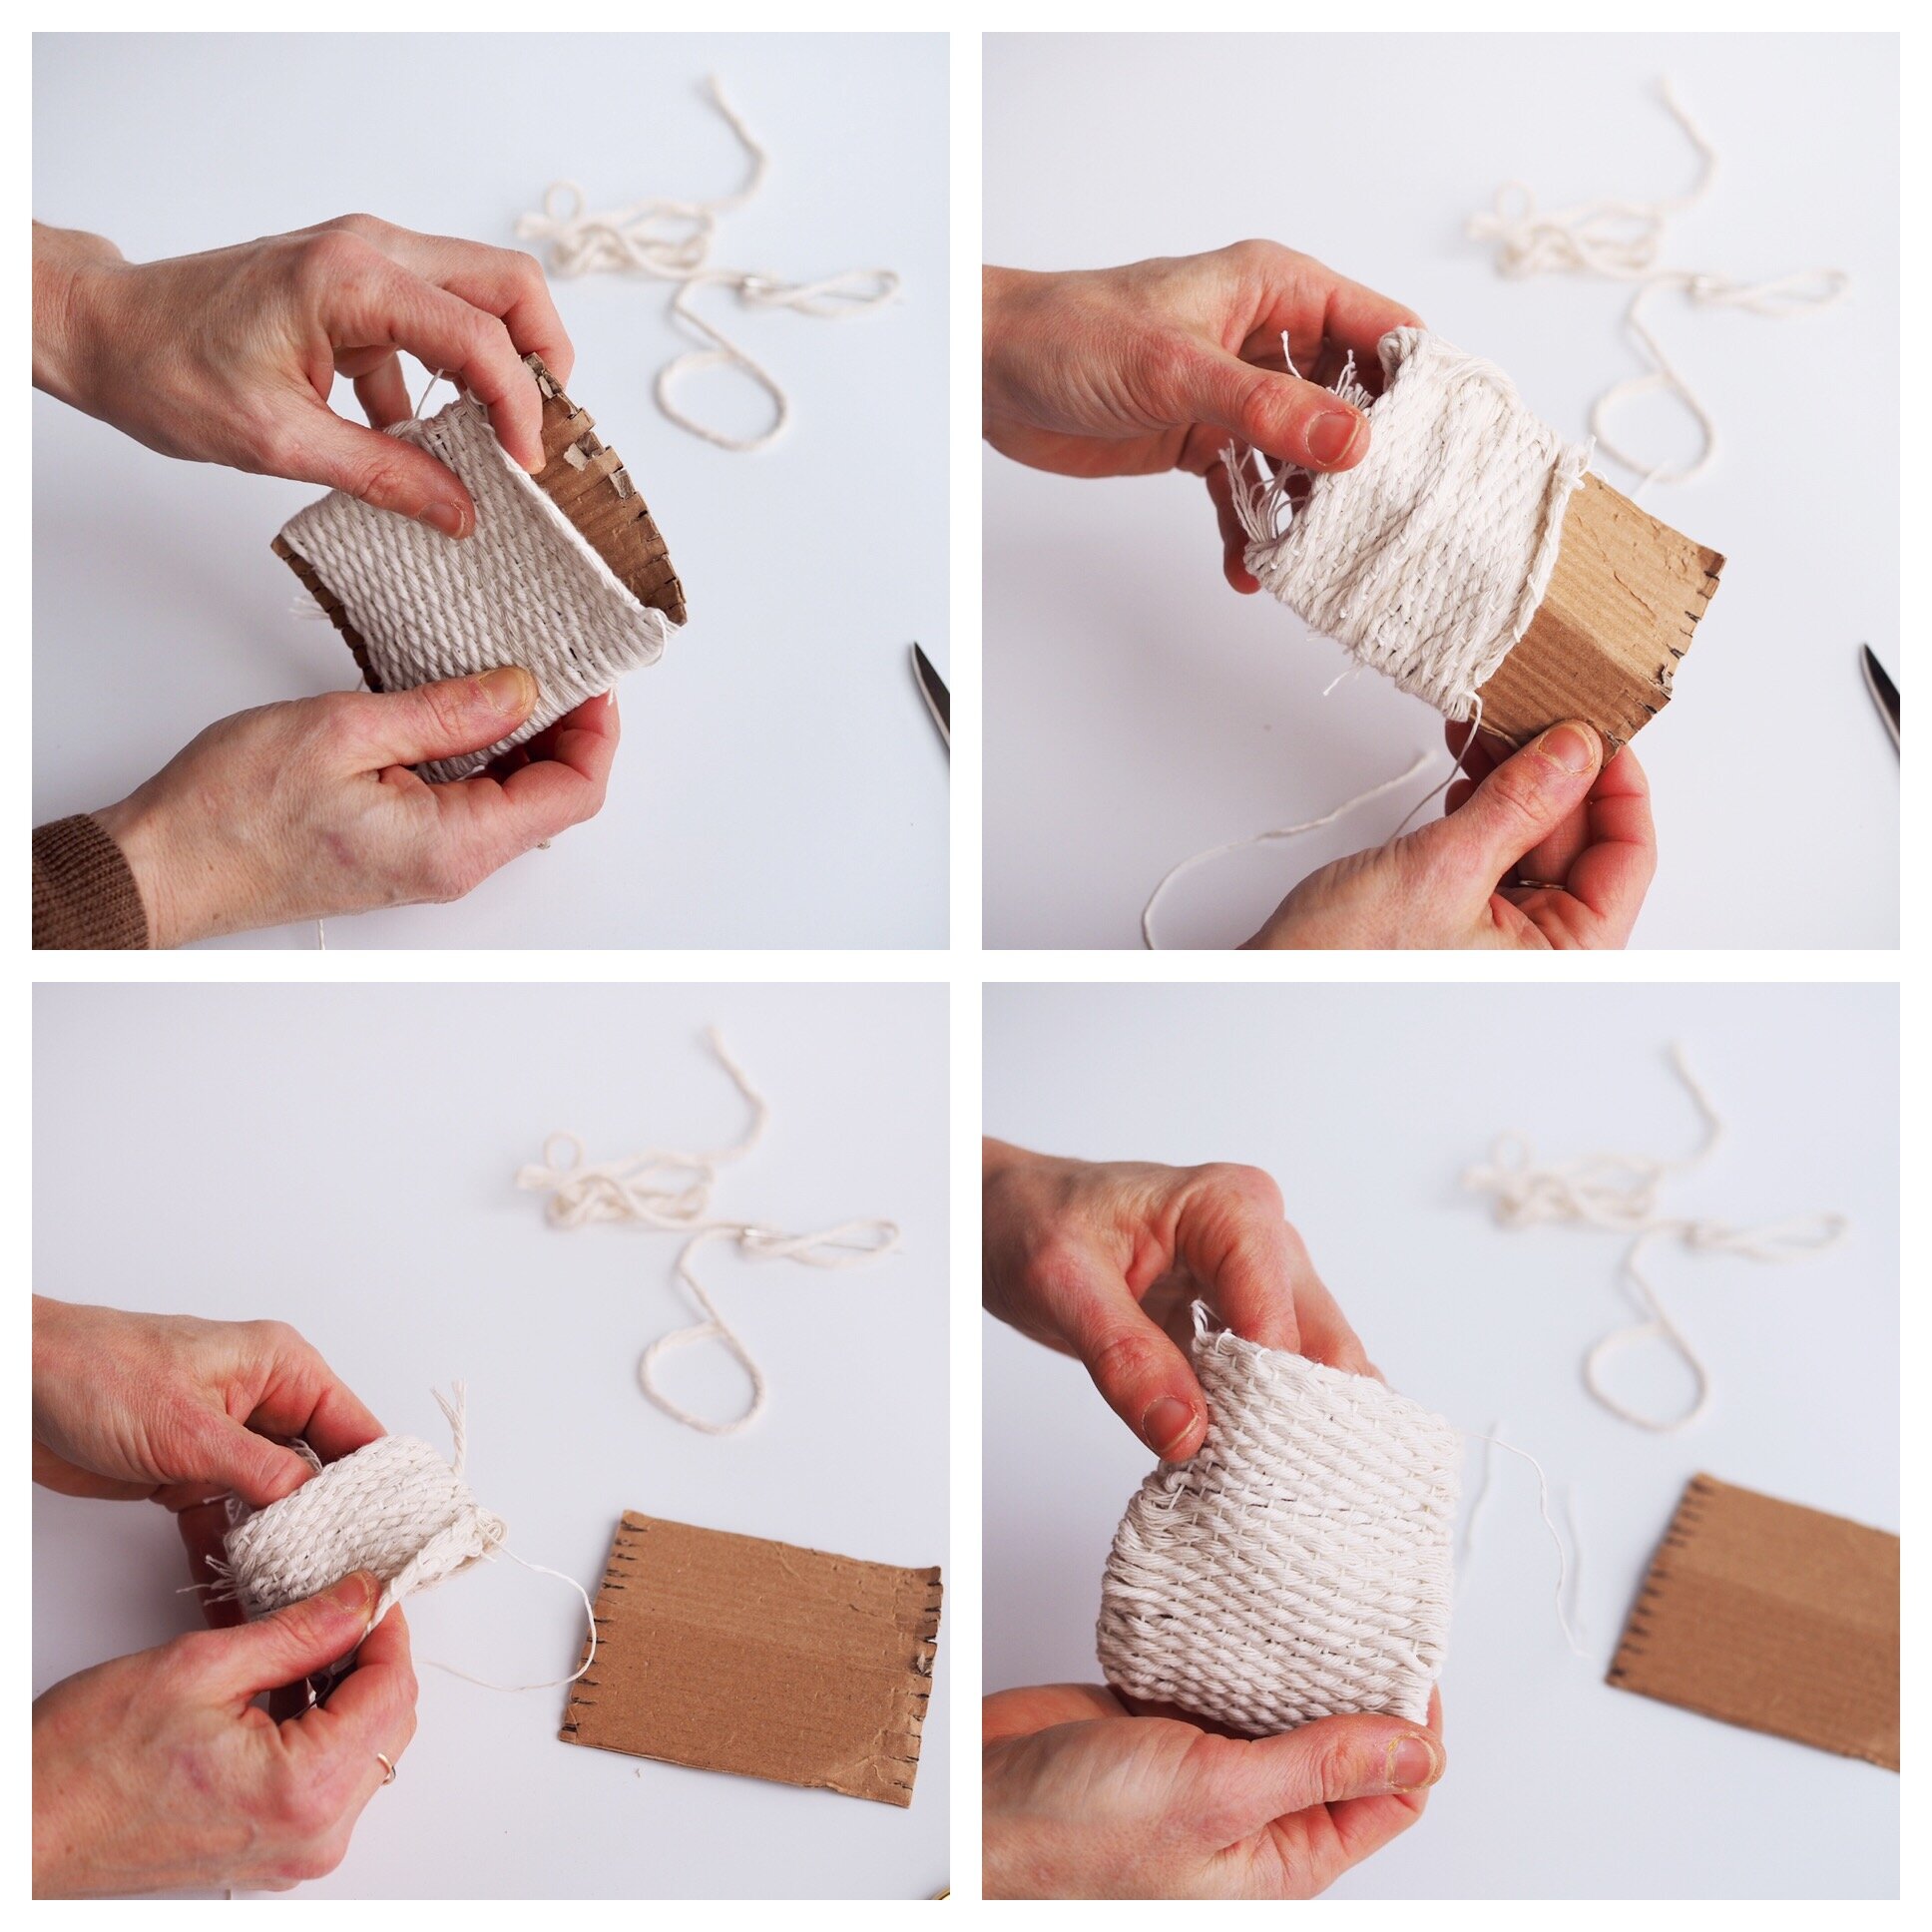
+ Using your darning needle, remove the warp strings from the notches of the cardboard by slipping them over the notched tabs. It’s fine to bend and break off the taps of cardboard in the process.
+ Slide the woven pouch off the bottom of the loom. Be sure to carefully remove the warp from the bottom notches. I find bending the cardboard makes it easier to remove your work.
+ Weave in the two remaining warp strings at the top of the pouch and turn your work inside out to conceal any tail ends.
+ If you did not create a drawstring tie earlier, you can add one here. Simply knot a necklace length string through a few stitches on opposite sides of your pouch.

Step-by-step instruction images were taken by Rose Pearlman. All other photos by Erin Boyle.
Thanks to Rose Pearlman for developing this project and writing the instructions. Rose is an artist, teacher, and textile designer. With a background in fine arts and a love of well designed functional objects, her creations blur the lines between art and craft and pushes the boundaries with non-traditional techniques and materials. Rose teaches monthly rug hooking workshops in and around her home in NYC, and also welcomes commissions for one of a kind constructions in decor and home furnishings. Her work has been featured in fiber magazines, galleries, and numerous online design sites. Her new book Modern Rug Hooking comes out December 3, 2019 and is currently available for preorder wherever books are sold. She lives in Brooklyn, NY with her family.
This post includes affiliate links. Reading My Tea Leaves might earn a small commission on the goods purchased through those links.

14 Comments
This is so cool! I love it when you post neat projects that are simple, elegant, and tasteful. Thank you!
This is so sweet and a perfect little project for over Easter 🙂
Thanks for sharing it!
What a beautiful little pouch, perfect for our walks collection things the kids find. Will have a go this bank holiday weekend.
I just tried this! It’s really a fun project but I have a question- when you weave from the back of the loom and begin to go to the front again are any of the stitches repeated ? I don’t know the real terms but let’s the back ended with the string going under the warp- does the first stitch on the front also go under? I tried it a number of ways and found this was the only thing I could do. Still turned out ok but wondering for next time ! Thanks!
Hey Anna! I’ll have Rose weigh in here to be sure, but I’m pretty sure I continued weaving in the round so if I went over the warp on one side, I was going under the warp when I flipped to the other side, just as if those stitches were next to each other!
I made this exact thing back in the 70s when I was a little girl in grade school. I never forgot it.
Hi
Please explain how to add on new string
Not sure what is meant by overlapping a few stitches when ending a piece and starting a new piece of cord
hey there! when you need to add a new string instead of starting right where the old string ends, start a few rows back and double up for a bit. alternately you can just tie a knot! it will be on the inside and doesn’t effect the finished bag!
Is it possible to make a larger bag this way? With a larger piece of cardboard perhaps?
Yes. You may want to use thicker/bulkier yarn for the weft (horizontal rows) to reduce the amount of time spent weaving.
I came across the same problem of turning from front to back. Every second row or so I wld come across the two under or two over threads at the edges when turning from front to back…which compromised the sides of the bag. I found if I had an even number of warp threads on one side and an odd on the other it solved the problem beautifully.
Yes! You’re right!
So how do you make an even number on one side and an odd number on the other side? When I tried that, I ended up with the warp thread left at the bottom. Like it ended at the bottom. And then what do you do with it? Is there any way you can post a picture of what it looks like on both sides when you make one side even and one side odd?
Hi there! Recently improved on this tutorial for the book, so there will be a better explanation and pictures there, but the short of it is to tape the last warp end to the side so that it doesn’t go all the way up to the top (this will get you even on one side and odd on the other!)
Comments are moderated.