I’ll write more about the latest iteration of the kid’s room once we’ve had a chance to settle into it a bit and finish a few projects, but I couldn’t wait to share the absolute simplest solution for under-bed storage that I’ve found. Bonus: It’s pretty and practically free.
Enter the wine crate.
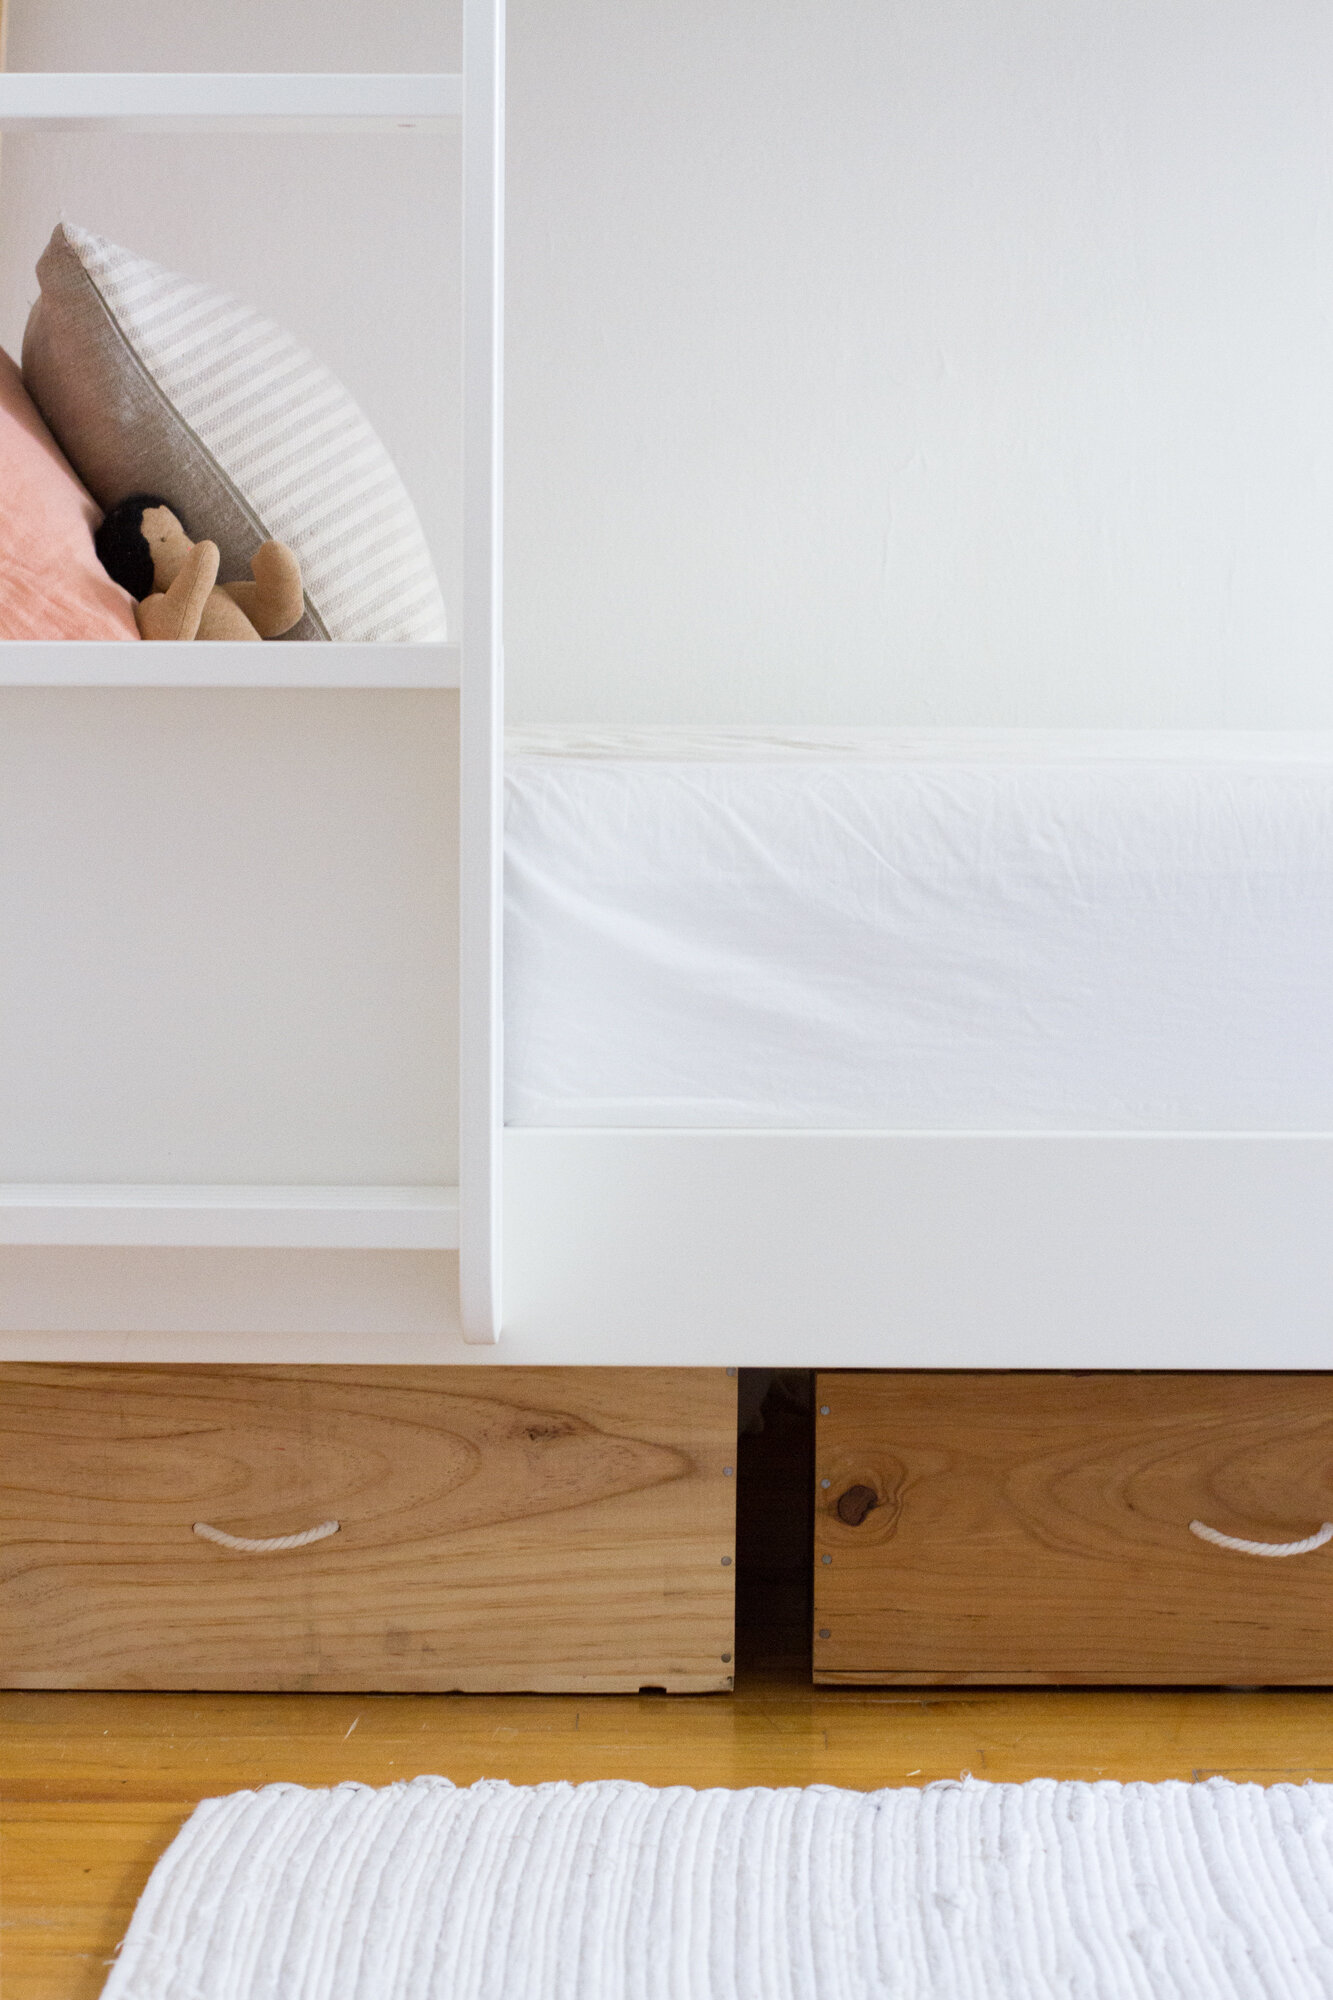
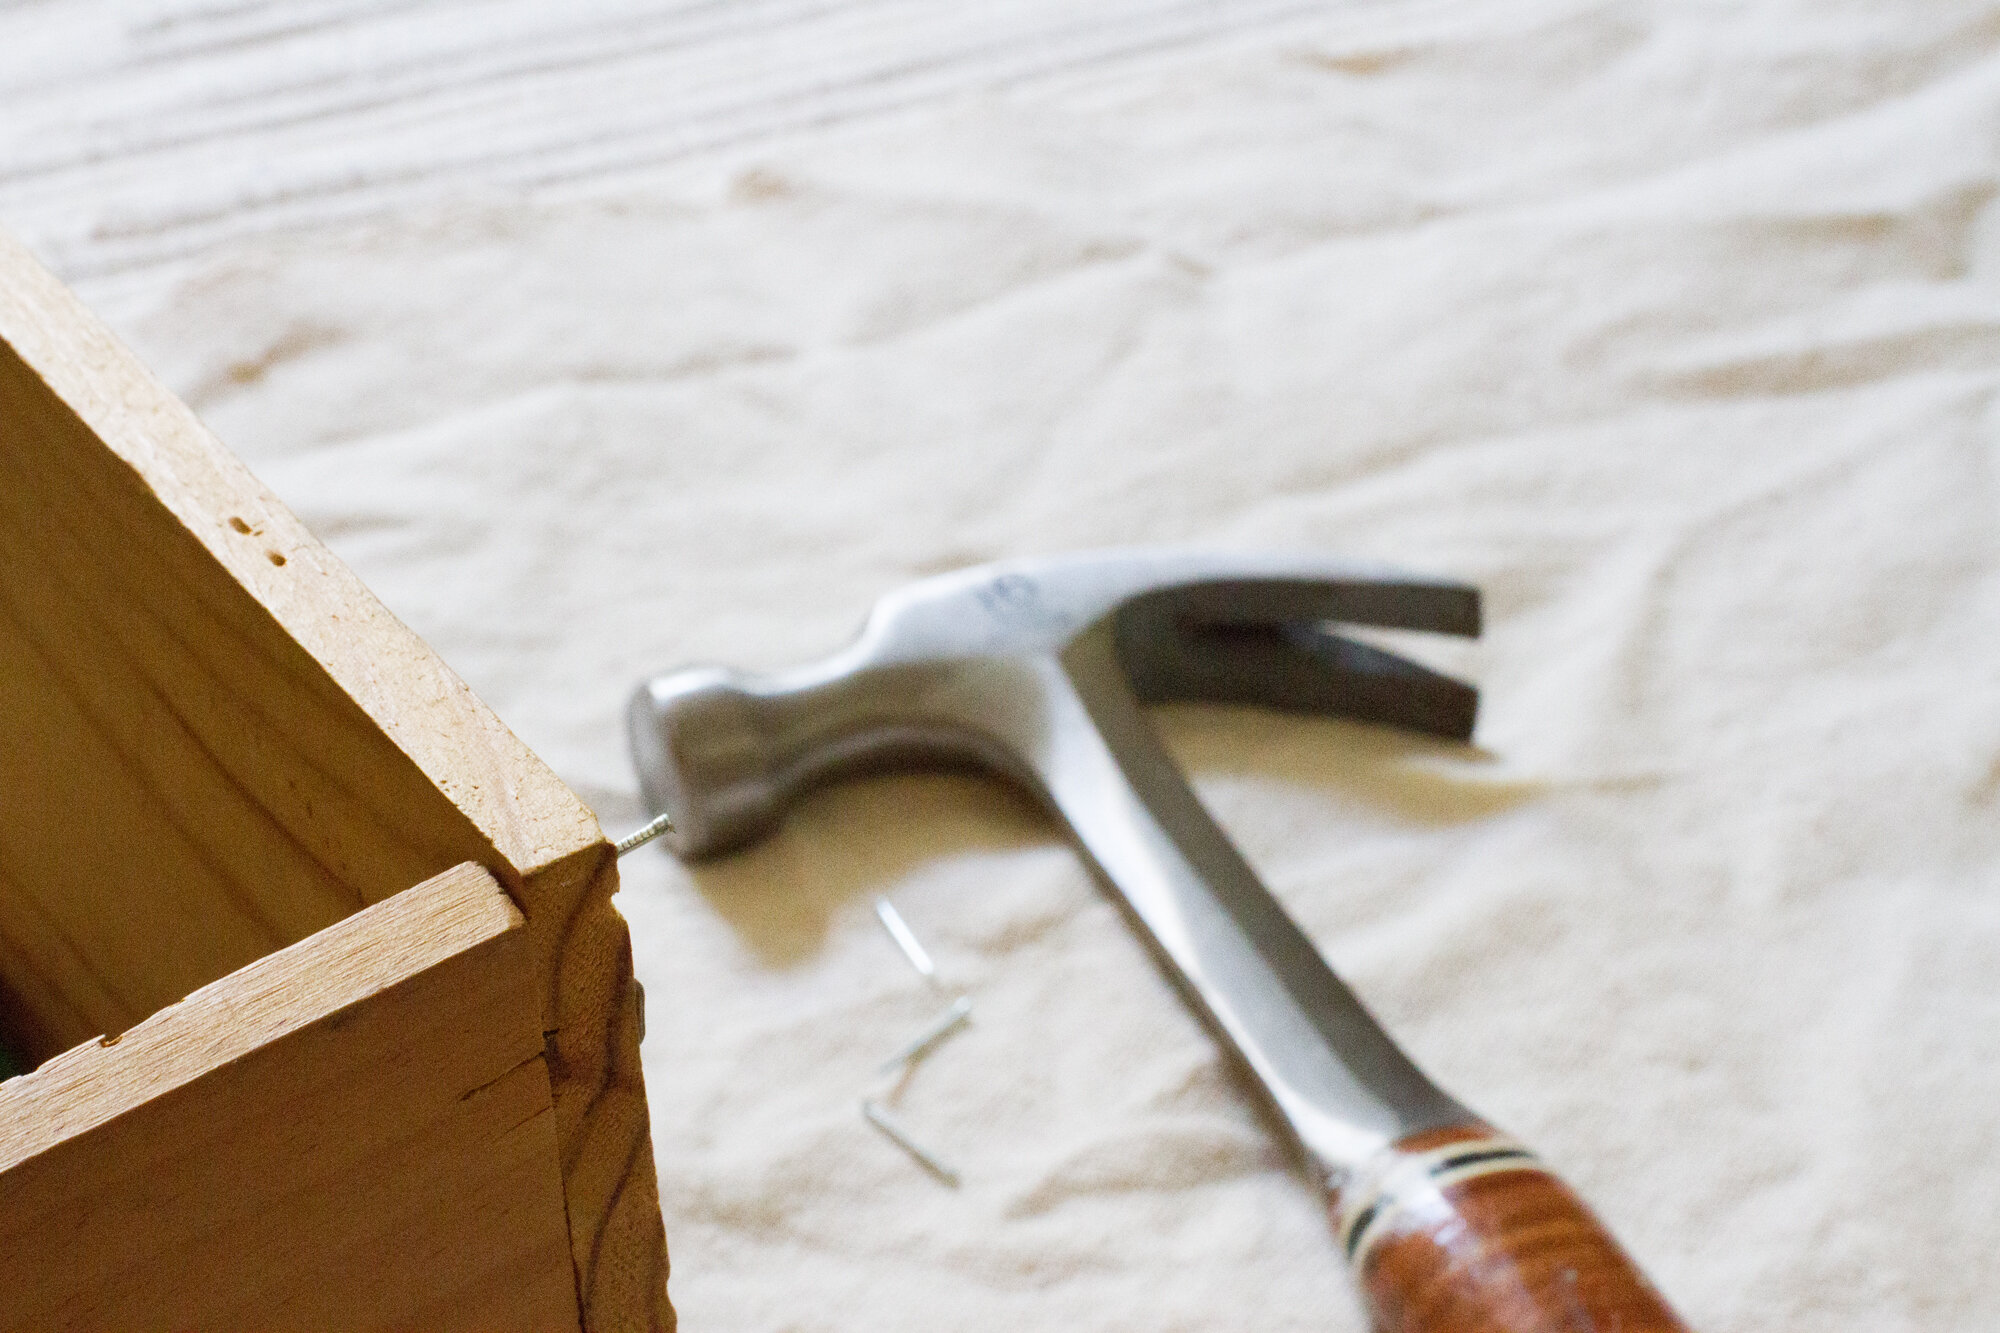
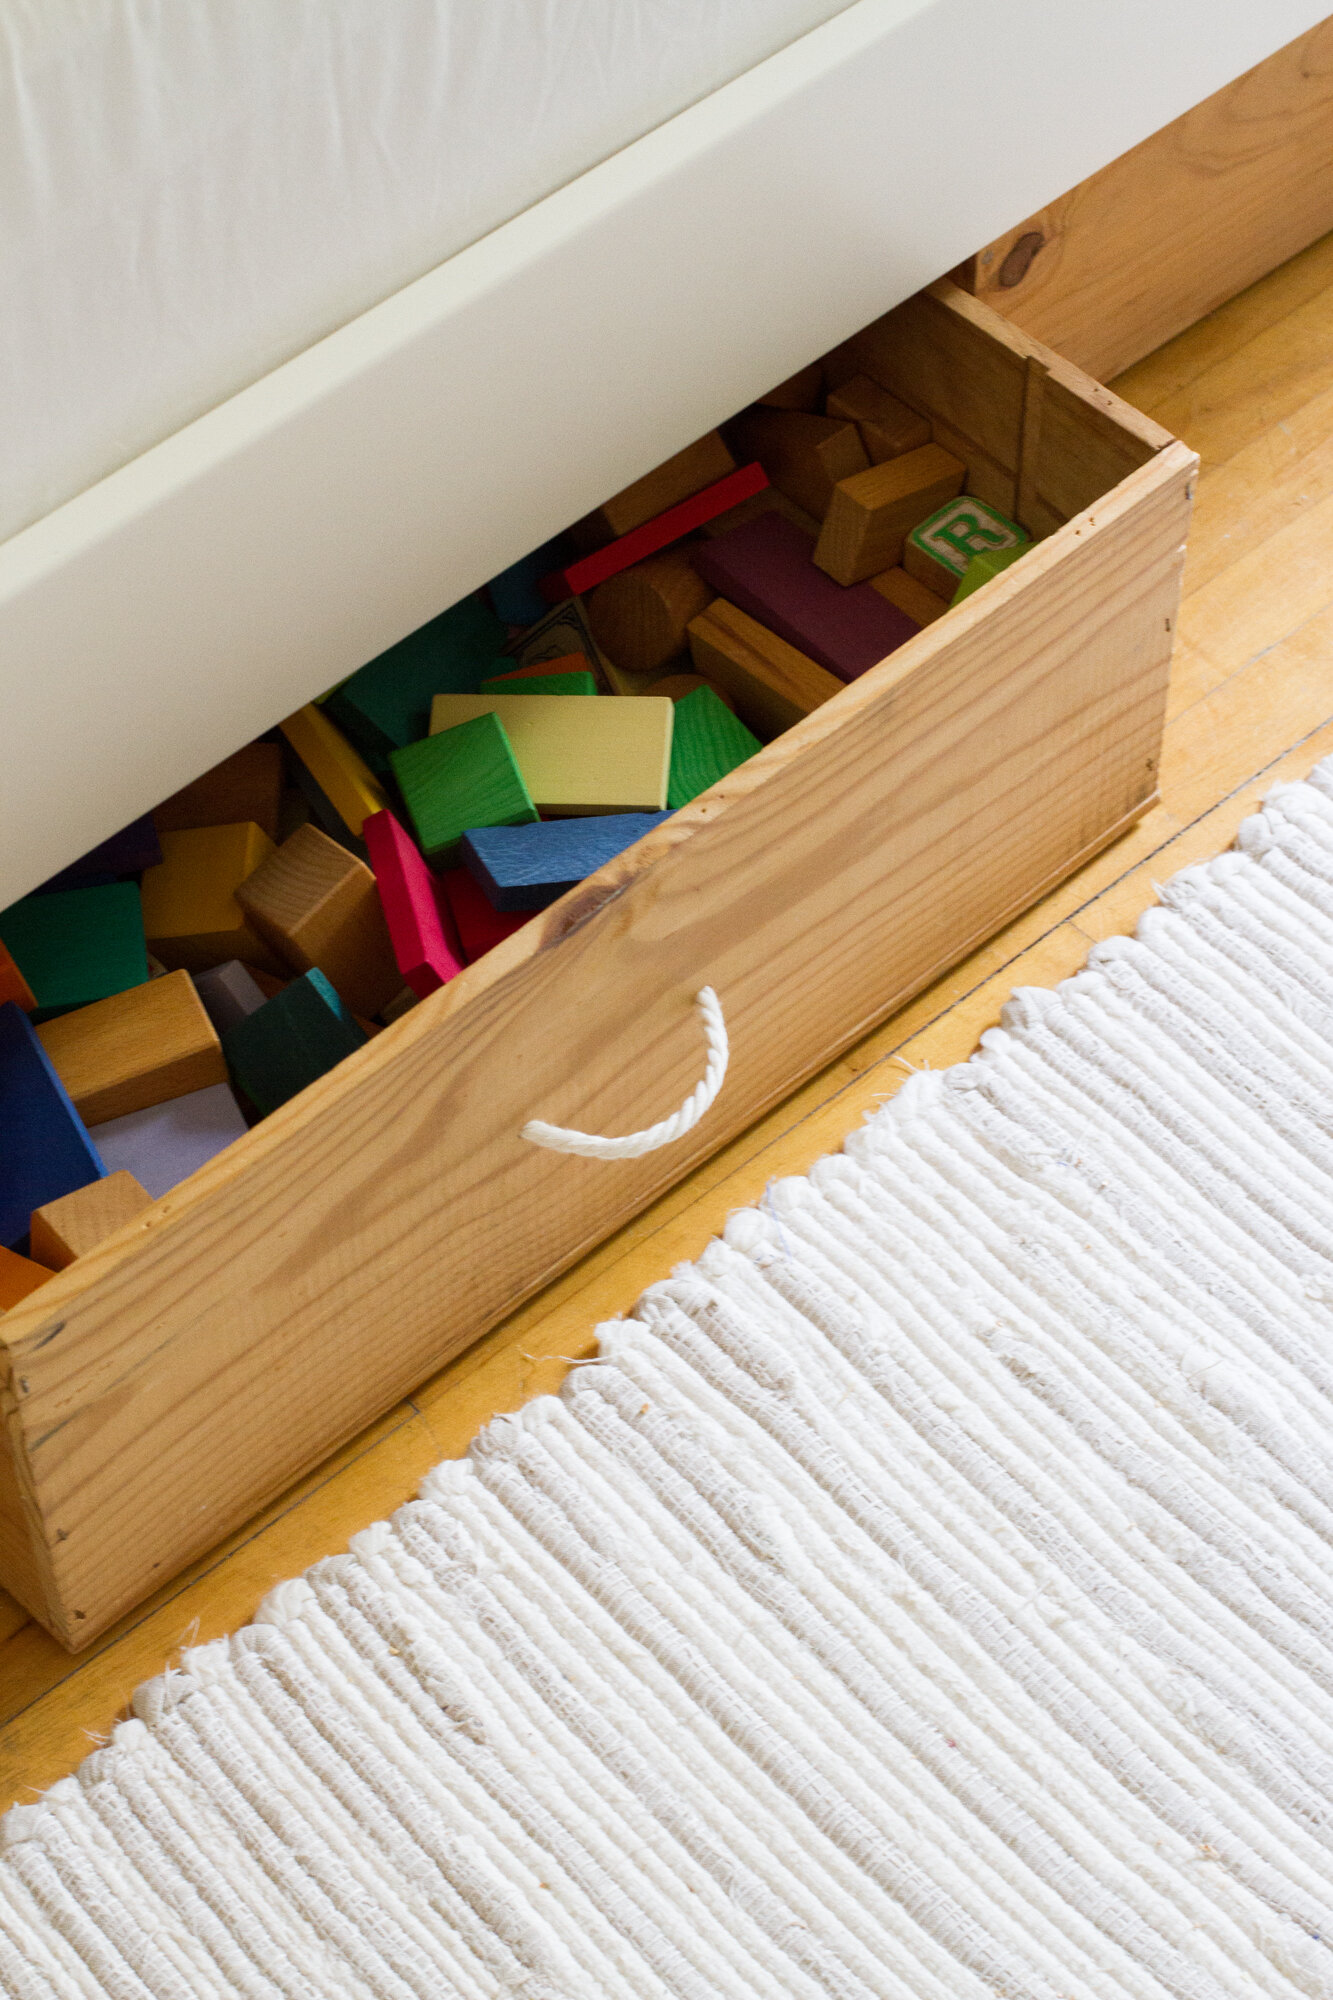
If your bed is high enough off the ground, this DIY is practically over. All you need to do is shore up your crate with a few extra finishing nails if need be, add a few felt chair pads to the bottom corners of the crate to help with sliding the crate along the floor, and you’re done. We’ve used simple wine crates under beds and benches for storing everything from toys and books, to backpacks and rain gear.
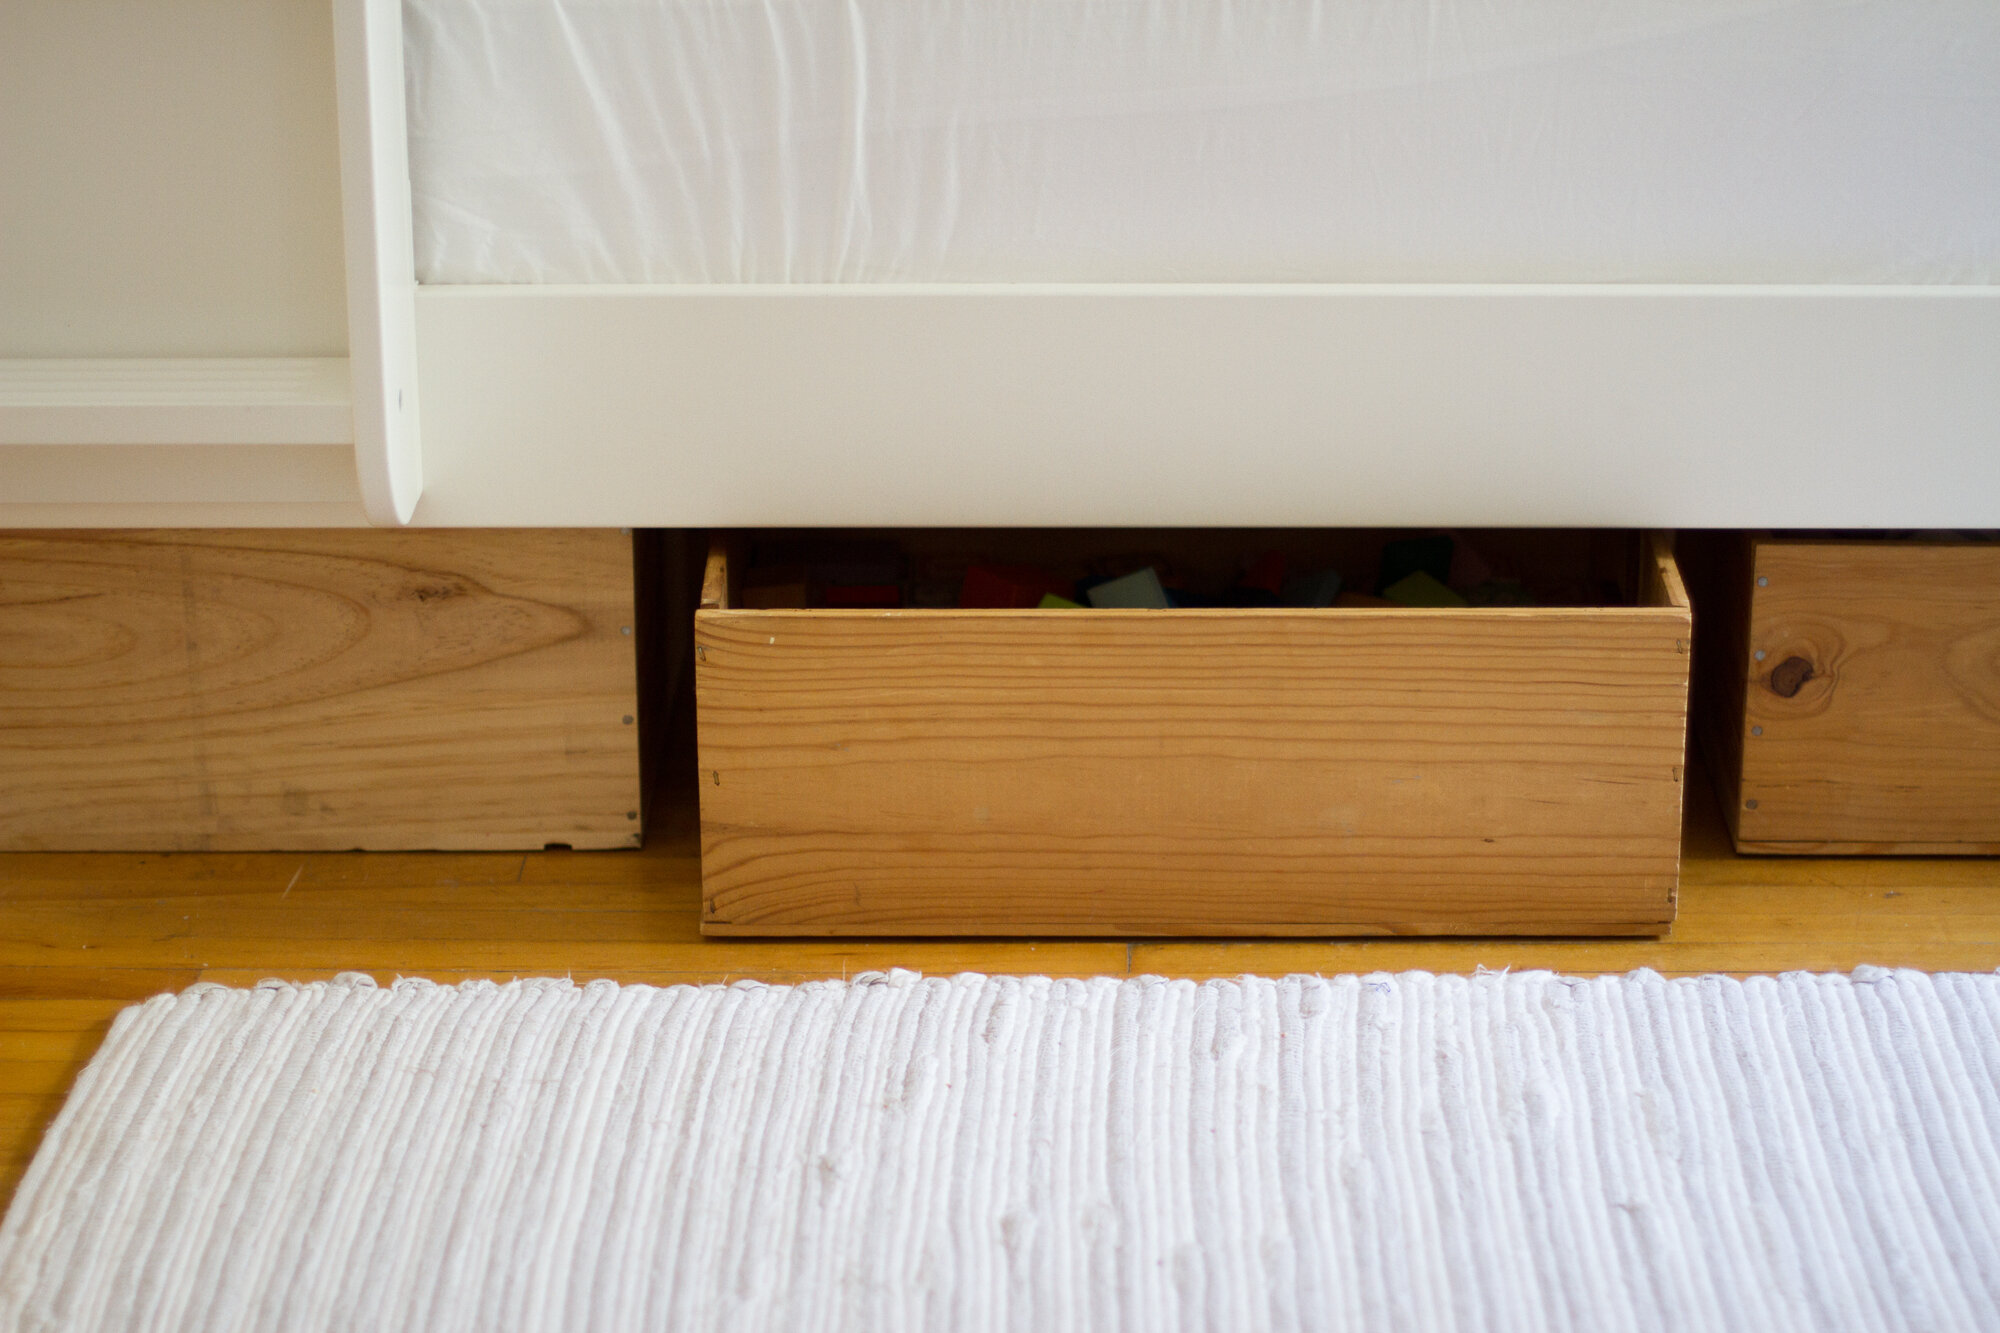
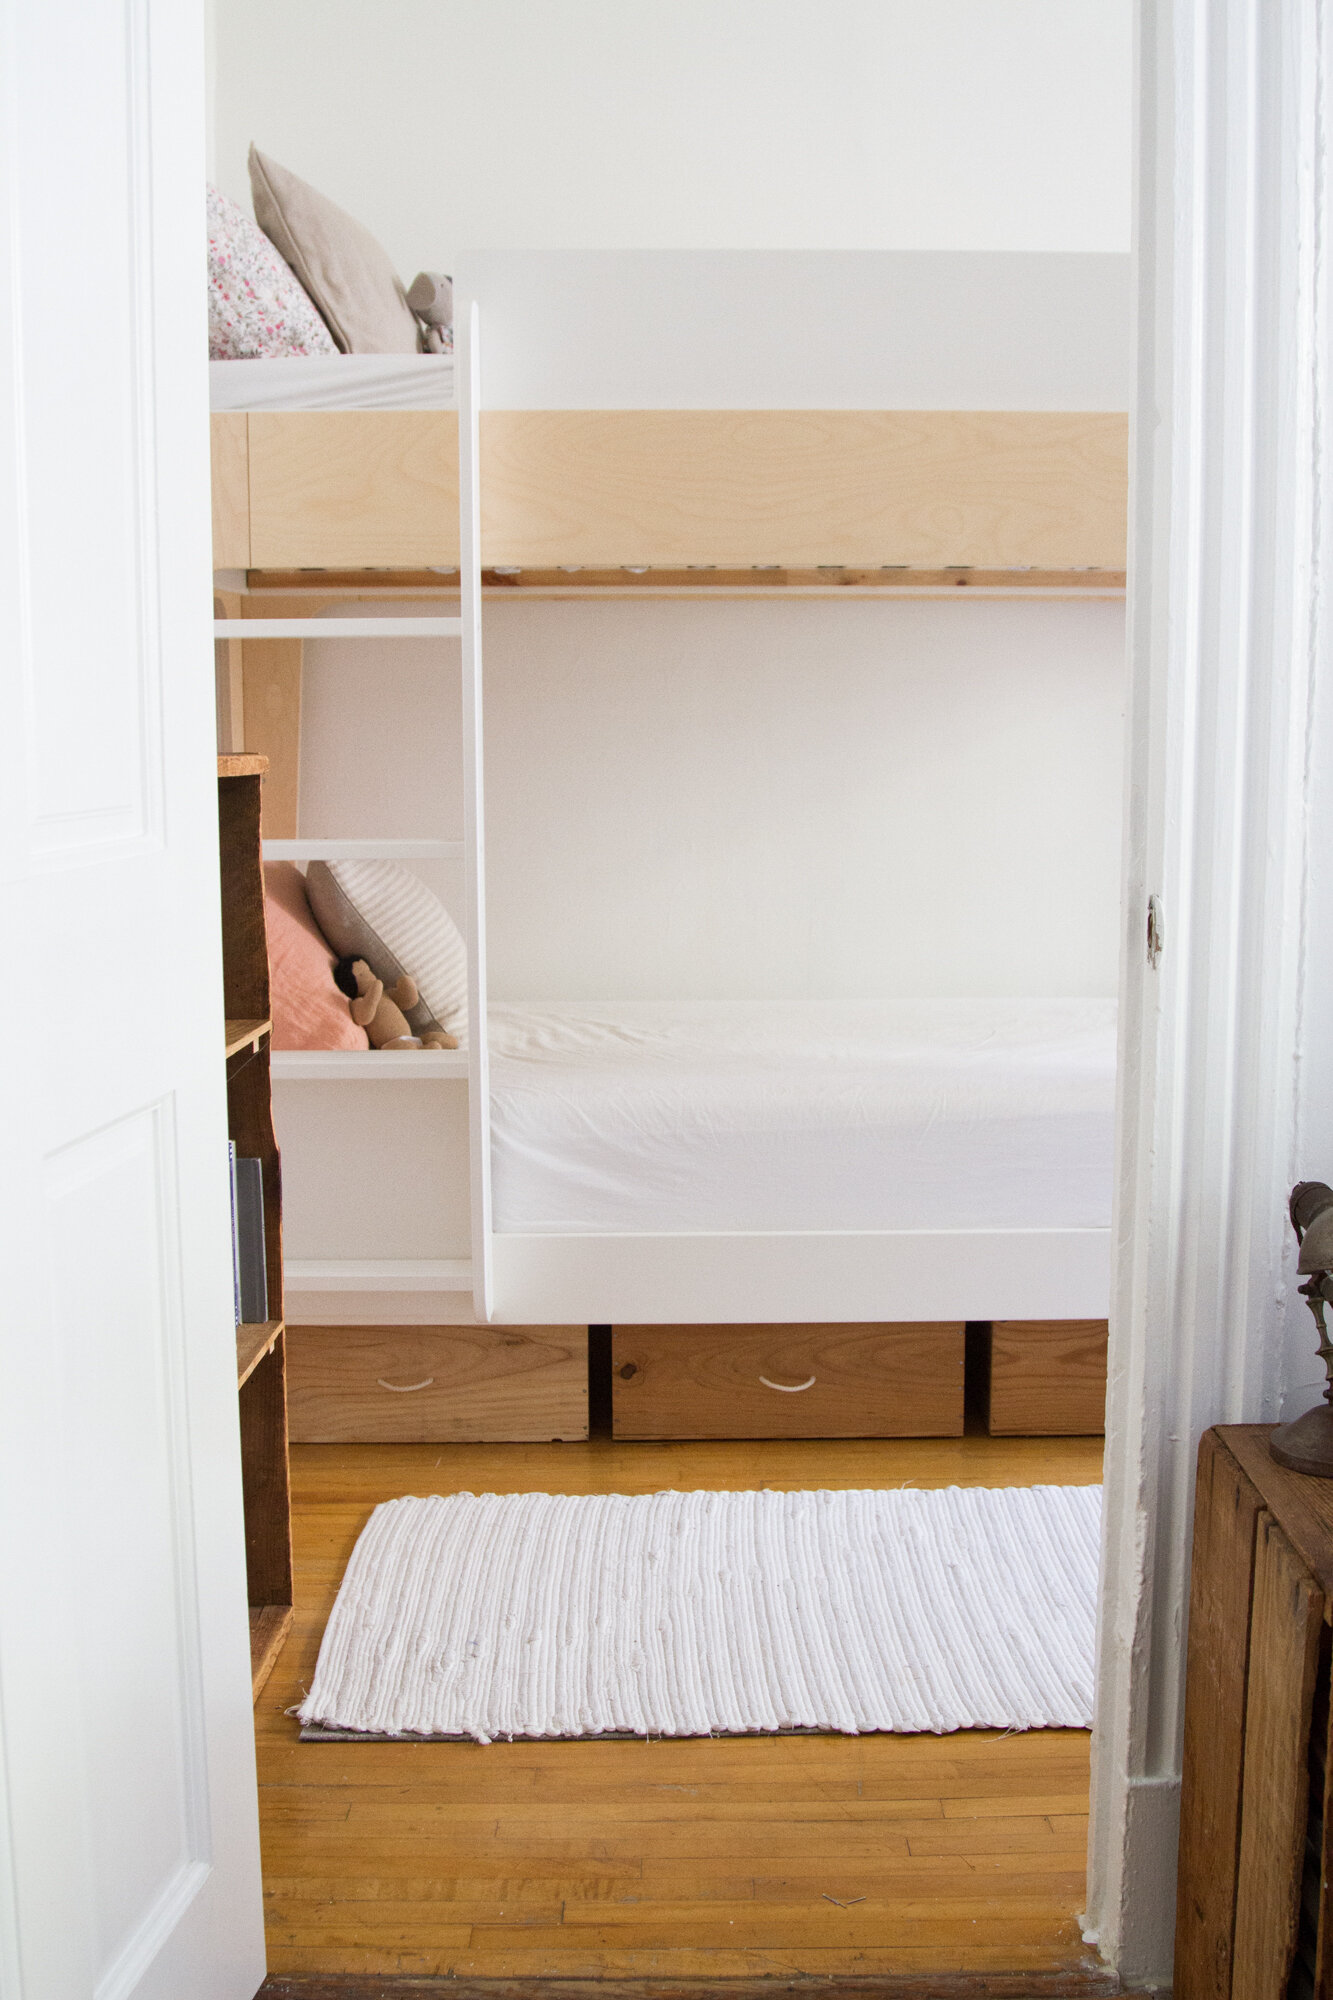
If your bed is lower to the ground, with less clearance between bed frame and floor, you might consider adding a simple handle. The kids’ new bunk bed is several inches lower to the ground than Faye’s twin bed was and so we needed a solution for pulling the same crates we used under her old bed without scraping up our knuckles every time.
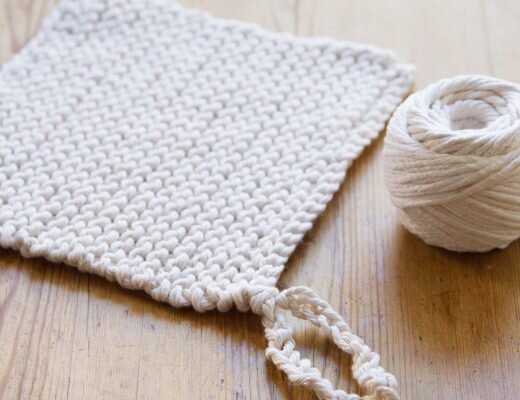
Enter, rope, and reason number #20,348 why I love having a power drill handy. I screwed two 1/4-inch holes three-inches apart and strung a bit of macramé cord between them. Done and done.
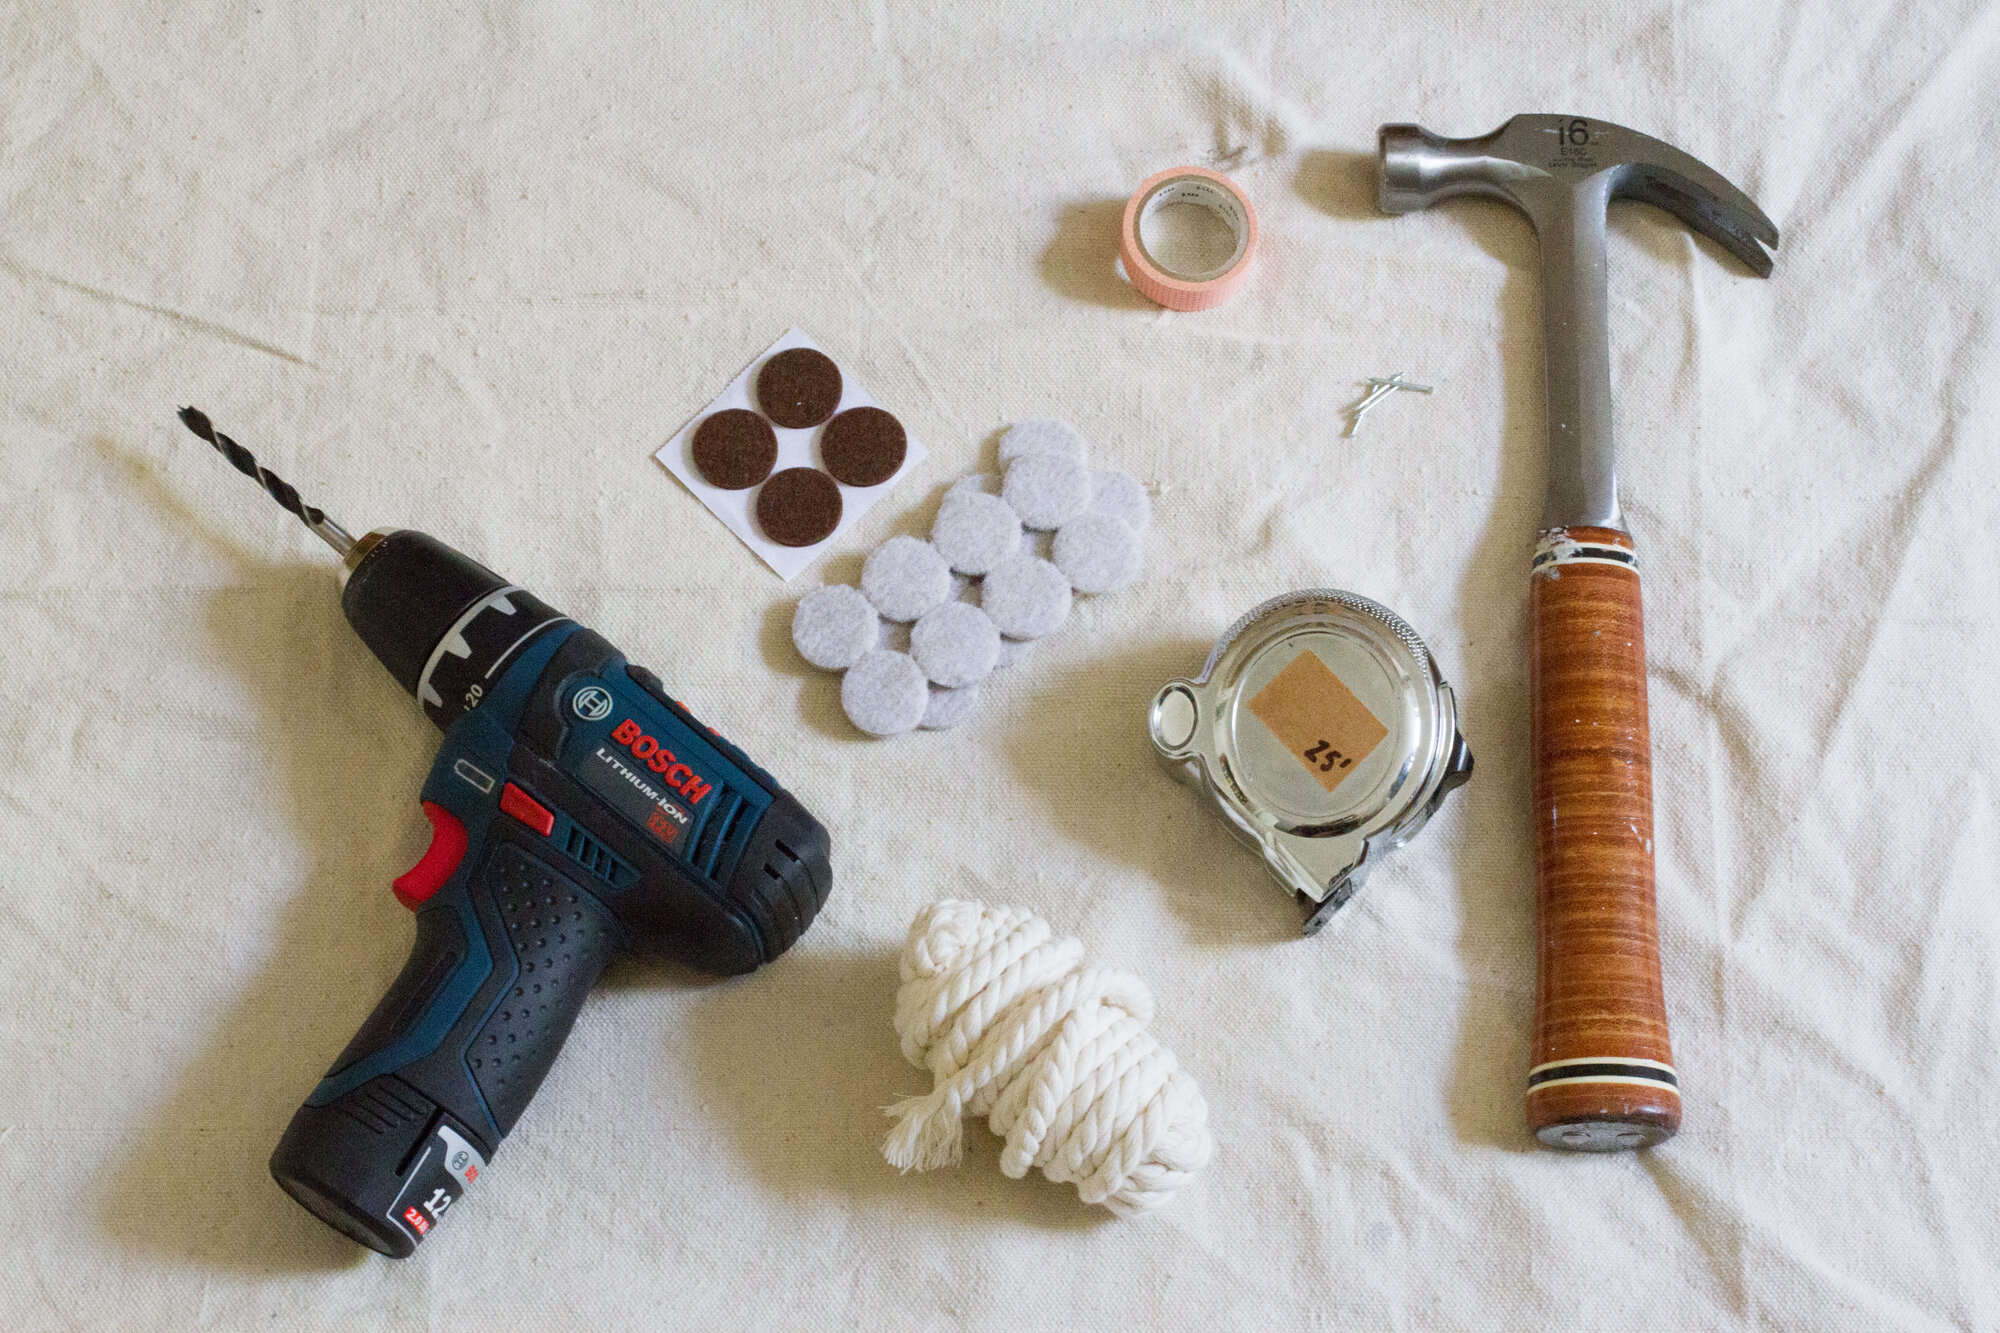
Materials:
Wine Crates
Finishing Nails
Measuring Tape
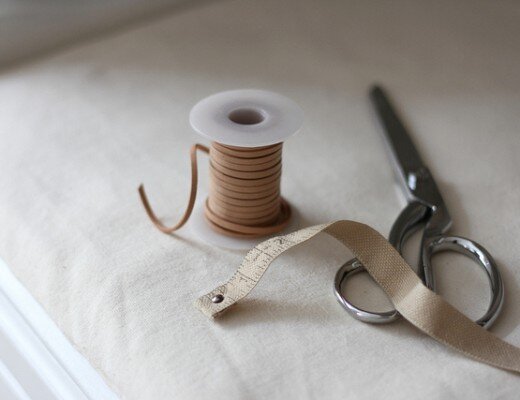
Rope or Cord (I used macramé cord)
Tape
Directions
+ Shore up the crate: Begin by making sure that your wine crate is firmly put together. There’s no fine joinery on a wine crate and since you’ll be pulling one side of it repeatedly, it doesn’t hurt to add an additional nail or two to help keep everything solid.
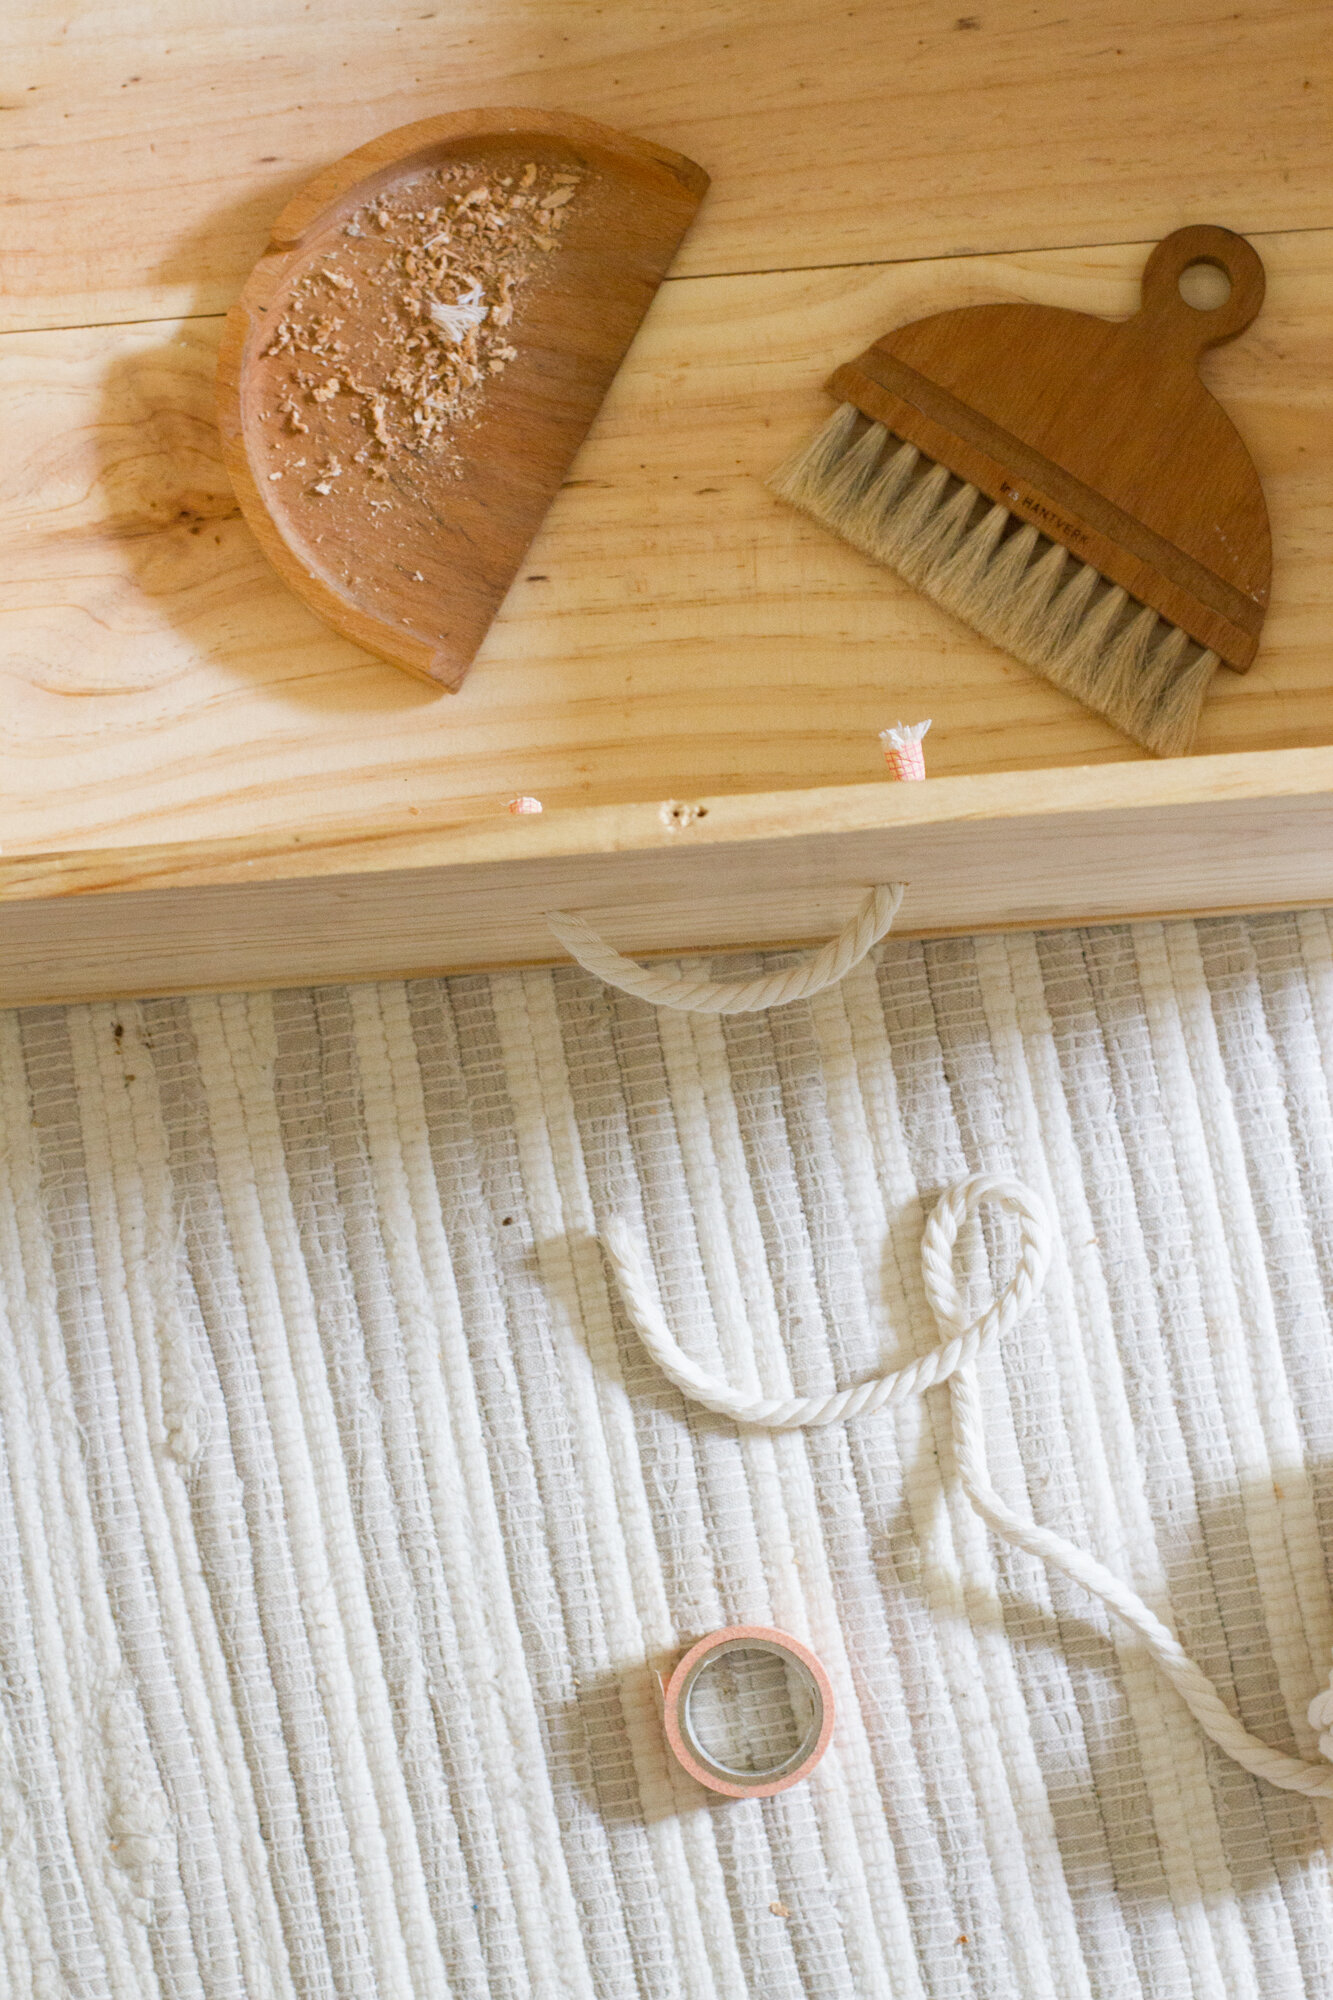
+ Drill two holes: Measure the side of your wine crate where you’d like your handle to go to find the mid-point of the box. I decided to make my handles 3-inches apart, so I measured 1.5 inches to each side of the center point, marked an x in pencil and drilled the holes with a 1/4-inch drill bit.
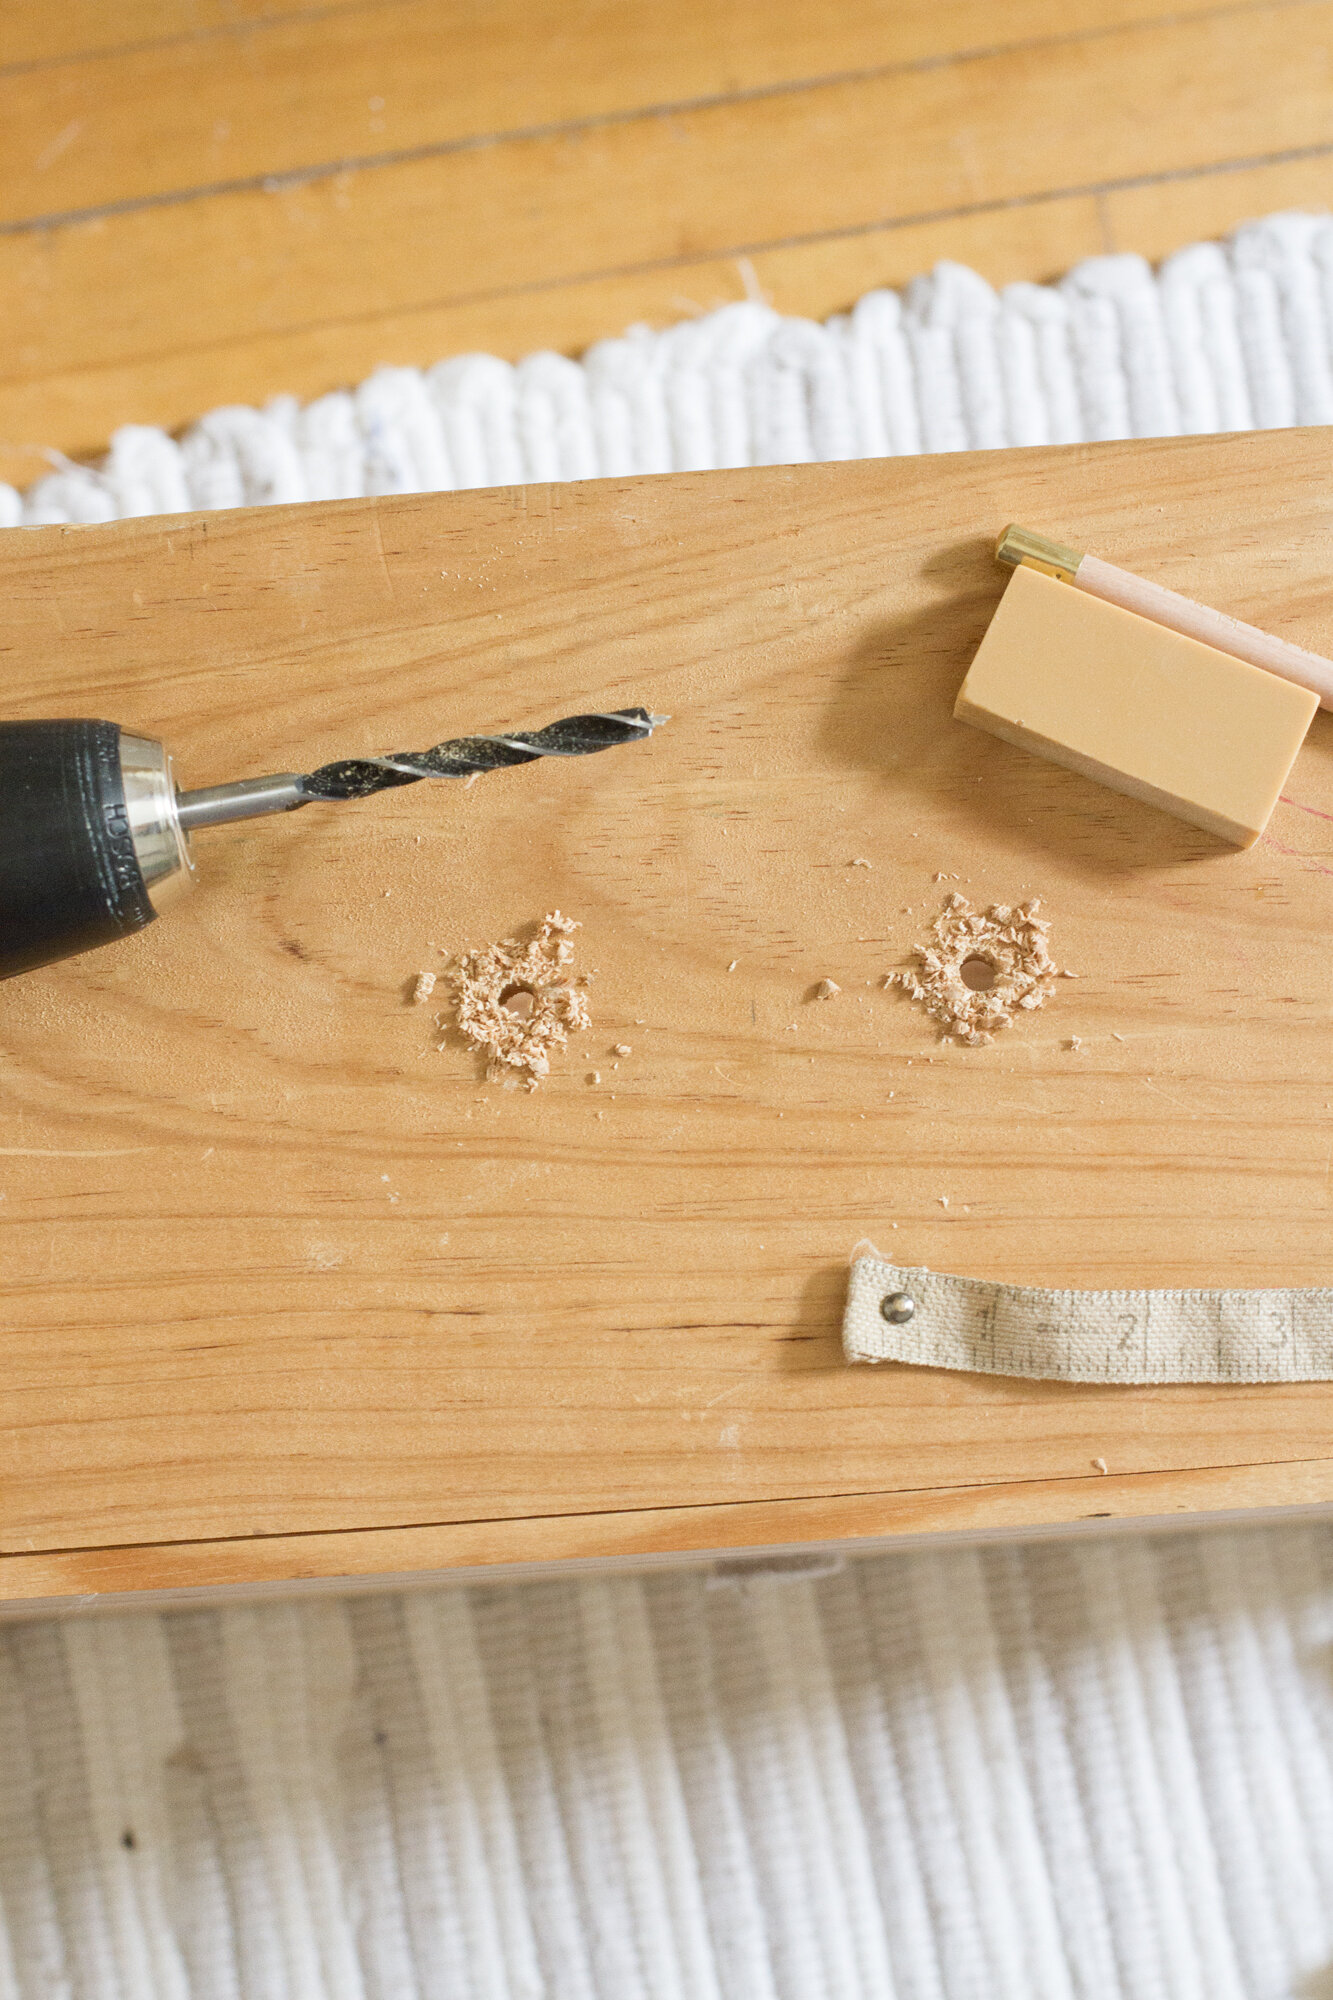
+ Add rope: I used approximately 6.5-7 inches of rope per handle. I wrapped tape around the ends of my rope to stop them from fraying.
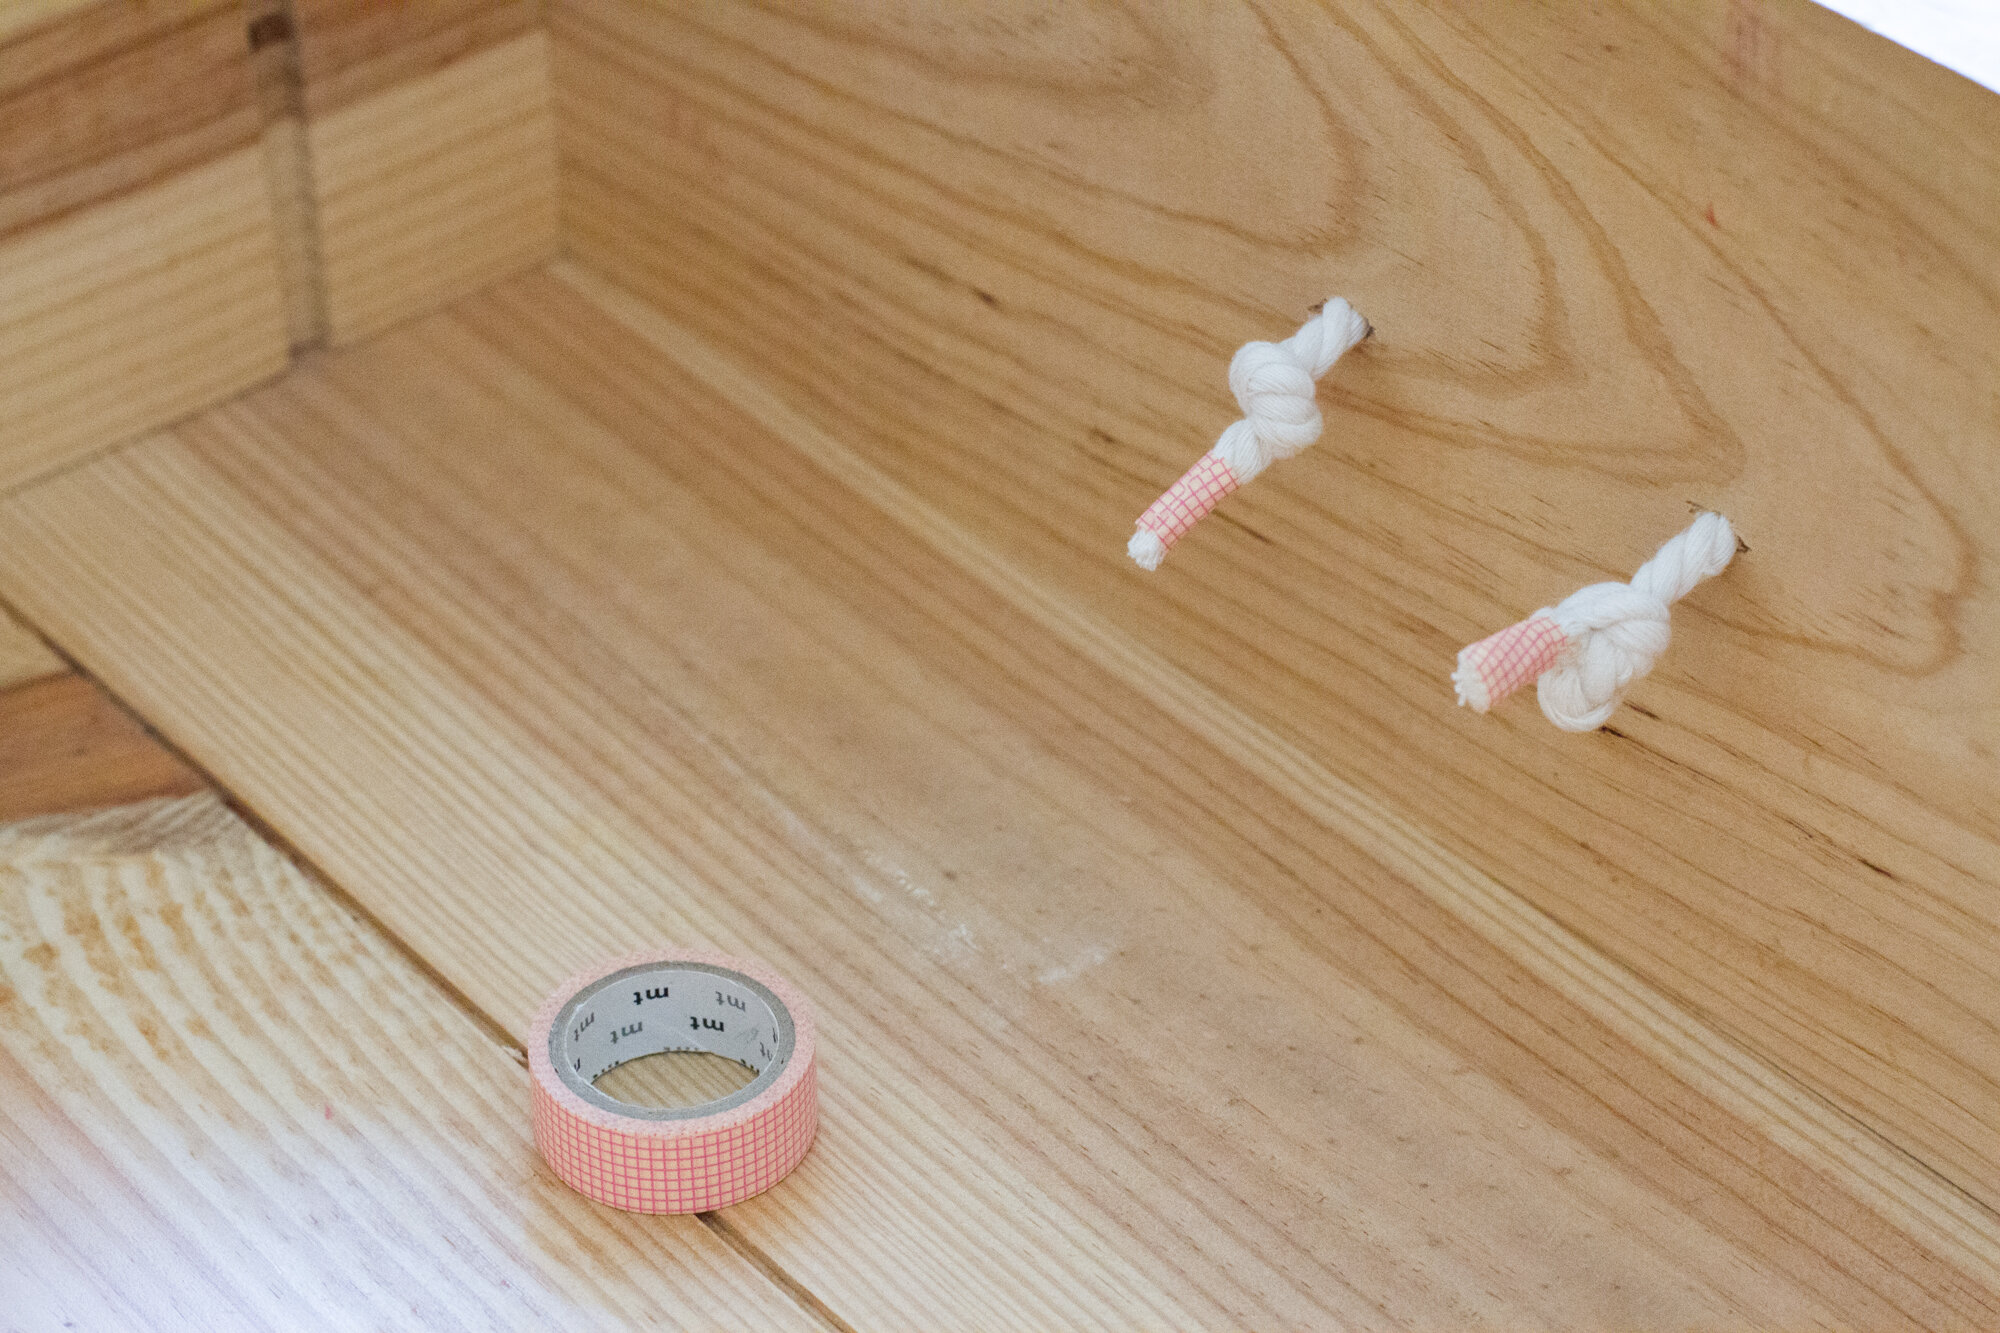
+ I found it easiest to get the nicest drape by tying a knot at one end of the rope, stringing it through the hole from the inside out and pulling the other end of the rope through the second hole making sure it’s all the way taut. Then I tied the second knot as close as I could to the board on the interior of the crate.
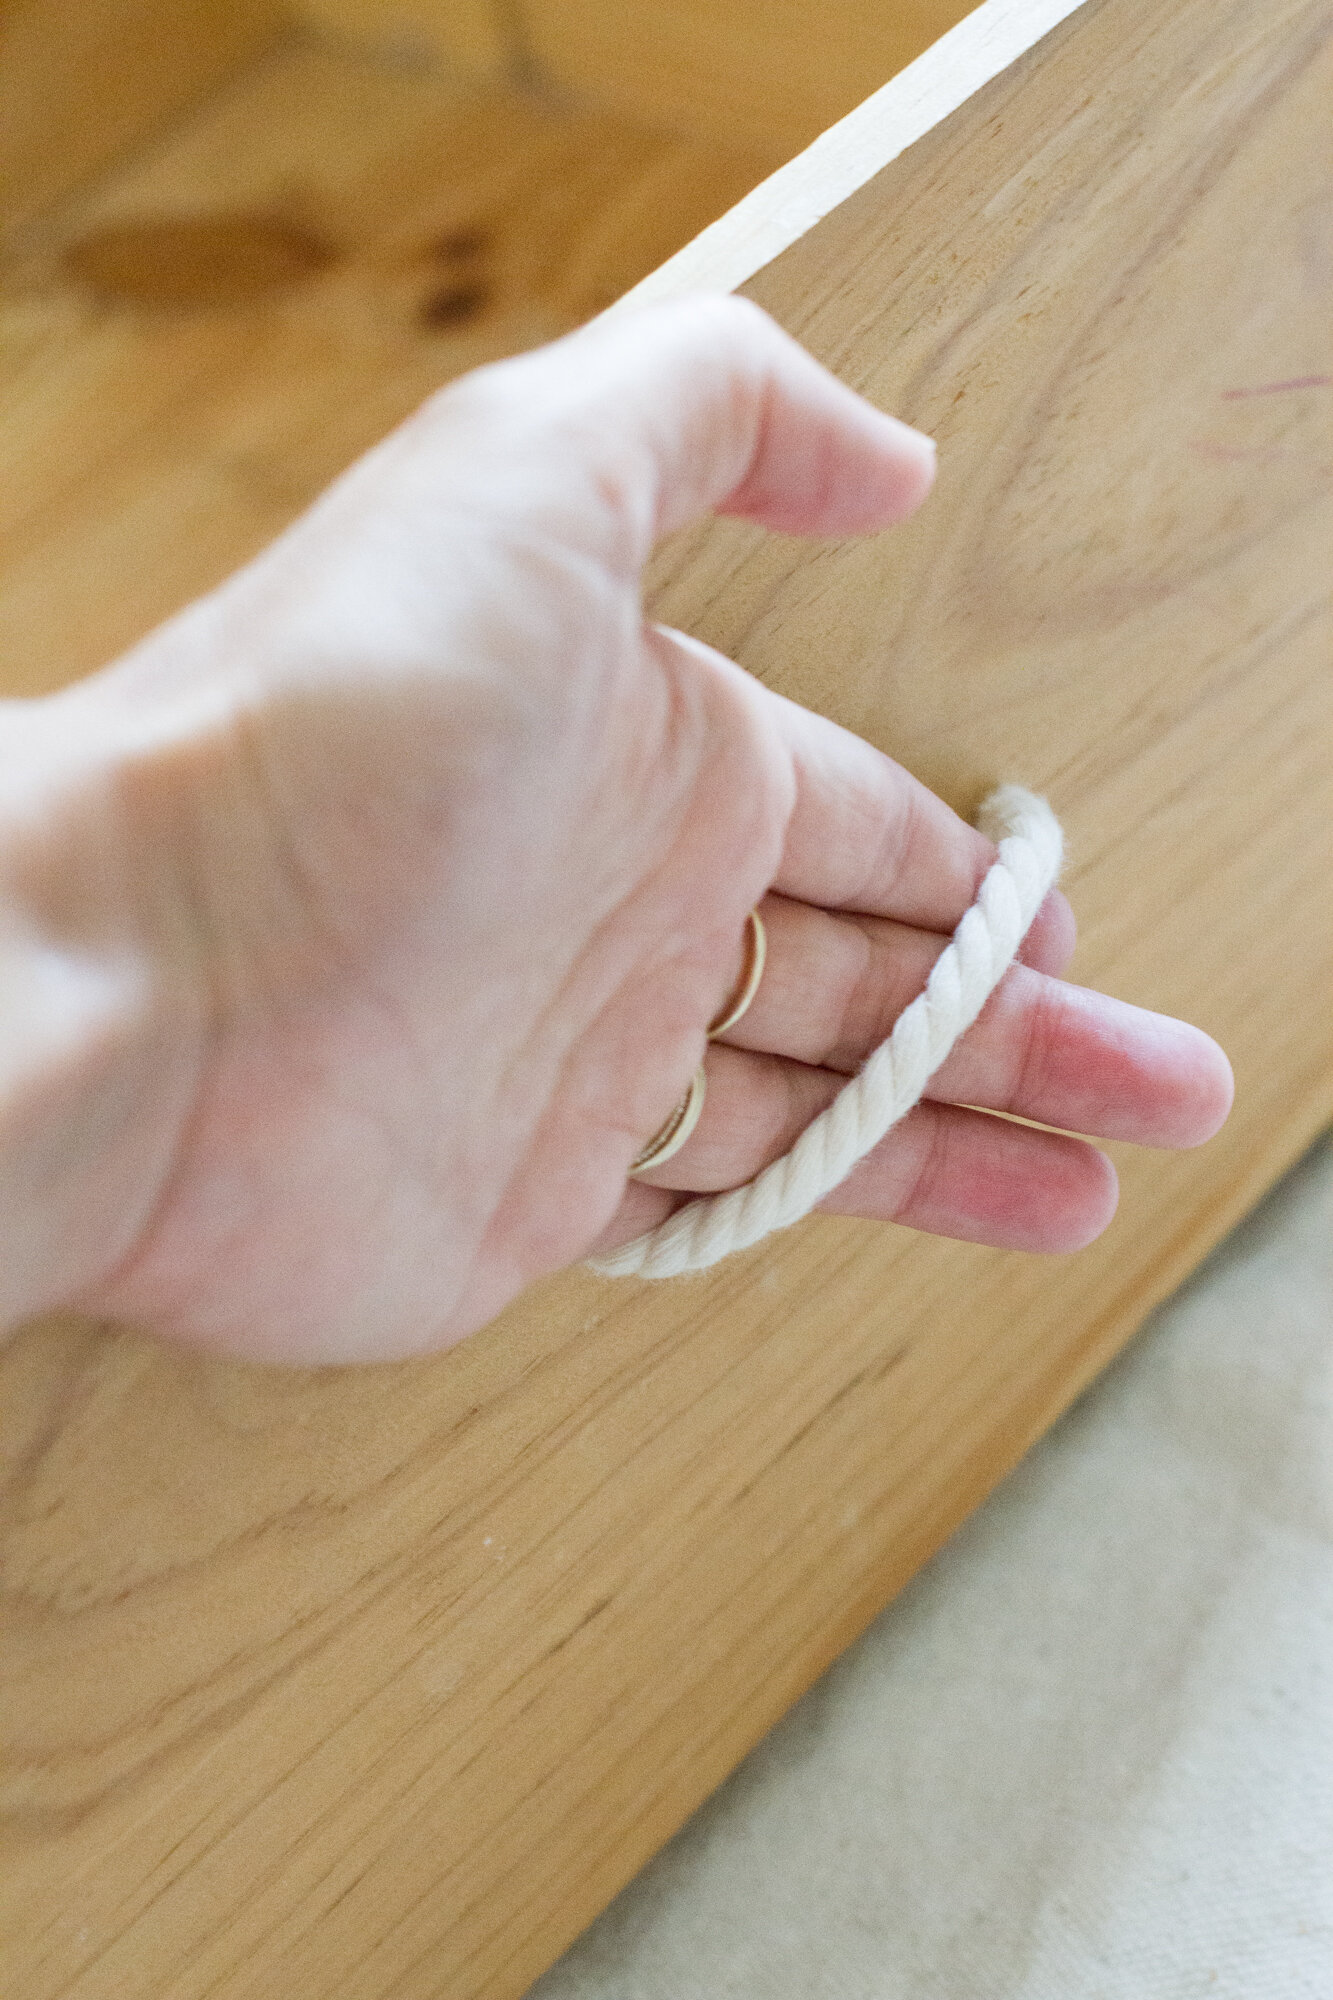
+ Tighten both knots by pulling on the outside loop, as though you’re using the handle.
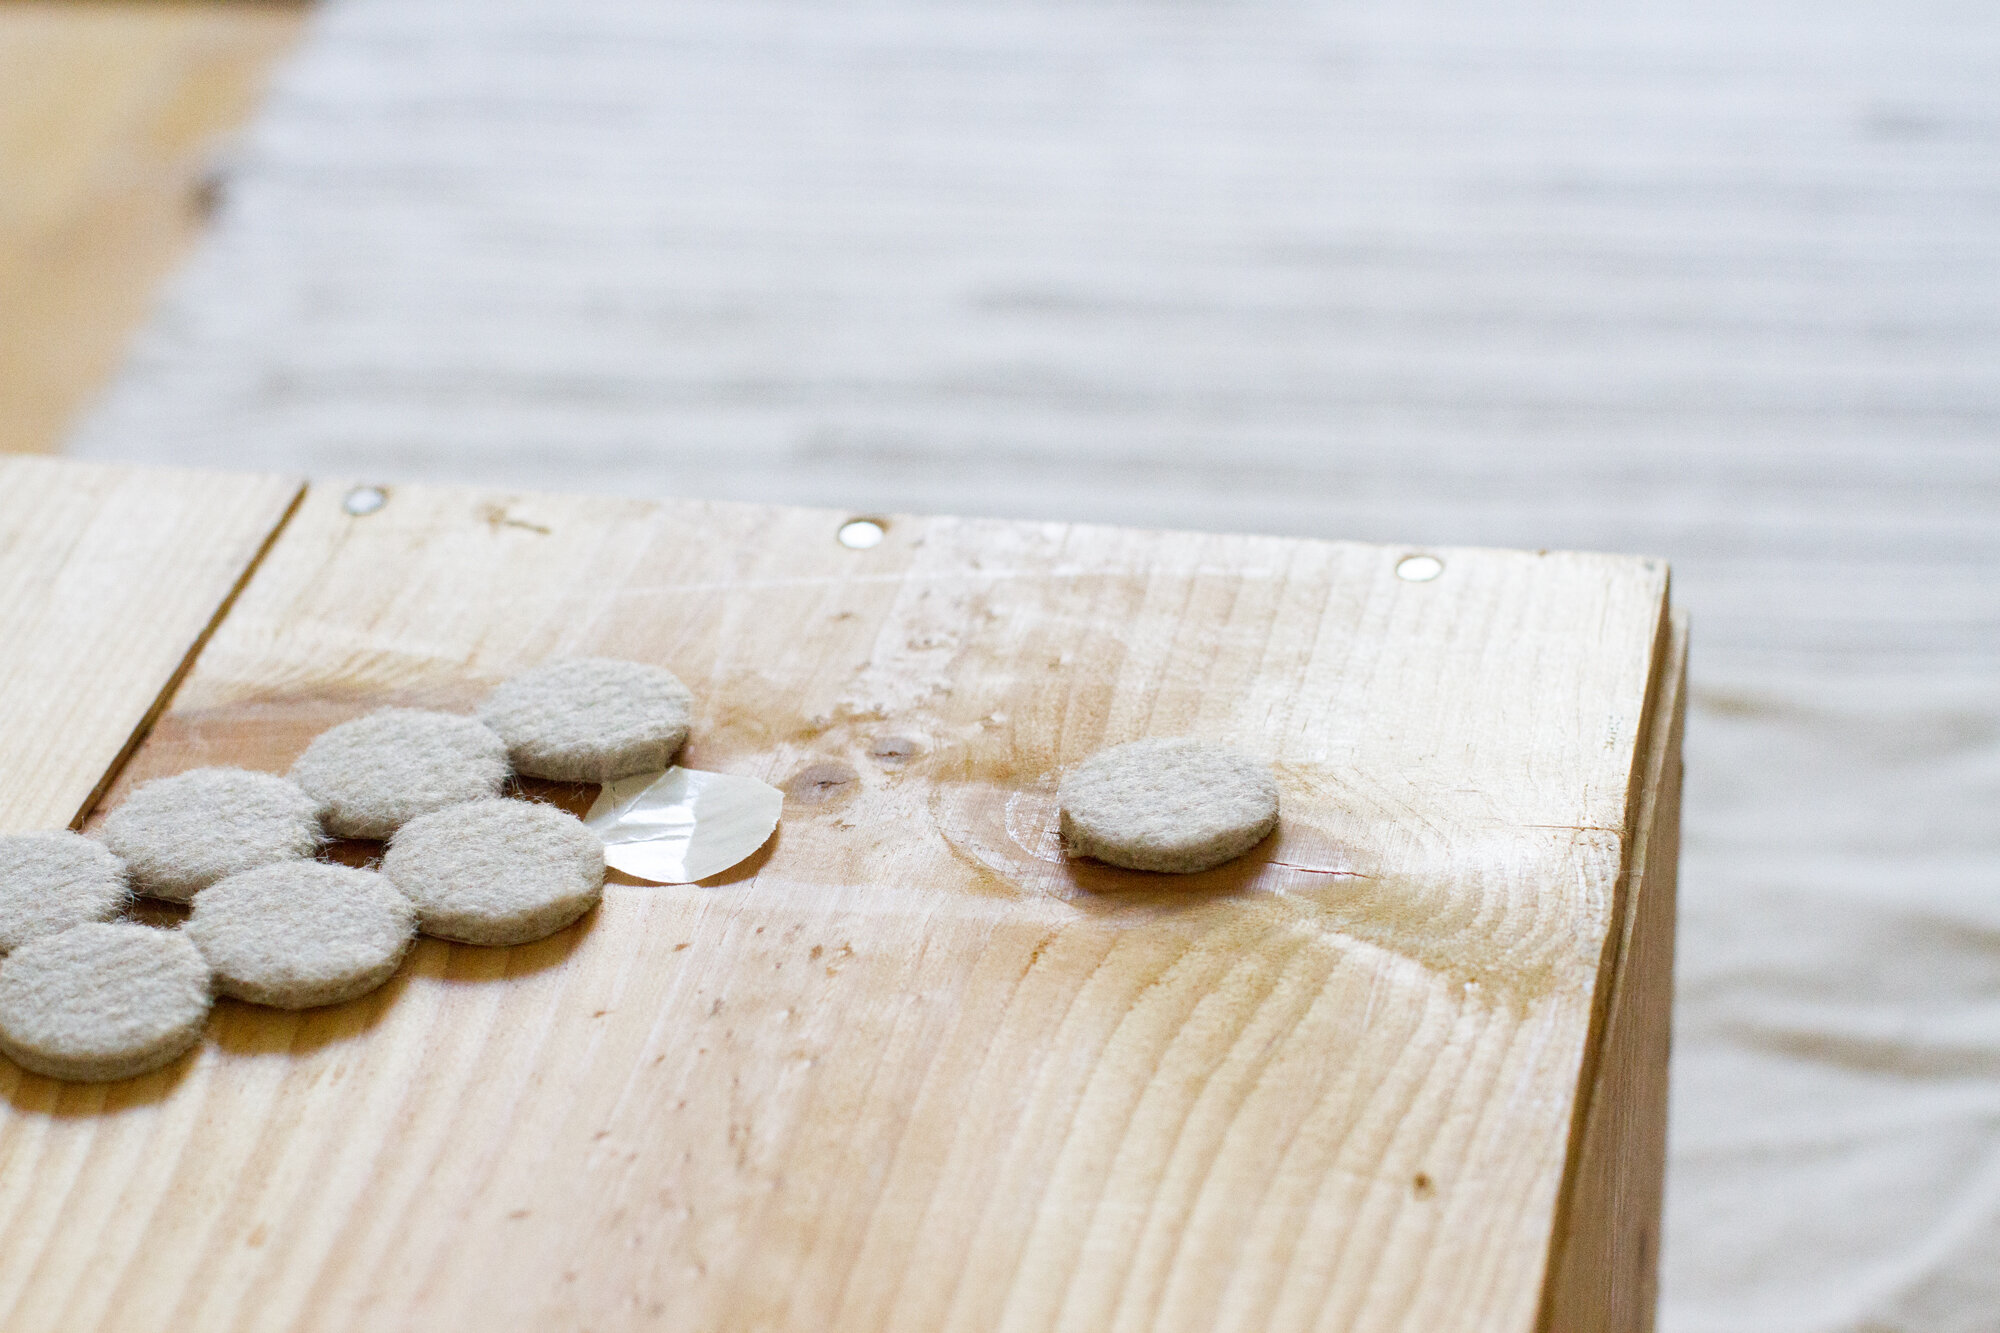
+ Finishing touches: To help protect your ears and your floor, and to make sliding the crate easier, use adhesive felt chair pads on the corners of your box.
TIPS:
+ All of our wine crates have been sidewalk-scooped, or otherwise asked for directly upon being emptied of their bottles. Many vineyards no longer ship in wooden crates, but plenty still do and asking folks at your local wine shop if they have any to spare is never a bad idea.
+ My crates varied slightly in height—between 7 and 8 inches tall—so I needed to use slimmer chair pads on one of my wine crates to make sure it could still slide easily out from under the bed. It never hurts to measure first to make sure a wine crate will work for your particular bed!

8 Comments
Several years ago I was searching for a design so I could build a do-it-yourself under bed storage drawer. Because we were renting and still are, sigh, we didn’t want to invest alot of money but pretty much knew that our current bed is coming with us for a guest bed in the future. Literally after telling my husband we need a bed drawer my father in law showed us his latest creation a bed box on wheels! I almost fell off my feet no exaggeration. I used his as a guide and consult him with specific questions. Probably spent about 80 bucks on the whole thing to create 3 bed drawers. One very deep one. And two average size drawers. It takes the place of our dresser and when we have a second bedroom one day it will be extra storage space. I needed plywood, handles (wish I used rope!) wheels and some wood the attach the wheels on the side of the box, the bed is not very high. I used paint I already had and purchased some shelf liners for the bottom. Almost 3 years and going strong! If I remember, I’ll post them on insta and tag you. Best money ever spent to use space efficiently!
Attached the wheels to the sides of the boxes, you say? Hmmm … sound of wheels turning in head … thanks, Becky!
Such a lovely idea!
What a cute idea! I love coming to your posts and seeing simple, cost effective ideas. We all need them so please keep them coming.
What a brilliant idea 🙂
Awesome! I recycled nightstand drawers under my bed that were being thrown out…giving my bed a custom look!
Ingenious!
I also just did this with old dresser drawers! I also attached some metal casters to the bottom so they roll.
Comments are moderated.