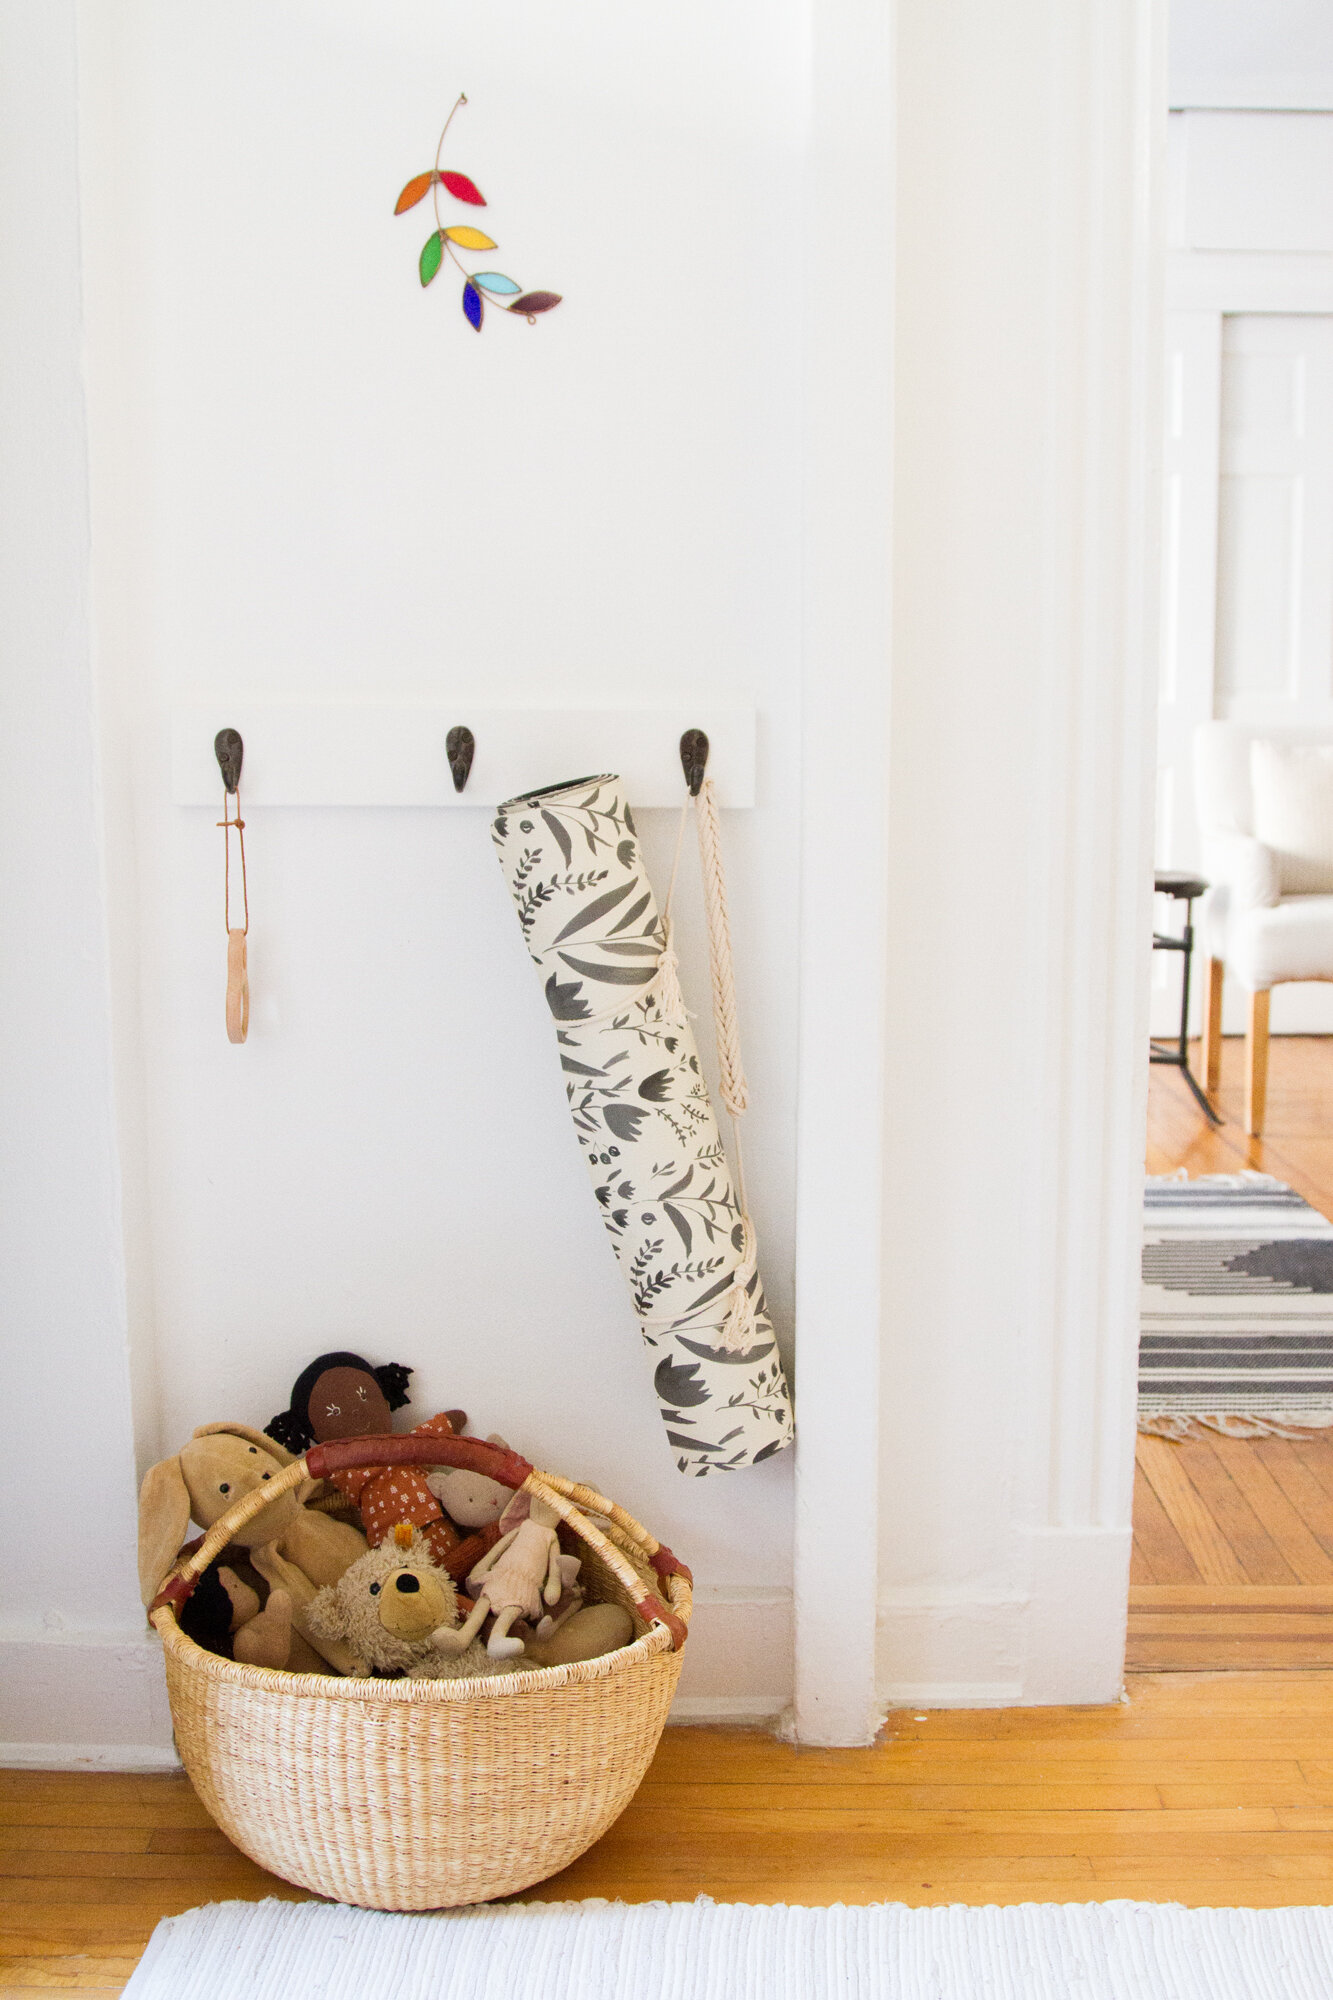
At Christmastime, two matching and pint-sized yoga mats wended their way into our apartment thanks to the foresight of a jolly old elf. The mats have since been acting as resting and stretching places for aspiring yogis and as landing spots for crashing block towers (…and aspiring yogis). Either way, they’ve been a welcome addition to our tiny apartment, we just needed to find a good spot to stash them and keep them tidy.
Rose to the rescue. I’d seen her own yoga mat hanging in her apartment from a sweet and simple cord and asked if she might be able to provide the instructions for such a project here.
Here’s what she had to say:
One of the first craft projects I ever schemed up was for a yoga mat. Using upholstery weight fabric and nylon notions I made a long cylinder bag to tote my mat to and from class. Bright chartreuse and with a butterfly print it was enjoyed for a few years before abandoning it for something slightly more…. sophisticated. Over the 23 years of my on again, off again, love affair with yoga, I’ve played with different versions of that original yoga mat carrier. Most recently, I abandoned the bag altogether for a lightweight, streamlined strap. It lets my sweaty mat breath, and I can tuck it into a pocket when not in use.
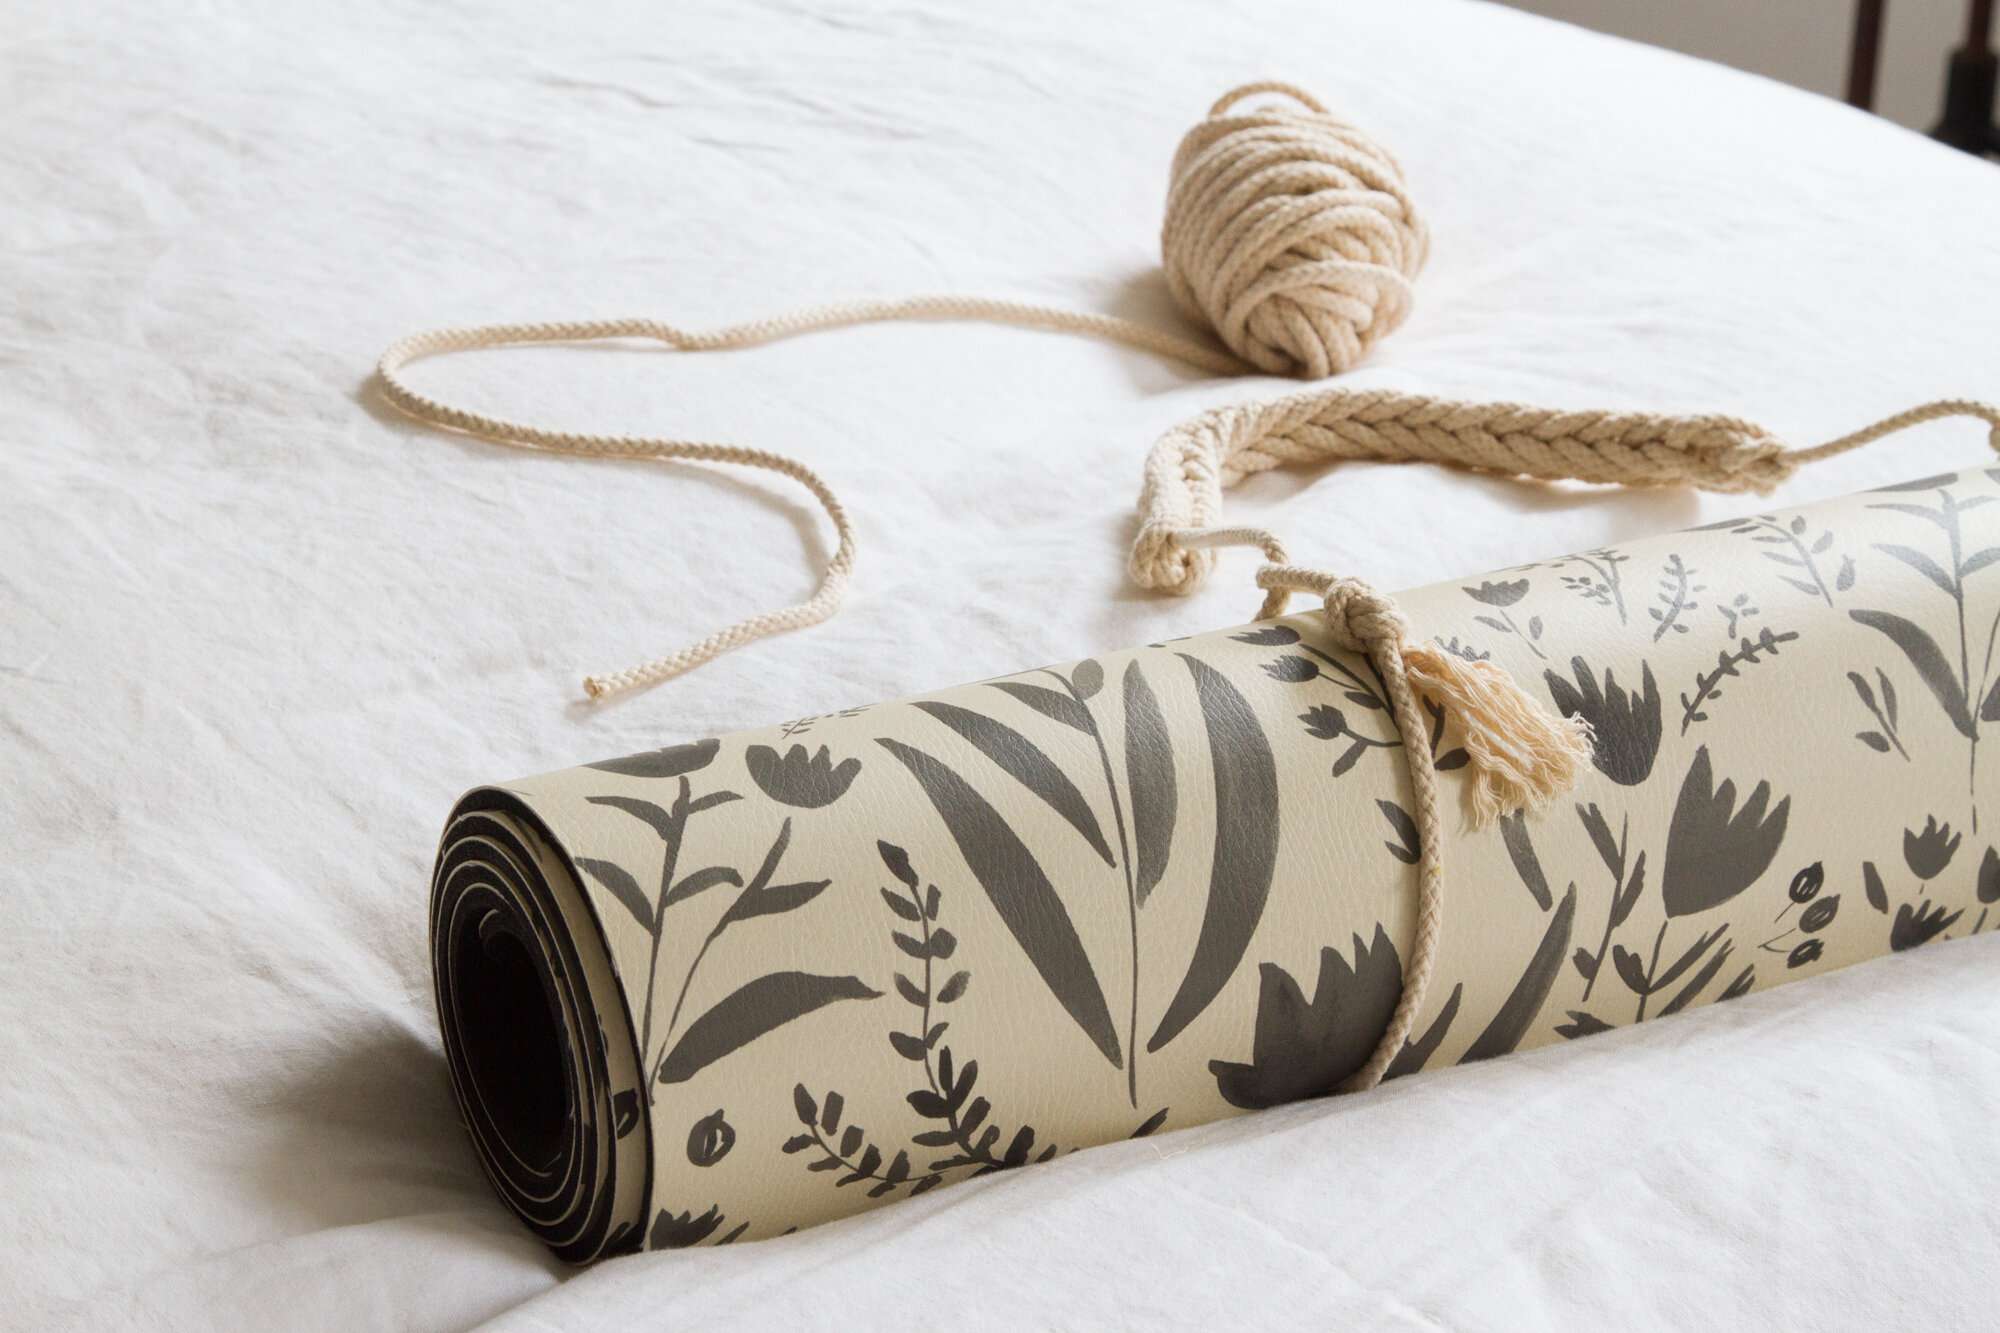
Last year, I made my favorite form/ function version of this carrier yet using only a simple finger knitting technique and $2 worth of craft supply rope.
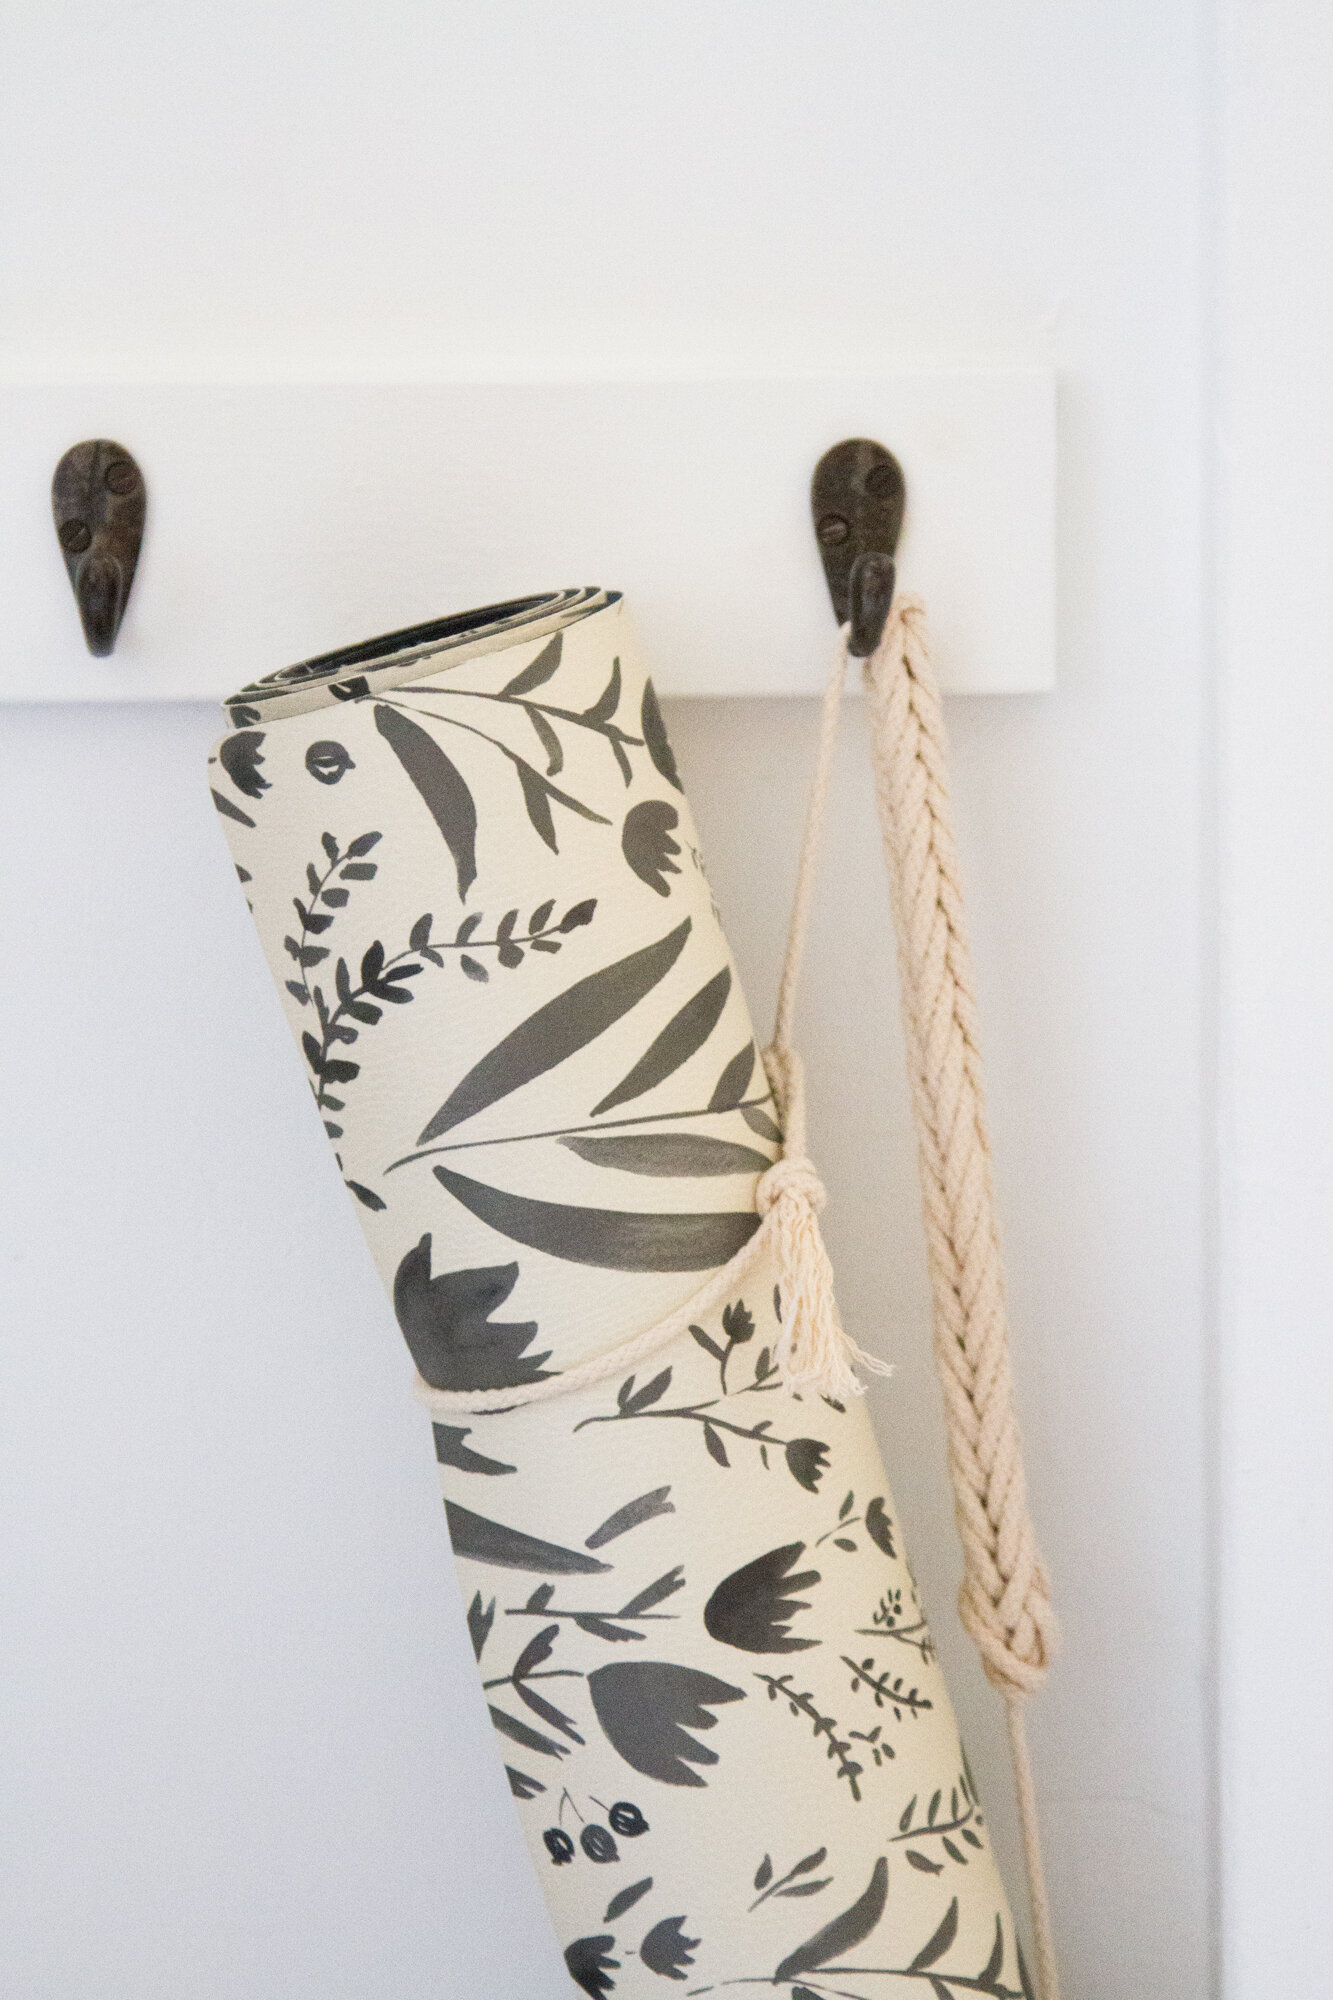
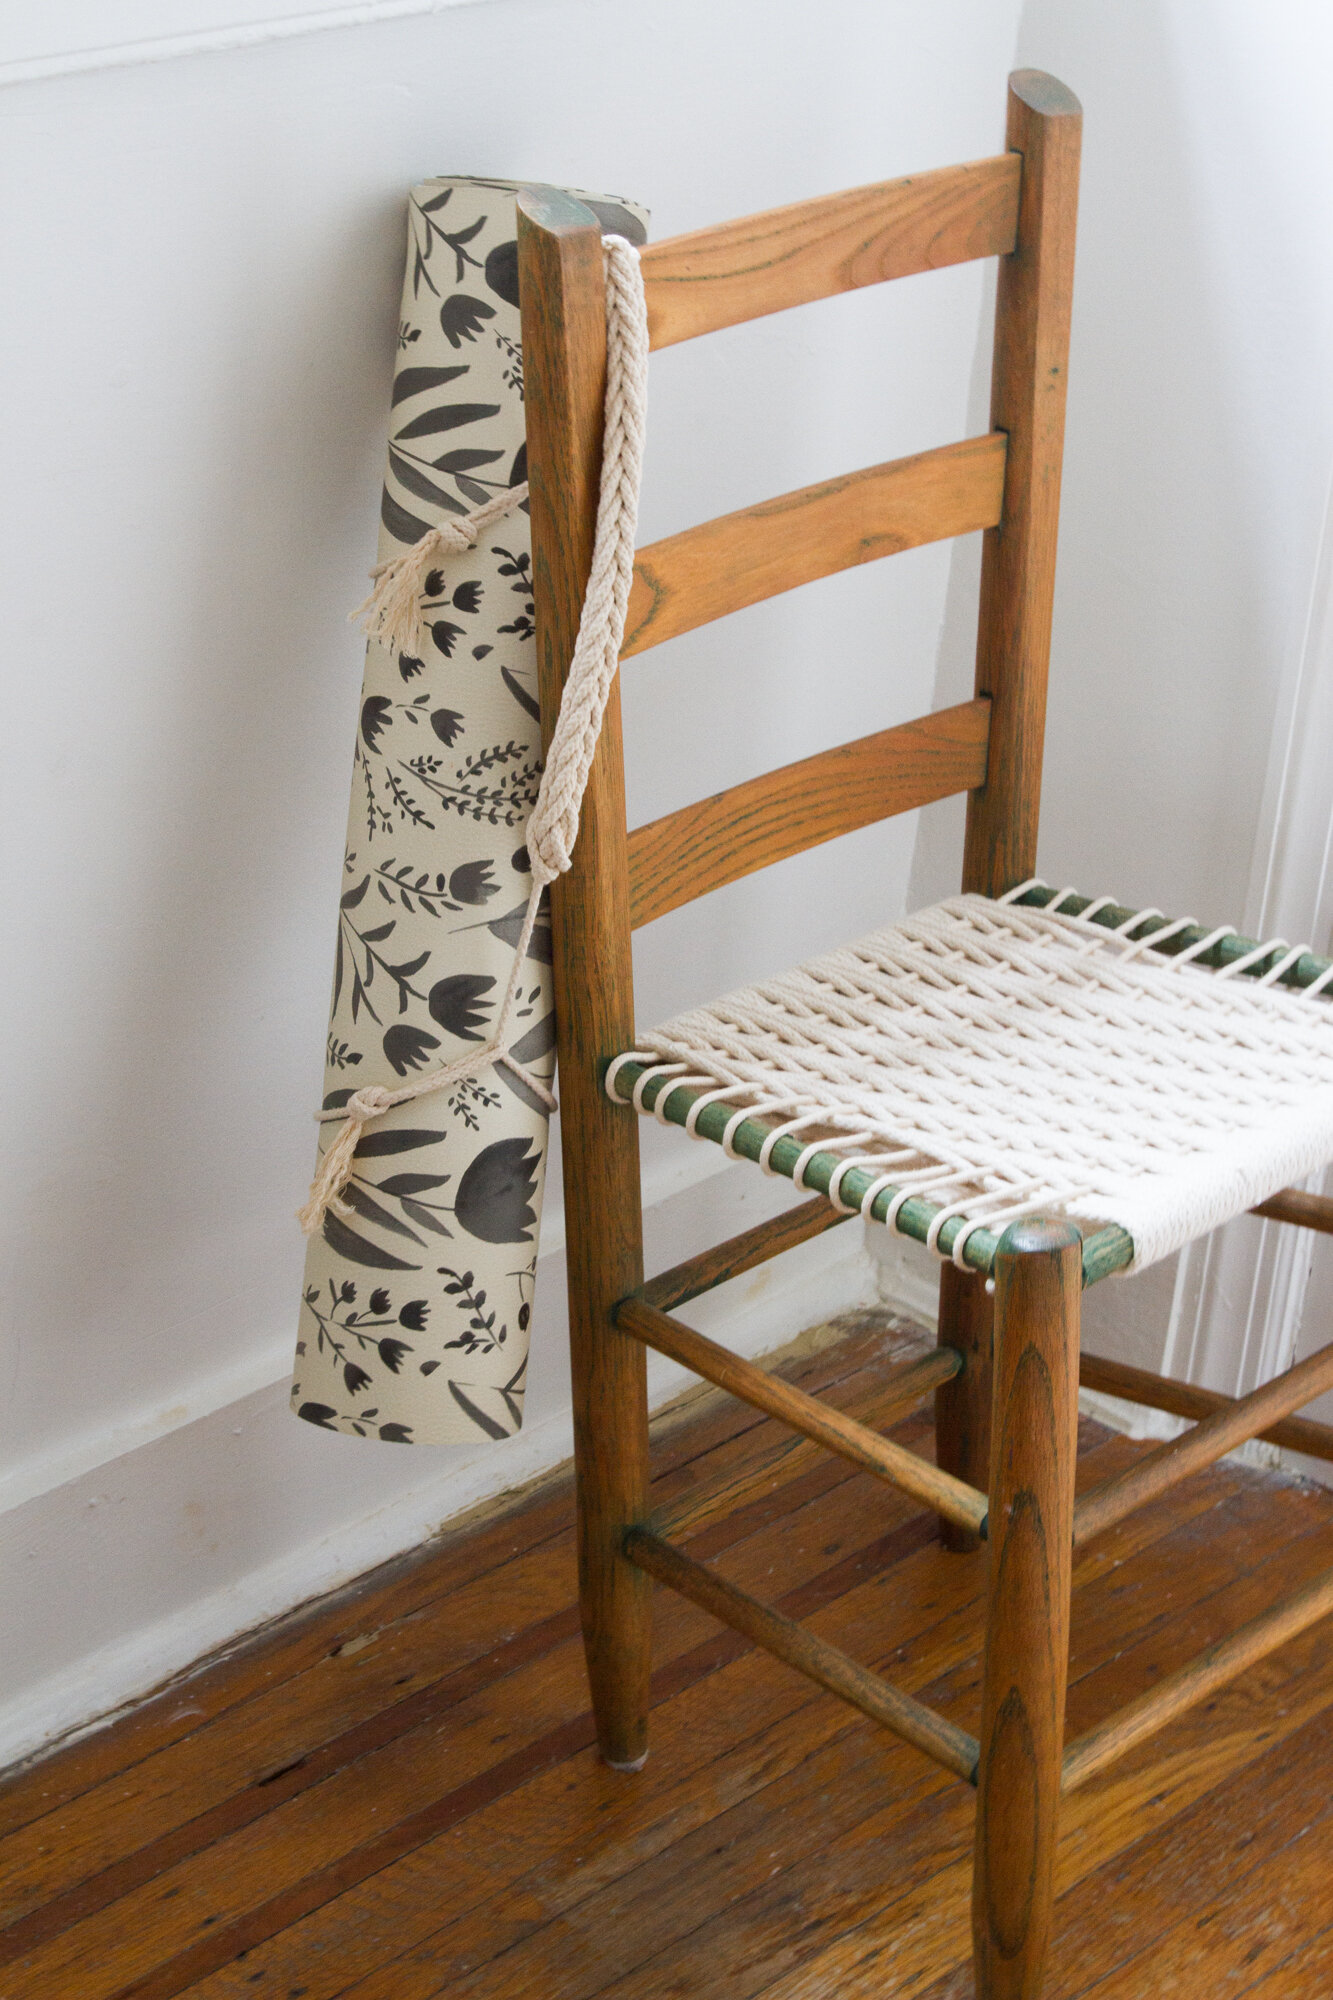
The intricate woven center of this strap adds both a cushioning component when worn across the chest or over the shoulder and intrigue when hanging from a knob. The knotted loops on either side can easily accommodate any sized yoga mat, rolled up blanket, or other cylindrical object.
Materials:
+ 23 feet of rope Size #6 3/16 is pictured here but you can use a wide variety of cotton string or rope. I’ve had great luck with sourcing cotton rope at Knot and Rope Supply, but don’t forget to check your local hardware and craft stores and buying in person is a good way to find just what you’re looking for. You can also easily increase or decrease the length of the rope used to accommodate yogis of all sizes.
+ Scissors
Instructions:
For the cord:
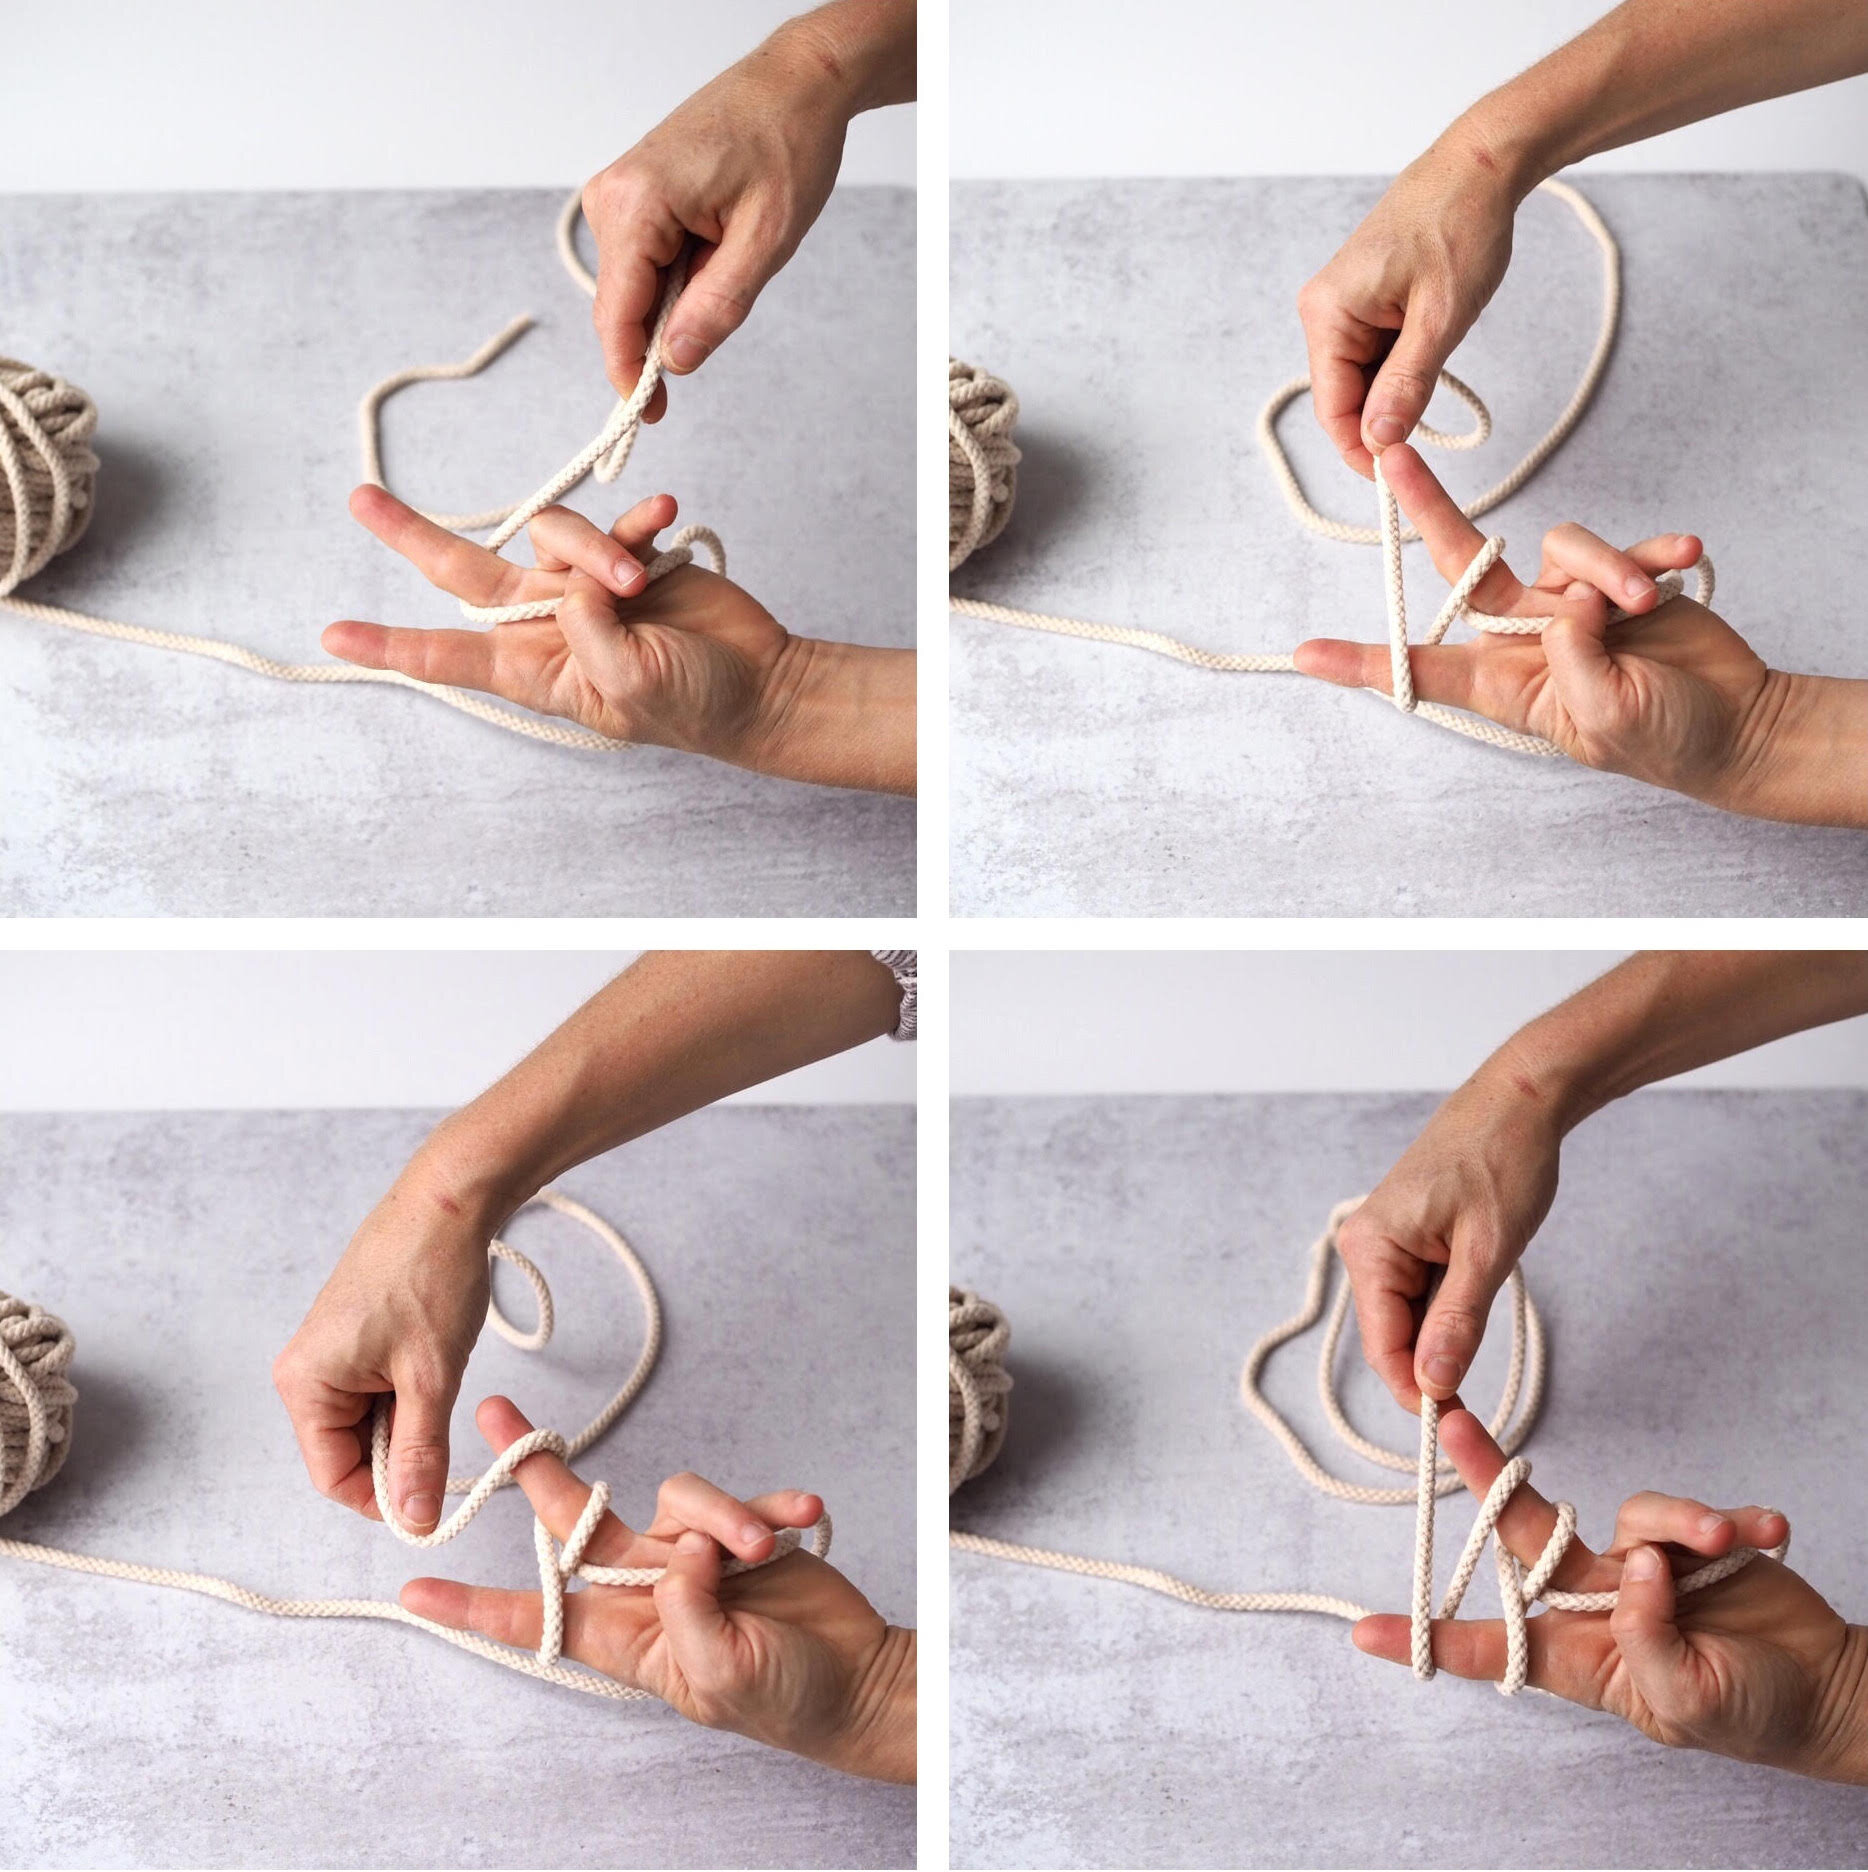
+ Start by holding the tail end of your rope in the left hand. Leave a 22-inch tail in the front of your palm and bring the remaining cord between your pointer finger and your middle finger of your left hand.
+Working with the long end of the cord, wrap the cord around your middle finger (clockwise) to the front of your hand, then circle it back between your fingers at a diagonal and wrap counterclockwise around your pointer finger.
+ Continue back between your two fingers again at a diagonal around your middle finger and through the two fingers to the back of your hand (clockwise). You are making a figure eight with the cord around your two fingers. Complete the figure eight one more time to create three loops on both your middle finger and your pointer finger and the working cord is hanging in back of your hand between your two fingers.
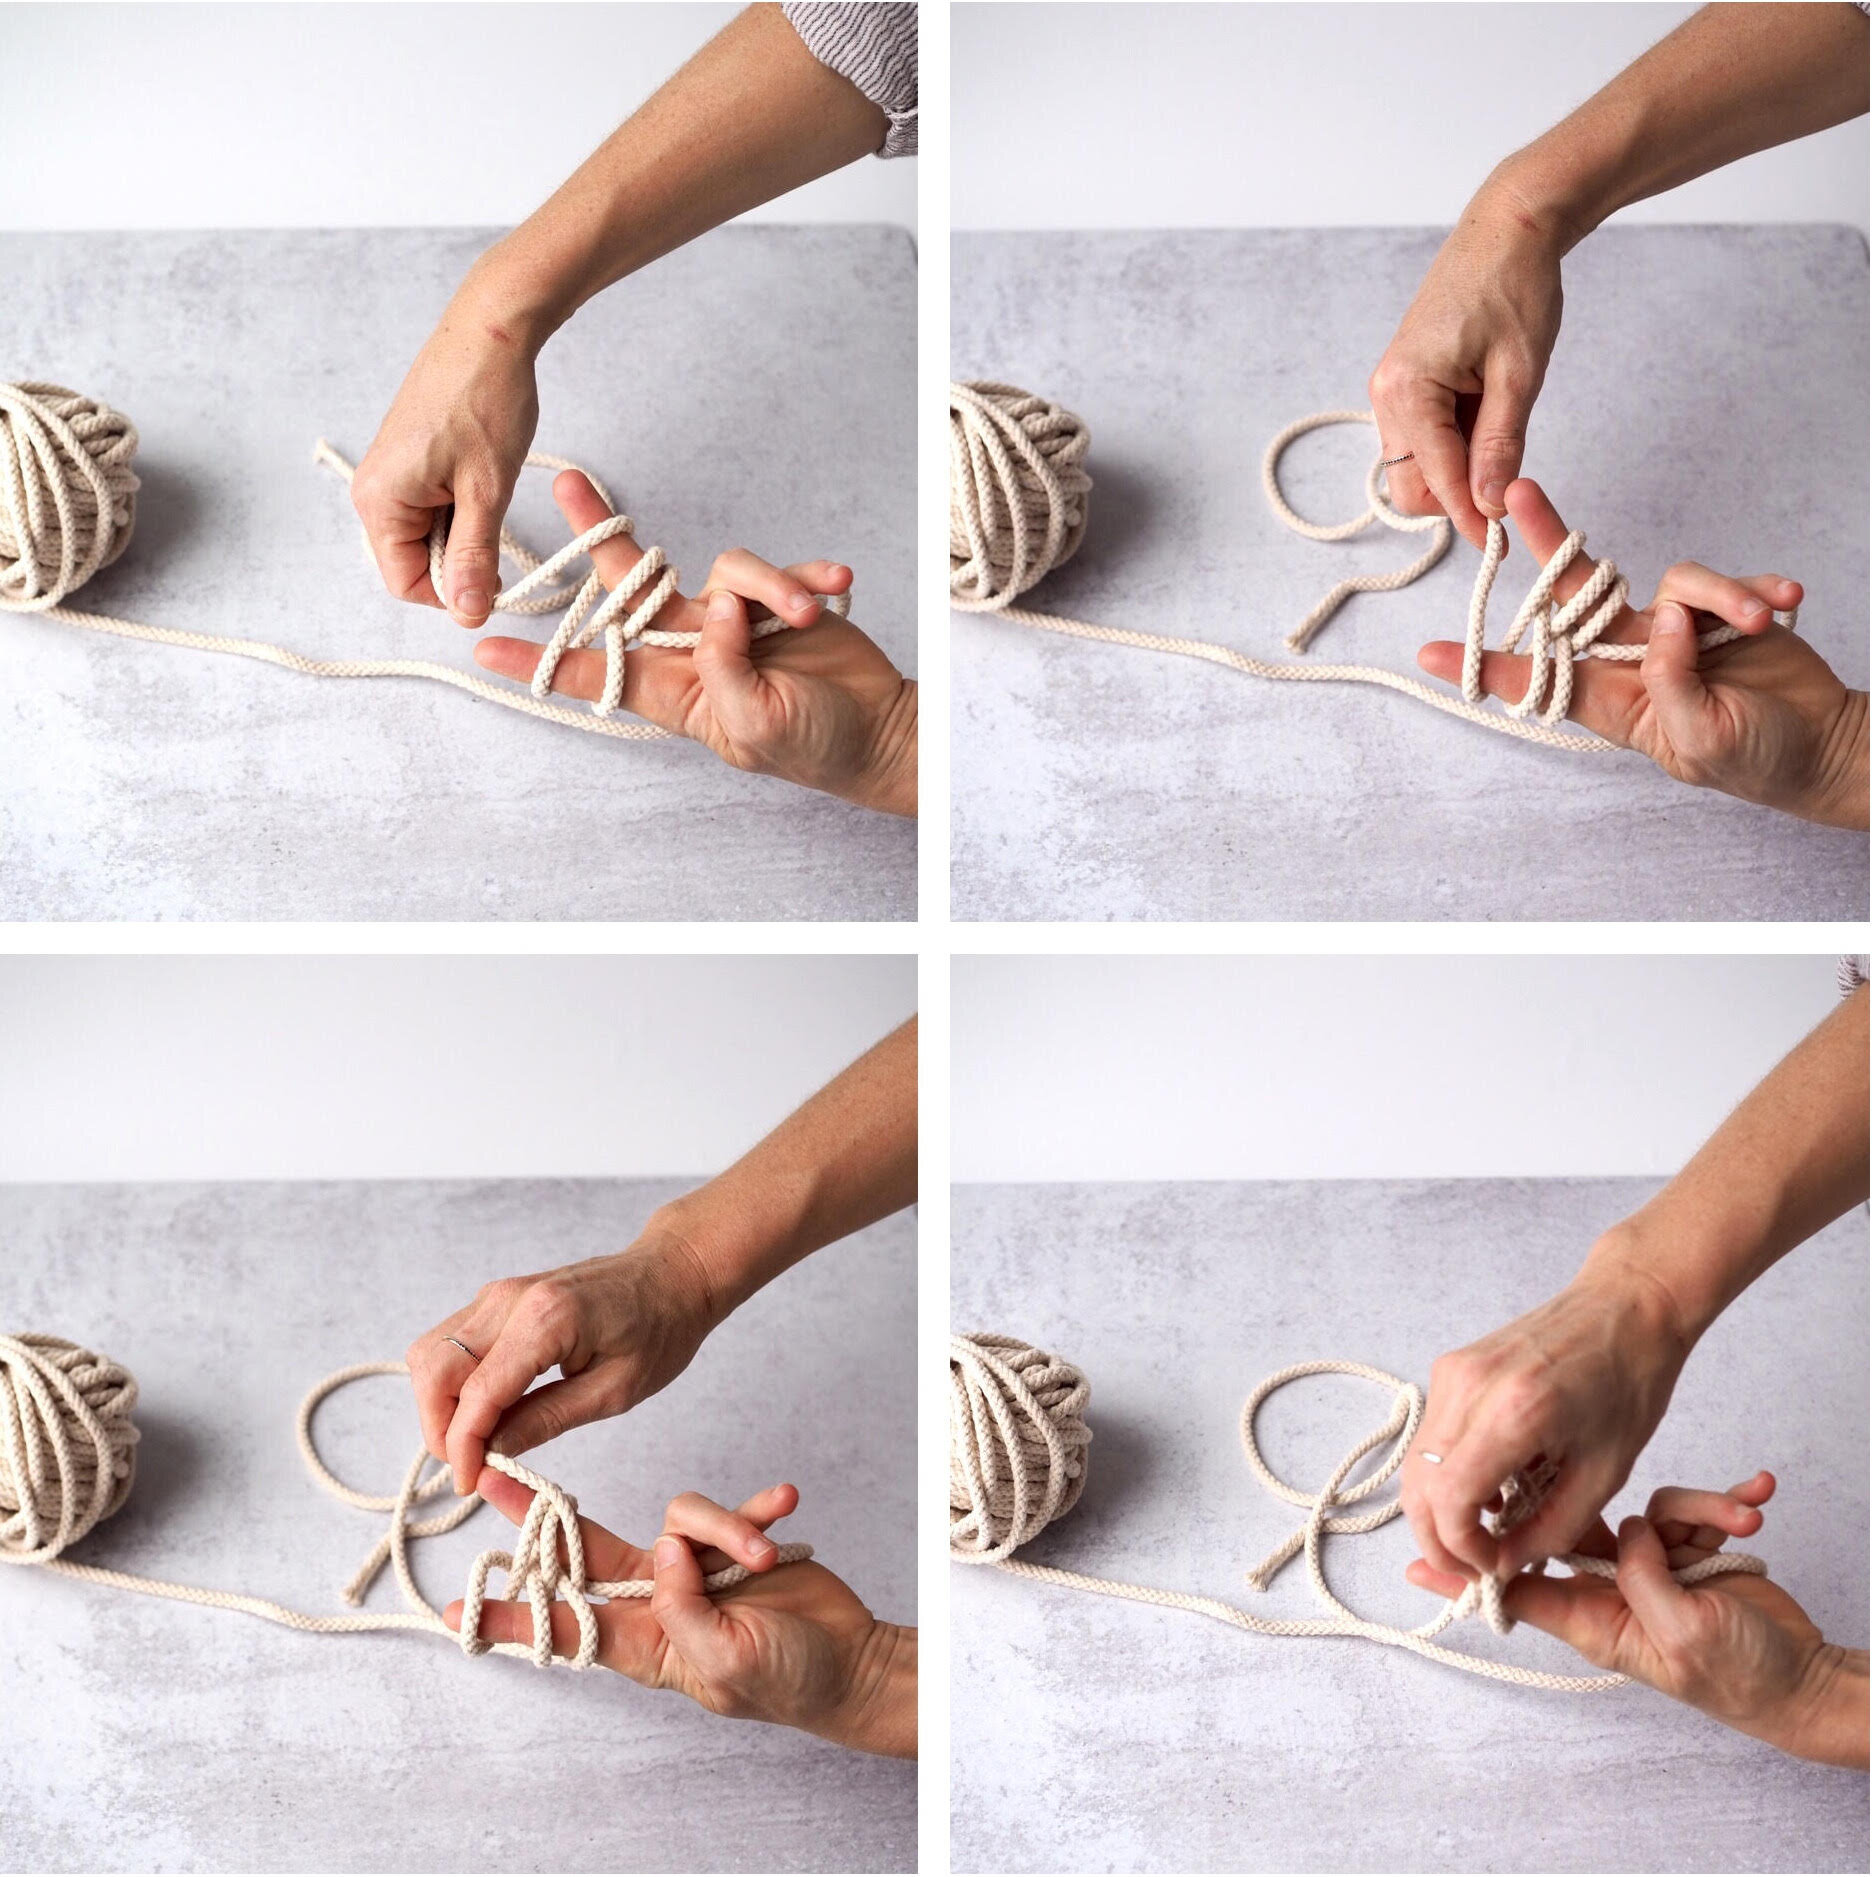
+ Working with the three loops on your middle finger first, carefully bring the loop on the bottom over the top two loops and off your finger. You will have two loops remaining on your middle finger.
+ Repeat for the pointer finger. Carefully slip the bottom loop over the top two loops and off your finger.
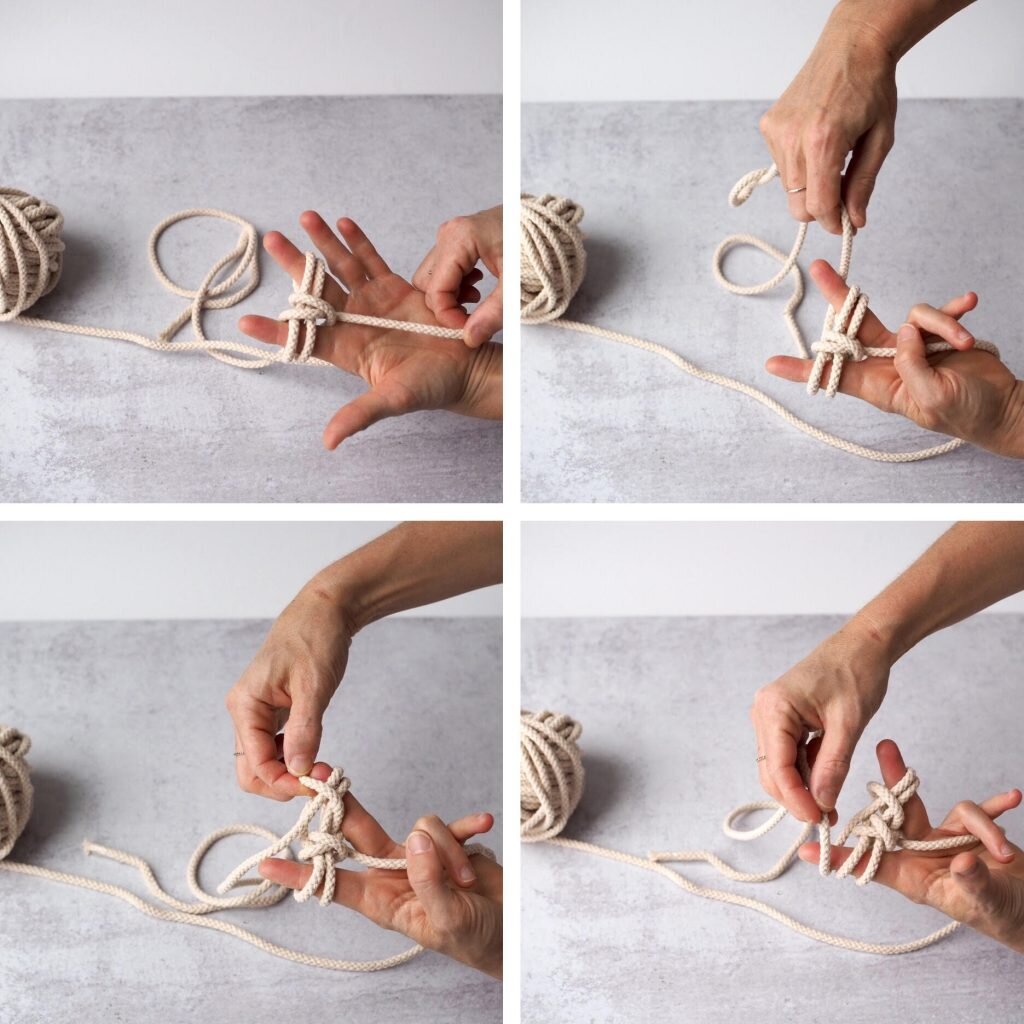
+ You will continue to cord in this manner making a figure-eight around your two fingers so three loops are on each finger and sliding the bottom loop over the top two. If the tension becomes too tight around your fingers pull on the bottom loop to create some slack. Wiggling your fingers while you work will help create space as well.
+ Work this method of cording for roughly 18-inches or whatever your desired length.
+ When you reach your desired length, cut a 23-inch tail end from your working rope. Thread the cut end through the two remaining loops from the middle finger (from the inside out) releasing the loops from your finger. Then thread the tail end through both loops on the pointer finger (from the inside out) and off your finger. Carefully pull to cinch together.
For the looped ends:
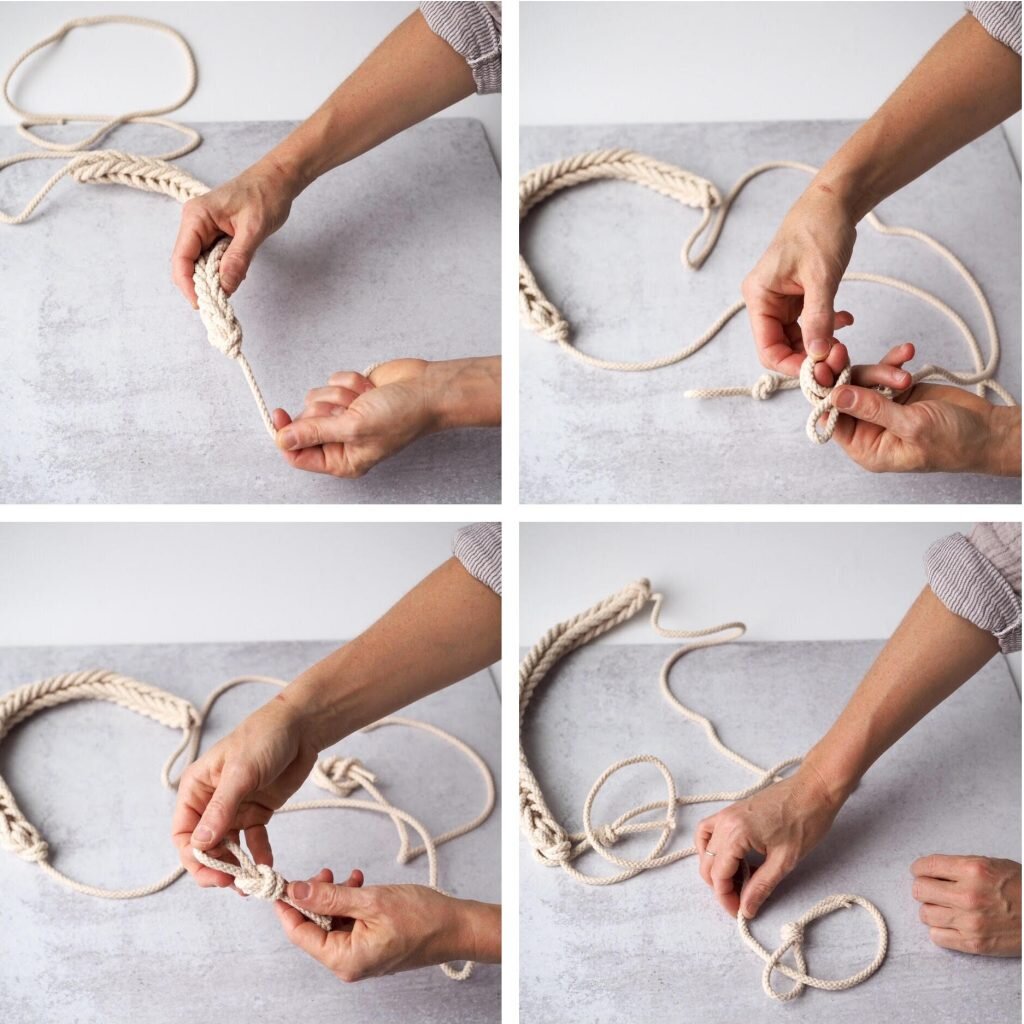
+ Starting with one end of your rope, fold it in roughly 7” length. Tie a simple knot in the center of the doubled rope and pull tight to create a secure knot.
+ Thread the knot through the loop hole and pulling it back up towards the center to form a self-adjusting loop. (You can also thread the entire length of the rope through the loop you just created starting at the opposite end). This is the loop that will be used to secure your yoga mat.
+ Repeat for the opposite side creating a double knot pushing the knot through or passing the entire length of the cord through the knotted loop.
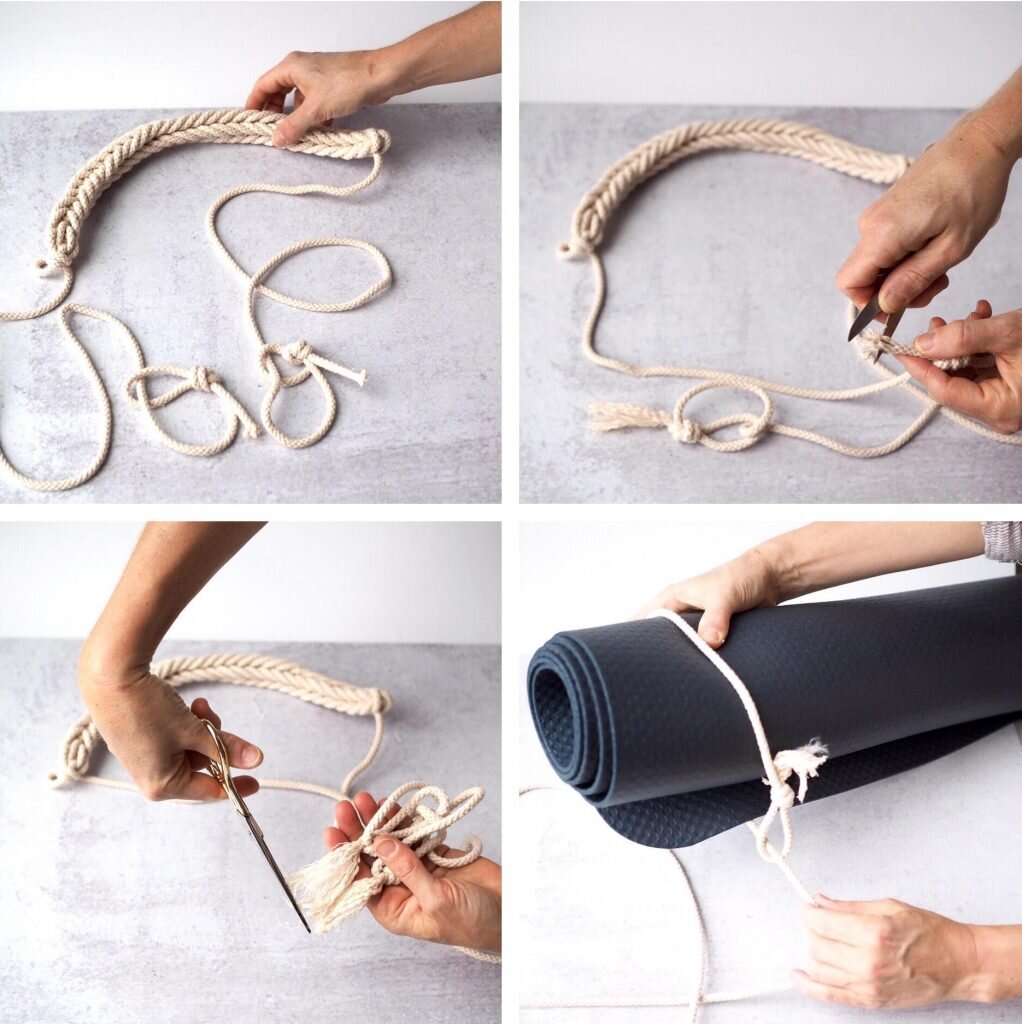
+ To create tasseled fringe on the tail ends, use the sharp point of your open scissor to fray apart the braided rope. Repeat for the second side and trim both ends to the same length.
To use:
+Widen the loops to slip over the rolled up yoga mat spacing the on either side and pull the center of the strap upwards to secure and tighten the strap closed. To open, simply pull apart either side of the loop to release the hold.
PS. If you’re a person who finds video helpful, I posted a few quick videos on my IGTV channel to help you along!
Thanks to Rose Pearlman for developing this project, writing the instructions, and capturing the step-by-step instruction imagery. Rose is an artist, teacher, and textile designer. With a background in fine arts and a love of well designed functional objects, her creations blur the lines between art and craft and pushes the boundaries with non-traditional techniques and materials. Rose teaches monthly rug hooking workshops in and around her home in NYC, and also welcomes commissions for one of a kind constructions in decor and home furnishings. Her work has been featured in fiber magazines, galleries, and numerous online design sites. Her new book Modern Rug Hooking came out in December 2019 and is available wherever books are sold. She lives in Brooklyn, NY with her family.
This post includes affiliate links. Reading My Tea Leaves might earn a small commission on the goods purchased through those links.
10 Comments
I just love this series so much! Thanks Rose for cooking up these great projects, and Erin for sharing them. I’ve admired (and bookmarked) so many in the series but this might be the one that actually takes shape soon 🙂
so glad!!
Hi!
Could you tell me how sturdy this strap is? Could it easily hold about 10lbs of weight? I would love to make this for my rollerskates but am not sure if it would work. Thanks !
Hi there: Haven’t run any kind of weight tests over here, but it’s quite sturdy! Imagine it would be more than okay for roller skates!
23 feet, or 2-3 feet of rope? This does look like the perfect solution for yoga mats! Bags can be cumbersome.
23 feet! The cording technique needs a good bit of rope!
Where did you purchase your yoga mat? I love it!
These are the kids’ yoga mats, linked to above!
I love the idea of this project, but I’m in need of troubleshooting help! Whenever I pull the loops over my fingers, I end up with really loose loops and no way to tighten them, which ends up making a knotty mess instead of a long woven cord. But if I keep them tight, I can’t pull them over! Is there a tightening technique I’m missing? Am I using the wrong kind of cord?
Hmmm. Have you had a chance to watch the IGTV video I made? If you’ve only made a few loops and the cord is looking like a knotty mess, you probably just need to keep cording–it takes a good ten loops or so before you start to see the cord lengthen!
Comments are moderated.