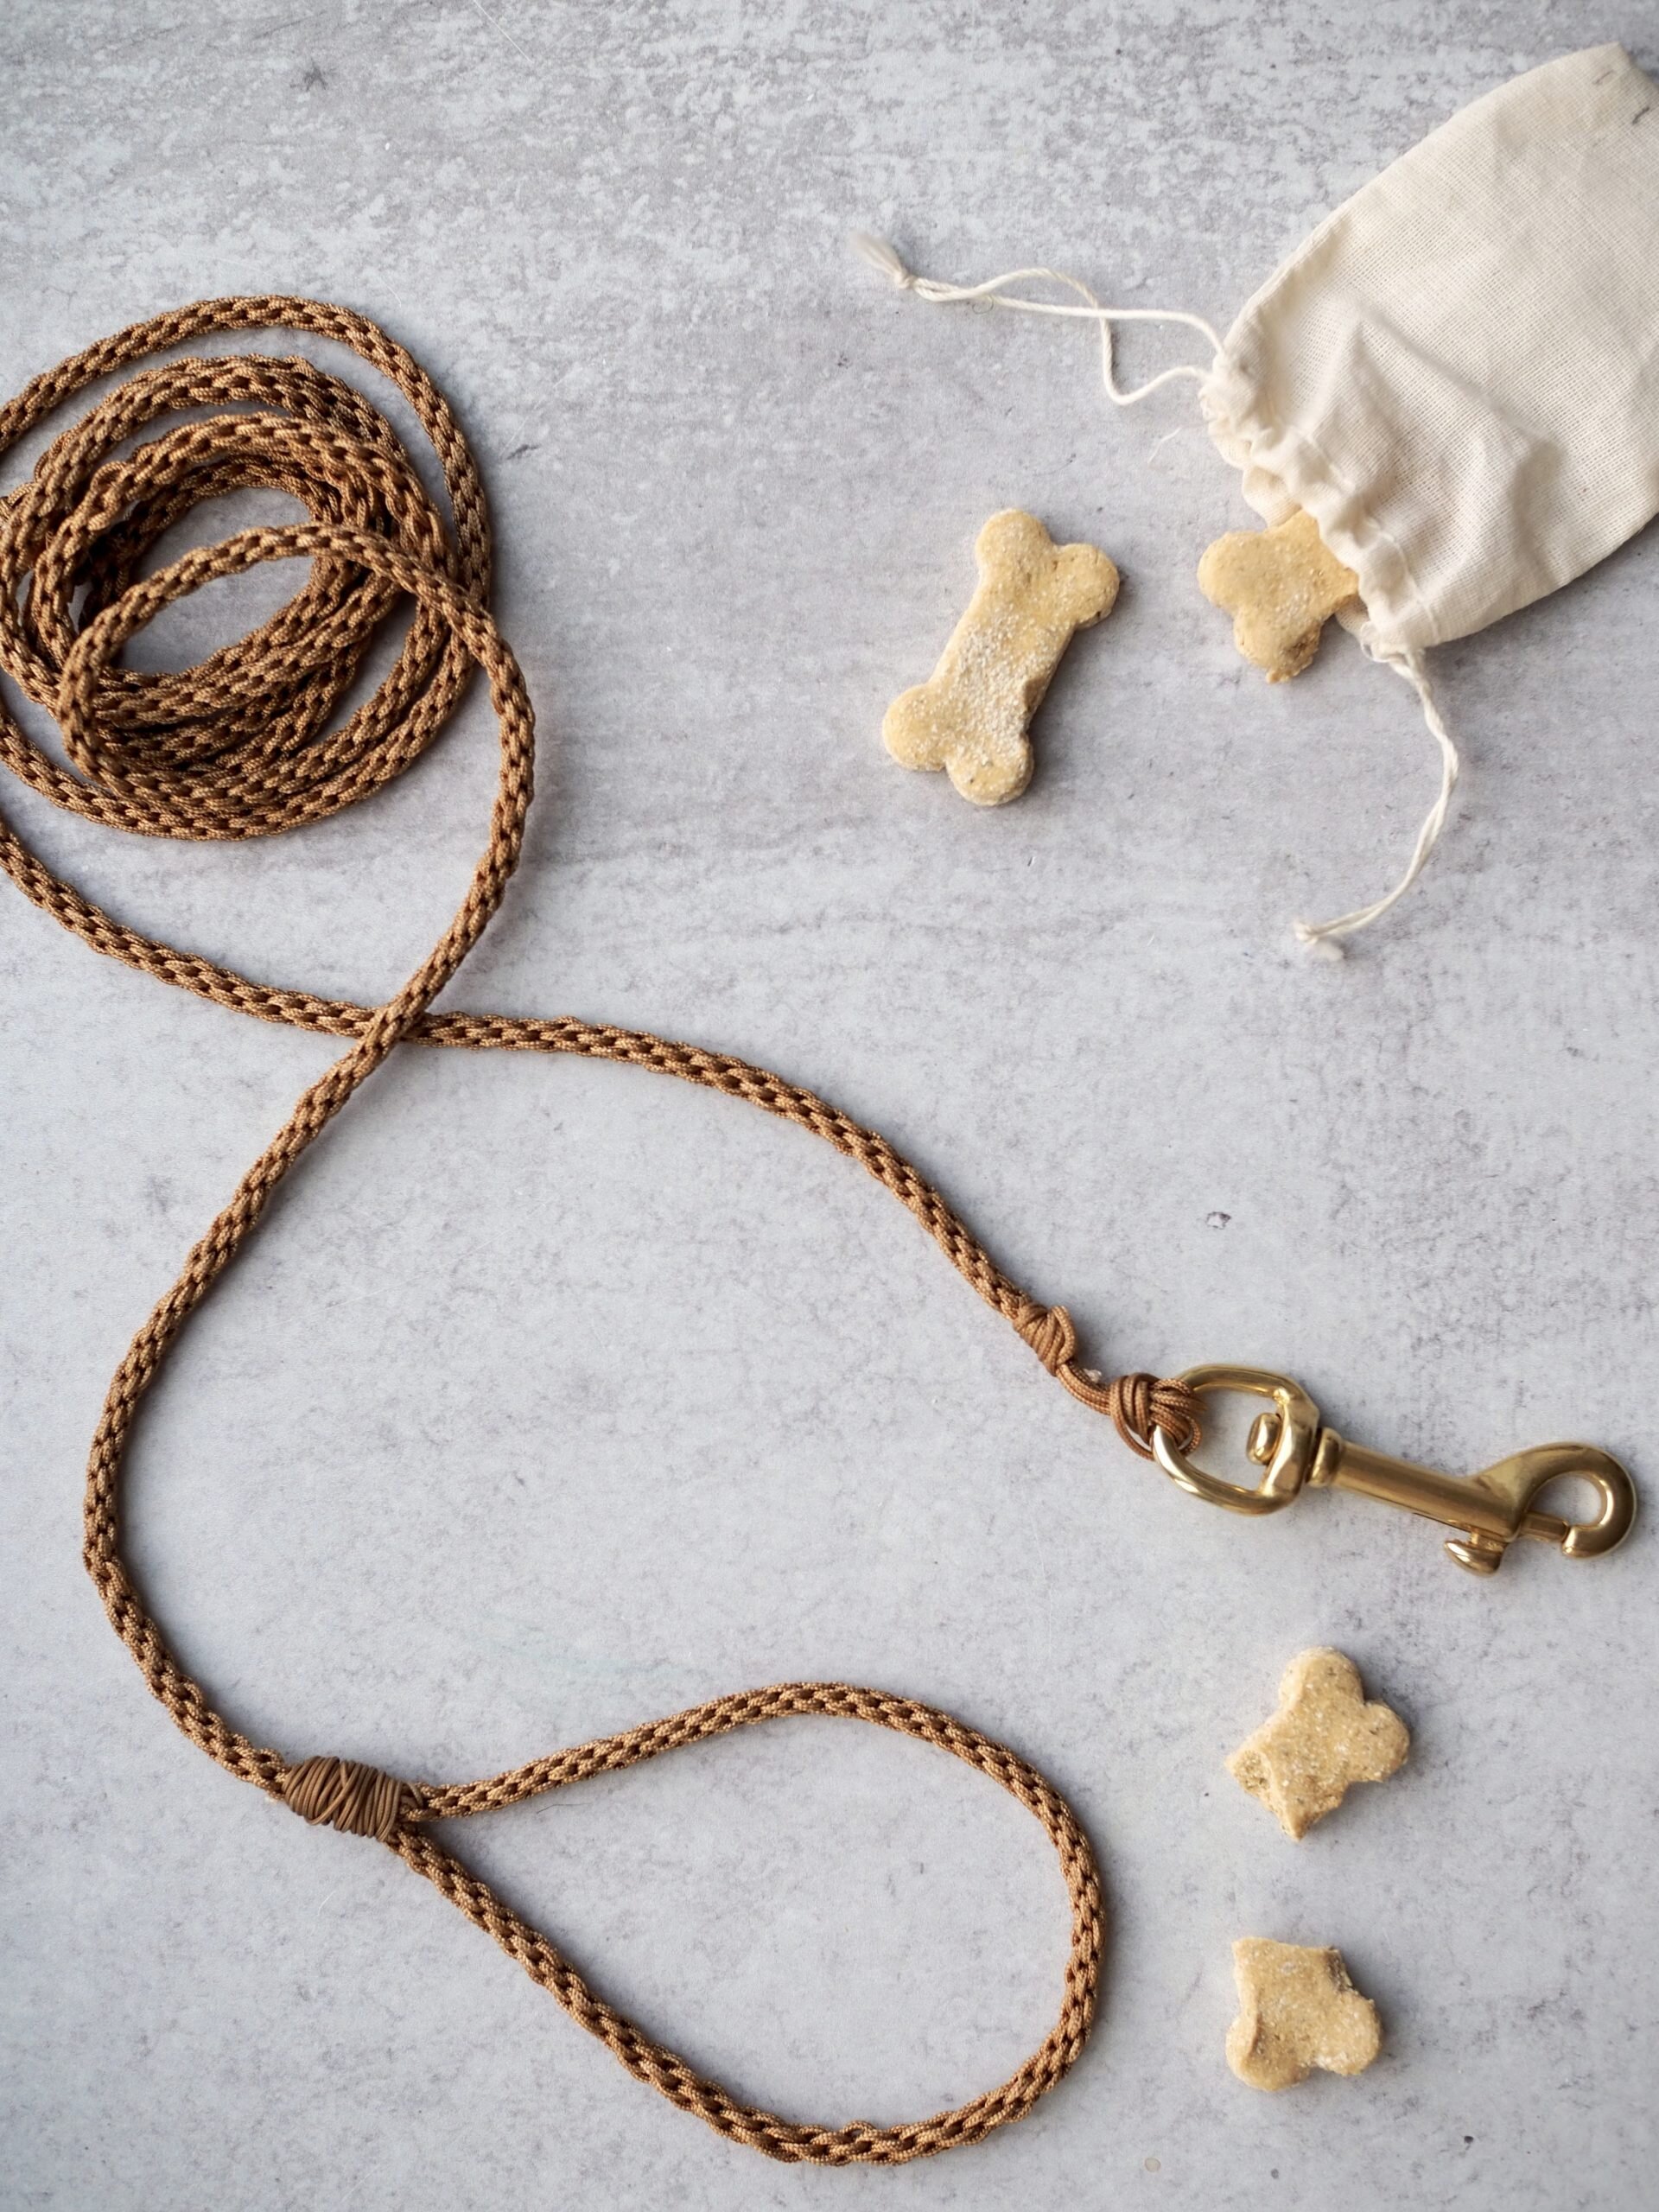
It’s a project-heavy week for a project-heavy season, so buckle up, my friends. Today Rose and I are sharing a project for anyone wanting a new hobby (the winter is long! new hobbies are fun!), or a new dog leash.
In this tutorial, Rose uses the traditional Japanese cording technique, Kumihimo, to make a sturdy but delicate leash. Kumihimo translates into English as “gathered threads” which sounds like a very lovely thing to offer someone as a gift. (You can learn more about the history of the technique at this online exhibit from the Tachibana Museum.)
This technique takes some time and a little more than 70 feet of string to complete, but the supplies are simple and few and can be found at any hardware store. Rose chose this nylon string because it’s hard-wearing, weather resistant, and not easily bitten through or broken. If you’d rather not use nylon you could try the same technique with cotton, just know that it won’t be as resistant to abraiding or dirt. (And if you you’re looking for a place to recycle nylon rope, the Sterling Rope Recycling Program is a place to know about.)
Kumihimo Corded Dog Leash
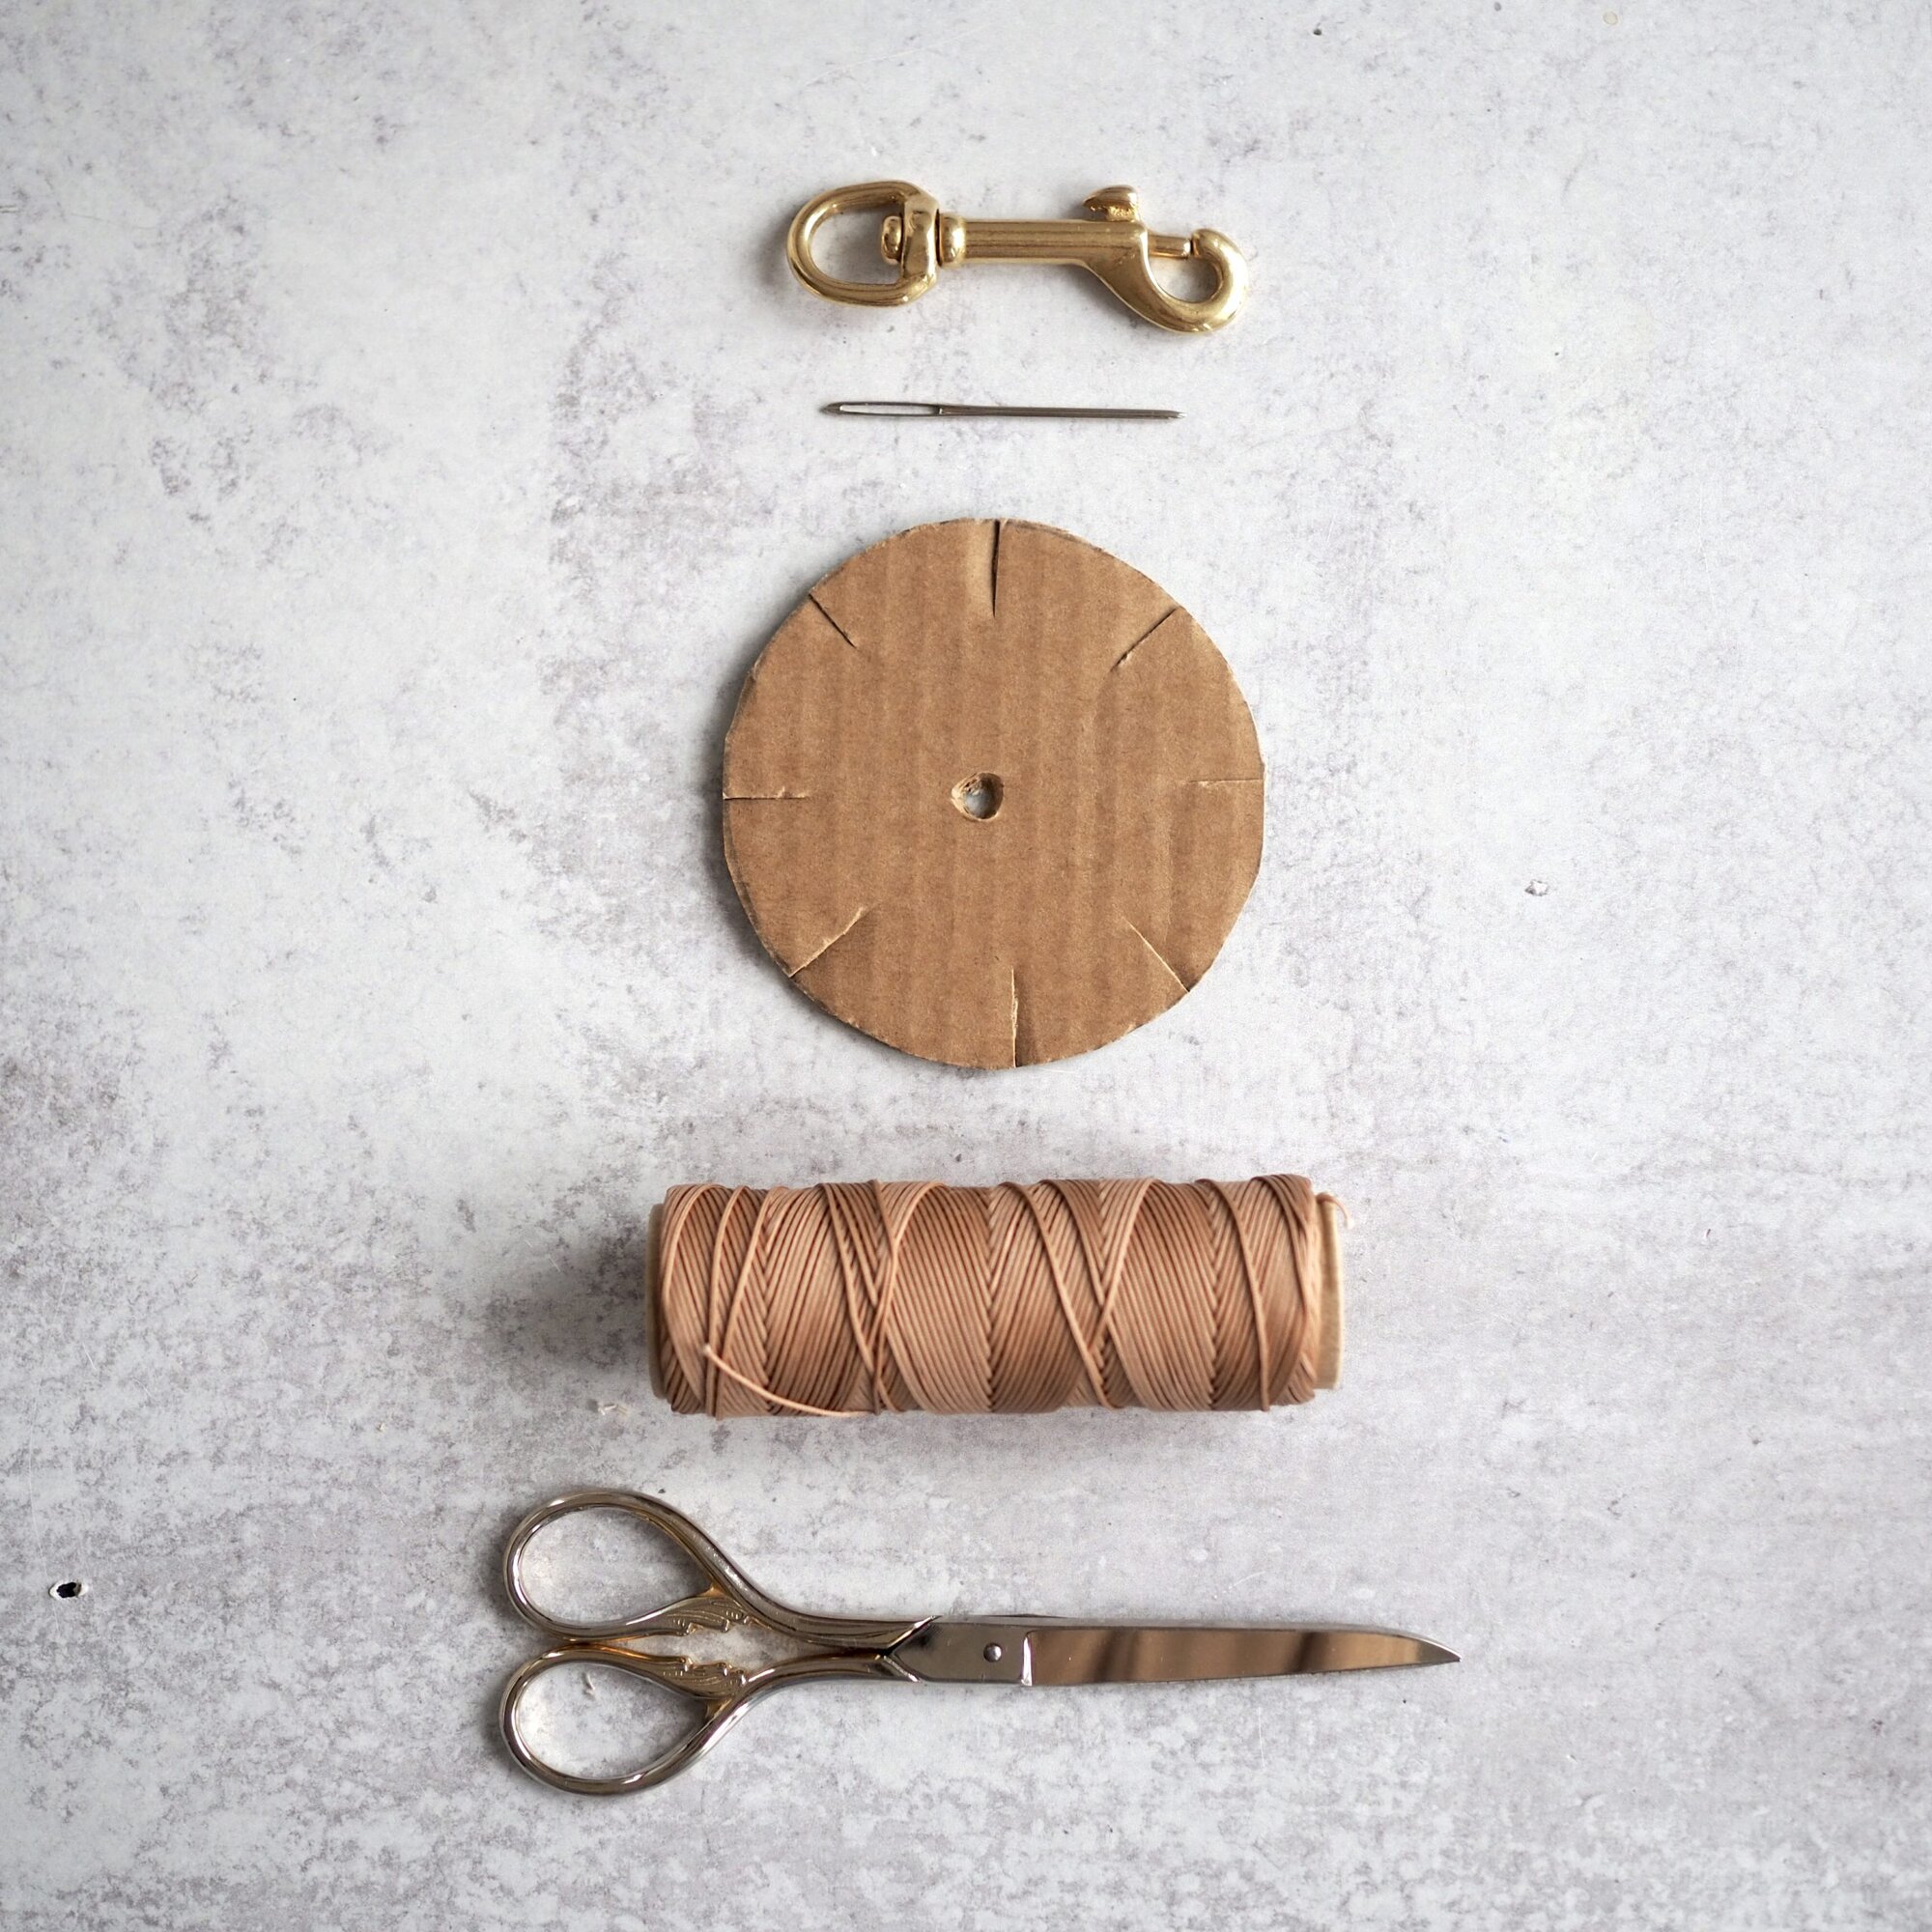
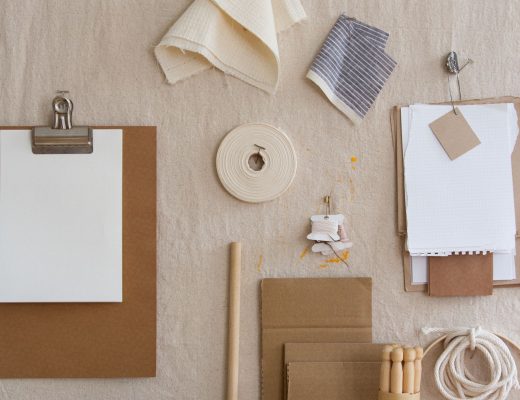
Materials:
+ Small piece of cardboard or cardstock
+ Sharp scissor
+ 3” Circular dish/ object to trace around (optional)
+ Pencil
+ Ruler (optional)
+ 72 feet of nylon string*
+ 1 three-inch brass or metal lobster clasp (check your local hardware store)
+ Awl, hole punch, or Exacto knife to puncture a center hole
+ Darning needle
*I recommend nylon string for this project as it is durable and strong. I use a fine nylon to create a very dainty (but strong!) leash (sometimes called mini-blind cord). If you prefer a thicker leash, use thicker nylon (you may not need as much yardage for thicker fibers). Most hardware stores have a variety of nylon string or cord to choose from. 72 feet of string made a finished leash that’s about six feet long.
Instructions:
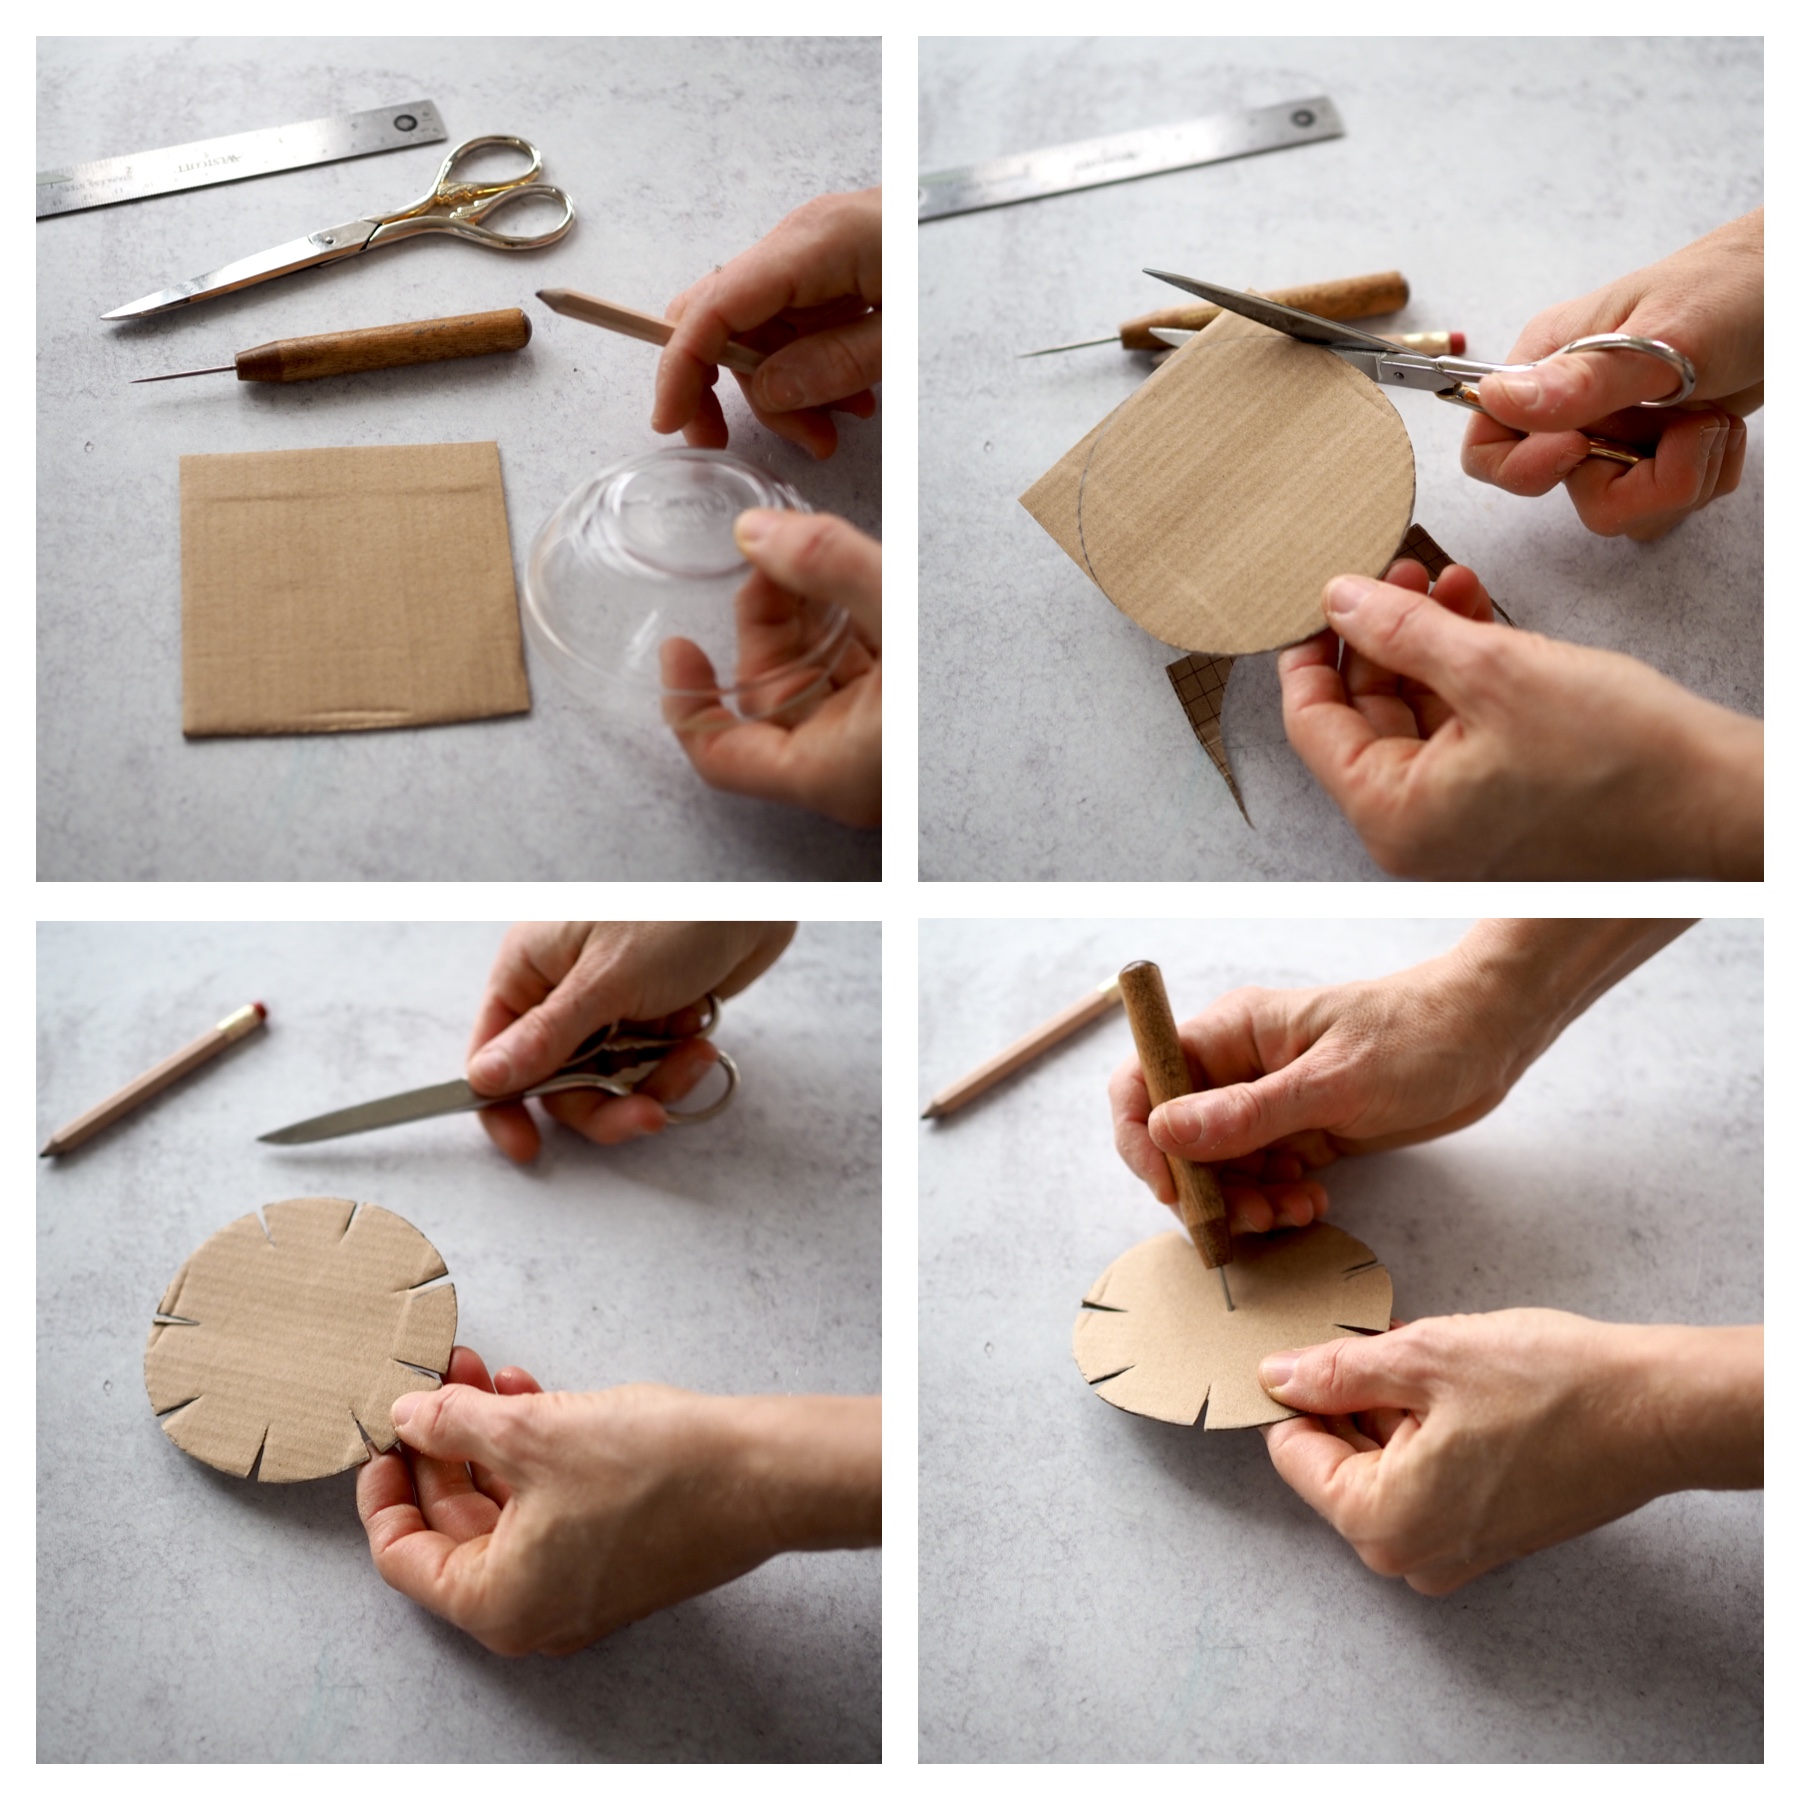
To make the kumihimo loom:
+Trace the outline of your circular object onto the cardboard.
+Cut out the circle shape with sharp scissors.
+With a pencil, draw a dash pointing in towards the center of the circle.
+Draw a dash directly below the first dash, also pointing towards the center.
+Draw a third and fourth dash between the first two dashes on either side of the circle. If you were to relate the dashes to hands on a clock, it would be 12 o’clock, 6 o’clock, 3 o’clock and 9 o’clock.
+Draw four more dashes in-between each of the four dashes, (i.e., between 12 o’clock and 3 o’clock, 3 o’clock and 6 o’clock, 6 o’clock and 9 o’clock, 9 o’clock and 12 o’clock.)
+With a scissor cut on the dash lines towards the center, roughly ¾” making a narrow ^ shape.
+With a sharp knife or awl, puncture a hole in the center of the circle. Use the tip of your scissors to gently open the hole wider.
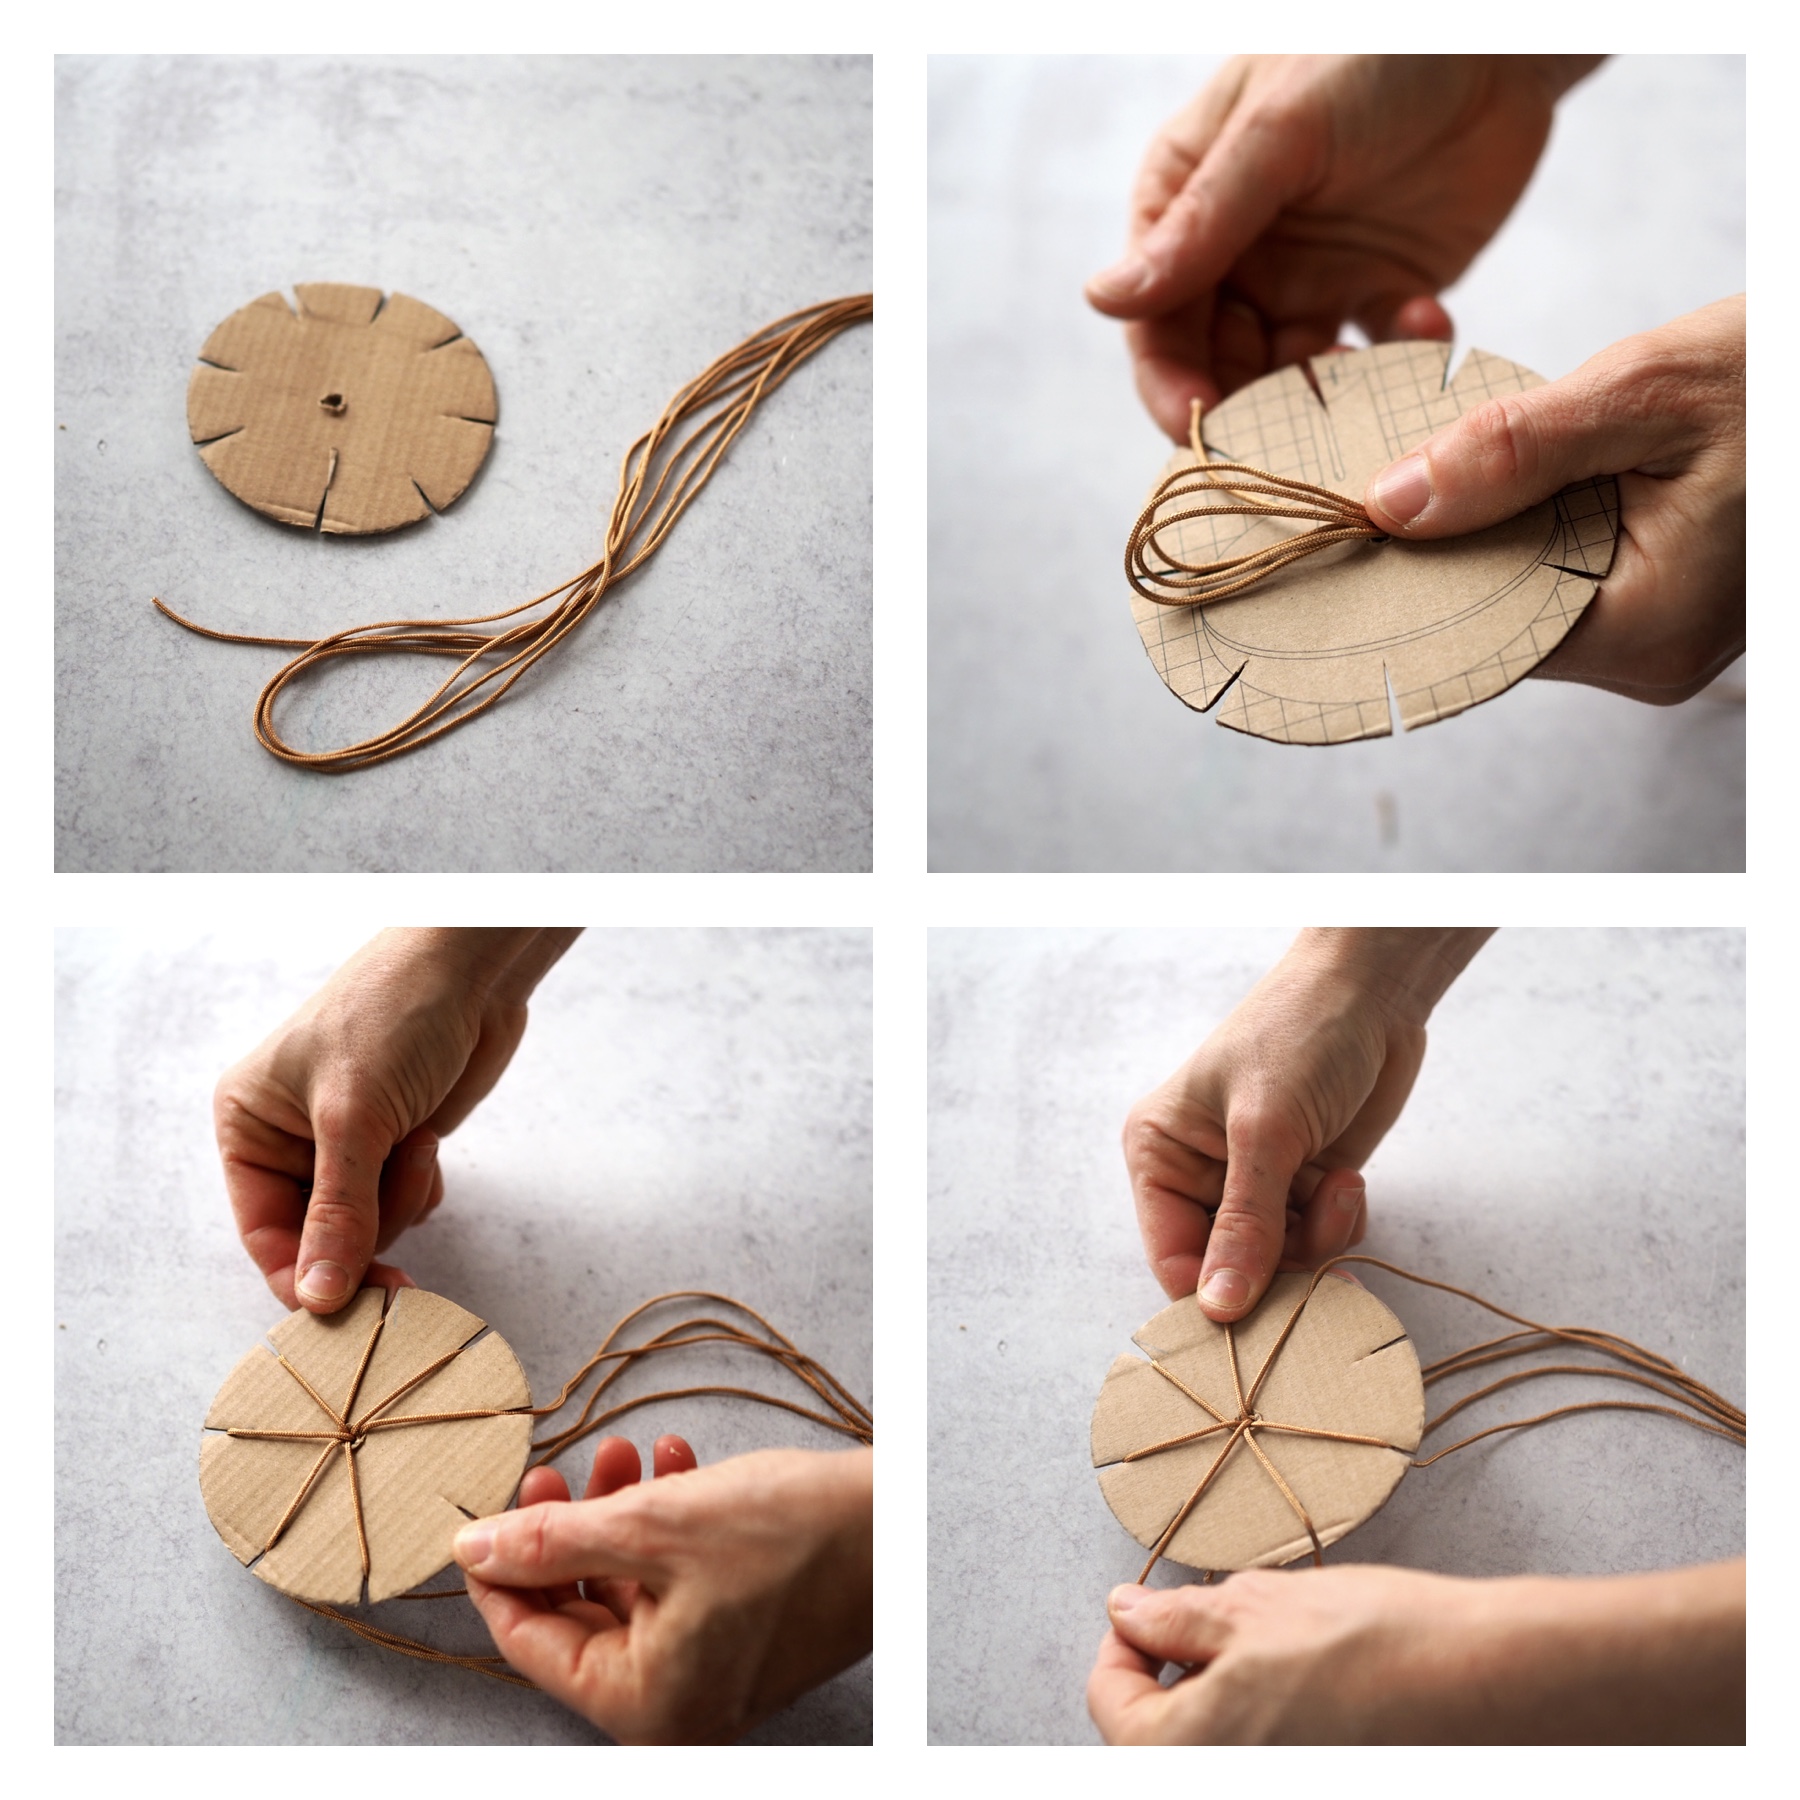
String your loom:
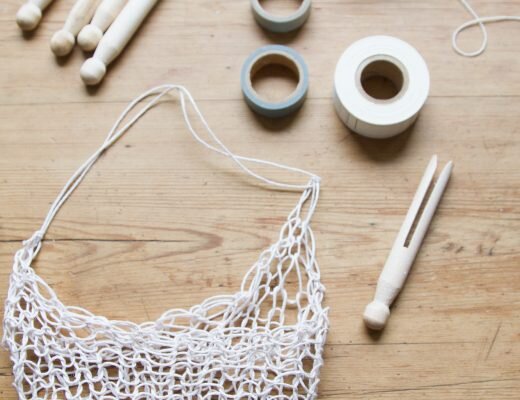
+Measure seven pieces of string, each ten feet in length (If your cord is thick you’ll need less string). Do not cut the string ends yet but keep it as one consecutive cord looped at the ends. One end will have three looped ends and one cut end (to make seven pieces), the other end can be cut to make seven blunt ends. The looped ends will help with turning your cord into a leash.
+Thread the three looped and one cut end of string through the front of the cardboard loom and out through the back. Make a knot by wrapping the cut end around the loops to secure. Be sure the three loops are intact.
+Insert all seven individual strings into a separate slot on the front side of the loom. There will be one slot left empty.
To weave the leash:
+ Hold the cardboard circle with the strings visible and secured in their slots. You will notice there are eight slots. You will have seven strings secured in individual slots and one slot will be empty.
+ Start with the empty slot at the position of 11 o’clock (between the 9 o’clock and the 12 o’clock position.)
+ The string pointing towards you is in the slot in the 6 o’clock slot position. Gently pull this string from the 6 o’clock position and bring it up to the empty slot at 11 o’clock, securing it in that slot. (To prevent the cord from slipping out place your thumb over the center hole when moving the string)
+ Turn the disc clockwise so the now empty 6 o’clock slot is in the 11 o’clock position.
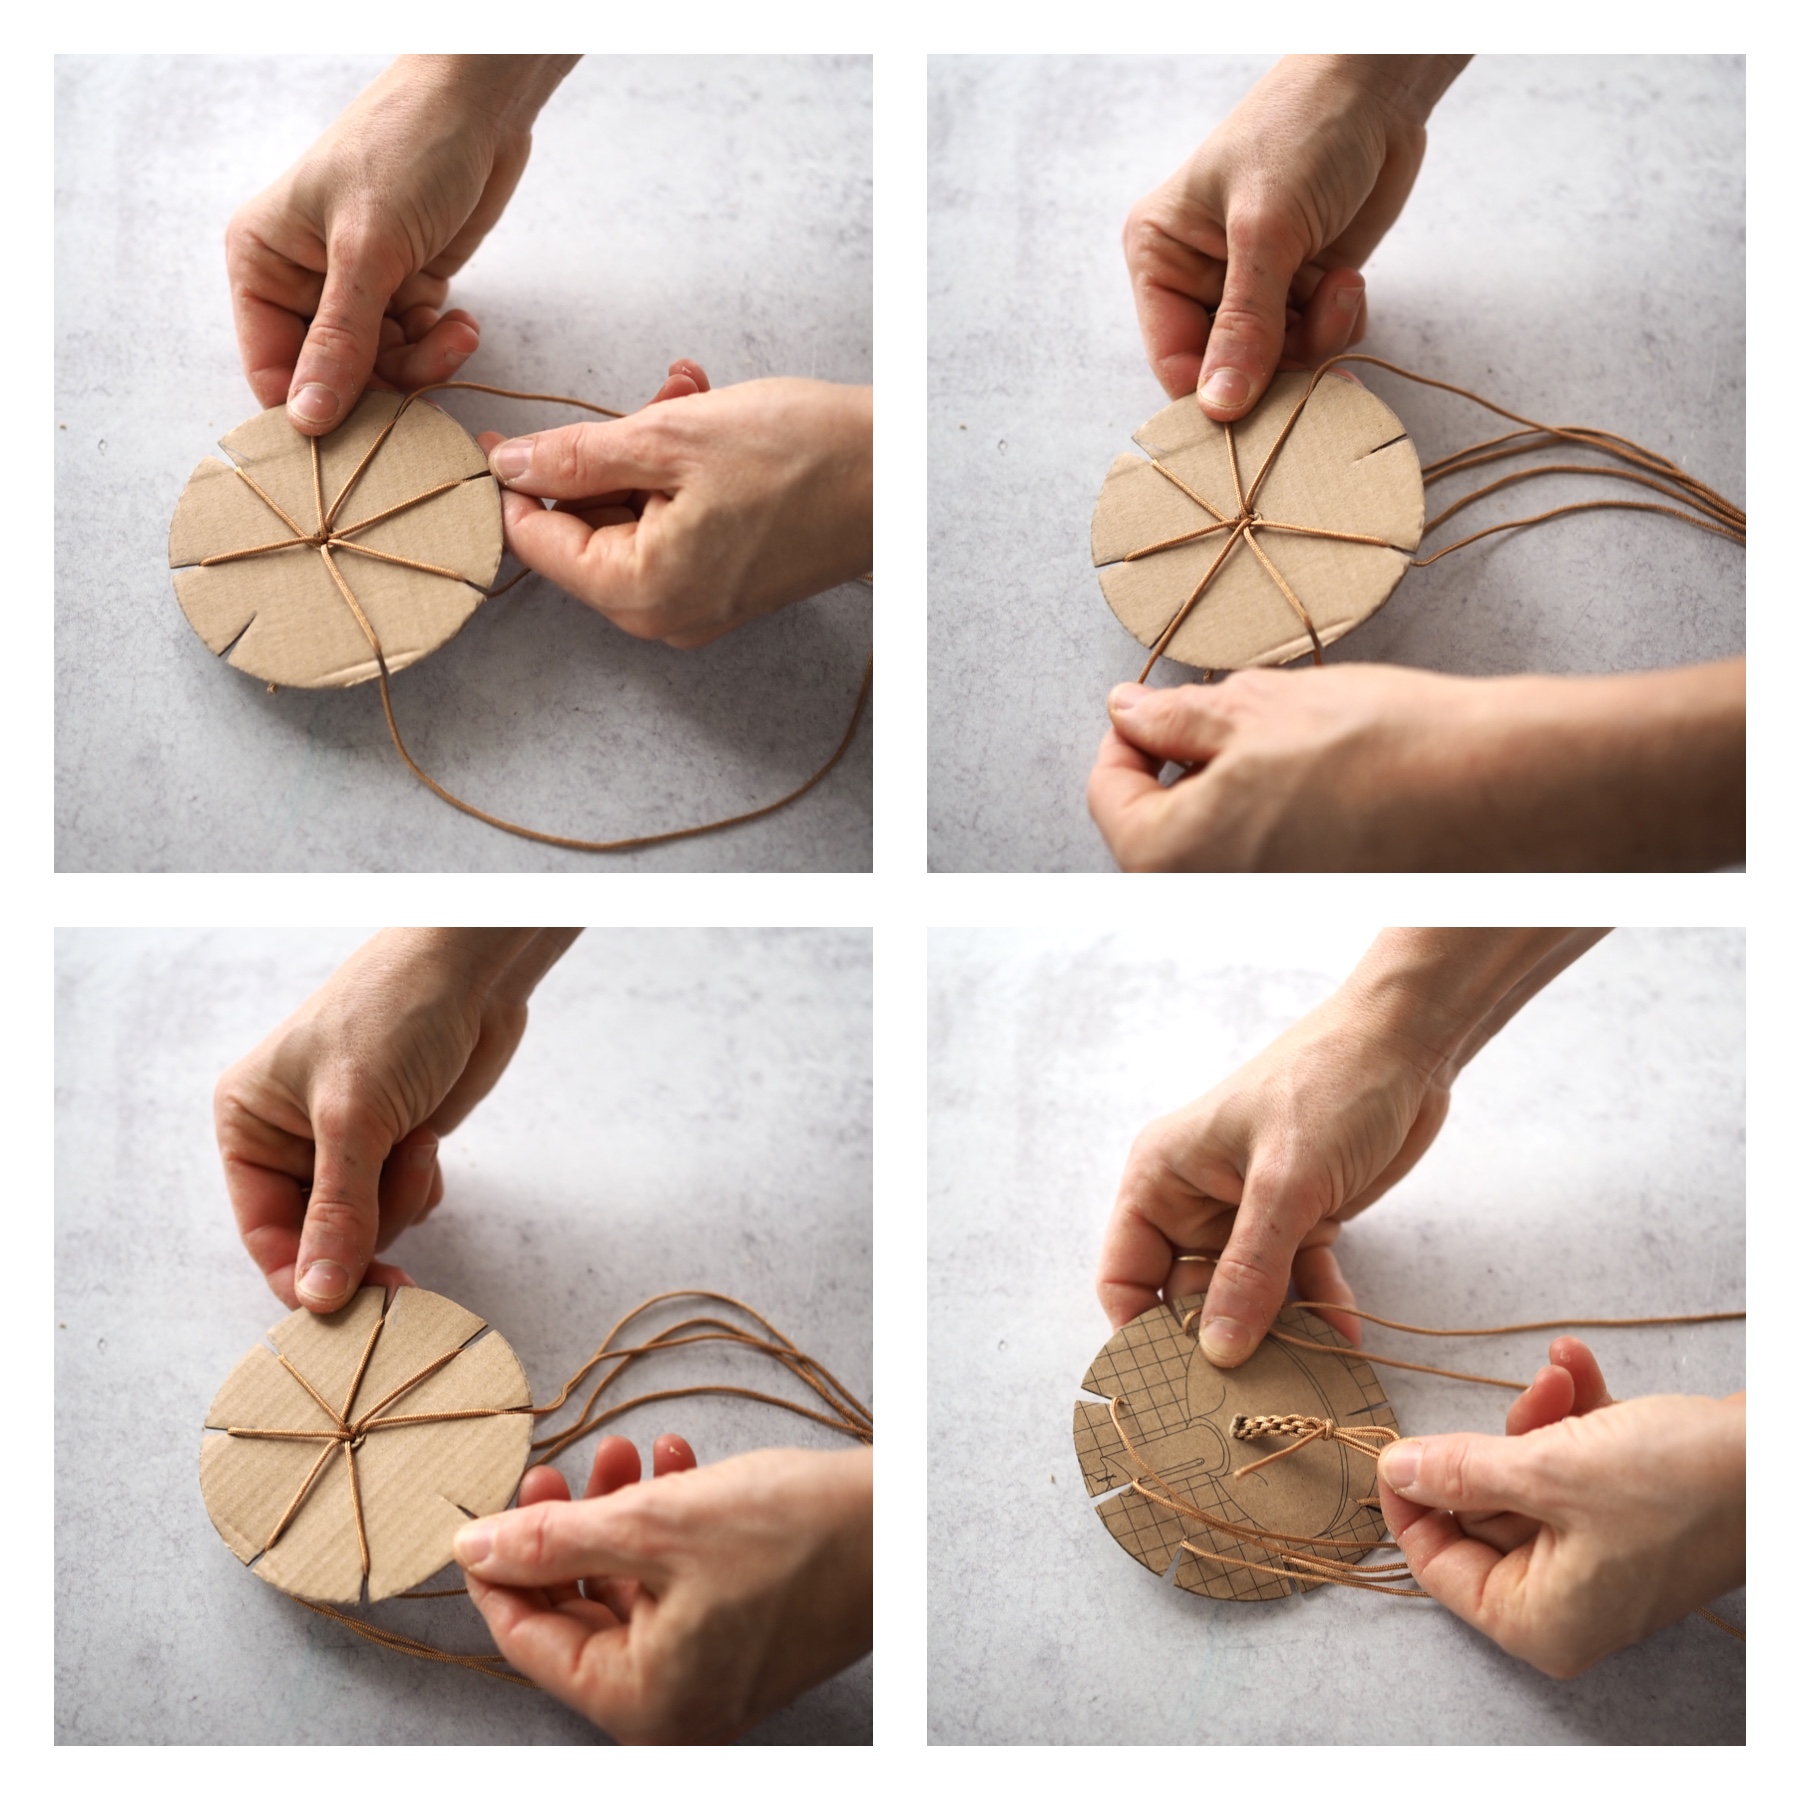
+ Continue in this way bringing the string in the 6 o’clock slot up to the 11 o’clock slot. Then, turn the circle so the 11 o’clock slot will always begin empty. Make sure you are turning your circle clockwise each time.
The extra long string will knot up while you are working; to prevent large tangles, run your fingers through the strings while you work. The long length makes this a bit frustrating in the beginning but will get easier as you work.
+ The cord will form on the backside of the disc. Gently pull the cord in back as you work to help it move along.
+ Work until you reached your desired length. A typical dog leash typically comes in three sizes; four feet, five feet, and six feet. Remove all strings from the slots and gently pull out the newly corded rope through the center hole. Secure the end with a knot.
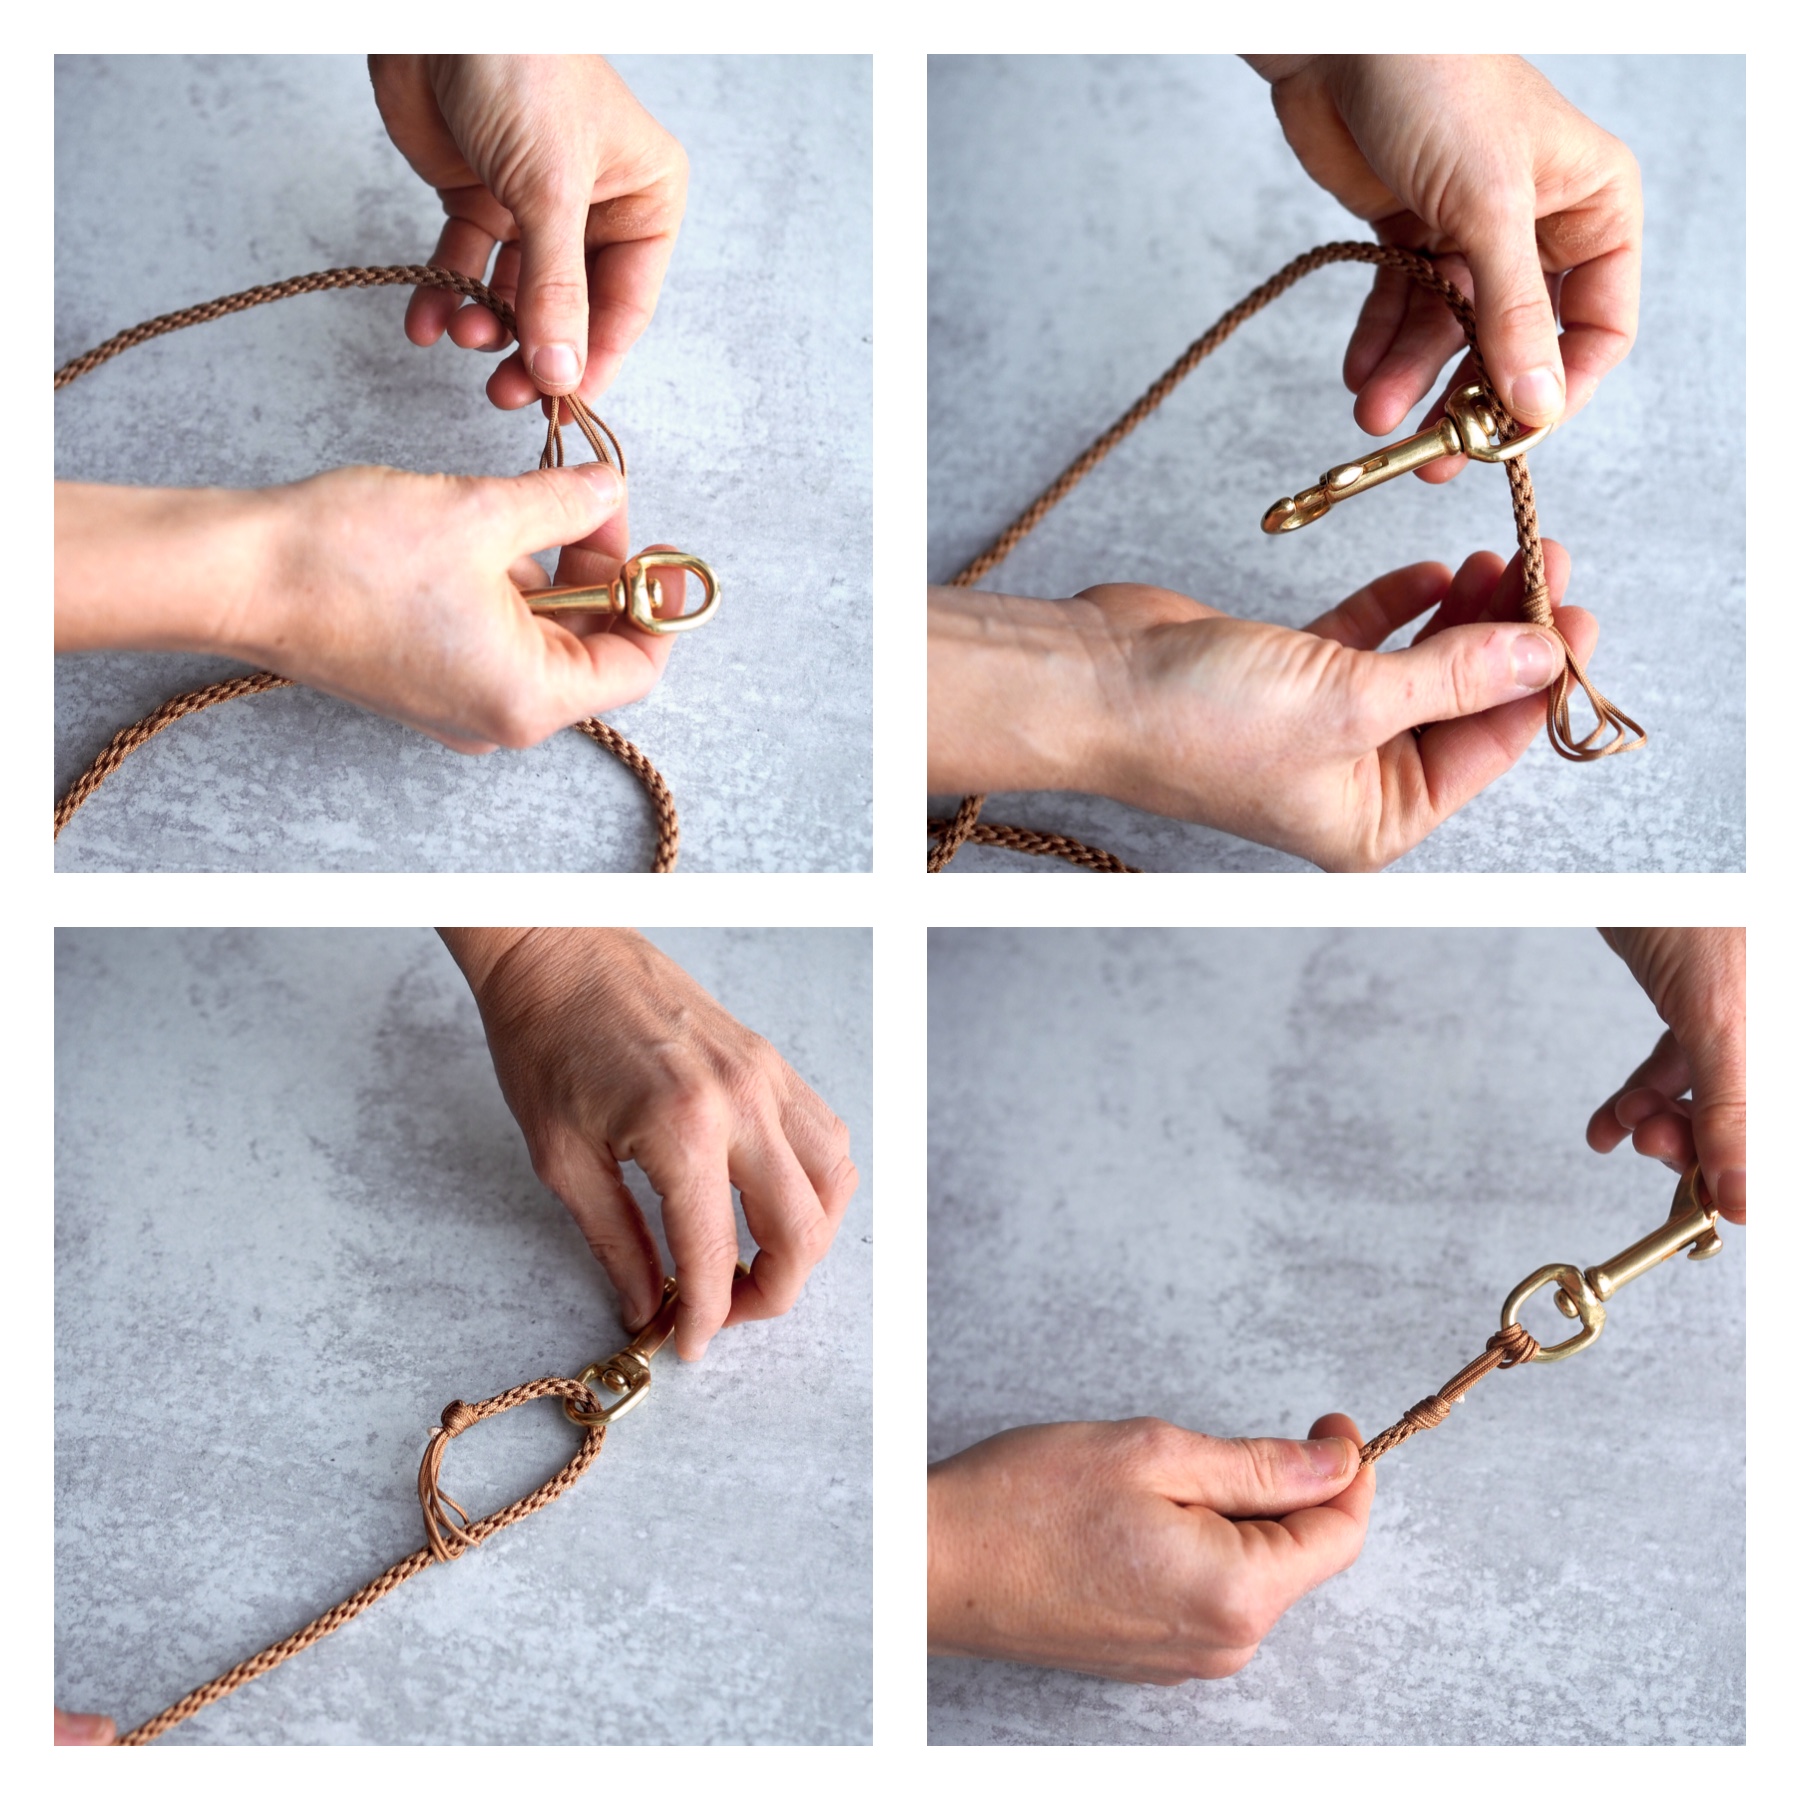
To finish the leash:
+ Place the belt attachment of the metal clasp over the tail end with the loops. Thread the opposite cut tail in through the loops and pull the entire length all the way through until it forms a hitch knot around the clasp.
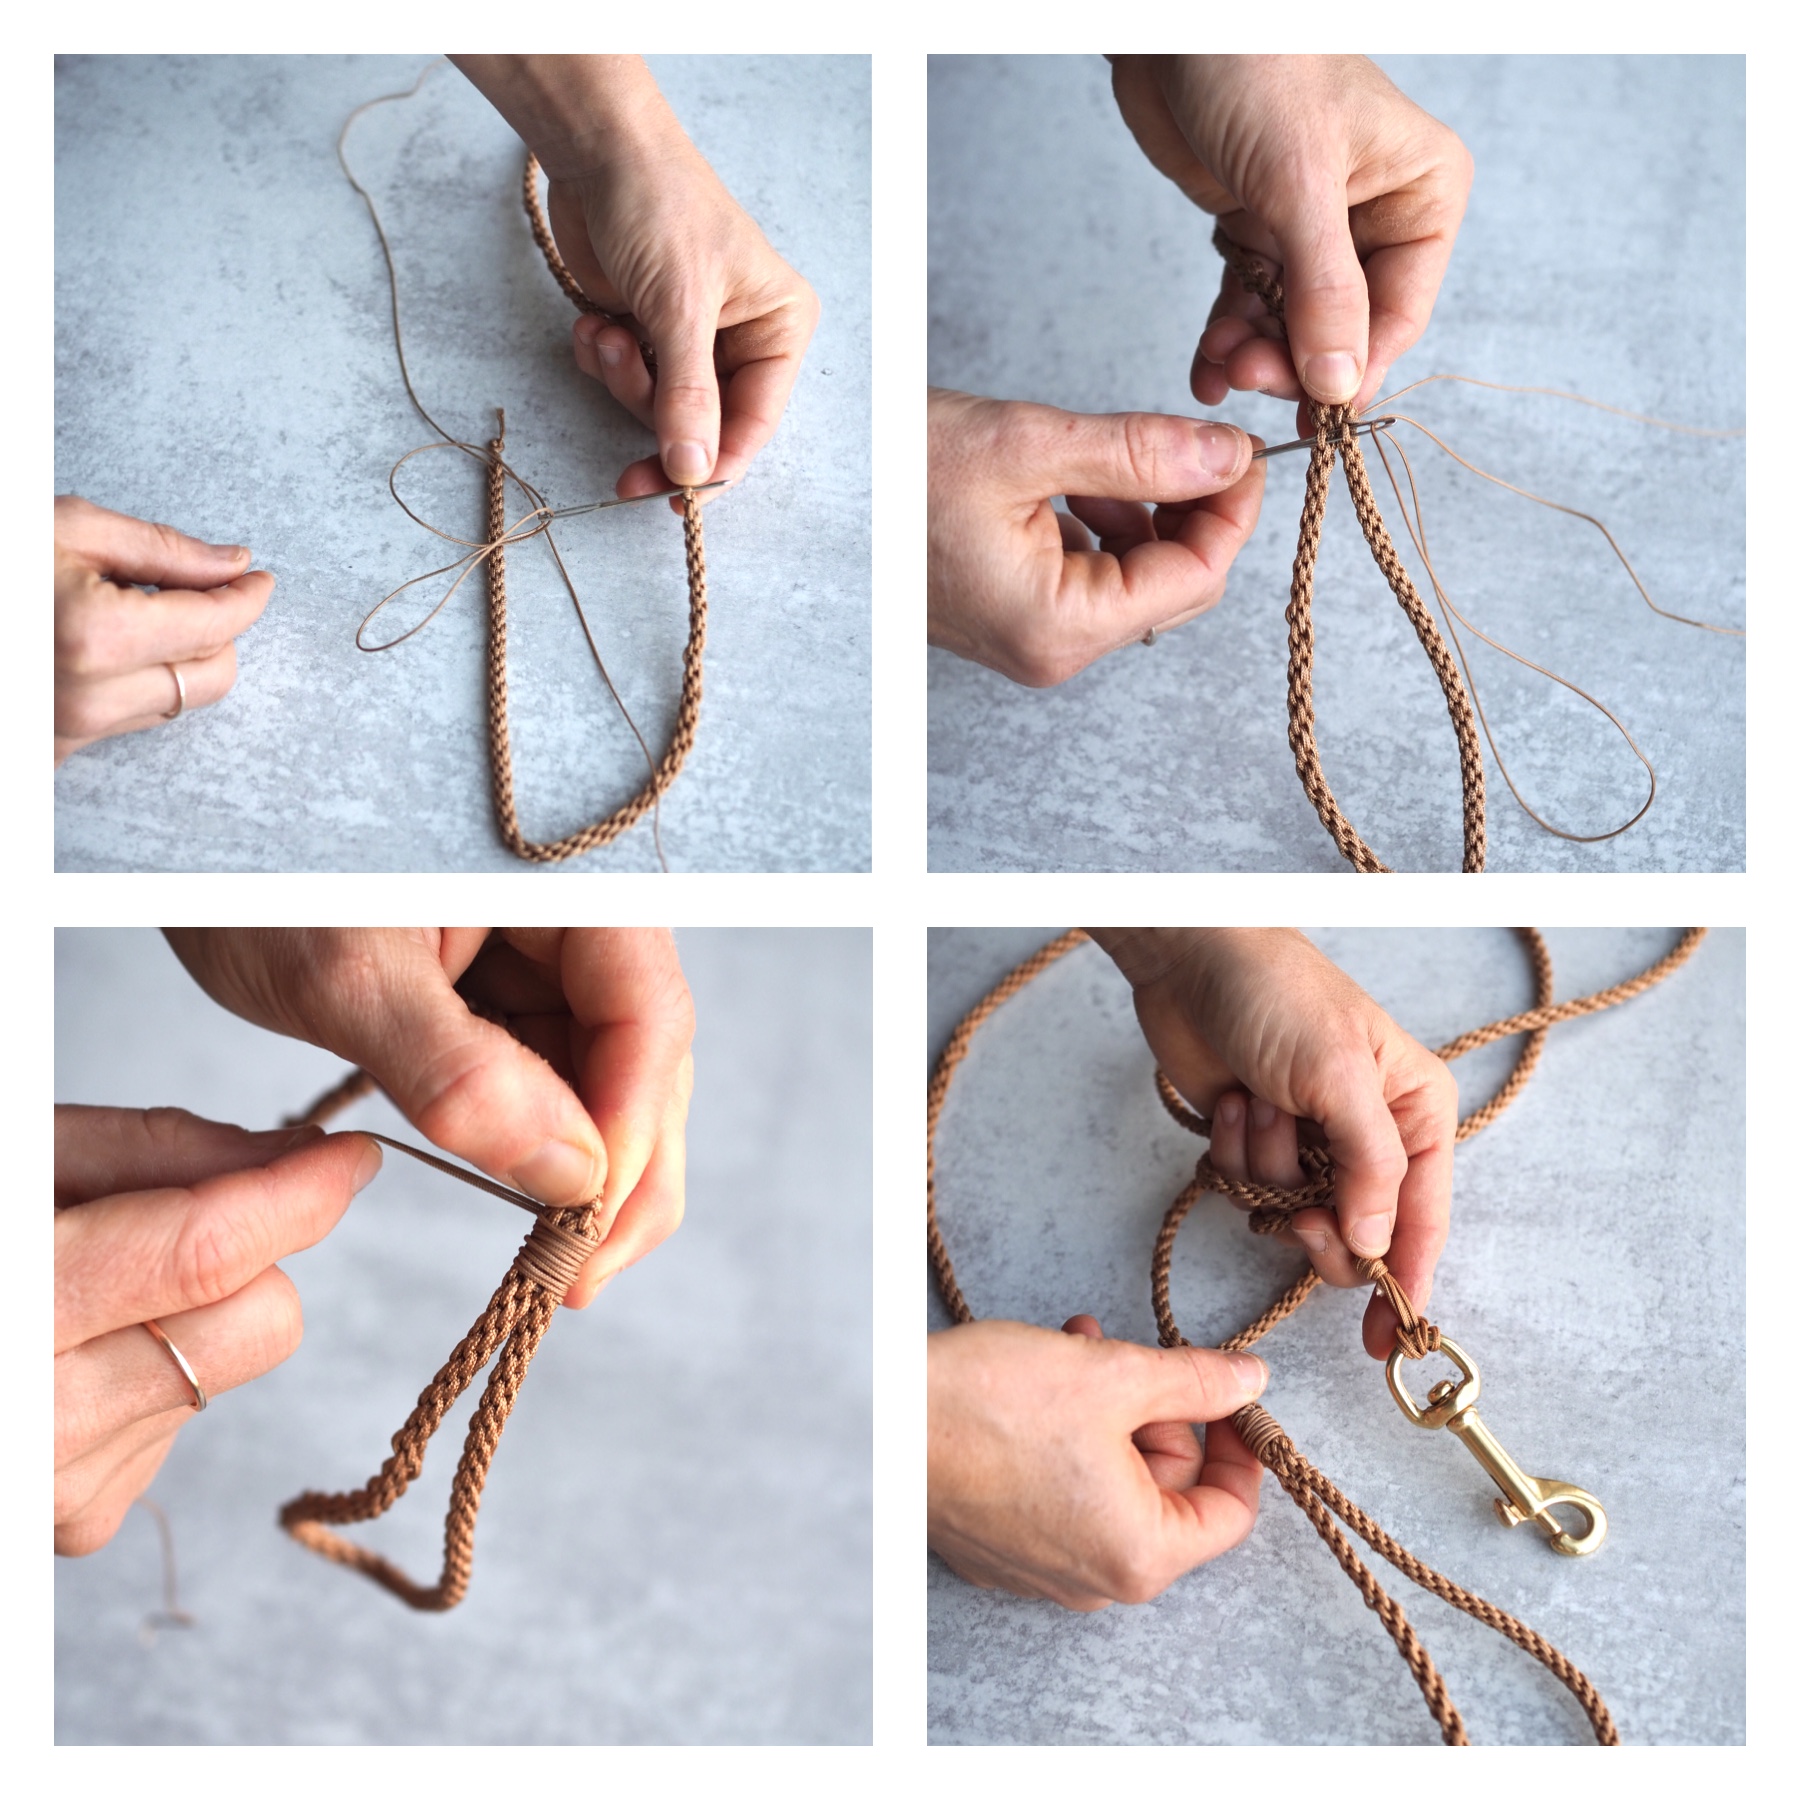
+ Fold the cut tail the end 3” to make a loop. With an extra two feet of nylon string and a darning needle, thread the string through the weave of one cord and into the weave of the second cord. Stop halfway so you have plenty of string on both ends. Loop back through the second cord, slightly lower than the previous insert, and then back through the first cord. Sew back and forth between the two cords, going in and out to secure at least seven or eight times and secure with a knot. To conceal the stitches and secure the leash, wind one of the strings up over the last knot, the stitched cords, and the second string. Tie the two ends together again in a knot; weave in the tails and cut any remaining long ends.

//
Thanks to Rose Pearlman for developing this project, writing the instructions, and capturing the step-by-step instruction imagery. Rose is an artist, teacher, and textile designer. With a background in fine arts and a love of well designed functional objects, her creations blur the lines between art and craft and pushes the boundaries with non-traditional techniques and materials. Rose teaches monthly rug hooking workshops in and around her home in NYC, and also welcomes commissions for one of a kind constructions in decor and home furnishings. Her work has been featured in fiber magazines, galleries, and numerous online design sites. Her book Modern Rug Hooking is available wherever books are sold. She lives in Brooklyn, NY with her family.
//
ACTION ITEMS:
If you’re hoping to expand your gift giving this year to help people and pups, consider making a donation to a local animal shelter or rescue program like, Marley’s Mutts Pawsitive Change Prison Program:
“Pawsitive Change Prison Program is an innovative and progressive program that pairs incarcerated men with rescued dogs for mutual rehabilitation.”
For more information about the Pawsitive Change program, visit their website. Hat tip to @hueso_seco—muse to toddlers and makers of tiny pugs—who donates a portion of her proceeds to this organization.
15 Comments
So cool! Would make a great gift for people with pets, so much love!
How perfect! I was just getting ready to hit Buy on a very similar-looking dog leash I wanted to gift. I think I’d rather give this a try.
Love this – a simple and beautiful and practical DIY gift!
I love this! Already started making one, and the act of weaving it is so therapeutic. A great way to keep my hands busy when watching something or listening to a podcast instead of being on my phone! I’m converted.
Yay! So glad to hear that!
Does this weaving style lend itself to increasing the diameter of the final cord? As the owner of a super enthusiastic dog, I think a larger diameter cord would be more comfortable when handling the occasional excited tug (the cord would not bite as much.) Love this project!
Hey Jen! Yes! I think you’d just need to use a bigger gauge string to end up with a larger diameter cord! Not sure if you might also need to increase the size of the loom—will check with Rose!
72 feet of what size mm nylon string? Would love to know which size she used!
the hardware store bundles used here were somewhat lacking in detail, but most nylon mini blind cord ranges in size from .8 – 2mm (from the looks of it this is likely on the smaller size, around .8mm). this is all very forgiving though, so the specific size is really a question of personal preference and what you can find most readily! they’ll all do the job!
Hi there, would it be possible in future to provide metric measurements as well? I know probably the bulk of your audience is in the US but you guys are pretty much the only ones that use imperial! Frustrating for the rest of us!
Oh man, can see if we can give it a shot!
How lovely! I picked up some “#18 nylon twine” from the hardware store to give this a try over the holidays. In the meantime, the examples shown in the Tachibara Museum exhibit are absolutely incredible in their artistry and complexity. Well worth a look.
Oh my! I started making one and have spent the whole time untwisting the loose string. As I weave it becomes a knot below the cardboard disk. The weaving part is easy, but there does not seem to be a way to keep the loose thread untwisted. Any suggestions?
Hi there: Don’t know of another but the regular running through of fingers suggested by Rose!
Just started this project and wow! I love it. I had to watch a couple of YouTube videos for extra help. I’ve made a couple of mistakes but nothing too bad for a first timer.
Comments are moderated.