For some of us, it’s a week for filling stockings and offering teacher gifts and generally expressing thanks and gratitude while in the midst of maybe also feeling a bit (or very) stretched. If so, this exceedingly sweet and simple gift idea from Rose is something kids can help with (or not, depending on the moods).
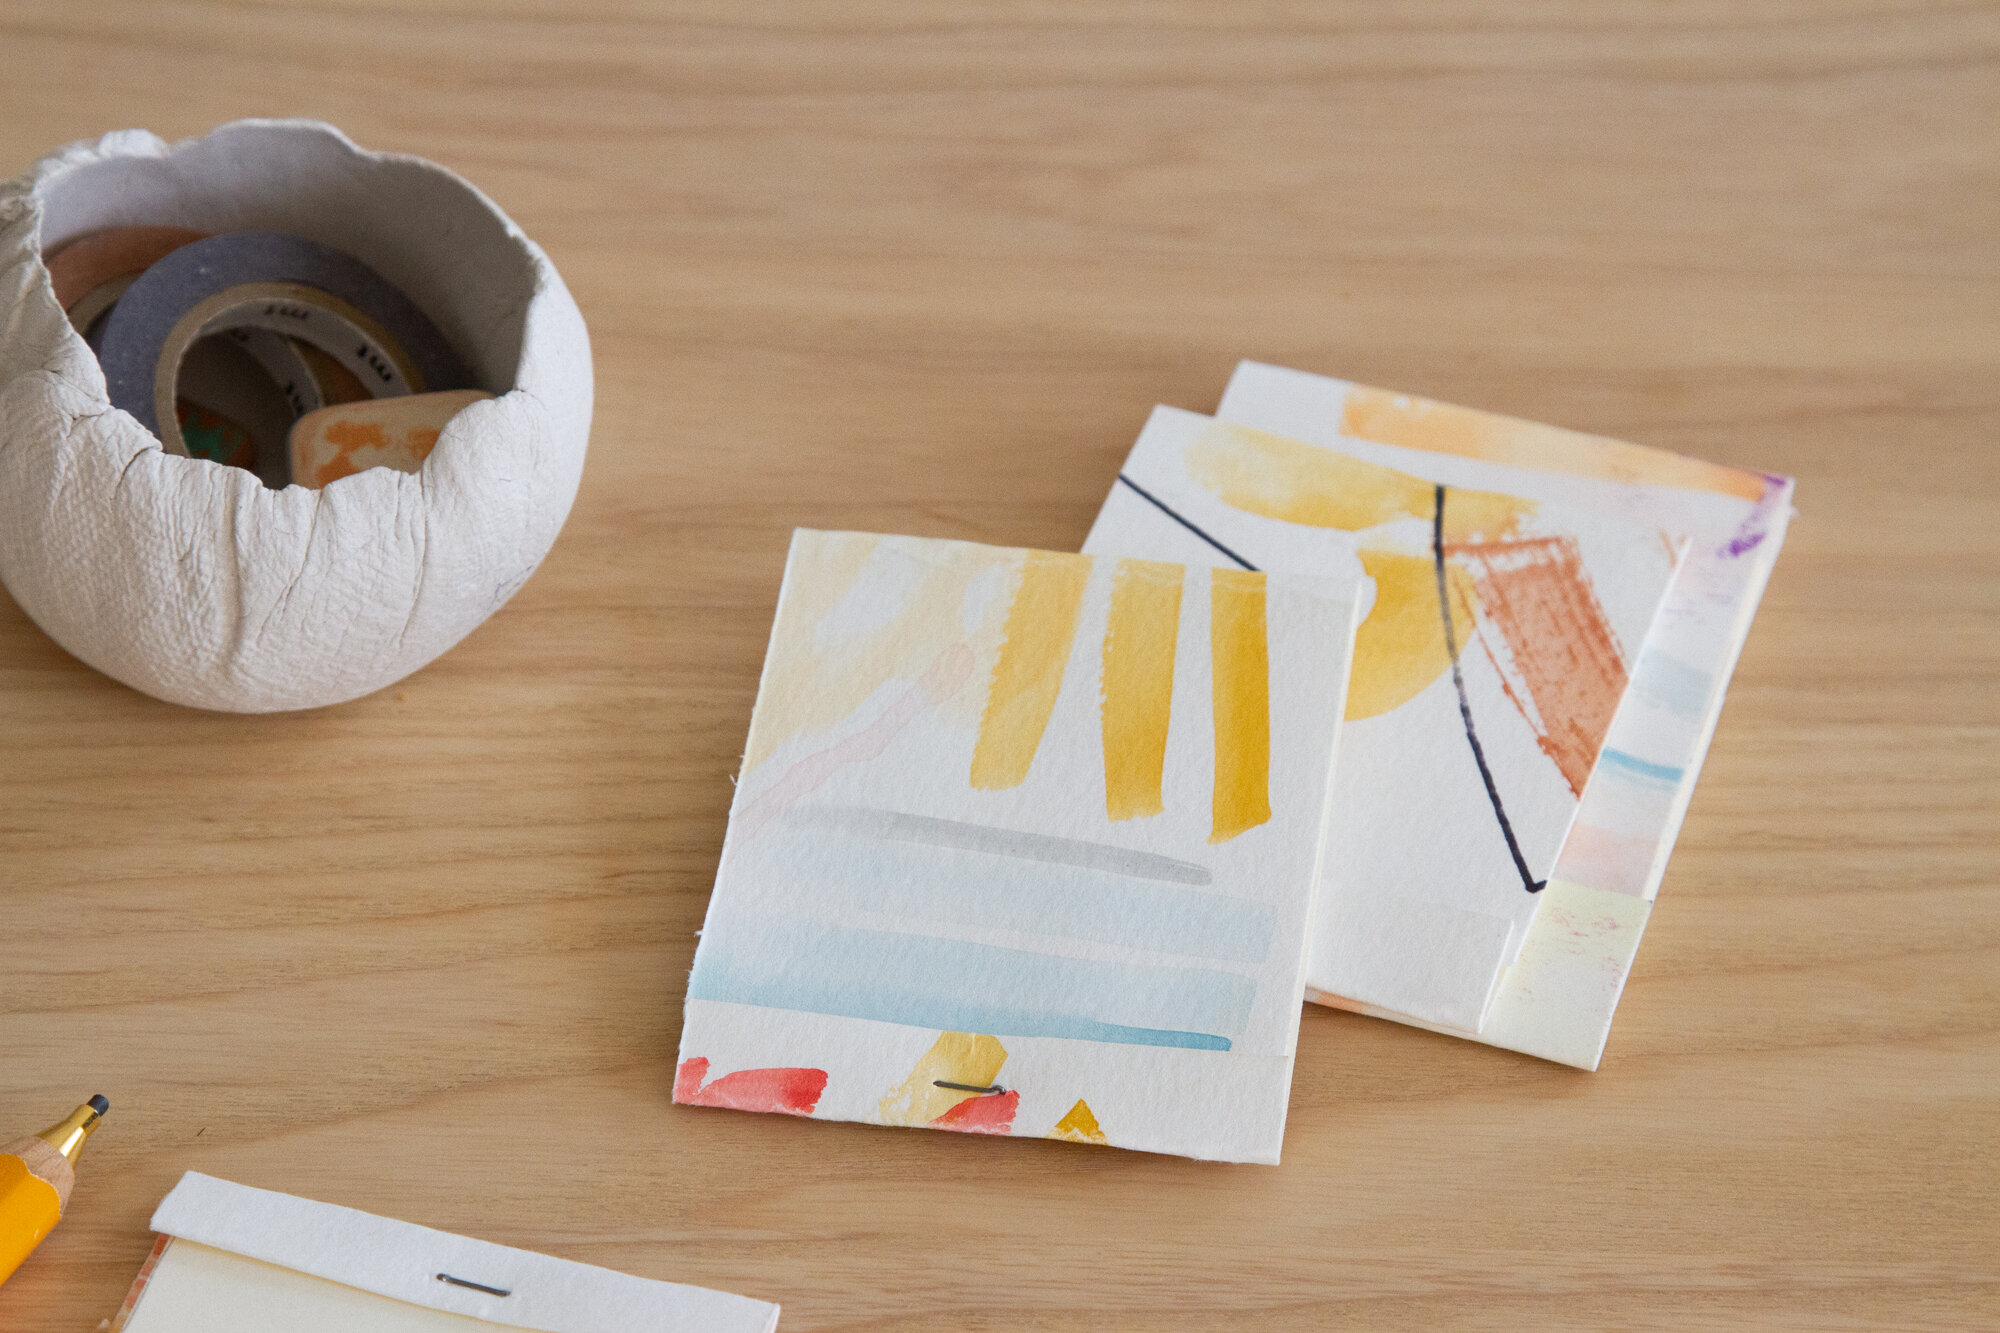
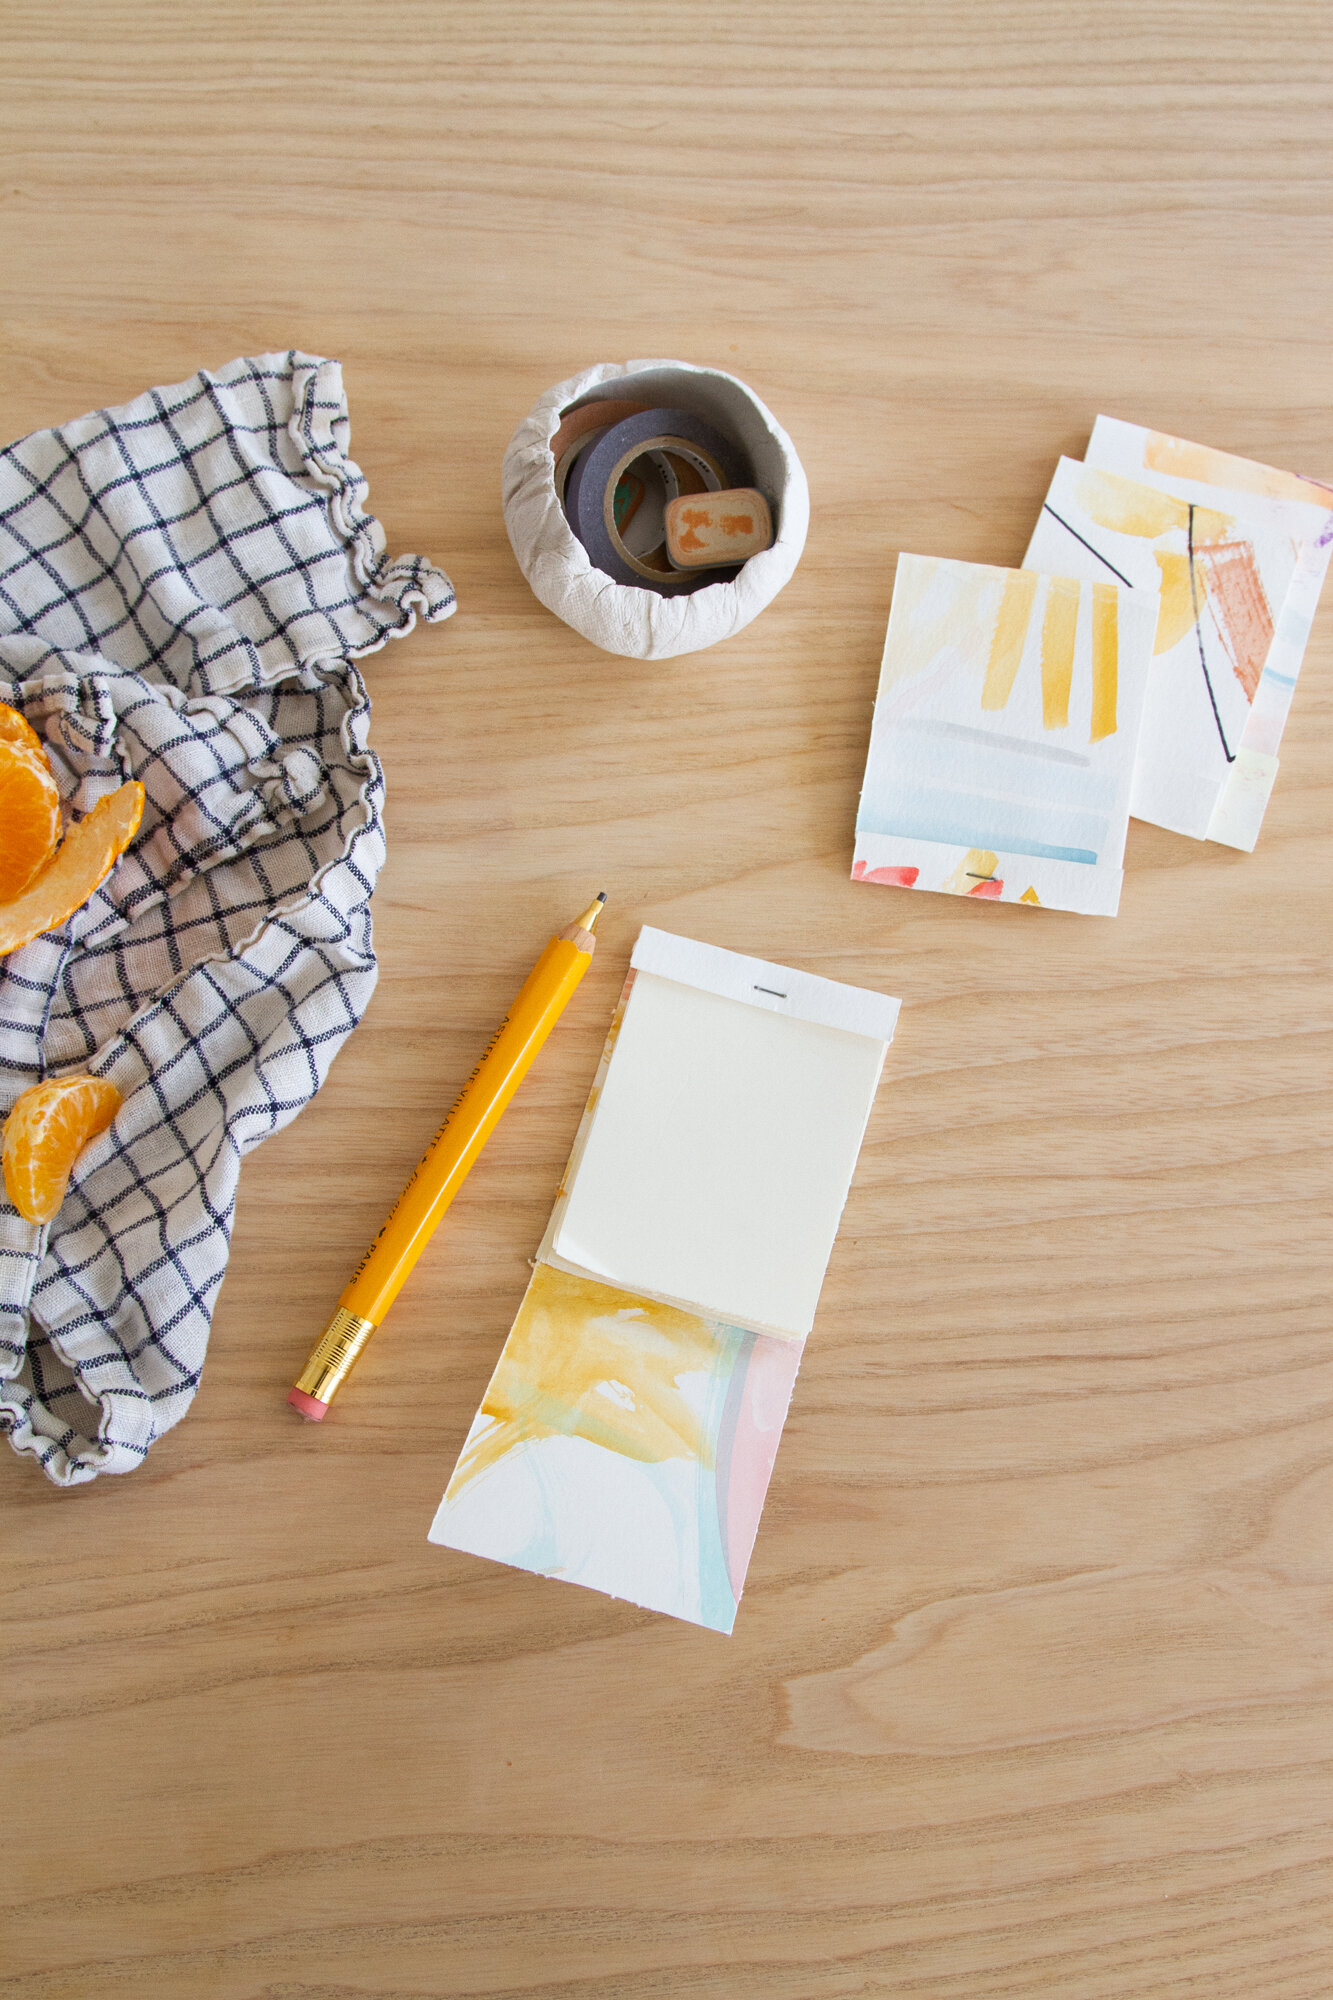
Children aren’t required in order to make these little gifts, of course, but for households with many prolific artists, this project is an excellent way to put all of that production to good use. In our apartment, there’s almost always a watercolor that can be co-opted for the cover and a stack of papers bearing only a handful of pencil flourishes that can be cut up in order to live a second life in a new notebook.
The finished project strikes the perfect balance of being homemade and useful, novel and familiar. A little set can be the gift itself, a single pad can top a present or stuff a stocking. An artful parent or older kid might turn one into a flip book. Kid art has maybe never been put to better use. As ever, Rose has the full instructions below.
Recycled Matchbook Sketchpads
Materials:
+ 1 sheet of recycled cardstock art (5”x 7” or larger)
+ 8-10 sheets of lightly used recycled paper (from a notebook or journal)
+ Scissors
+ Stapler
+ Ruler (optional)
+ Pencil (optional)
Directions:
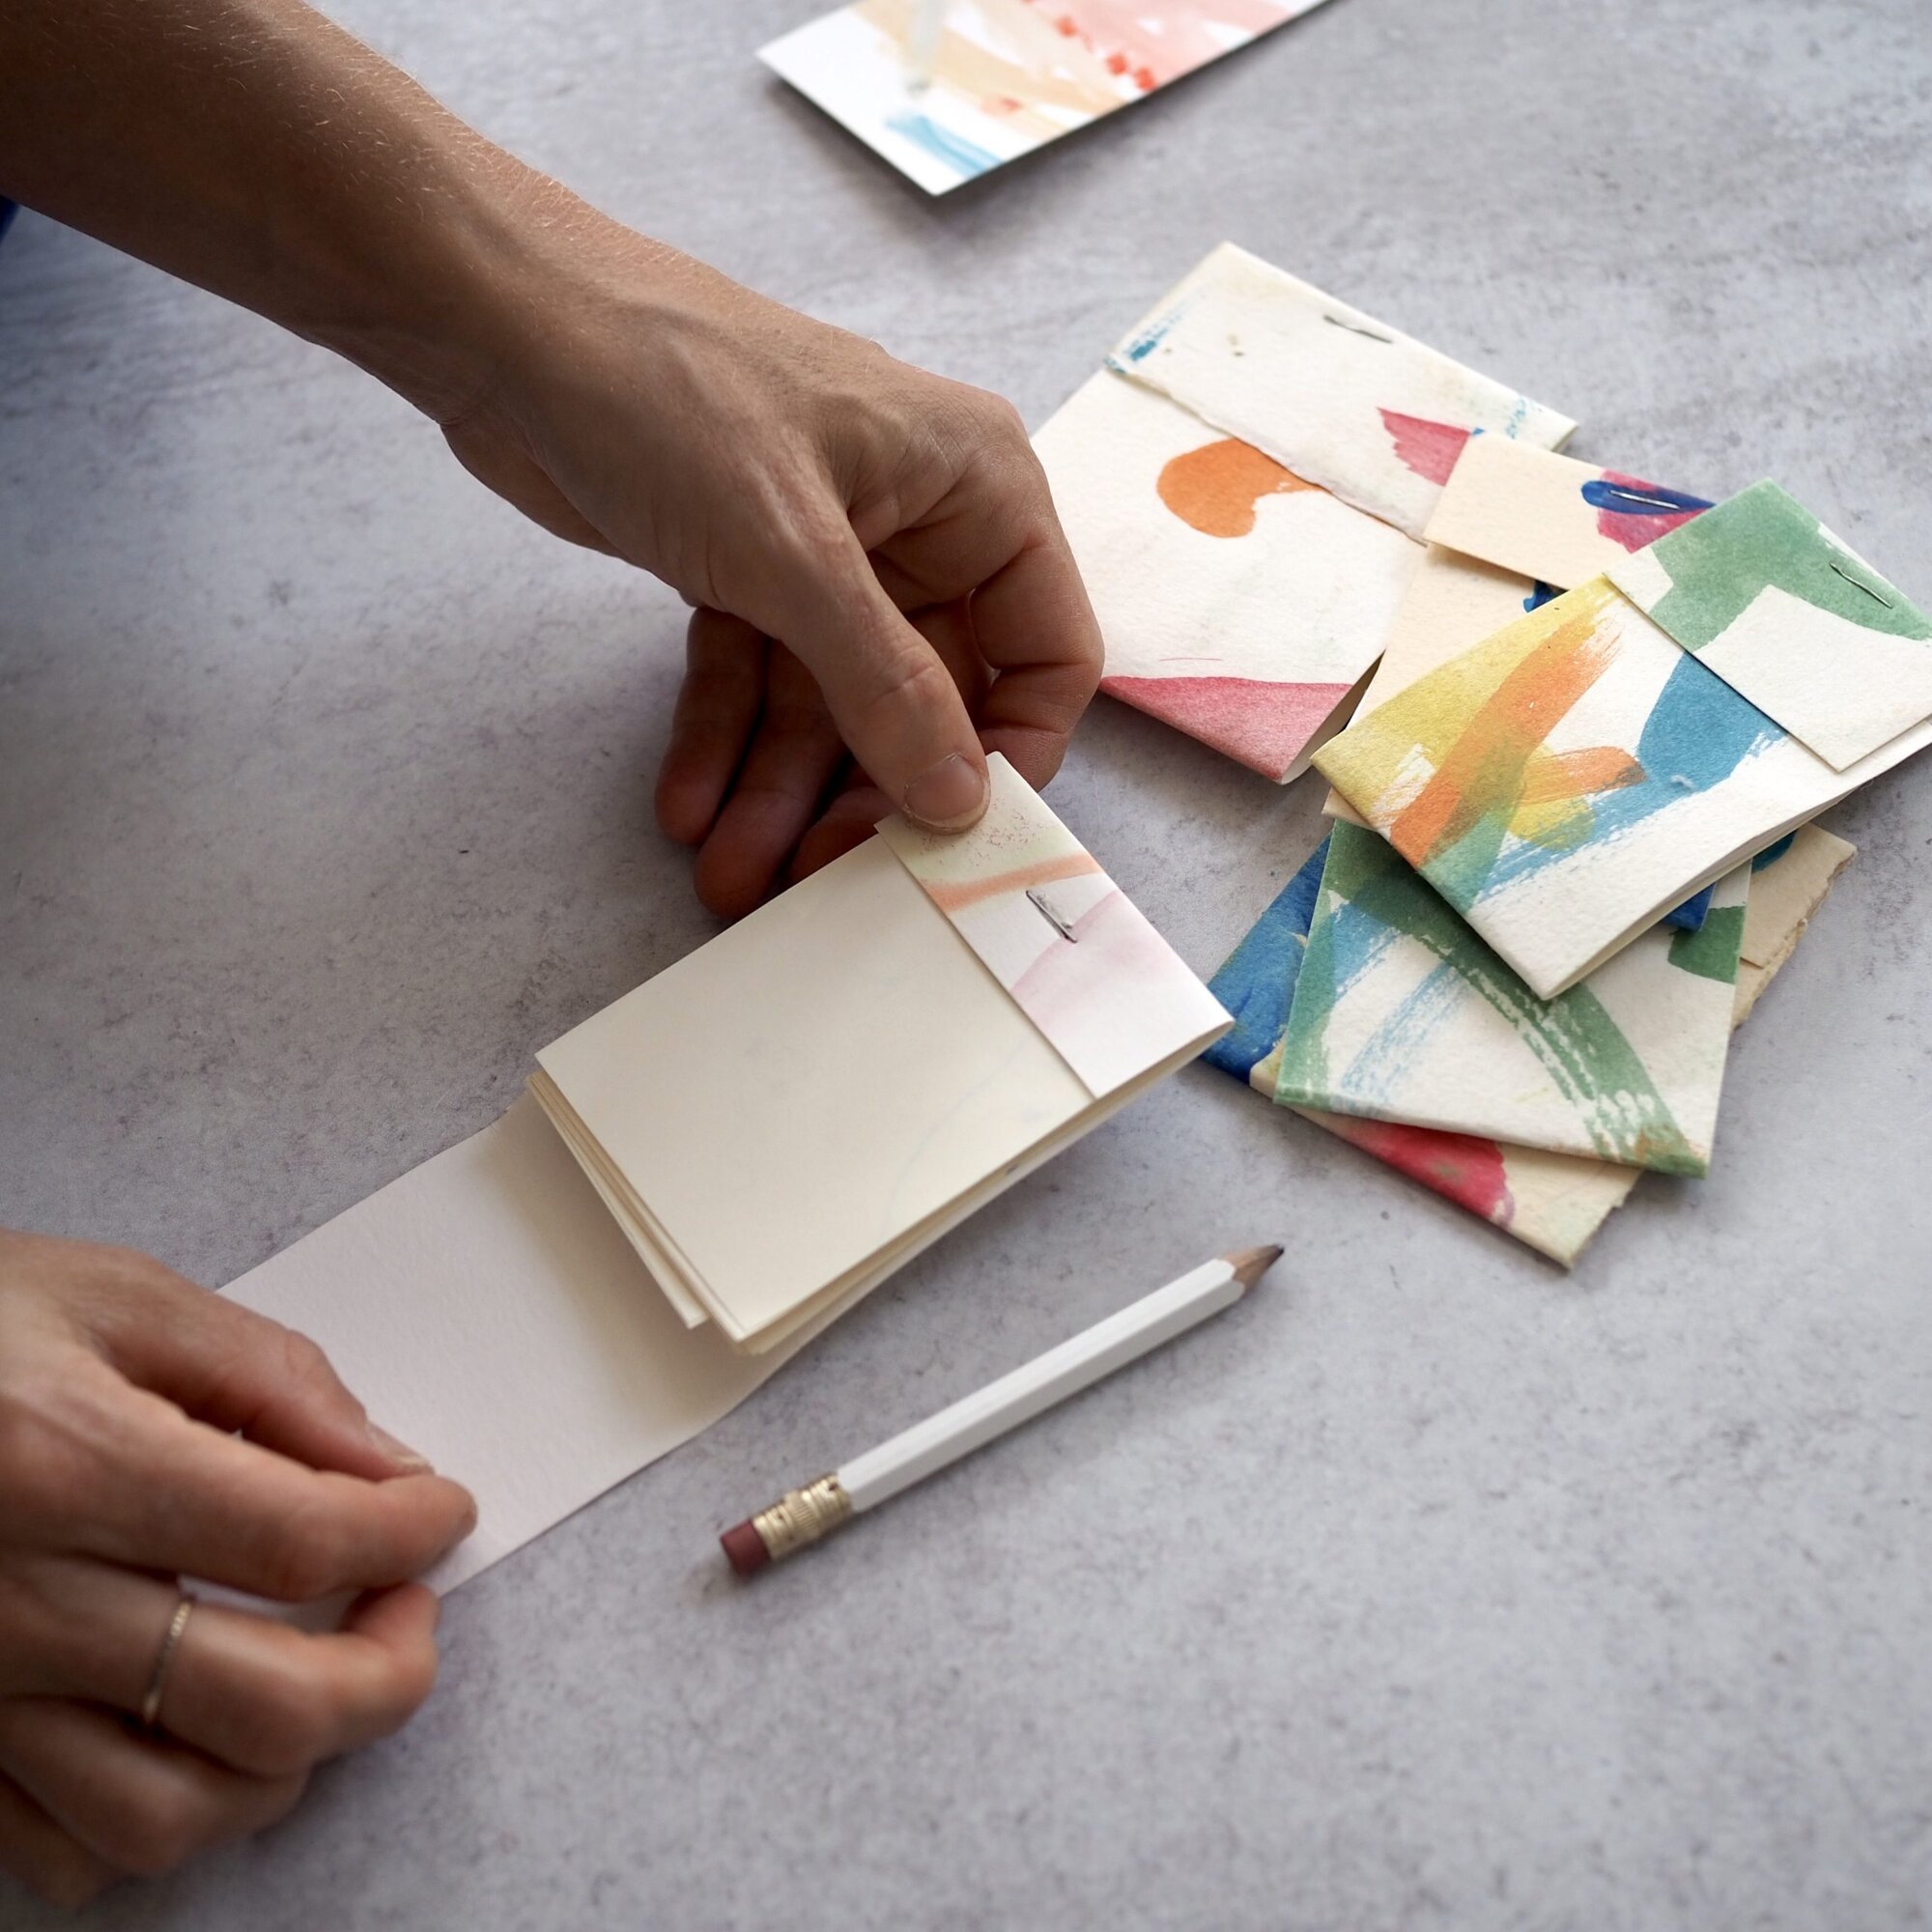
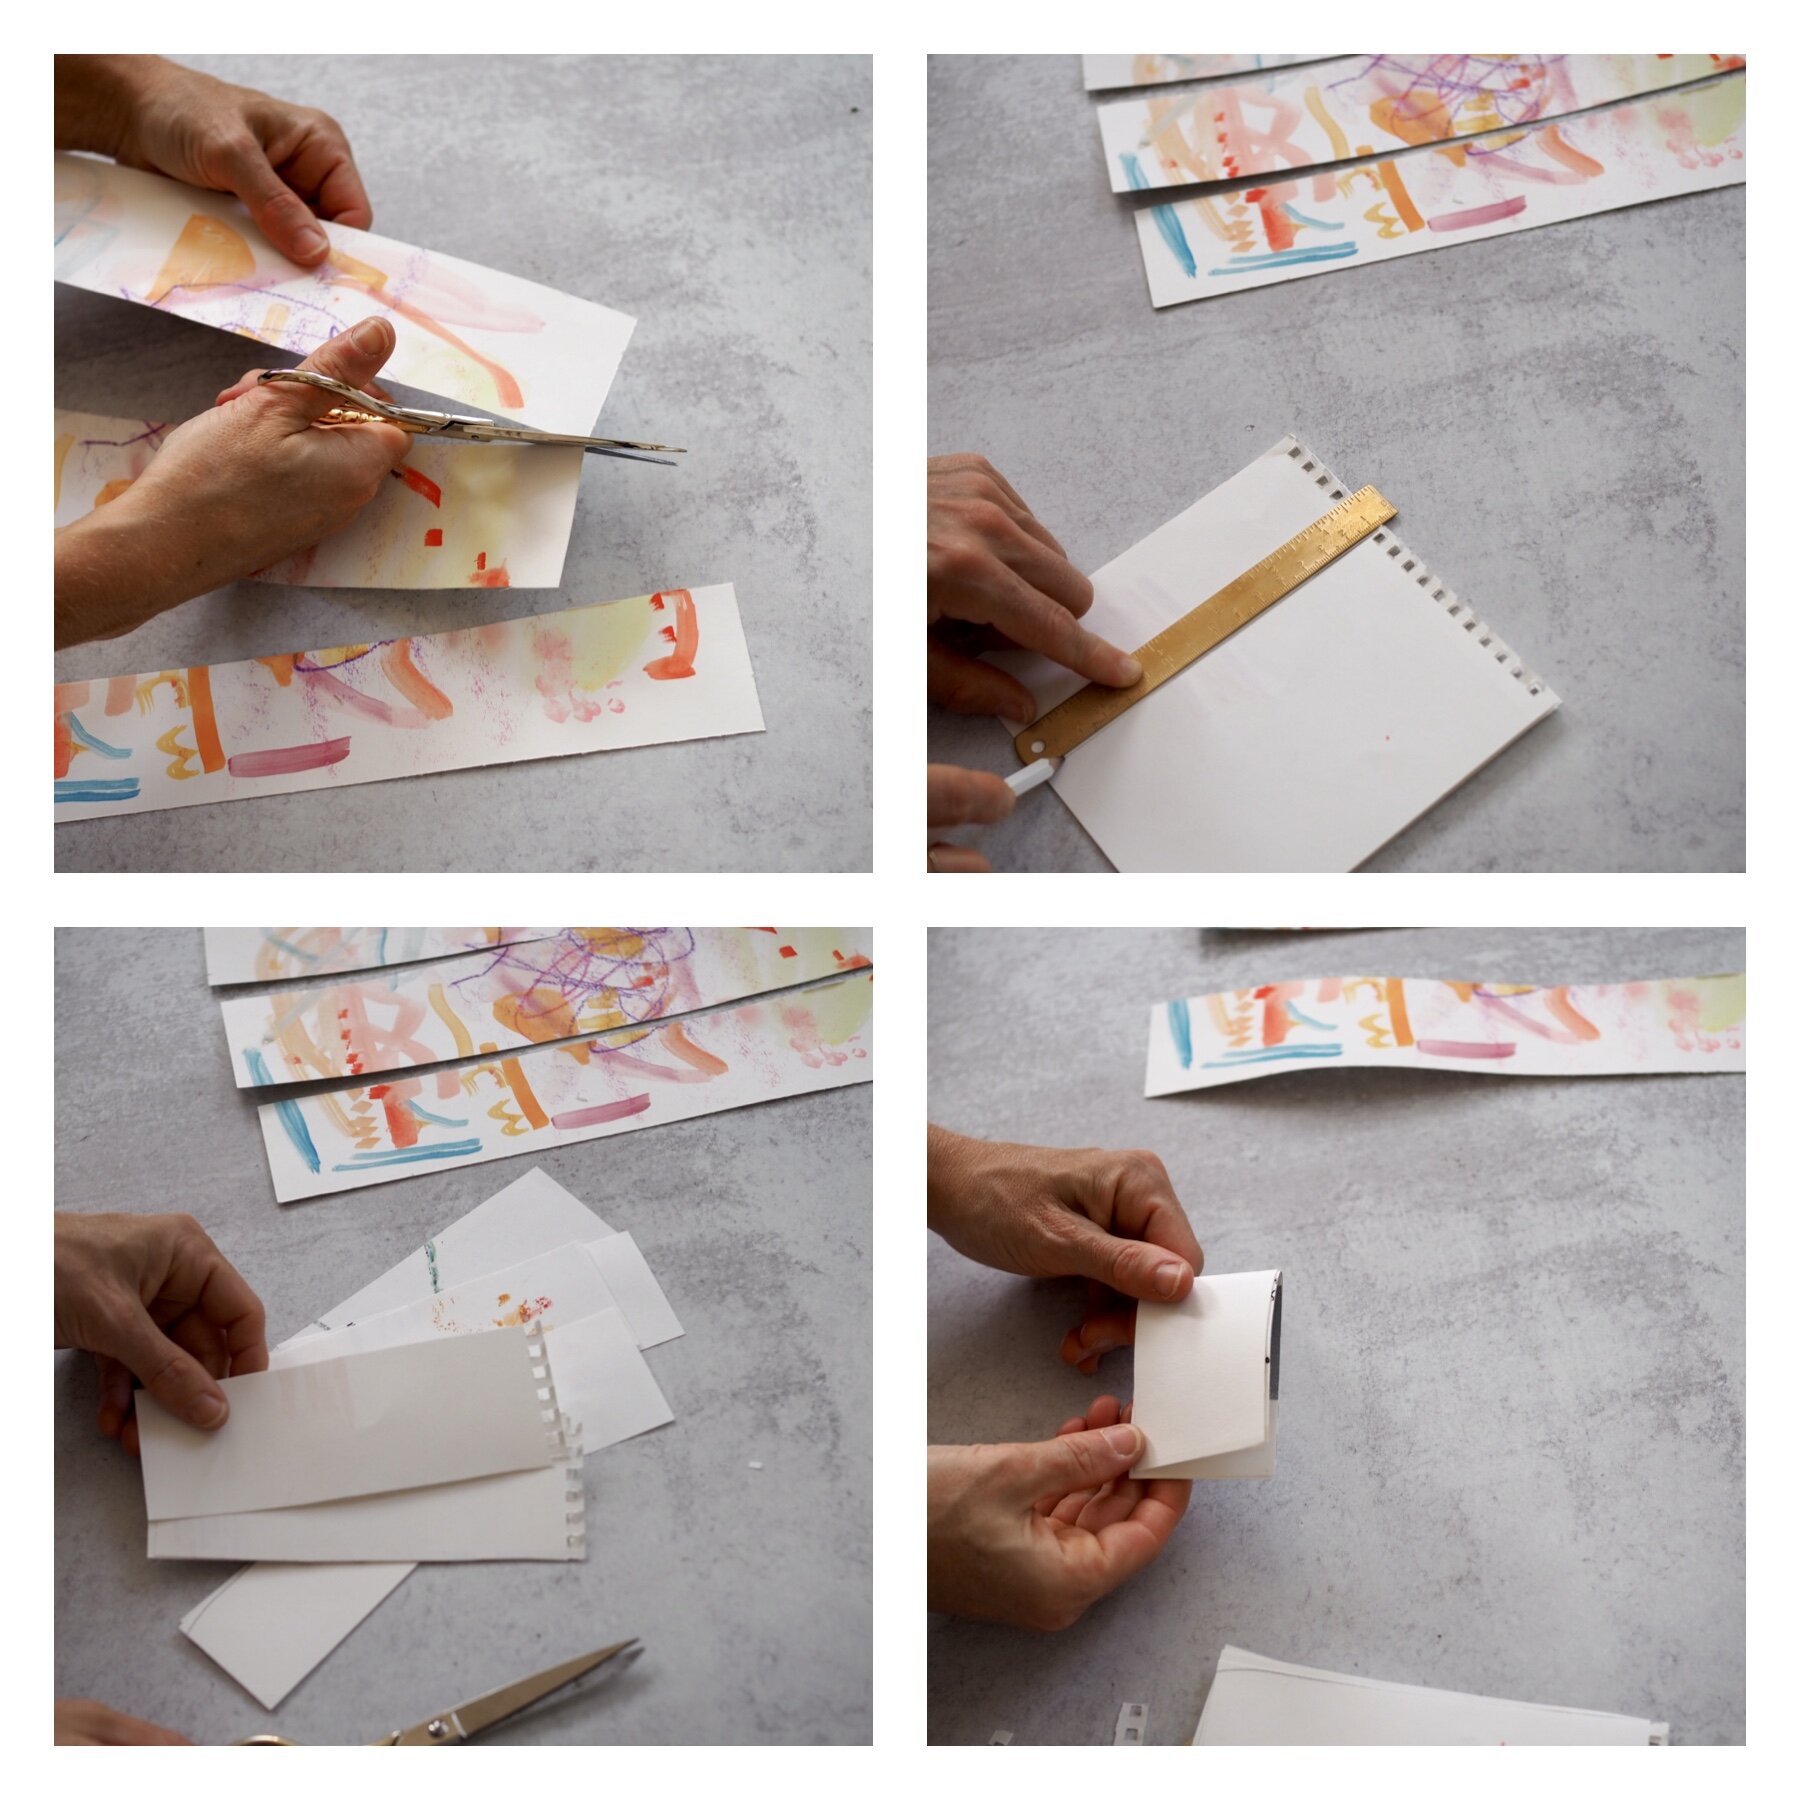
+ Cut the cardstock into strips roughly 2.25” x 7” lengths (the dimensions can easily be adjusted to create smaller or larger notebooks).
+ Cut strips of recycled paper into strips that are a little bit smaller than the size of the cardstock measurements roughly 2”x 6.25”
+ Fold the stack of recycled paper strips in half, lengthwise.
+ Fold down and crease the top ¾” edge of a cardstock strip.
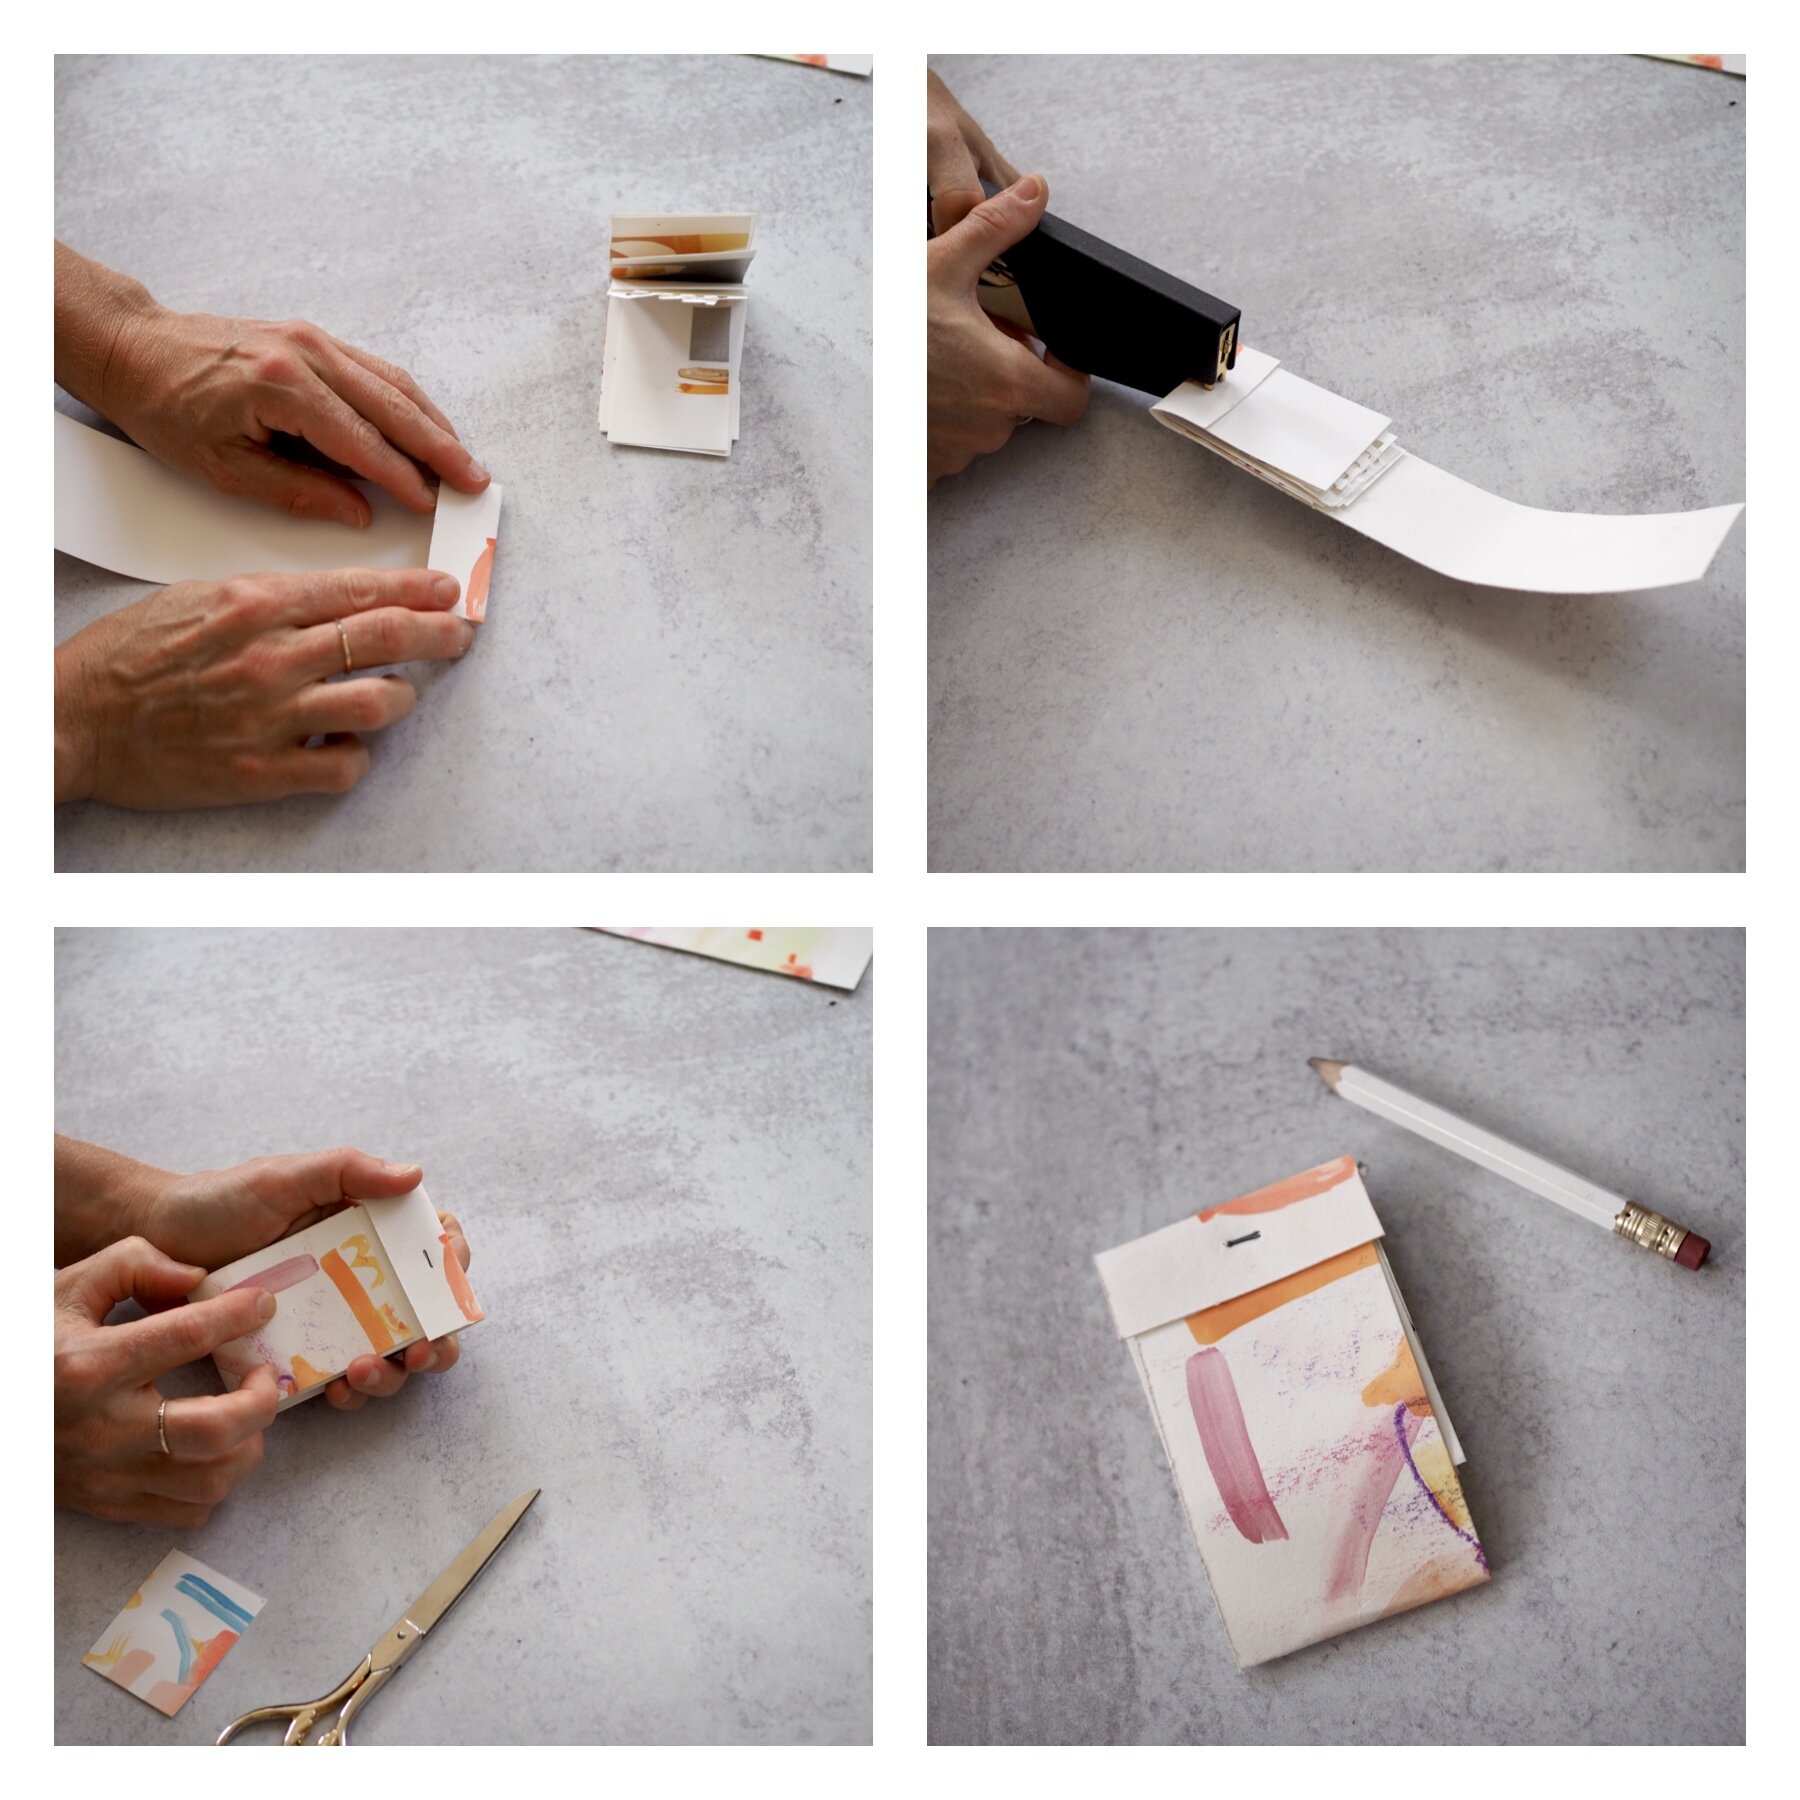
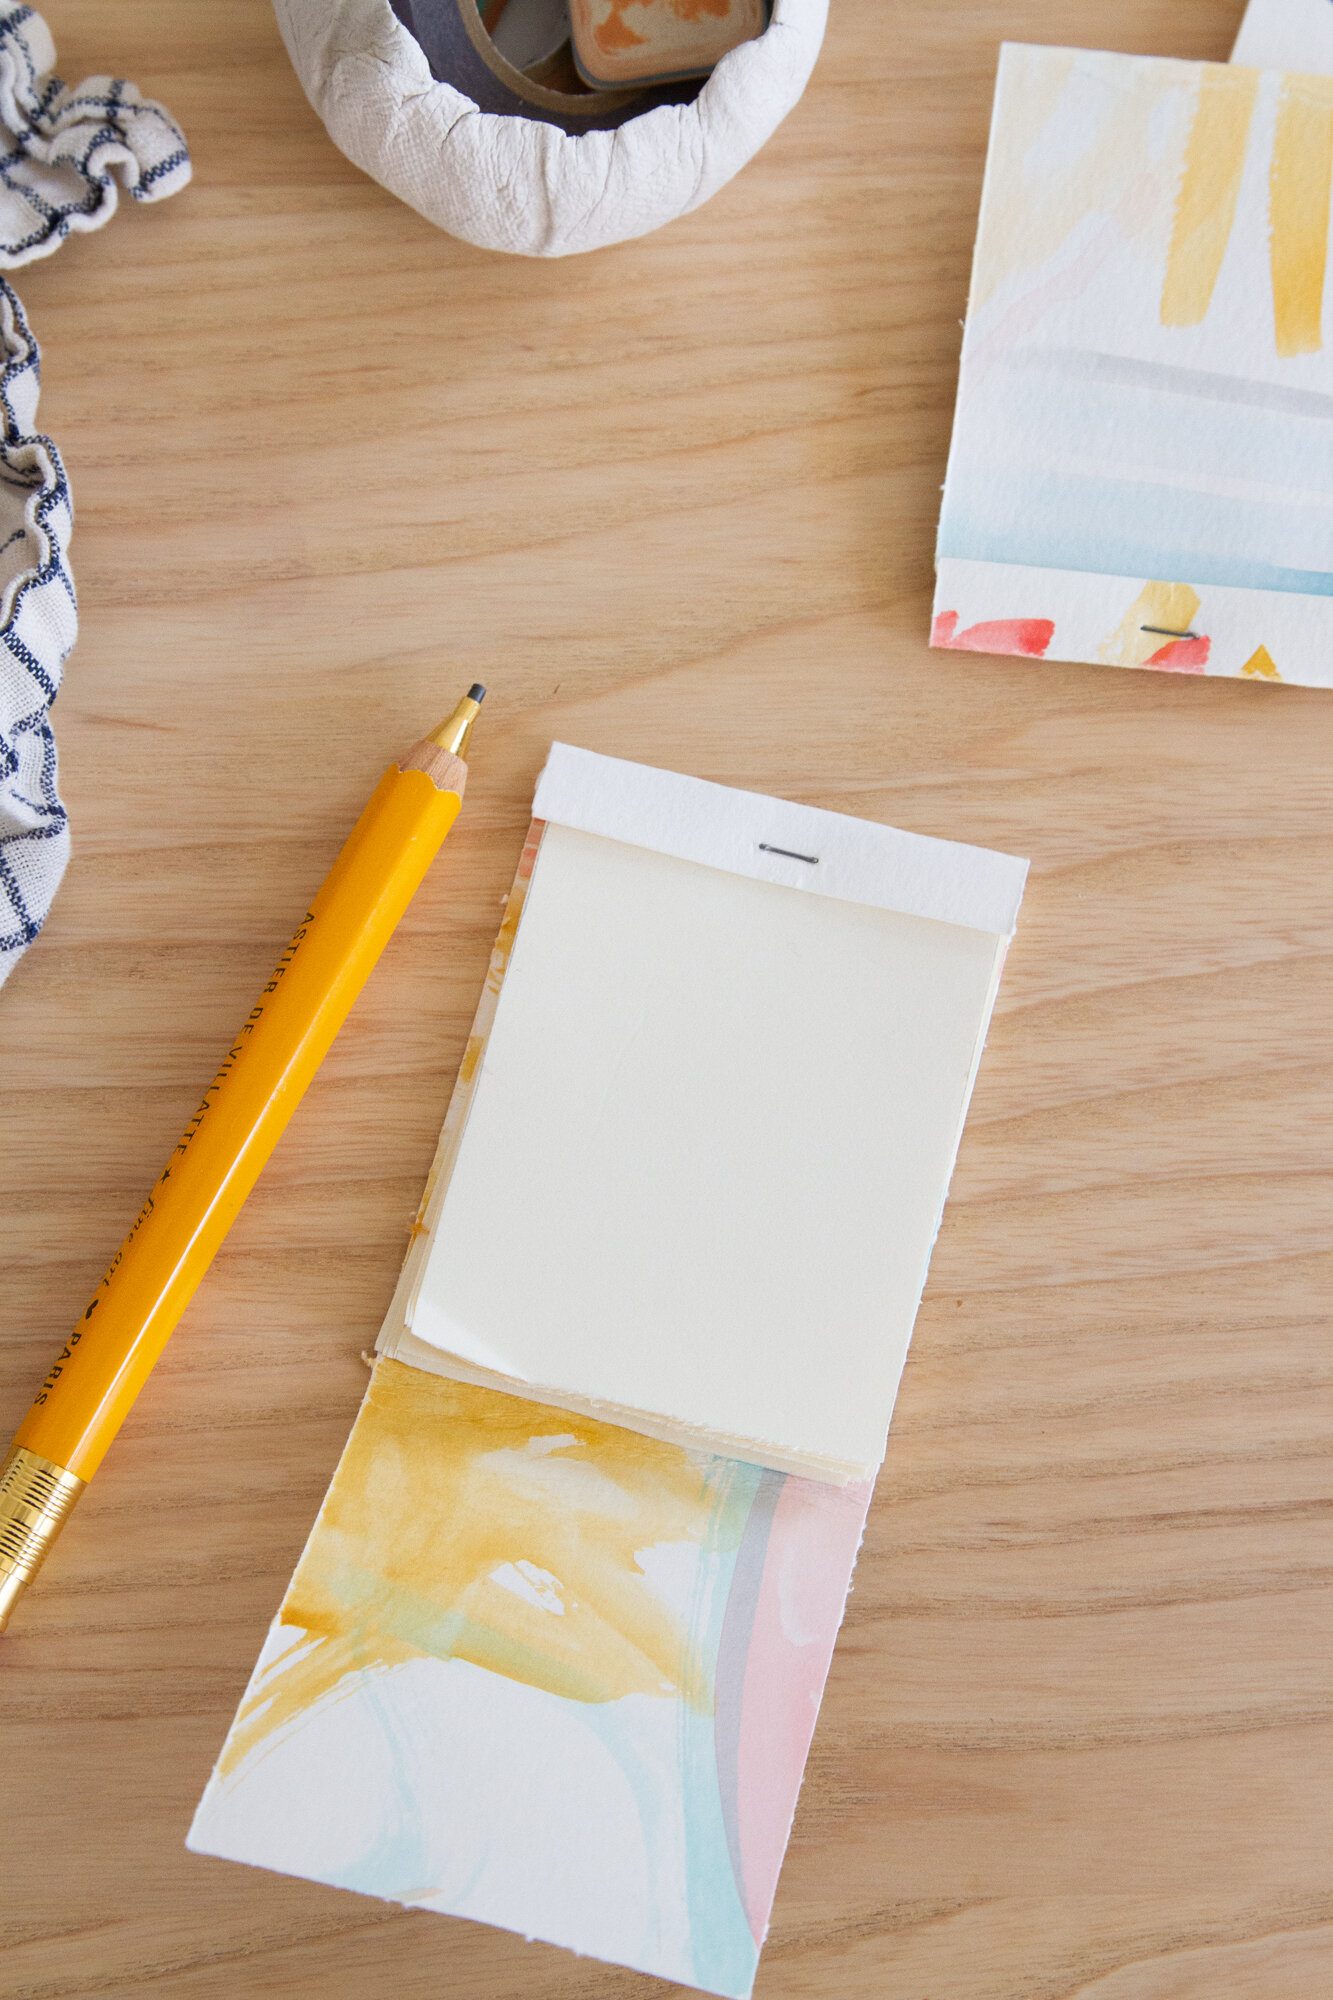
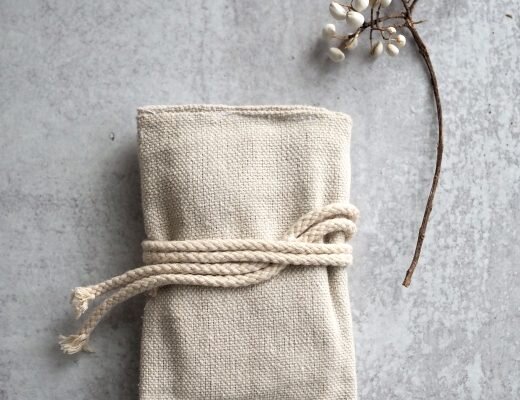
+ Insert the folded edge of your recycled paper stack into the inside of the folded cardstock end and staple the top center to secure.
+ Fold the remaining length of cardstock over the paper and up towards the top. Make sure that the cardstock edge goes past the overlap but not under the staple. If it’s too long, trim with scissors.
+ Tuck the remaining overlap underneath the flap to close, and crease the bottom fold.
//
Thanks to Rose Pearlman for developing this projects and capturing the step-by-step imagery. Rose is an artist, teacher, and textile designer. With a background in fine arts and a love of well designed functional objects, her creations blur the lines between art and craft and pushes the boundaries with non-traditional techniques and materials. Rose teaches monthly rug hooking workshops in and around her home in NYC, and also welcomes commissions for one of a kind constructions in decor and home furnishings. Her work has been featured in fiber magazines, galleries, and numerous online design sites. Her book Modern Rug Hooking is available wherever books are sold. She lives in Brooklyn, NY with her family.
//
ACTION ITEMS:
If you’re hoping to expand your gift giving this year to help people outside of your own families, consider making a donation to The Conscious Kid’s incredible on-going rent relief campaign:
We’ve sent out over $1M in rent relief to thousands of families this year. Our community has continued to show up and support our relief fund, so we are continuing to donate every dollar back to families who need it.
For more information about The Conscious Kid‘s rent-relief effort, visit their GoFundMe page.

10 Comments
Love this – such a great idea! 🙂
Jenna ♥
These are beautiful and I made some! I want to make more with my students to write their stories and letters inside! Thank you for this lovely and simple idea!
Oh wow! These are so adorable!!
Wondering what brand of watercolor paints the kids are using ? Love how bright the colors are.
My current set seems very pale in comparison.
Happy Holidays
We have this set from Acorn Toy Shop: https://www.acorntoyshop.com/products/watercolor-paint-set
These are so cute!! What a smart idea!
Love this idea — and the stapler! Where is it from? You must grow weary of these questions.
This one’s Rose’s, so I’d have to confirm, but I think it’s the Ellepi Klizia stapler–a classic beauty!
Indeed. Thanks for sharing!
Thank you for this project! I’m leading a trash cleanup with some kids and they’re getting prizes of recycled paper pencils and one of these little books I made from my kids’ schoolwork. Seems perfect to me!
Comments are moderated.