
Just in time for the dog days of summer, I finished the window treatments I set out to have finished before the summer solstice. As my dad would say: that’s life in the big city.
When I set out to find a window treatment solution for the kids’ room, I wanted something simple in terms of materials, construction, and aesthetics. I didn’t want frills or fuss or complicated mechanisms that could break or be expensive to replace and I wanted to be able to tackle the shades with my own limited sewing skills. With these parameters in mind, my research consistently landed me back at the concept of traditional Swedish roller shades and so here we are with my riff on those.
As longtime readers will know, I have only recently come into a used sewing machine. Rest assured I kept this construction as simple as possible and have tried to reflect that by writing simple instructions based on my personal experience.
In construction and other things, these roll-up shades are endlessly customizable. I have no illusions that there might well be additional steps for folks wanting or needing more polished finishes and I hope folks reading will feel emboldened to use these instructions for a jumping off point to make shades of their own. It would be easy to swap out plain cotton canvas for something fancier, for instance. If light is an issue, lining these with an additional layer of light-blocking fabric—black canvas or burlap for example—would be simple and effective, though I’ve found that the tight weave of the #12 Cotton Duck has been sufficient for us so far. It wouldn’t be wrong to swap silk cord for cotton twill tape and playing with scale and color of cords and finishes are all things to try.
If you want your shades simpler still and don’t need them to roll all the way up, you could forego cords altogether, rolling the shades up by hand (the dowel would still be helpful here!) and resting the rolled shade on a simple bracket or hook placed inside your window frame.
In terms of installation hardware, I especially love that the small cup hooks and eye hooks are so low-impact in a rental window frame. (The blinds that I removed—and stored for my landlords should they want to replace them—were far more intensive in terms of damage to the window frame and general bulk.) That said, everyone’s windows are different and folks might need to tweak placement or materials depending on their particular needs or wants.
Without further ado, here are the basic materials and instructions for what I did in my home. If anything’s not clear, I’m happy to try to help! (And I’ll be adding lots of video to Instagram to help flesh things out, too!)
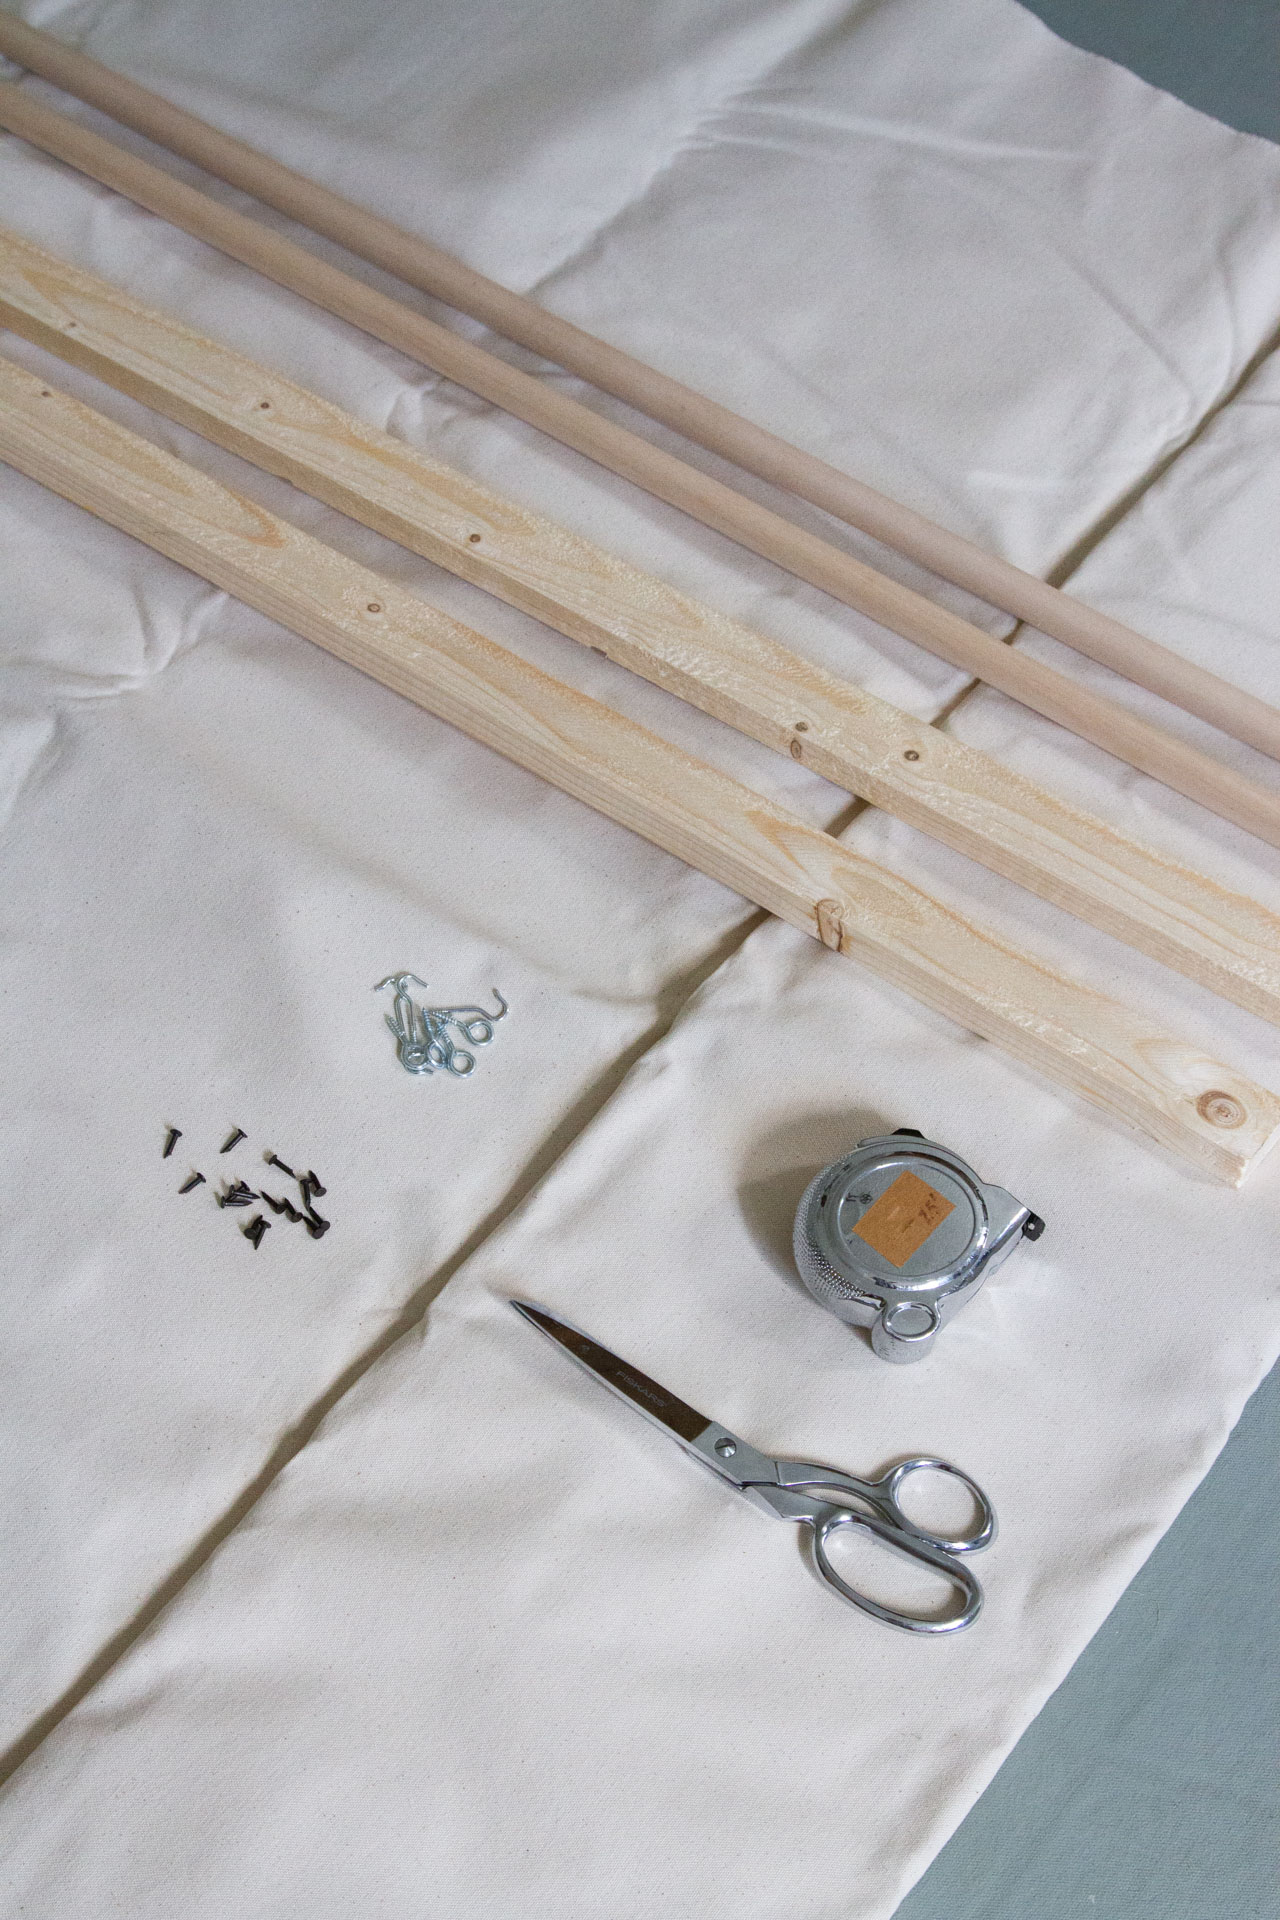
Materials:
+ Round 3/4 inch wooden dowel, cut to 1/4 inch less than the interior of window frame width measurement
+ 1-inch x 2-inch wooden batten;cut to 1/4 inch less than the interior of window frame width measurement
+ #12 Cotton Duck Canvas, cut to ~5 inches longer than the interior window length measurement
+ Small steel tacks, nails, or staples
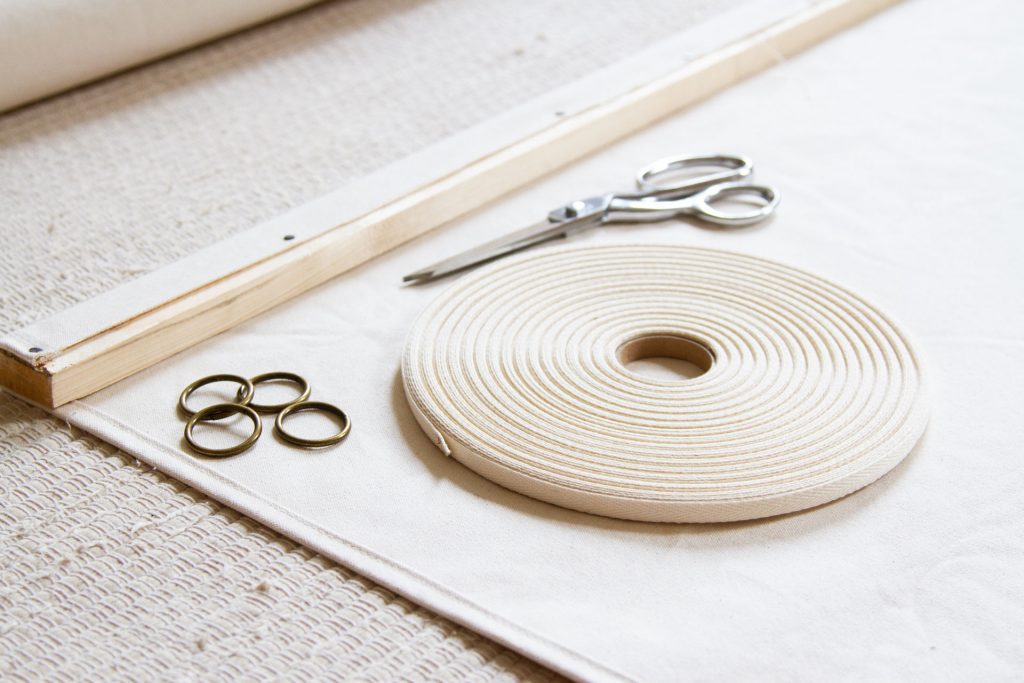
+ 2 brass o-rings per shade
+ Heavyweight 3/8″ natural cotton twill tape; roughly 4 times the length of your window, plus 20 inches.
+ 2 small cup hooks per shade
+ 2 small eye hooks per shade
+ 1 blind cleat per shade
Instructions
+ I started by measuring the interior frame of my window from side to side and top to bottom.
+ Next I cut my fabric allowing an additional 1/2-inch seam allowance on each side and an additional ~5 inches in length. (Specifics will depend on the size of dowel and battens you’re using.)
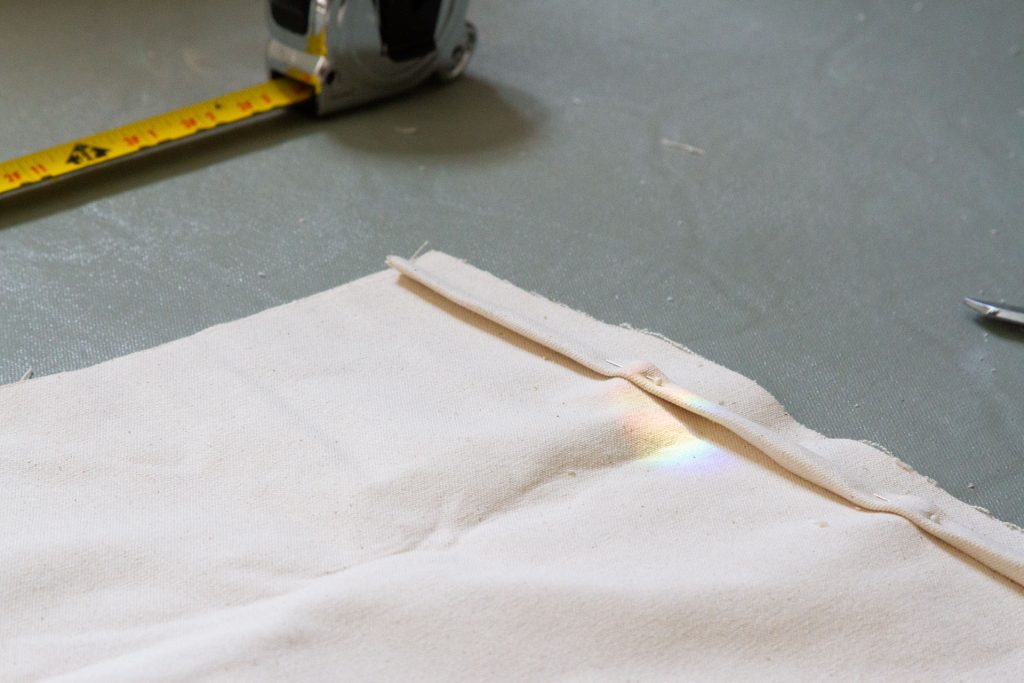
+ Next I folded a ~1/4-inch seam along the length of each shade and pinned it into place. (I found the canvas to be stiff enough that I didn’t need to iron the seams flat for sewing, but if you need a sharp edge, now is the time to pull out the iron.)
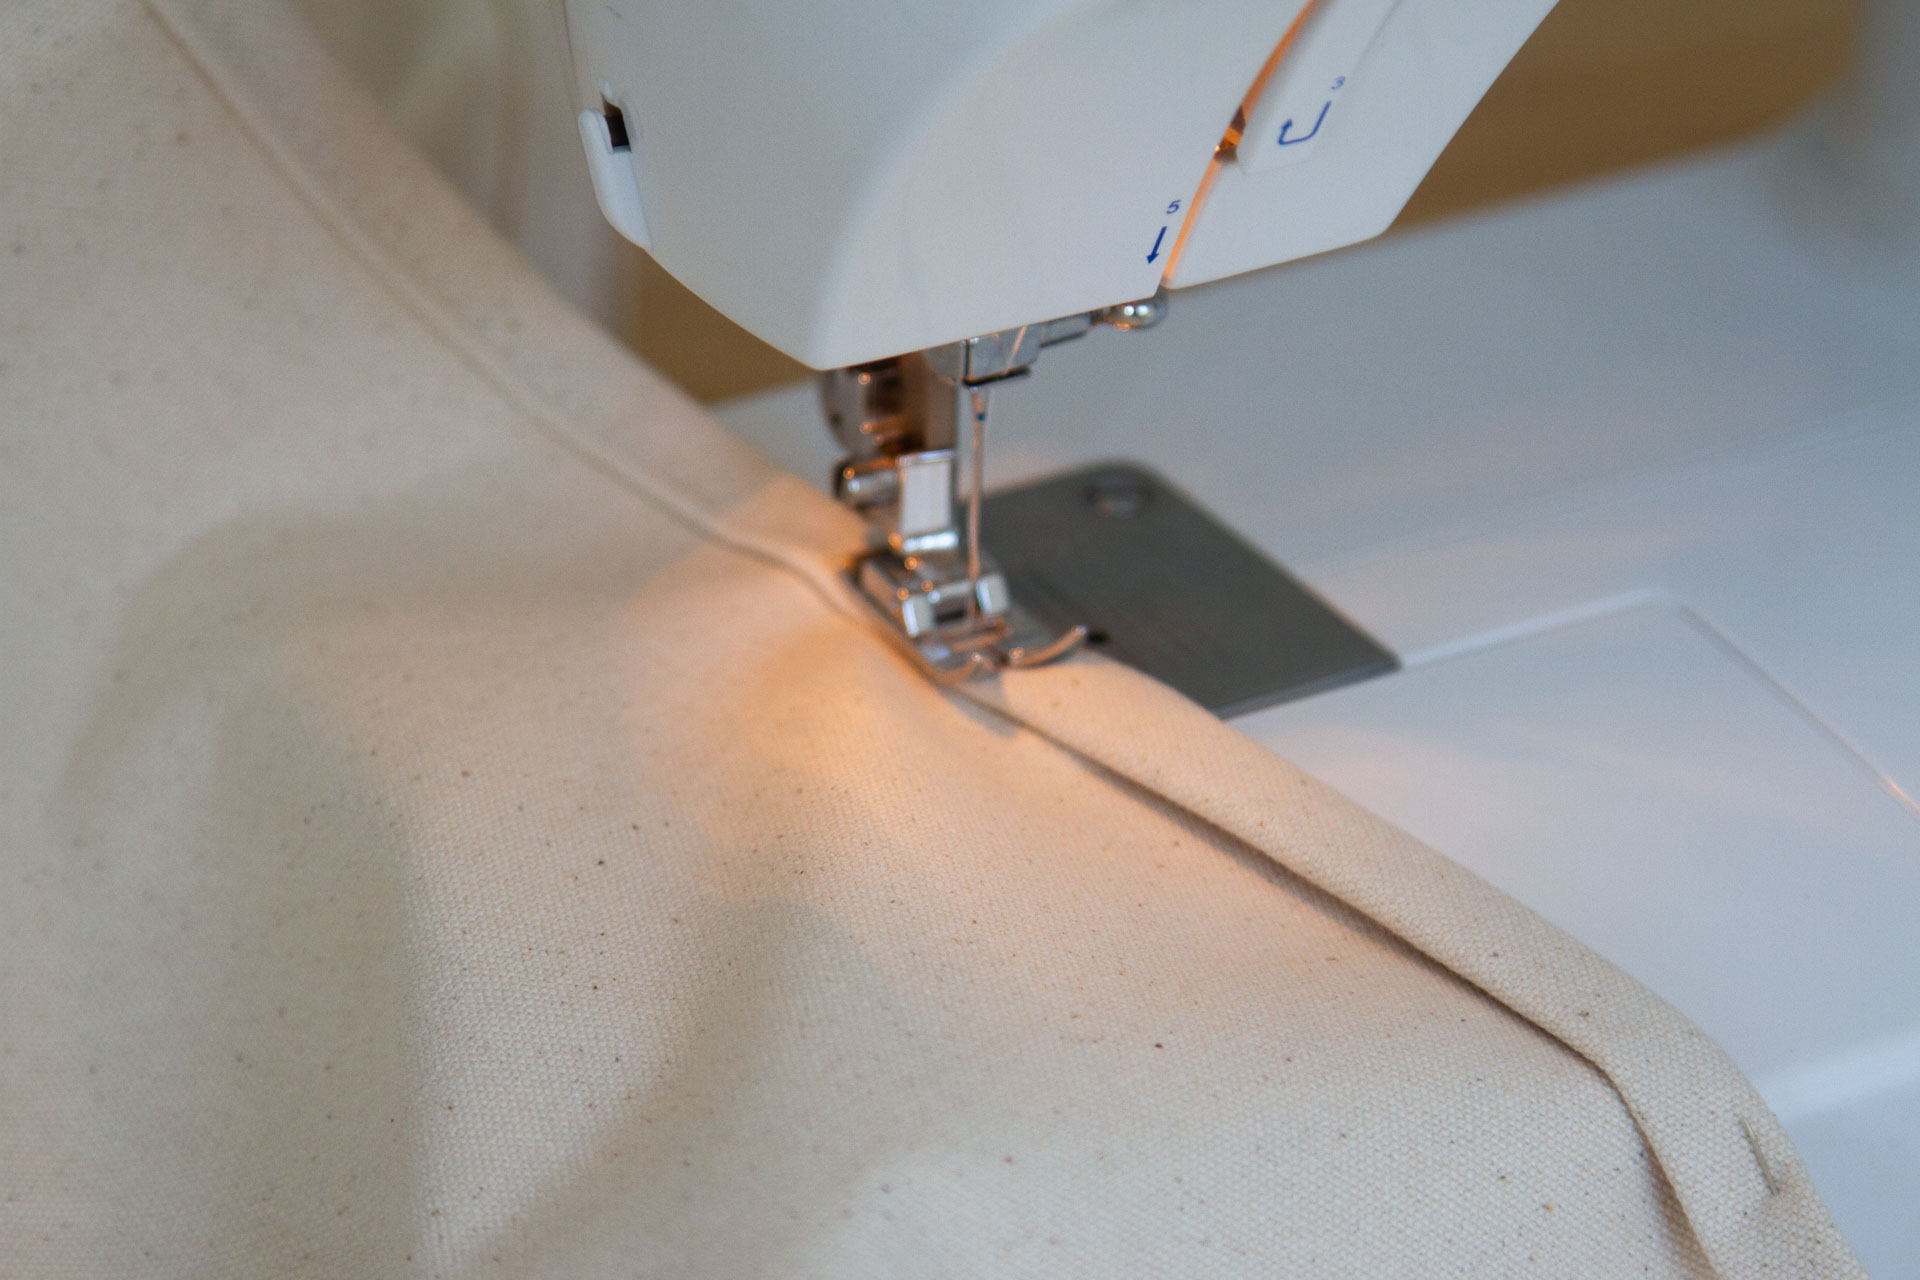
+ I sewed a straight seam along both edges, remembering to reenforce the ends.
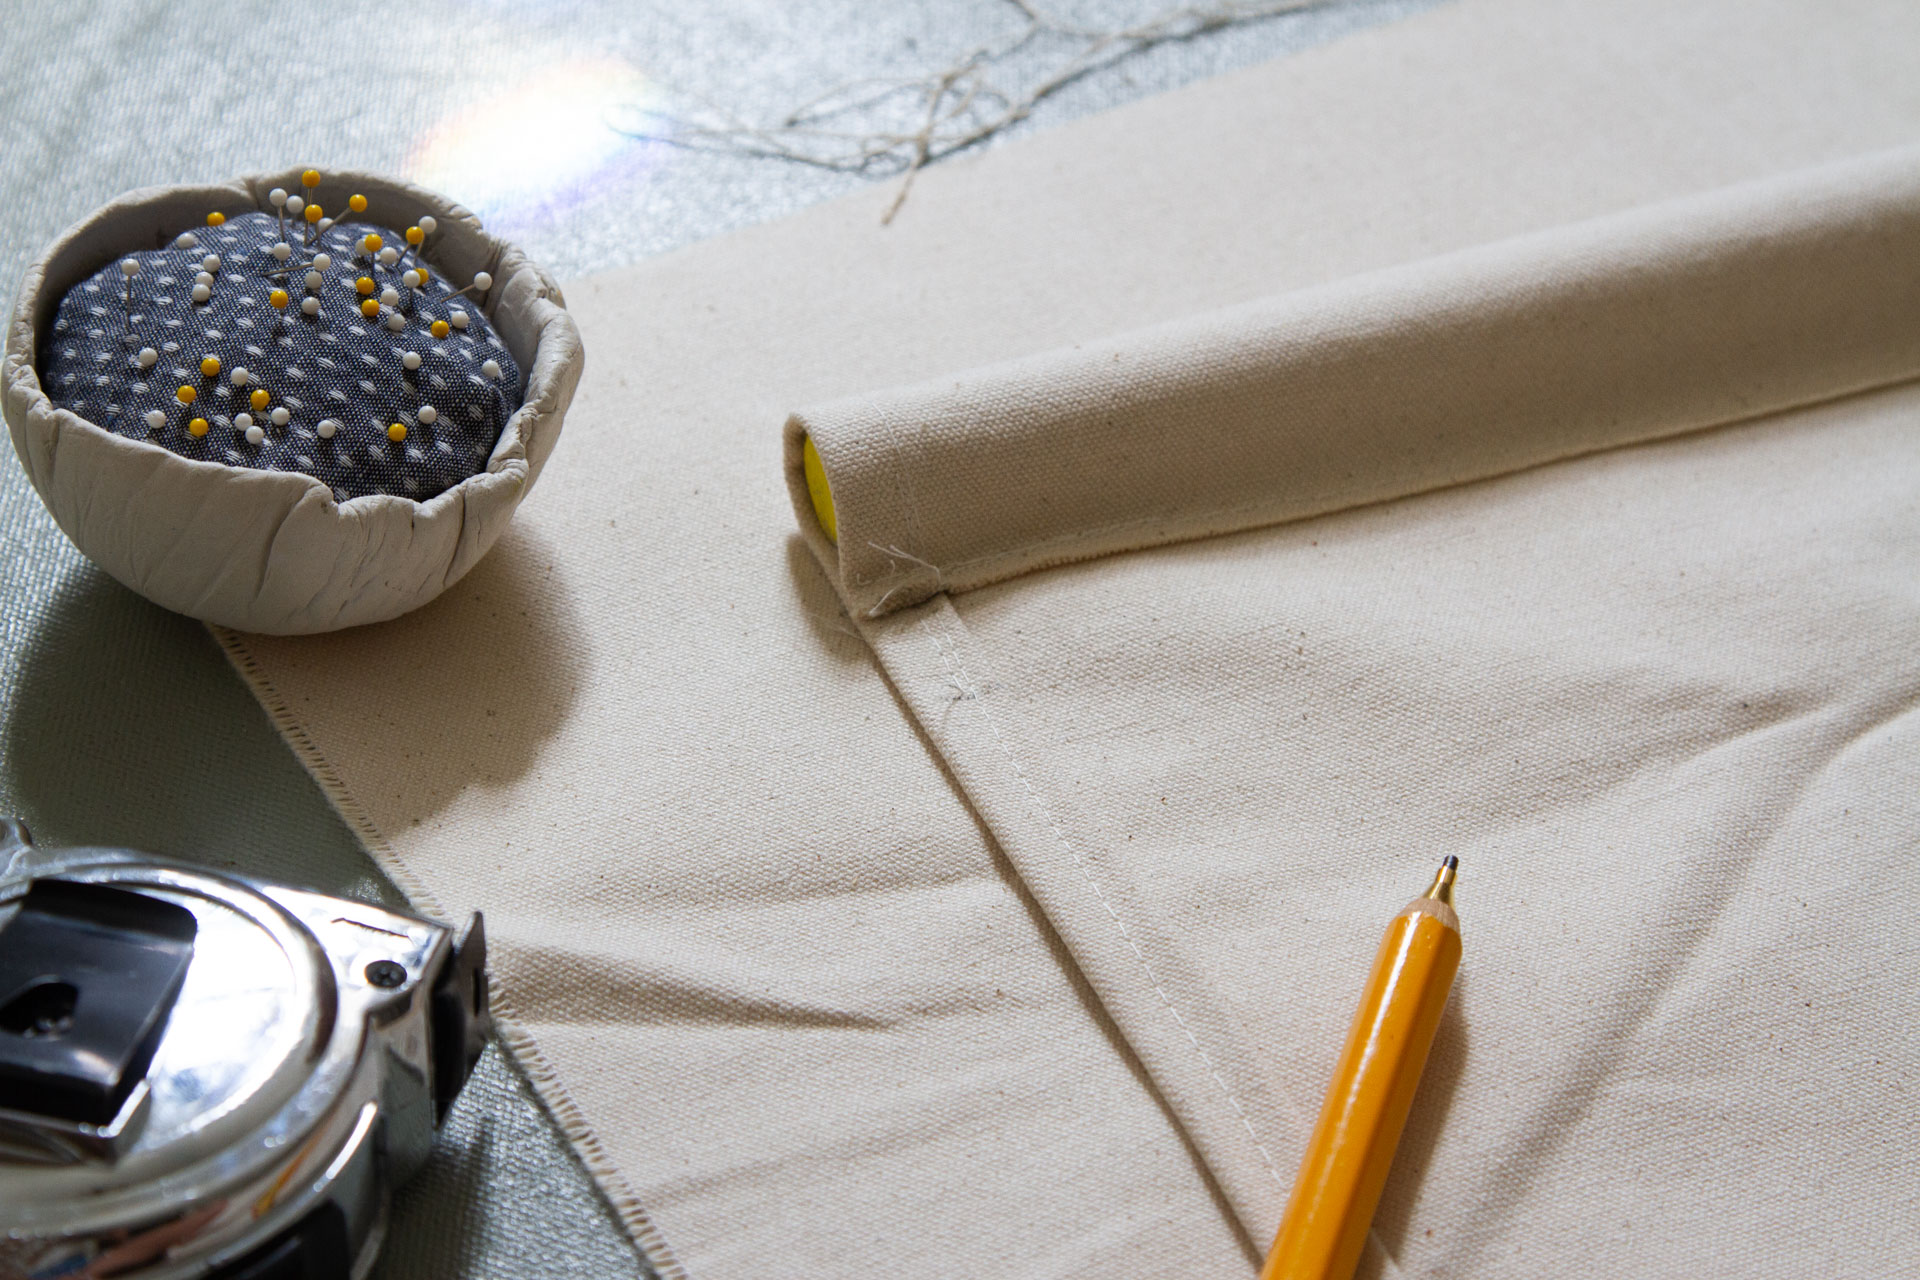
+ To make the bottom dowel pocket, I folded the bottom edge of the shade up approximately 3.5 inches and pinned it into place before sewing along the top of the fabric edge and reenforcing the sides.
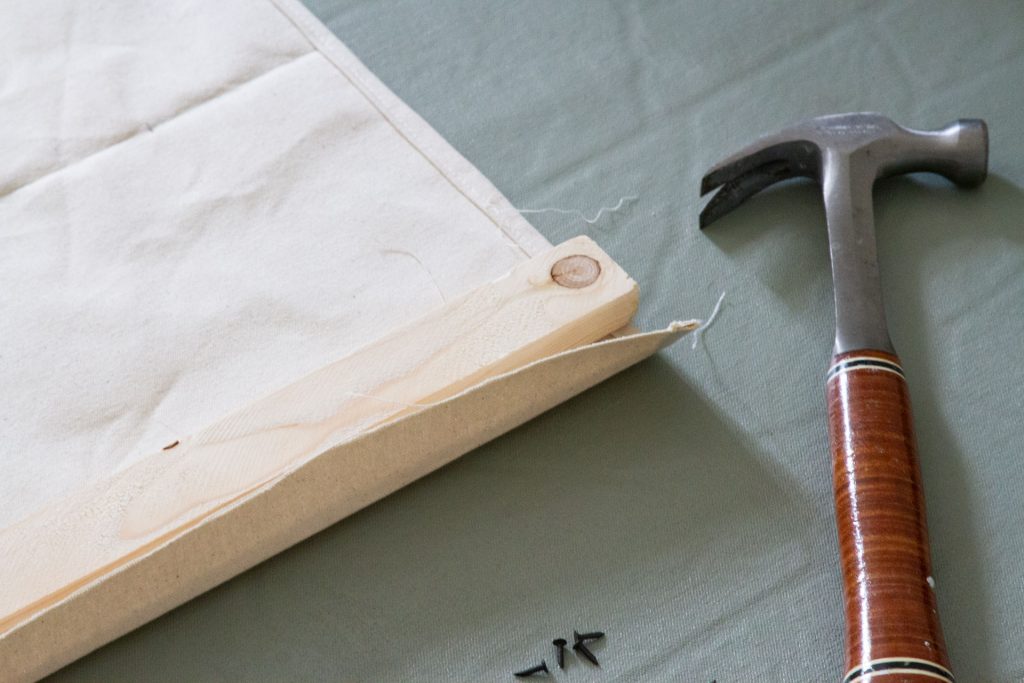
+ On the opposite end, I folded the top of the shade around my wooden batten. I placed the batten on top of the fabric and folded the raw edge of the fabric around the top and onto the front as pictured.
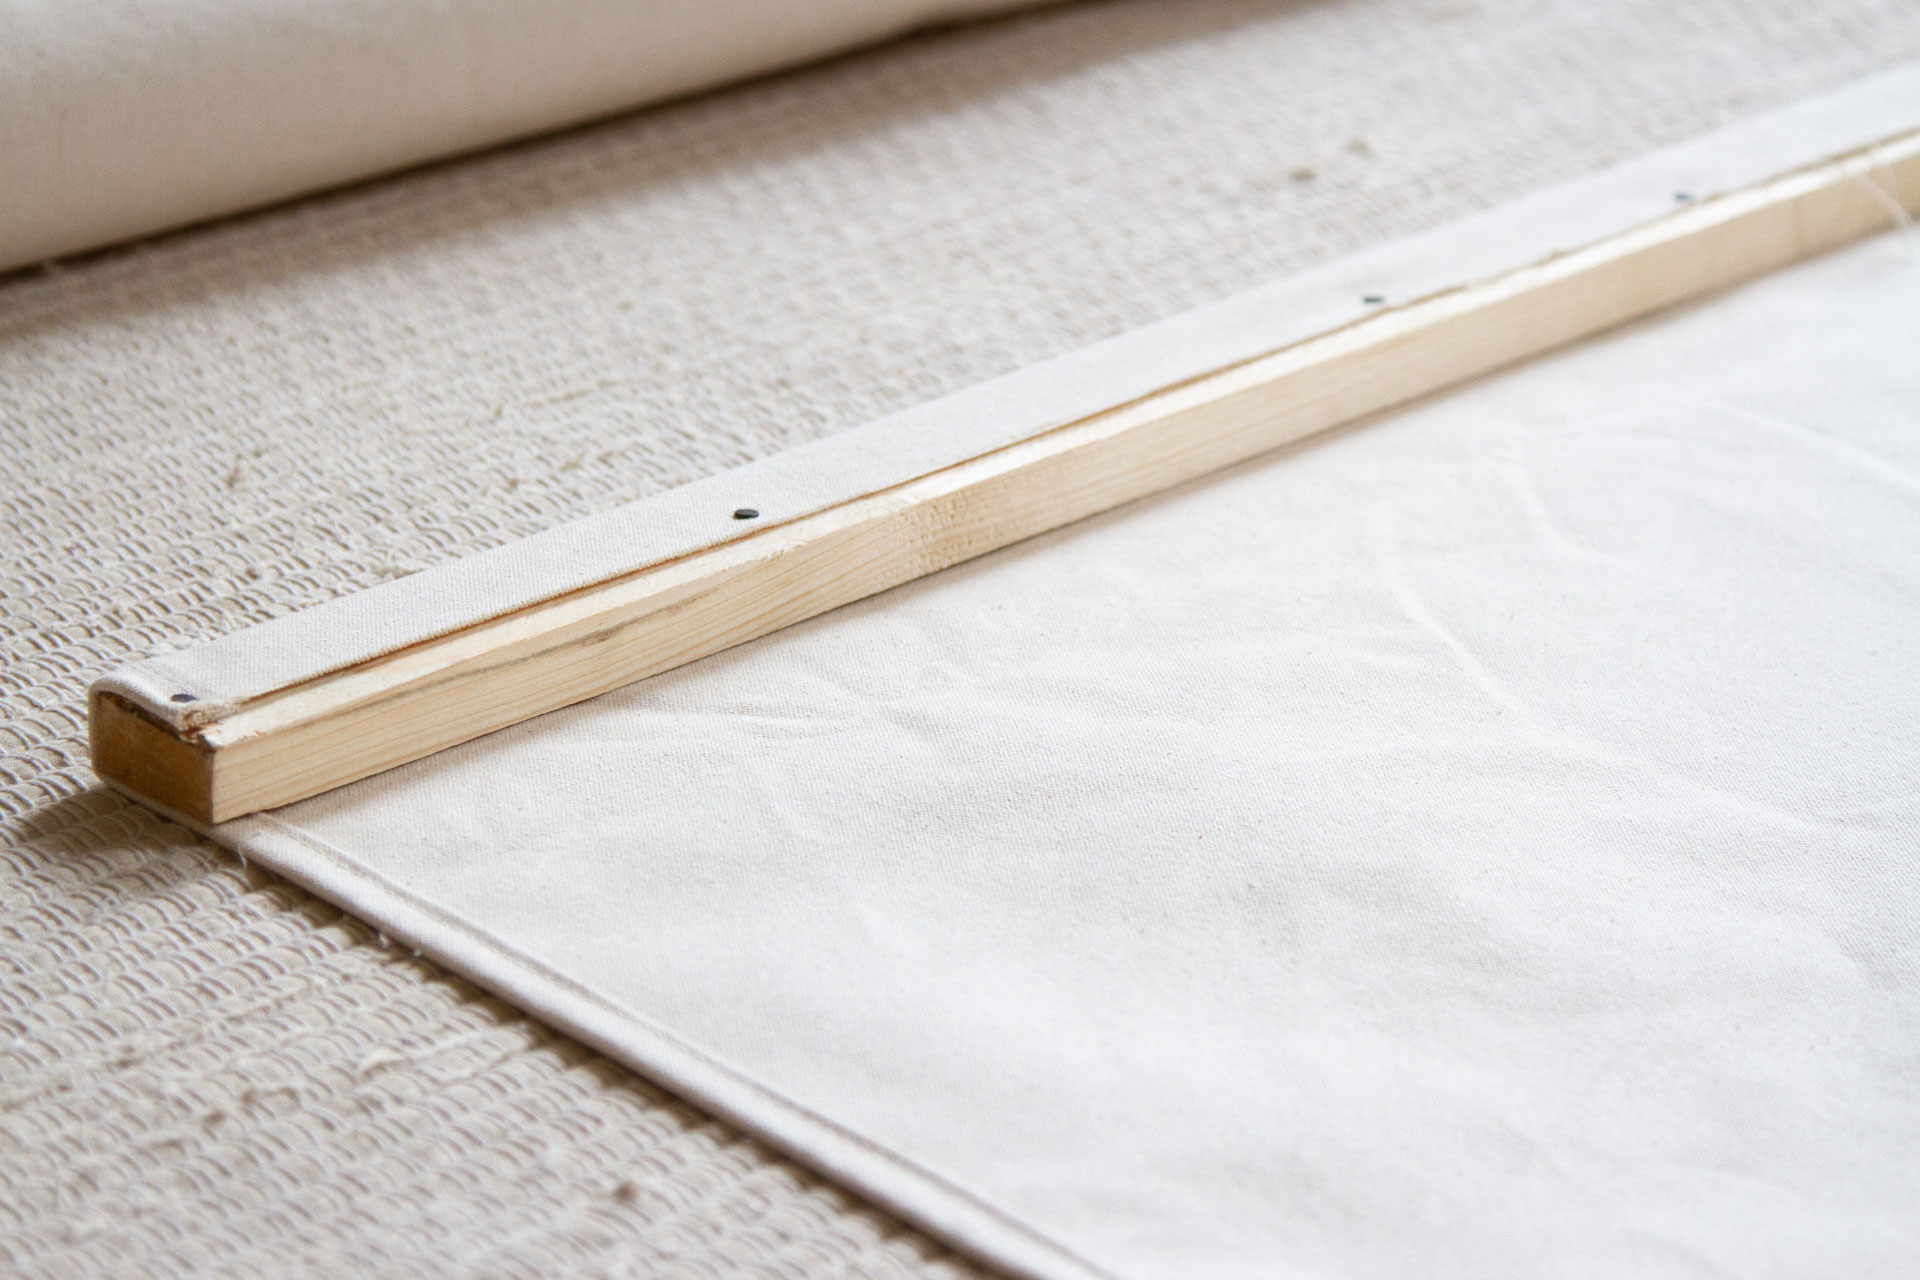
+ I used small steel carpet tacks to secure my fabric, but small nails or staples would also work. I placed my tacks roughly 4 inches apart.
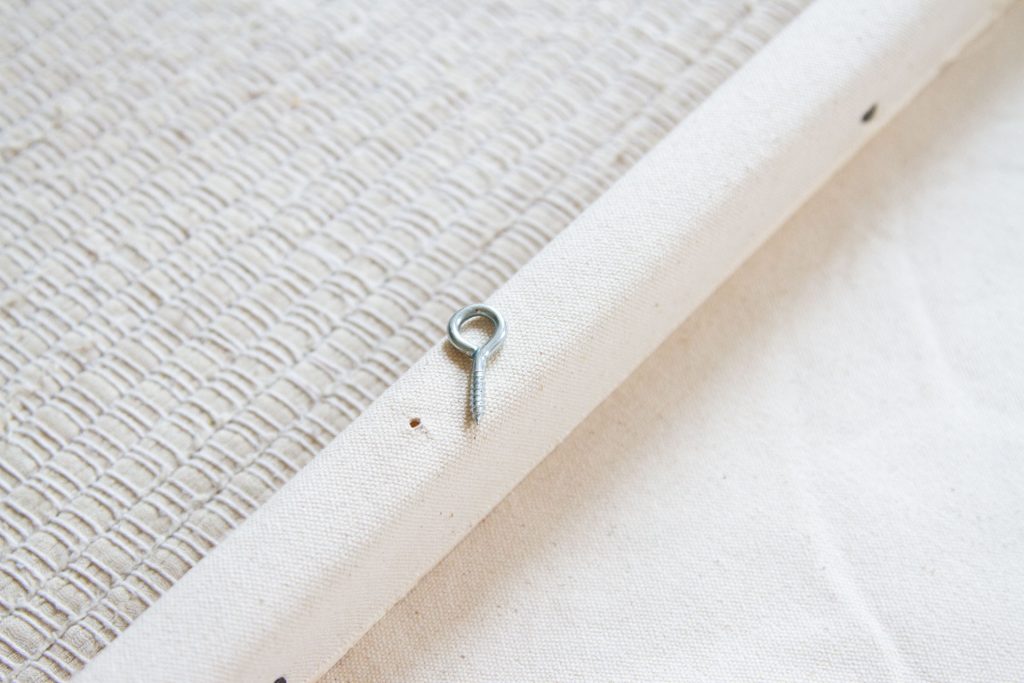
+ Once the canvas shade was secured to the batten, I marked two spots along the top edge of the batten, each 8 inches from the batten edge on the right and left and drilled small starter holes. These would be spots for securing the eye hooks and brass rings that create the pulling mechanism. (Exact placement and measurements depend entirely on the size of the window. My windows are 38 1/4 inches wide, so placing my rings 8-inches from the edge of the batten felt like a good spot for me. Keep in mind that the rings themselves will pull in a bit toward the center when the shade is drawn.)

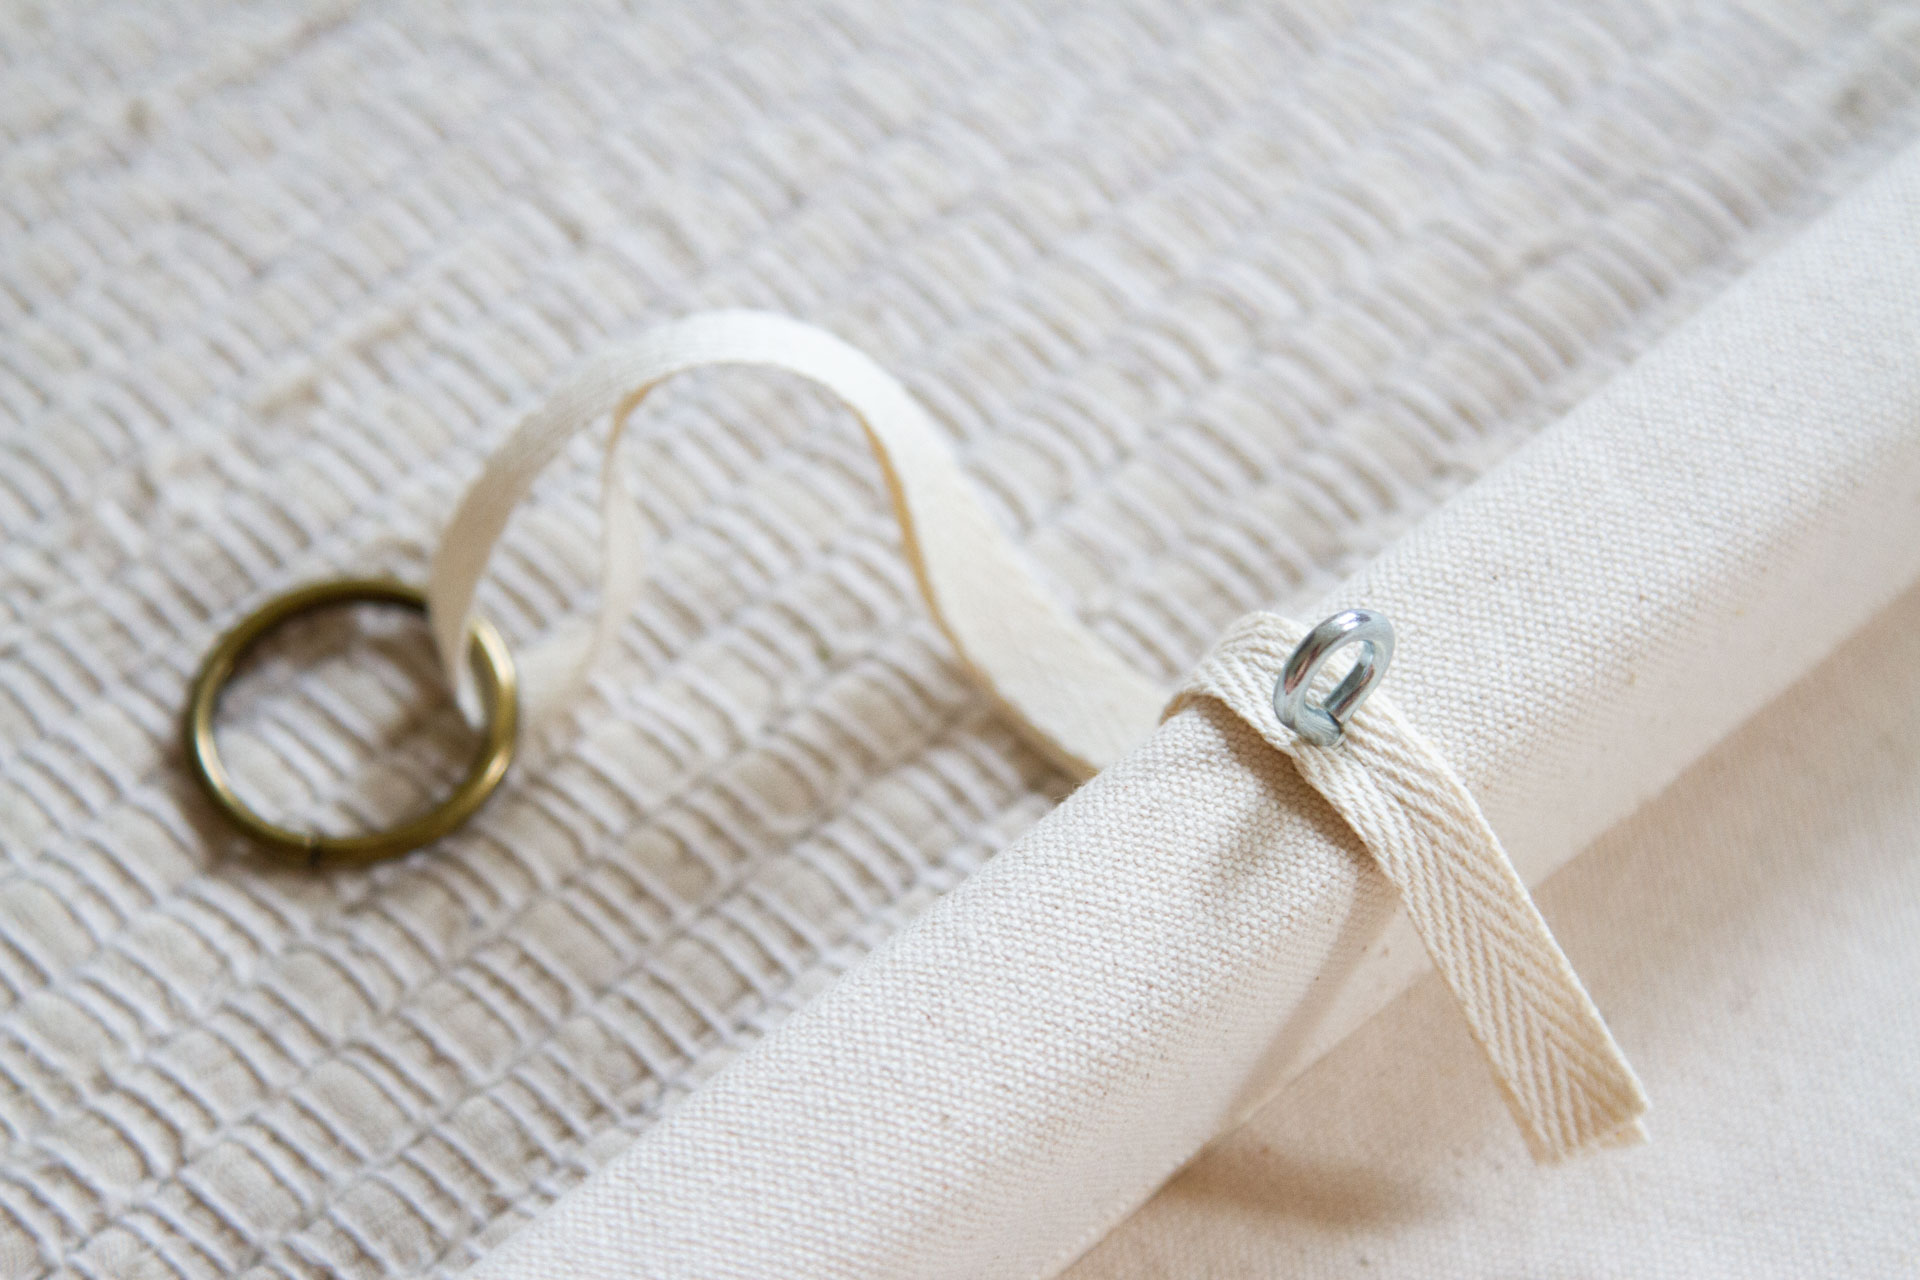
+ Next it was time to add the mechanism for raising and lowering the shade. I used brass rings that hang from two loops of cotton tape. In traditional Swedish shades, these rings were often made of glass, but I ordered brass rings from a bag-maker’s Etsy shop and they work beautifully. I began by cutting two ~16-inch lengths of tape and slipped the rings over the ends of each tape, bringing the ends together so each ring hung in the center of an ~8-inch drop as shown above.
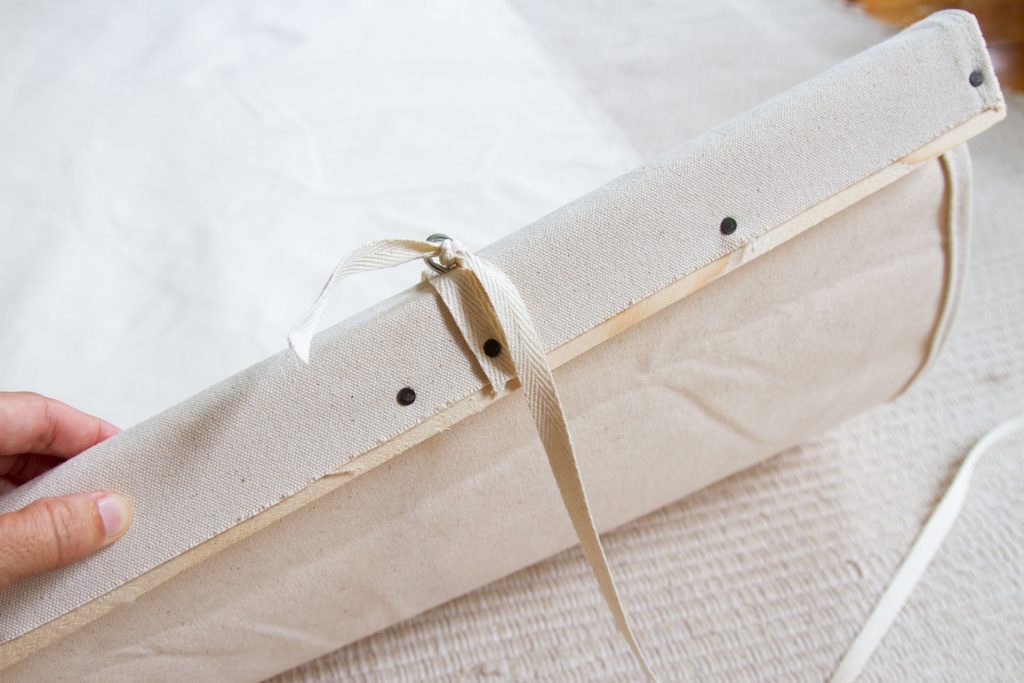
+ Placing the two ends of each tape length on top of each other, I screwed my eye hook through the twill tape and canvas and directly into the wooden batten. This resulted in each ring being suspended roughly six inches from the top of the shade as pictured.

+ I added an additional tack to the bottom tail of each ring tape just for good measure.
+ Next, I added the long vertical tapes that run the length of the shade. (This step was hard to capture in photographs so head to my Instagram account for videos.) I found this step to be easiest to do with the shade extended on the floor, with the room-facing side facing up. I began by tying one end of my whole roll of cotton tape to back of the first eye hook (which I had already secured into the batten).
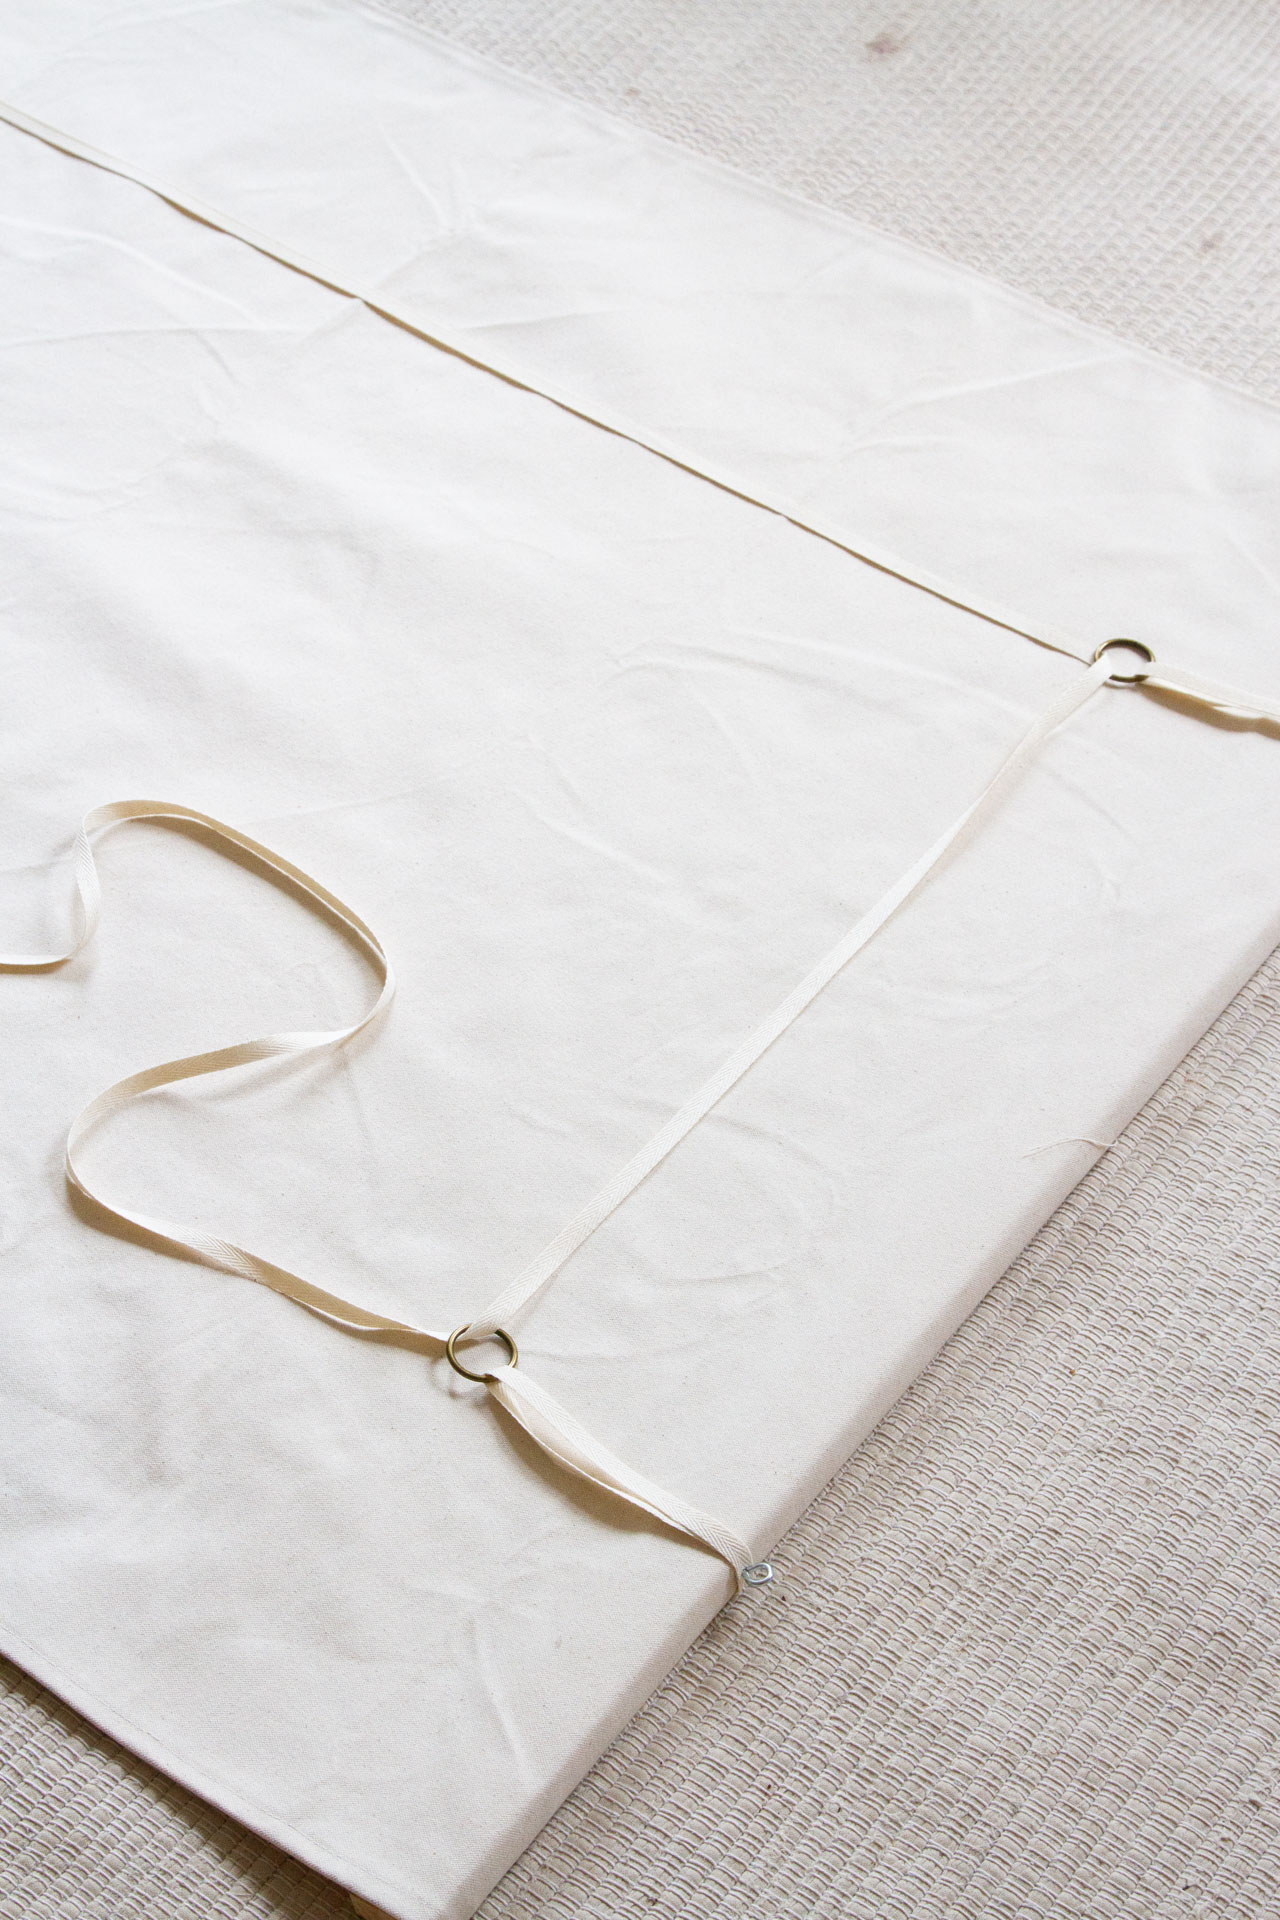
+ I ran the tape down the back of the shade and up around the dowel back up to the brass loop hanging on the left side of the shade. Next I draped it horizontally across to the loop on the right-hand side and snipped it from the roll with a roughly 2-foot tail hanging from the right-hand loop. Once snipped from the toll of tape, I wove the tape through both loops (shown above) and started again on the right-hand side.
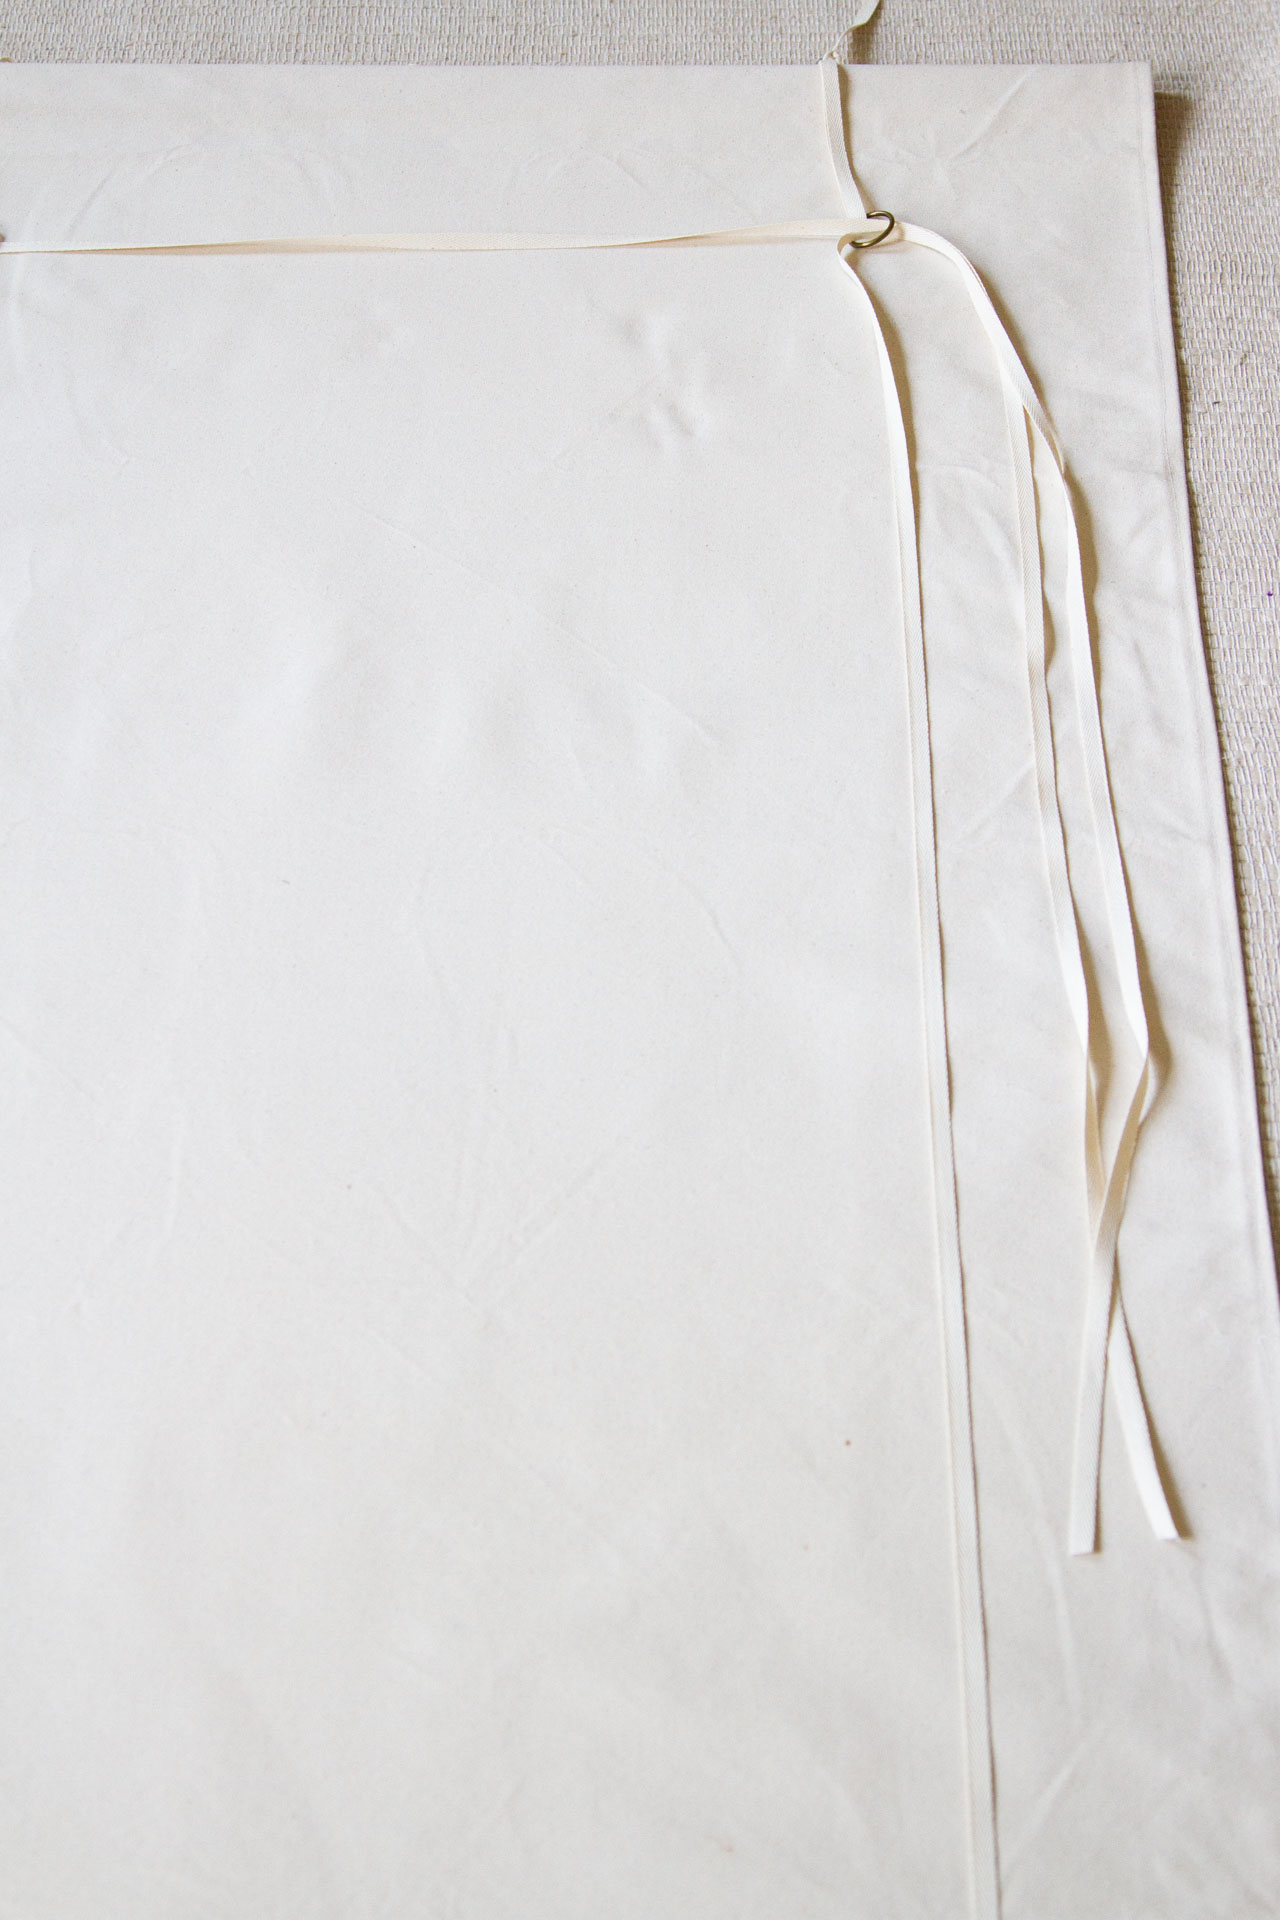
+ Reminder: The tape running on the left hand side of the shade goes first through left-hand loop and then across to the right-hand loop. The tape running on the right hand side goes only through the loop on the right.
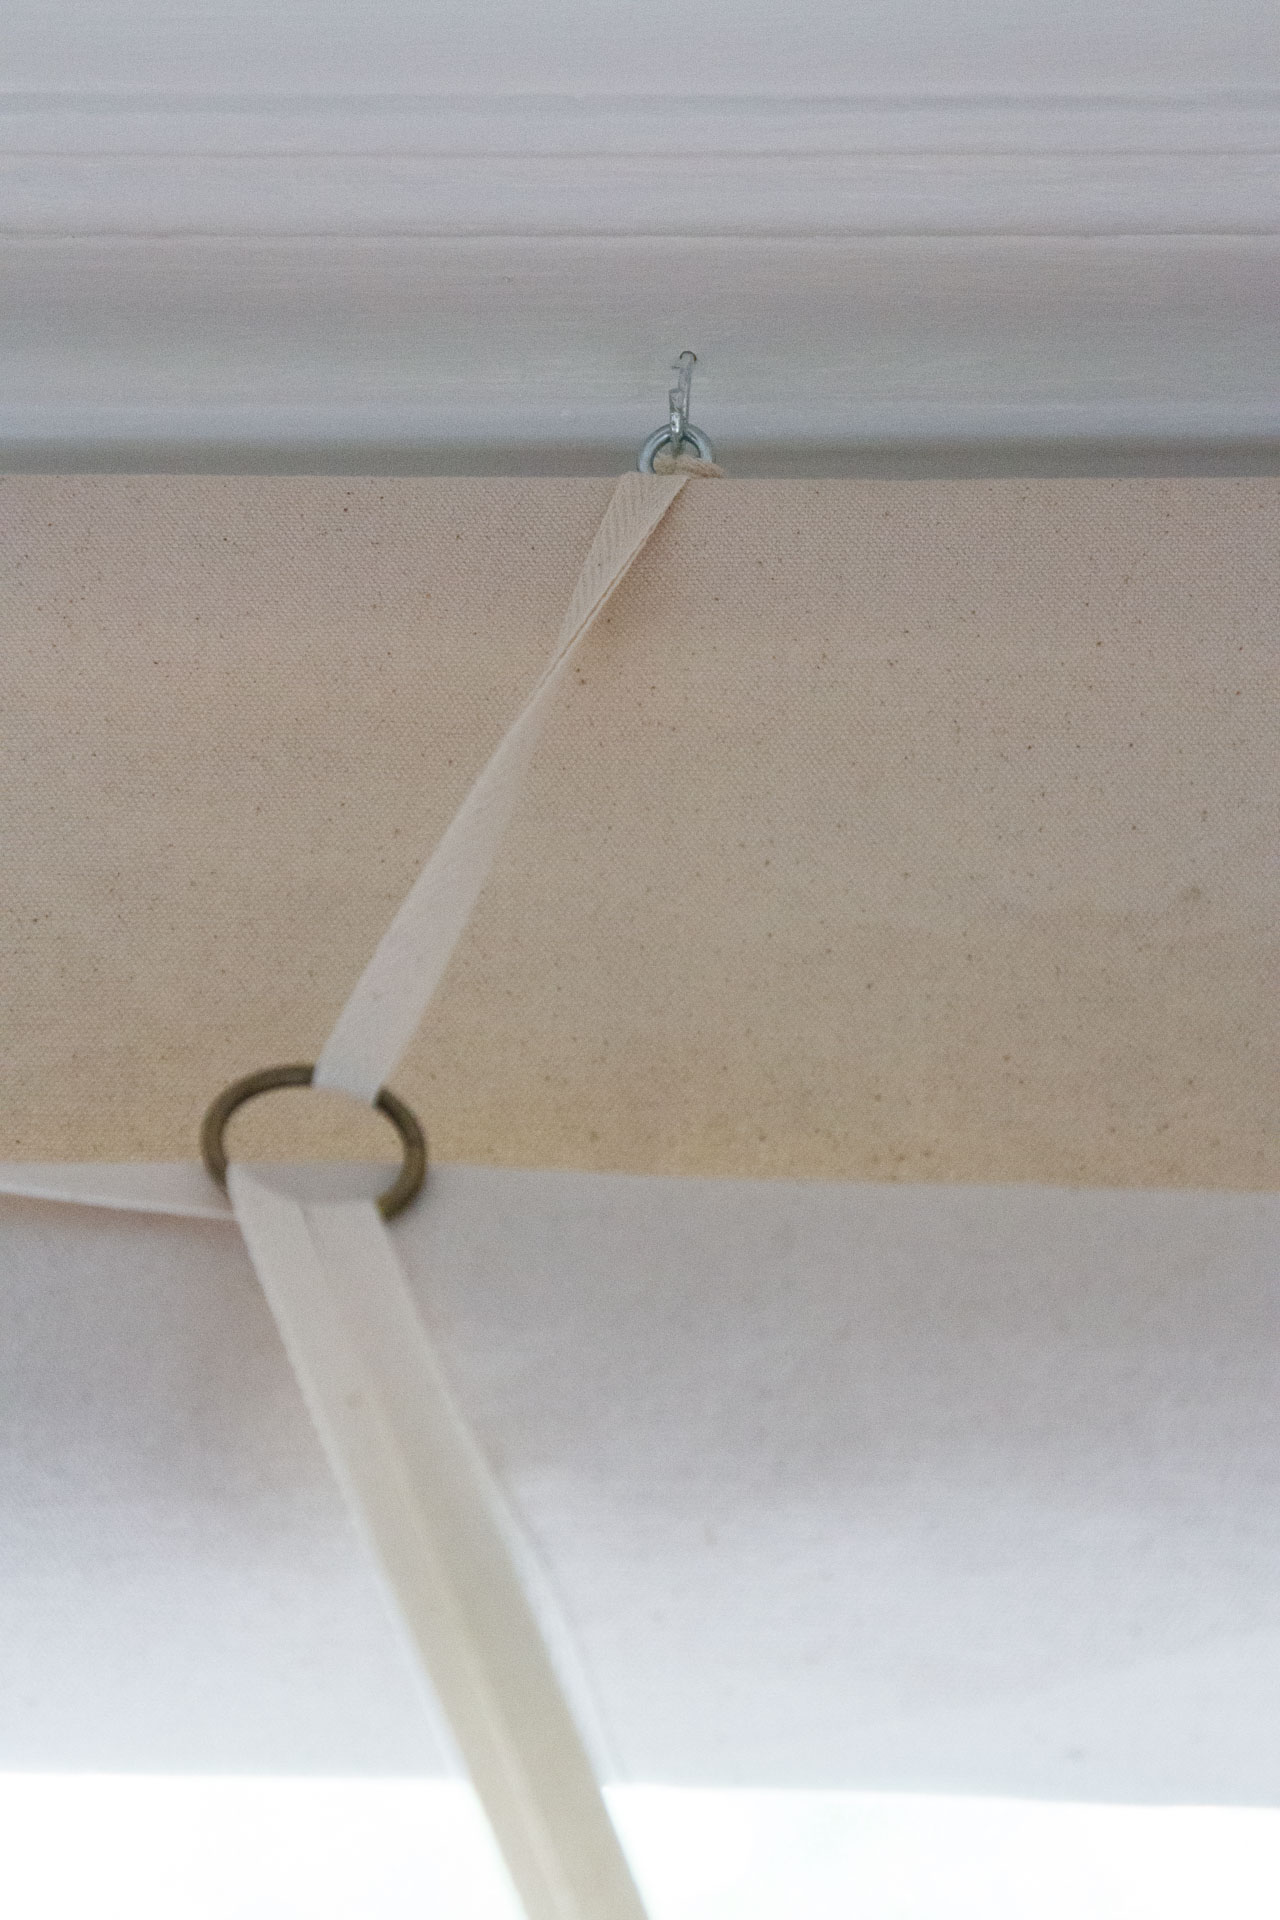
+ After the tapes were in place, I was ready to hang the shade in the window. I added my cup hooks to the top of my window frame, measuring to ensure they would meet the eye hooks at the 8-inch mark where I placed them on the batten.
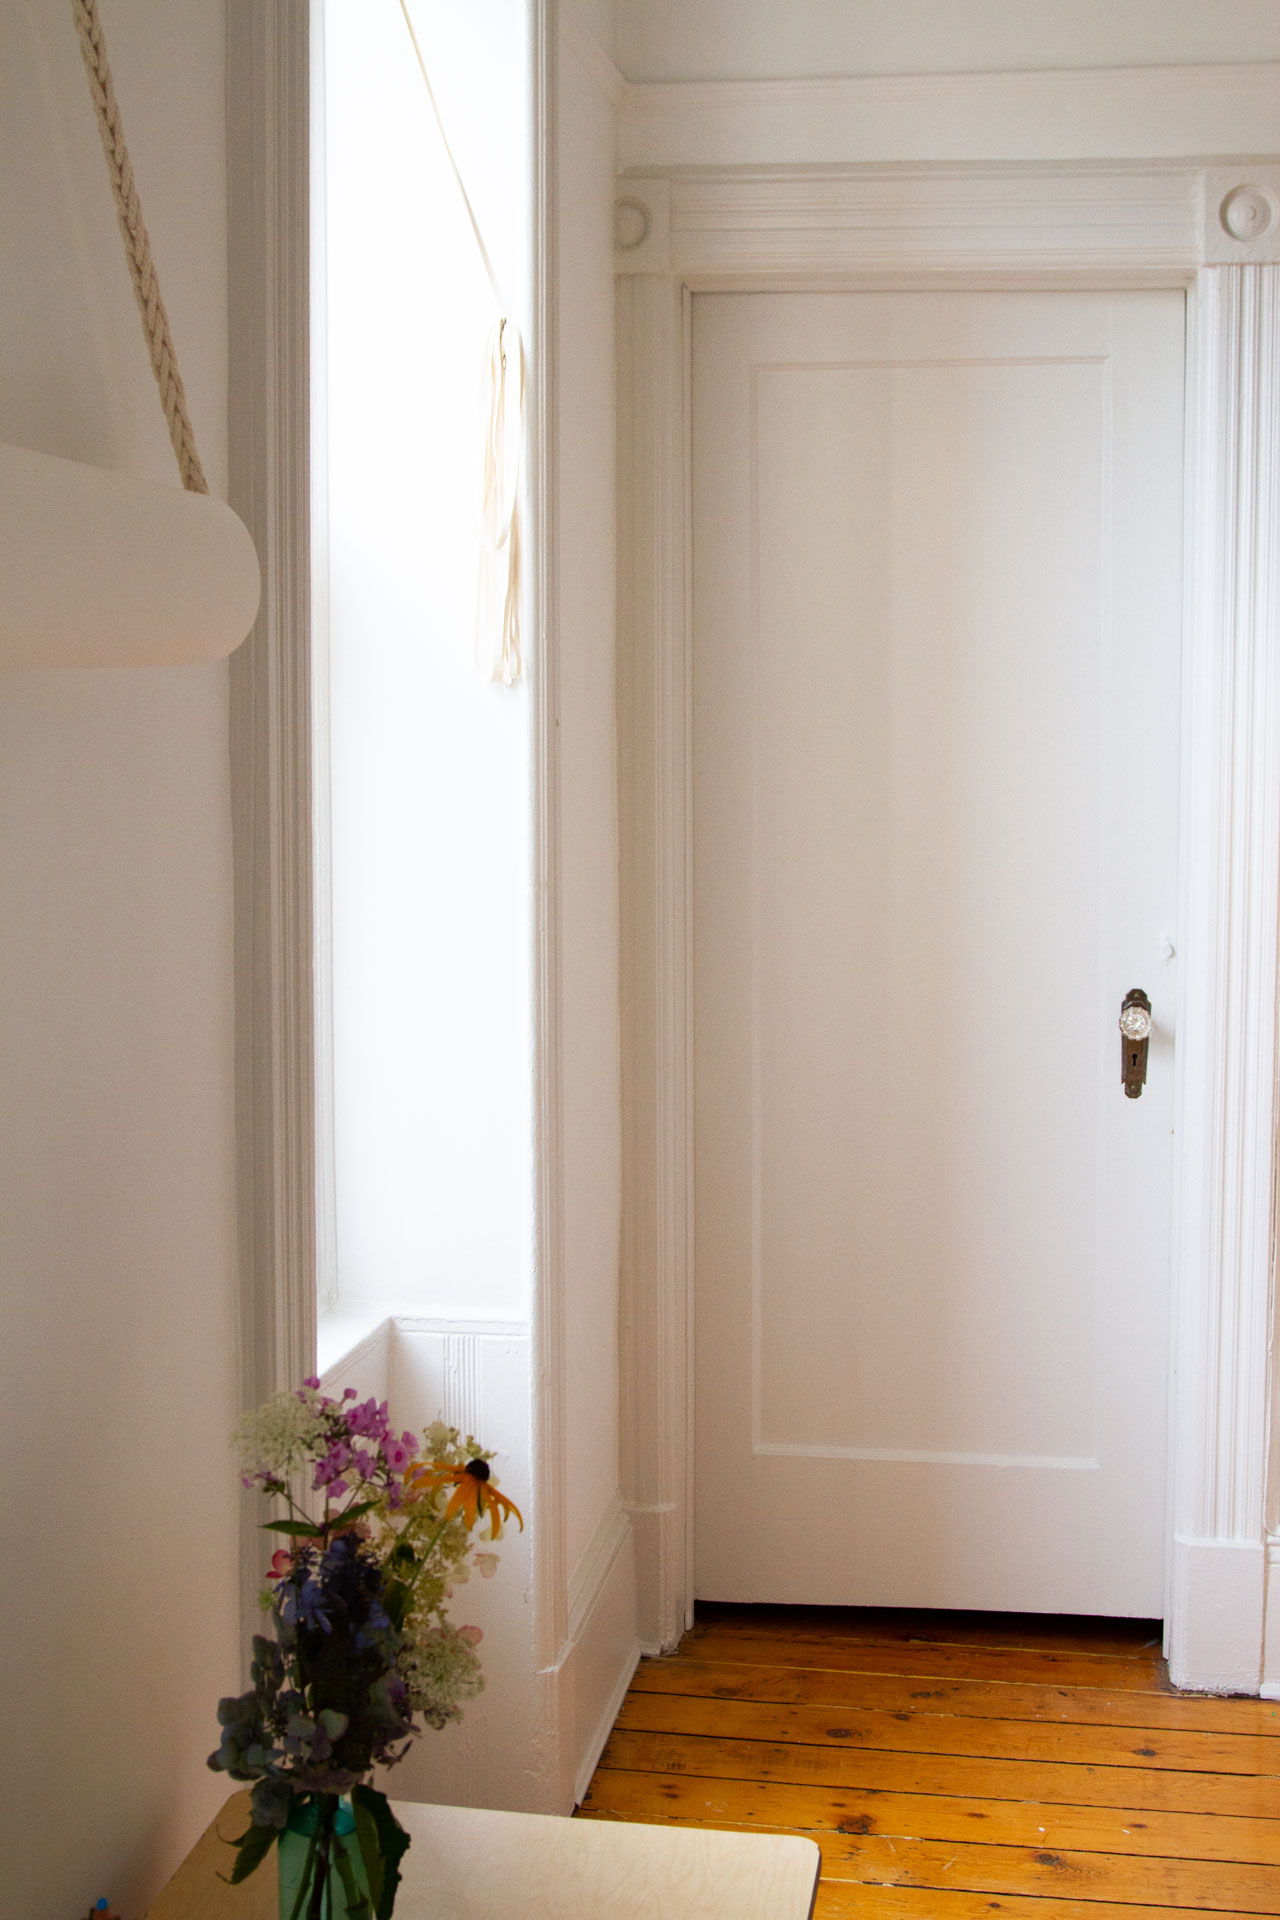
+ Finally, I installed my brass cleats to secure the cord, taking care to loop the extra tape out of reach of kids. By pulling both tapes simultaneously, the shade effortlessly rolls up. To let it down again, I remove the tapes from the cleat and let the dowel and gravity do the work.
More than anything, I can’t get over how much a prefer the simple look and feel of these shades to just about anything I was able to find commercially, including far, far more expensive window treatments like custom roman shades and roller shades. Canvas Etc. was kind enough to supply the canvas for me, but even including the cost of fabric and the fact that I was working with quite large windows, the total cost per window came to less than $25.
Any questions, just ask!

46 Comments
These are amazing! I’m inspired to pick up a sewing habit again 🙂
I love the simplicity and ease of these shades! Do you think this style of shade and mechanism would work okay on a very wide window? Or would the weight of the fabric be too much? All my windows are about 5 feet wide x 3 feet tall.
it would be simple enough I think to add another eye hook to the batten and possibly even a third cord if you felt like you needed it!
Just in time, thank you! We moved earlier this summer and the new place needs really simple window treatments but I didn’t want to buy roller shades – I always ruin the spring – or pay for/make roman blinds. I can make these!
Do you plan to put these in the back windows also?
Maybe! For now we have two drop cloth curtains that are much more lightweight which is kind of nice for a room that gets tons of sun but where no one sleeps! The kitchen still has a PVC miniblind though, and I might get v bold and try something with a pattern in there!
These are lovely! I’m very impressed, and tempted to try this out. I’m also wading through options for window coverings and all the commercially available models are so ugly, and wildly expensive.
This is amazing! I’ve been dragging my feet over what to put across our huge panoramic front window, what I really thought I wanted were hand made linen Roman shades, but eek so much sewing!! So much measuring! So much fabric needed! This seems doable and even more discreet when rolled up.
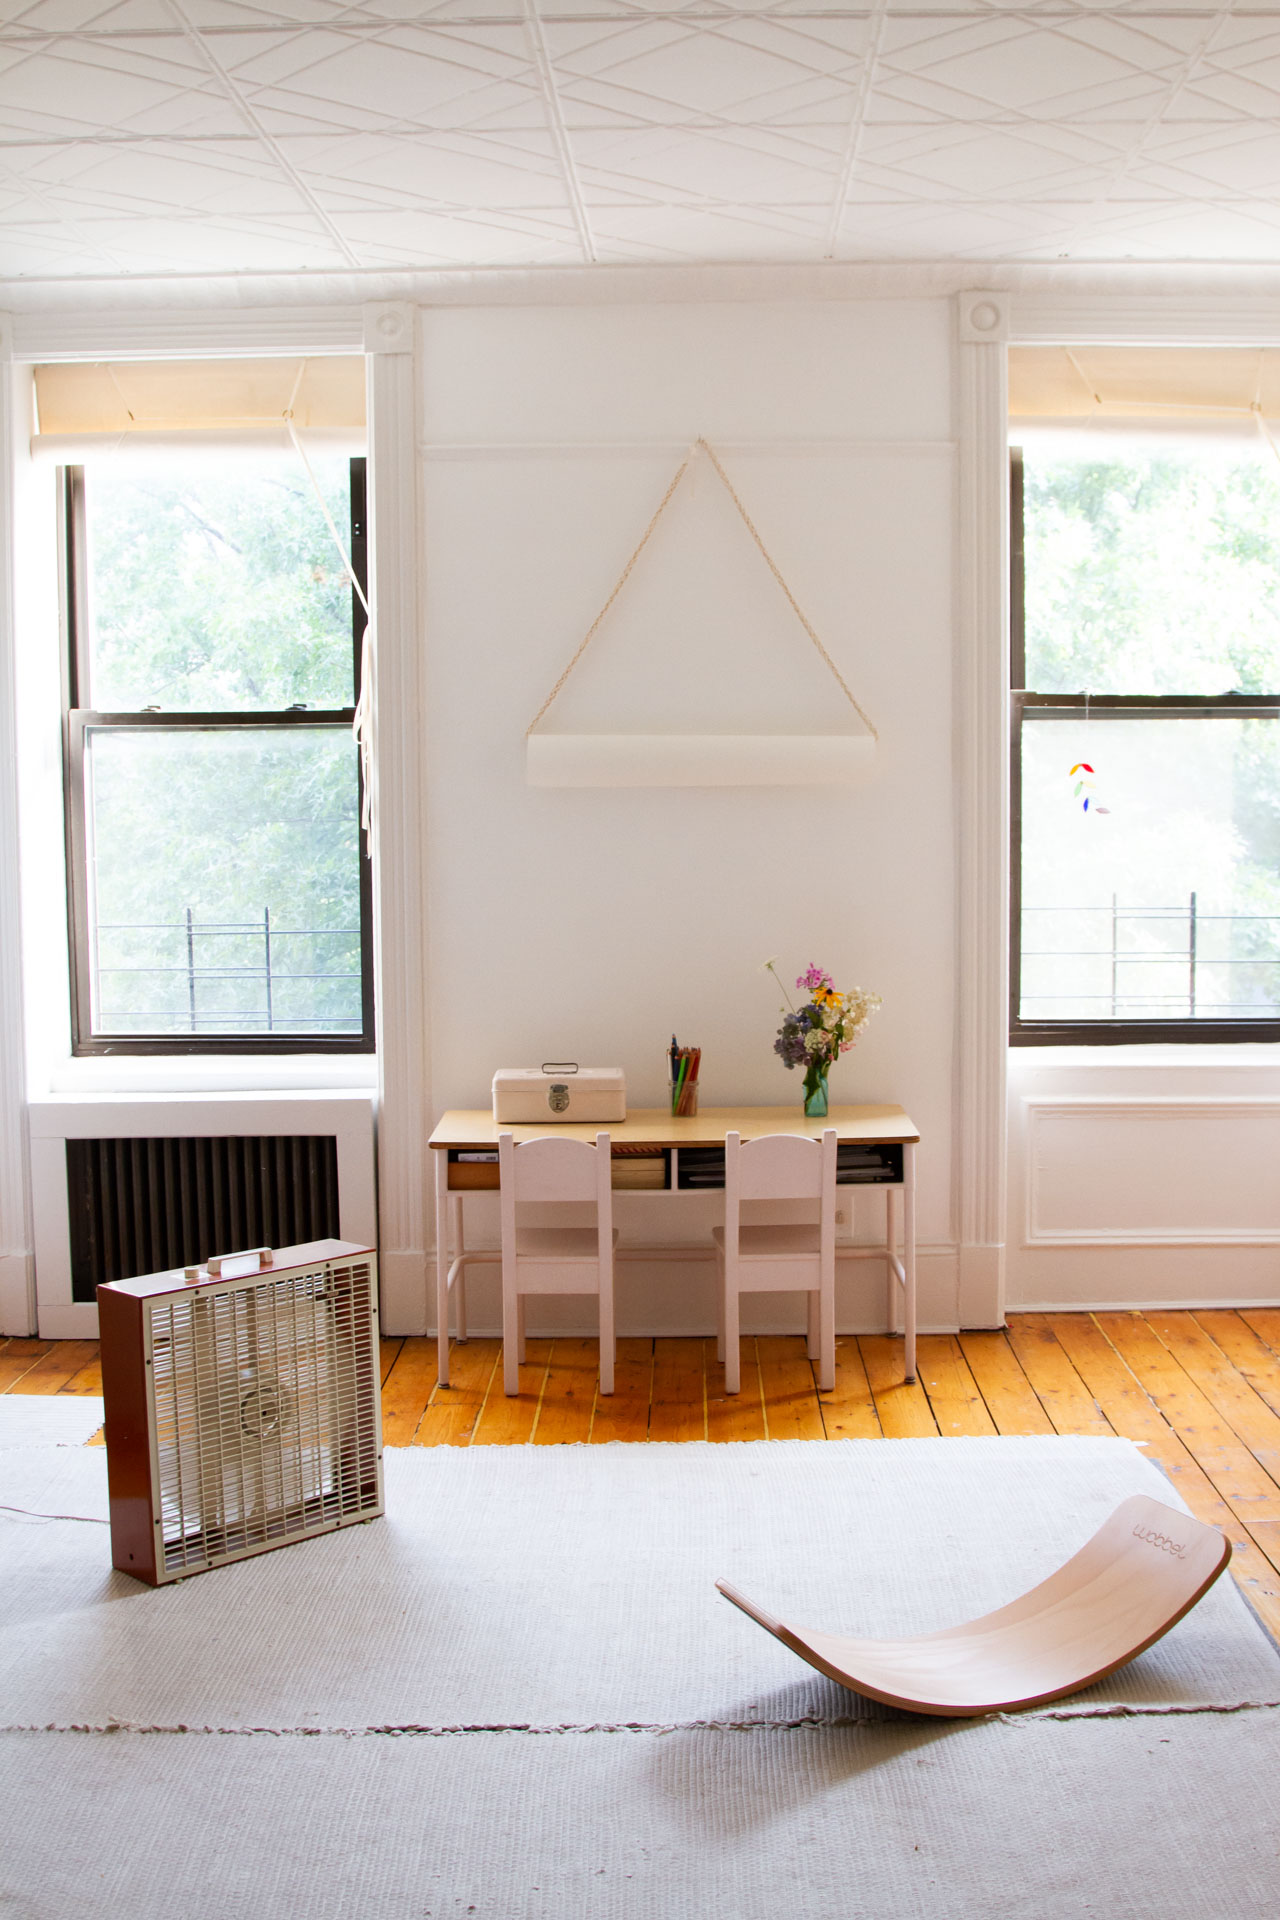
These turned out so pretty. I think I might give these a try – thank you! Also, your box fan – it is not ugly! Revolutionary! May I ask what brand?
Sidewalk find! It’s vintage and the only marking is “frigid” but if you’re searching eBay or similar might be helpful to know the box itself is steel (or otherwise metal)!
Just sent this to my mom for a project next time she visits! We have 4 windows in our laundry room and a huge window in our kitchen that gets all the evening Tennessee heat, and I’d love for our air conditioning to not have to work so hard!
Love everything about this – I’m currently trying to figure out a curtain situation (unclear if I can remove my similarly dreadful blinds) and LOVE the idea of using cup hooks to hold the top of the curtains, rather than a rod!
These are wonderful! Did you consider an option that connected the pull strings to the back of the shade only, to provide a more minimal look on the front? If so, what made you go with this version instead?
This is the traditional method that I knew was tried and true so I stuck with it. I imagine it would pretty straight forward to change the placement and have the rings in the back, but I haven’t experimented!
Love this! And definitely the most clearly explained tutorial I’ve seen. I notice that you used 12 oz fabric, would 10 oz also be sturdy enough or should it be 12? Thank you!
Hi there! Long story is that I used a #12 canvas from Canvas Etc, which happens to be a 12 ounce fabric, but not all canvas numbers and ounces correspond! So: #10 cotton duck is a 15 ounce fabric and I’m sure usable in this context but you’d want to make sure that a home sewing machine could handle it first!
I like these a lot. Shades in my house get very dirty (dogs, open windows, proximity to highway) will you try to clean them? would they need to be dis-assembled? Did you pre-shrink the fabric?
Yes! Disassembly would probably be necessary (and not too difficult)!
This was going to be my question too! But looking at the step by step, once all the holes are in place I imagine it wouldn’t be too tricky to disassemble and reassemble.
Such a pretty and elegant solution, Erin! Thanks so much for sharing.
These are really the loveliest shades—and your tutorial is as well. I love the aesthetic behind all of your home projects but I love this one best
They look wonderful! So impressed by your DIY.
Do you follow The Spirited Man on YouTube? I feel like you two may share the appreciation for “the details” https://www.youtube.com/watch?v=ooTN3dkYXQM
I gasped at $25! These are simple, effective and just beautiful. Thanks for always sharing your ways.
These are amazing! Immediately putting this project on my list.
One question: During your research, did you find any versions that can be easily removed for machine washing? And/or what are your cleaning plans for yours? Maybe irrelevant, but my biggest complaint with my current Venetian blinds (other than the appearance) are that with two pets, they’re virtual fur/dust traps. These definitely look like that wouldn’t be as big as a problem, but just curious about cleaning capabilities.
Omg I’m so sorry, just saw that this question has already been asked & answered! Feel free not to approve my comment; I will do a better job of reading carefully in future!
no worries!
Fantastic! I have been planning to make a projector screen for my apartment and this is the perfect design and instructions.
You are a mind reader!
Thank you so much 🙂
Does anyone have a window treatment suggestion or method that would block street light out at night and allow light to come in as the sun rises?
I feel like this might be a real unicorn unless you got into the world of motorized or otherwise much more advanced shades!
Hi Erin, these are truly wonderful! I am am inspired to repurpose my current curtains into these. Do you know if I would be able make it work with 2-3 layers of material? Would like to use what I have around to make them close to blackout. Thank you!
I think so, yes! Depends of course on the particulars, but I think these are perfect for making your own blackout curtains!
IKEA used to sell these and I loved them but they were impossible to keep clean. Of course I could not disassemble them easily. I will be interested to hear how the cleaning of your goes. Good luck!
Since then I have stuck to simple curtains — easy to take down, wash and put back up.
Really excited to give this a go! I have five big windows in a lovely sunroom off the back of our house that currently have metal mini-blinds on them, all but one broken. I was thinking there was going to be no way we’d be able to afford to get new window treatments, but after seeing $25/window I’m going to price them out for our slightly bigger windows! That might be doable!
This is an amazing tutorial! But I’m also wondering… where did you get the gorgeous box fan on the floor in the picture? its amazing!
It’s an old one someone was giving away across the street! Scooped it off the sidewalk!
I’m not sure if you are answering questions on this post any longer, but I’ll ask, just in case! My family has lived in a rental in Providence for going on 5 years now and I’ve put off replacing the discolored & ripping vinyl pulldown shades (mostly because of the expense). Now that we’re likely going to be here for at least another couple of years, I’ve made other improvements I’m so happy with and I’m seriously considering going in on the shades even if it takes me a while! I love your idea and believe the cost will fall within reason for us. I’m wondering about the time it’s taken you to do this? I’ll need to make at least 4 larger-sized shades and 7 narrow-sized shades. Do you remember approximately how long they took you to make once you got the hang of it?
oh gosh, hard to say! depends a lot on how comfy you are with a sewing machine etc. it is a very, very straightforward project though, and there’s really nothing overly fussy about these, so i think you’d be surprised at how quickly it goes!
Where did you get your supplies-wood, hardware, etc.?
Local hardware store!
Hi Erin,
Like the others, I love this simple, beautiful and cost effective roller shade. How are the cup hooks and cotton twill tape doing after a year of rolling up and letting down everyday? My windows are much wider and I’m scared that the cup hooks will come out after repeated use, especially if my kids accidentally pull on it. I’ve ordered the fabric so I’m getting ready to make this for my kids’ bedroom too. I also love your philosophy of living a simple, sustainable life.
They’ve held up so well! I don’t typically have the kids do the unrolling or rolling back up because our windows are so big and it does require a bit of adult hand-eye coordination, but we haven’t had any kind of issue with the hardware/cup hooks/etc in any of the four windows where these hang! Would absolutely make again!
Would this work with 3/8in velvet ribbon?
oh, lovely! i’m sure it would look gorgeous. not sure how well the velvet would hold up longterm if you plan to do a lot of moving of the shade tho!
About to embark on this project and am so excited! My concern is that the size of the batten is too wide/thick? Are those measurements definitely correct? 1inch x 2inch? I looked at the battens in the hardware and that size just felt so big and bulky. Thank you from Australia!
Sorry for my delay on this, but this is the size that I used! If you prefer something else, or have a different size window, you can of course adjust.
Hello-
I came across this yesterday while researching ideas for window covering for my (older) kids’ room.
I love them! My one question is on cleaning. I love curtains as they are washable. I notice that our honeycomb shades are so dirty over the years and no way to clean them.
Any thoughts on how to make these so they may be washed on occasion?
Thank you!!!
Hi! Sorry for my delay here! I vacuum mine regularly, but haven’t washed. I think to wash, I would be most comfortable with removing the fabric from the wooden bar at the top and soaking in the tub, but I haven’t felt the need to do that yet!
Comments are moderated.