I’m not telling you need to make a tissue box cover, just that having one might make your next head cold a little easier to bear. Last week—or was it the week before—the whole family had colds. I’m sorry if this comes as a disappointment, but even with masked up measures and perfected hand washing protocol and generally being on alert for all things germy, contracting the common cold is still possible. Anecdotally, nearly everyone I know with little kids has had a cold hit their family since school started and I’m afraid we’re just at the beginning of a long season of sniffles. So, when the next cold strikes and your household is temporarily transformed into a sniffling, sniveling chaos monster, know that a little bit of leftover drop cloth and some needle and thread goes a long way toward getting through it.
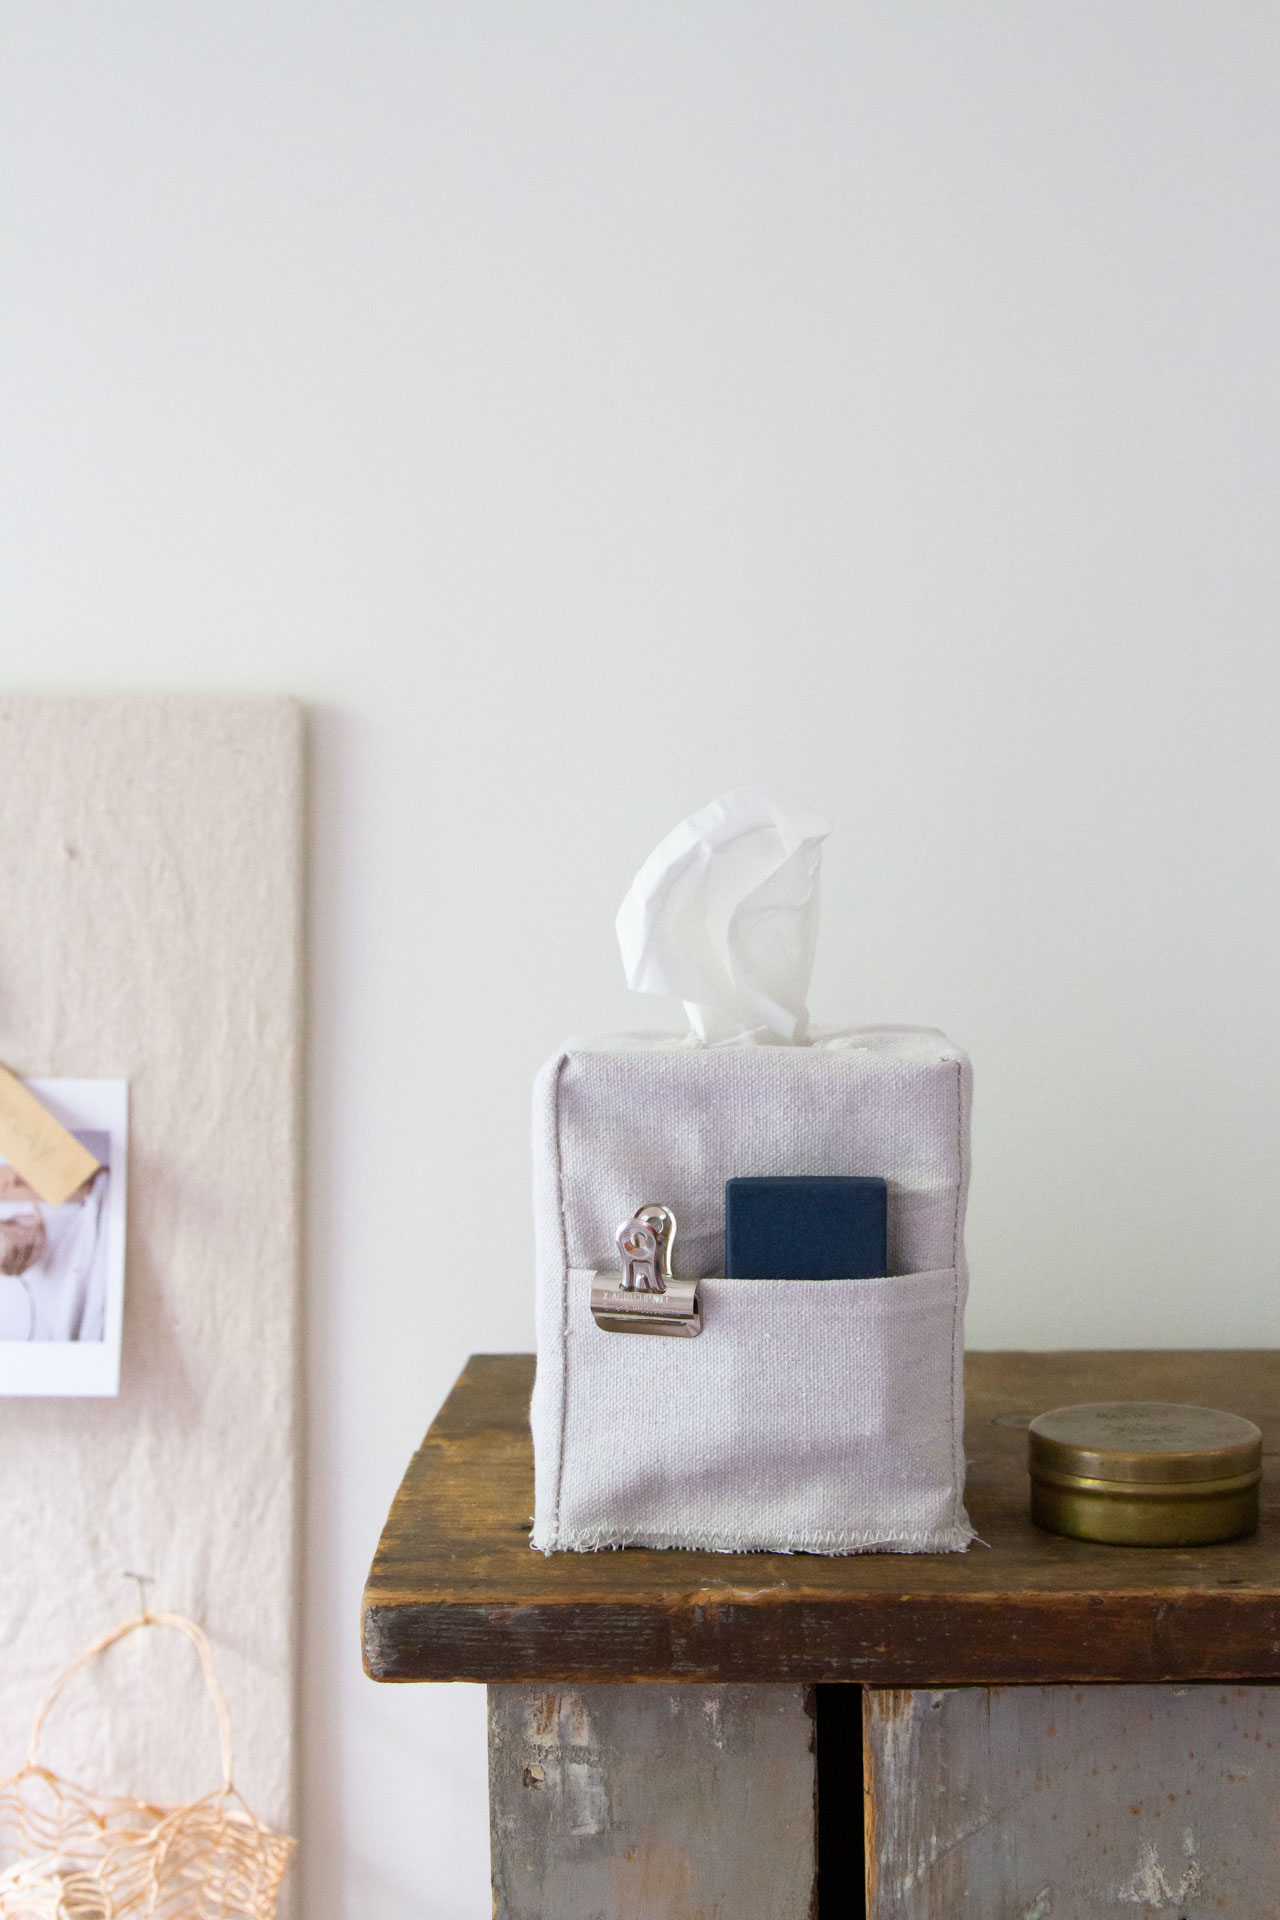
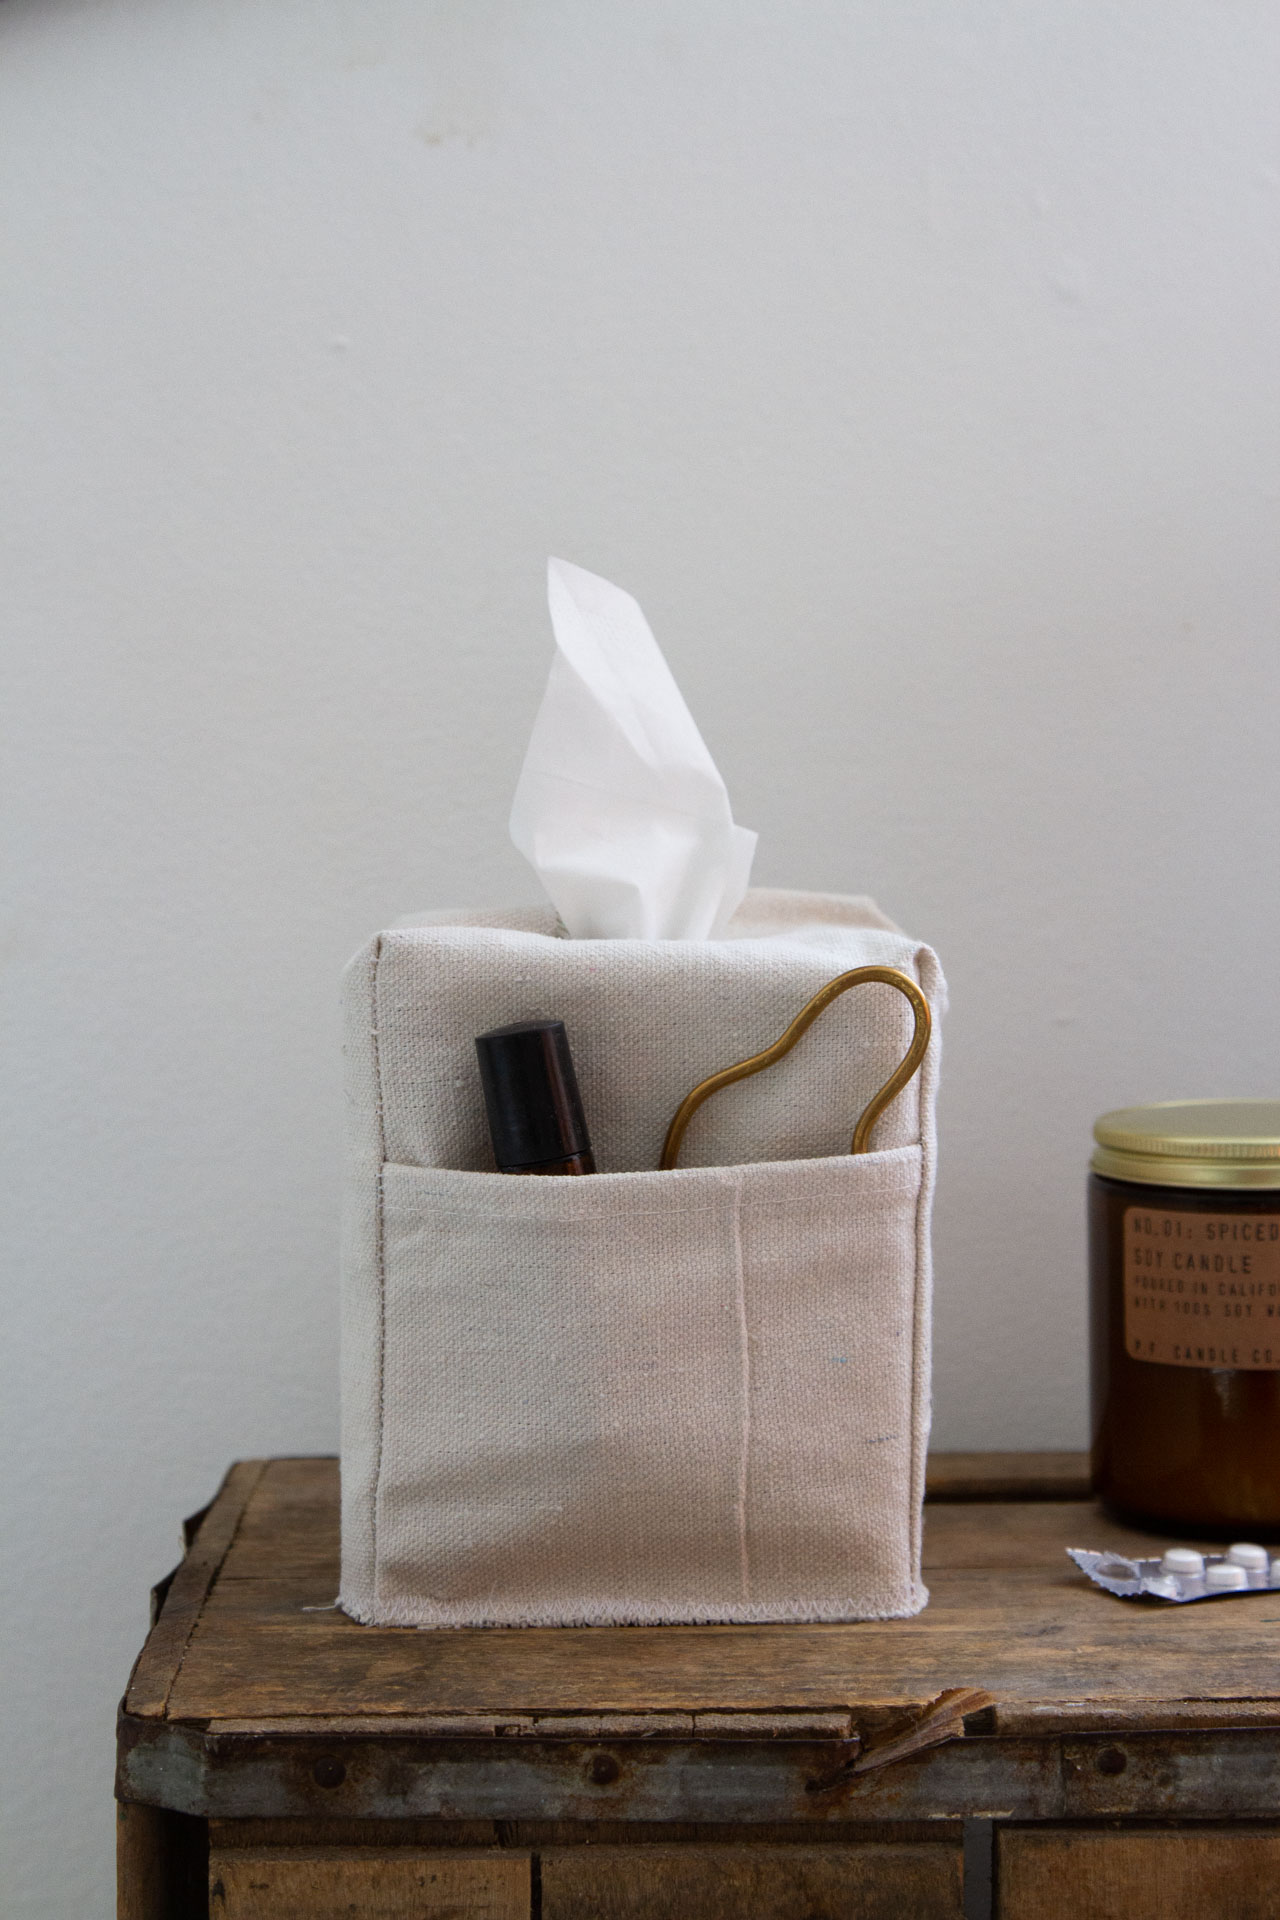
This is a tutorial for covering up your average drug store tissue box. The box itself serves as the pattern maker, so as long as you’ve got one to trace, you’re guaranteed a proper fit. As ever, Rose’s tutorial is for a quick and easy cover, with pockets made from the remnant fabric so the scraps don’t go to waste. Keep lip balm, essential oils, or whatever it is you like to have in your bedtime arsenal during cold season in the pockets and you’ll get the added benefit of keeping the cover nicely weighted down when you pull up your tissues.
This project takes truly minutes to sew up, even for a very novice sewer. And even though it forgoes possible finer finishes, it very much does the job of shielding eyes from the assault of Big Tissue Box design.
(PS. Should sewing your own be more than your stuffed up head can contemplate, these linen tissue box covers from Pilosale are old favorites of mine and real beauties.)
Full instructions from Rose:
Once again, I’ve cut corners on this sewing project, to make things quick and easy. But, if raw/ zig-zag edges are not for you, feel free to add a hemmed edge instead. Also, depending on the canvas being used, you might find that the fabric shrinks slightly when it’s (inevitably) washed. (I find that some fabric will shrink and some won’t …but, still, I don’t pre-wash). So, in case your fabric is the shrinking kind, I’ve created this tissue box cover with a little extra room on the bottom edge of the box. I like the look of the slight overhang but won’t miss it terribly if it isn’t there.
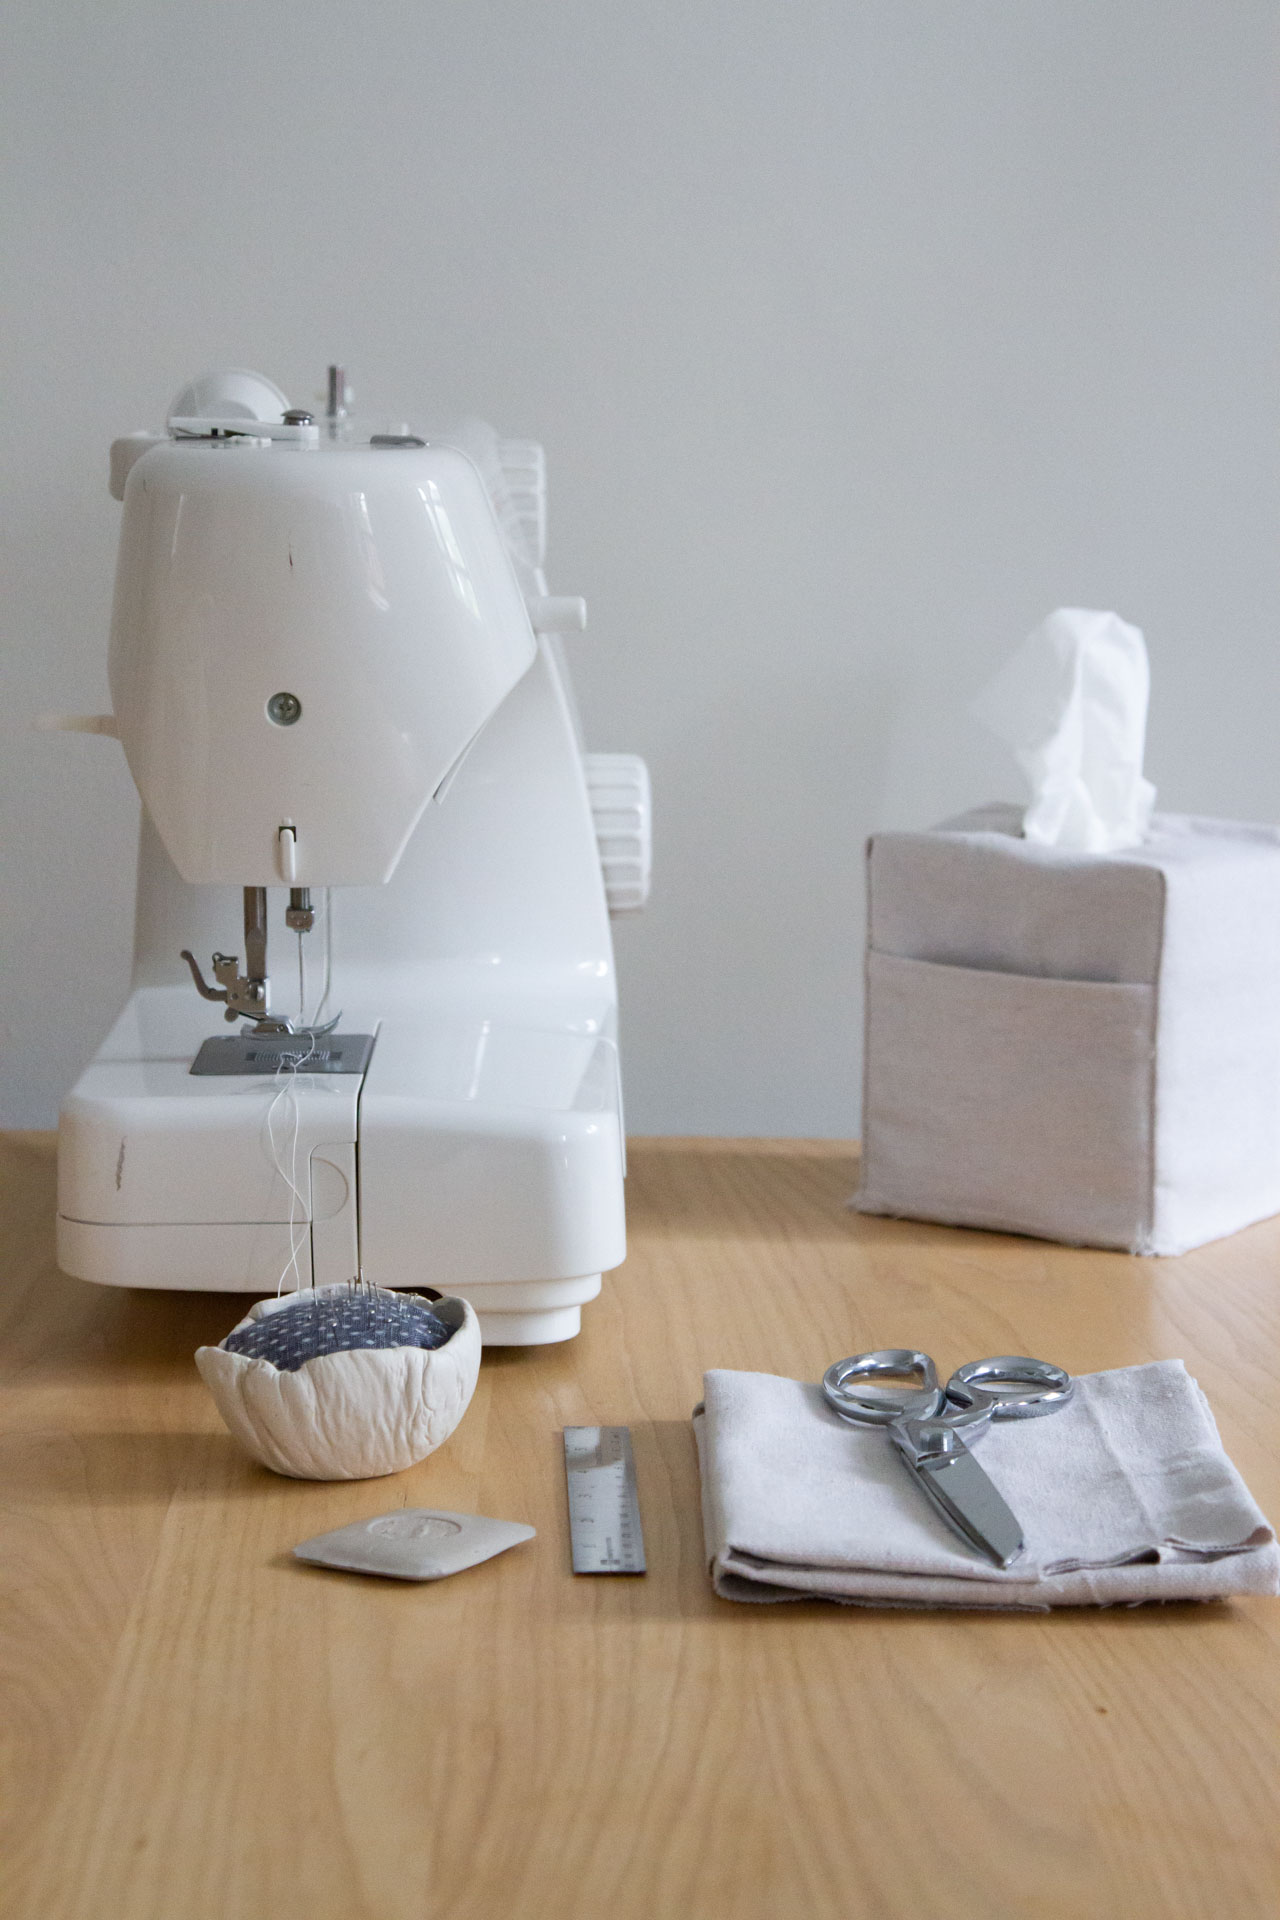
Materials:
+ Square tissue box (to cover and use as a template)
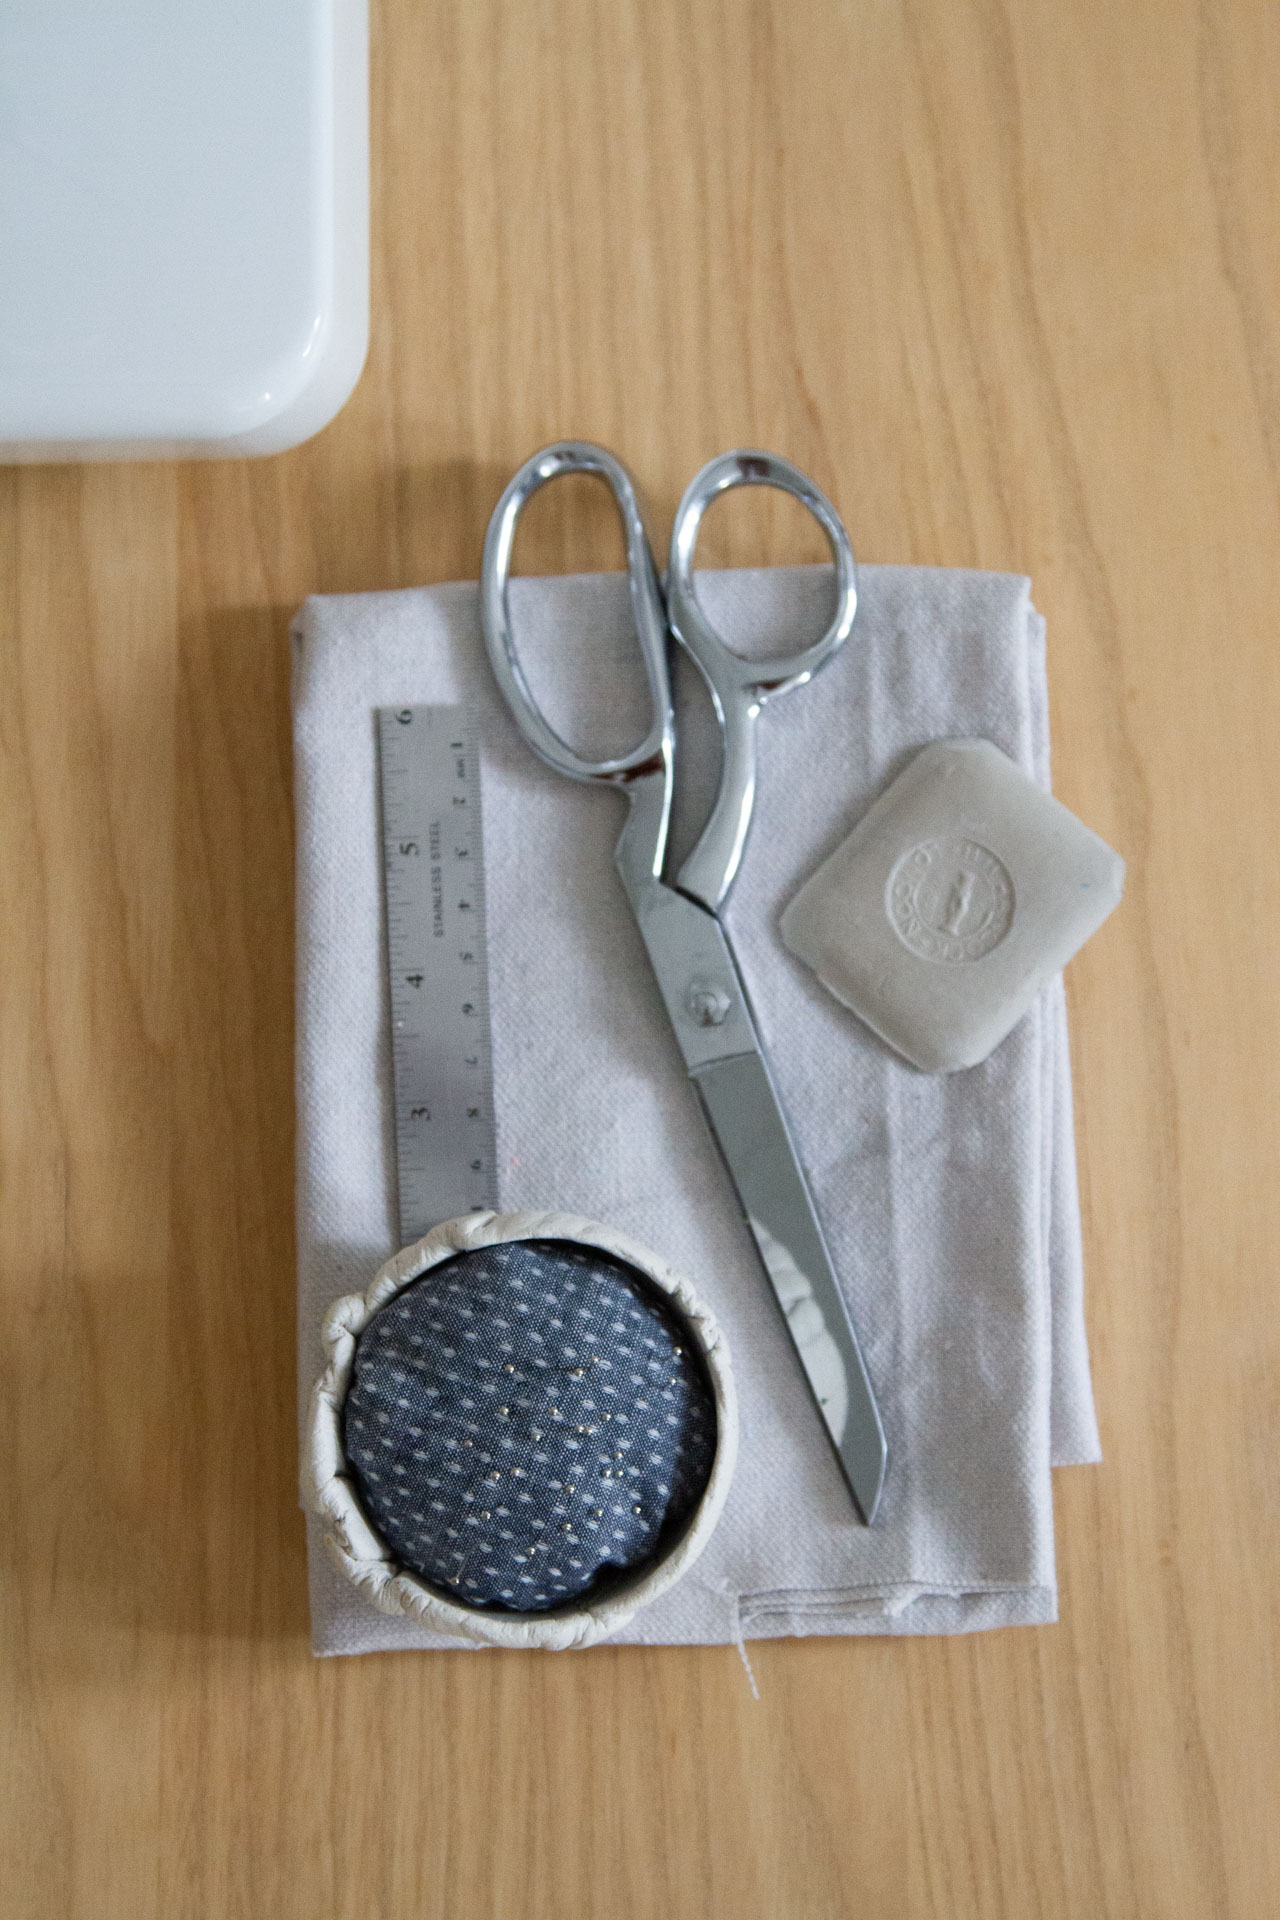
+ Fabric pen or tailor’s chalk
+ Canvas drop cloth or other medium weight fabric of your choice (17”x17” or larger)
+ Thread and needle or sewing machine
+ Scissors
Instructions:
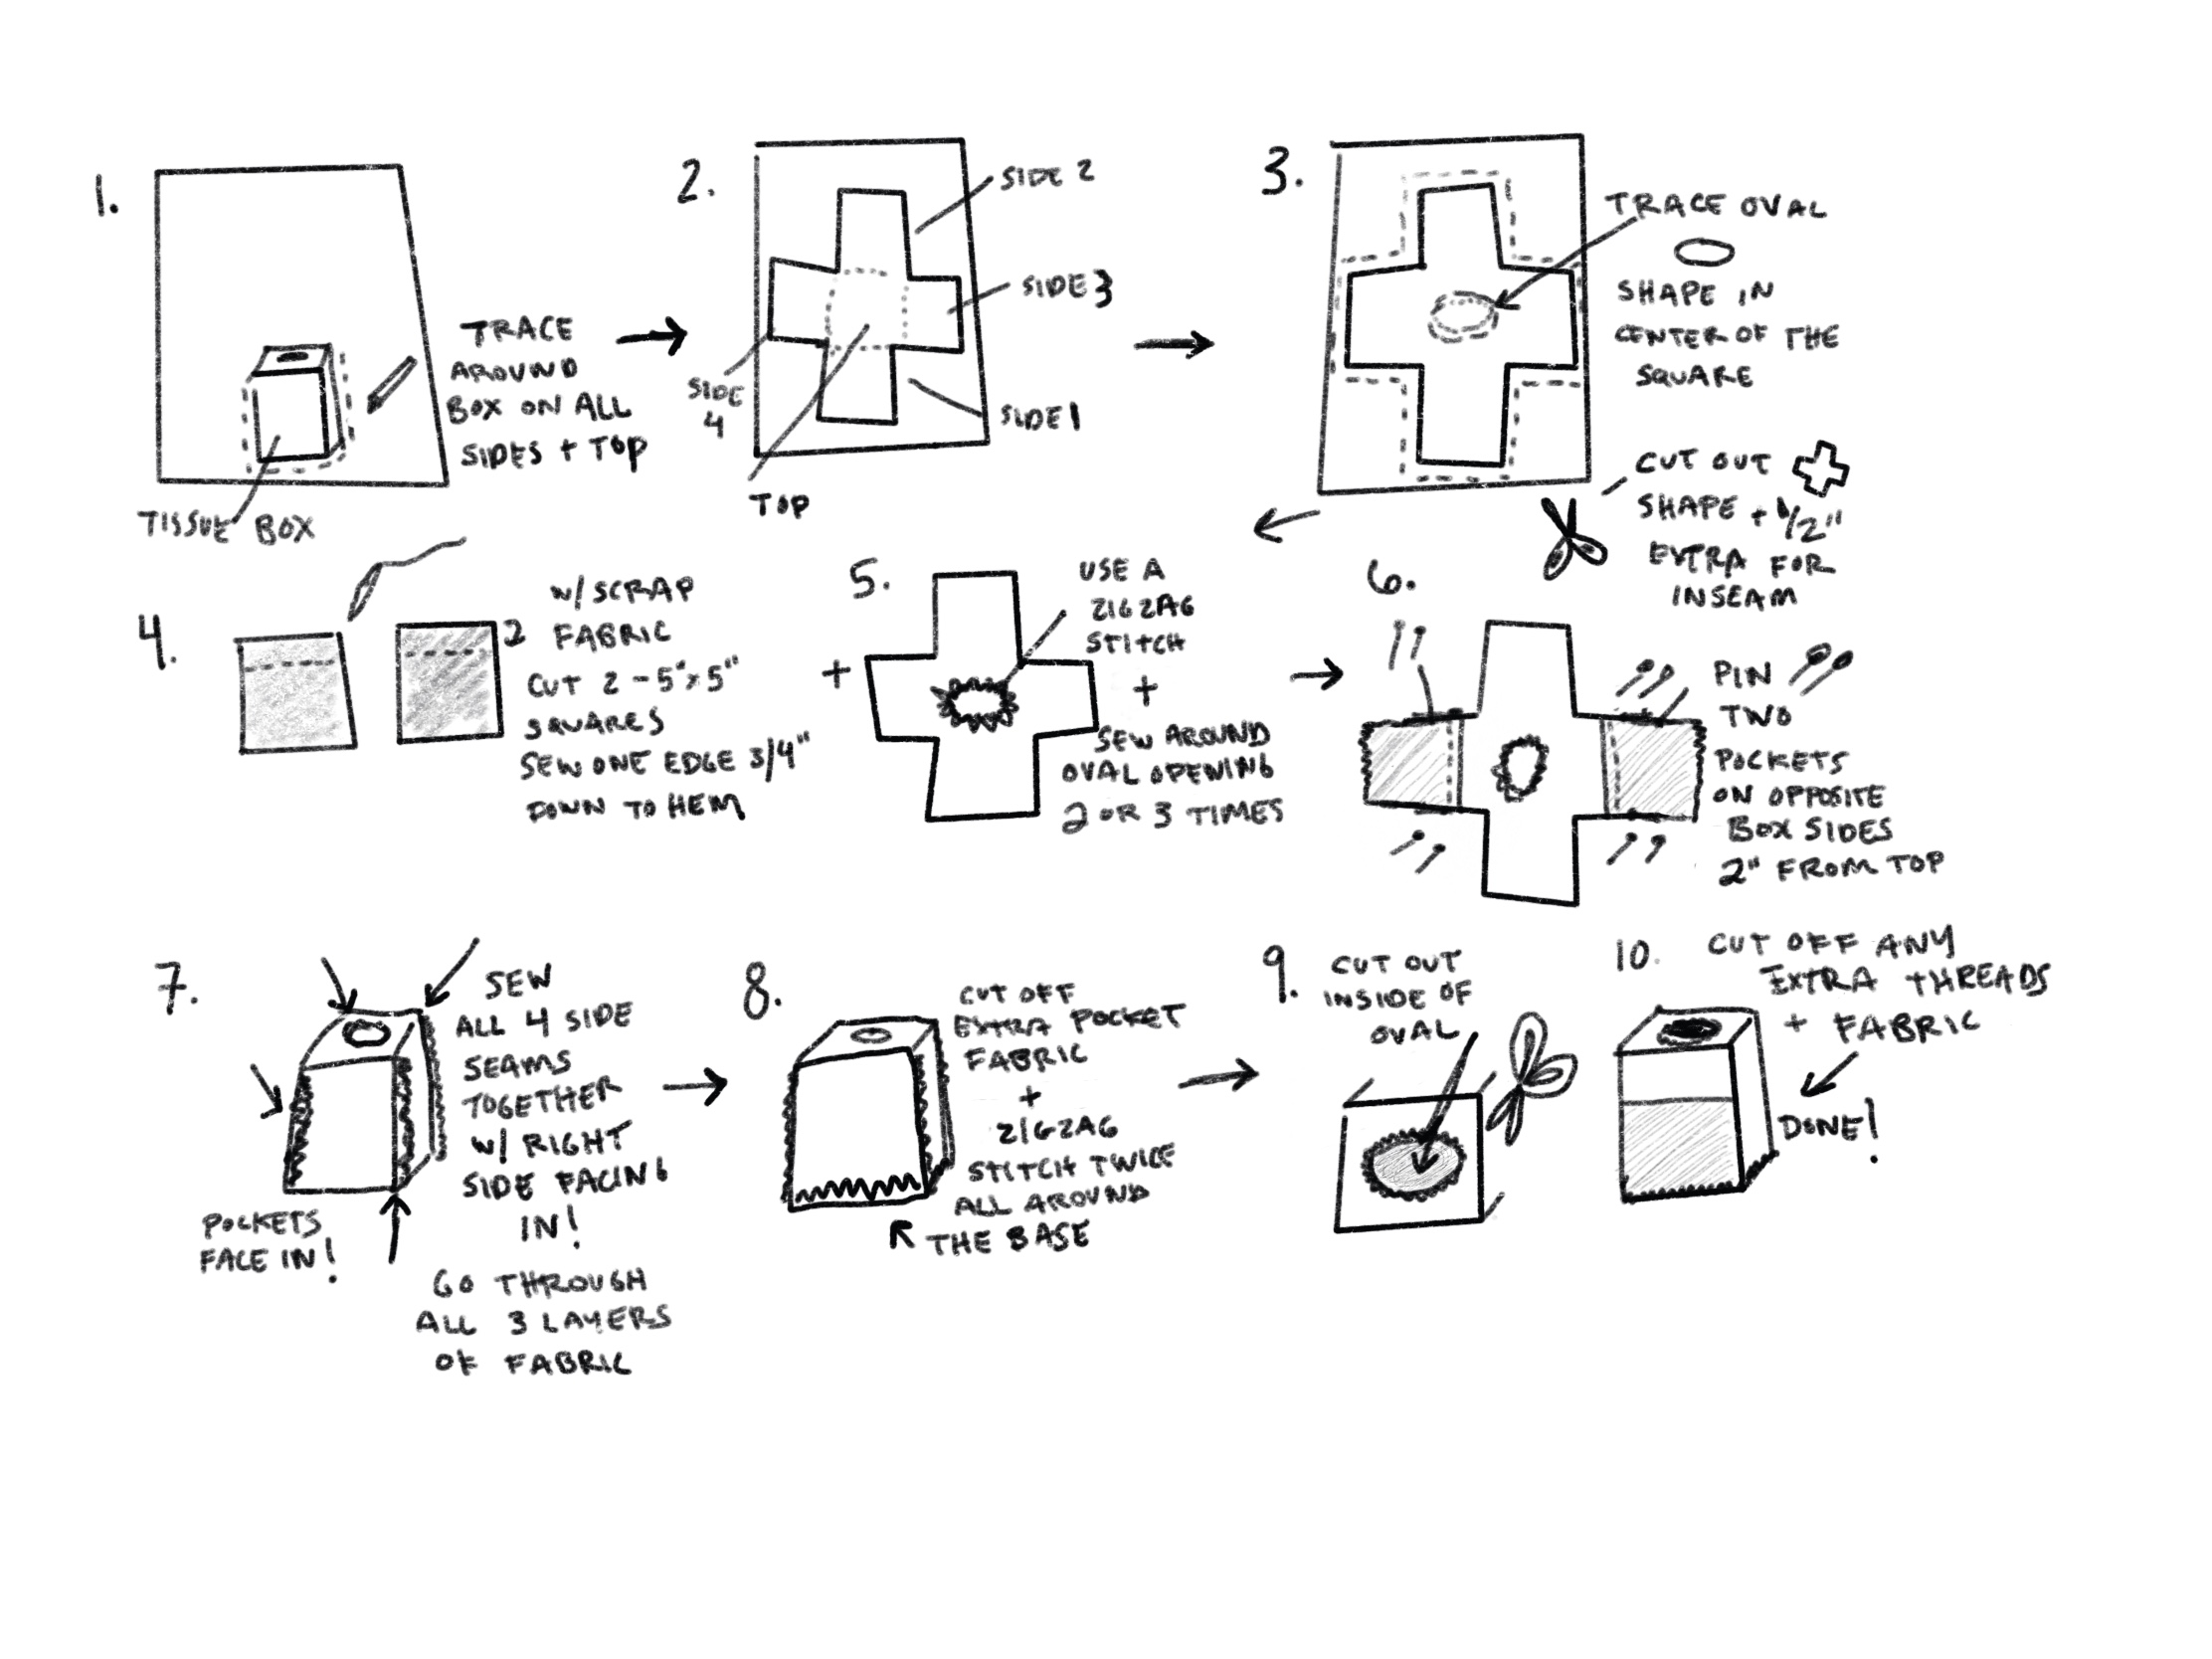
Trace the tissue box template
+ Lay one flat rectangular side of your tissue box ½” from the bottom edge and center it in the middle of your canvas fabric. Trace around all sides lightly with a fabric pen.
+ Without moving the position of the box, carefully flip the box onto the top (where the opening is) and trace around the square so it is lined up and connected to the first rectangle.
+ Flip the box again (it should rotate from one rectangle side, over the square top, to the other rectangle side) directly above the center square. Trace around that rectangle.
+ Line up the top of your box on the center square again, then lay it to the right side. Trace around the perimeter.
+ Repeat that step for the left and final side.
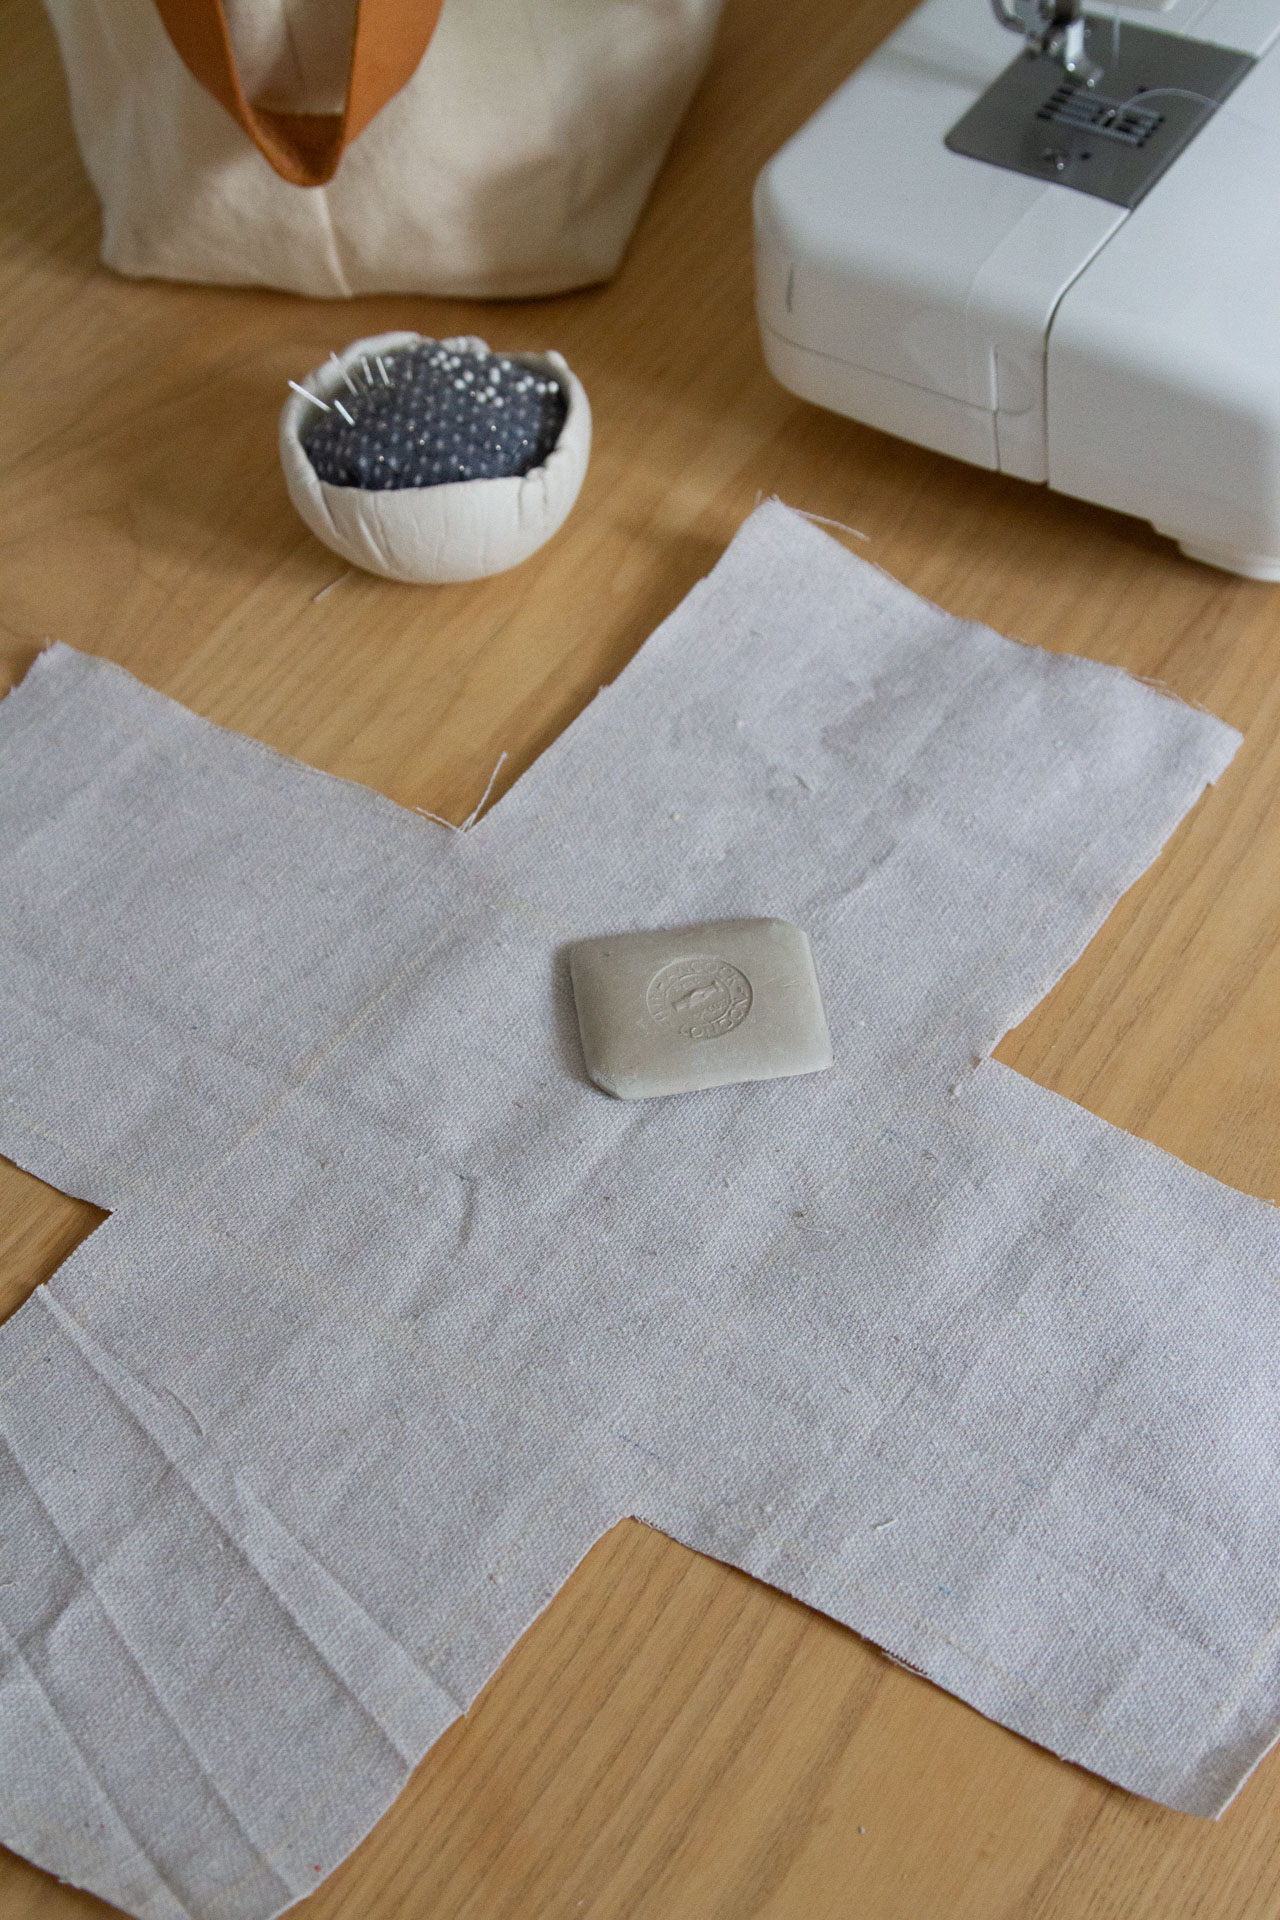
+ You should now have one square in the middle connecting all for side rectangles. The shape will look like a plus sign.
+ In the center of the connecting square you will need to draw an oval shaped opening for dispensing tissues. The opening should be somewhere around 3” wide and 2” deep—a smaller opening works even better than a large one. (To better mark the center of the square, and to help align the placement of the oval, fold the square fabric in half and press the seam with your hands to make a crease. Then, opening it up, fold it in half the opposite way, again creasing it with your hands. Once more open it up and you should see faint lines where the two fold meet, this is your center point, and the center for where your oval to go. Don’t stress about making this perfect, any misshapen oval will be concealed by tissues!)
+ Using a ruler (or even the straight edge of the tissue box) and a fabric marker, trace around the outside lines of your template ½” from the original outline. This will give you a little inseam space when it comes to sewing your sides together. With scissors, cut out the + shaped box template, including the ½” inseam you just added.
Cut out pockets and sew together all pieces
+ Using a zigzag stitch on your sewing machine, sew around the traced oval perimeter on the top of your box. Go over the same stitches a second time. (You’ll cut the oval out later.)
+ From the remnant fabric that you cut away from your plus shape, cut two squares roughly 5”x5”
+ Starting with one 5”x5’ square, fold one side down 3/4” and sew the top edge in place to create a hemmed edge.
+ Repeat for the second rectangle of fabric.
+ Pin one of the hemmed remnant pieces of fabric to one of the fabric rectangles edge 2” lower from the top of the box shape. The raw edge will be concealed on the inside (right side facing out). The remnant pocket should line up on either side edge and have extra length along the bottom edge.
+ Repeat for the second pocket on the opposite side of the box.
+ With the wrong sides facing out (pockets facing inside!!), pin together all four adjacent side edges of your cut rectangles to create corner seams (leave a ¼” seam allowance). Be sure to pin the pocket fabric along with the fabric from the two rectangles (3 pieces of fabric together).
+ Using a zig-zag stitch, sew together all four side seams leaving a ¼” inseam. To do this, you can lay the fabric flat on your sewing machine as you sew each seam. Stitch from the top corner of the square edge and down to the bottom of each side base. Be sure to sew through all three layers of fabric (two side seams and pocket) and sew forward and back every time you start and stop sewing.
+ With sharp scissors, trim any excess pocket fabric along the bottom edges so they are roughly all the same length.
+ Using a zig-zag stitch, sew around the bottom perimeter of your tissue box ¼” from the bottom edge, turning your work as you go and incorporating all four corner seams.
+ Go over the same stitches a second time to create a secure edge.
+ Using sharp scissors, trim any remaining bottom fabric/threads on the base of your tissue box and inner side seams. The sewn edge will prevent the fabric from faying. Remove any pins.
+ Carefully cut inside the stitched oval by folding the top square in half and making a small incision with your scissor inside the oval. You can then use the incision to slowly cut away the inside of your sewn oval right up to the zigzag stitches. The sewn seam will prevent your fabric from fraying outside of the oval.
+ Turn your work inside out and place over your tissue box. Pull the first tissue out through the center oval and you are finished.
//
Thanks to Rose Pearlman for writing this tutorial and sketching the step-by-steps. Rose is an artist, teacher, and textile designer. With a background in fine arts and a love of well designed functional objects, her creations blur the lines between art and craft and pushes the boundaries with non-traditional techniques and materials. Rose teaches monthly rug hooking workshops in and around her home in NYC, and also welcomes commissions for one of a kind constructions in decor and home furnishings. Her work has been featured in fiber magazines, galleries, and numerous online design sites. Her book Modern Rug Hooking is available wherever books are sold. Follow along with her functional craft projects at @art_objects_ She lives in Brooklyn, NY with her family.


No Comments
Comments are moderated.