I’ve been encouraging folks to skip physical presents in favor of experiential ones for long enough to know that sometimes the barrier to folks following through with the idea lies in the presentation. It’s lovely to tell someone you’re going to take them for an afternoon of gallery hopping, but when we’ve wrapped up (pun intended) our expectations of gift giving in ribbons and bows for so long, it can be hard to shake the feeling of needing to deliver something tangible.
In the world of minimalist gift giving, it’s useful to have a few pretty packaging tricks up your sleeve for giving gifts that might be otherwise lacking in physical form: gifts of experience, gifts of self, gifts of donations, even gifts of subscriptions and gifts of cash, are all things that can be lovely to give but that can be somewhat challenging to present with fanfare.
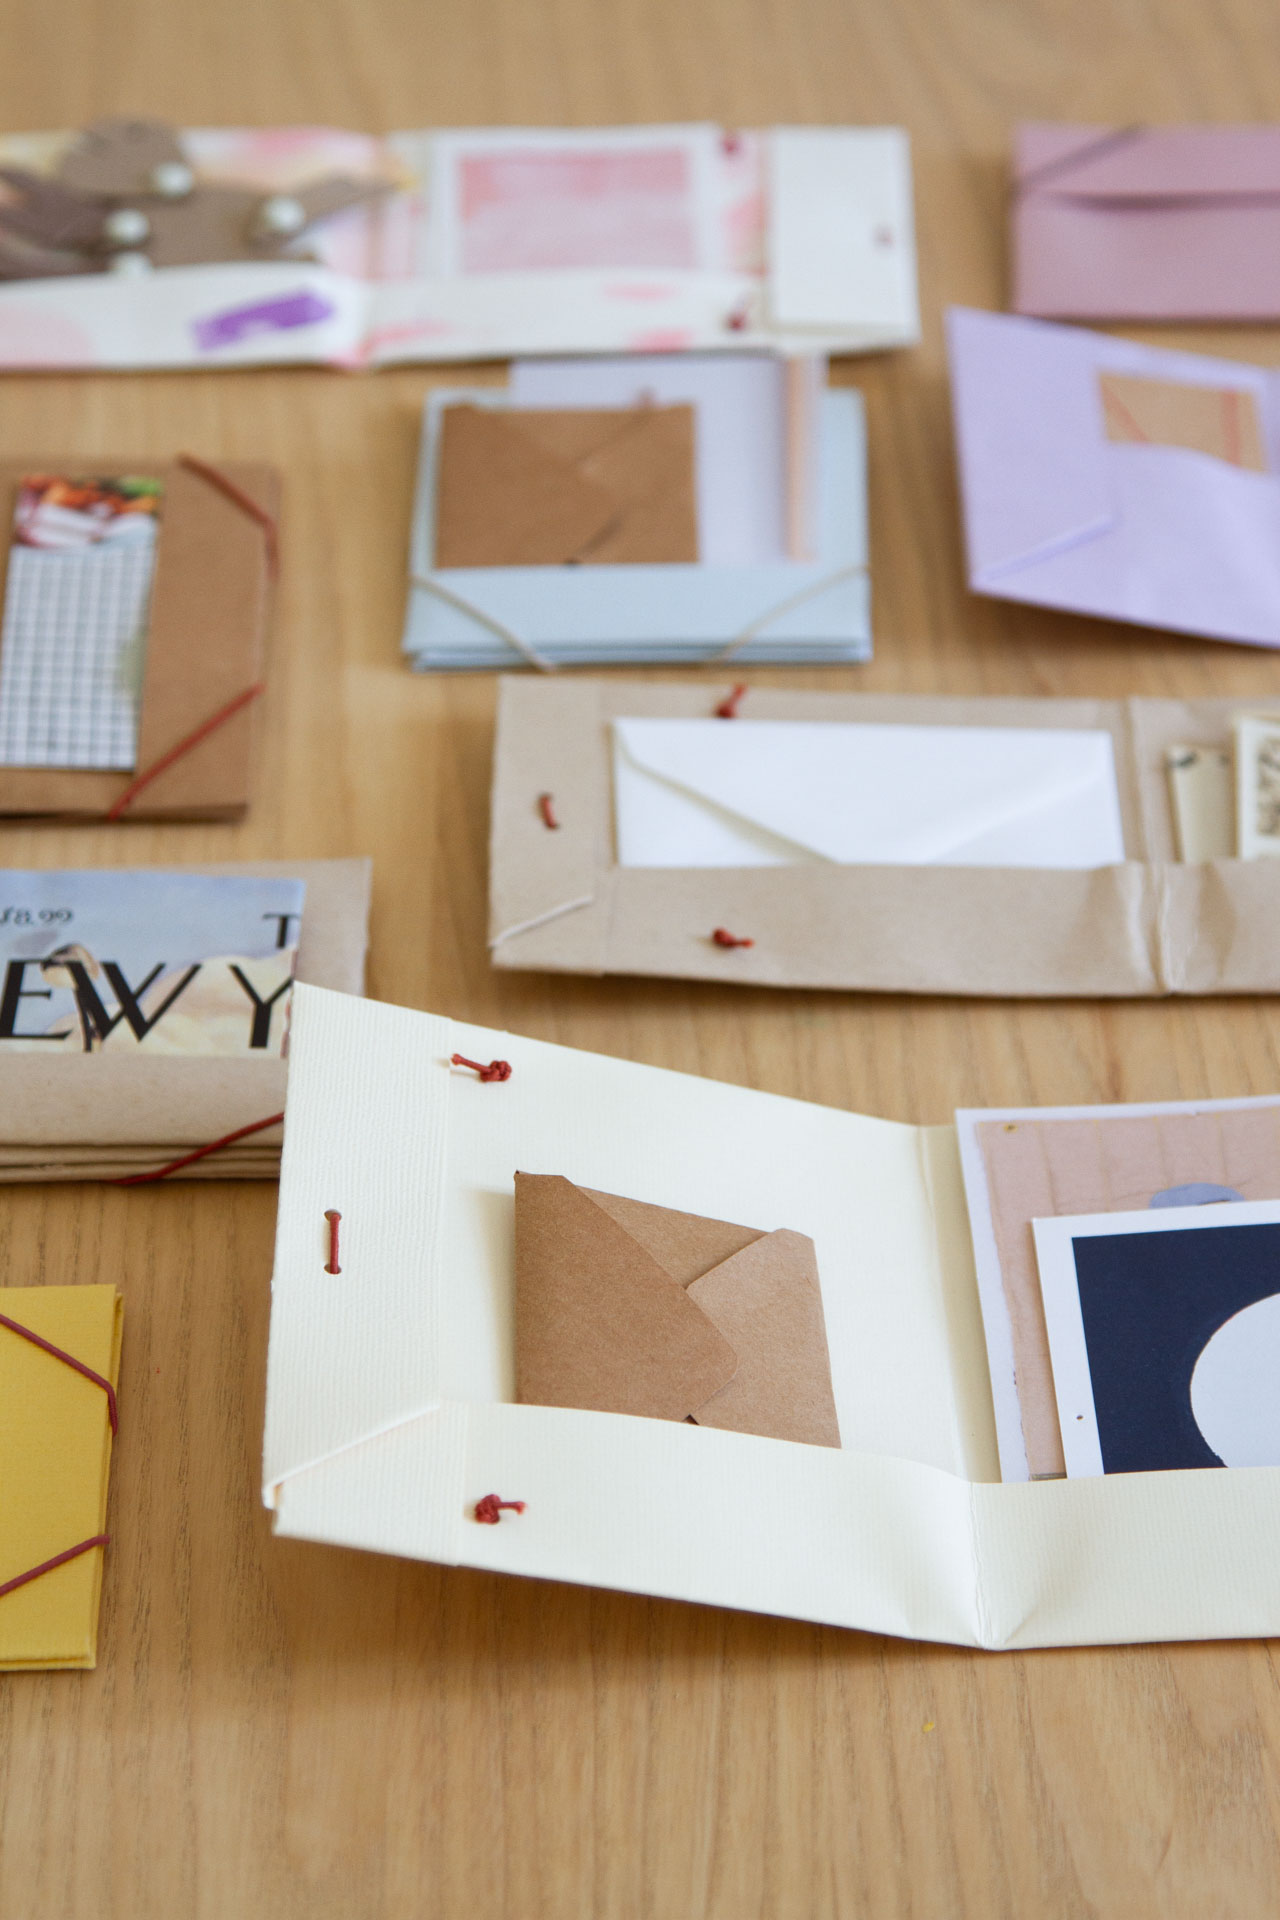
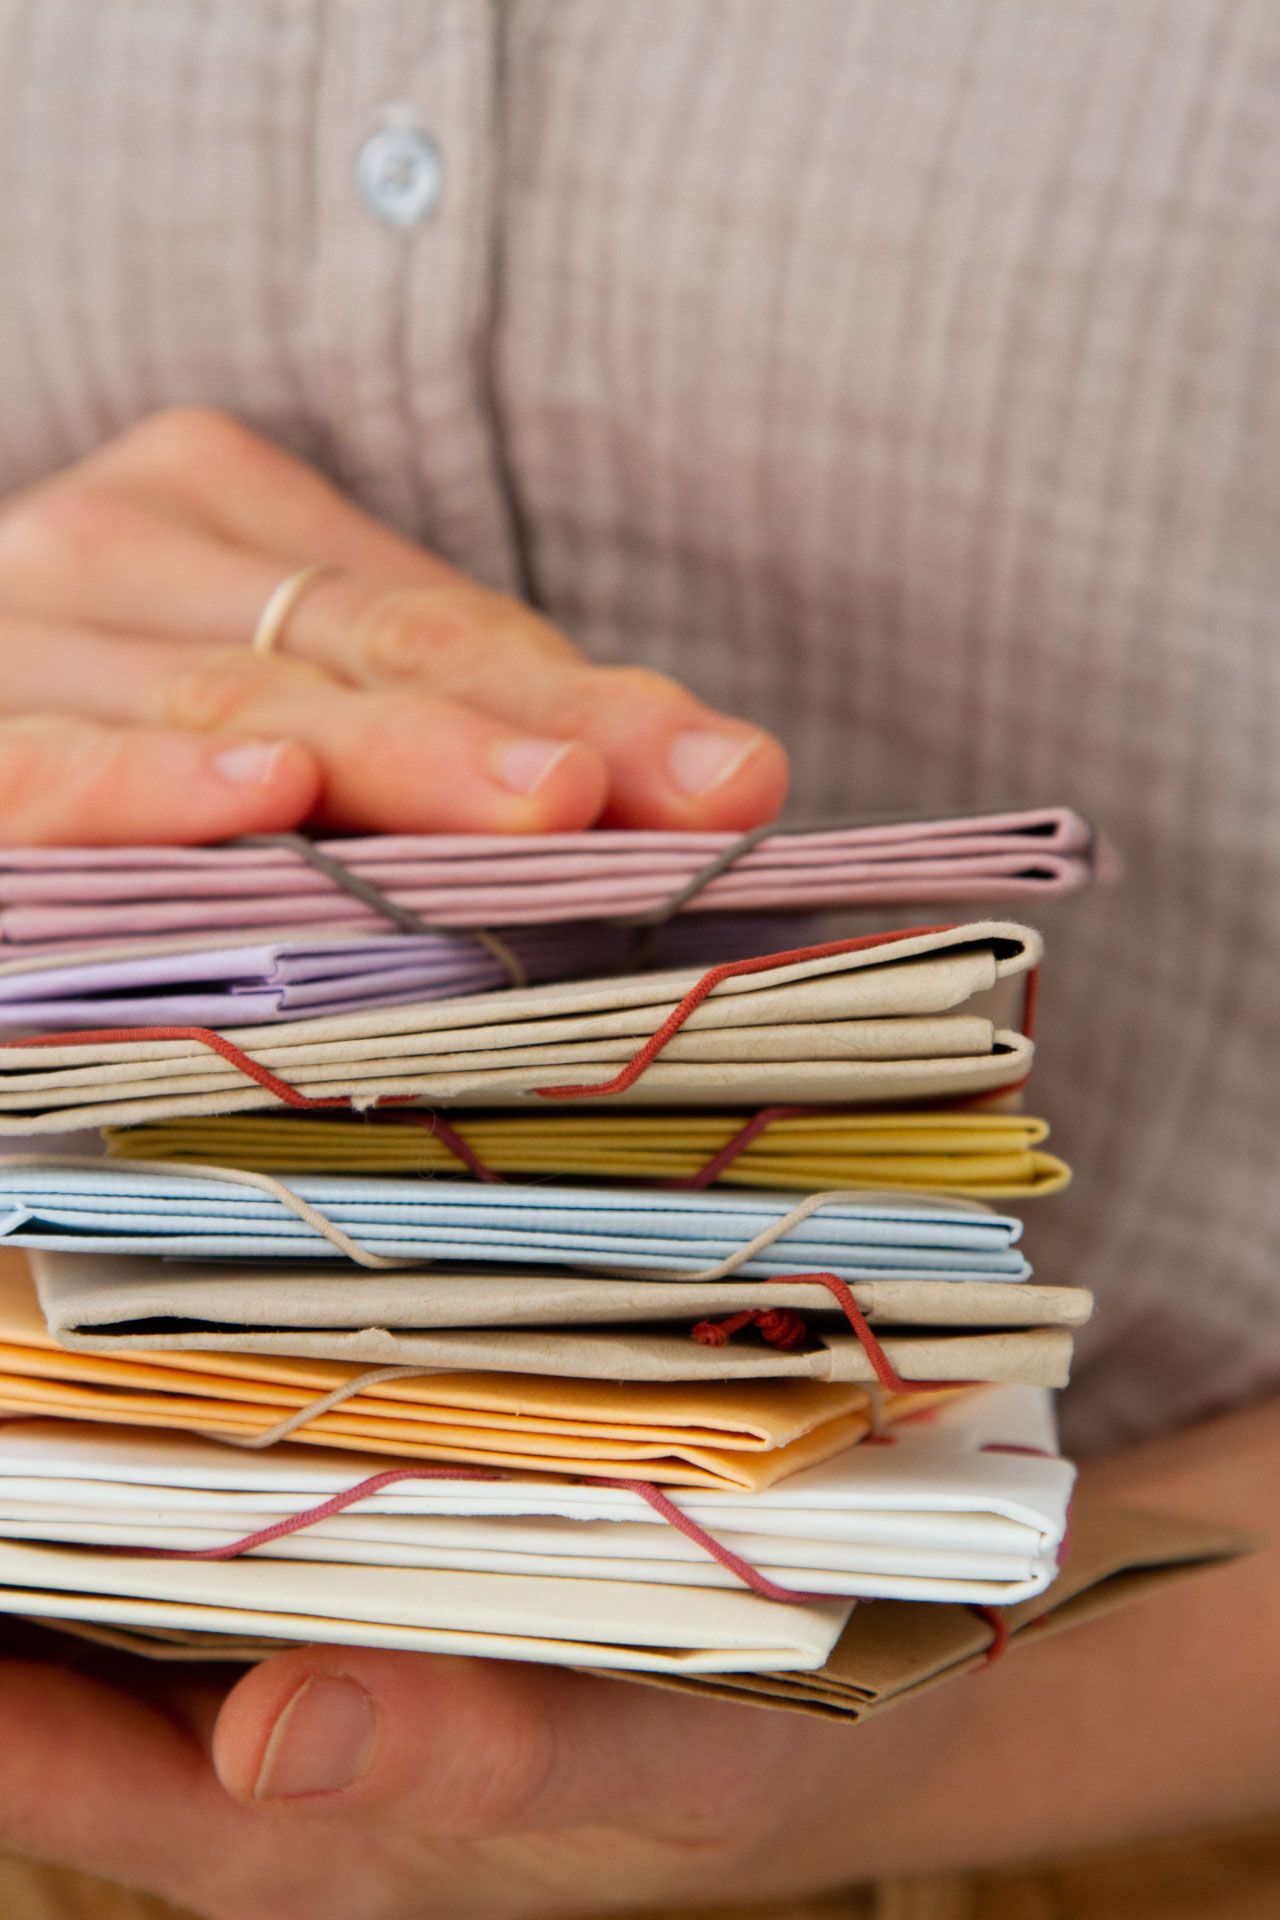
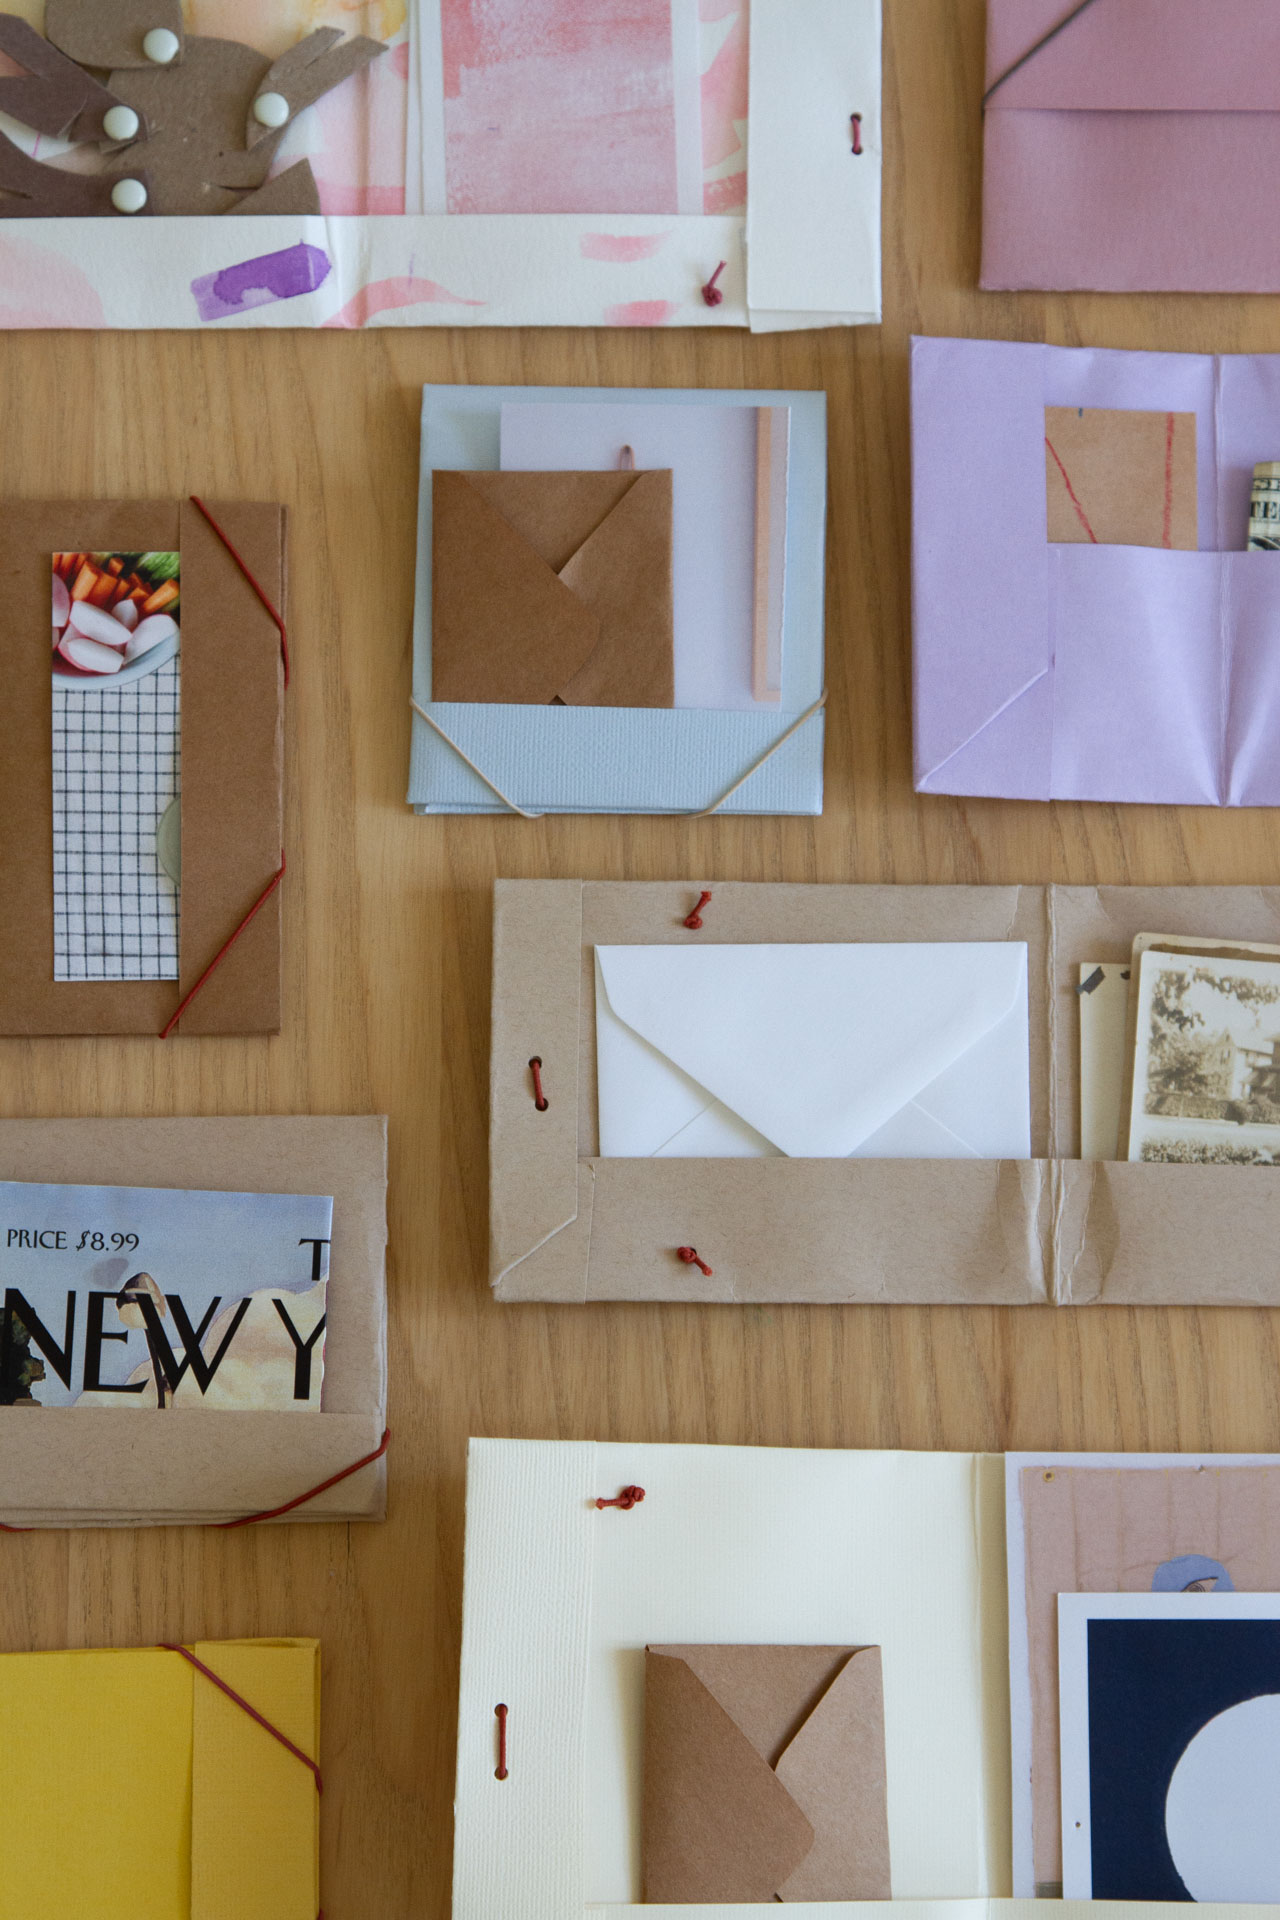
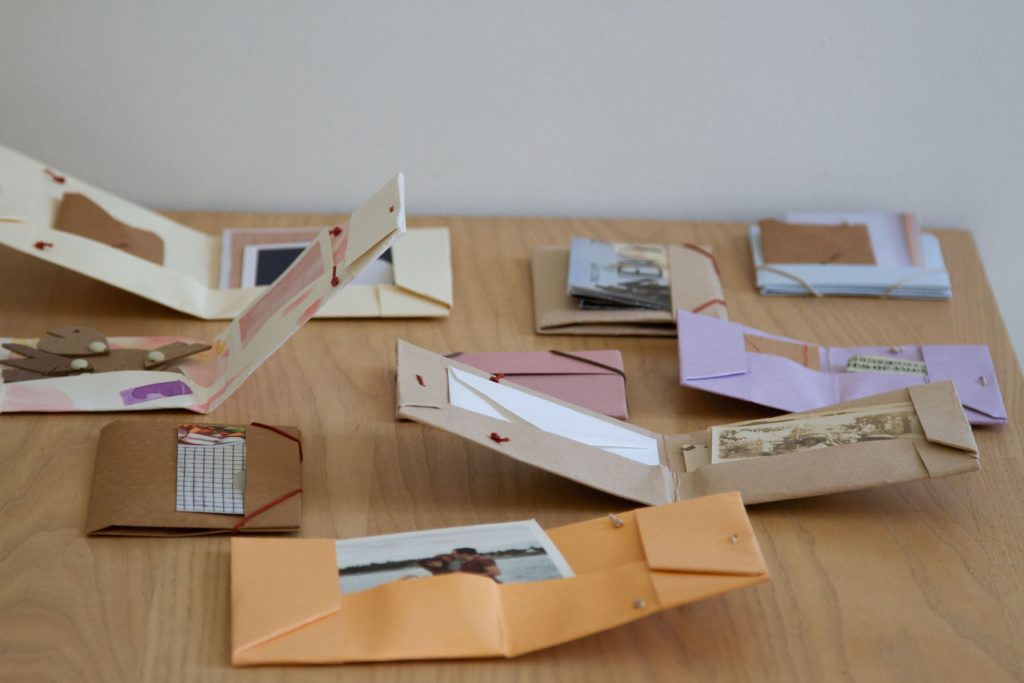
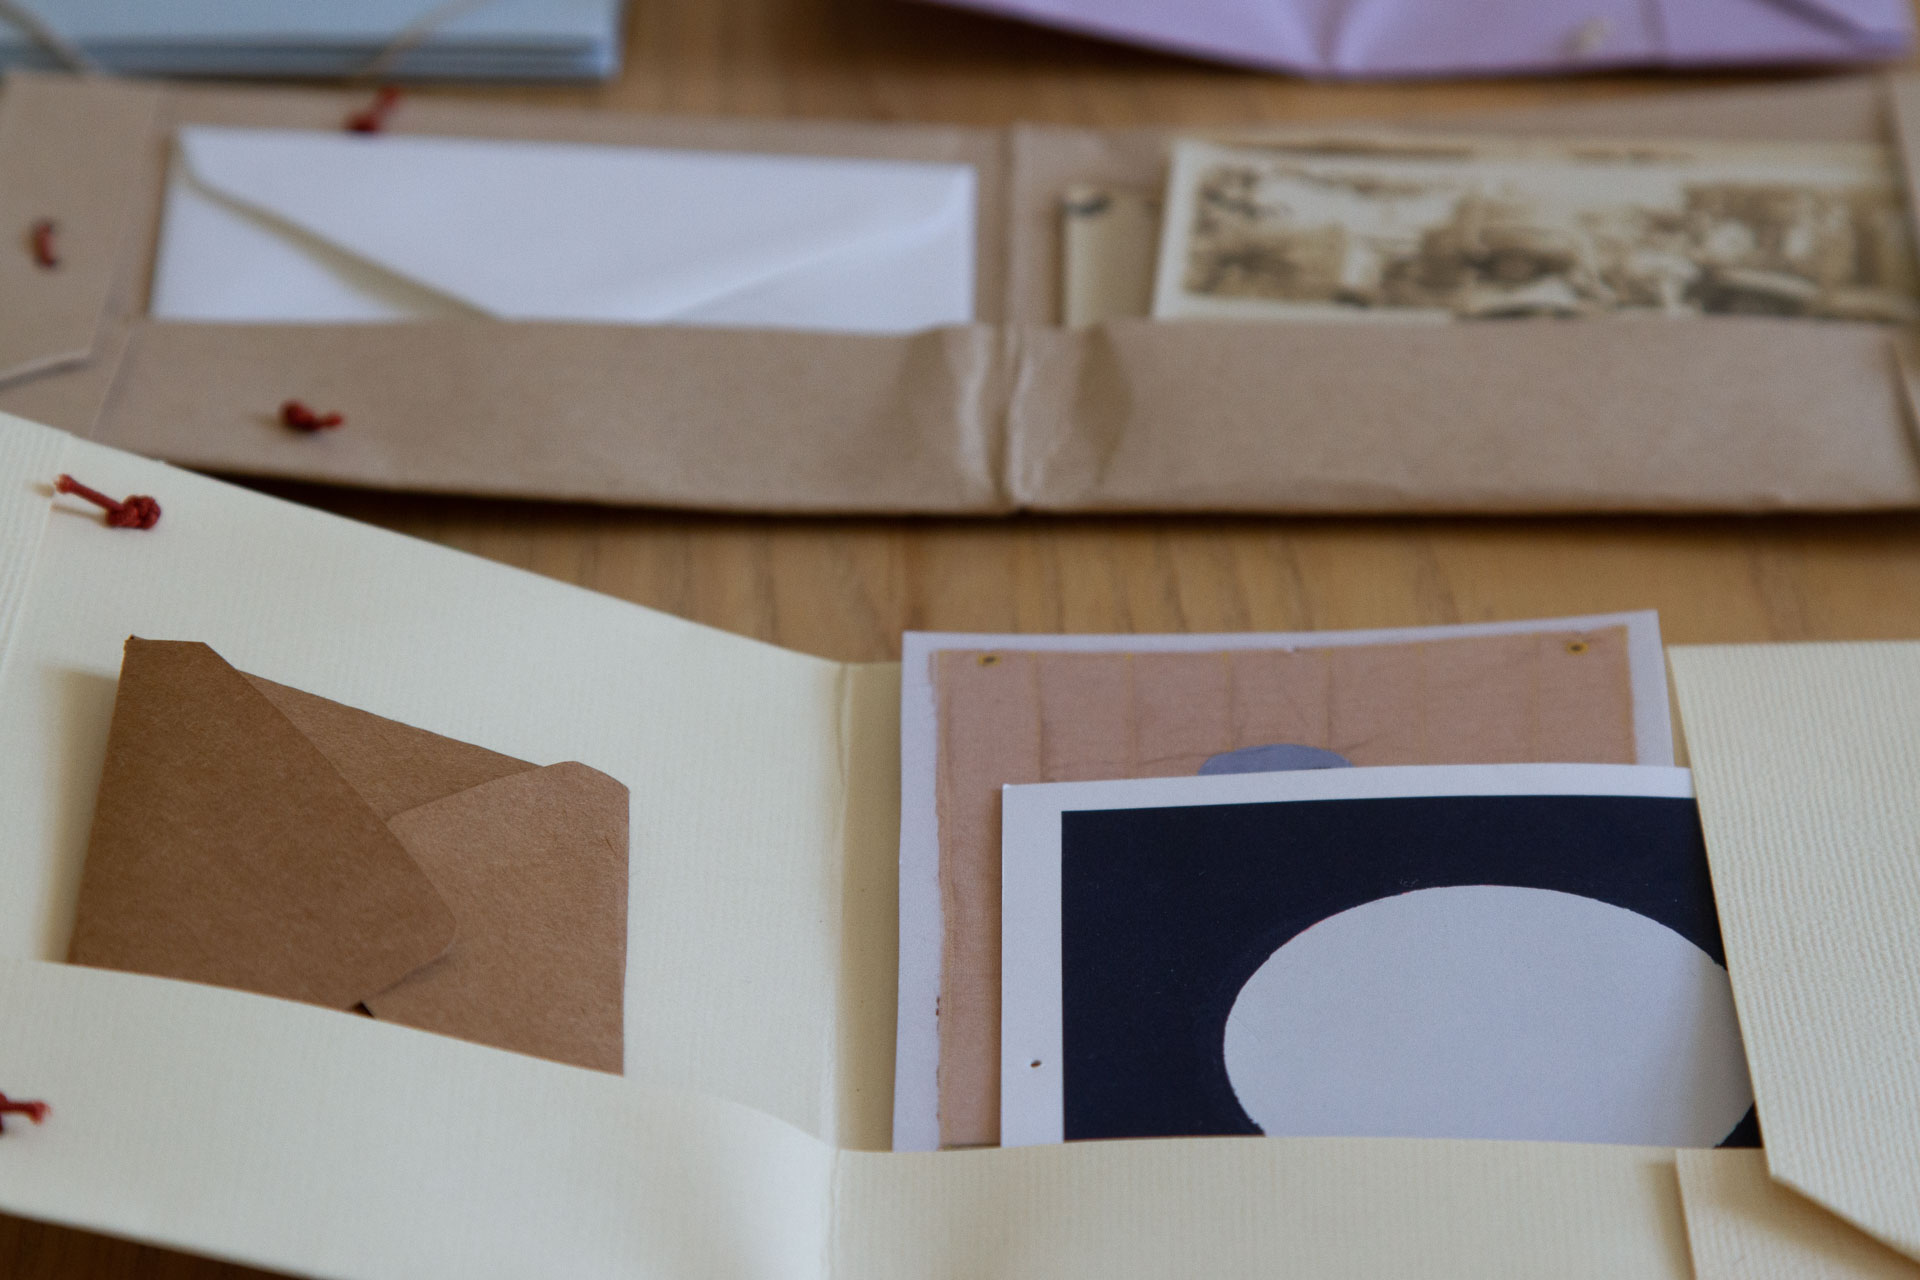
Enter this simple origami folder fitted with an elastic enclosure for good measure. It’s the sort of paper good that stationery enthusiasts might covet from speciality shops, but it can be easily made at home with kid art or any medium weight paper of your choosing (a recycled brown paper bag would work!). Like handmade envelopes from recycled paper, or origami masu boxes, these little folders are nearly endlessly customizable depending on supplies you have on hand and personal preferences. The full tutorial from Rose is below, with a few ideas for gifts to stick inside from me.
A few few ideas for filling:
An invitation for an afternoon at a museum…
A set of printed photos for grandparents or adoring aunties.
A certificate for a stroll through a favorite garden…
The promise of time for a hands-on lesson...
An old family photo and the promise of an afternoon’s deep-dive into family history.
From Rose:
This origami folder can be made in a variety of sizes and weights of paper. While I suggest small margin folds along the edges, feel free to play with different widths to create different sized inner pockets. The elastic closer is used with thicker paper to make a more secure and durable folder, but feel free to use a lightweight paper and forgo the elastic to create simple paper pockets. Once you know the simple steps to create these folders, you can adjust and adapt the instructions to create a variety of sizes.

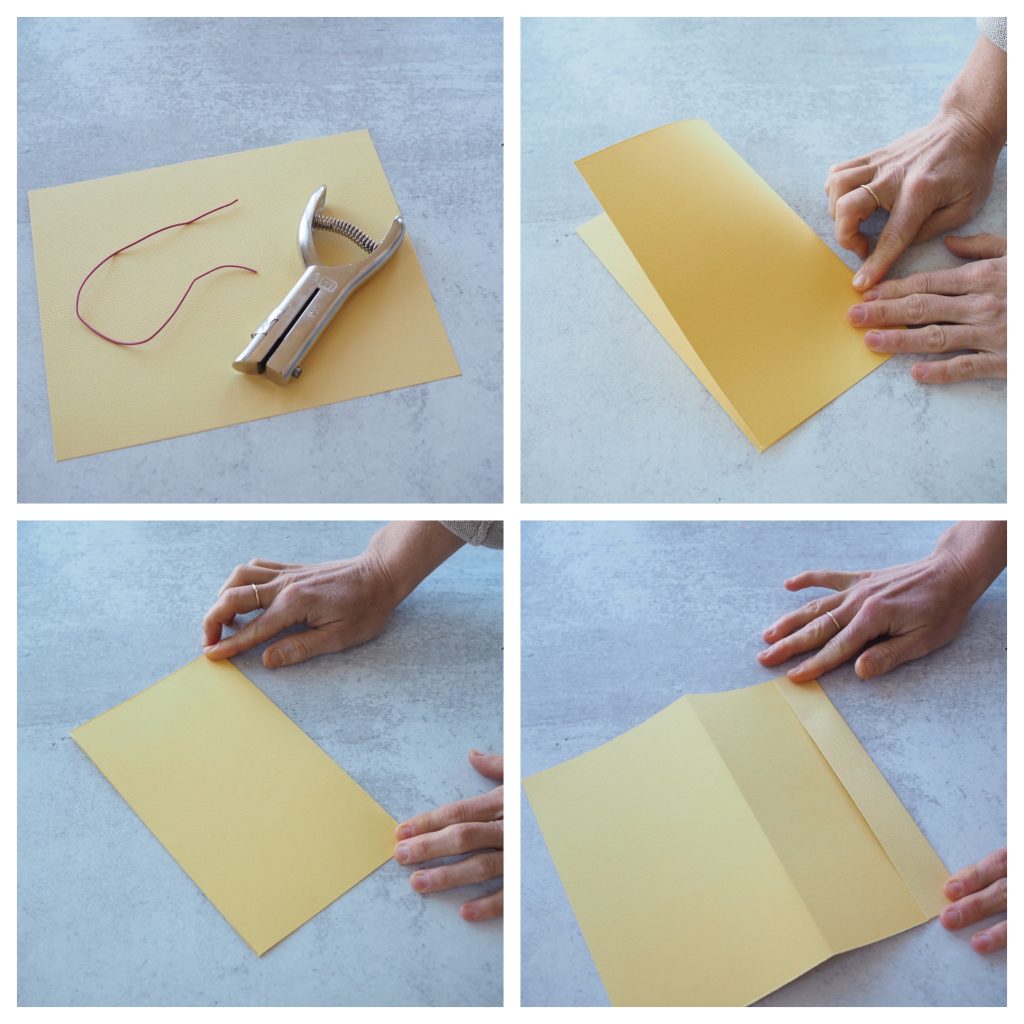
Materials:
+ sheet of medium weight paper*
+ small hole punch or awl
+ 5”-7” of round cord elastic
+ scissors
*the paper can be a variety of sizes and weights; while the folding is much easier with lightweight paper, a thicker paper weight will provide more structure and support needed for an elastic closure
Directions:
To fold the paper:
+ Crease the paper in half (lengthwise if using a rectangular sheet of paper.) Be sure to match up your edges before creasing the center fold
+ Open your paper.
+ Starting on one side of the fold, make a smaller fold (only an inch or two) towards the center.

+ Refold your paper along the center crease and using the first fold as a guide, fold the second edge to match the first. Make sure both smaller folds are folded in the same direction.
+ Keep the two small folds and open up your center fold, turn the paper over to the back (so the folded edges are facing the table) and the rectangle is vertical to you.
+ Fold the bottom edge closest to you up towards the top about ¾ of the way. Make a crease.
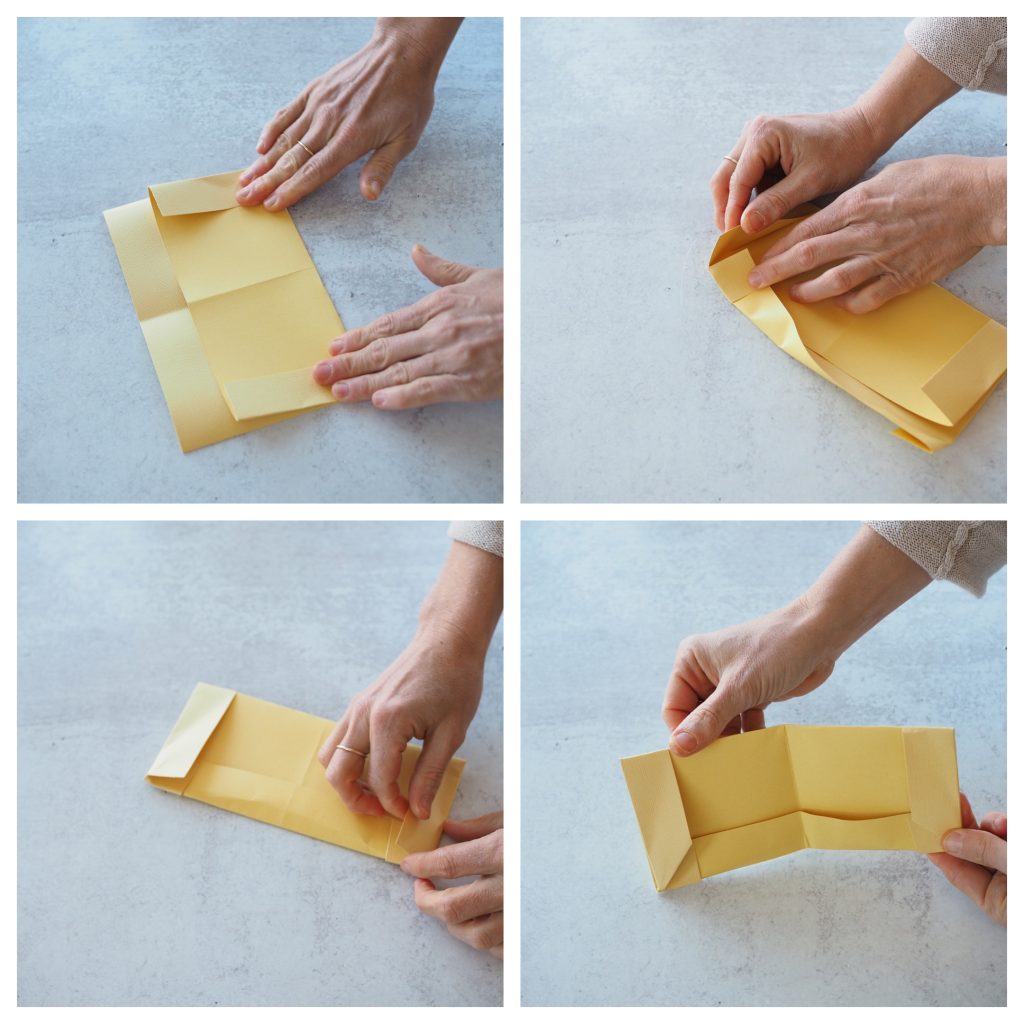
+ Bring the top underside flap of paper over the top of the last fold, and make a crease.
+ Tuck the edges of the top shorter edges into the sides of the edges of the larger fold, (you will need to open up the flaps to make the paper lay flat). Crease the edges in place.
+ Fold the top corner triangles on either side of the folder underneath.
+ Re-crease the center fold to close shut
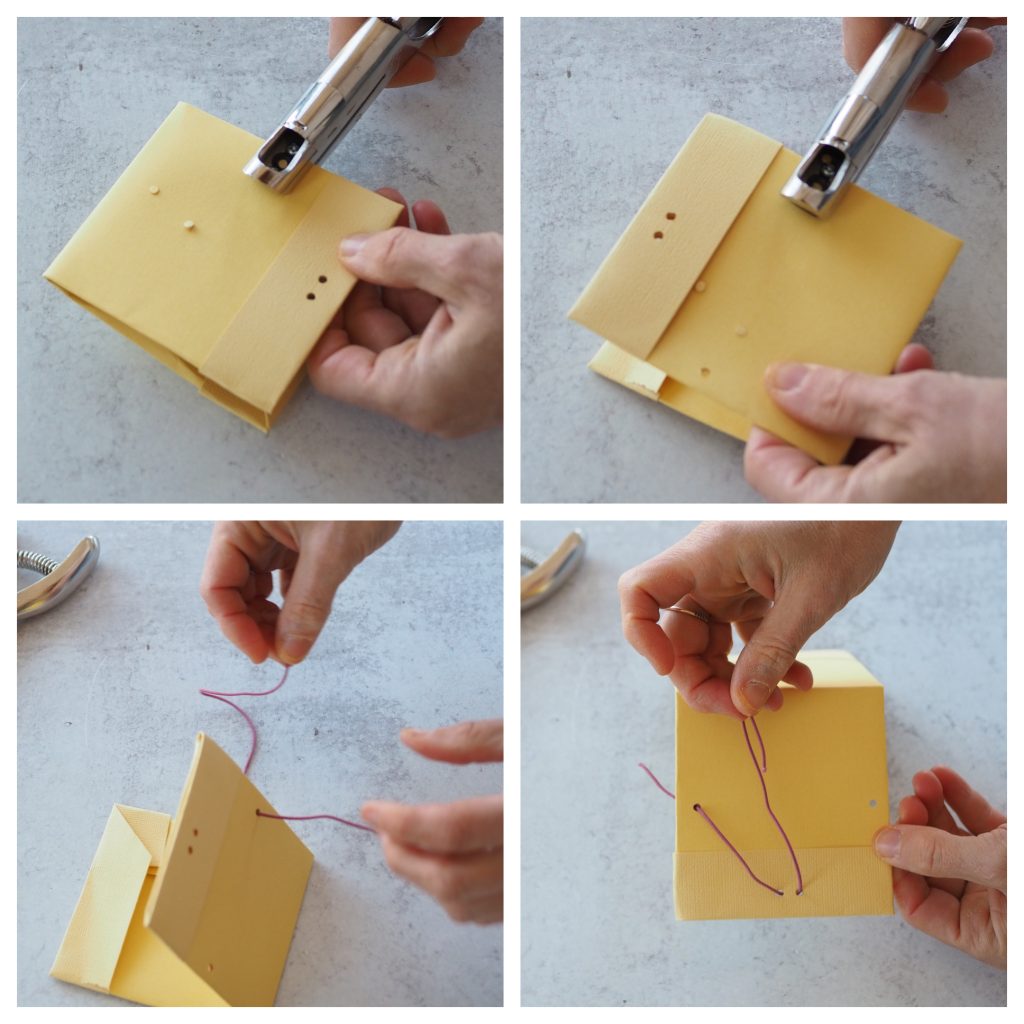
To create the elastic closure:
+ With a whole puncher or awl, make two small holes in the middle center on one side of the flap. The holes should be right next to each other and close to the edge.
+ Make two more holes; each one on opposite sides of the folder and right above the folded flap.
+ Thread your elastic from one of the side holes so that the elastic goes out through the front of the folder. Tie a secure knot at the end of the elastic on the underside of the folder (knotting twice or three times so it can not slip out of the hole).
+ With the opposite end of the elastic, thread it from the front to the back, through the first center hole closest on that side.
+ From the inside, thread the elastic end through the hole next to it. (Going from the inside and out through the front of the folder).
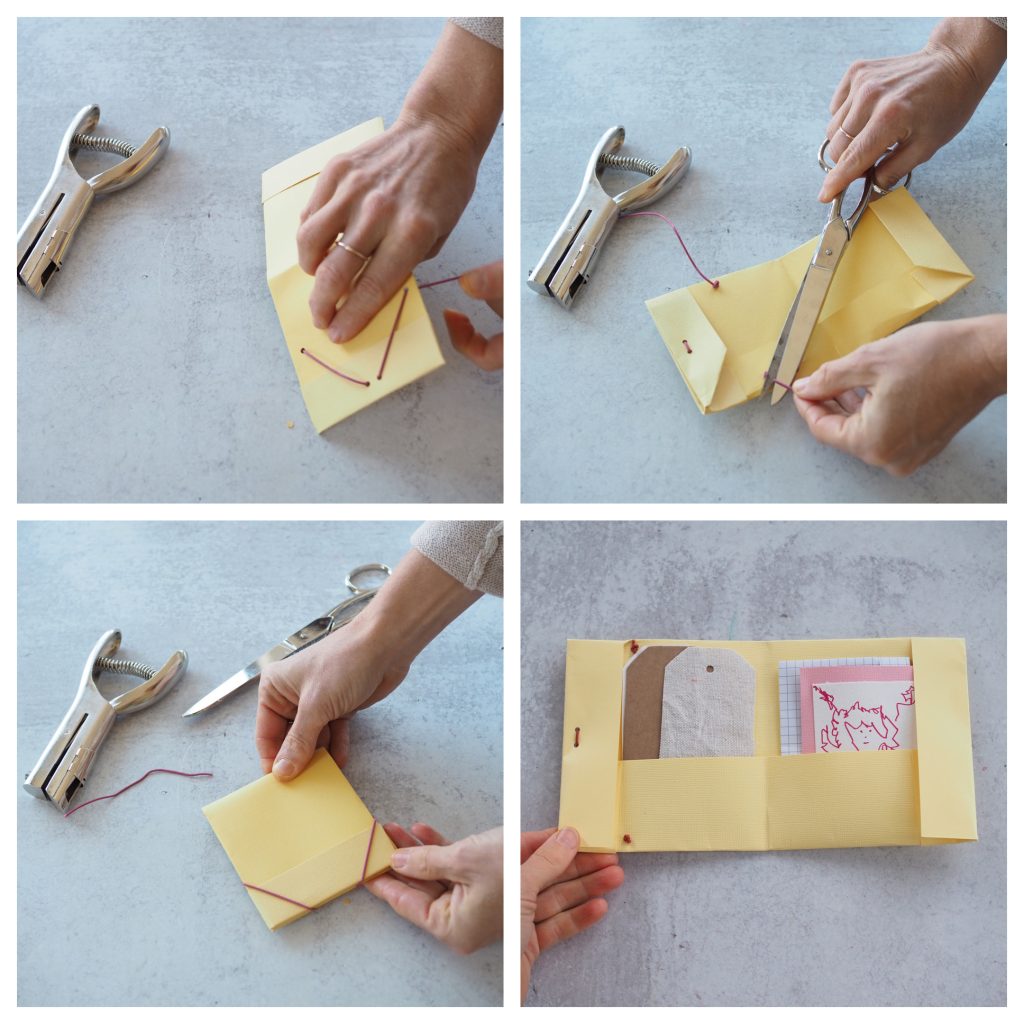
+ Then insert the tail end through the last hole (front to back) and tie off a knot on the inside of your folder. Make sure the elastic is taught and neither too tight or too loose.
+ Trim any extra length from the knotted elastic.
+ To use, fill your folder with a note or other paper mementos and wrap the elastic around each corner of the folder for a secure close.
//
Thanks to Rose Pearlman for preparing this tutorial and preparing the sketches. Rose is an artist, teacher, and textile designer. With a background in fine arts and a love of well designed functional objects, her creations blur the lines between art and craft and pushes the boundaries with non-traditional techniques and materials. Rose teaches monthly rug hooking workshops in and around her home in NYC, and also welcomes commissions for one of a kind constructions in decor and home furnishings. Her work has been featured in fiber magazines, galleries, and numerous online design sites. Her book Modern Rug Hooking is available wherever books are sold. Follow along with her functional craft projects at @art_objects_ She lives in Brooklyn, NY with her family.
This post includes affiliate links to online shops. Reading My Tea Leaves might earn a small commission on the goods purchased through those links, but most of these supplies can be found locally right in your own community. If you’d like to support this site directly, you can contribute directly here. Thanks so much for supporting this work.

3 Comments
I just made one with some of my preschooler’s art and some leftover mask-making elastic. I think the preschooler’s grandmother will be thrilled to receive it, thanks!!
This is so beautiful! Will make it as a Christmaspresent for sure. I think with a ticket for a museum inside. X
Wonderful idea! We are exchanging gift cards and this will be a wonderful way to present it. I have kept stacks of my children’s watercolour paintings from their Waldorf days and it is such good paper (and beautiful) to work with.
Comments are moderated.