Is there anything more summery than a lazy afternoon spent too-hot making crafts and eating berries ’til your stomach hurts? I was never a camp kid, but I still managed to spend long hours making friendship bracelets and giving them away to just about anyone with a wrist. My friends and I wore ours until they were grubby with salt water and sand and frayed enough to finally fall off. In this project, Rose Pearlman teaches us to make a reusable cardboard loom to help secure and stabilize the threads and leaving us with two free hands to make a simple two-color bracelet.
Lest you think a friendship bracelet is a thing for kids only, know that I think making a friendship bracelet is a project that’s precisely what most adults I know could really use. It allows for some quality time spent away from screens or keyboards and it’s an exercise in making something beautiful, simply and inexpensively. As Rose says, “No batteries, gadgets, or screens needed, this meditative and repetitive art of knotting is the stuff of many grade school memories.”

When I was a kid I favored using fluorescent embroidery thread—neon oranges and electric blues and day-glow yellow. As adults, Rose and I have both been favoring subtler shades—silvery grays, minty whites, pale lilac and goldenrod. Of course, the very best part of this project is getting to choose whatever colors you like best.
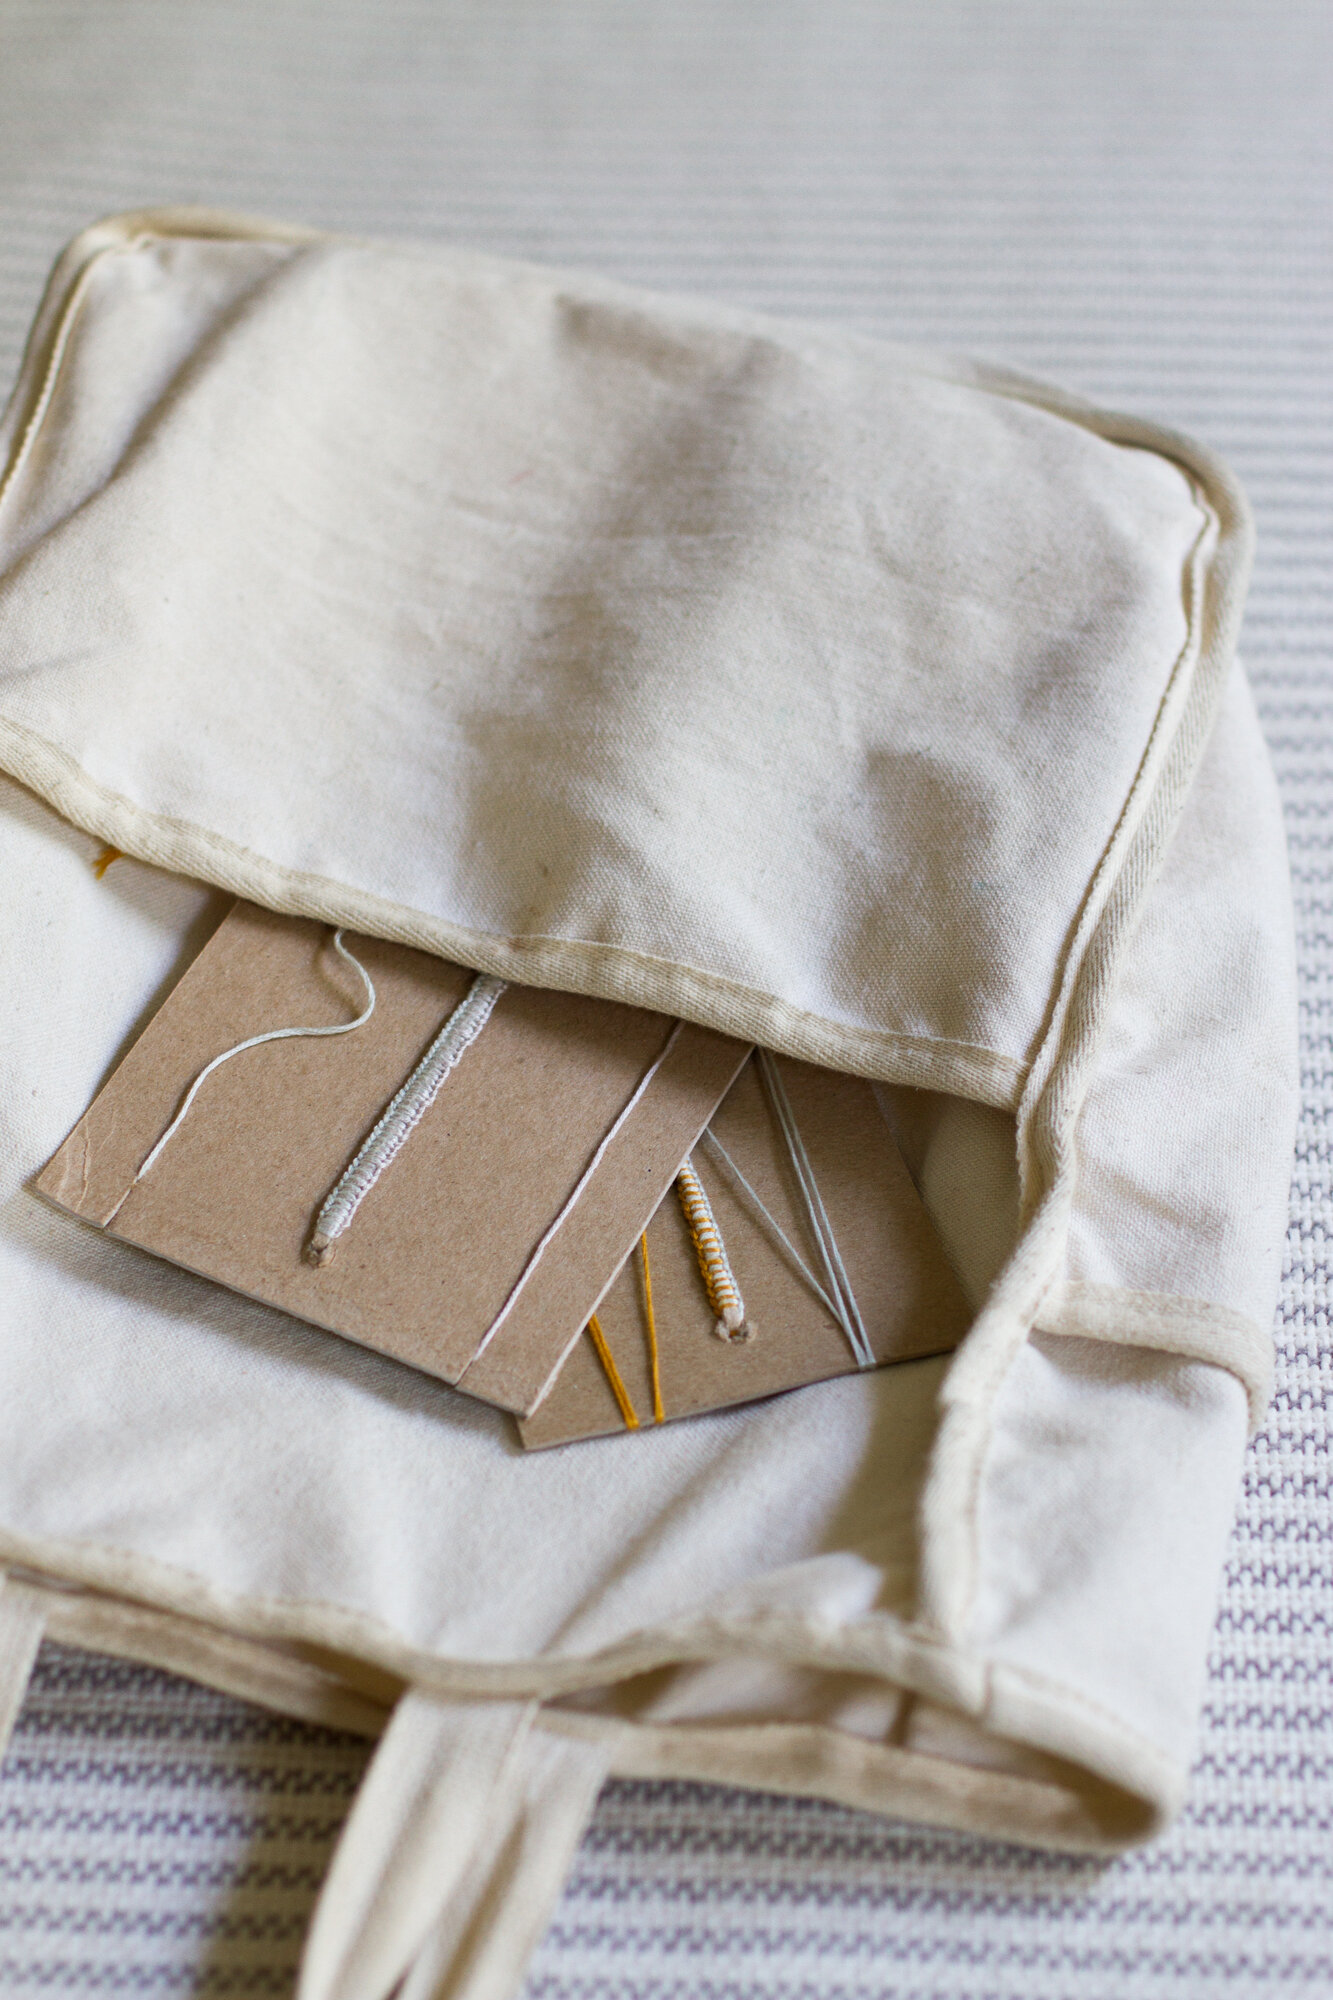
Bonus: the cardboard loom means the project is even more portable than it would be otherwise. I’ve got two bracelets-in-progress tucked into my tote bag right this minute and they’re the perfect thing to reach for on a stalled subway train, or while hangry and waiting on a bagel and cream cheese. (Anytime you might otherwise reach for a phone, or begin to badger your parents, in other words.) Make a few looms ahead of time for a ready-to-go activity on a long plane or car ride.

Materials:
+ Heavy-weight cardboard or chipboard
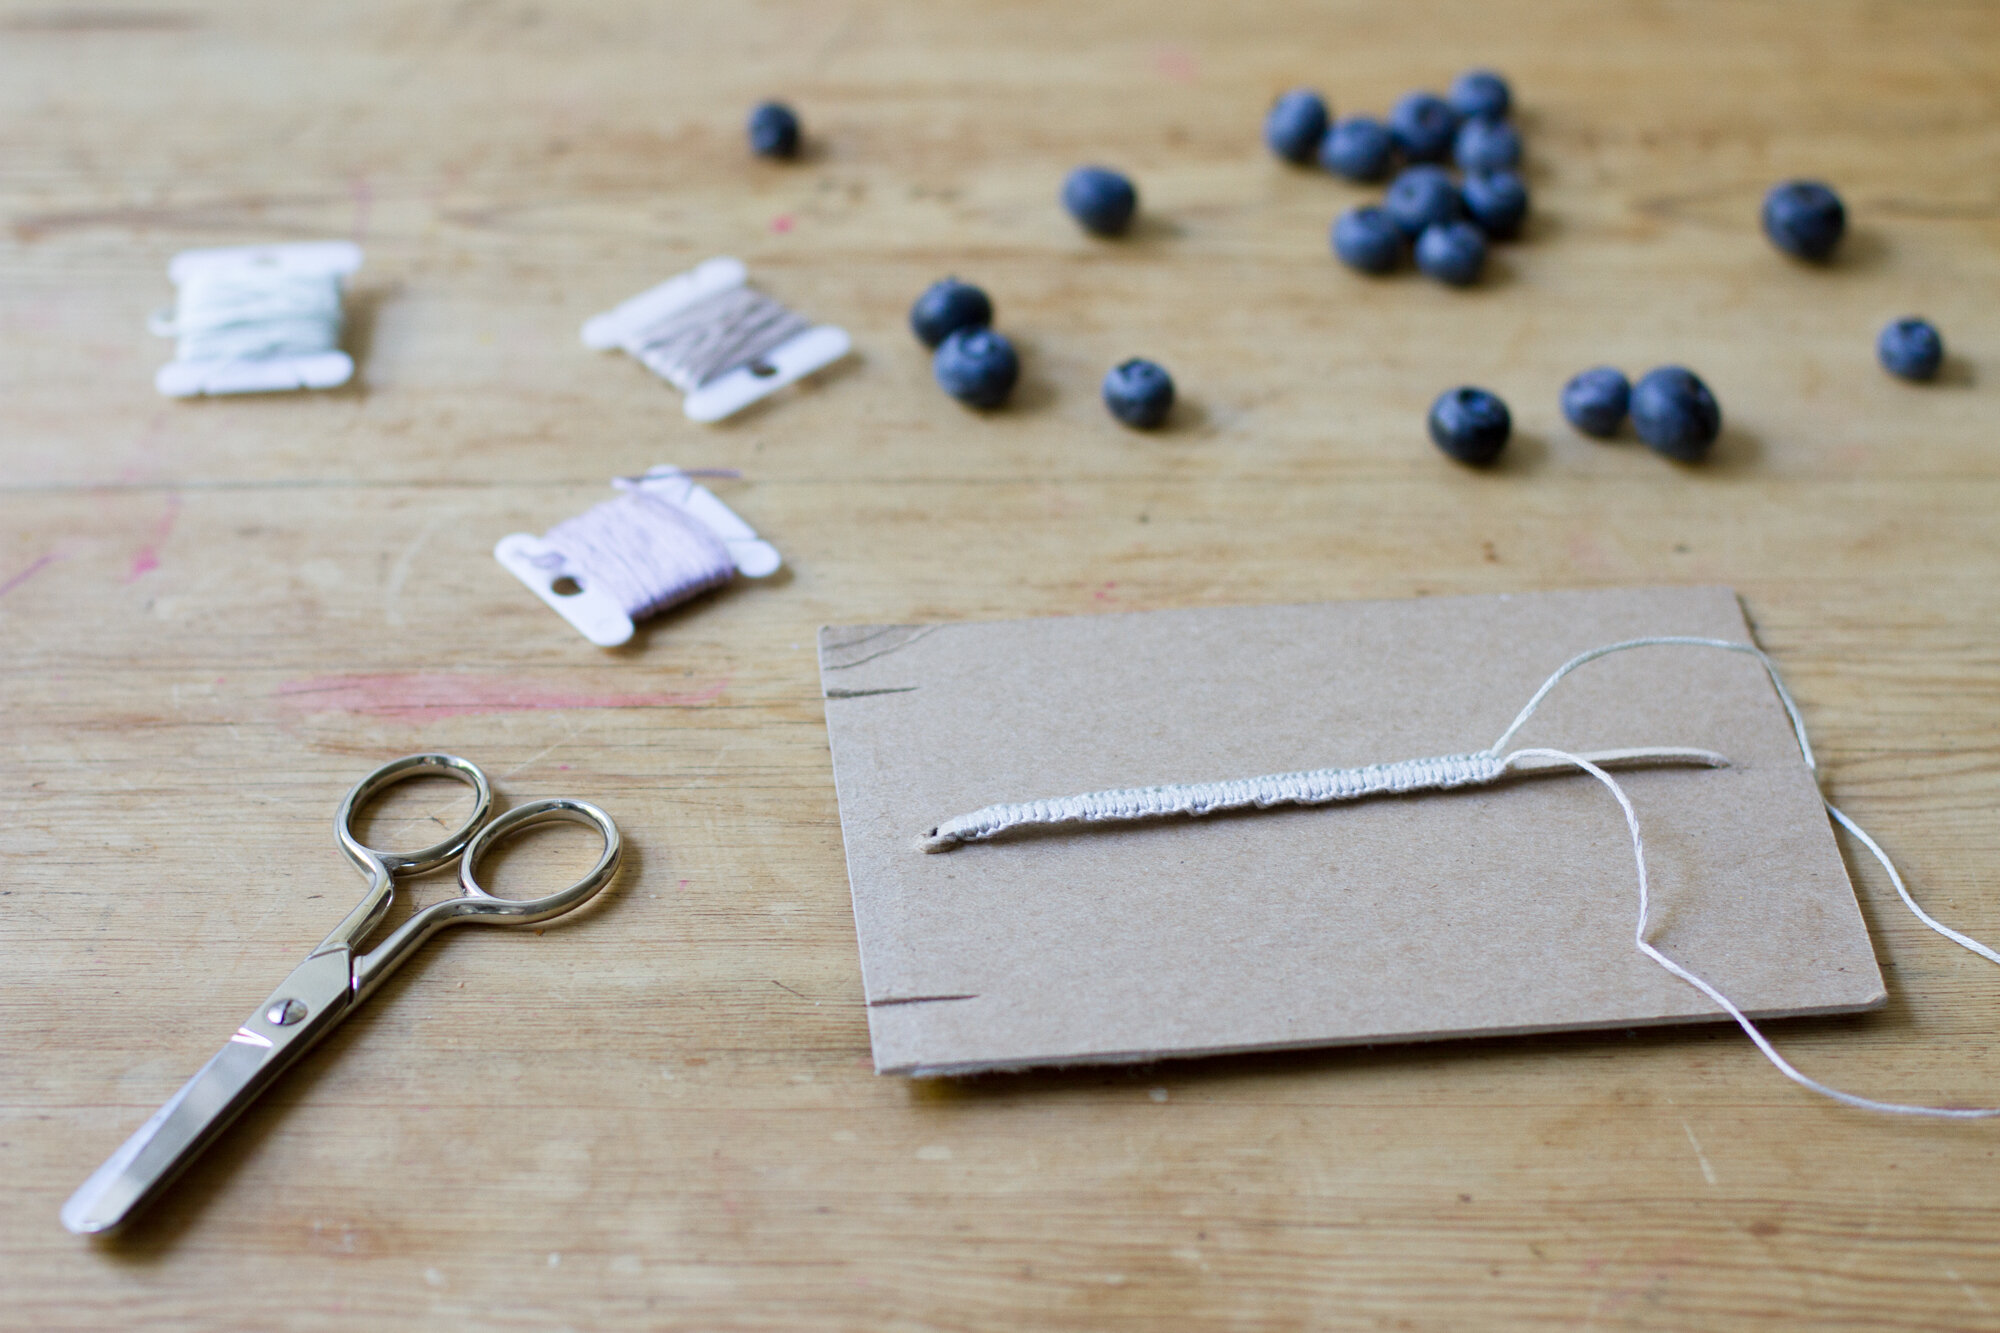
+ 2 colors of embroidery thread or yarn (approx. 50-inches in length for each color)
+ 1 12-inch strand of thicker center cord (similar to leather cord pictured)
+ Ruler
+ Scissors or sharp blade like an X-ACTO knife
+ Pencil
+ Tape
To create the cardboard loom:
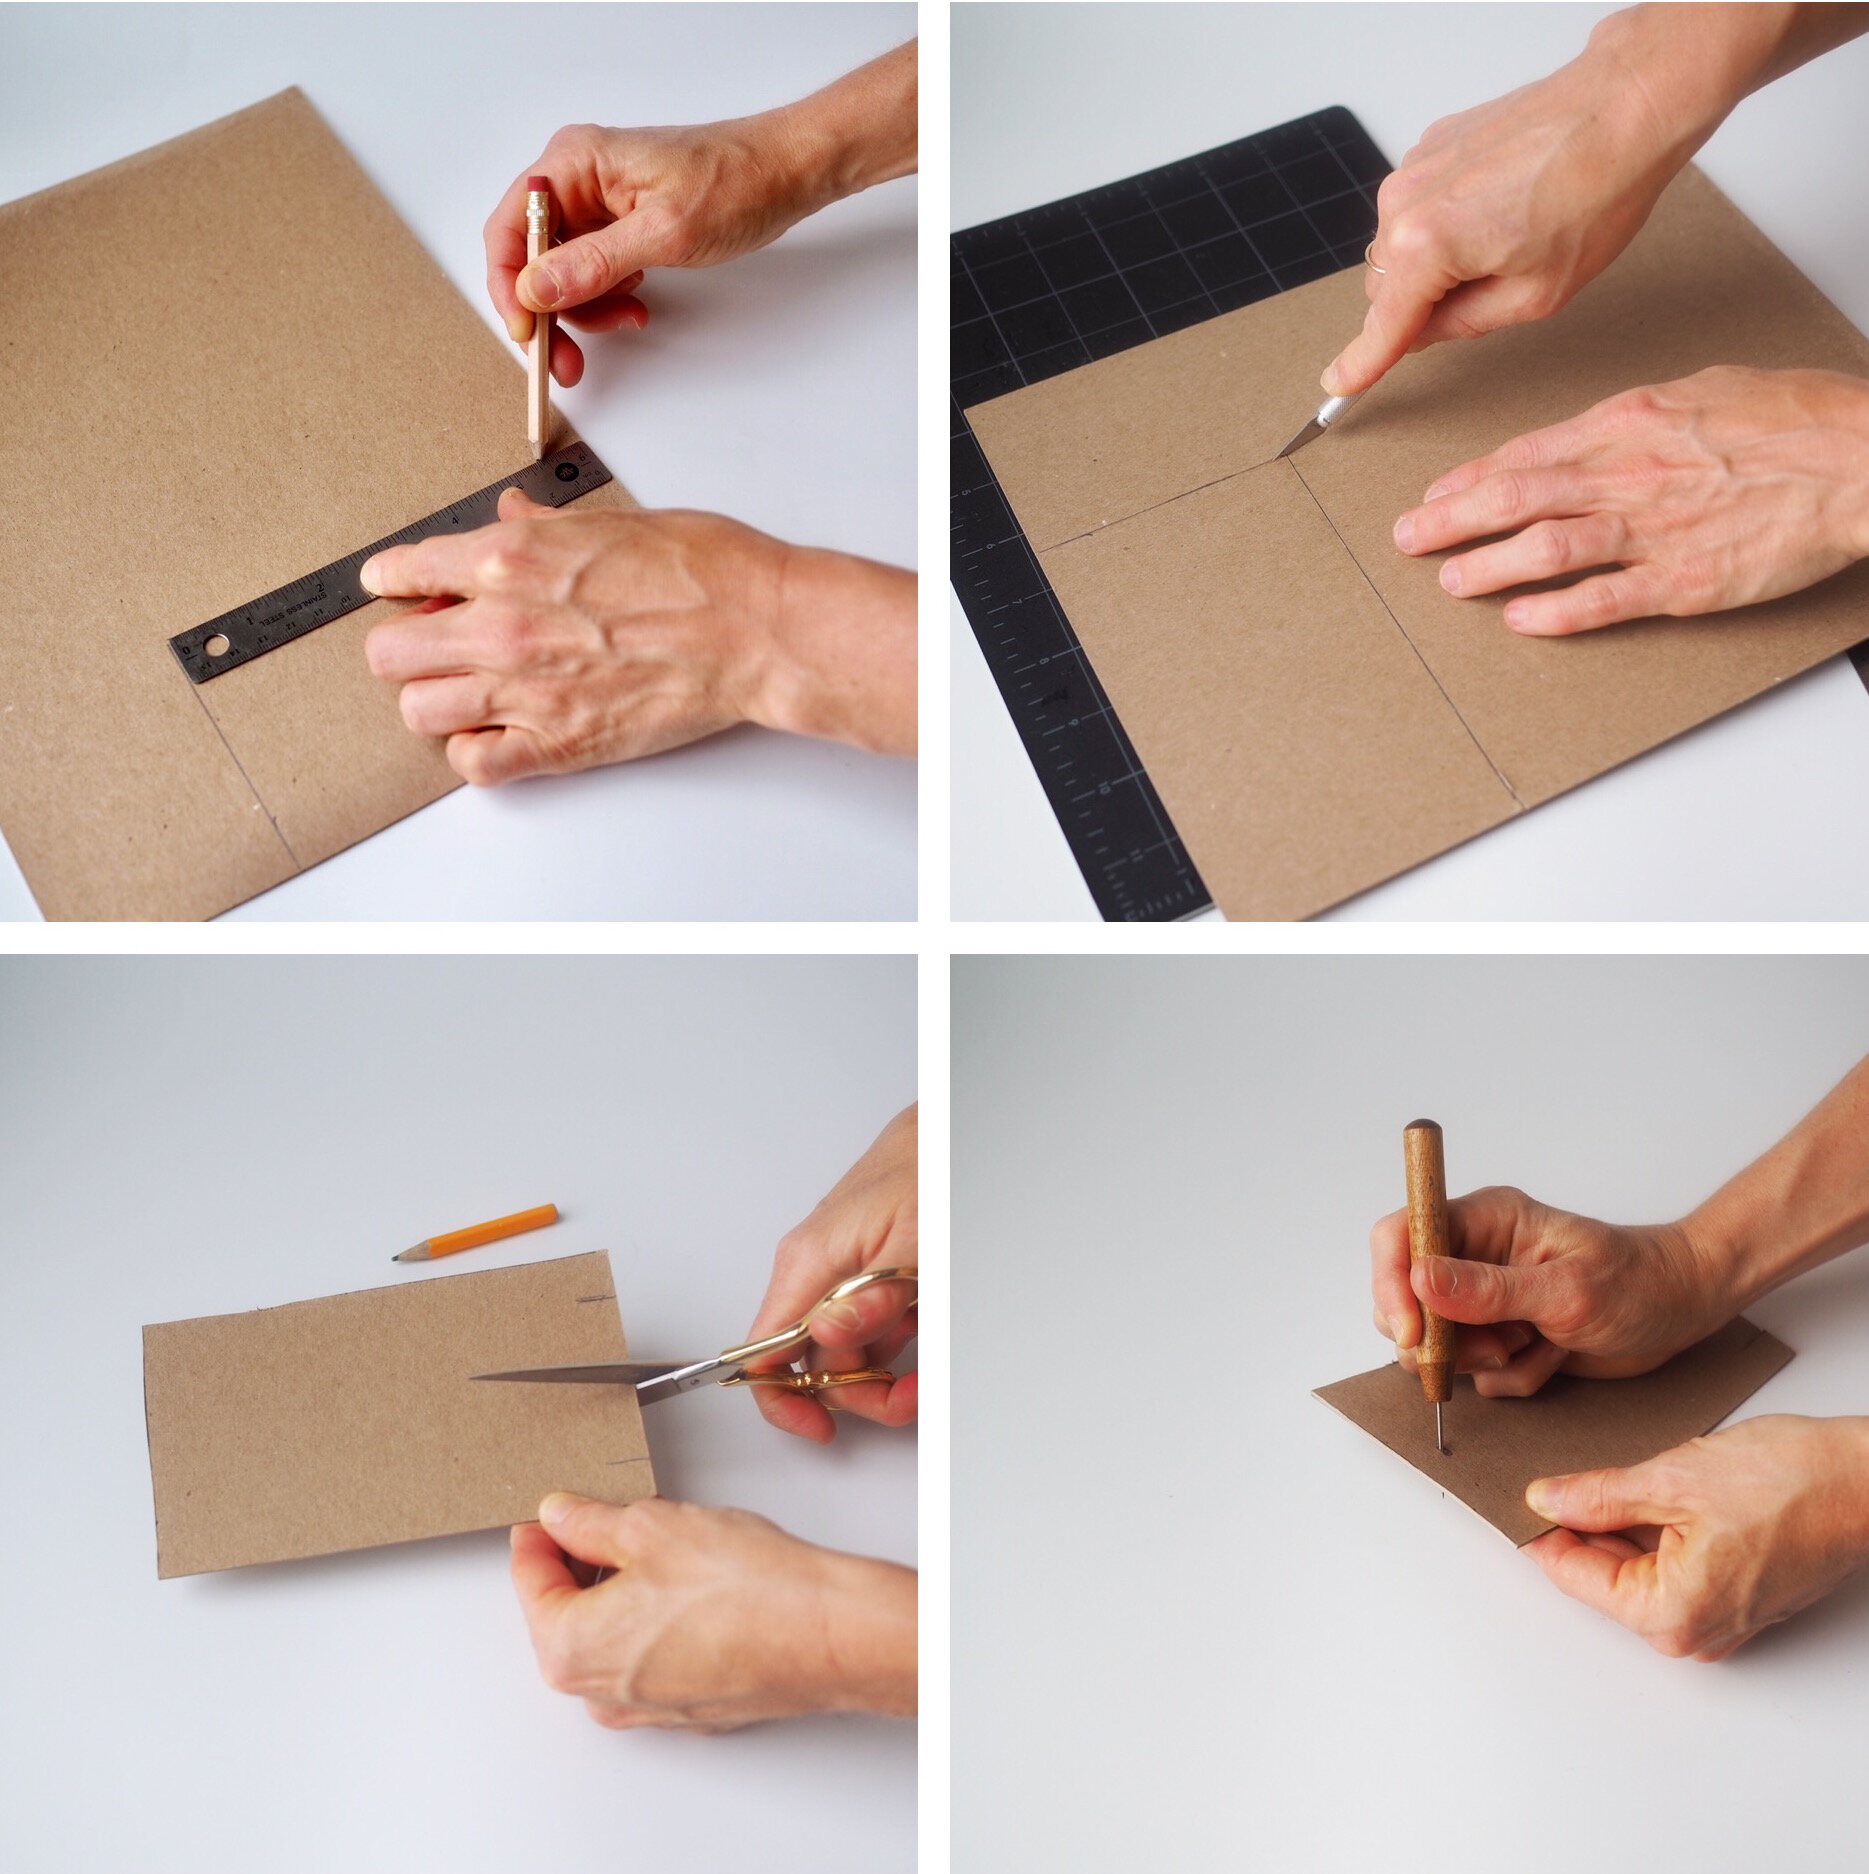
1. Using a ruler draw a rectangle from your cardboard that is 6-inches long by 3 ½-inches wide.
2. Cut out the rectangle shape using a sharp blade or sharp scissors.
3. Along one short side of the cardboard rectangle cut 3 ½ -inch notches, one in the center one an inch to the left and one an inch to the right.
4. On the other short end make a hole ¼ -inch from the top and in the center of the cardboard. This hole should be no larger than 1/8-inch wide and can be done with a hole puncher or sharp blade.
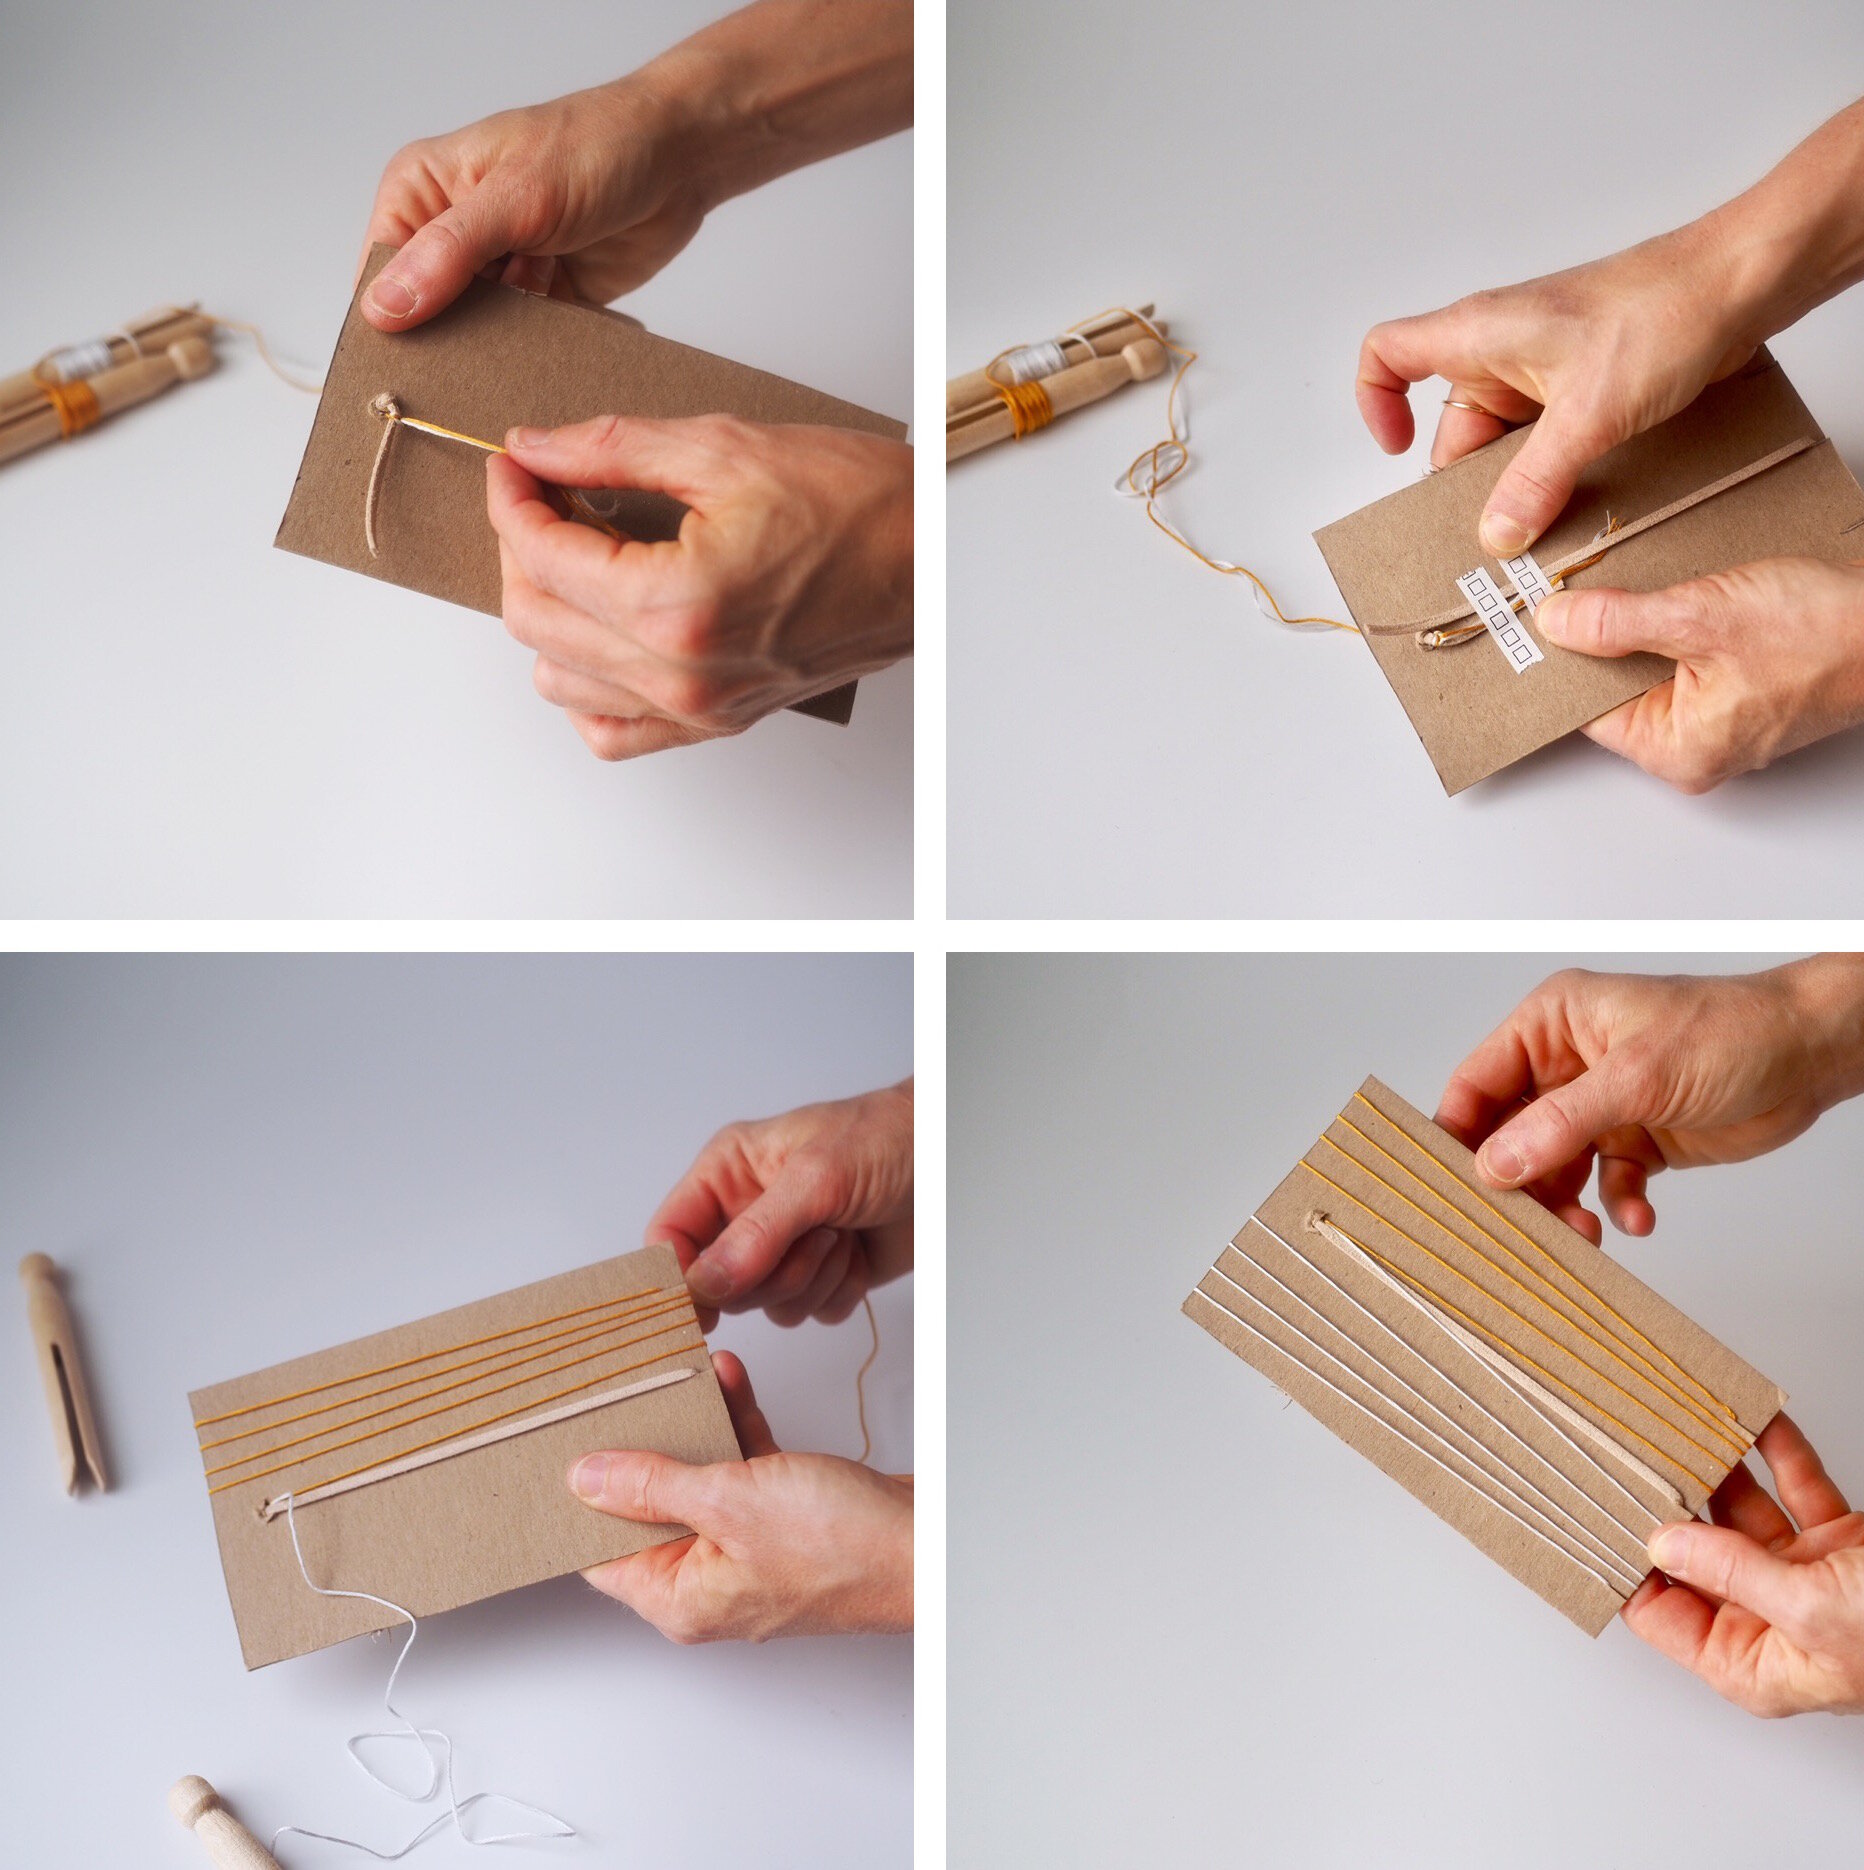
To string the loom:
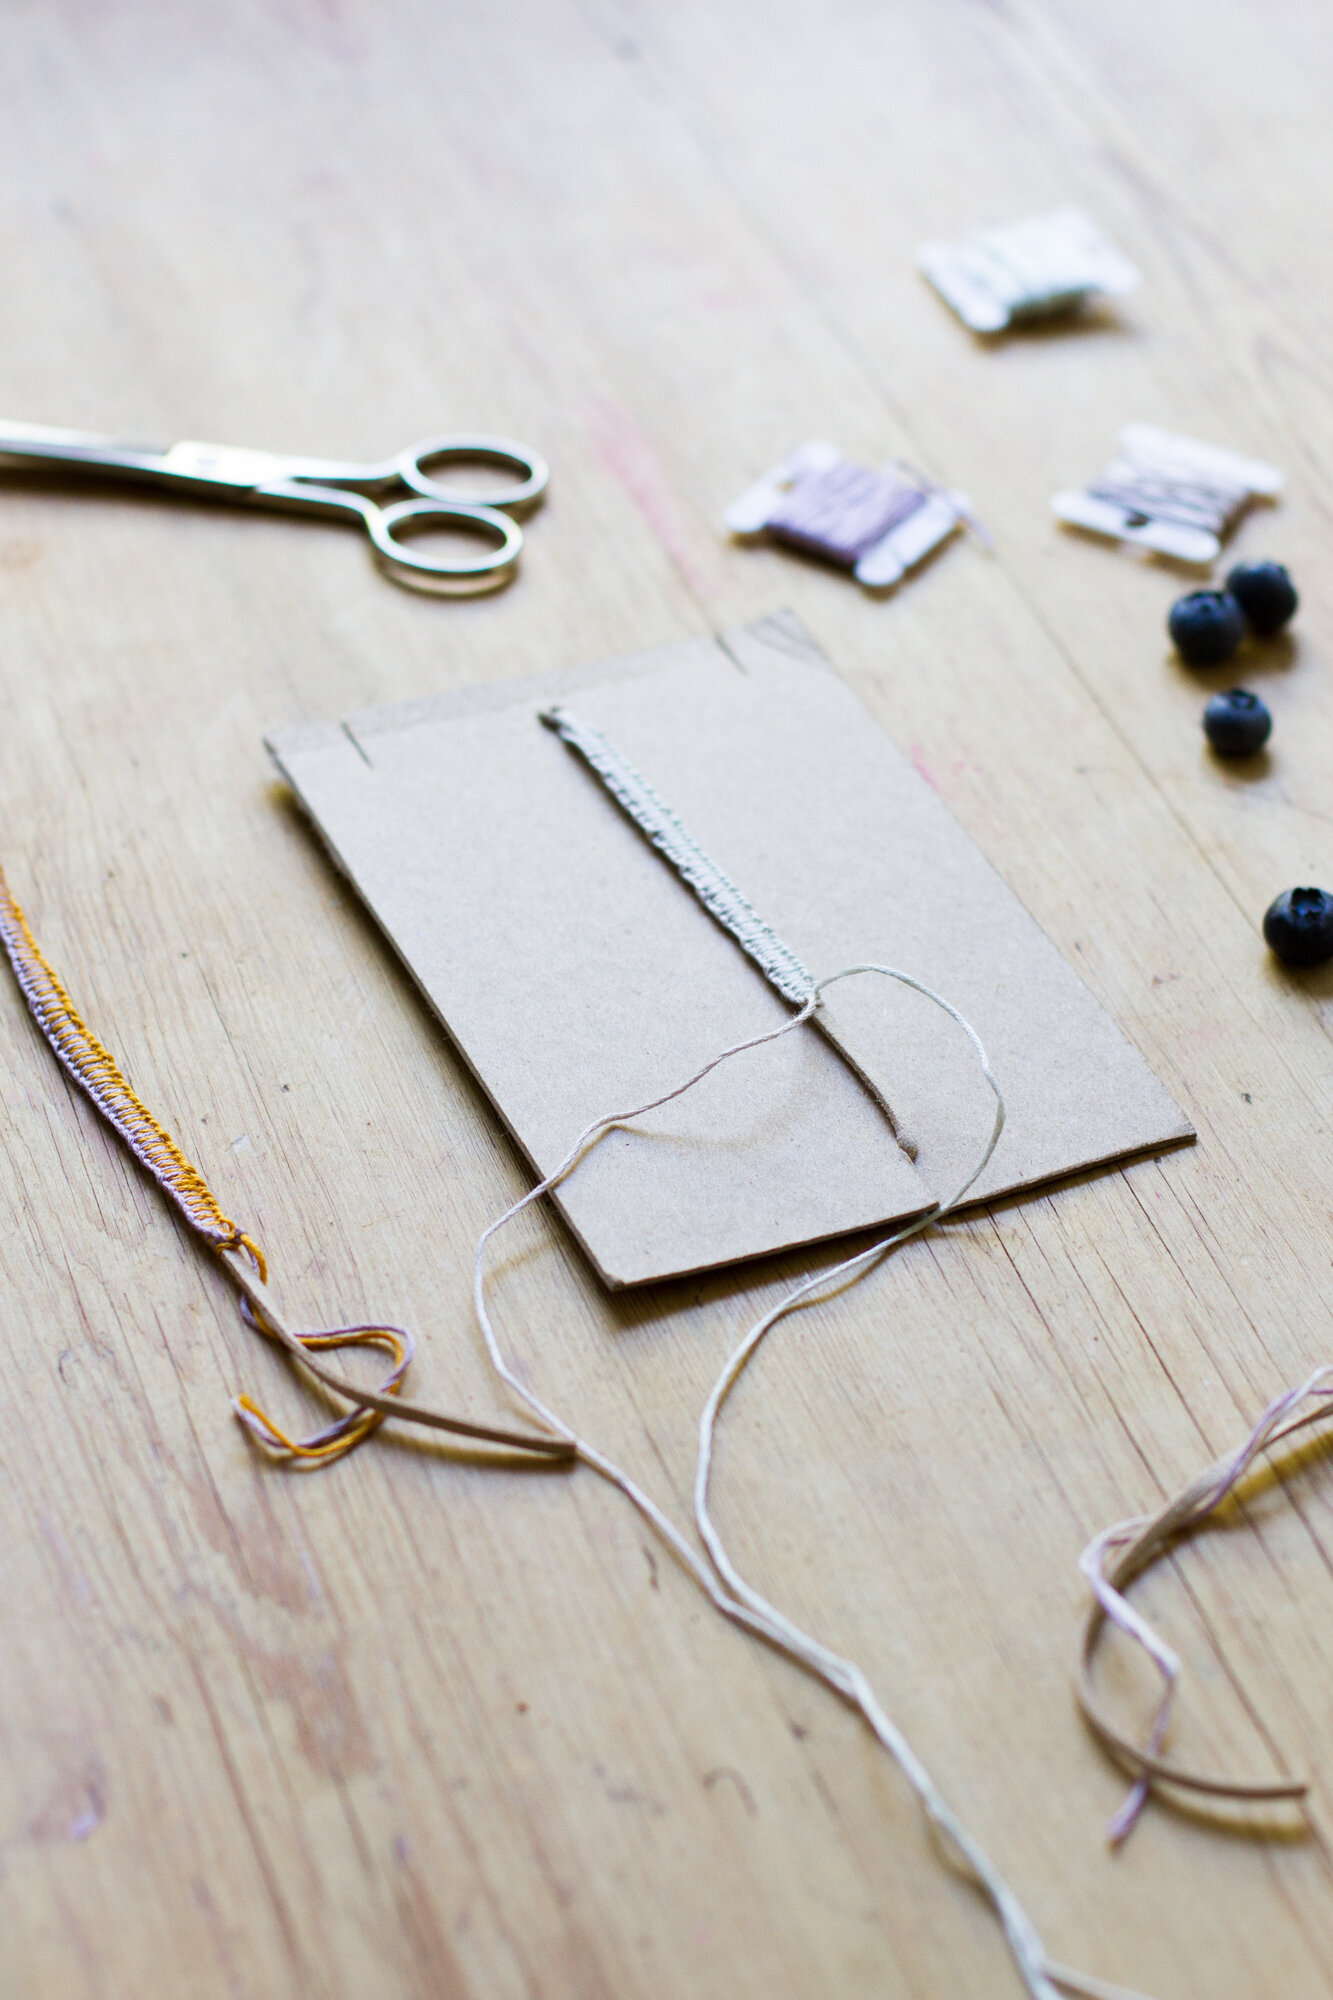
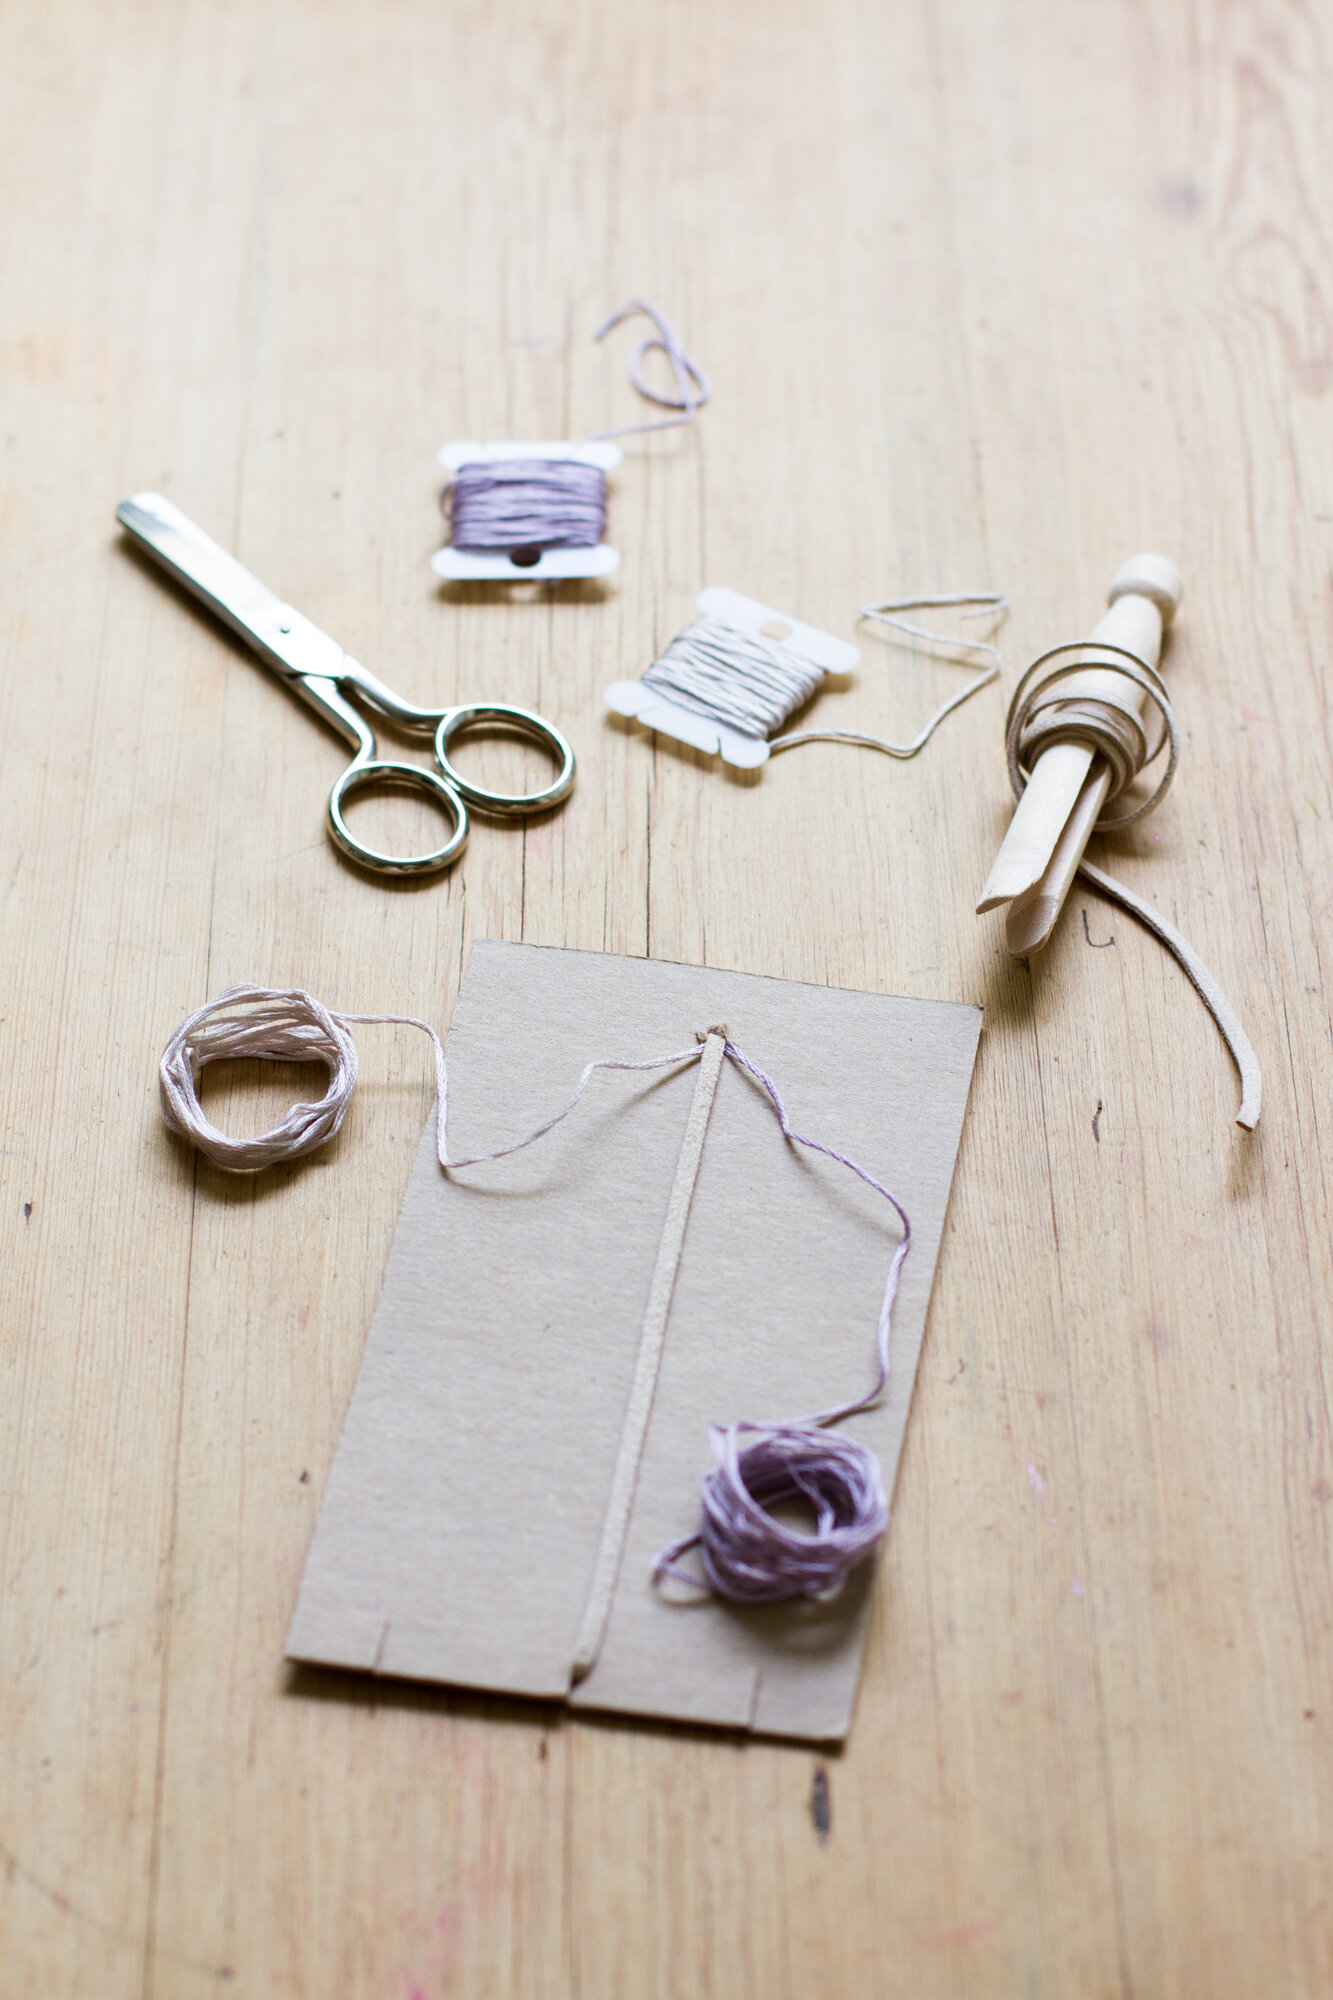
1. Tie the ends of the cord and the two pieces of embroidery string together in a knot, leave a 2-inch tail remaining for the thicker string. Insert the tail ends of all the strings from the back of your loom through the small hole and out the front. Be sure the knot is large enough that it will not be pulled through the hole.
2. Secure the thicker fiber in the bottom center notch of the cardboard. The remaining length of center cord can be secured with a small piece of tape on the back of the loom.
3. If preparing the loom as a gift, or to use later, wind either strand of embroidery floss around the top and bottom of the loom and secure each tail end through one of the bottom notches. One strand will be on the right of the loom; the other color will be on the left.
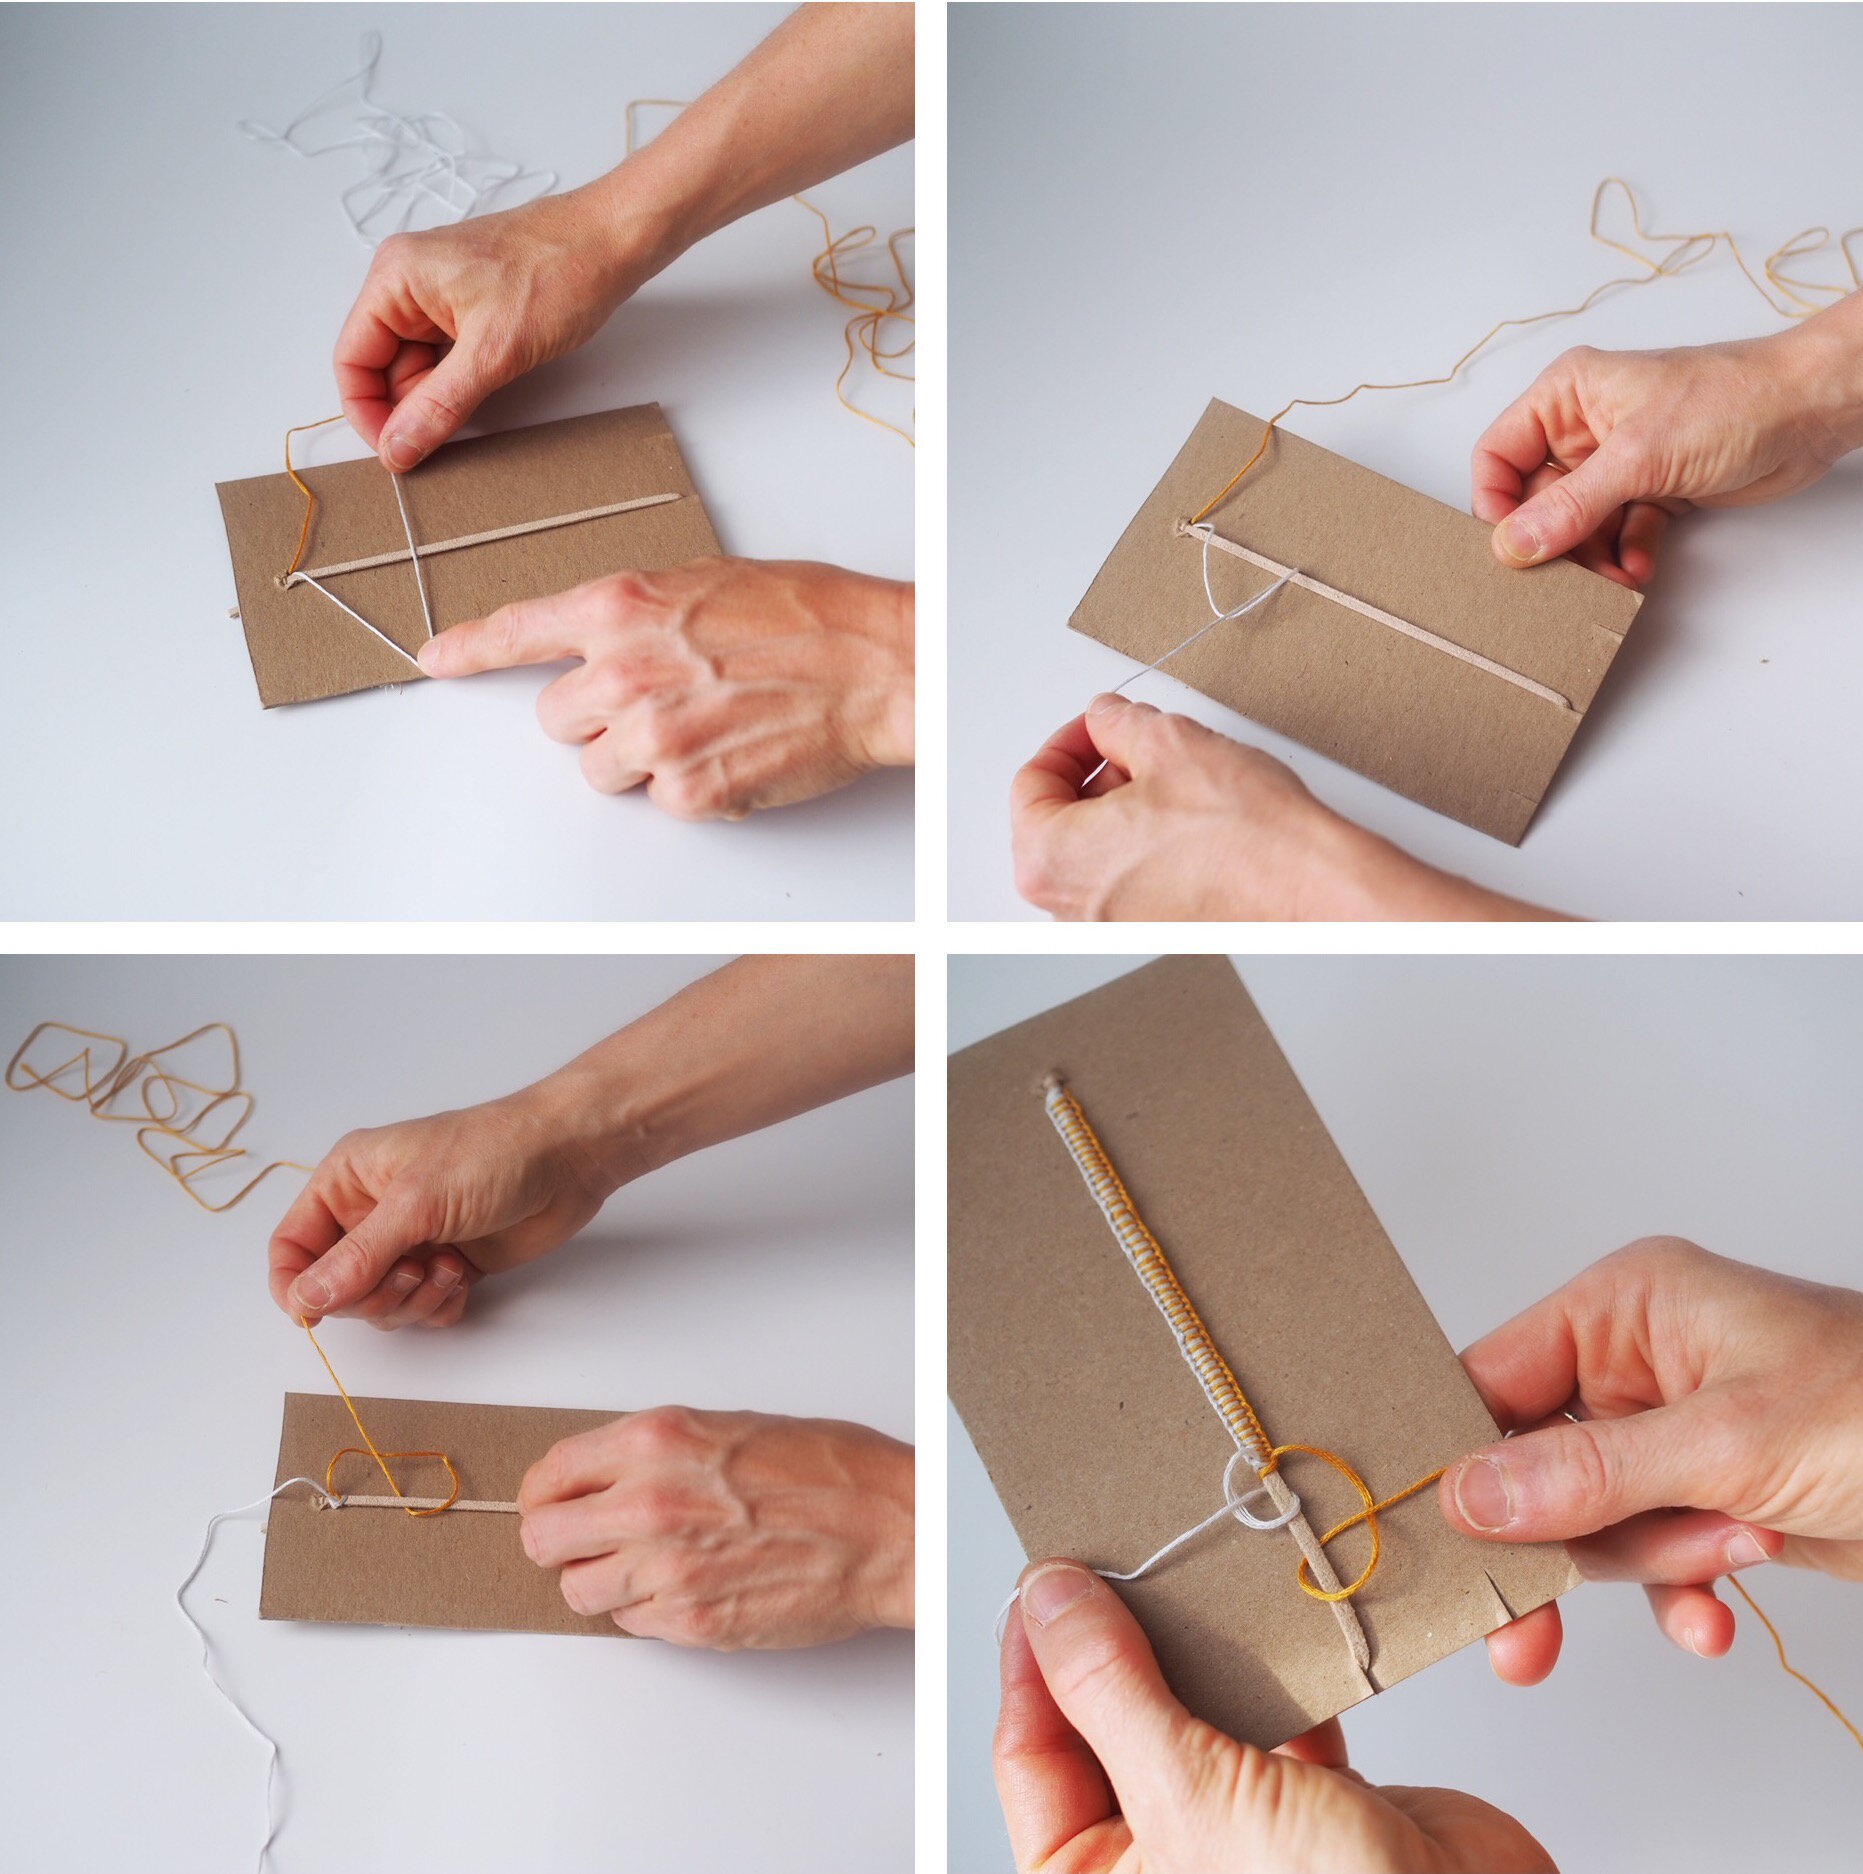
To weave the bracelet:
1. Start by unhooking the two side strands of colored string from the notches in the cardboard (leaving the center cord intact).
The two side strings may be a bit long to begin with – to make it easier to weave, wind each of the side strings into a small circle. (You can use your middle & index finger to wind.)
2. Using the first color of string, cross the string over the top of the center cord making a triangle shape. Next, tuck the remains of the string back and under into the triangle space you created. (The center string will always stay in the center.)
Pull that tail end up as the string tightens to the top of your bracelet.
3. Take the opposite string and do the same, pull it upward to secure it right below the previous stitch.
To tighten both sides evenly, pull both colors of string horizontally away from the cardboard in opposite directions.
Repeat starting with the first color and continue on alternating string until the weaving part of bracelet is the desired length.

4. When you finish weaving, tie both colors of string around the center cord.
Remove bracelet from cardboard by gently pushing top knot through the hole or pulling the woven bracelet back through the hole.
5. Tie the two ends together around your wrist and cut off any remaining string to finish.
What do you think? Shall we all commit to a summer of less phone, less whining, and more friendship bracelets? Somehow I don’t think think there’s a way that plan could possibly go wrong.
Step-by-step instruction images were taken by Rose Pearlman. All other photos by Erin Boyle.
Thanks to Rose Pearlman for developing this project and writing the instructions. Rose is an artist, teacher, and textile designer. With a background in fine arts and a love of well designed functional objects, her creations blur the lines between art and craft and pushes the boundaries with non-traditional techniques and materials. Rose teaches monthly rug hooking workshops in and around her home in NYC, and also welcomes commissions for one of a kind constructions in decor and home furnishings. Her work has been featured in fiber magazines, galleries, and numerous online design sites. Her new book Modern Rug Hooking comes out December 3, 2019 and is currently available for preorder wherever books are sold. She lives in Brooklyn, NY with her family.
This post includes affiliate links. Reading My Tea Leaves might earn a small commission on the goods purchased through those links.
15 Comments
Yes! I’m headed to a family reunion this week, and I just packed up the supplies to make these with all my cousins. So fun! Thanks for the inspiration.
Hooray! Enjoy!
This loom is a fun and probably more grown-up way to do this, but as I kid we just used a safety pin! Same basic idea, knot the ends of your string, but then use a safety pin to attach it to your pants, the couch, a bag or whatever you had around to anchor it. Also very portable! Might have to try my hand at a few bracelets again this summer. 🙂
yes!! we did this too! i love the loom because it takes 1 min to make and nothing gets tangled!
Lest you think a friendship bracelet is a thing for kids only, know that I think making a friendship bracelet is a project that’s precisely what most adults I know could really use. -> YES! I’m so Team Friendship Bracelets for adults!! (I actually wrote about it here: https://www.justgoodshit.com/blog/friendship-bracelets-as-a-hobby-best-tutorials) It’s a perfect chill summertime activity and is a genuinely cute thing to give a friend.
Love this tutorial; thanks for sharing!!
yes!!!! love yours!
so pretty and yes most adults could use more making in their lives! i’ve always salvaged lots of supplies but never really “had the time” to make the stuff i thought up – not anymore! 7 things i made recently, so much fun and i already have a whole new list of ideas going in my head: https://tps-steph.blogspot.com/2019/06/0041-7-days-making.html
Steph! You have a related post for everything!
haha I guess we’re on the same wavelength. but, also, you are so very kind for including them – thank you! please know i really appreciate it and that not all very established bloggers are as generous 🙂
Such a friendly reminder of wonderful summers as a kid! I, too, was very big into all types of friendship bracelets. As an adult, that passion has turned itself over into crochet, knitting, and macrame. But maybe I’ll need to get some bracelets on these wrists this summer… thanks so much for the inspo, Erin, and the reminder to be more creative and wear that creativity with pride on our wrists!
I love this! When we ran out of embroidery string as a kid we used natural cotton kitchen string. (There was a huge spool in our house that never seemed to run out). I never used a thicker center string, just another piece of embroidery string and a safety pin. Love the loom for portability, especially with small kiddos, as I probably will not finish a bracelet in one sitting these days.
My daughters and I invited a bunch of their friends over tomorrow to make friendship bracelets and drink strawberry lemonade. So happy to get to introduce them to the world of friendship bracelets – thanks for the reminder that they exist!
I want to learn different macrame bracelets
Thank you for this! Just one question though, does the cord that we tie around stays in the bracelet or do we pull through? I didn’t quite understand.
stays put! think of it as the core of the bracelet!
Comments are moderated.