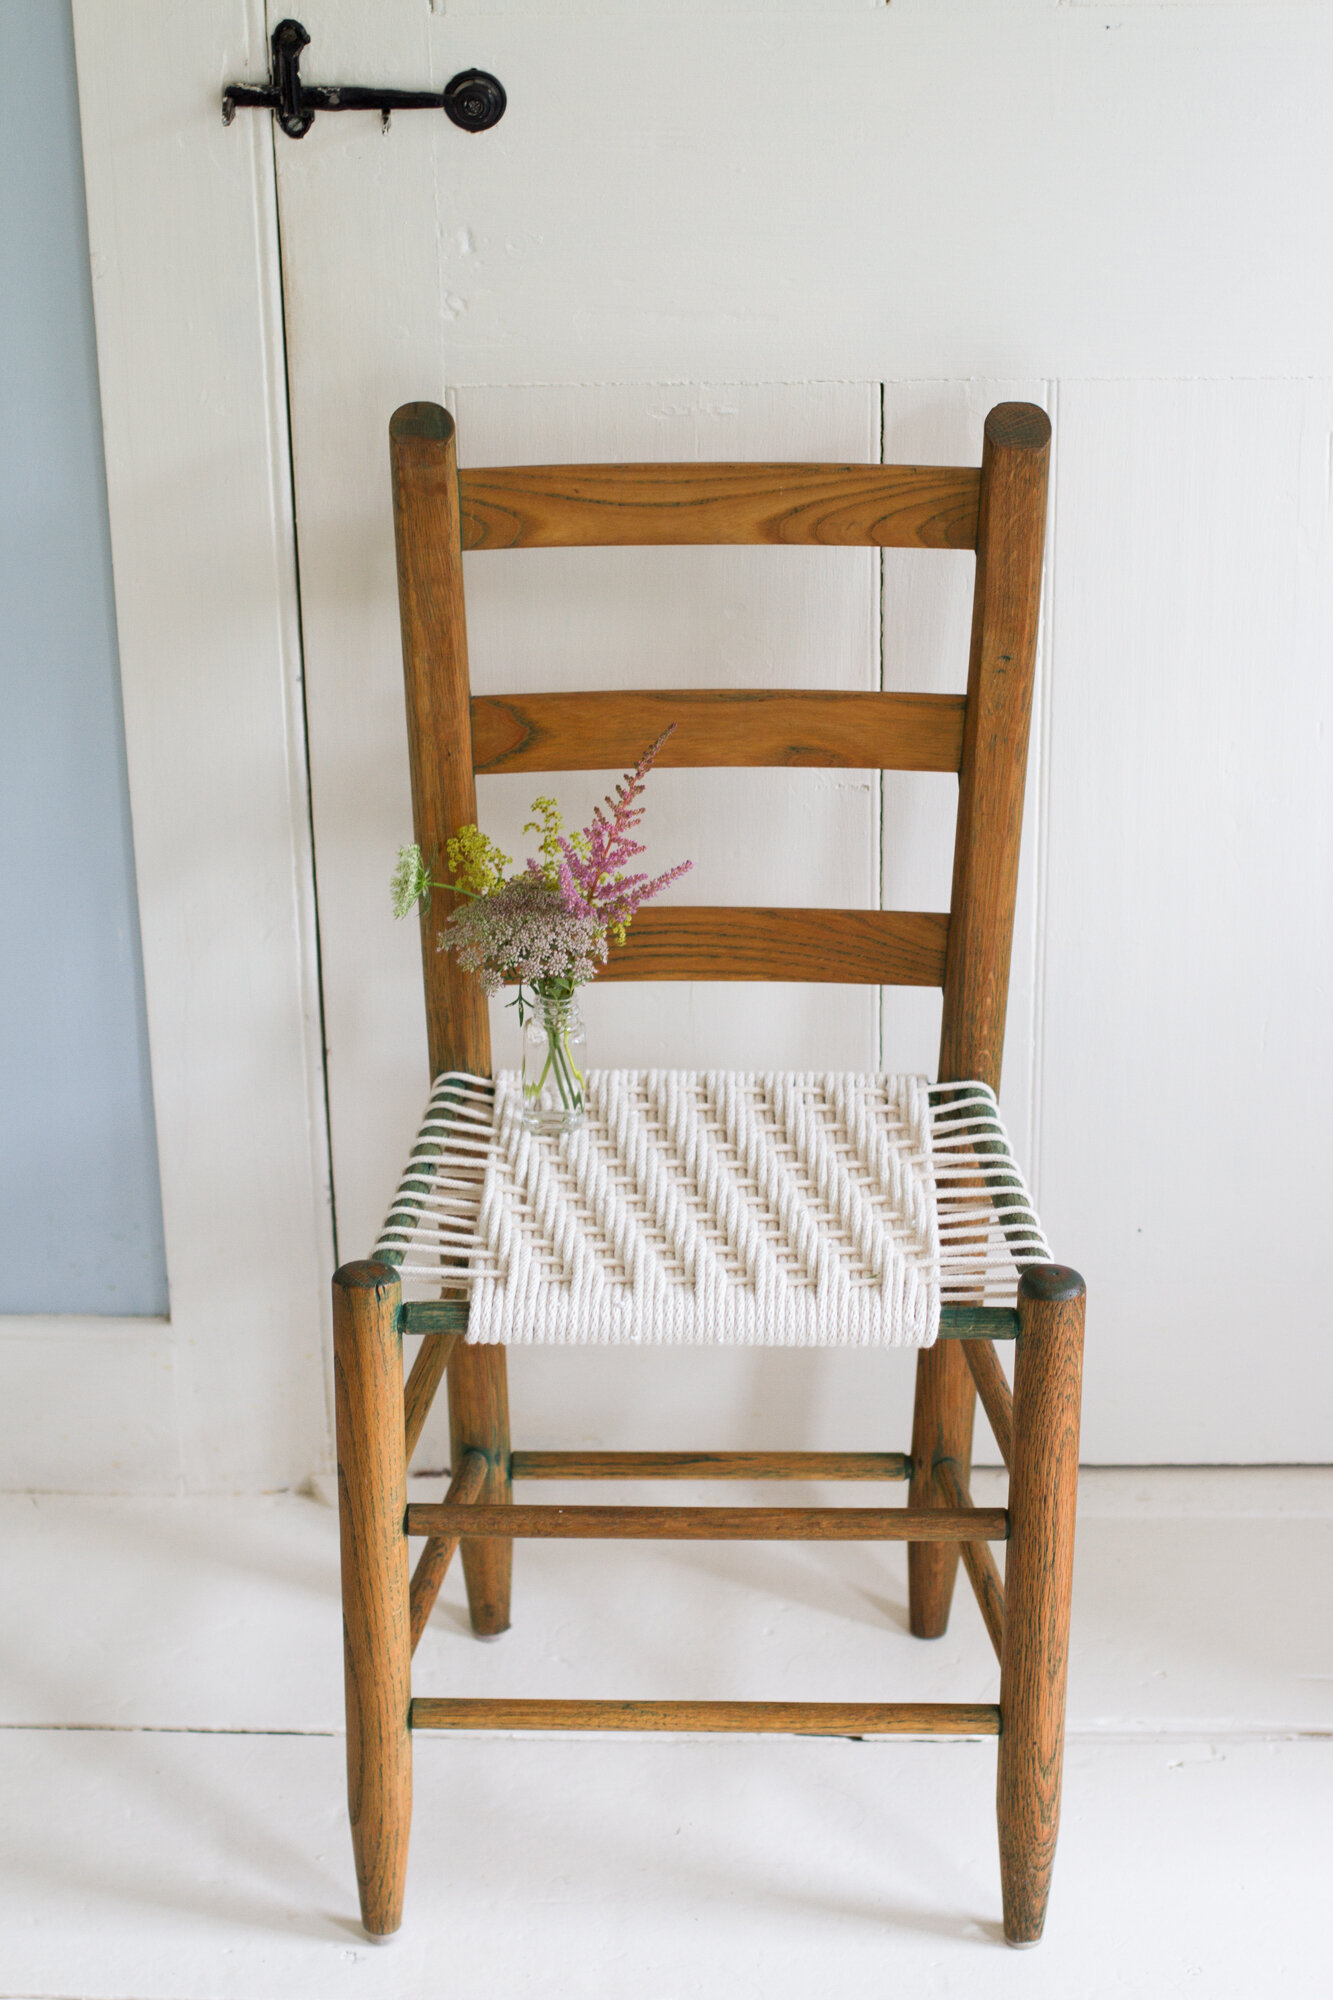
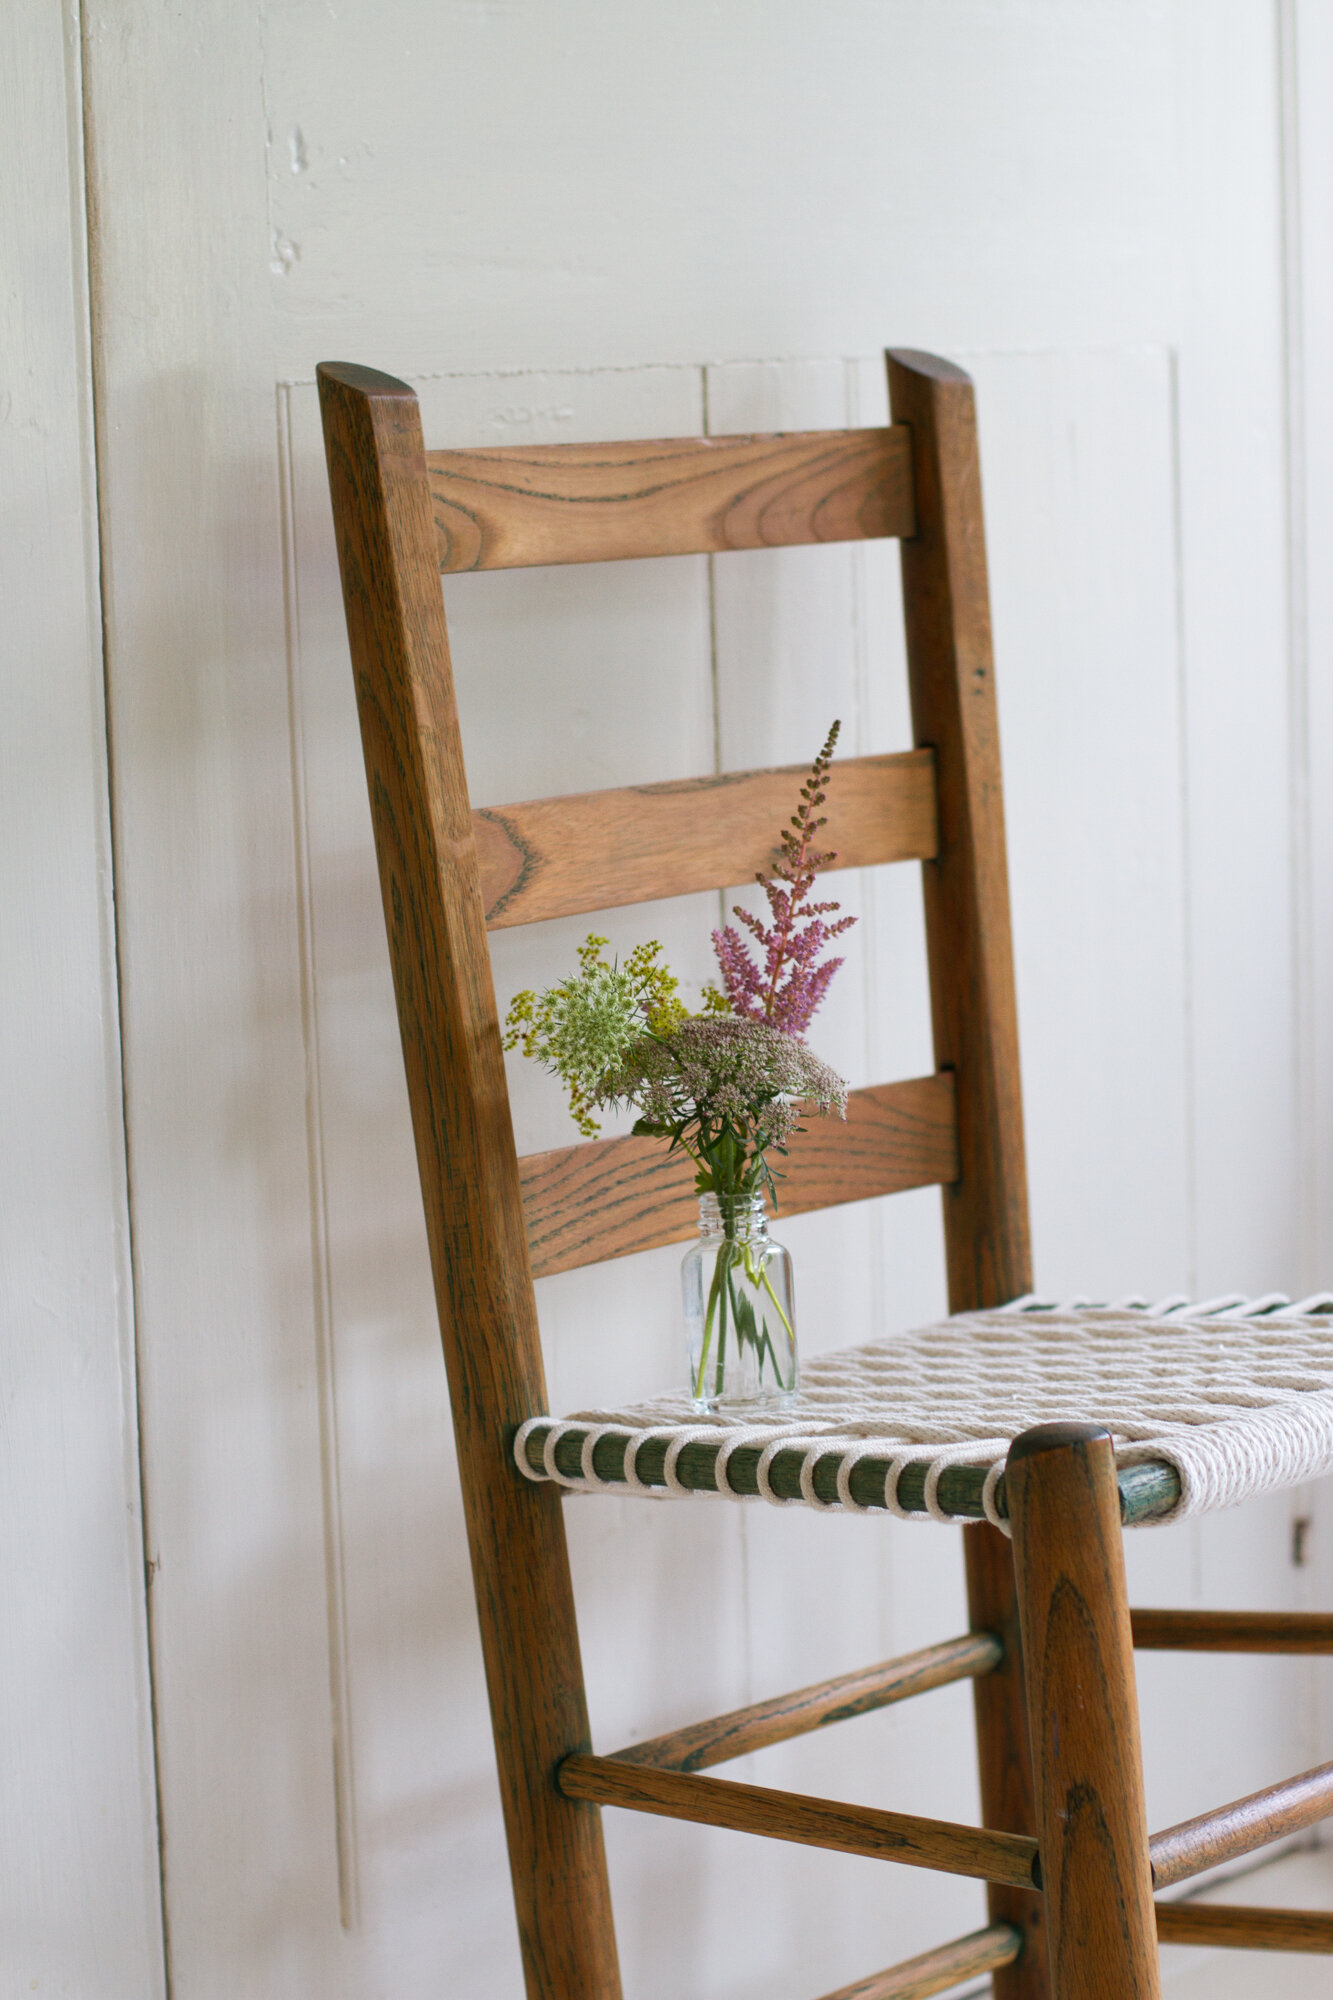
I made a new seat for an old chair this week.
In a sweltering cobwebbed corner of my mom and dad’s attic, I found what I’d abandoned there years before: a small chair too big for a tiny apartment. It had never been terribly comfortable, this chair, but I’d bought it with my very first paycheck in North Carolina and toted it with me to Rhode Island, where it served as a perch for late-night essay writing in graduate school. I couldn’t bear to part with it when we first moved to Brooklyn and so under the eaves it went. (My penchant for minimalism does not cancel out my fondness for stuff with stories.) When I spotted it last week, I remembered that the cane seat had started to snap in places, and it didn’t take long to catch wind of the fact that it had absorbed the mustiness particular to this 18th-century attic by the sea. Nothing a good scrub and a new seat couldn’t fix.
Like many of my most-loved DIY projects, I failed to document the majority of this project. I was too wrapped up (a weaving pun if ever there was one) in seeing it come together; too delighted by watching something take shape to stop to take photos. Isn’t that the case with all the best things?
I’ll lay out a few simple instructions below, but be warned that this was my first time attempting such a project, let alone giving instructions for it, so forgive any bits that might be unclear. If you need a visual, I watched this video tutorial for binding a cane chair in a herringbone pattern and took what was applicable to weaving a seat from clothesline. My attempt at simple instructions are below.
Materials:
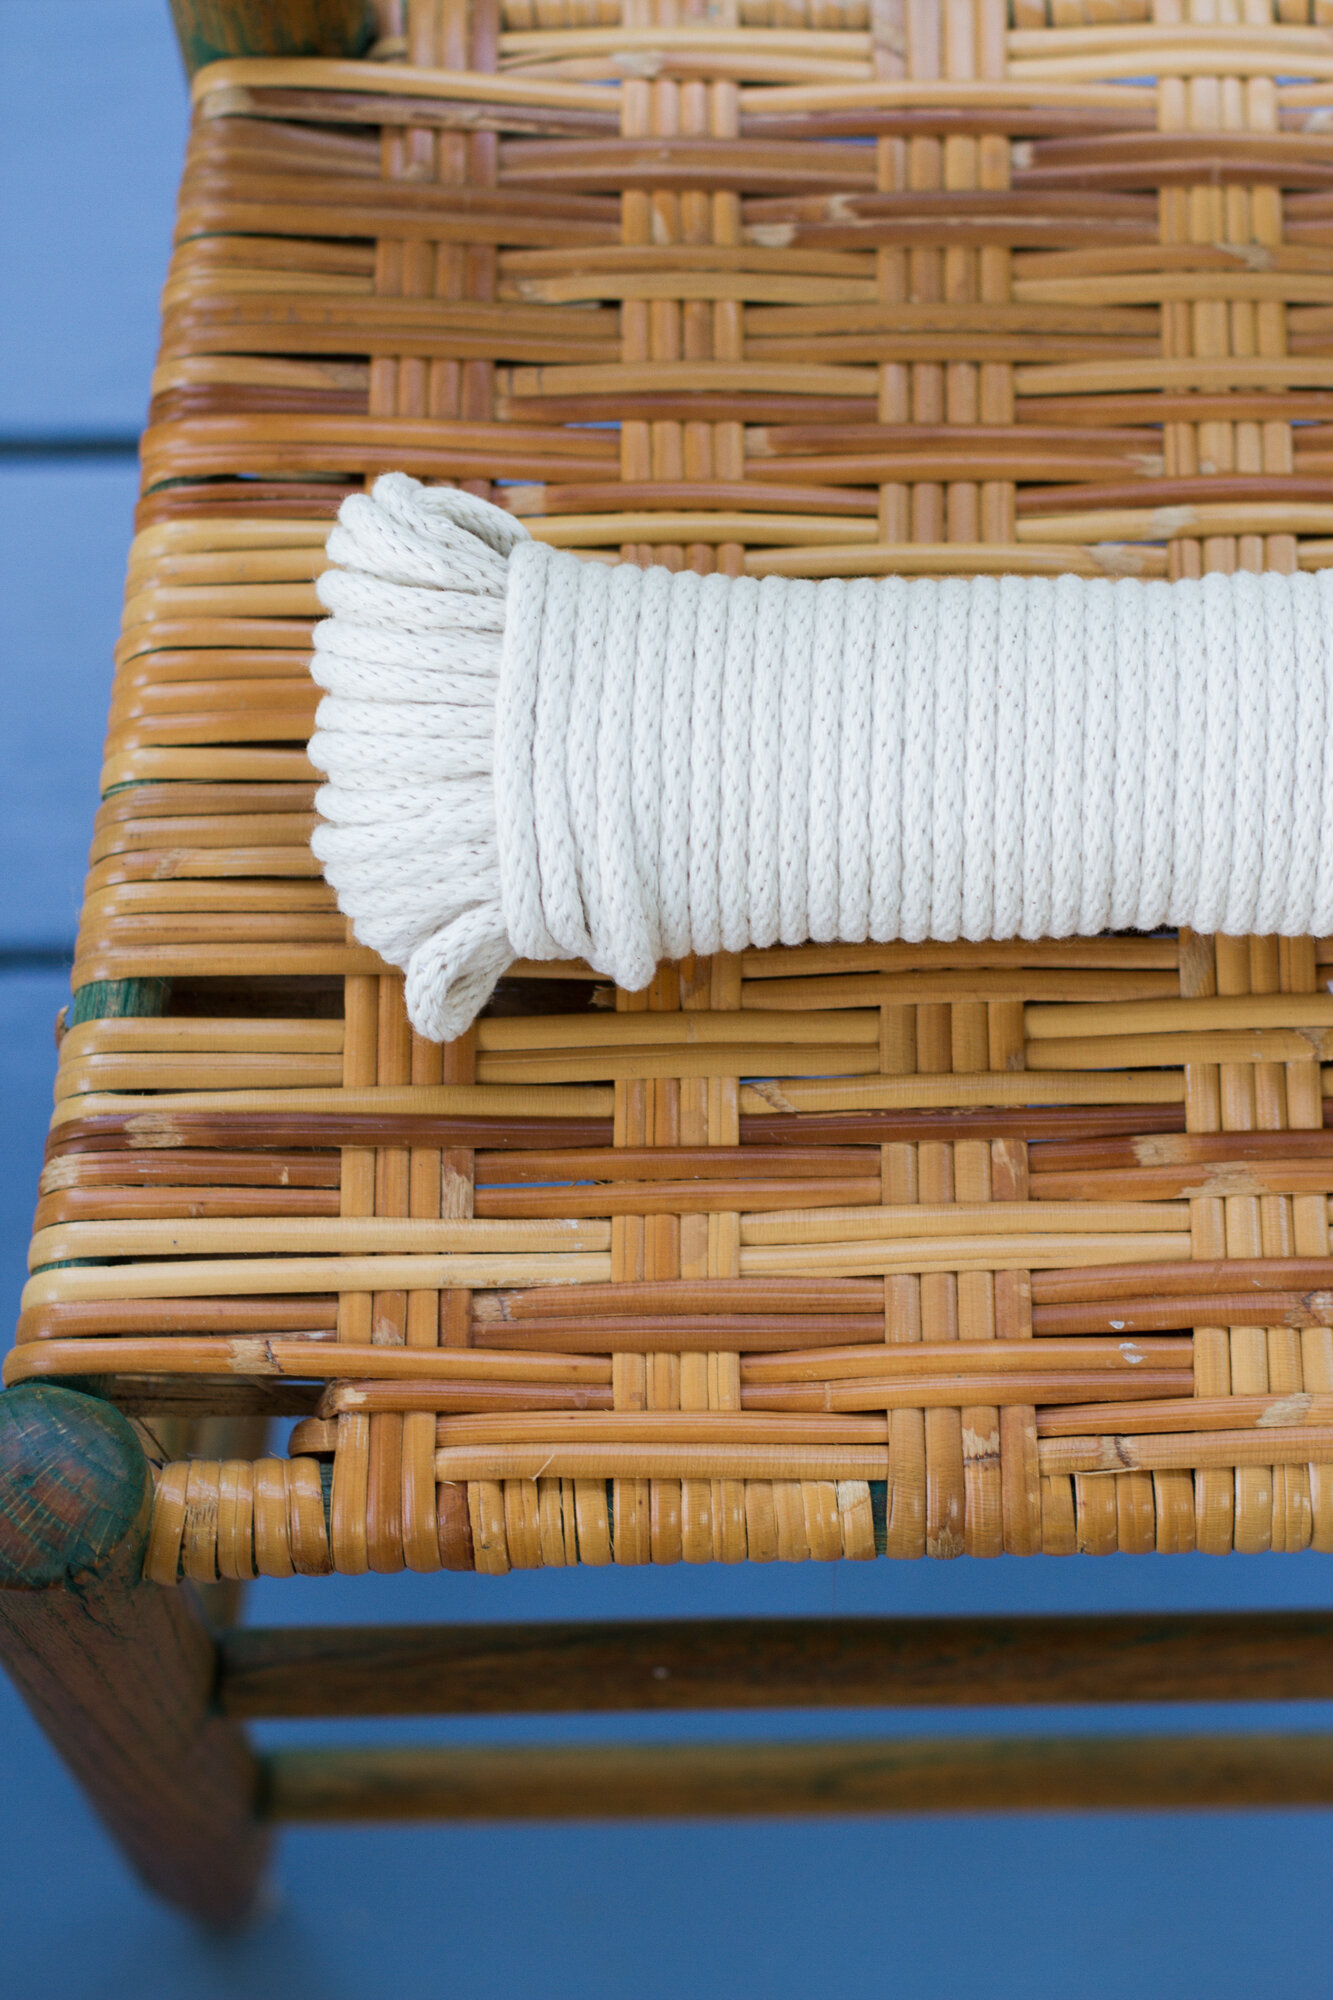
+ ~150 – 200 feet of cotton clothesline (how much will depend on the size of the seat)
+ An old chair frame, woven cane seat removed
+ Hammer
+ Scissors
Directions:
+ Use scissors to remove any remaining cane seat. (If the cane was held in place with tacks, remove those too!)
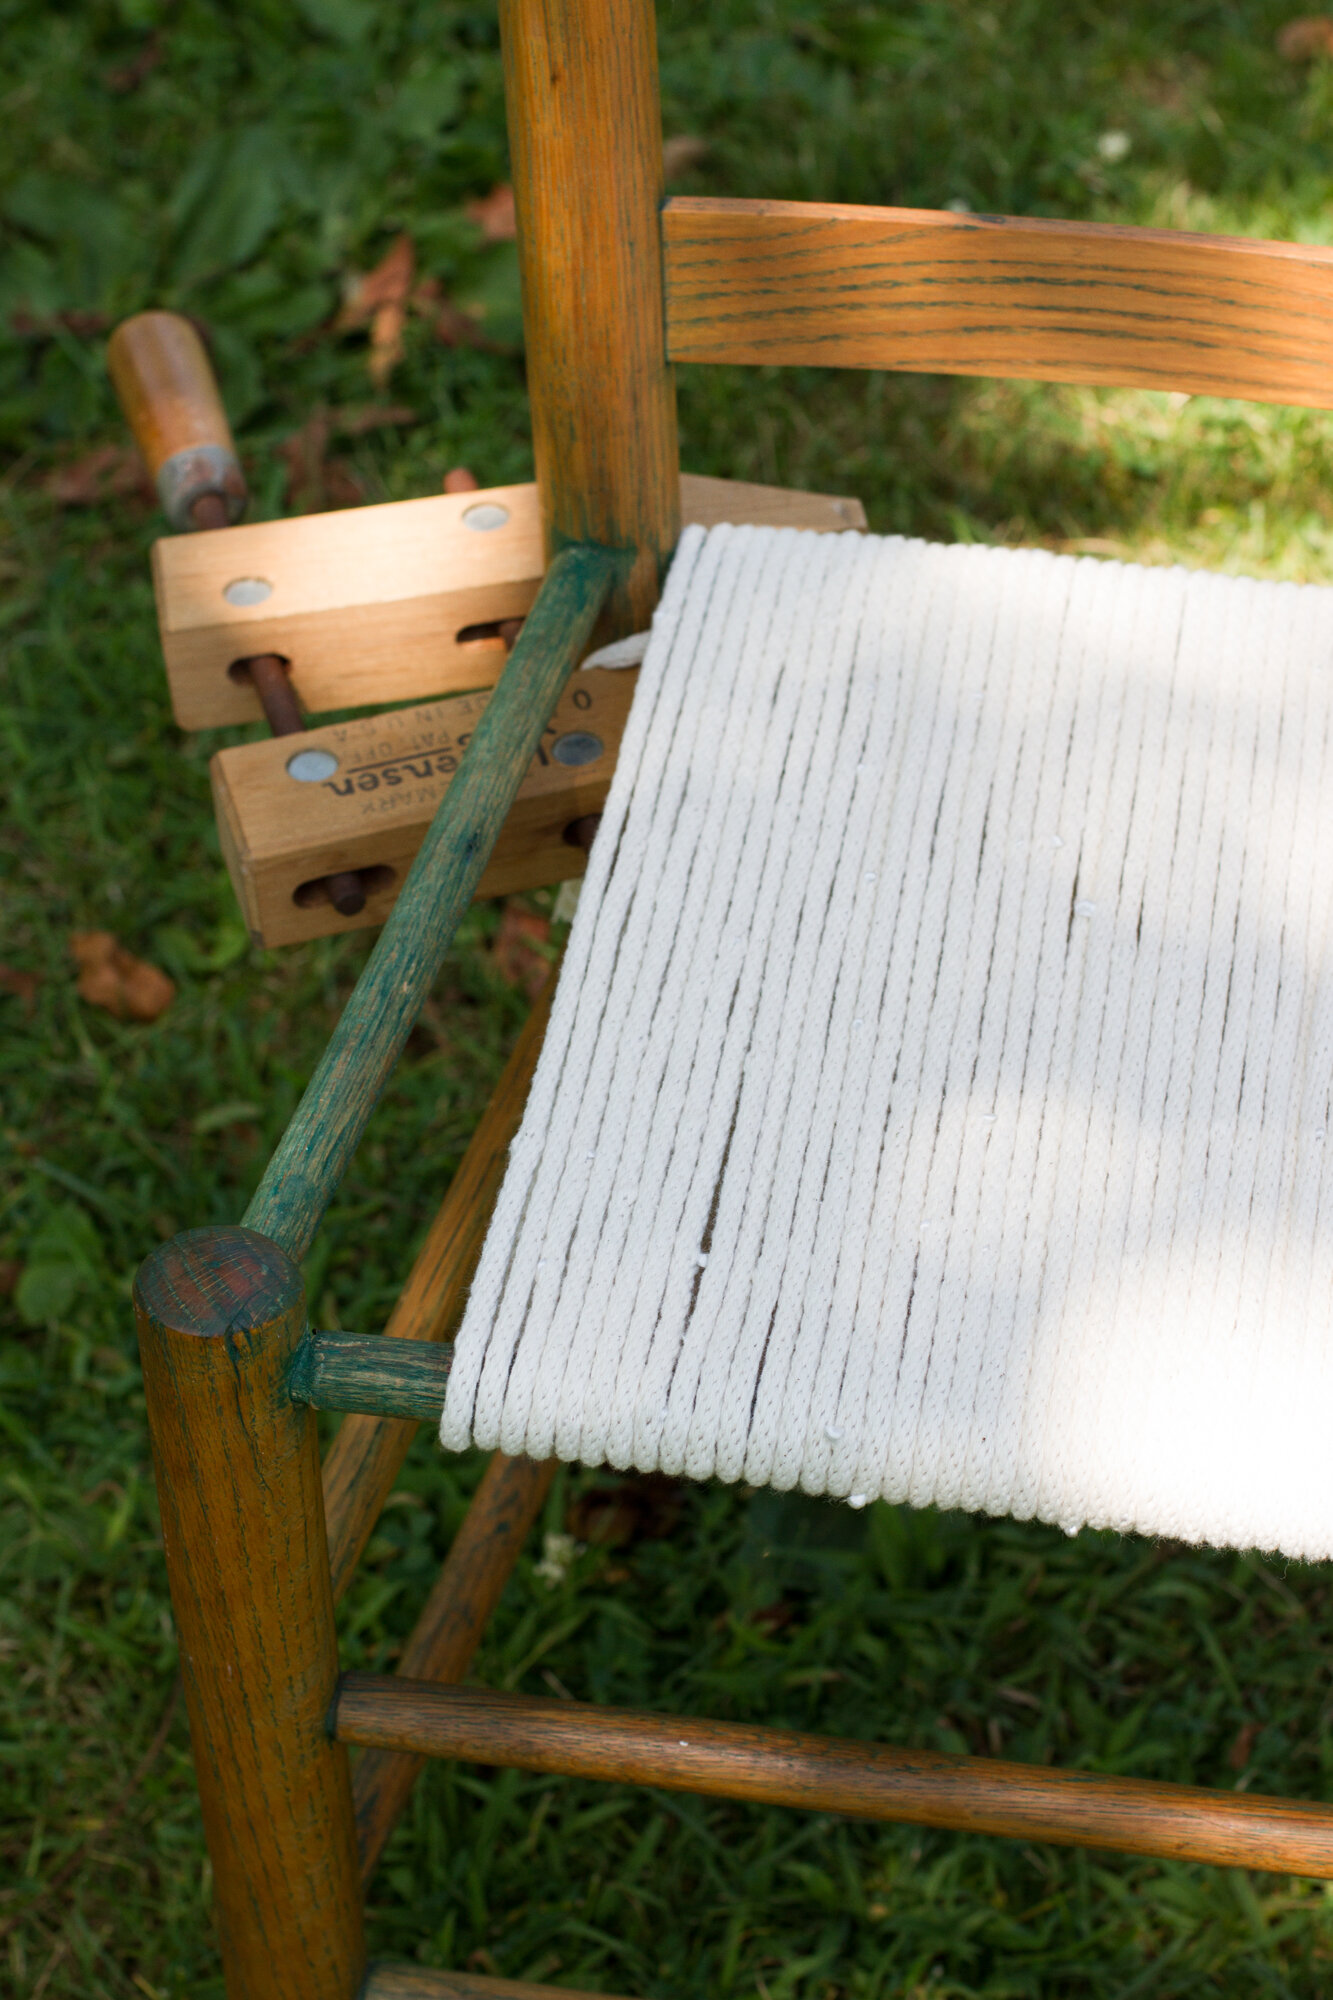
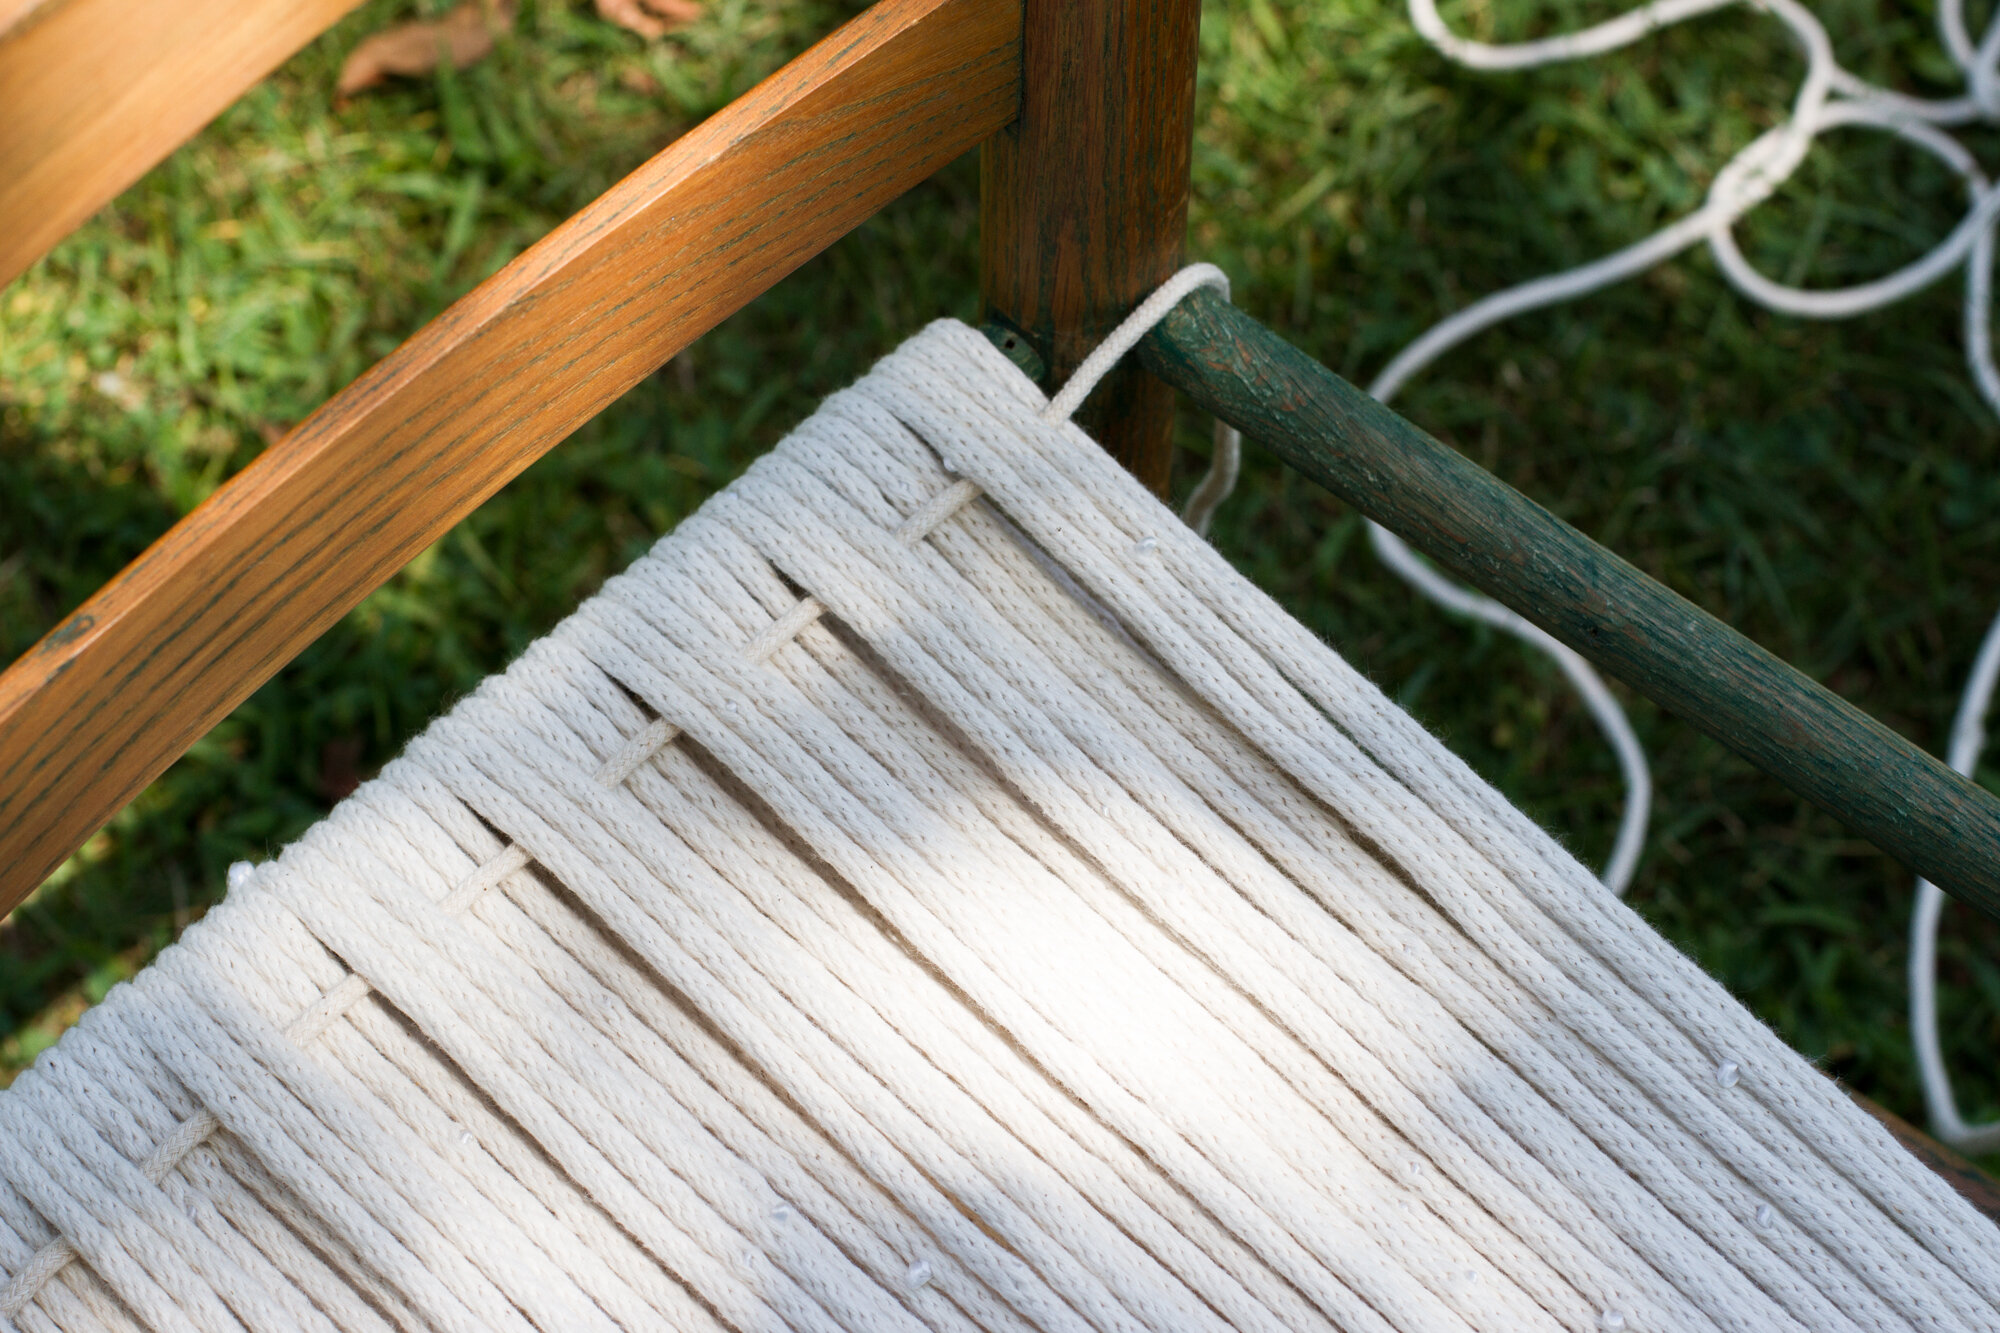
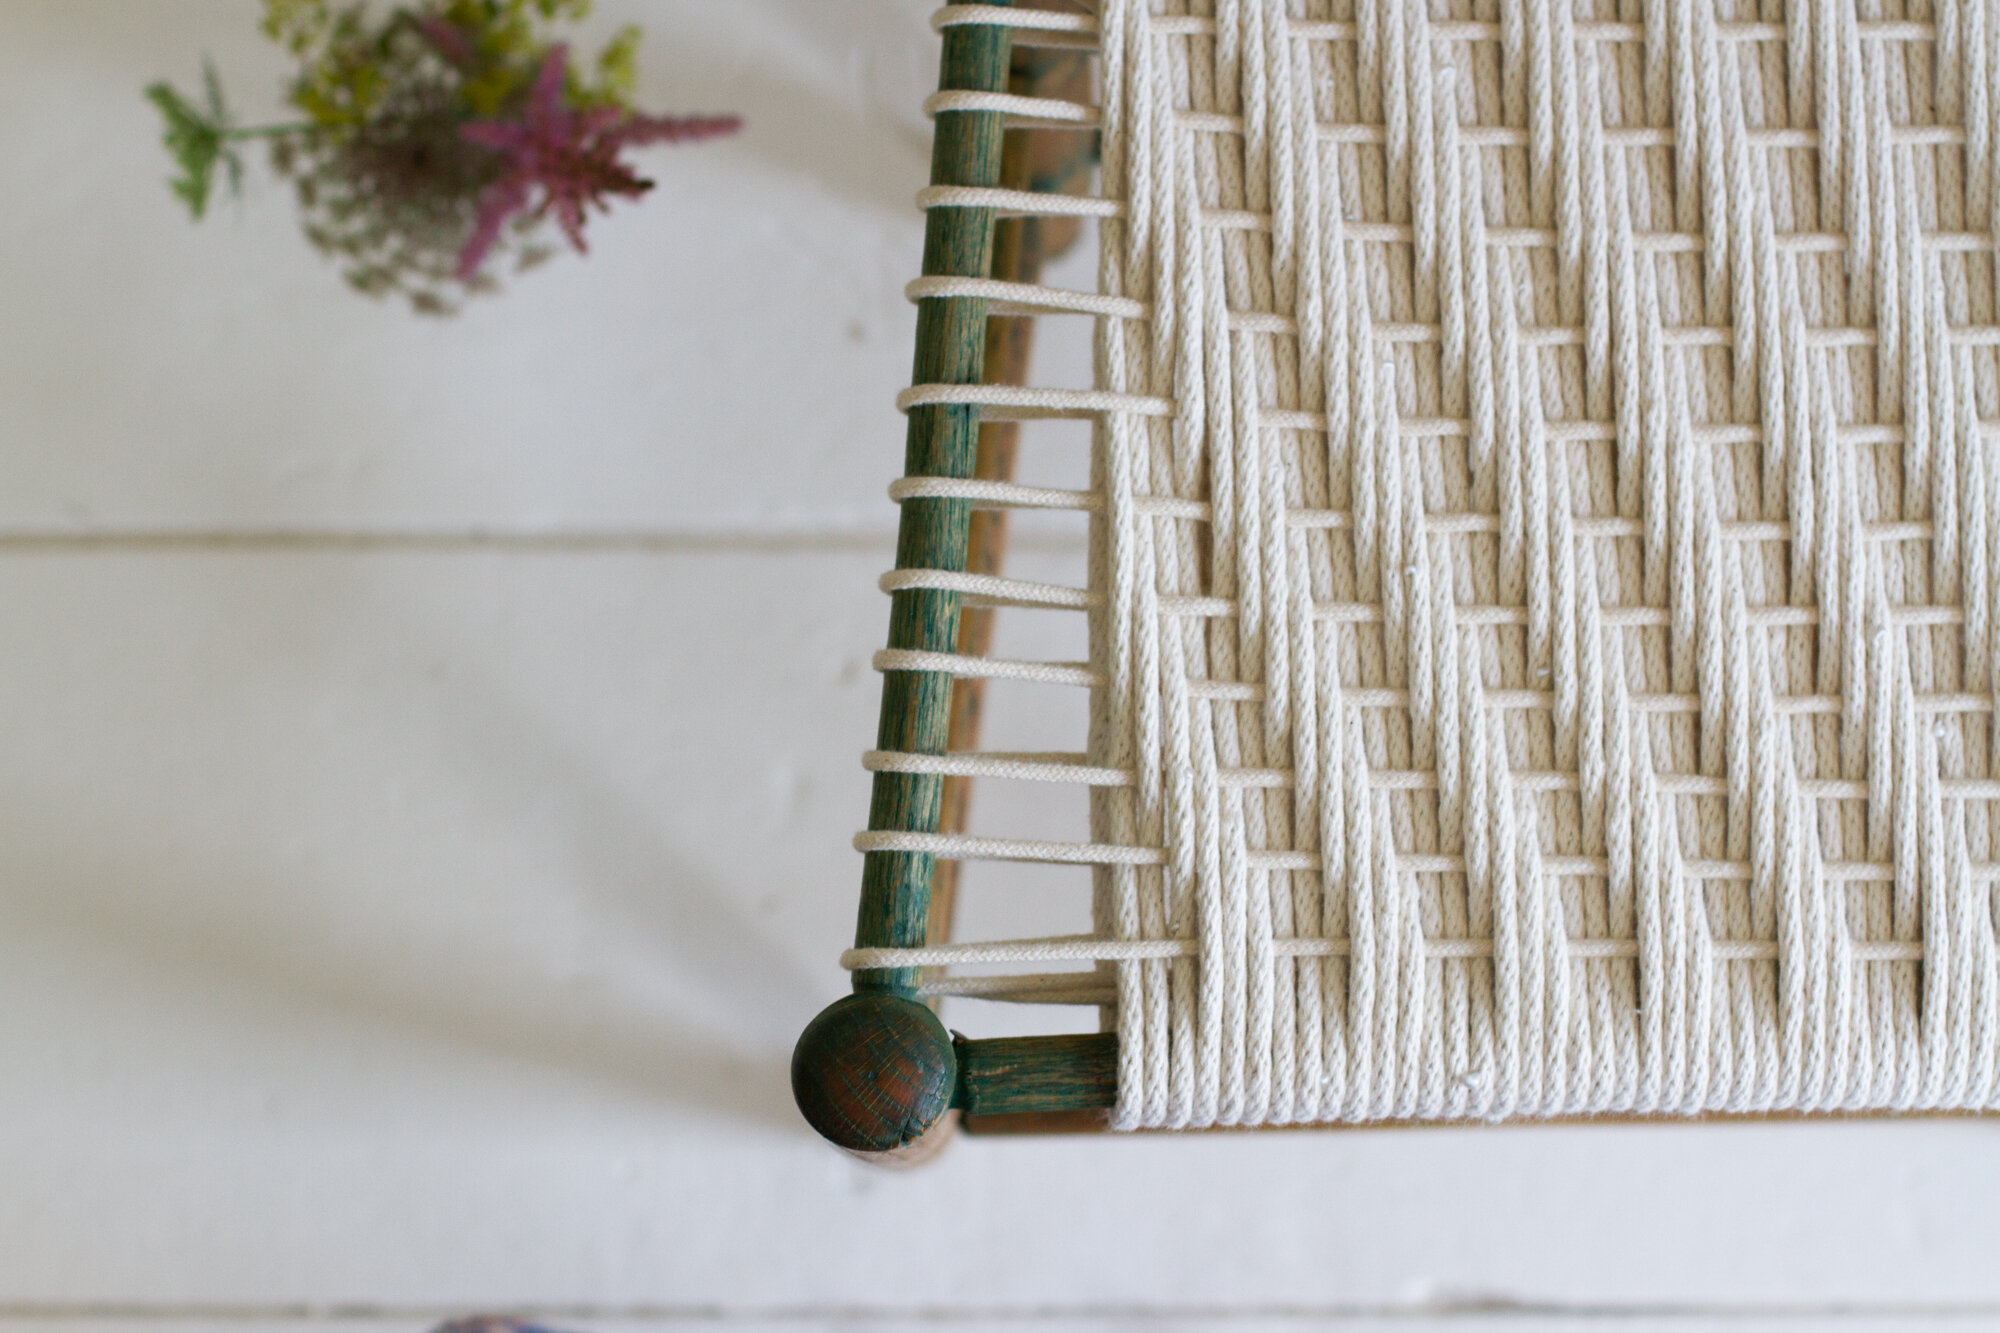
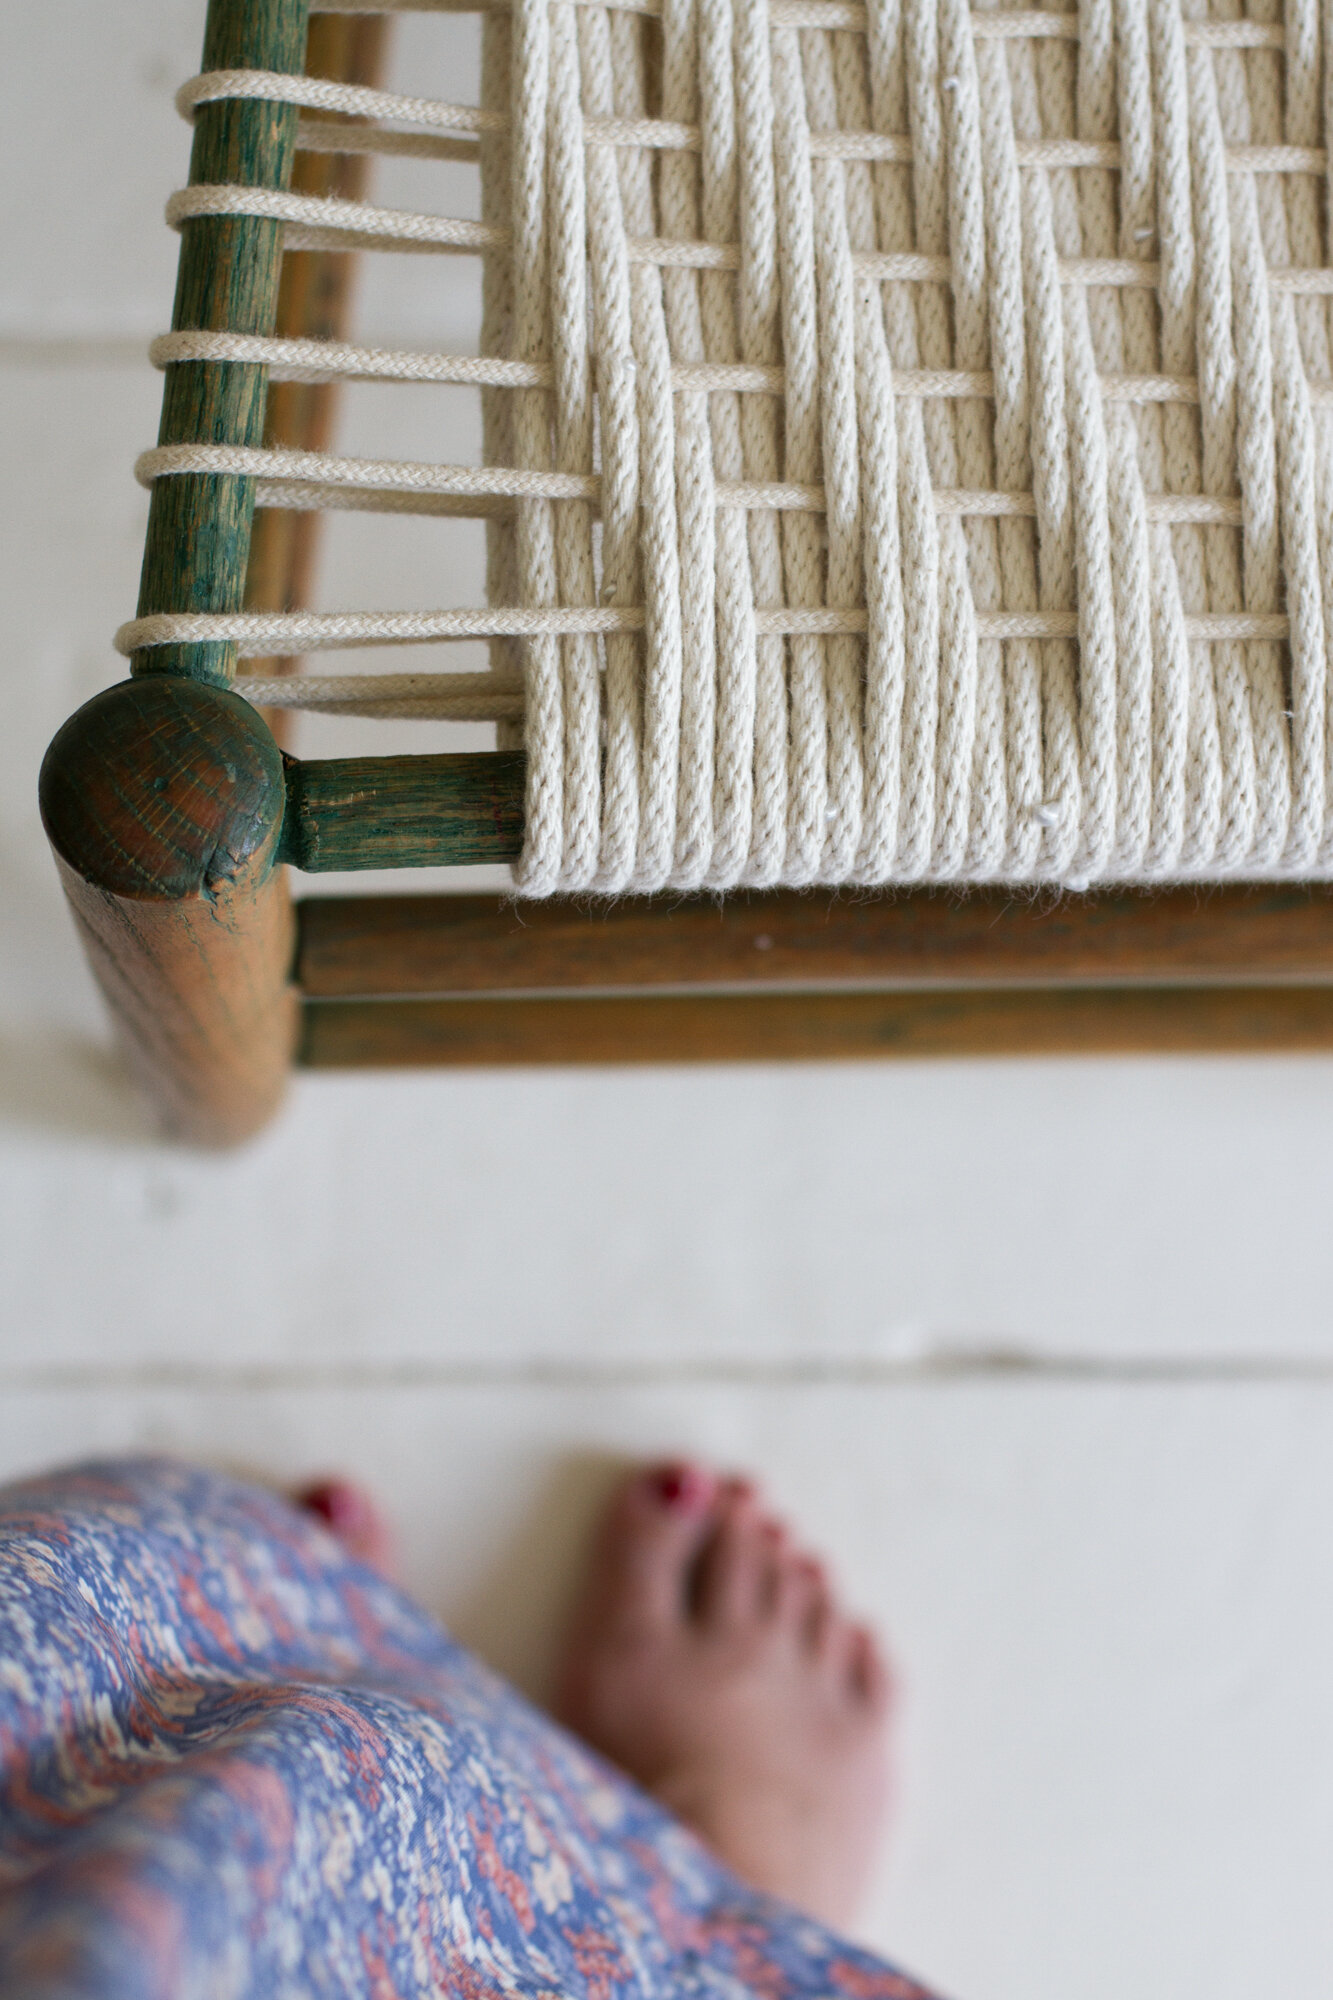
+ Begin by securing one end of your clothesline to the underside of the back rung. (I started off with a clamp as shown, but ultimately decided it was easier and more convenient to simply secure the rope with a furniture tack.)
+ In most cases, the back rung of your chair will be less wide than the front, so be sure to draw your rope in a straight line from the back of the chair to the front, and around again. (See above). Continue wrapping the rope until the entire seat is covered in a vertical warp.
+ When you’ve finished wrapping the warp, tack the end of the rope into place, leaving about 6-inches of extra length just for good measure.
+ Begin to weave in the pattern of your choosing. (Instructions for herringbone below).
+ When you’ve reached the end of your first row, gently push the rope toward the back rung so you have an even and taut line.
+ Flip the chair upside down, wrapping the weft around the side of the chair rung as you do, and continue your pattern. Note: Because the bottom of the chair isn’t visible, you can opt for a simpler weave on the underside. I chose to do a simple basket weave on the underside of the chair, weaving the weft under 4, over 4, under 4, over 4…for 4 rows, and then switched to over 4, under 4…for 4 more. (See below.)
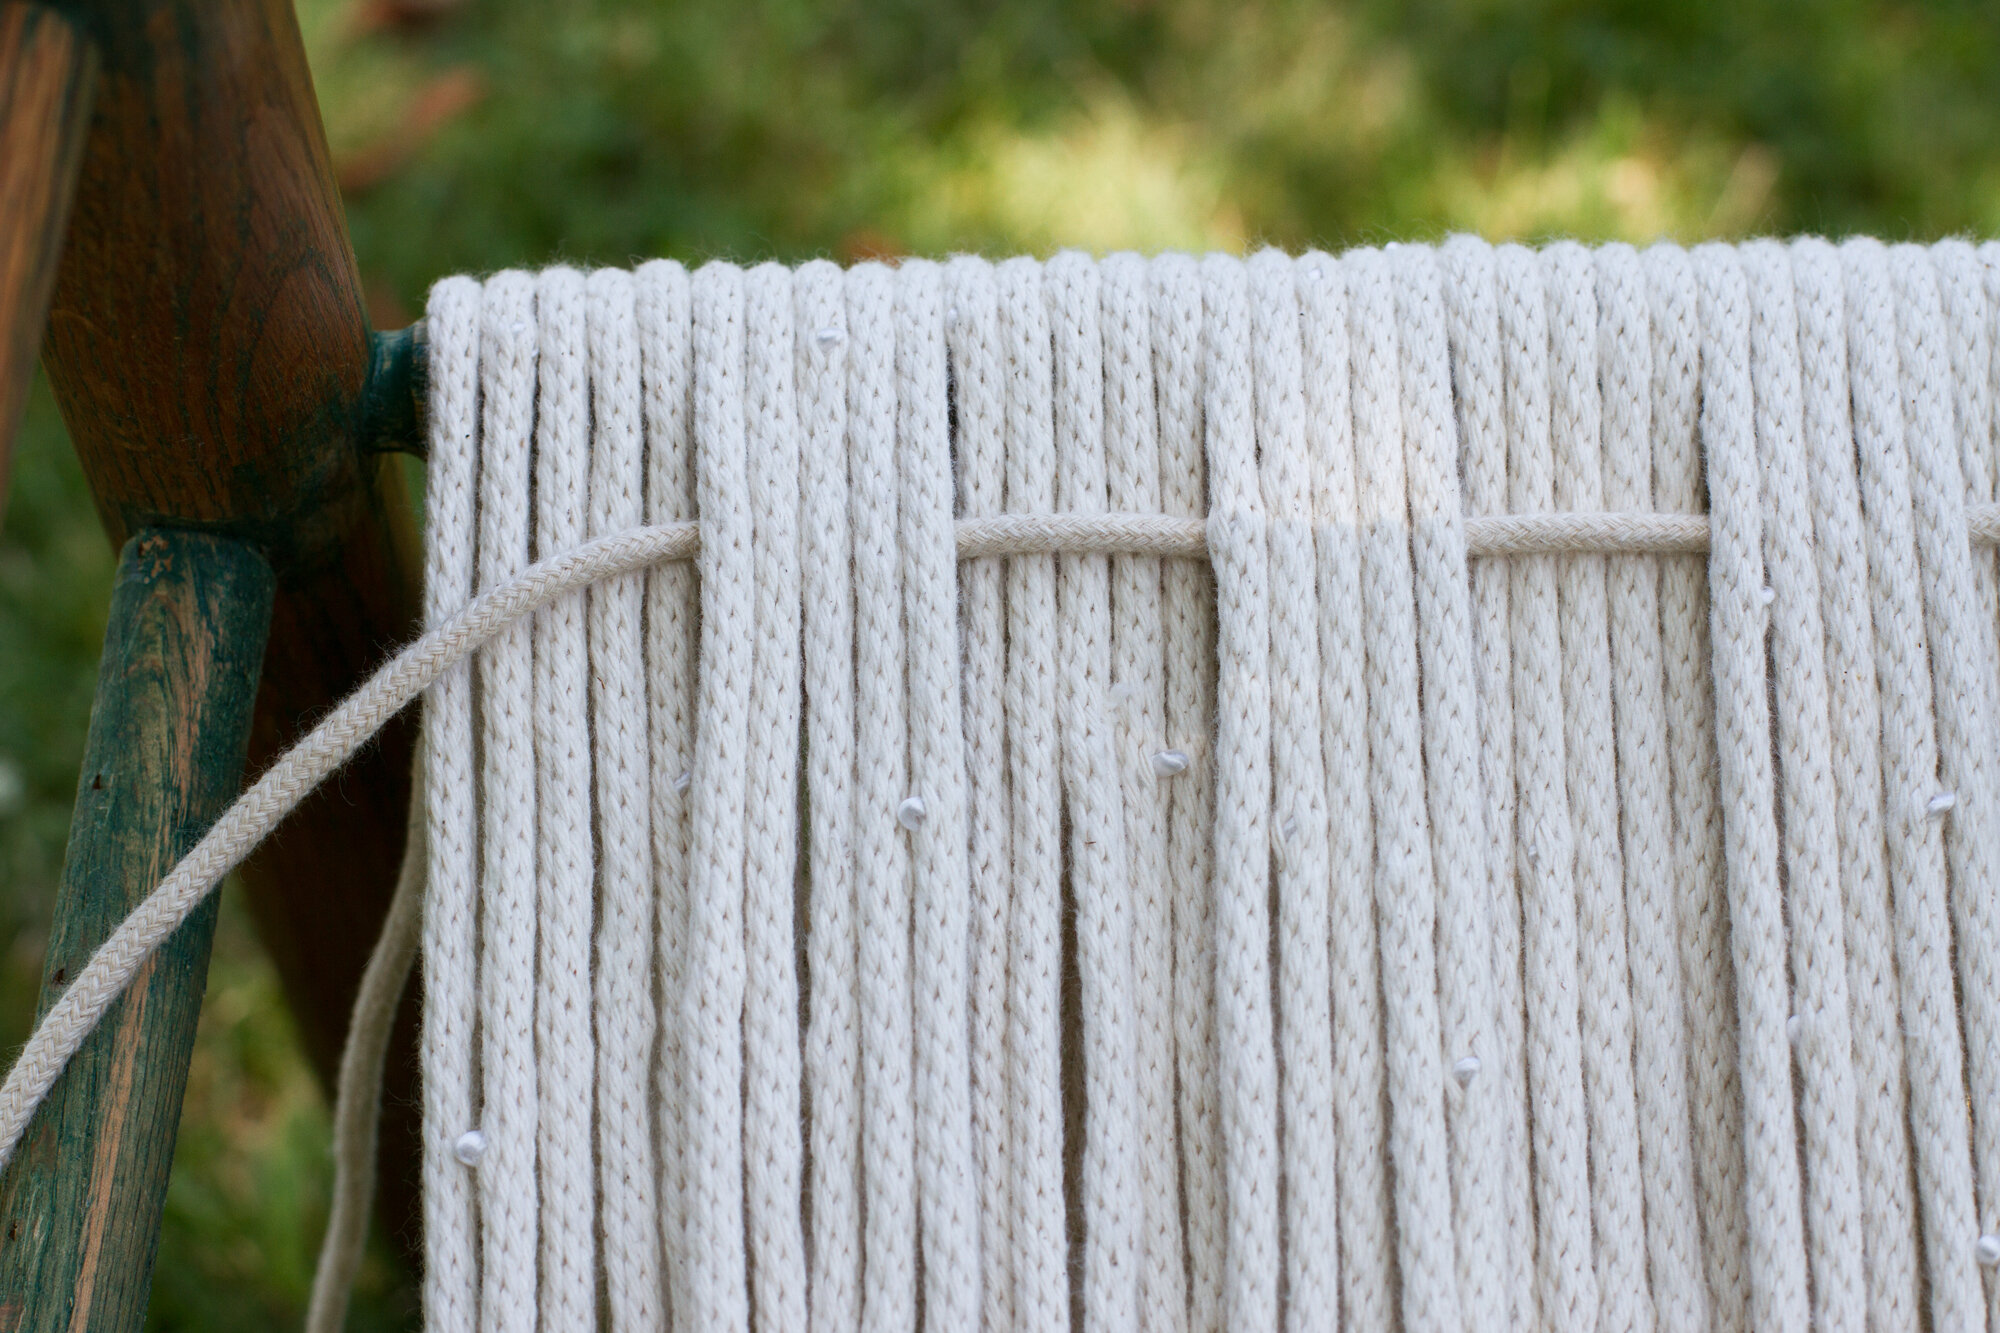
+ Flip the chair back to the topside and continue weaving your pattern. Because I had limited rope for my weft, I chose to leave 1-inch gaps between each row of weaving. (See below.) If you have more rope, or prefer a tighter weave, simply push your rope to be flush with the row above.
To weave a herringbone pattern:
Weave under 1, over 3, under 3, over 3, etc. (Flip to underside and complete a row of simple basket weave: over 4, under 4, over 4, under 4, etc.)
Weave under 2, over 3, under 3, over 3, etc. (Flip to underside and complete a row of simple basket weave)
Weave under 3, over 3, under 3, over 3, etc. (Flip to underside and complete a row of simple basket weave)
And switch!
Weave over 1, under 3, over 3, under 3, etc. (Flip to underside and complete a row of simple basket weave)
Weave over 2, under 3, over 3, under 3, etc. (Flip to underside and complete a row of simple basket weave)
Weave over 3, under 3, over 3, under 3, etc. (Flip to underside and complete a row of simple basket weave)
Once you’ve completed the sixth row, start the pattern again from the beginning, weaving under 1.
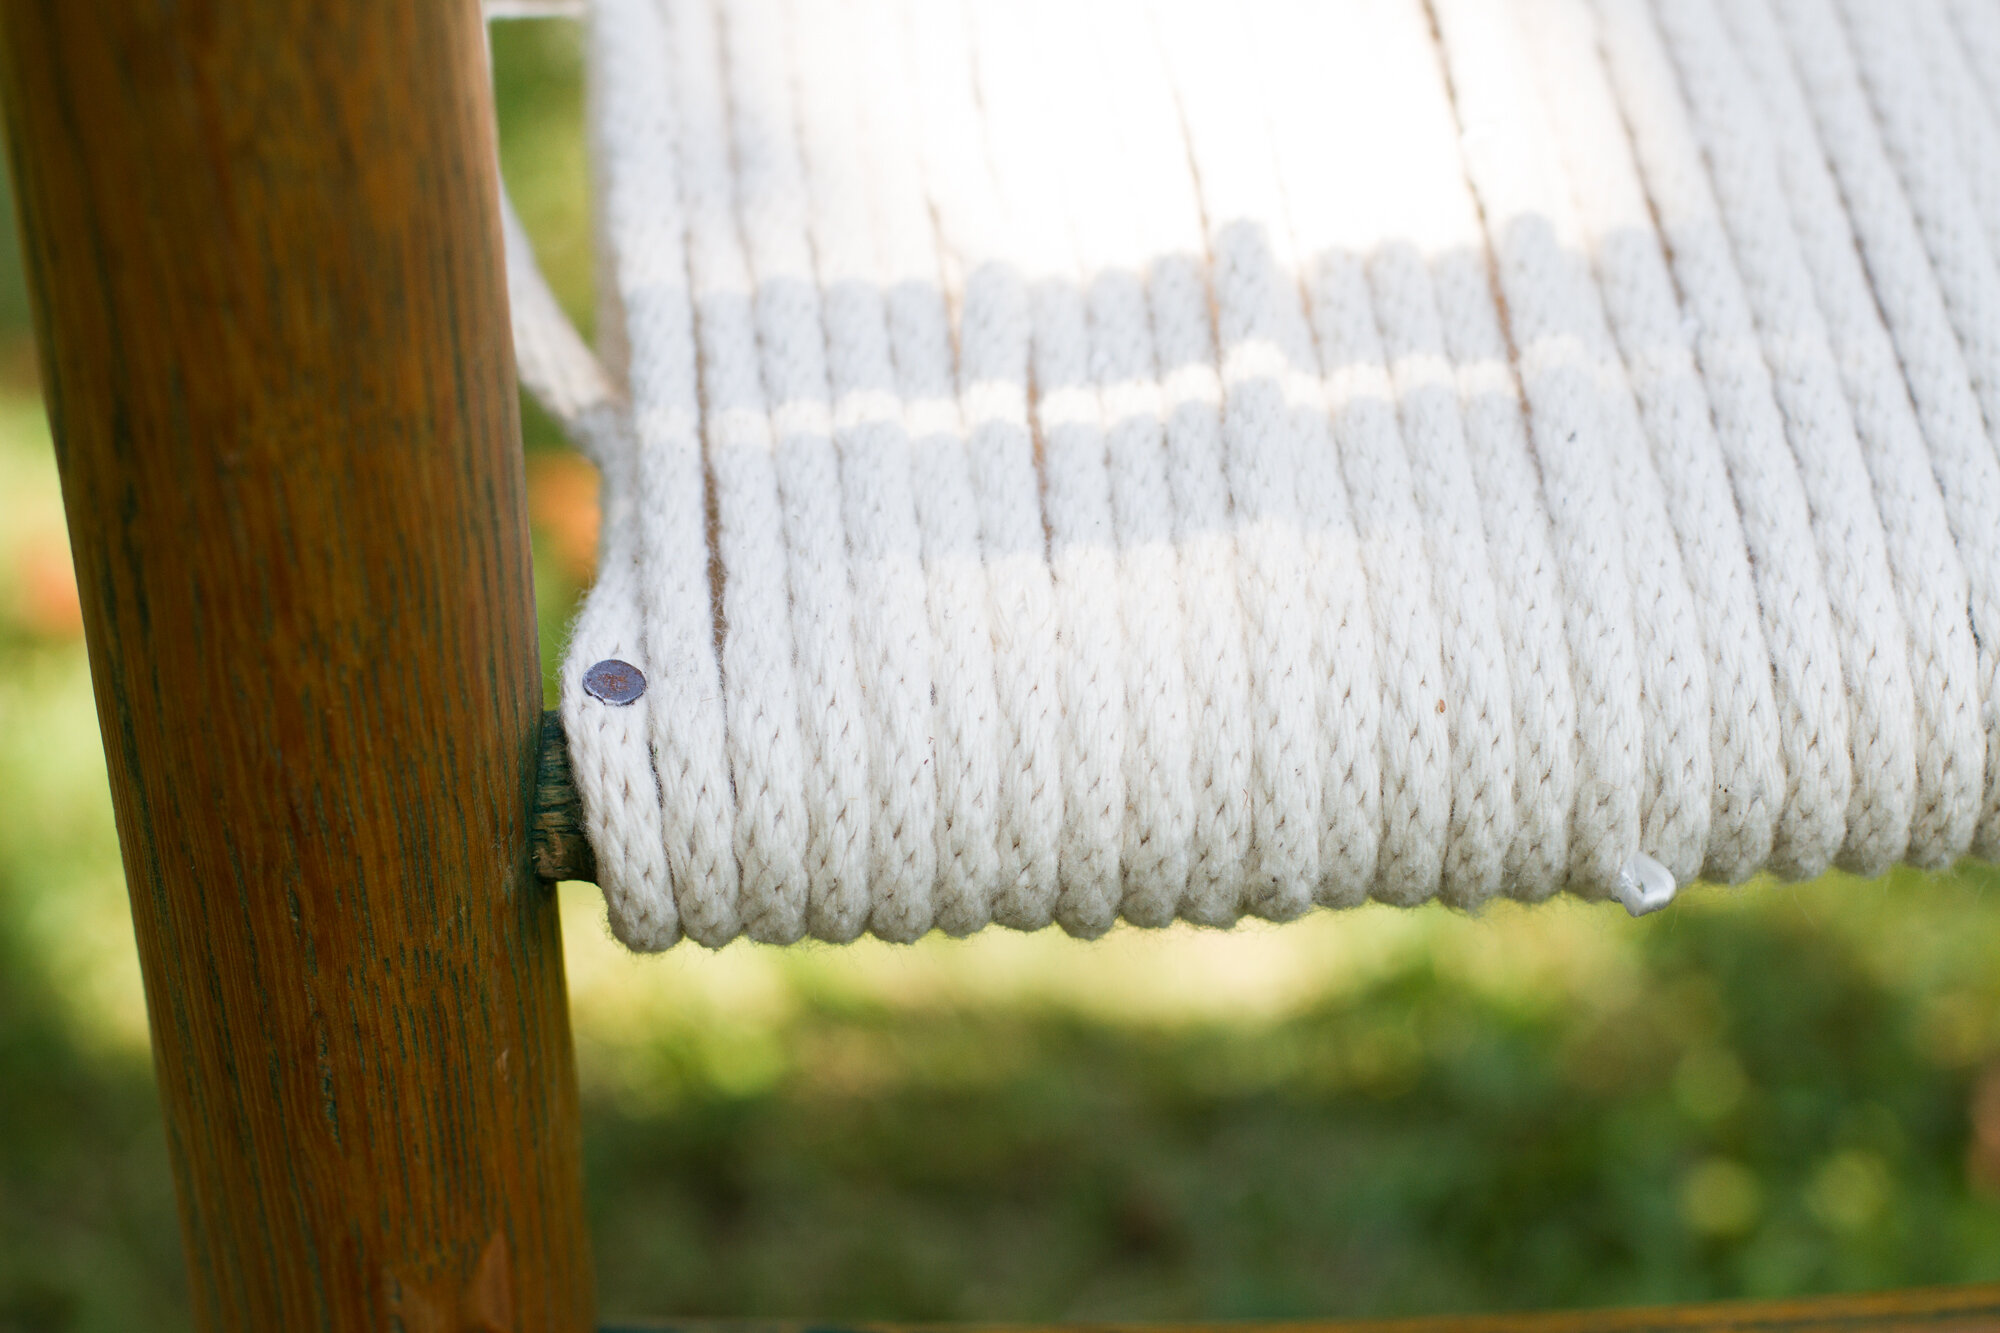
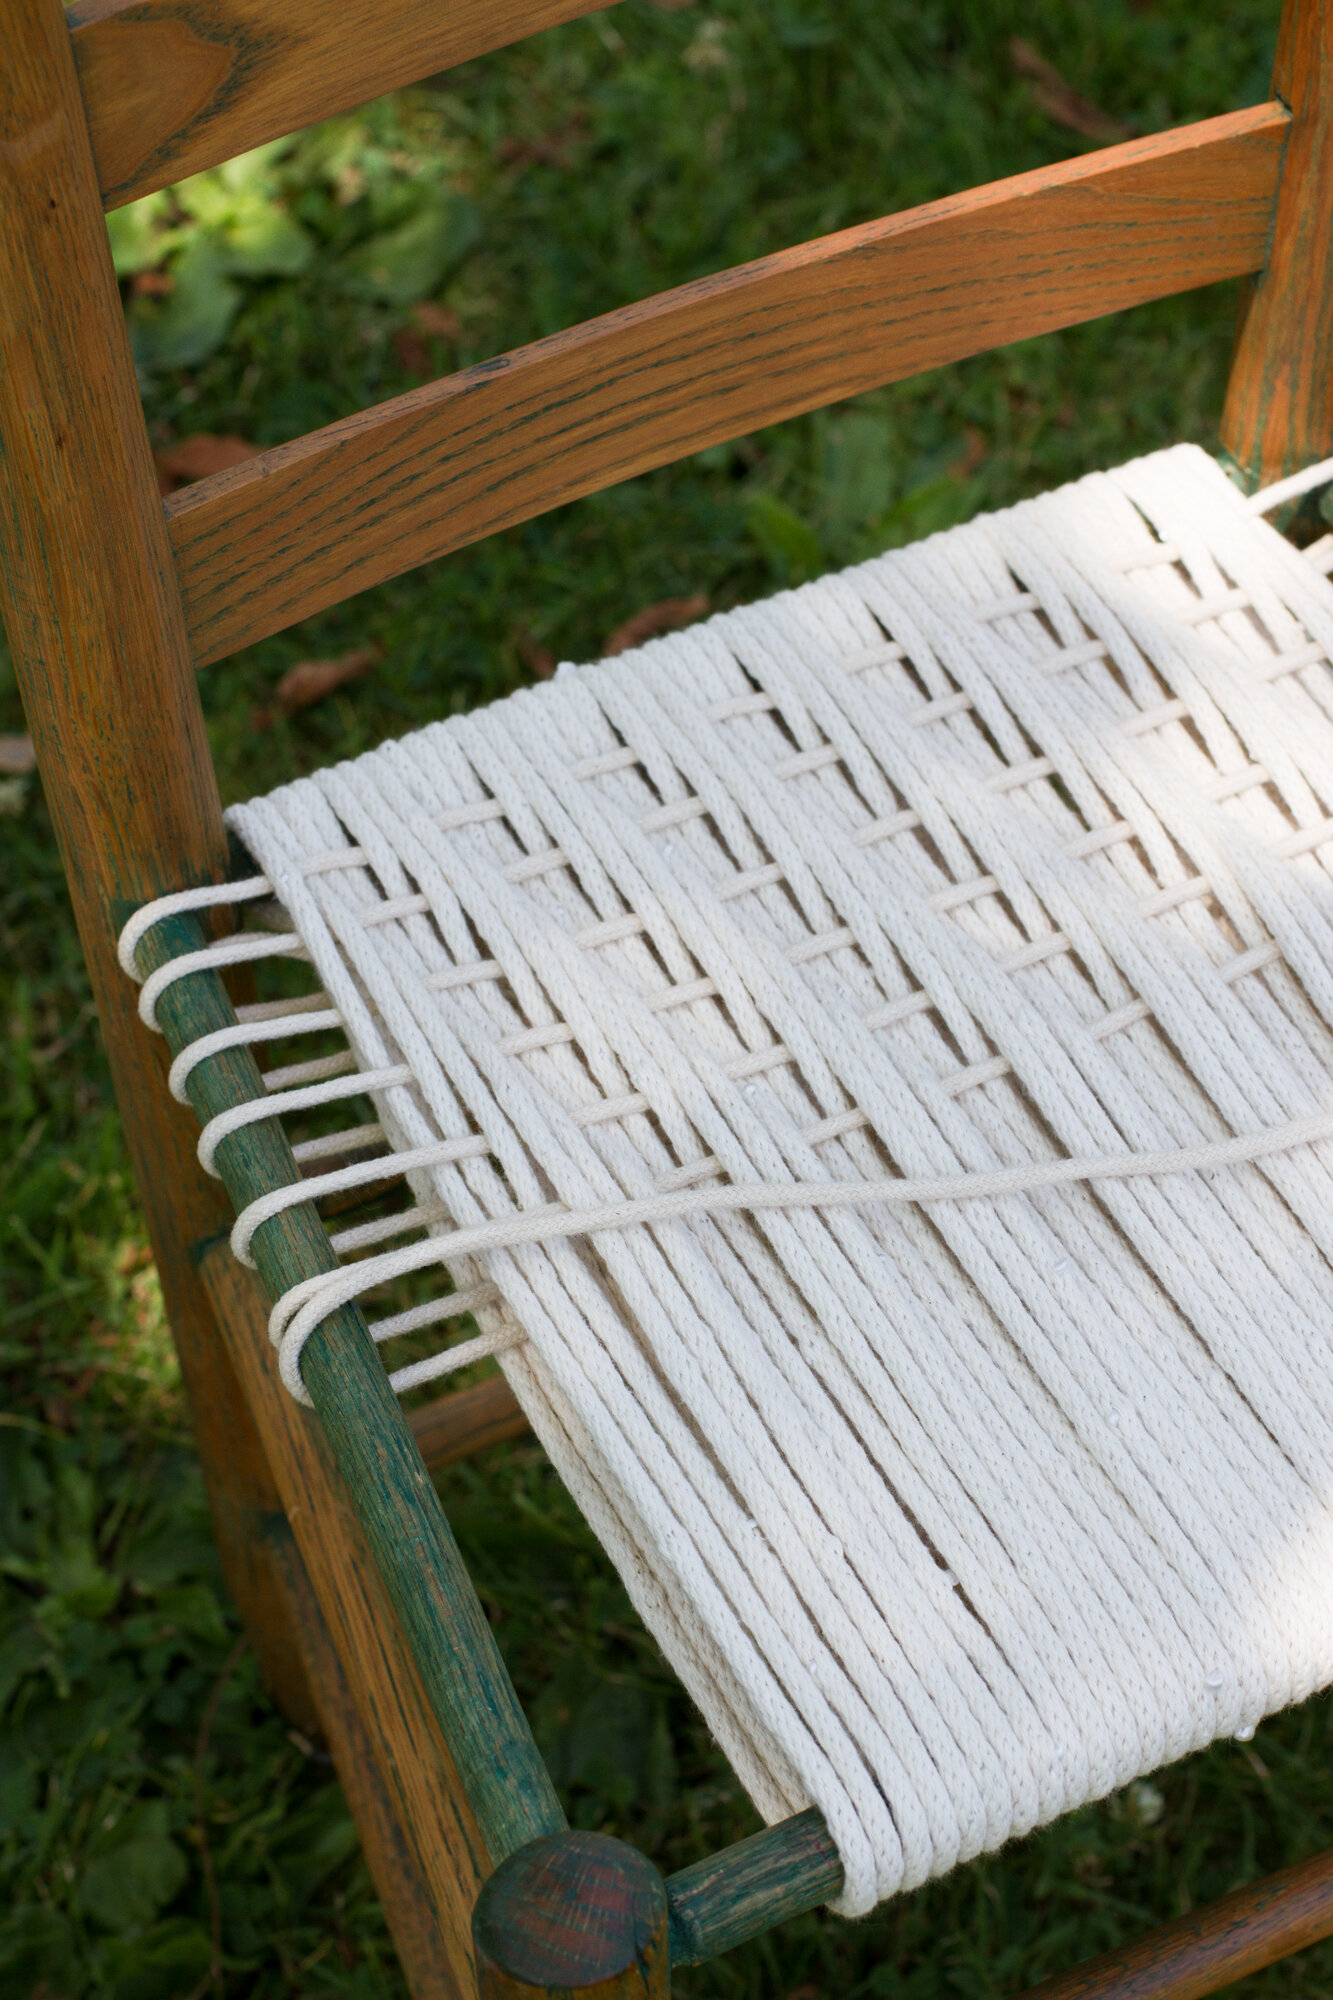
+ Once you’ve reach the bottom of the chair, tack the end of your rope to the underside of your rung, leaving a 6-inch tail.
+ Weave the tails of your rope into the underside of the chair, and you’re finished!
Above all, experiment! There are tons of different ways to weave a seat—herringbone, like you see here, or basket weave, or a plain woven seat, over-under-over-under style. You can weave loosely as I’ve done, or tightly, filling in all the gaps.
You can alternate colors, or materials. You can make t-shirt yarn from a pile of shirts you won’t wear, a multi-colored rag-style chair, a yarn or hemp chair. In the end, I used a combination of 100% cotton clothesline I already had on hand and cotton-wrapped synthetic line that I could find locally. I used the clothesline with the synthetic core for the warp—the vertical rope—and what I had left of 100% cotton line for the weft.

In the finished chair, bits of the shiny polypropylene core peek through the cotton in places, which is a thing that might annoy me if I weren’t so busy being chuffed by having made my own seat. It’s a delight to make something for yourself and a thrill to turn something that’s been neglected into something fresh and new.
For the curious:
+ I finally put all of my furniture projects in one spot.
+ Speaking of new from old, my dress is part of a limited-edition run of Christy Dawn’s signature dresses made with deadstock vintage fabric. It was a gift to me from Christy Dawn x Madewell.
This post includes affiliate links. Reading My Tea Leaves might earn a small commission on the goods purchased through those links.

26 Comments
gorgeous!
thank you!
Eriin,
I am trying to weave a corded chair with a Mexican weave which has a loop at the rail edge for each 2 cords. Do you have instructions for making that loop as I weave each pair of cords? I cannot find instructions anywhere and I could sure use your help.
Erin this is so beautiful!! I’m amazed!!
Thank you!!! I bet I know of an old barn in Maine with one or two of these chairs hanging around!
I’m SERIOUSLY amazed. Wow!!! Thanks for sharing.
v. impressive 🙂 thanks for sharing this (perfect for summer) project, erin!
That is super gorgeous <3
Adorable!
You’ve inspired me Erin with this chair transformation – so beautiful. You must be very proud.
I bookmarked this one, I love it so much.
Everything you make sings with quiet beauty.
Wow! This is spectacular! Love this project.
It’s so you!!! So pretty!
Looks beautiful! Thinking of doing something similar for a headboard. Any recommendations?
Old chair and new seat concept is awesome and. This very useful idea. I have two old chair and in out house. I decide to renovate. Thank you for the post.
Hi there! Beautiful makeover! I’m trying to redo a worn out synthetic rattan patio chair by using jute rope. Even though you used a cotton clothline, how did it turn out for after multiple sitting on the chair. Does it eventually sag? Thank you and looking forward to your reply! Regards from Malaysia.
No sagging! This weave is particularly sturdy!
Did it! I found an antique chair being given away on the side of the road. Followed your instructions (slightly closer weave…more like 3/4″ rows) and the video you linked to was helpful in the sense of saying to keep the warp a little loose so that as you weave the rows you have enough slack. It gets tight towards the end. Thanks very much for the info!
Thank you, Erin. This is inspirational. I’m ready to purchase the clothes line. One question, however. Can you sit on the chair? Is it strong enough? I want to refurbish a chair for my daughter’s home desk. She is full grown and working from home – so it needs to be strong. Cheers~
You can sit on it and is strong! I don’t know what it would be like to use it as a desk chair and sit on it all day though!
Fantastic save !! And from a “Chair caner” of 46 years. Looks lovely ! Good for you !
So beautiful in its simplicity! Thank you for sharing this lovely project–which is super timely for me because I have THREE ladderback chairs that all need new seats! I think I’ll use a different weave for each chair, too, now that you’ve inspired me 🙂 Thanks again ~E
Hermoso !!!!
Hello! late to the party! I sourced a free vintage 1800s chair without a seat that requires this perfect diy!! I’m so excited! I was wondering, the cord i can find locally stops at 100 feet. I’ll get 2 bundles, but I wondered what you do when the cord runs out? do you simply nail it to the frame? thank you!
Yes, that should work just fine!
Comments are moderated.